Flyingvoice FTA1101 User manual

User Manual
User Manual
FTA1101
Version 1.0

User Manual
Revision Record
Version Date Description Applicability
V1.0 2017-3-7 The first edition

User Manual
Table of Contents
1. Introduction...................................................................................................................................1
1.1 Package Contents ................................................................................................................1
2. Product Overview .........................................................................................................................2
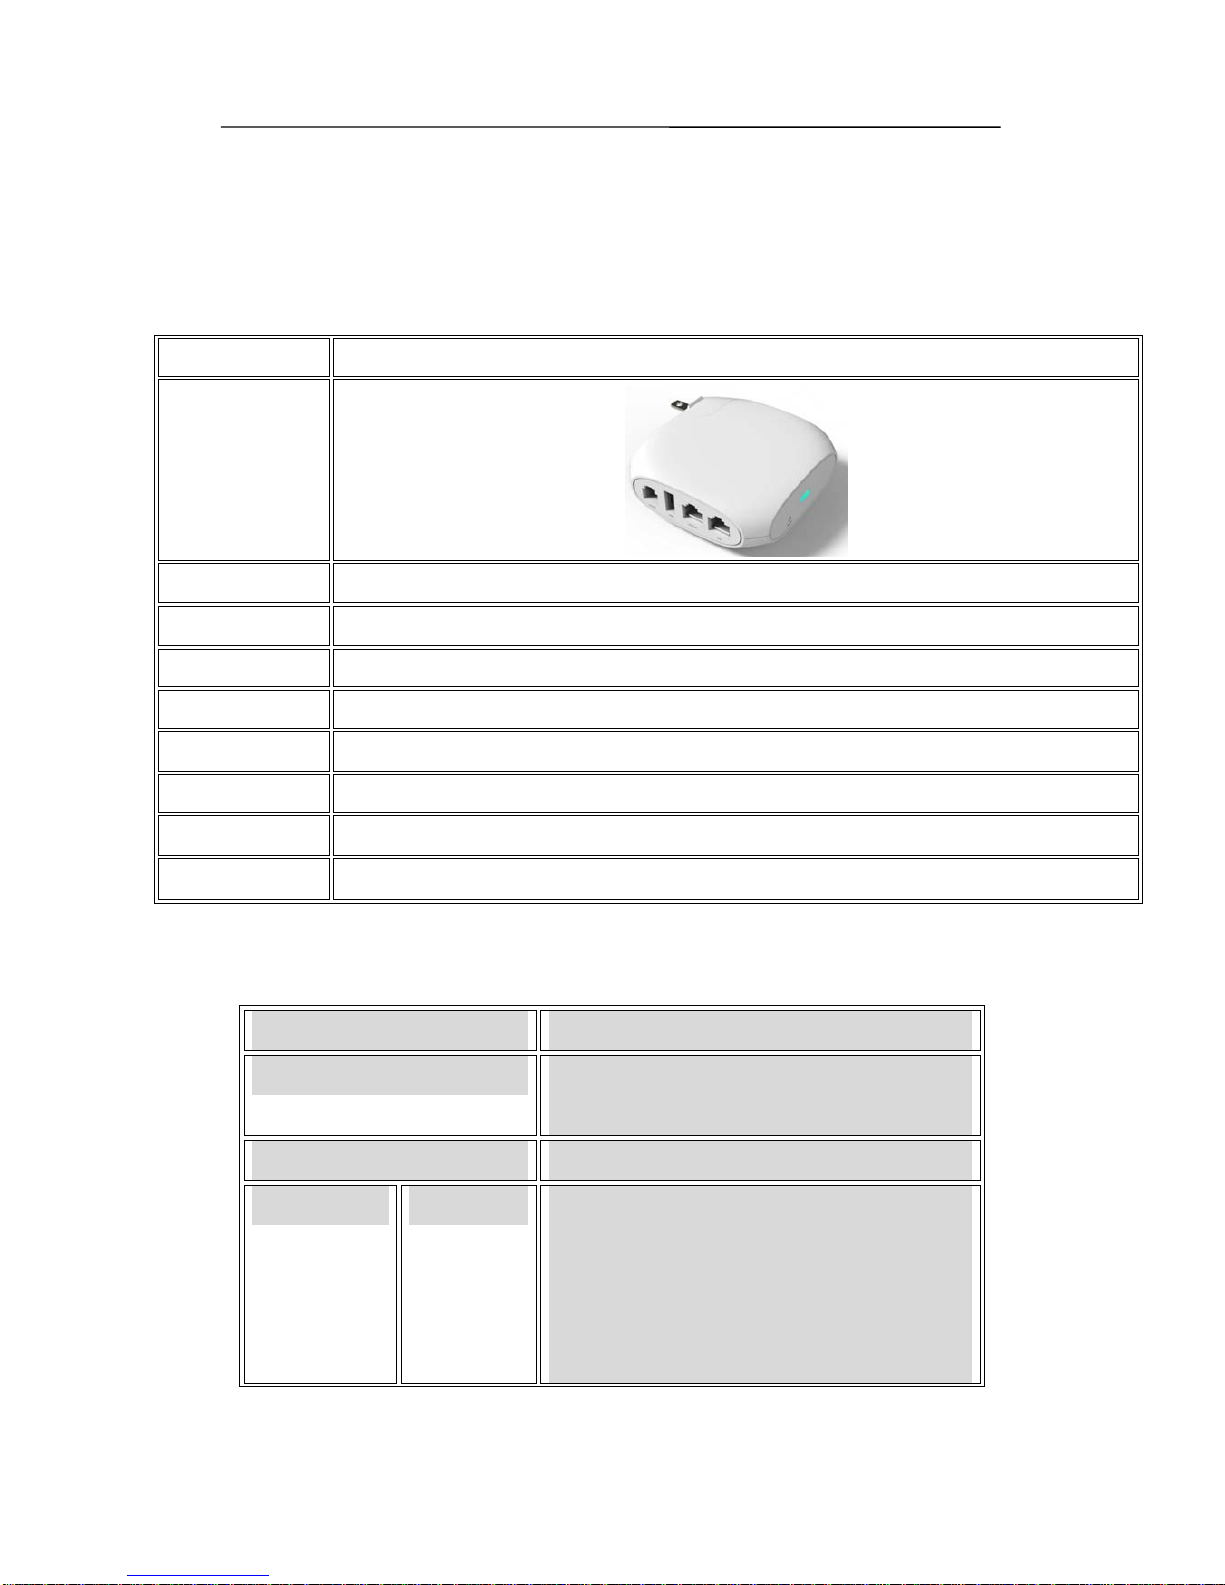
2.1 FTA1101 .............................................................................................................................2
2.2 Hardware Specification.......................................................................................................2
2.3 Front View and LEDs Introduction.....................................................................................3
Installation.........................................................................................................................................5
2.4 Connection topography .......................................................................................................5
2.5 Installation Steps .................................................................................................................5
3. IVR................................................................................................................................................ 6
3.1 Ways to Configuration ........................................................................................................6
3.2 Start IVR .............................................................................................................................6
3.3 IVR Description ..................................................................................................................6
3.4 Notice..................................................................................................................................9
4. Parameters Introduction ..............................................................................................................10
4.1 Password ...........................................................................................................................10
4.2 URL format .......................................................................................................................10
5. Login to WEB ............................................................................................................................. 11
5.1 Login WEB via LAN port................................................................................................. 11
5.2 Login WEB via WAN port ................................................................................................ 11
5.3 WEB Interface Introduction..............................................................................................12
6. Configuration from WEB............................................................................................................ 13
6.1 Status.................................................................................................................................13
6.1.1 Basic....................................................................................................................... 13
6.1.2 Syslog.....................................................................................................................14
6.2 Network............................................................................................................................. 15
6.2.1 WAN.......................................................................................................................15
6.2.2 LAN .......................................................................................................................16
6.2.3 VPN Settings..........................................................................................................18
6.2.4 DMZ.......................................................................................................................18
6.2.5 DDNS.....................................................................................................................18
6.2.6 Port Setting.............................................................................................................18
6.3 Wireless.............................................................................................................................20
6.3.1 Basic....................................................................................................................... 20
6.3.2 Wireless Security.................................................................................................... 21
6.3.3 WMM.....................................................................................................................21
6.3.4 WPS .......................................................................................................................21
6.3.5 Station Info.............................................................................................................22
6.3.6 Advanced................................................................................................................22
6.4 SIP.....................................................................................................................................23

User Manual
6.4.1 Line1 ......................................................................................................................23
6.4.2 SIP Settings ............................................................................................................26
6.4.3 VoIP QoS................................................................................................................26
6.5 Phone................................................................................................................................. 27
6.5.1 Preferences .............................................................................................................27
6.5.2 Dial Rule ................................................................................................................28
6.5.3 Phonebook.............................................................................................................. 28
6.5.4 Call Log..................................................................................................................30
6.6 Administration...................................................................................................................30
6.6.1 Management...........................................................................................................30
6.6.2 Firmware Upgrade .................................................................................................32
6.6.3 Certificates .............................................................................................................32
6.6.4 Provisioning ...........................................................................................................33
6.6.5 SNMP..................................................................................................................... 34
6.6.6 TR069.....................................................................................................................34
6.6.7 Diagnosis................................................................................................................ 36
7. Functions.....................................................................................................................................36
7.1 Making Calls.....................................................................................................................36
7.2 Call Waiting ......................................................................................................................36
7.3 Call Hold...........................................................................................................................36
7.4 Call Transferring...............................................................................................................37
7.4.1 Blind Transfer ........................................................................................................37
7.4.2 Attended Transfer...................................................................................................37
7.5 3-way conference call .......................................................................................................37
7.6 Call Forwarding ................................................................................................................37
7.7 Direct IP calls....................................................................................................................38
7.8 Speed dialing..................................................................................................................... 38
7.9 Hotline............................................................................................................................... 39
7.10 Daylight Saving Time .....................................................................................................39
7.11 Upgrade Firmware...........................................................................................................39
7.12 Password Control ............................................................................................................40
7.13 Web Access ..................................................................................................................... 40
7.14 System log....................................................................................................................... 40
8. Software Feature .........................................................................................................................41

User Manual
1
1.Introduction
Thank you for choosing FTA1101 Wireless VoIP ATA adapter. This ATA adapter will allow user to
make ATA call using your broadband connection.
This manual provides basic information on how to install and connect FTA1101 VoIP ATA adapter
to the Internet. It also includes features and functions of FTA1101 VoIP ATA adapter components,
and how to use it correctly.
Before you can connect FTA1101 to the Internet and use it, you must have a high-speed
broadband connection installed. A high-speed connection includes environments such as DSL,
cable modem, and a leased line.
FTA1101 VoIP ATA adapter is a stand-alone device, which requires no PC to make Internet calls.
This ATA adapter guarantees clear and reliable voice quality on Internet, which is fully compatible
with SIP industry standard and able to interoperate with many other SIP devices and software on
the market.
1.1 Package Contents
User package includes:
One FTA1101 VoIP ATA Adapter
One Ethernet cable
Two telephone lines
If the above device or accessory is damaged or lost, please contact with your reseller for
replacement.

User Manual
2
2.Product Overview
2.1 FTA1101
Features/Model FTA1101
Picture
Network Ports 2 RJ45 10/100Mbps (WAN/LAN)
FXS Ports 1
SIP Accounts 1
LTE 1
DHCP Client/Server
Voice Codec G.711(A-law, U-law), G.729A/AB,G.723,G.722
Management Integrated IVR, Web browser, Auto-Provision with HTTP/TFTP/HTTPS,TR069, SNMP
FAX T.30,T.38 Fax
2.2 Hardware Specification
Item specification
Power Adapter AC/DC Adapter,
AC Input: 100~240V, 50~60Hz
CPU MT7628
Port WAN 1 RJ-45 for WAN port (Ethernet 100 Base-T)
1 RJ-45 for LAN port (Ethernet 100 Base-T)
1 RJ-11 for FXS port
1 USB
IEEE802.11 b/g/n

User Manual
3
Operating Temperature -5~45℃(41~113℉)
Storage Temperature -25~85℃(-13~185℉)
Relative Humidity 10~90% (No condensing)
Dimension (L×W×H) 85×85×28mm
Weight (packaging included) 366g
Certification CE / FCC / RoHS
2.3 Front View and LEDs Introduction
Front View
LED
Indicator Color Status Description
Solid The device network is working normally
Power Red Blinking The device is power on
Port Name Description
Reset Press 10s to set FTA1101 factory settings.
WAN(RJ-45) Connect to Internet or router
LAN(RJ-45) Connect to PC or build a small LAN network
PHONE(RJ11) Connect to traditional phone or FAX Machine

User Manual
4
USB For phone charger or LTE Dongle

User Manual
5
Installation
This chapter introduces how to install FTA1101..
2.4 Connection topography
2.5 Installation Steps
Step 1: Insert one end of the Ethernet cable into the WAN port on the back panel of the FTA1101
and the other end of cable to your existing broadband connection port (e.g. router or
Ethernet switch)
Step 2: Connect the LAN port on the back panel of the FTA1101 to your conventional ATA using
a standard ATA cabling
Step 3: If need to set up a small LAN network, the FTA1101 should work in router or bridge mode
so that you or more people can access to the Internet through FTA1101. Then you need to
connect your PC or LAN connection equipment (e.g. Ethernet switch) to the LAN port on
the back panel of the FTA1101 using Ethernet cable. (Step 3 is optional depending on your
needs)
Step 4: Connect the power adapter to the power port at the back panel of FTA1101 and then plug
another end of power adapter into a wall outlet or power strip. The LED of FTA1101 will
turn on to indicate operated properly.
Warning: Please do not attempt to use other different power adapter or cut off power supply
during configuration or updating FTA1101 VoIP ATA adapter. Using other power adapter
may damage FTA1101 VoIP ATA adapter and will void the manufacturer warranty.

User Manual
6
3.IVR
3.1 Ways to Configuration
FTA1101 support three ways to configuration.
Use IVR.
Use web browser(recommend way)
Use provision.
3.2 Start IVR
Customer can use the IVR function by referring to the following steps:
Step 1.Connect analog phone to FTA1101’s phone port
Step 2.Pick up phone and press “****” to start IVR, then FTA1101 will report sound prompting
“please enter your option, one WAN Port ……”.
Step 3.Choose the operation code from 0 to 9, then FTA1101 will report the contents, details are
in the following table.
Step 4.Every time after successfully operation, FTA1101 will return to sound prompting “please
enter your option, one WAN Port ……”.
3.3 IVR Description
Below is the table that lists command, and description.

User Manual
7
Operation code Contents
1
Step 1.Pick up phone and press “****” to start IVR
Step 2.Choose “1”, and FTA1101 report the current WAN port
connection type
Step 3.Prompt "Please enter password”, user need to input password
with end char # if user want to configuration WAN port
connection type.
The password in IVR is same as the one of WEB login, user can use
phone keypad to enter password directly, and the matching table is
in Note 4.
For example: WEB login password is “admin”, so password in IVR
is “admin” too, user input “23646” to access and then configuration
WAN connection port.
Step 4.Report “operation successful” if password is right.
Step 5.Choose the new WAN port connection type from 1.DHCP and
2.Static
Step 6.Report “operation successful”, this means user make the changes
successfully, and then FTA1101 will return to sound prompting
“please enter your option, one WAN Port ……”.
Note: add “#” to assume after input password and selected new
WAN port connection type
If you want to quit by the wayside, press “*”
2
Step 1.Pick up phone and press “****” to start IVR
Step 2.Choose “2”, and FTA1101 report current WAN Port IP Address
Step 3.Input the new WAN port IP address and with the end char #,
using “*” to replace “.”, user can input 192*168*20*168 to set the
new IP address 192.168.20.168
press # key to indicate that you have finished
Step 4.Report “operation successful” if user operation properly.
Note: If you want to quit by the wayside, press “**”.
3
Step 1.Pick up phone and press “****” to start IVR
Step 2.Choose “3”, and FTA1101 report current WAN port subnet mask
Step 3.Input a new WAN port subnet mask and with the end char #
using “*” to replace “.”, user can input 255*255*255*0 to set the
new WAN port subnet mask 255.255.255.0
press # key to indicate that you have finished
3) Report “operation successful” if user operation properly.
Note: If you want to quit by the wayside, press “**”.
4
Step 1.Pick up phone and press “****” to start IVR
Step 2.Choose “4”, and FTA1101 report current gateway
Step 3.Input the new gateway and with the end char #
using “*” to replace “.”, user can input 192*168*20*1 to set the

User Manual
8
new gateway 192.168.20.1
press # (pound) key to indicate that you have finished
3) Report “operation successful” if user operation properly.
Note: If you want to quit by the wayside, press “**”.
5
Step 1.Pick up phone and press “****” to start IVR
Step 2.Choose “5”, and FTA1101 report current DNS
Step 3.Input the new DNS and with the end char #
using “*” to replace “.”, user can input 192*168*20*1 to set the
new gateway 192.168.20.1
press # (pound) key to indicate that you have finished
3) Report “operation successful” if user operation properly.
If you want to quit by the wayside, press “**”.
6
Step 1.Pick up phone and press “****” to start IVR
Step 2.Choose “6”, and FTA1101 report “Factory Reset”
Step 3.Prompt "Please enter password", the method of inputting
password is the same as operation 1.
If you want to quit by the wayside, press “*”.
Step 4.Prompt “operation successful” if password is right and then
FTA1101 will be factory setting.
Step 5.Press “7” reboot to make changes effective.
7
Step 1.Pick up phone and press “****” to start IVR
Step 2.Choose “7”, and FTA1101 report “Reboot”
Step 3.Prompt "Please enter password", the method of inputting
password is same as operation 1.
Step 4.FTA1101 will reboot if password is right and operation is
properly.
8
Step 1.Pick up phone and press “****” to start IVR
Step 2.Choose “8”, and FTA1101 report “WAN Port Login”
Step 3.Prompt "Please enter password", the method of inputting
password is same as operation 1.
If you want to quit by the wayside, press “*”.
Step 4.Report “operation successful” if user operation properly.
Step 5.Prompt “1enable 2disable”,choose 1 or 2, and with confirm char
#.
Step 6.Report “operation successful” if user operation properly.
9
Step 1.Pick up phone and press “****” to start IVR
Step 2.Choose “9”, and FTA1101 report “ WEB Access Port”
Step 3.Prompt “Please enter password”, the method of inputting
password is same as operation 1.
Step 4.Report “operation successful” if user operation properly.
Step 5.Report the current WEB Access Port
Step 6.Set the new WEB access port and with end char #

User Manual
9
3.4 Notice
In Voice Menu, press *(star) to return to up level menu.
If any changes made in the IP assignment mode, please reboot the FTA1101 to take the
settings into effect.
When enter IP address or subnet mask, input “*” after an address field and add “#” to finish
inputting
For example, to enter the IP address 192.168.1.11 by keypad, press these keys:
192*168*1*11#.
You can enter the password by phone keypad, the matching table between number and letters
as follows:
To input: A, B, C, a, b, c -- press ‘2’
To input: D, E, F, d, e, f -- press ‘3’
To input: G, H, I, g, h, i -- press ‘4’
To input: J, K, L, j, k, l -- press ‘5’
To input: M, N, O, m, n, o -- press ‘6’
To input: P, Q, R, S, p, q, r, s -- press ‘7’
To input: T, U, V, t, u, v -- press ‘8’
To input: W, X, Y, Z, w, x, y, z -- press ‘9’
To input all other characters in the administrator password-----press ‘0’,
E.g. password is ‘admin-admin’, press ‘23646023646’.
Press # (pound) key to indicate that you have finished entering the IP address or subnet mask
or other settings.
When assigning IP address in Static IP mode, customer must set IP address, subnet mask and
default gateway. If in DHCP mode, please make sure that DHCP Server is available in your
existing broadband connection to which WAN port of FTA1101 is connected.
Step 7. Report “operation successful” if user operation properly.
0 Step 1.Pick up phone and press “****” to start IVR
Step 2.Choose “0”, and FTA1101 report current Firmware version

User Manual
10
4.Parameters Introduction
4.1 Password
There are 2-level to access to FTA1101: administrator level and user level, password of
different levels are different.
User with administrator level can browse and set all configuration parameters, while user
with user level can set all configuration parameters except SIP1/2 that some parameters can
not be changed, such as server address and port. User has different access level with different
password.
Default user with administrator level:
Username:admin, Password:admin
Default user with user level
Username:admin, Password: user
4.2 URL format
The WEB login URL format is http://xxx.xxx.xxx.xxx. xxx.xxx.xxx.xxx stands for the IP address
of LAN or WAN port.
Below are two examples about the URL of LAN port and WAN port.
LAN port:
Default URL of LAN port is: http://192.168.1.1
Note: 192.168.1.1 is FTA1101 default LAN port’s IP address
WAN port:
Get WAN port address from IVR function or in Status/Basic webpage
(Assuming the IP is: 192.168.100.18)
The URL: http://192.168.100.18

User Manual
11
5.Login to WEB
FTA1101 has an embedded Web server that will respond to HTTP get/post requests.User can use
a Web browser like Microsoft’s IE to login and then configure FTA1101.
5.1 Login WEB via LAN port
Step 1: Open WEB browser;
Step 2: Input the LAN port URL, default is http://192.168.1.1;
Note:
User PC has the IP Address which is in the same segment of LAN port IP address,
otherwise you can not open the login page successfully.
Step 3: Once the right http request is entered and sent by the Web browse,the ATA will respond
with the following login page.
Step 4: Input the password
Note: The password is case sensitive.
Step 5: First page user will see is Status page.
5.2 Login WEB via WAN port
Step 1: Open WEB browser;
Step 2: Lookup WAN port IP Address from IVR function or from WEB;
Step 3: Input the WAN port URL
User’s PC should have the IP Address which is in the same segment of WAN port IP
address, otherwise you can not open the login page successfully.
Step 4: Once the right http request is entered and sent by the Web browse,the ATA will respond
with login page.
Step 5: Input the password
Note: The password is case sensitive.

User Manual
12
5.3 WEB Interface Introduction
Name Description
1 navigation bar Click navigation bar, many sub-navigation bar will appear in
the place 2
2 sub-navigation bar Click sub-navigation bar to enter to configuration page
3 configuration title The configuration title
4 configuration bars The configuration bars
5
main information Display the firmware version, DSP version, Current Time,
and user can change login level (mode) to return to login
page by press blue Switch button.
6 Help Display the main information for configuration; user can get
help from it directly.
Every time making some changes, user should press the button to confirm the
changes.
After pressing the button, the red notice
will appear to notice user to reboot.
To cancel the changes.
Press it to reboot FTA1101.

User Manual
13
6.Configuration from WEB
6.1 Status
User can view FTA1101 Basic and Syslog. It is the first page which user will see firstly after login
to WEB.
6.1.1 Basic
User can see the Product Information, SIP Account Status, Net Status, VPN Status, LAN Status,
and System Status.

User Manual
14
6.1.2 Syslog
In this configuration Interface,you can view Syslog, which record the FTA1101’s important
configuration information.
By default, syslog is enabled, and the level is INFO, there are two system log level, INFO and
Debug, in Debug level, there will be more information. If you want to change, please go to
Administration/Management page, System Log Setting column to change.
Click Refresh to refresh the system log, and click Clear to empty the current system log and click
Save to save the system log to your local PC.

User Manual
15
6.2 Network
6.2.1 WAN
Introduction
The Internet Setup is to set WAN port mode, IP address and so on.
User can choose one WAN mode from Static, DHCP and PPPoE
Static: Users need to set IP Address, Subnet Mask, Gateway IP and DNS.
DHCP: FTA1101 will auto-configuration the WAN parameter with immediate
effect.
PPPoE: Users can enable FTA1101 to connect to Internet by ADSL.
WEB
Interface
1.Static
Settings
Introduction
1) Set “Static” in the “INTERNET” text.
2) Set IP address, the IP address is the one of the local area
network.
3) Set Subnet Mask, it is usually “255.255.255.0” for the local
area network.
4) Set Gateway, you can get it from your Administrator.
5) Set DNS, you can get it from your Administrator.
WEB
Interface
2.DHCP
1) Set “DHCP” in the “INTERNET” text.

User Manual
16
Settings
Introduction
2) DNS type: Manual and Auto
In Manual: user should set the Primary DNS and Second
DNS manually.
In Auto: FTA1101 will get the Primary DNS and Second
DNS from DHCP Server automatically.
WEB
Interface
3.PPPoE
Settings
Introduction
1) Set “PPPoE” in the “INTERNET” text
2) Fill the PPPoE account and password in the texts.
3) You should set “manual” in the “DNS Mode” if you set “DNS”
by yourself. And then fill the DNS in the two following texts.
Generally speaking, you can set “Auto” in the “DNS Mode” and
FTA1101 will get “DNS” from DHCP Server automatically.
4) You should click the “Reboot” in the left of the page to reboot
the FTA1101 if you see the words “Please REBOOT to make the
changes effective!” After Reboot, you can see PPPoE Status and
the network parameters in the System Status page if FTA1101
connect successfully.
You can select the “PPPoE” IP Mode if you are family users or
your PC connects to Internet by ADSL. You should connect your
PC with FTA1101’s LAN. In detail, you can see the following
LAN settings.
Port Bind
WAN connection can not be shared between the binding port ,
and finally bound port WAN connections bind operation will
wash away before the other WAN connection to the port binding
Other manuals for FTA1101
1
Table of contents
Other Flyingvoice Adapter manuals