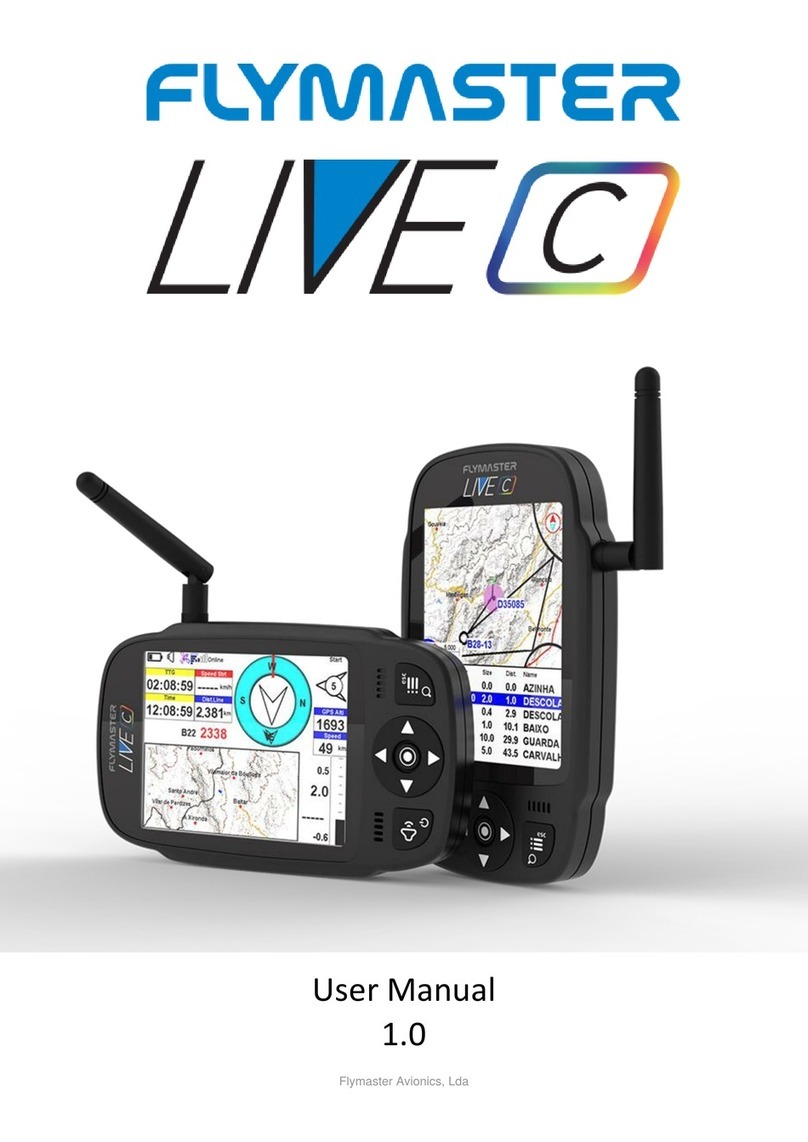
Flymaster LIVE DS User manual

ENG
FRA
DE
ITA
RU
PT
Read before use
A lire avant utilisation
Vor Benutzung lesen
Leggere prima dell’uso
Прочитайте перед
использованием
Ler antes de usar

ENG
Main Specications
Display Type Dual Screen- Colour: 640x480px Grayscale: 320x240px
Battery Capacity (Lithium-Ion) 9000mAh
Autonomy Usually +24 hours (environment conditions may alter this value)
Pressure Sensor High resolution barometric sensor 10 – 1200 mbar
Audio Dual speaker system for separate vario and voice
Memory expansion Micro SD card
GPS 72-channel BeiDou, Galileo, GLONASS, GPS / QZSS
Microprocessor Flymaster Microprocessor with proprietary RTOS
GSM Multi-band LTE-M / EGPRS Module
FLARM® Flarm ready (optional Flarm Aware RX+TX mode)
Bluetooth Bluetooth 5 low energy module
Native USB Type C Connection Allows connection to the PC
Battery Charging From wall adapter or standard usb port
Firmware update by USB (upgrades are free)
Size 186x132x18 mm
Weight 410g
2

ENG
STEP 1 - We recommend the reading of the following documents:
- Warranty terms and conditions.
- Complete user manual of your instrument.
To do that, please use the following links:
https://dnl.ymaster.net/Flymaster_Standard_Limited_Warranty_EN.pdf
https://www.ymaster.net/manuals/live-ds
STEP 2 - Create a Flymaster Cloud account if you don’t already
have one.
After the account creation go to:
https://livetrack360.com/devices/liveds/register
3

ENG
STEP 3 - Activate the Live DS
A valid Paypal account is needed to activate the LIVE DS.
Go to the following link and use the activation code
https://livetrack360.com/vodasims/activate
The activation code of the Flymaster LIVE
DS can be found on the last page of this
booklet.
STEP 4 - Install “Flymaster Instrument Manager” to manage your
LIVE DS.
Connect your instrument to the computer via USB. The instrument will
appear as a mass storage device. Inside you will find a folder called
“Flymaster Instrument Manager” where the installation file is located.
STEP 5 - OPTIONAL FLARM AWARE SERVICE ACTIVATION
Go to our website (www.flymaster.net), and under “accessories” you can
buy the product “Flarm Aware”. You must fill in the “Dev. ID” (Flarm
Serial number, which can be seen on the instrument). After receiving
a confirmation email with the activation code, you must enter it in the
instrument.
4

ENG
1 - Colour display
2 - Monochrome display
3 - Voice assistance speaker
4 - Vario speaker
5 - Power
6 - Zoom 0ut / sound adjustment (long press)
7 - Zoom In
8 - Cursor/ Pan keys
9 - Enter/Mark
10 - Fn Key
11 - Menu/Esc (back)
12 -Scroll wheel
13 - Enter (push down wheel)
General view
5
1
2
34
56 7 8
9
10 11 12 13

Getting started
Throughout this guide, we’ll refer to the Enter/conrm
operation just as Enter. This can always be done using
the Enter/mark key or pushing down the scroll wheel.
Power ON - Press Power button and confirm with Enter/Mark button.
Power OFF -Press Power button. Choose yes using the cursor keys in the
pop-up menu, and press Enter.
Navigate in main menu -Use Scroll wheel or cursor/pan keys to
switch between menu icons. Push Enter to confirm. Use Menu/esc to go back.
Navigate in list type menu -Use Scroll wheel to navigate up and
down in the list type menu. Push Enter to confirm. Use Menu/esc to go back.
Set volume - Long Press Zoom 0ut / sound adjustment, use up and down
in cursor to change between vario sound and speaker volume, use scroll wheel
to change the setting , push down scroll wheel to confirm.
Check GPS Status - Selecting “Settings” in the main menu, without
pressing Enter, the GPS status will appear in the monochrome display.
Calibrate compass - Use Scroll wheel or cursor/pan keys and go to
“Settings”. Push Enter to enter settings. Choose “calibration” using scroll
wheel in the monochrome and press push Enter to enter calibration mode.
Follow the colour display indications and turn the instrument in all four axis
until calibration is done.
Setting SOS and Report back messages - After logging into
your user account, click on “devices” in the left sidebar. Choose your instru-
ment, click on “actions” -> “messages”
Setting volume - On any page, “long press” the “Zoom-out/Sound ad-
justment” key. Use up and down cursor keys to change between “vario sound”
and “volume sound (voice assistance). Change the setting using the scroll
wheel and push wheel down to confirm.
Test Vario sound - Press Menu -> Settings -> Vario Acoustics -> Auto
Silent. Set Auto Silent to OFF. Push Enter to accept.
Set altimeter - Press Menu -> Settings -> Set Altimeter > Push scroll
wheel to edit the QNH or Altitude. Use Scroll wheel to change values. Use
cursor keys or scroll wheel to move to “save” or “cancel”. Push Enter to set
the value.
Hardware reset - Press both Power button and Wheel down at same
time and release. The instrument should turn off. Press power button to turn
it on again.
ENG
6
Do not delete or manipulate any les in the SD card
directly. All SD card management tasks must be done
through Flymaster Instrument Manager. Not doing so,
may cause the instrument to malfunction.To copy some
le from SD card to your computer, you must use your
computer’s le explorer using the USB connection with
the instrument.

7
Getting started
Change page - In flight mode, short press Fn key to switch pages, Long
press Fn key to show pages access menu. In the pages access menu, use scroll
wheel or Up and Down cursor keys to choose page. Push Enter to confirm.
Task Navigator - Use up and down cursor keys or navigation wheel to
navigate through task waypoints in the monochrome display. The waypoints
are highlighted and centred in the colour display.
Airspace browser - The colour display will show your current position.
You can pan the mark in the colour display map to get the airspaces in the
monochrome display. You can use the navigation wheel to scroll between the
airspaces to get them highlighted in the colour map and get their info.
GSM status: Selecting “Report Back” in the main menu, without pressing
Enter, the Gsm status will appear in the monochrome display.
Current GPS position: Selecting “Report Back” in the main menu, with-
out pressing Enter, the GPS position will appear in the monochrome display.
Current time: Selecting “Report Back” in the main menu, without pressing
Enter, the current time will appear in the monochrome display.
Report back - Select “Report Back” from the main menu and press Enter.
On the monochrome display you can find the report back types. Select the
desired one and press Enter or push down scroll wheel to send. In the colour
display you can see the created events and their status.
Flight Log - Select “Flight Log” from the main menu and press Enter. On
the monochrome display you can find the types of operations you can do on
each flight log. Select the desired operation and press Enter to confirm. On the
colour display it will be active with the selector to choose the desired flight log.
Press Enter to confirm the desired operation.
Generate IGC le to Micro SD card - Select “Flight Log” from the
main menu and press Enter. In the monochrome display you can find the op-
tion “generate Flight IGC”. Select it and press Enter to confirm. On the colour
display it will be active with the selector to choose the desired flight log. Press
Enter to confirm the IGC file creation to the SD card. You can find the IGC files
inside a folder called “igcs”.
ENG

FRA
Spécications principales
Type d’affichage :
Double écran- Couleur : 640x480px Niveaux de gris: 320x240px
Capacité de la batterie (Lithium-Ion) 9000mAh
Autonomie Généralement +24 heures (les conditions environnementales
peuvent modifier cette valeur)
Capteur de pression Capteur barométrique haute résolution 10 – 1200 mbar
L’audio Système à double haut-parleur pour vario et voix séparés
Extension de mémoire Carte Micro SD
GPS 72-channel BeiDou, Galileo, GLONASS, GPS / QZSS
Microprocesseur Microprocesseur Flymaster avec RTOS propriétaire
GSM Multi-band LTE-M / EGPRS Module
FLARM® Prêt pour Flarm (mode Flarm Aware RX+TX en option)
Bluetooth Module Bluetooth 5 basse consommation
Connexion USB de type C native Permet la connexion au PC
Charger la batteri À partir d’un adaptateur mural ou d’un port USB standard
Mise à jour du firmware par USB (les mises à jour sont gratuites)
Taille 186x132x18 mm
Poids 410g
8

FRA
ÉTAPE 1 - Nous recommandons la lecture des documents suiv-
ants :
- Conditions de garantie.
- Manuel d’utilisation complet de votre instrument.
Pour ce faire, veuillez utiliser les liens suivants :
https://dnl.ymaster.net/Flymaster_Standard_Limited_Warranty_EN.pdf
https://www.ymaster.net/manuals/live-ds
ÉTAPE 2 - Créez un compte Flymaster Cloud si vous n’en avez
pas déjà un.
Après la création du compte allez sur :
https://livetrack360.com/devices/liveds/register
9

FRA
ÉTAPE 3 - Activer le Live DS
Un compte Paypal valide est nécessaire pour activer le LIVE DS.
Allez sur le lien suivant et utilisez le code d’activation
https://livetrack360.com/vodasims/activate
Le code d’activation du Flymaster LIVE DS
se trouve à la dernière page de ce livret.
ÉTAPE 4 - Installez « Flymaster Instrument Manager » pour gérer
votre LIVE DS.
Connectez votre instrument à l’ordinateur via USB. L’instrument appa-
raîtra comme un périphérique de stockage de masse. À l’intérieur, vous
trouverez un dossier appelé « Flymaster Instrument Manager » où se
trouve le fichier d’installation.
ÉTAPE 5 - ACTIVATION DU SERVICE FLARM AWARE EN OPTION
Sur notre site Web (www.flymaster.net) et sous « accessoires », vous
pouvez acheter le produit « Flarm Aware ». Vous devez remplir le « Dev.
ID” (Numéro de série Flarm, qui peut être vu sur l’instrument). Après
avoir reçu un e-mail de confirmation avec le code d’activation, vous
devez le saisir dans l’instrument.
10

FRA
1 - Affichage couleur
2 - Affichage monochrome
3 - Haut-parleur assistant vocal
4 - Haut-parleur Vario
5 - Touche marche/arrêt
6 - Zoom arrière / réglage du son (appui long)
7 - Agrandir (Zoom in)
8 - Touches curseur
9 - Enter/Mark
10 - Fn clé
11 - Menu/Esc (arrière)
12 -Molette
13 - Entrer (pousser la molette)
Vue générale
11
1
2
34
56 7 8
9
10 11 12 13

FRA
Commencer
Tout au long de ce guide, nous ferons référence à l’opération
Enter/conrm comme Enter. Cela peut toujours être fait en
utilisant la touche Enter/mark ou en appuyant sur la molette
de délement.
Allumer - Appuyez sur le bouton d’alimentation et confirmez avec le bouton
Enter/Mark.
Éteindre - Appuyez sur le bouton d’alimentation. Choisissez oui à l’aide des
touches du curseur dans le menu contextuel et appuyez sur Entrée.
Naviguer dans le menu principal -Utilisez la molette de défilement ou
les touches curseur/panoramique pour basculer entre les icônes de menu. Appuyez
sur Entrée pour confirmer. Utilisez Menu/esc pour revenir en arrière.
Naviguer dans le menu des types de liste - Utilisez la molette de
défilement pour naviguer de haut en bas dans le menu de type de liste. Appuyez sur
Entrée pour confirmer. Utilisez Menu/esc pour revenir en arrière.
Régler le volume - Appuyez longuement sur Zoom 0ut / réglage du son,
utilisez le curseur haut et bas pour basculer entre le son vario et le volume du
haut-parleur, utilisez la molette de défilement pour modifier le réglage, appuyez sur
la molette de défilement pour confirmer.
Vérier l’état du GPS - En sélectionnant “Paramètres” dans le menu princi-
pal, sans appuyer sur Entrée, l’état du GPS apparaîtra sur l’affichage monochrome.
Calibrer la boussole - Utilisez la molette de défilement ou les touches
curseur/panoramique et allez dans « Paramètres ». Appuyez sur Entrée pour entrer
les paramètres. Choisissez « calibration » à l’aide de la molette de défilement dans
le monochrome et appuyez sur la touche Enter pour entrer en mode de calibrage.
Suivez les indications de l’écran couleur et tournez l’instrument dans les quatre
axes jusqu’à ce que l’étalonnage soit terminé.
Conguration des messages SOS et de rapport - Après vous être
connecté à votre compte utilisateur, cliquez sur « appareils » dans la barre latérale
gauche. Choisissez votre instrument, cliquez sur « actions » -> « messages »
Réglage du volume - On any page, “long press” the “Zoom-out/Sound ad-
justment” key. Use up and down cursor keys to change between “vario sound” and
“volume sound (voice assistance). Change the setting using the scroll wheel and
push wheel down to confirm.
Testez le son Vario - Appuyez sur Menu -> Paramètres -> Vario Acoustics
-> Silence automatique. Réglez Silence automatique sur OFF. Appuyez sur Entrée
pour accepter.
Régler l’altimètre - Appuyez sur Menu -> Paramètres -> Régler l’altimètre>
Appuyez sur la molette de défilement pour modifier le QNH ou l’altitude. Utilisez la
molette de défilement pour modifier les valeurs. Utilisez les touches du curseur ou
la molette de défilement pour passer à « enregistrer » ou « annuler ». Appuyez sur
Entrée pour définir la valeur.
Forcer la réinitialisation - Appuyez à la fois sur le bouton d’alimentation
et la molette vers le bas en même temps et relâchez. L’instrument doit s’éteindre.
Appuyez sur le bouton d’alimentation pour le rallumer.
12
Ne supprimez ou ne manipulez aucun chier directement sur la carte SD.
Toutes les tâches de gestion de la carte SD doivent être effectuées via
Flymaster Instrument Manager. Ne pas le faire peut entraîner un dysfonc-
tionnement de l’instrument. Pour copier un chier de la carte SD sur votre
ordinateur, vous devez utiliser l’explorateur de chiers de votre ordinateur
en utilisant la connexion USB avec l’instrument.

FRA
13
Commencer
Changer de page - En mode de vol, appuyez brièvement sur la touche
Fn pour changer de page, appuyez longuement sur la touche Fn pour afficher
le menu d’accès aux pages. Dans le menu d’accès aux pages, utilisez la molette
de défilement ou les touches curseur Haut et Bas pour choisir la page. Appuyez
sur Entrée pour confirmer.
Navigateur de manche - Utilisez les touches de curseur haut et bas ou
la molette de navigation pour parcourir les étapes de la manche sur l’affichage
monochrome. Les waypoints sont mis en surbrillance et centrés sur l’écran
couleur.
Navigateur d’espace aérien - L’écran couleur affichera votre position
actuelle. Vous pouvez déplacer la marque dans la carte d’affichage couleur
pour obtenir les espaces aériens dans l’affichage monochrome. Vous pouvez
utiliser la molette de navigation pour faire défiler les espaces aériens pour
les mettre en évidence dans la carte en couleur et obtenir leurs informations.
GSM status: En sélectionnant « Report Back » dans le menu principal,
sans appuyer sur Entrée, l’état du GSM apparaîtra sur l’écran monochrome.
Position GPS actuelle : En sélectionnant « Report Back » dans le
menu principal, sans appuyer sur Entrée, la position GPS apparaîtra sur l’écran
monochrome.
Heure actuelle: En sélectionnant « Report Back » dans le menu principal,
sans appuyer sur Entrée, l’heure actuelle apparaîtra sur l’écran monochrome.
Rapport - Sélectionnez « Report Back » dans le menu principal et appuyez
sur Entrée. Sur l’écran monochrome, vous pouvez trouver les types de rapport.
Sélectionnez celui que vous souhaitez et appuyez sur Entrée ou appuyez sur la
molette de défilement pour envoyer. Dans l’écran couleur, vous pouvez voir les
événements créés et leur statut.
Carnet de vol - Sélectionnez « Cadernet de vol » dans le menu principal
et appuyez sur Entrée. Sur l’écran monochrome, vous pouvez trouver les types
d’opérations que vous pouvez effectuer sur chaque journal de vol. Sélectionnez
l’opération souhaitée et appuyez sur Entrée pour confirmer. Sur l’écran couleur
il sera actif avec le sélecteur pour choisir le carnet de vol souhaité. Appuyez sur
Entrée pour confirmer l’opération souhaitée.
Générer un chier IGC sur une carte Micro SD -Sélection-
nez « Cadernet de vol » dans le menu principal et appuyez sur Entrée. Dans
l’affichage monochrome, vous pouvez trouver l’option « générer le vol IGC ».
Sélectionnez-le et appuyez sur Entrée pour confirmer. Sur l’écran couleur il
sera actif avec le sélecteur pour choisir le carnet de v ol souhaité. Appuyez
sur Entrée pour confirmer la création du fichier IGC sur la carte SD. Vous
pouvez trouver les fichiers IGC dans un dossier appelé « igcs ».

DE
DE
Hauptspezikationen
Display Type Zweifarbig: 640x480px, Schwarzweiß: 320x240px
Batteriekapazität (Lithium-Ion) 9000mAh
Betriebsdauer +24 Stunden (Äußere Einflüsse können diesen Wert beeinflus-
sen)
Druckmesser High resolution barometric sensor 10 – 1200 mbar
Audio Getrenntes Audio Dual Lautsprecher System für Vario und Stimme
Memory expansion Erweiterte Speicherfunktion mit Micro SD card
GPS 72-channel BeiDou, Galileo, GLONASS, GPS / QZSS
Microprozessor Flymaster Microprozessor mit geschütztem RTOS
GSM Multi-band LTE-M / EGPRS Module
FLARM® Flarm ready (optional Flarm Aware RX+TX mode)
Bluetooth Bluetooth 5 mit geringem Energieverbrauch
Native USB Type C Verbindung zum PC
Batterie aufladen Über die Steckdose oder Standard USB
Firmware updates über USB (Upgrades sind kostenlos)
Größe 186x132x18 mm
Gewicht 410g
14

DE
DE
SCHRITT 1 Wir empfehlen das sorgfältige Lesen dieser In-
formationen:
- Garantiebestimmungen
- Bedienungsanleitung ihres Gerätes
Folgen Sie hierfür dem folgenden Link:
https://dnl.flymaster.net/Flymaster_Standard_Limited_Warranty_
EN.pdf
https://www.flymaster.net/manuals/live-ds
SCHRITT 2 Kreieren Sie einen Account in der Flymaster Cloud,
wenn Sie noch keinen haben.
Nachdem Sie Ihren Account eingerichtet haben, gehen Sie auf:
https://livetrack360.com/devices/liveds/register
15

DE
SCHRITT 3 Aktivieren Sie das Live DS
Zunächst benötigen Sie einen gültigen Paypal Account, um Ihr Live DS
aktivieren zu können. Folgen Sie dem folgenden Link und geben Sie
dort ihren Aktivierungscode ein:
https://livetrack360.com/vodasims/activate
Den Aktivierungscode für Ihr Live DS fin-
den Sie auf der letzten Seite dieser Anlei-
tung
SCHRITT 4 -Verbinden Sie Ihr Instrument über USB mit einem
Computer. Das Instrument wird als Speichergerät auf Ihrem Computer
angezeigt. Wenn Sie dieses öffnen, erscheint ein Ordner mit dem Na-
men „Flymaster Instrument Manager“, in dem sich das Dokument für
die Installation befindet.
SCHRITT 5 - Optionale Aktivierung des FLARM AWARE Service
Gehen Sie auf unsere Webseite (www.flymaster.net). Unter dem
Menüpunkt „Accessories“, können Sie das Produkt „Flarm Aware“
kaufen. Dafür müssen Sie die Gerätenummer (Dev. ID) eingeben. Die
Flarm-Seriennummer finden Sie auf Ihrem Instrument.
Nachdem Sie eine E-Mail mit dem Aktivierungscode erhalten haben,
geben Sie diesen in Ihrem Flymaster-Gerät ein.
16

DE
1 - Farbdisplay
2 - Schwarzweißdisplay
3 - Lautsprecher Sprachsteuerung
4 - Lautsprecher Vario
5 - Power an/aus
6 - Rauszoomen und Lautstärkeregelung (Lange halten)
7 - Ranzoomen
8 - Cursor/Pan-Tasten
9 - Enter/Markieren
10 - Fn-Taste
11 - Menü/Esc (zurück)
12 -Scrollrad
13 - Enter (Scrollrad)
Überblick
17
1
2
34
56 7 8
9
10 11 12 13

DE
Kurzanleitung
Während dieser Anleitung, werden wir den Vorgang von En-
tern und Bestätigen nur als Entern bezeichnen. Das kann
immer vorgenommen werden, indem Sie die „Enter/Markier-
en“- Taste betätigen oder das Scrollrad drücken.
Power AN – Drücken Sie den Power-Schalter und bestätigen Sie mit der En-
ter-Taste.
Power OFF - Drücken Sie den Power-Schalter. Wählen Sie „Yes/Ja“ in dem
Pop-up-Menü, mit den Cursor-Tasten und drücken Sie Enter.
Navigation im Hauptmemü – Benutzen Sie das Scrollrad oder den Cur-
sor, um zwischen den einzelnen Menüpunkten zu wählen. Drücken Sie Enter, um
ihre Auswahl zu bestätigen. Gehen Sie zurück, mit Menu/Esc..
Navigation in der Menüliste – Benutzen Sie das Scrollrad, um in dem
Listenmenü nach oben und unten zu navigieren. Drücken Sie Enter, um ihre Aus-
wahl zu bestätigen. Gehen Sie zurück, mit Menu/Esc.
Lautstärke einstellen – Halten Sie die Taste für“ Rauszoomen und Laut-
stärkeregelung“ lange gedrückt und verwenden Sie dann den Cursor, um zwischen
Vario Sound und Lautstärke auszuwählen. Um die Auswahl zu ändern, benutzen Sie
das Scrollrad und drücken Sie es, um die Auswahl zu bestätigen.
Check GPS Status – Wählen Sie „Settings/Einstellungen“ in Ihrem Haupt-
menü aus, ohne Enter zu drücken, dann erscheint der GPS Status in dem Schwar-
zweißdisplay.
Kompass kalibrieren – Drehen sie an dem Scrollrad oder verwenden
Sie den Cursor, um zu „Settings/Einstellungen“ zu gelangen. Um die Eingabe zu
bestätigen, drücken Sie Enter. Wählen Sie „Kalibrieren“ mit dem Scrollrad aus und
drücken Sie Enter, um den Kalibrierungsmodus zu bestätigen. Folgen Sie den Ang-
aben auf Ihrem Farbdisplay und drehen sie das Instrument in alle vier Richtungen,
bis die Kalibrierung erfolgt ist.
SOS und Benachrichtigung einstellen – Loggen Sie sich in Ihren
Benutzeraccount ein und wählen Sie „devices/Geräte“ in der linken Übersicht aus.
Wählen Sie Ihren Gerätetyp aus und drücken Sie auf „actions“ -> „messages/Be-
nachrichtigungen“
Lautstärke regeln – Gehen Sie auf eine beliebige Seite und halten Sie die
Taste für“ Rauszoomen und Lautstärkeregelung“ lange gedrückt. Benutzen Sie
den Cursor um zwischen „vario sound“ und „volume sound (voice assistance)“
zu wählen. Benutzen Sie das Scrollrad und drücken Sie es, um die Auswahl zu
bestätigen.
Vario Sound testen – Gehen Sie auf Menü -> Settings -> Vario Acoustics
-> Auto Silent (Automatische Stummstellung). Stellen Sie „Auto Silent“ aus und
drücken Sie Enter um die Eingabe zu bestätigen.
Höhenmeter einstellen – Gehen Sie auf Menu -> Settings -> Set Altimeter
> Drücken Sie das Scrollrad, um die QNH oder Höhe einzustellen. Verwenden Sie
das Scrollrad, um die Werte zu verändern. Um „save“ oder „cancel“ auszuwählen,
benutzen Sie den Cursor. Zur Bestätigung drücken Sie Enter.
Hardware reset - Drücken Sie zeitglich den Power-Schalter und das Scroll-
rad und lassen es wieder los. Das Gerät sollte sich jetzt ausschalten. Drücken Sie
den Power-Schalter, um es wieder einzuschalten.
18
Löschen oder verändern Sie niemals eine Datei direkt auf der DS-Karte. Alle
Änderungen dürfen ausschließlich über den Flymaster Instrument Manager
vorgenommen werden.Wenn Sie sich nicht daran halten, kann es sein, dass
ihr Gerät nicht mehr ordnungsgemäß funktioniert. Um ein Dokument von
Ihrer DS-Karte auf Ihren Computer zu kopieren, verwenden Sie die Ordner
in Ihrem Explorer über die USB-Verbindung mit dem Gerät.

DE
19
Kurzanleitung
Seiten einstellen - Bringen sie das Gerät in den Flugmodus. Drücken
sie kurz die Fn-Taste, um zwischen den Seiten zu wechseln, halten Sie die Fn-
Tast länger, um das eine Übersicht der Seiten angezeigt zu bekommen. In dem
Seiten-Auswahl-Menü benutzen Sie das Scrollrad, um eine Seite auszuwählen.
Drücken Sie Enter, um die Auswahl zu bestätigen.
Task Navigator – Benutzen Sie das Scrollrad oder den Cursor, um sich
in der Übersicht des Schwarzweißdisplays zu bewegen. Die verschiedenen
Punkte sind hervorgehoben und abgebildet in dem Farbdisplay.
Lufträume anzeigen – Das Farbdisplay zeigt ihnen die aktuelle Po-
sition an. Sie können die Markierung in dem Farbdisplay anwählen, um die
Lufträume in dem Schwarzweißdisplay angezeigt zu bekommen. Verwenden
Sie das Navigationsrad, um zwischen den Lufträumen zu wechseln und die
entsprechenden Infos angezeigt zu bekommen.
GSM status: Wählen Sie „Report Back“ im Hauptmenü aus, ohne Enter zu
drücken. Der GSM-Status wird im Schwarzweißdisplay angezeigt.
Aktuelle GPS-Position – Wählen Sie „Report Back“ im Hauptmenü
aus, ohne Enter zu drücken. Der GSM-Status wird Ihnen im Schwarzweißdis-
play angezeigt.
Aktuelle Zeit – Wählen Sie „Report Back“ im Hauptmenü aus, ohne Enter
zu drücken. Der GSM-Status wird Ihnen im Schwarzweißdisplay angezeigt.
Benachrichtigung senden – Wählen Sie „Report Back“ im Haupt-
menü aus und drücken Sie Enter. Auf dem Schwarzweißdisplay werden Ih-
nen die verschiedenen Benachrichtigungs-Optionen angezeigt. Wählen Sie
die gewünschte Option aus und drücken Sie Enter oder das Scrollrad, um
die Nachricht abzusenden. Auf dem Farbdisplay werden die bereits kreierten
Vorgänge und ihr Status angezeigt.
Flugbuch – Wählen Sie „Flight Log“ aus dem Hauptmenü aus und drücken
Sie Enter. Auf dem Schwarzweißdisplay werden Ihnen die verschiedenen Aus-
wahlmöglichkeiten angezeigt, die Sie bei jedem Flugbucheintrag vornehmen
können. Wählen Sie die gewünschte Option aus und drücken Sie Enter, um Ihre
Auswahl zu bestätigen. Auf dem Farbdisplay können Sie nun den gewünschten
Flugbucheintrag auswählen. Drücken Sie Enter, um die gewünschte Auswahl
zu bestätigen.
Erstellen einer IGC-Datei auf der Micro SD-Karte – Wählen
Sie „Flight Log“ im Hauptmenü aus und drücken Sie Enter. Auf dem Schwar-
zweißdisplay erscheint nun die die Auswahlmöglichkeit „generate Flight IGC“.
Bestätigen Sie die Auswahl, indem Sie Enter drücken. Auf dem Farbdisplay
können Sie nun den gewünschten Flugbucheintrag auswählen. Bestätigen Sie
die Auswahl, um eine IGC-Datei auf der SD-Karte zu erstellen. Sie finden die
gespeicherten IGC-Dateien in dem Ordner mit der Bezeichnung „igcs“.

ITA
Speciche principali
Tipo display Doppio schermo
Colore: 640x480px Scala di grigi: 320x240px
Capacità della batteria (Ioni di Litio) 9000mAh
Autonomia Normalmente +24 ore (le condizioni ambientali
possono alterare questo valore)
Sensore di pressione Sensore barometrico ad alta risoluzione 10 –
1200 mbar
Audio Doppio sistema di altoparlanti separato per vario
e voce
Espansione della memoria Scheda Micro SD
GPS 72-canali BeiDou, Galileo, GLONASS, GPS / QZSS
Microprocessore Microprocessore Flymaster con RTOS proprietario
GSM Modulo multibanda LTE-M / EGPRS
FLARM® Flarm ready (modulo Flarm Aware RX+TX opzionale)
Bluetooth Modulo Bluetooth 5 a basso consumo energetico
Connessione USB Tipo C Consente la connessione al PC
Carica batteria Con adattatore da muro o porta USB standard
Aggiornamento Firmware tramite USB (aggiornamenti gratuiti)
Dimensioni 186x132x18 mm
Peso 410g
20
Other manuals for LIVE DS
1
Table of contents
Languages:
Other Flymaster Avionic Display manuals
Popular Avionic Display manuals by other brands
Advanced Flight Systems
Advanced Flight Systems AF-5400 pilot's guide

VRinsight
VRinsight MCP combo panel user manual
Garmin
Garmin DA42 G1000 Cockpit reference guide
IFD-NET
IFD-NET EVO User guide and installation manual
PROXALERT
PROXALERT R5 pilot's guide
GRT Avionics
GRT Avionics Horizon Quick-Reference Pilot Card
