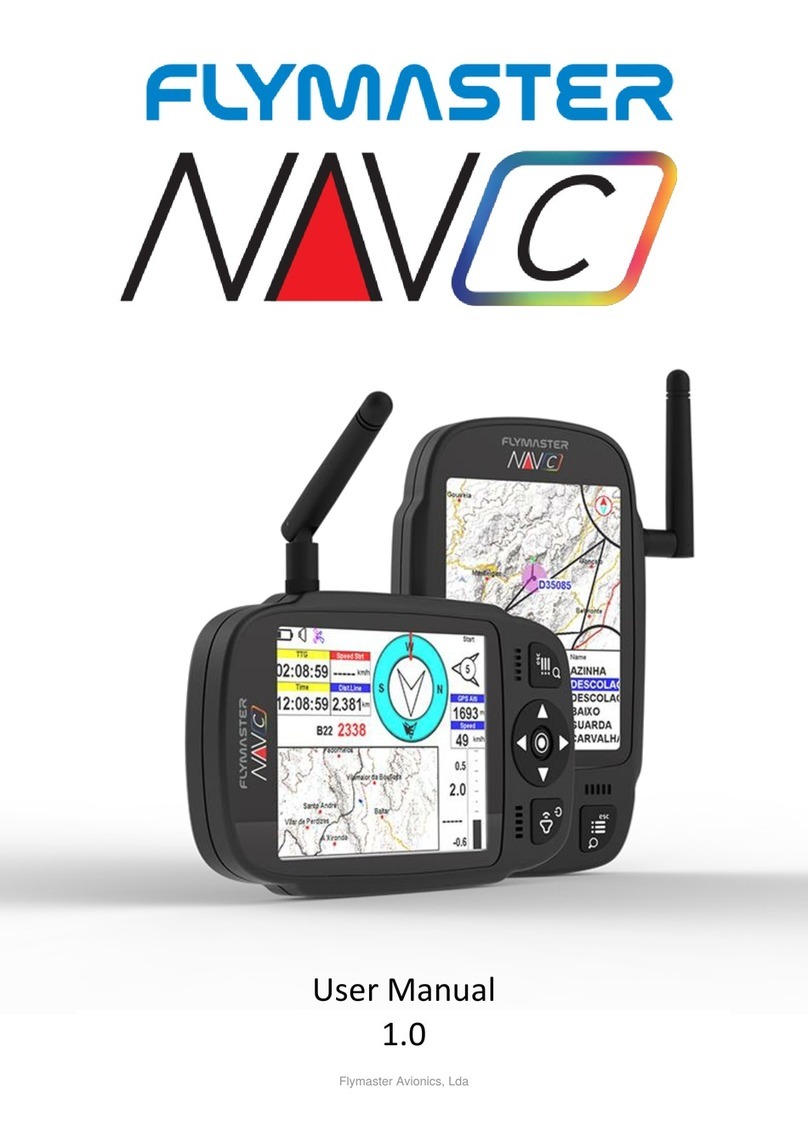
Flymaster NAV C User manual

series
ENG
FRA
DE
ITA
RU
PT
Read before use
A lire avant utilisation
Vor Benutzung lesen
Leggere prima dell’uso
Прочитайте перед
использованием
Ler antes de usar
series

series
ENG
Main Specications
Display Type Reflective colour 640x480px
Battery Capacity (Lithium-Ion) 6000mAh
Autonomy Usually +24 hours (environment conditions may alter this value)
Pressure Sensor High resolution barometric sensor 10 – 1200 mbar
Audio Dual speaker system for separate vario and voice sound
Memory expansion High speed 128 GB Micro SD card
GPS 72-channel BeiDou, Galileo, GLONASS, GPS / QZSS
Microprocessor Flymaster Microprocessor with proprietary RTOS
GSM Multi-band LTE-M / EGPRS Module (LIVE C ONLY)
FLARM® Flarm ready (optional Flarm Aware RX+TX mode)
Bluetooth Bluetooth 5 low energy module
Native USB Type C Connection Allows connection to the PC
Battery Charging From wall adapter or usb port
Firmware update by USB (upgrades are free)
Size 152x90x18 mm
Weight Aprox.220g (LIVE C)
2

series
ENG
STEP 1 - We recommend the reading of the following documents:
- Warranty terms and conditions.
- Complete user manual of your instrument.
To do that, please use the following links:
https://dnl.ymaster.net/Flymaster_Standard_Limited_Warranty_EN.pdf
https://www.ymaster.net/downloads
STEP 2 - Create a Flymaster Cloud account if you don’t already
have one.
After the account creation go to:
https://livetrack360.com/login
3

series
ENG
STEP 3 - Register and activate the instrument.
A valid Paypal account is needed to activate the LIVE C.
Go to the following link and use the activation code.
https://livetrack360.com/devices/register
The activation code can be found on page 39 of
this booklet.
STEP 4 - Install “Flymaster Instrument Manager” to manage your
Flymaster C Series instrument.
Connect your instrument to the computer via USB. The instrument will
appear as a mass storage device. Inside you will find a folder called
“Flymaster Instrument Manager” where the installation file is located.
We also recommend get the installer from Flymaster website in the
downloads section, to be sure you get the latest version.
STEP 5 - OPTIONAL FLARM AWARE SERVICE ACTIVATION
Go to our website (www.flymaster.net), and under “accessories” you can
buy the product “Flarm Aware”. You must fill in the “Device ID” (Flarm
serial number, which can be seen in the instrument Menu -> Device info
-> Flarm Device ID: After receiving a confirmation email with the activa-
tion code, you must enter it in the Flarm Settings ( Menu -> Settings ->
Flarm settings-> FlarmAware licence.
4

series
1 2
34
5 6
8
7
ENG
5
1 - Display
2 - Flarm antenna
3 - Audio speaker
4 - Vario speaker
5 - Volume/Power
6 - Menu-Esc/Zoom mode
7 - Enter/Mark
8 - Cursor/Pan
9 - Micro-SD card
10 - USB Type C
910

series
Getting started
Throughout this guide, we will use the term “Enter” to refer to the Enter/confirm
operation, which can be performed using the cursor center button.
Power ON - Press the Volume/Power button and confirm by pressing Enter/
Mark button.
Power OFF - Press the Power button. Select “yes” using the cursor keys in
the pop-up menu, and press Enter.
Navigate in the main menu - Use the cursor/pan keys to switch be-
tween menu icons. Press Enter to confirm. Use the Menu/esc button to go
back.
Navigate in a list-type menu - Use the cursor/pan keys to navigate up
and down the list. Press Enter to confirm. Use the Menu/esc button to go back.
Set volume - Long press the Volume/Power button, use the up and down
cursor keys to change between vario sound and speaker volume. Use the cur-
sor/pan keys (left and right) to adjust the setting, then press the scroll wheel
down to confirm.
Check GPS Status - Select “GPS Status” in the main menu, and press
Enter to confirm.
Calibrate compass - Use the cursor/pan keys to go to “Settings”. Press
Enter to enter the settings. Select “calibration” and press Enter to enter calibra-
tion mode. Follow the display instructions and rotate the instrument along all
four axes until calibration is complete.
Setting SOS and Report back messages (LIVE C only) -
After logging into your livetrack360.com user account, click on “devices” in
the left sidebar. Choose your instrument, click on “actions” -> “messages”.
Test Vario sound - Press Menu -> Settings -> Vario Acoustics -> Auto
Silent. Set Auto Silent to OFF. Press Enter to confirm.
Set altimeter - Press Menu -> Settings -> Set Altimeter. Use the cursor/
pan keys to edit the QNH or Altitude. Use the cursor/pan keys to change values.
Use the cursor keys to move to “save” or “cancel”. Press Enter to set the value.
Hardware reset - Press both the Volume/Power button and the Menu-
Esc/ button simultaneously and release. The instrument should turn off. Press
the power button to turn it on again.
ENG
6
Do not delete or manipulate any les in the SD card di-
rectly. All SD card management tasks should be done
through Flymaster Instrument Manager. Not doing so,
may cause the instrument to malfunction. To copy some
le from SD card to your computer, you should use your
computer’s le explorer using the USB connection with
the instrument.

series
7
Getting started
Change page - In flight mode, press the Enter/Mark button briefly to
switch between pages. Long press the Enter/Mark button to access the pages
menu. In the pages menu, use the Up and Down cursor keys to select the
desired page. Press Enter to confirm the selection.
Task Navigator - Use the Up and Down cursor keys l to navigate
through task waypoints. The waypoints will be highlighted and centered on
the display.
Airspace browser - The display will show your current position. To view
the airspace name, pan the marker on the airspaces map. Press Enter to enter
the cursor scroll mode and use the Up and Down buttons to scroll through the
airspaces. The highlighted airspaces will be displayed on the color map along
with their information. You can also change the zoom level in the airspaces
map. To enter zoom mode, long press the Menu/Esc button and use the Up and
Down cursor buttons to zoom in and out.
GSM status (Live C only): Select “GSM status” from the main menu
and press Enter.
Current GPS position and GPS status: Select “GPS Status” in the
main menu and press Enter to view the current GPS position and GPS status.
Current time: Select “Device info” in the main menu and press Enter to
view the current date, Time and UTC offset.
Report back (LIVE C only) : Select “Report Back” from the main menu
and press Enter. You will find the report back types. Select the desired one
and press Enter to send. You can see the created events and their status in the
“Report Back” events option.
Flight Log - Select “Flight Log” from the main menu and press Enter. On the
you will find the available operations for each flight. Select the desired opera-
tion and press Enter to confirm. The flight log will be active with the selector to
choose the desired log. Press Enter to confirm the selected operation.
Generate IGC le to Micro SD card: Select “Flight Log” from the
main menu and press Enter. You will find the option “Generate Flight IGC”.
Select it and press Enter to confirm. The option will be active with the selector
to choose the desired flight log. Press Enter to confirm the creation of the IGC
file to the SD card. You can find the IGC files inside a folder called “igcs”.
ENG

series
FRA
8
Principales spécications :
Type d’affichage : Couleur réfléchissante 640x480px
Capacité de la batterie (Lithium-Ion) : 6000mAh
Autonomie : Généralement +24 heures (les conditions environnementales
peuvent influencer cette valeur)
Capteur de pression : Capteur barométrique haute résolution de 10 à 1200
mbar
Audio : Système de haut-parleurs double pour les sons vario et la voix séparés
Extension de mémoire : Carte Micro SD haute vitesse de 128 Go
GPS : Module 72 canaux BeiDou, Galileo, GLONASS, GPS / QZSS
Microprocesseur : Microprocesseur Flymaster avec un système d’exploitation
RTOS propriétaire
GSM : Module LTE-M / EGPRS multi-bandes (LIVE C UNIQUEMENT)
FLARM® : Prêt pour Flarm (mode Flarm Aware RX+TX en option)
Bluetooth : Module Bluetooth 5 à faible consommation d’énergie
Connexion native USB Type C : Permet la connexion à un PC
Chargement de la batterie : À partir d’un adaptateur mural ou d’un port USB
Mise à jour du micrologiciel par USB (les mises à niveau sont gratuites)
Taille : 152x90x18 mm
Poids : Environ 220 g (LIVE C)

series
FRA
9
ÉTAPE 1 - Nous vous recommandons de lire les documents
suivants :
Conditions générales de garantie.
Manuel d’utilisation complet de votre instrument.
Pour cela, veuillez utiliser les liens suivants :
https://dnl.flymaster.net/Flymaster_Standard_Limited_Warranty_FR.pdf
https://www.flymaster.net/downloads
-
ÉTAPE 2 - Créez un compte Flymaster Cloud si vous n’en avez
pas déjà un.
Après la création du compte, rendez-vous sur :
https://livetrack360.com/login

series
FRA
10
ÉTAPE - 3 Inscrivez et activez l’instrument.
Un compte PayPal valide est nécessaire pour activer le LIVE C.
Rendez-vous sur le lien suivant et utilisez le code d’activation :
https://livetrack360.com/devices/register
Le code d’activation se trouve à la page 39 de
ce livret.
ÉTAPE 4 - Installez “Flymaster Instrument Manager” pour gérer
votre instrument Flymaster de la série C.
Connectez votre instrument à l’ordinateur via USB. L’instrument appa-
raîtra comme un périphérique de stockage de masse. À l’intérieur, vous
trouverez un dossier appelé “Flymaster Instrument Manager” où se
trouve le fichier d’installation.
Nous vous recommandons également de télécharger l’installateur depu-
is le site Web de Flymaster dans la section des téléchargements, afin de
vous assurer d’obtenir la dernière version.
ÉTAPE 5 - Activation du service FLARM Aware (facultatif)
Rendez-vous sur notre site web (www.flymaster.net), puis dans la sec-
tion “Accessoires”, vous pouvez acheter le produit “Flarm Aware”. Vous
devez remplir l’ID de l’appareil (numéro de série Flarm, visible dans
le menu de l’instrument -> Informations sur l’appareil -> ID de l’ap-
pareil Flarm). Après avoir reçu un e-mail de confirmation avec le code
d’activation, vous devez le saisir dans les paramètres Flarm (Menu ->
Paramètres -> Paramètres Flarm -> Licence FlarmAware).

series
FRA
11
1 2
34
5 6
8
7
1 - Écran
2 - Antenne Flarm
3 - Haut-parleur audio
4 - Haut-parleur vario
5 - Volume/Alumez-éteindre
6 - Menu/Esc/Mode Zoom
7 - Entrée/Marquer
8 - Curseur/Panoramique
9 - Carte micro-SD
10 - USB Type C
910

series
FRA
12
Démarrage
Tout au long de ce guide, nous utiliserons le terme “Entrée” pour faire référence à l’opéra-
tion Entrée/confirmation, qui peut être effectuée en utilisant le bouton central du curseur.
Allumer - Appuyez sur le bouton Volume/Marche et confirmez en appuyant sur le bouton
Entrée/Marquer.
Éteindre - Appuyez sur le bouton Marche/Arrêt. Sélectionnez “oui” à l’aide des touches
du curseur dans le menu contextuel, puis appuyez sur Entrée.
Naviguer dans le menu principal - Utilisez les touches du curseur/panoramique pour
passer d’une icône de menu à l’autre. Appuyez sur Entrée pour confirmer. Utilisez le
bouton Menu/Esc pour revenir en arrière.
Naviguer dans un menu de type liste - Utilisez les touches du curseur/panoramique pour
naviguer dans la liste vers le haut et vers le bas. Appuyez sur Entrée pour confirmer.
Utilisez le bouton Menu/Esc pour revenir en arrière.
Régler le volume - Maintenez enfoncé le bouton Volume/Marche, utilisez les touches
du curseur vers le haut et vers le bas pour changer entre le son du vario et le volume
des haut-parleurs. Utilisez les touches du curseur/panoramique (gauche et droite) pour
ajuster le paramètre, puis appuyez sur la molette de défilement vers le bas pour confirmer.
Vérifier l’état du GPS - Sélectionnez “État du GPS” dans le menu principal, puis appuyez
sur Entrée pour confirmer.
Calibrer la boussole - Utilisez les touches du curseur/panoramique pour accéder à “Par-
amètres”. Appuyez sur Entrée pour entrer dans les paramètres. Sélectionnez “calibra-
tion” et appuyez sur Entrée pour entrer en mode de calibration. Suivez les instructions
affichées et faites tourner l’instrument sur ses quatre axes jusqu’à ce que la calibration
soit terminée.
Réglage des messages SOS et de retour (uniquement pour LIVE C) - Après vous être
connecté à votre compte utilisateur sur livetrack360.com, cliquez sur “appareils” dans la
barre latérale gauche. Choisissez votre instrument, cliquez sur “actions” -> “messages”.
Tester le son du vario - Appuyez sur Menu -> Paramètres -> Acoustique du vario ->
Mode silencieux automatique. Réglez le mode silencieux automatique sur OFF. Appuyez
sur Entrée pour confirmer.
Régler l’altimètre - Appuyez sur Menu -> Paramètres -> Réglage de l’altimètre. Utilisez les
touches du curseur/panoramique pour modifier le QNH ou l’altitude. Utilisez les touches
du curseur/panoramique pour changer les valeurs. Utilisez les touches du curseur pour
vous déplacer vers “enregistrer” ou “annuler”. Appuyez sur Entrée pour définir la valeur.
Réinitialisation software - Appuyez simultanément sur le bouton Volume/Marche et le
bouton Menu-Esc/Zoom mode, puis relâchez-les. L’instrument devrait s’éteindre. Ap-
puyez sur le bouton d’alimentation pour le rallumer.
Ne supprimez pas ou ne manipulez pas directement les
chiers sur la carte SD. Toutes les tâches de gestion de
la carte SD doivent être effectuées via Flymaster Instru-
ment Manager. Ne pas le faire pourrait entraîner un dys-
fonctionnement de l’instrument. Pour copier des chiers
de la carte SD vers votre ordinateur, utilisez l’explora-
teur de chiers de votre ordinateur via la connexion USB
avec l’instrument.

series
FRA
13
Démarrage
Changer de page - En mode vol, appuyez brièvement sur le bouton Entrée/Marquer pour
passer d’une page à l’autre. Maintenez enfoncé le bouton Entrée/Marquer pour accéder
au menu des pages. Dans le menu des pages, utilisez les touches du curseur Haut et
Bas pour sélectionner la page souhaitée. Appuyez sur Entrée pour confirmer la sélection.
Navigateur de manches - Utilisez les touches du curseur Haut et Bas pour naviguer entre
les points de passage de la manche. Les points de passage seront mis en évidence et
centrés sur l’écran.
Navigateur d’espace aérien - L’écran affichera votre position actuelle. Pour afficher le
nom de l’espace aérien, déplacez le curseur sur la carte des espaces aériens. Appuyez
sur Entrée pour entrer en mode de défilement du curseur et utilisez les touches Haut et
Bas pour faire défiler les espaces aériens. Les espaces aériens mis en évidence seront
affichés sur la carte en couleur avec leurs informations. Vous pouvez également modifier
le niveau de zoom dans la carte des espaces aériens. Pour entrer en mode de zoom,
maintenez enfoncé le bouton Menu/Esc et utilisez les touches du curseur Haut et Bas
pour effectuer un zoom avant et arrière.
État GSM (uniquement pour Live C) : Sélectionnez “État GSM” dans le menu principal
et appuyez sur Entrée.
Position GPS actuelle et état GPS : Sélectionnez “État GPS” dans le menu principal et
appuyez sur Entrée pour afficher la position GPS actuelle et l’état GPS.
Heure actuelle : Sélectionnez “Infos appareil” dans le menu principal et appuyez sur
Entrée pour afficher la date, l’heure actuelle et le décalage UTC.
Rapport de retour (uniquement pour Live C) : Sélectionnez “Rapport de retour” dans le
menu principal et appuyez sur Entrée. Vous trouverez les types de rapports de retour.
Sélectionnez celui désiré et appuyez sur Entrée pour l’envoyer. Vous pouvez voir les
événements créés et leur statut dans l’option “Événements de rapport de retour”.
Journal de vol - Sélectionnez “Journal de vol” dans le menu principal et appuyez sur
Entrée. Vous trouverez les opérations disponibles pour chaque vol. Sélectionnez l’opéra-
tion souhaitée et appuyez sur Entrée pour confirmer. Le journal de vol sera actif avec le
sélecteur pour choisir le journal souhaité. Appuyez sur Entrée pour confirmer l’opération
sélectionnée.
Générer un fichier IGC sur la carte Micro SD : Sélectionnez “Journal de vol” dans le menu
principal et appuyez sur Entrée. Vous trouverez l’option “Générer un vol IGC”. Sélec-
tionnez-la et appuyez sur Entrée pour confirmer. L’option sera active avec le sélecteur
pour choisir le journal de vol souhaité. Appuyez sur Entrée pour confirmer la création
du fichier IGC sur la carte SD. Vous pouvez trouver les fichiers IGC dans un dossier
appelé “igcs”.

series
DE
DE
14
Hauptspezikationen
Displaytyp Reflektierende Farben 640x480px
Batterieleistung (Lithium-Ion) 6000mAh
Laufzeit Standard +24 Stunden (Umweltbedingungen können die Laufzeit der
Batterie beeinträchtigen)
Drucksensor Hoch auflösender Luftdrucksensor 10 – 1200 mbar
Audio Dualer Lautsprecher für getrennten Vario und Standardsound
Speichererweiterung High speed 128 GB Micro SD card
GPS 72-channel BeiDou, Galileo, GLONASS, GPS / QZSS
Mikroprozessor Flymaster Mikroprozessor mit geschütztem RTOS
GSM Multi-band LTE-M / EGPRS Module (NUR FÜR LIVE C)
FLARM® Flarm ready (optionaler Flarm Aware RX+TX
Modus)
Bluetooth Bluetooth 5 low energy Modul
Native USB Type C Verbindung Ermöglicht die Verbindung
zum PC
Batterie laden über die Steckdose oder den USB-Anschluss möglich
Firmware update mit USB (Upgrades sind kostenlos)
Größe 152x90x18 mm
Gewicht ca. 220 g (LIVE C)

series
DE
DE
15
Schritt 1 - Wir empfehlen das sorgfältige Lesen dieser Unterla-
gen, vor der Nutzung des Gerätes
- Garantiebestimmungen.
- Komplette Bedienungsanleitung für ihr Flymaster-Gerät.
Die Dokumente finden sie unter den folgenden Links:
https://dnl.ymaster.net/Flymaster_Standard_Limited_Warranty_EN.pdf
https://www.ymaster.net/downloads
Schritt 2 - Legen Sie einen Flymaster Cloud Account an, wenn
sie noch keinen besitzen
Nachdem der Account erstellt wurde, gehen Sie auf:
https://livetrack360.com/login

series
DE
16
Schritt 3 - Registrieren und Aktivieren des Gerätes.
Sie benötigen einen aktiven Paypal Account, um ihr LIVE C aktivieren zu
können.Gehen sie über den folgenden Link zur Registrierungsseite und
benutzen Sie den Aktivierungscode
https://livetrack360.com/devices/register
Den Aktivierungscode finden Sie auf Seite 39
dieser Anleitung.
Schritt 4 - Installieren Sie den “Flymaster Instrument Manager”
um Einstellungen an Ihrem Flymaster Gerät der C-Serie vorzunehmen.
Verbinden Sie Ihr Fluggerät über USB mit dem Computer. Das Gerät
wird als Massenspeichergerät angezeigt. In dem Ordner “Flymaster In-
strument Manager” finden Sie die Installationsdatei.
Wir empfehlen Ihnen außerdem, die Installationssoftware von der Fly-
masterwebseite herunterzuladen. Damit gehen Sie sicher, die neuste
Version zu haben.
Schritt 5 - OPTIONALE FLARM AWARE SERVICE AKTIVIERUNG
Gehen Sie auf unsere Website (www.flymaster.net). Unter “Zubehör”
(accessories) können Sie das Produkt “Flarm Aware” kaufen. Dafür ge-
ben Sie die Gerätenummer ein (Seriennummer, die im Menü des Gerätes
angezeigt wird unter -> Geräteinformation ->Flarm Gerätnummer.
Nachdem Sie eine E-Mail mit dem Aktivierungscode erhalten haben, ge-
ben Sie diesen bei den Flarm-Einstellungen ein (Menü -> Einstellungen
-> Flarm-Einstellungen ->FlarmAware Lizenz.

series
DE
17
1 2
34
5 6
8
7
1 - Display
2 - Flarm-Antenne
3 - Audio Lautsprecher
4 - Vario Lautsprecher
5 - Lautstärke/Power
6 - Menü-Esc/Zoom-Modus
7 - Enter/Markieren
8 - Cursor/Pan
9 - Micro-SD Karte
10 - USB Typ C
910

series
DE
18
Grundlagen der Bedienung
In dieser Bedienungsanleitung benutzen wir den Begriff „Enter“ zur Beschreibung
einer Auswahlbestätigung, die mit dem Drücken der Mitte des Cursors geschieht.
Power ON - Drücken Sie den Lautstärke-/Power-Schalter und bestätigen Sie mit
Enter.
Power OFF - Drücken Sie den Power-Schalter, wählen Sie mit dem Cursor “Ja”
aus und drücken Sie Enter.
Navigieren im Hauptmenü - Verwenden Sie den Cursor, um zwischen den Aus-
wahlbildern zu wählen. Drücken Sie Enter, um die Auswahl zu bestätigen. Mit dem
Menü/Esc-Schalter kehren Sie zurück zur Auswahl.
Navigieren in einer Auswahlliste - Verwenden Sie den Cursor, um sich in dem
Menü auf und ab zu bewegen. Bestätigen Sie mit Enter. Mit dem Menü/Esc-Schalter
kehren Sie zurück zur Auswahl.
Lautstärke regeln - Halten Sie den Lautstärke/Power-Schalter lang gedrückt.
Mit dem Cursor wählen Sie Vario oder Standardsound aus und wählen dann die
gewünschte Lautstärke aus (rechts und links). Anschließend mit Enter bestätigen.
Check GPS Status - Wählen Sie “GPS Status” im Hauptmenü und drücken Sie
Enter um ihre Auswahl zu bestätigen.
Kompass kalibrieren - Gehen Sie mit dem Cursor zu „Einstellungen“. Drück-
en Sie Enter für die Bestätigung. Wählen Sie „kalibrieren“ aus und bestätigen die
Auswahl mit Enter. Folgen Sie dann den Anweisungen auf dem Display und lassen
Sie das Gerät in alle vier Achsen rotieren, bis die Kalibrierung abgeschlossen ist.
SOS und Report Back Nachrichten einstellen (Nur für LIVE C) - Nachdem Sie sich
in Ihrem livetrack360.com Benutzerkonto eingeloggt haben, wählen Sie „Geräte“ im
linken Auswahlmenü aus. Wählen Sie Ihr Instrument aus, drücken Sie „Aktionen“
-> „Nachrichten“
Vario Sound testen - Wählen Sie folgende Punkte aus: -> Menü -> Einstellungen
-> Vario Akustik -> Automatische Stummschaltung. Setzen Sie „Auto Silent“ auf
AUS und bestätigen Sie die Auswahl mit Enter.
Höhenmeter einstellen - -> Menü -> Einstellungen -> Höhenmeter einstellen.
Verwenden Sie den Cursor um Änderungen am QNH oder der Höhe vorzunehmen.
Mit dem Cursor können Sie dann die Einstellungen zu ändern. Wählen Sie „Bestäti-
gen“ oder „Löschen“. Mit Enter die Auswahl bestätigen.
Hardware reset - Drücken Sie gleichzeitig den Lautstärke/Power-Schalter und
den Menü-Schalter und lassen Sie dann wieder los. Danach sollte sich das Gerät
ausschalten. Mit dem Power-Schalter schalten Sie es wieder an.
Löschen oder verändern Sie niemals die Daten auf der SD-Karte.
Alle Veränderungen auf der SD-Karte sollten ausschließlich über
den Flymaster Instrument Manager vorgenommen werden. Bei
Nichtbeachtung kann es dazu führen, dass das Gerät nicht ein-
wandfrei funktioniert. Um eine Datei von der SD Karte auf den
Computer zu kopieren, sollte der Datei Explorer des Computers
über die USB-Verbindung genutzt werden.

series
DE
19
Grundlagen der Bedienung
Seite wechseln - Im Flugmodus, drücken sie kurz Enter/Markieren, um
die Seiten zu wechseln. Durch ein langes Halten der Taste, gelangen Sie
zu der jeweiligen Seite. Im Seitenmenü benutzen Sie den Cursor, um die
gewünschte Seite auszuwählen. Mit Enter bestätigen Sie die Auswahl.
Task Navigator - Benutzen Sie den Cursor, um durch verschiedene
Wegpunkte zu navigieren. Die Wegpunkte werden hervorgehoben und im
Zentrum des Displays angezeigt.
Airspace browser - Das Display zeigt Ihre genaue Position an. Um den
Namen des Luftraums zu sehen, bewegen Sie sich mit dem Cursor zu den
Markierungen auf der Luftraumkarte.
Bestätigen Sie mit Enter, um in den Scrollmodus zu gehen und durch die
Lufträume scrollen zu können. Die hervorgehobenen Lufträume werden
dann auf der farbigen Karte mit den dazugehörigen Informationen an-
gezeigt. Sie können auch die Ansicht der Karte verändern. Um in den
Zoom-Modus zu gelangen, halten Sie die Menü/Esc-Taste gedrückt und
bewegen Sie den Cursor hoch und runter, um heran- bzw. herauszu-
zoomen.
GMS Status (nur Live C): “GSM status” im Hauptmenü auswählen und
mit Enter bestätigen.
Aktuelle GPS Position und GPS Status: “GPS Status” im Haupt-
menü auswählen und mit Enter bestätigen, um die aktuelle GPS Position
und den GPS Status zu sehen.
Aktuelle Zeit: “Device info” im Hauptmenü auswählen und mit Enter
bestätigen, um die aktuelle Zeit, Datum und UTC offset angezeigt zu be-
kommen.
Bericht erstatten (Nur beim LIVE C): “Report Back” im Hauptmenü
auswählen und mit Enter bestätigen. Sie sehen eine Übersicht der ver-
schiedenen „Report Back“- Optionen. Wählen Sie die gewünschte Form
aus und bestätigen Sie Ihre Auswahl mit Enter, um den Bericht zu senden.
In der Übersicht der „Report Back“ Einträge, können Sie alle erstellen Ber-
ichte einsehen.
Flüge speichern -“Flight Log” im Hauptmenü auswählen und mit Enter
bestätigen. Hier werden verschiedene Optionen für jeden gespeicherten
Flug angezeigt. Wählen Sie den gewünschten Vorgang aus und bestä-
tigen Sie mit Enter. Die Fluginfos werden bei entsprechender Auswahl
angezeigt. Mit Enter die Auswahl bestätigen.
IGC Datei für Micro SD Karte erstellen: - “Flight Log” im Hauptmenü
auswählen und mit Enter bestätigen. Dort wird Ihnen die Option “Generate
Flight IGC” angezeigt. Auswählen und mit Enter bestätigen. Nun kann der
gewünschte gespeicherte Flug ausgewählt werden. Mit Enter bestätigen
Sie die Erstellung der IGC-Datei für die SD-Karte. Die IGC-Dateien finden
Sie in dem Ordner „igcs“.

series
ITA
20
Speciche principali
Tipo display Colore riflettente 640x480px
Capacità batteria (Ioni di Litio) 6000mAh
Autonomia Normalmente +24 ore (le
condizioni ambientali possono alterare questo valore)
Sensore di pressione Sensore barometrico ad alta risoluzione
10 - 1200 mbar
Audio Doppio sistema di altoparlanti separato per vario e voce
Espansione della memoria Scheda Micro SD Alta velocità 128 GB
GPS 72-canali BeiDou, Galileo, GLONASS, GPS / QZSS
Microprocessore Microprocessore Flymaster RTOS proprietario
GSM LTE-M Multibanda / Modulo EGPRS (solo LIVE C)
FLARM® Flarm ready (modulo Flarm Aware RX+TX opzionale)
Bluetooth Bluetooth 5 a basso consumo energetico
Connessione USB tipo C nativa Consente la connessione al PC
Carica batteria Con adattatore da muro o porta USB
Aggiornamento Firmware tramite USB (aggiornamenti gratuiti)
Dimensioni 152x90x18 mm
Peso circa 220g (LIVE C)
Other manuals for NAV C
1
This manual suits for next models
1
Table of contents
Languages:
Other Flymaster Avionic Display manuals
