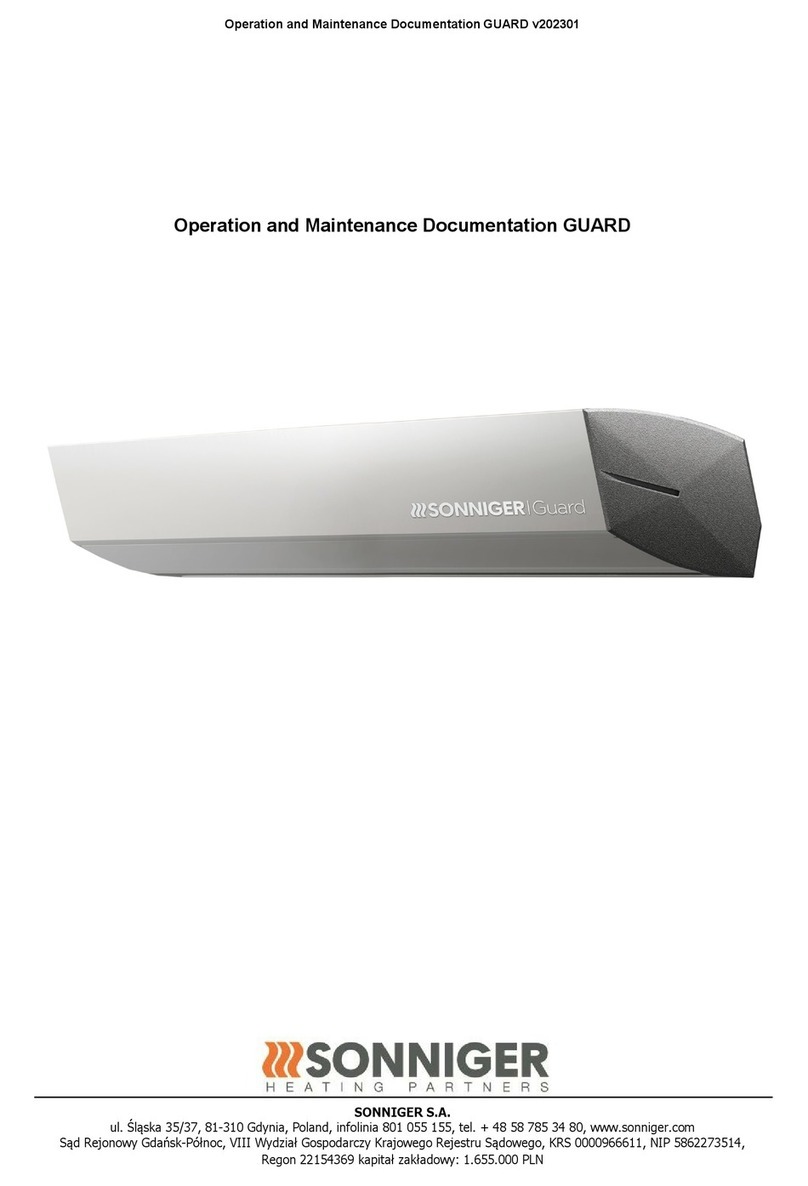
FMC Econat C-15 User manual

Econat C-15
www.ufoheaters.com
USER MANUAL & CERTIFICATE OF WARRANTY
MANUAL DE USUARIO & CERTIFICADO DE GARANTĺA
MANUEL DE I’UTLISATEUR ET & CERTIFICAT DE GARANTIE


Econat C-15
www.ufoheaters.com
USER MANUAL & CERTIFICATE OF WARRANTY
MANUAL DE USUARIO & CERTIFICADO DE GARANTĺA
MANUEL DE I’UTLISATEUR ET & CERTIFICAT DE GARANTIE

ENGLISH
2
INTRODUCTION
Distinguished customer,
You have purchased a high quality, efficient, and original ECONAT C-15 Infrared Heater.
We would like to express our gratitude to you for your appropriate choice and confidence in
ECONAT C-15.
This manual has been designed for our ECONAT C-15 model.
Please read this manual thoroughly to attain sustainable satisfaction with your heater.
Please stick to the items in the "Safety Instructions" section with strict observance. Proper
installation, operation, and maintenance are of great importance for the security of you and
those who benefit from the heater. Please keep this manual in a safe place for future
reference and urgent needs.
We wish you to enjoy your new ECONAT C-15 heater for better days and times…
Please read safety instructions
carefully for the security of you, your
family and your belongings before
operating your appliance.
Manufacturer: FMC ELEKTRİK
MAKİNE SANAYİ TİCARET A.Ş.
Orhangazi Mah. Tunç Cad. No:6/1
İç Kapı No: 2 Esenyurt / İstanbul
+90 212 852 65 52
DISTRIBUTED AND IMPORTED BY
Econat Inc.
651 North Broad Street, Suite 206
Middletown, Delaware, 19709, USA
www.econatinc.com
www.ufoheaters.com

ENGLISH
3
1. TABLE OF CONTENTS
Contents
INTRODUCTION ...................................................................................
1. TABLE OF CONTENTS ....................................................................
2. SAFETY INSTRUCTIONS ...............................................................
2.1 Electrical Connection .....................................................................
2.2 Safety and Fire Protection ..............................................................
2.3 Maintenance and Cleaning Instructions .........................................
2.4 Installation Distances and Safety Clearances ................................
2.5 Repair and Service .........................................................................
3. INSTALLATION INSTRUCTIONS ....................................................
3.1 Installation Position Warning ..........................................................
3.2 Right and Wrong Installations Positions .........................................
3.3 Minimum Installation Distances ......................................................
3.4 Parts Included ................................................................................
3.5 Installation Instructions ...................................................................
4. APPLICATION FIELDS .....................................................................
5. TECHNICAL DATA ...........................................................................
5.1 Coverage Information .....................................................................
6. OPERATING INSTRUCTIONS ........................................................
7. MAINTENANCE AND CLEANING INSTRUCTIONS .......................
7.1 Maintenance ...................................................................................
7.2 Cleaning ..........................................................................................
8. TECHNICAL SERVICE .....................................................................
9. LIMITED WARRANTY ......................................................................
2
3
4
4
5
5
5
6
6
6
6
7
10
11
12
13
14
15
16
16
16
17
18

ENGLISH
4
2. SAFETY INSTRUCTIONS
2.1 Electrical Connection
- Check whether your appliance and power cord are damaged before operating your
appliance. If yes, do not plug your heater and contact with authorized technical service or
seller.
- Check whether there is any crack, disjoint, or scratch on the filament (heating tube). If any,
do not plug your heater and contact with authorized technical service or seller.
- Make sure that the primary electrical circuit is appropriate according to your ECONAT
C-15 model:
- Connect your ECONAT C-15 heater to a properly rated circuit. A minimum of 15 amps is
recommended. Many household circuits are rated 15 amps, but if other appliances are on
the same circuit, the breaker may trip. If this is the case, consider moving your heater to a
higher rated circuit, either using a properly rated extension cord (min. 14 AWG.) or by
having the circuit rewired to a higher capability. Ensure that the grounding capability of your
heater's power cord is maintained. Never use a three-prong to two-prong adapter without
securing an additional grounding location.
- When using your ECONAT C-15 heater in kitchens, baths, or exterior application areas
(where approved), use only an approved GFCI (Ground Fault Circuit Interrupter) outlet.
Never locate a heater where it may fall into a bathtub or other water container.
-Try to orient your heater so that the power cord, plug, and/or outlet are not within the direct
heating area.
- Do not allow the power cord to rest on the housing of your heater. Avoid using an
extension cord because the extension cord may overheat and cause a risk of fire. However,
if you have to use an extension cord, the cord shall be a minimum of 14 AWG. And not
rated less than 3000 watts.
- Do not run cord under carpeting. Do not cover the cord with throw rugs, runners, or alike.
Arrange the cord away from the traffic area and where it will not be tripped over.
- Always unplug the heater if it's not being used.
- Unless there is sufficient circuit protection (an integral over current/surge breaker), do not
use multiple cords or extension cords.
- If you are using an outlet strip, it must be rated at 15 amps and include a breaker/reset
function.
- Check whether there is any crack, disjoint, or scratch on the filament (heating tube). If any,
contact your authorized technical service or seller.
- Do not use your ECONAT C-15 heater together with another appliance plugged to the
same multiple sockets or connected to the same breaker.
- Use your appliance with an adequately earthed plug.
- The earthed plug must fall outside the heating field and hot surface.
- The earthed plug must be installed at a level above the heater.
- The power cord must not be left on or around the frame of your ECONAT C-15 appliance.
- Unplug your appliance when you don't operate it for a long term or will conduct cleaning
or maintenance.
- The heater glass has to be changed at the damage.
- It has to be notified that the mounting in the bath must be so that the persons in the bath
can not reach the controls.
- It has to be notified that the product has to be installed at a dry location and may not be
wet.

ENGLISH
5
2.2 Safety and Fire Protection
- ECONAT C-15 heaters are designed to be operated in the HORIZONTAL position only.
Always install your heater so that there is no more than 5º deviation from level. Operating
the heater in a tilted position will cause heat build-up, shorten your heater's life, and create
an unsafe condition.
- Never install your heater on a combustible surface (plastics, nylon, cardboard, etc.)
- The heater is hot in use. To avoid burns, do not touch the hot surfaces.
- Do not cover your appliance and do not hang any clothing over the heater or do not place
any clothing on or near the appliance.
- Do not stick anything into the protective grid.
- Do not make use of your heater to light up a cigarette or similar materials.
- Never block the front grill of the heater.
- The heater is not suitable for hazardous locations.
- Supervision is needed when this product is used anywhere near children. The appliance is
not intended for use by children or other persons without assistance or supervision if their
physical, sensory or mental capabilities prevent them from using it safely.
- NEVER attempt to service the heater without disconnecting its power source.
2.3 Maintenance and Cleaning Instructions
- Before any maintenance or cleaning, first, unplug your heater. Never pull the cord to
unplug your device.
- Take out the front grid and the filament to clean the reflector (reflecting mirror), apply the
instructions on page
2.4 Installation Distances and Safety Clearances
Attention! The appliance must only be operated in a horizontal position with a slope of max
± 5º. The heater must be installed at level on a flat, stable surface, rigid enough to
withstand the device's weight safely, and not covered by any flexible material, such as
carpets, plastic or fabric.
- The distance between the back of the infrared heater and the installation surface must be
at least 12.5 cm (5'') (the supplied mounting brackets provide adequate clearance).
- At all times, your appliance's distance from the living beings should be min 100 cm (39").
- The distance of your appliance's heating area from combustible materials such as
curtains, drapes, etc., must be min 100 cm (39").
- You may operate your heater in the bathroom, considering the items below.
- The distance of your appliance from the bathtub, washbasin, or other sanitary installations
is to be min 100 cm (39").
- Wall installation
- The distance of your appliance from the ground is to be min 180 cm (71").
- The distance of your appliance from the ceiling is to be min 40 cm (16") (See table 1, page
5).
- The distance of your appliance from the corners to be installed is to be min 40 cm (16").
- Ceiling installation
- The distance of your appliance from the ground is to be min 180 cm (71").
- The distance of your appliance from the ceiling is to be min 12,5 cm (5").
- The distance of your appliance from the corners to be installed is min 70 cm (28").

ENGLISH
6
2.5 Repair and Service
- Attention! Only qualified electricians may serve, repair, and replace this heater's parts
(see page 18).
Attention! The heater must be installed in a horizontal position only. Never install your
device with an angle greater than 5 °. In case of operations in angles larger than 5º, the
heating loop wire may fall into disuse shortly.
3. INSTALLATION INSTRUCTIONS
3.1 Installation Position Warning
ECONAT C-15 heaters use infrared energy to transmit heat directly into the objects and
people. Unlike forced-air or convective baseboard systems, ECONAT C-15 infrared heat is
radiated onto an object. That heat is absorbed only by that object. The air is not heated,
and the heat will not migrate to the objects you don't want to heat. Along those same lines,
unless you position your heater correctly, it will not perform as expected. Its energy will be
diminished.
- Position your heater so that it warms your work/living area, not the air above or below it
3.2 Right and Wrong Installations Positions
WRONG WRONG RIGHT

ENGLISH
7
- Ensure that the radiant heat is not directed out windows or doorways. Infrared heat will
pass through glass and wastes heat on objects that are outside.
- It's also important to remember that infrared heat will reflect off of shiny or bright
surfaces. The heat will be reflected off mirrors or the tile surfaces and fall upon objects you
may not intend to heat.
Although infrared heat does not use a flame or a heating grate, significant heat can be
developed near the filaments and along surfaces on the heater housing. The heater should
not be installed on flammable wall coverings or on surfaces that will deform or discolour
when subject to heat.
Also, your heater should be installed with the following considerations:
Wall installation
3.3 Minimum Installation Distances
WRONG
RIGHT
WRONG
RIGHT
WRONG
RIGHT

ENGLISH
8
- Minimum 16 inches (40 cm) from the walls when installed on the wall.
- Minimum 71 inches (180 cm) from the floor when installed on the wall.
Ceiling installation
- Minimum 28 inches (70 cm) from the walls when installed to a ceiling.
- Minimum 71 inches (180 cm) from the floor when installed to a ceiling.
Minimum distances from fixtures and other pieces of equipment
- Minimum 39 inches (100 cm) from fixtures.

ENGLISH
9
- Do not place combustible materials closer than 40 inches (1 meter) in front of the heater.
- Do not place explosive materials closer than 25 feet (7,6 meter) in front of the heater.

ENGLISH
10
Your ECONAT C-15 heater comes completely assembled and is shipped with the
necessary hardware to install your heater on the wall or ceiling. Check through the parts list
and ensure that all necessary parts are on hand before beginning. Contact ECONAT or
seller if parts are missing or broken.
3.4 Parts Included

ENGLISH
11
Attention! The appliance must be installed at level on solid surfaces. See pages 6-7 to
come up with
the most appropriate installation method for your ECONAT C-15.
1- Drill four 8 mm (5/16") diameter holes on the wall to the place where the unit will be
placed with the distances shown in Figure 1.
2- Insert the wall anchors supplied with the unit into the holes (Part #29).
3- With a star (Phillips) screwdriver, mount two of the L shaped legs on the wall using the
40 mm screws supplied with the unit (Part #18).
4- With the small (open end) wrench (Part #32), attach the other L-shaped bracket legs to
the heater as shown in Figure 2. Use the two 7.5 mm screws (Part #21). The female
threads are built into the heater housing.
5- Attach the heater brackets to the wall brackets using 8 mm bolts (Part #25), the 8 mm
cap nuts (Part #26), and the washers (Part #24) as shown in Figure 3. Tighten using the
large end (box end) of the supplied wrench.
6- You can adjust the unit's angle between a 0-45 degrees to achieve the optimal heating
effect (Figure 4).
7- Before operating the unit, recheck all the screws and bolts that they are tight. Be sure to
route the electrical cord so that it doesn't contact the heater housing.
3.5 Installation Instructions

ENGLISH
12
4. APPLICATION FIELDS
Application fields of ECONAT C-15 heaters
Residential applications
Living room
Bathroom
Kitchen
Kid's room
Bedroom
Patio
Garage
Hallways
Entranceway
Nursery room for babies
Home offices
Commercial applications
Office
Meeting room
Entranceway
Retail store
Restaurant, café, bistro
Conservatory
Classroom
Auto shop
Salon
Workshop
Shopping centre
Showrooms
Swimming pool
Classroom
Conservatories
Factories and production plants
Warehouse and loading zones
Hotel
Airport
Train station

ENGLISH
13
Refer to the following tables for information on your ECONAT C-15 infrared heater.
5. TECHNICAL DATA

ENGLISH
14
5.1 Coverage Information
Unlike conventional space heaters, the ECONAT C-15 infrared heater radiates heat onto
the objects you'd like to heat.
Coverage depends on the ambient temperature of the room being heated, the natural
losses of that room, and the reflectivity of the items being heated. The following table
indicates the heating capabilities of ECONAT C-15 heaters in both indoor and outdoor
environments.

ENGLISH
15
6. OPERATING INSTRUCTIONS
You can use your ECONAT C-15 more efficiently by adjusting the thermostat to the desired
comfort level, thus reducing your electricity bills. By setting the thermostat switch to a
desired level, you may control your device so that it turns on and off within set time periods
automatically. When the thermostat switch is at its highest level; the heater will operate
continuously.
Switching off during the maintenance or long-term inactivity
When the heater is not operated for the long term, cleaning or maintenance, put the
regulator in "Min" mode and unplug the power cord.

ENGLISH
16
7. MAINTENANCE AND CLEANING INSTRUCTIONS
7.1 Maintenance
7.2 Cleaning
Attention! Careful and regular maintenance of ECONAT C-15 infrared heater considering
these instructions assume great importance to attain your heater's long and efficient
operation.
1- Check the filthiness of the reflector and IR – filament at least once a month. If necessary,
apply cleaning and maintenance instructions.
2- he frequency and number of maintenance checks must be adjusted considering the
heater's operating environment. Outdoor use or a dusty environment requires more
maintenance.
3- At each maintenance, check for visual deformation of the reflector, grid, and heater
frame. In case of any deformation, consult to your technical service.
4- Check the power cord and plug visually while cleaning the appliance. In case of any
deformation, consult with an electrician.
5- It is recommended to clean regularly the reflector of your heater to ensure proper and
efficient operation.
Attention! Regular and careful cleaning helps your ECONAT C-15 heater operate for
longer years and more efficiently.
1- Before any maintenance or cleaning of your heater, be sure to unplug the power cord for
your safety.
2- To clean the reflector of your ECONAT C-15 infrared heaters, remove the unit's grid.
To do so, unscrew the plastic cover of the housing using a star screwdriver (Philips).
Subsequently, drag plastic covers, finishing trim, and grid to the outside of the frame by
following the extrusion guidelines.
3- The reflector and filament must be cleaned with a soft cloth, a smooth brush, or dry air.
The cloth may be damp but never too wet, and the cleaner should not include any
chemicals.
4- Never use abrasive or chemical cleaner so as not to damage your heater.
5- After the cleaning, be sure to reinstall the unit's grid properly using a slotted screwdriver.

ENGLISH
17
8. TECHNICAL SERVICE
Attention! Only qualified electricians may serve, repair, and replace the spare parts of this
heater. In case of a problem, contact with authorized technical service or seller.
Points to be considered before shipping the product to the technical service:
1- Ensure that the plug to which the appliance is connected has power; check the breaker
and power cord. If the plug lacks power, consult an electrician.
2- Make sure that the appliance has been installed following the instructions in
the manual. If the installation is inaccurate, consult the technical service.

ENGLISH
18
9. LIMITED WARRANTY
This warranty is valid for 1 year, as stated in the technical data. ECONAT warrants all
ECONAT C-15 branded infrared heaters from the day of purchase (receipt required) for one
year when used in accordance with our user manual.
Should this product be proven defective in workmanship or material, the consumer's sole
remedies shall be such repair or replacement as provided by the terms of this warranty
(ECONAT's option). Under no circumstances shall ECONAT be liable for any loss or
damage, direct, consequential, or incidental, arising out of the use of or inability to use this
product.
Warranty by ECONAT does not cover the defects arising out of the improper use of the
appliance. The warranty does not cover the situations below:
1- The damages and defects arising out of improper use.
2- The damages and defects have occurred during transportation after the delivery of
the product to the customer by the company.
3- The damages and defects arising out of low or excessive voltage, ungrounded plug
usage, faulty electrical systems, operating the appliance in different voltage values other
than specified in the instructions.
4- The damages and defects arising out of fire and lightning.
5- The damages and defects arising out of repairs and maintenance by persons other than
authorized services or sellers.
6- The defects arising out of the breach of the instructions in the manual.
7- The damages and defects arising out of the transportation of the product instead of
repair.
Attention! Faulty maintenance and cleaning are not covered by the warranty. The warranty
does not cover the situations below:
1- The dust and polluters in the environment.
2- Damage in the reflector or filament due to faulty cleaning.
3- Faulty installation or dismantlement.
4- Operating with damaged filament, frame or power cord.
Above mentioned defects and services are not covered by the warranty.
This warranty will become void if the serial number, model number identification, or brand
have been wholly or partially removed or erased.
Table of contents
Languages:
