ALPHA™
User Manual 12
3. Make sure the mains voltage mentioned at the bottom of the back panel (below the IEC inlet) is matching your
local mains voltage range. If it is not the case, do not connect the monitors to a power source and contact your
dealer or distributor. Use the power cable provided to connect the monitors to the AC sockets.
4. Switch on the audio source connected to the monitor and make sure the output level of the audio source is set
at -∞or at a very low level.
5. Switch on your monitors. The monitors are now in "Standby" mode.
6. Increase the output level of your audio source slowly to unmute the monitors.
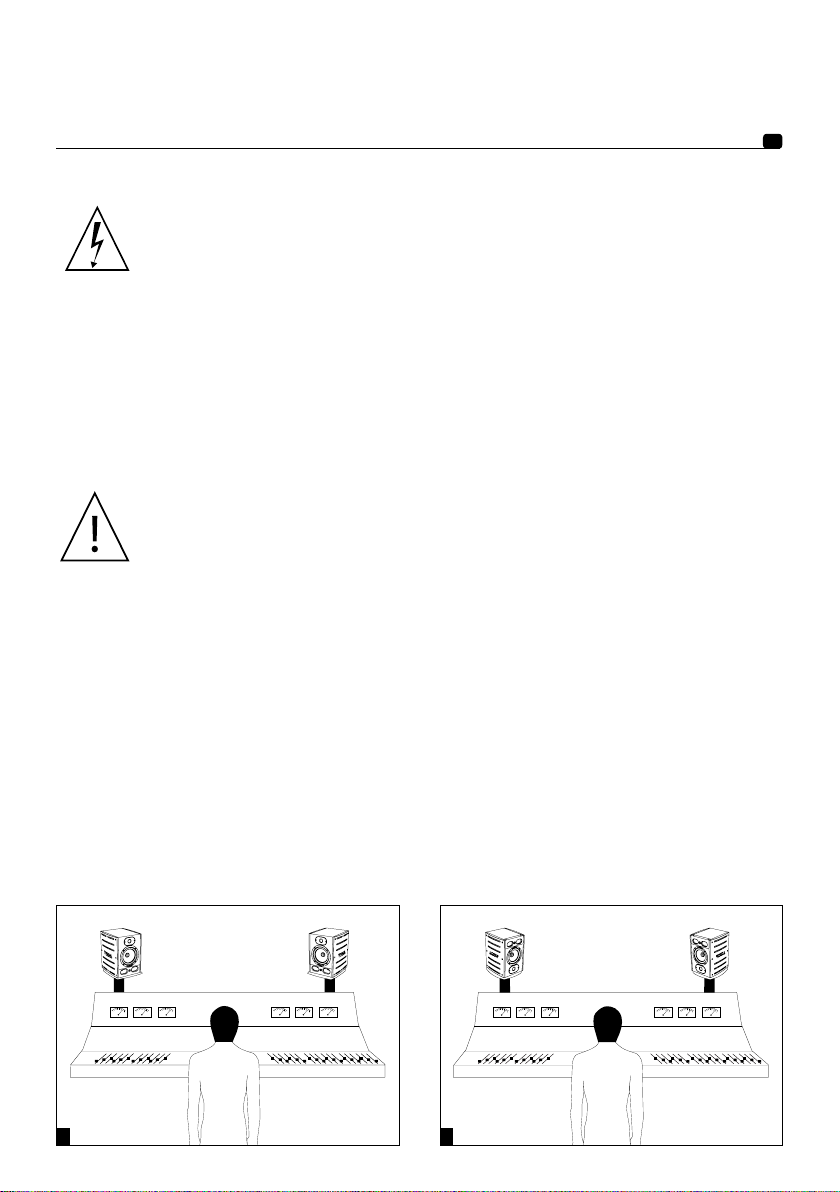
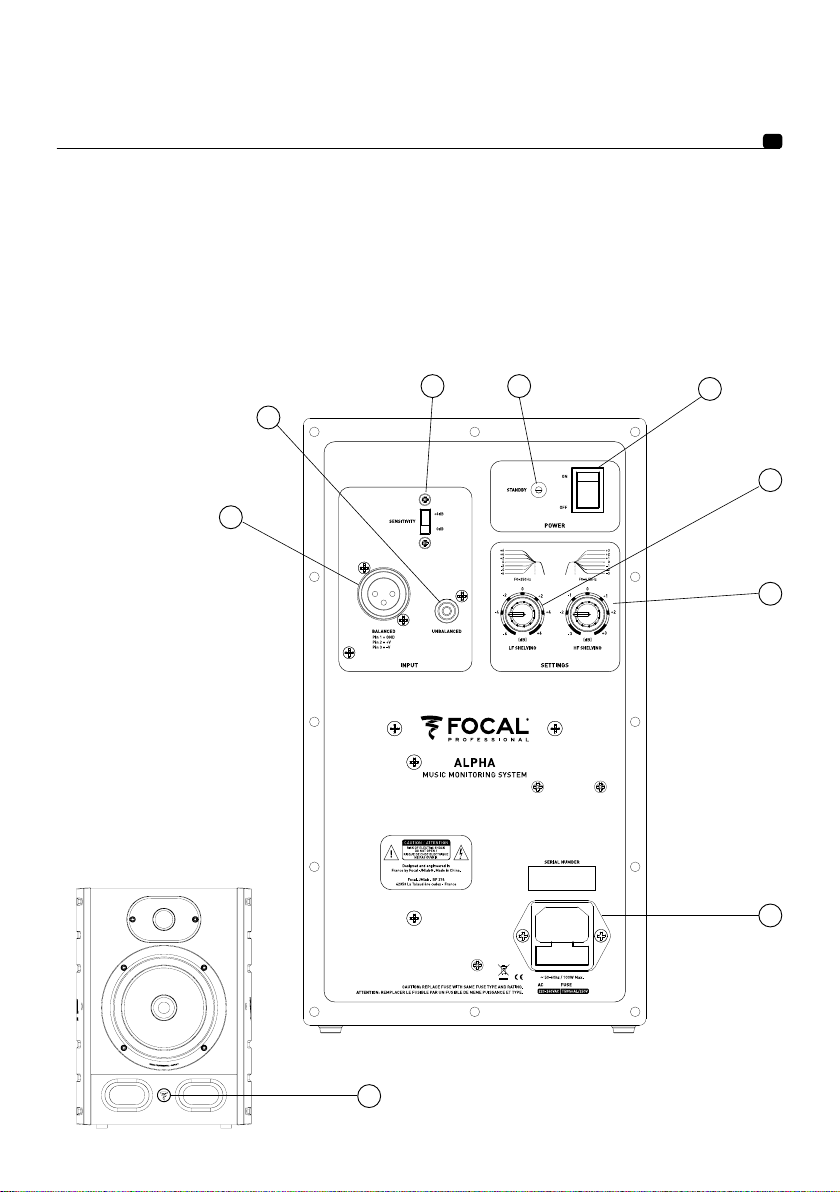
In order to allow you to plug up to two audio sources to the monitors using RCA and XLR inlets,
please note that both inputs will remain on. Please refer to page 14 for more information.
After switching on the monitors, and after activation of the automatic "Standby"mode (please refer
to page 14 for more information about "Auto standby mode"), the signal detector circuit will need
approximately few seconds to unmute the monitors.
7. After your tracking, mixing or mastering session, we recommend you to switch of the audio gears this way :
a. Switch your monitors off
b. Switch the audio source off
You have just purchased a Focal product. We would like to thank you and welcome you to our world of high-
fidelity. For more than 30 years, Focal has been designing, developing and manufacturing high-end speaker
drivers, loudspeakers and more recently headphones. Innovation, tradition, performance and pleasure are our key
values; they characterise “the Spirit of Sound”. Wherever you may be, we have one goal, to unite people around one
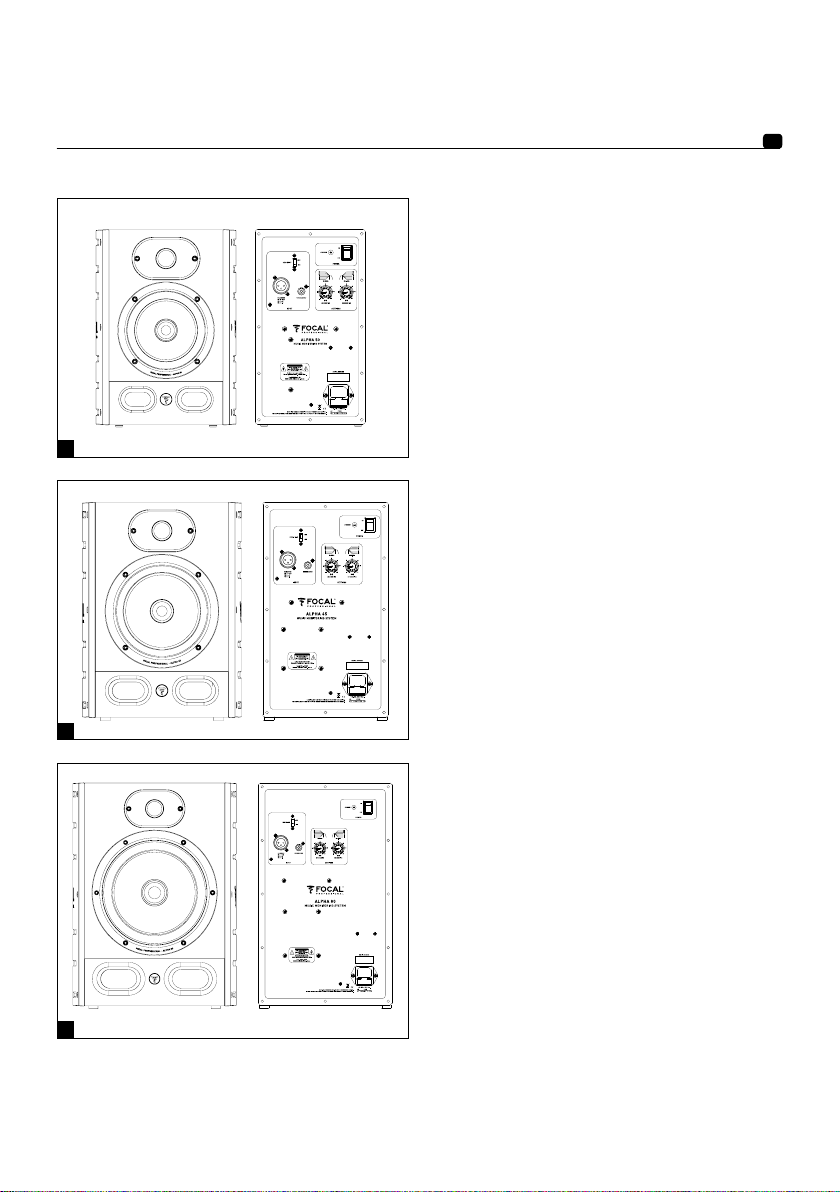
common passion: rich and authentic sound. The ALPHA loudspeakers constitute a professional monitoring system.
Those products have been designed to combine perfect soundstage, high precision and extended frequency
response, suitable for near field monitoring.
Packaging content
The loudspeaker is supplied with the following elements (apart from this manual):
• 1 power cord
• 4 rubber pads
• 1 guarantee card
Please check that none of these items is missing, and remove all accessories from the box. To remove the
loudspeaker from its box without damage, open the end flaps fully and bend them right back. Then remove the
upper cushion and lift the loudspeaker out gently. Inspect the speaker for signs of any possible damage. In the
unlikely event of this having occurred, please inform the carrier and supplier. It is a good practice to keep the
packaging in case of future transportation.
Preliminary recommendations
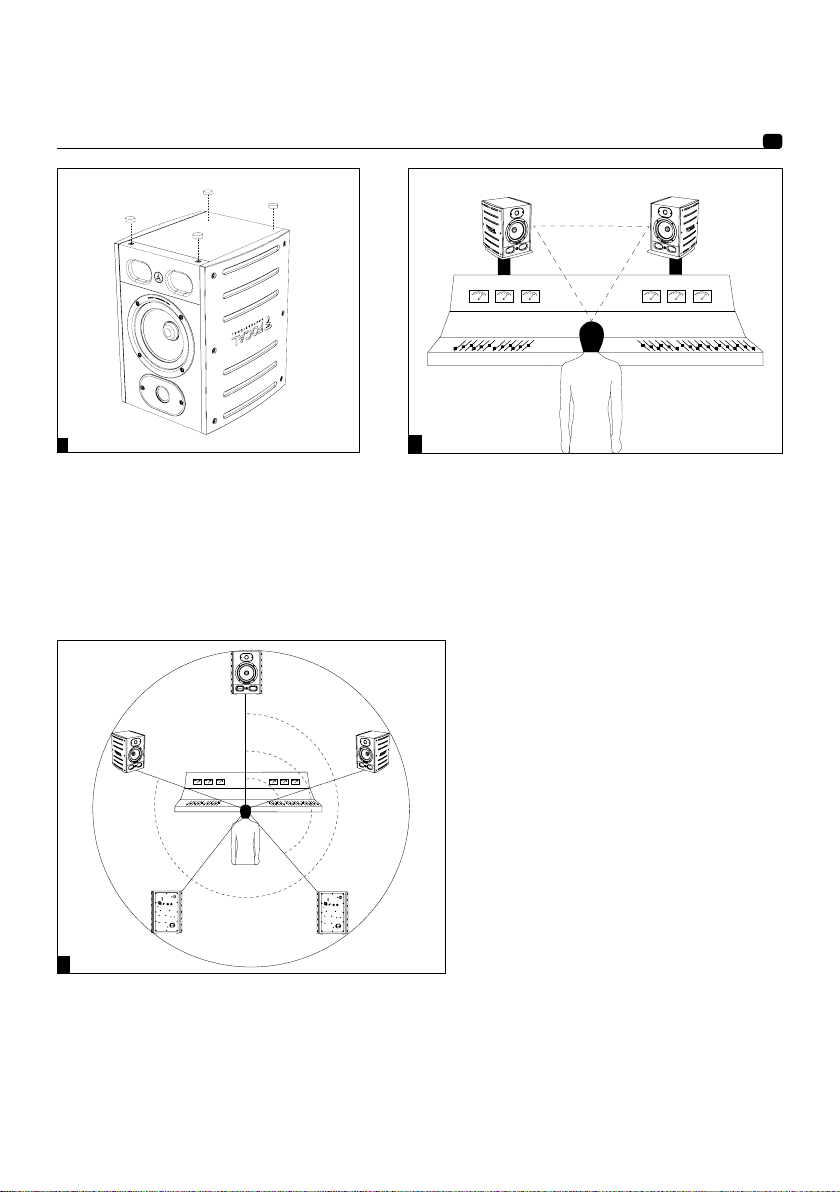
We would like to give a word of warning about the high sound pressure levels that can be generated by these
loudspeakers, especially in a 5.1 configuration. Because of their low levels of distortion, and the minimal fatigue
incurred by the user, it is not always obvious to realize the actual sound pressure level while working. Please bear
in mind that exposure to excessive levels over a sustained period of time may lead to permanent hearing loss.
Warranty
These products are guaranteed against defects in components and workmanship only, for a period of two years
from the date of shipment to the end user for countries of the European Union. For other countries, please refer to
the law in effect. During the warranty period Focal will, at their discretion, either repair or replace products which
prove to be defective, provided that the product is returned, shipping prepaid, to an authorised Focal service facility.
Defects caused by unauthorised modifications, accident, negligence or any misuse are not covered by this warranty.
For further information please contact your dealer or the distributor in your country. Register your product online:
www.focalprofessional.com/warranty.
Quick start
1. Before starting, make sure the monitors and audio source are off and all setttings are located on 0 position.
2. Connect the audio signal coming out from your audio source to both monitors. To do so, use either RCA or XLR
inlets.