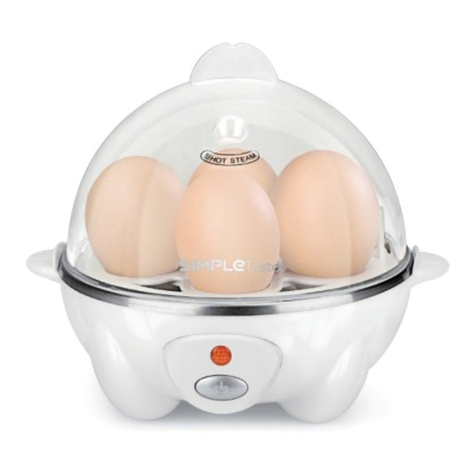
Focus Electrics WestBend Soho 86675 User manual

SOHO®EGG COOKER
Instruction Manual
Register this and other Focus Electrics products through our website:
www.focuselectrics.com
Important Safeguards................................................................................................ 2
Heat Precautions....................................................................................................... 2
Electricity Precautions............................................................................................... 3
Using Your Egg Cooker............................................................................................. 4
Cleaning Your Egg Cooker........................................................................................ 6
Recipes..................................................................................................................... 7
Warranty.................................................................................................................... 8
SAVE THIS INSTRUCTION MANUAL FOR FUTURE REFERENCE
©2008 West Bend®, a Brand of Focus Electrics, LLC.
www.focuselectrics.com

IMPORTANT SAFEGUARDS
To prevent personal injury or property damage, read and follow all instructions
and warnings.
When using electrical appliances, basic safety precautions should always be
followed including the following:
•Read all instructions, including these important safeguards and the care and use
instructions in this manual.
•Do not use appliance for other than intended use.
•Do not place on or near a hot gas or electric burner, in a heated oven,
refrigerator or freezer.
•Close supervision is necessary when this appliance is used by or near children.
•The use of accessory attachments not recommended by Focus Electrics may
cause fire, electric shock, or injury to persons.
•Do not operate when the appliance is not working properly or when it has been
damaged in any manner. For service information see warranty page.
•Do not attempt to repair this appliance yourself.
•For household use only.
To prevent burns, personal injury or property damage, read and follow all
instructions and warnings.
2
HEAT PRECAUTIONS
•Do not touch hot surfaces. Use handles and knobs where provided. Use hot
pads or oven mitts when handling hot surfaces.
•Do not move an appliance containing hot water or other hot liquids.

To prevent electrical shock, personal injury or property damage, read and
follow all instructions and warnings.
ELECTRICITY PRECAUTIONS
•To protect against electric shock, do not immerse cord, plugs, or other electric
parts in water or other liquids.
•Do not operate any appliance with a damaged cord or plug.
•Do not use this appliance outdoors.
•Always unplug the appliance from outlet before cleaning. Allow to cool before
putting on or taking off parts and before cleaning.
•A short power-supply cord is provided to reduce risks resulting from becoming
entangled in or tripping over a longer cord.
•Longer, detachable power-supply cords or extension cords are available and
may be used if care is exercised in their use. While use of an extension cord is
not recommended, if you must use one, the marked electrical rating of the
detachable power-supply cord or extension cord should be at least as great as
the electrical rating of the appliance. If the appliance is of the grounded type,
the extension cord should be a grounding-type 3-wire cord. The cord should be
arranged so that it will not hang over the counter top or tabletop where it can be
pulled by children or tripped over.
•This appliance has a polarized plug (one blade is wider than the other). To
reduce the risk of electric shock, this plug is intended to fit into a polarized outlet
only one way. If the plug does not fit fully into the outlet, reverse the plug. If it
still does not fit, contact a qualified electrician. Do not attempt to modify the plug
in any way.
•Do not use an outlet or extension cord if the plug fits loosely or if the outlet or
extension cord feels hot.
•Keep the cord away from hot parts of the appliance and hot surfaces during
operation.
SAVE THESE INSTRUCTIONS
3

USING YOUR EGG COOKER
Cover
Poaching Pan
Cooking Rack
Egg Cooker Base
Measuring
Cup
Before using your Egg Cooker, clean the entire unit according to the cleaning
instructions. Wash all loose parts in warm, soapy water, rinse thoroughly and
dry. Do not immerse egg cooker base in water.
You can poach up to 3 eggs or hard-cook or soft-cook up to 7 eggs. Cooking times
will vary depending on the size of the egg. To get the best results, use the
measuring cup included with the egg cooker which has water level markings to use
as a guide. These amounts are approximate and can be varied to suit individual
preferences. Use less water for softer cooked eggs and more water for harder
cooked eggs.
TO POACH EGGS:
1. Place the egg cooker base on a dry, level surface. Use the medium cooked
water level markings on the measuring cup to determine the amount of water for
the number of eggs being cooked. Example: For 1 poached egg fill water to the
7 mark on the measuring cup; for 2 poached eggs, fill water to the 6 mark; for 3
poached eggs, fill water to the 5 mark. Note: The more eggs you are poaching
the more water you should use.
2. With the switch set to “OFF,” pour the recommended amount of cold water into
the electric base. Place the cooking rack into the base.
3. Lightly butter or oil the poaching cups to be used. Place the poaching pan on
top of the cooking rack in the egg cooker base. ALWAYS PLACE THE
POACHING PAN ON THE COOKING RACK. Be sure to position the poaching
pan onto the cooking rack so that it is level. Break one egg into each cup.
4. Place the cover on the egg cooker base and plug the appliance into a 120-volt,
AC electrical outlet. Turn the switch to “ON.” The “ON” light will glow, indicating
the cooking process has begun. Note: Do NOT remove the cover from the base
while the eggs are cooking. An audible alert will sound when the eggs are
ready, after approximately 5 to 8 minutes. Turn the switch to “OFF.” Unplug
cord from electrical outlet. Use hot pads or oven mitts to remove the cover and
poaching pan. Slide the eggs out of the cups with a smooth-edged utensil.
Serve immediately to prevent overcooking.
4

5
5. Allow the egg cooker to cool completely before discarding any remaining water
from the egg cooker base and before cleaning.
TO SOFT-COOK EGGS:
1. Place the egg cooker on a dry, level surface. Use the soft cooked water level
markings on the measuring cup to determine the amount of water for the
number of eggs being cooked. Example: If soft cooking 7 eggs, fill the
measuring cup to the 7 mark.
2. With the switch set to “OFF,” pour the recommended amount of cold water into
the egg cooker base. The recommended amount of water will provide eggs with
soft yolks and cooked egg whites.
3. Place the cooking rack onto the egg cooker base. Place the eggs in the cooking
rack.
4. Place the cover onto the egg cooker base and plug the appliance into a 120 volt,
AC electrical outlet. Turn the switch to “ON.” The “ON” light will glow, indicating
the cooking process has begun. Note: Do NOT remove the cover from the egg
cooker base while the eggs are cooking. An audible alert will sound when the
eggs are ready, after approximately 6 to 8 minutes. Turn the switch to “OFF.”
Unplug the cord from the electrical outlet. Use hot pads or oven mitts to remove
the cover and cooking rack. Serve immediately to prevent over cooking. Eggs
may be rinsed briefly with cold water while still in the cooking rack for easy
handling.
5. Allow the egg cooker to cool completely before discarding any remaining water
from the base and before cleaning.
TO MEDIUM-COOK EGGS:
1. Place the egg cooker on a dry, level surface. Use the medium cooked water
level markings on the measuring cup to determine the amount of water for the
number of eggs being cooked. Example: If medium cooking 7 eggs fill the
measuring cup to the 7 mark.
2. With the switch set to “OFF,” pour the recommended amount of cold water into
the egg cooker base. The recommended amount of water will provide eggs with
medium yolks and cooked egg whites.
3. Place the cooking rack onto the egg cooker base. Place the eggs in the cooking
rack.
4. Place the cover onto the egg cooker base and plug appliance into a 120 volt, AC
electrical outlet. Turn the switch to “ON.” The “ON” light will glow indicating the
cooking process has begun. Note: Do NOT remove the cover from the base
while the eggs are cooking. An audible alert will sound when the eggs are
ready, after approximately 8 to 10 minutes. Turn the switch to “OFF.” Unplug
the cord from the electrical outlet. Use hot pads or oven mitts to remove the
cover and cooking rack. Serve immediately to prevent over cooking. Eggs may
be rinsed briefly with cold water while still in the cooking rack for easy handling.
5. Allow the egg cooker to cool completely before discarding any remaining water
from the egg cooker base and before cleaning.
Table of contents
