FONRI DB01 User manual
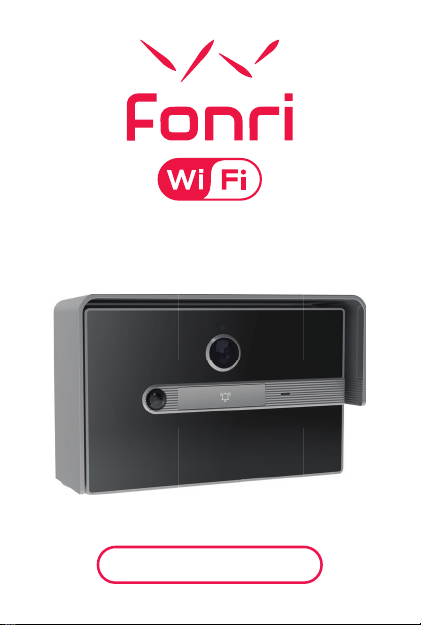
SMART DOORBELL
USER GUIDE

2
INDEX
EN
RU
FR
ES
TR
IT
AR
DE
NL
SV
SMART DOORBELL
УМНЫЙ ДВЕРНОЙ ЗАМОК
SMARTE TÜRKLINGEL
CAMPANELLO INTELLIGENTE
3
29
16
42
94
68
120
55
107
81
TIMBRE INTELIGENTE
AKILLI KAPI ZİLİ
SONNETTE DE PORTE INTELLIGENTE
SLIMME DEURBEL
SMART DÖRRKLOCKA

3
The device only supports 2.4 GHz Wi-Fi net-
works.
Fonri WiFi app can only be used on smart-
phones and tablets.
The smart doorbell supports SD cards with
8–128 GB of storage.
It is recommended to format the SD card
before inserting it into the doorbell. You
should not insert or remove the SD card
when the doorbell on.
If the SD card memory is full, the device
continuously overwrites the oldest footage
recorded.
For your questions, you can use the Prole >
FAQ and Feedback menu in Fonri WiFi app.
1.
2.
3.
4.
5.
6.
Important Information
EN

4
Package Content
Doorbell
Wall
Mounting
Bracket
4 x Wall
Mount Screw
Bell
Apparatus
Allen
Key
4 x
Dowel
User
Manual
2 x 2500mAh
18650 Battery
3 x Hex
Head Screw

5
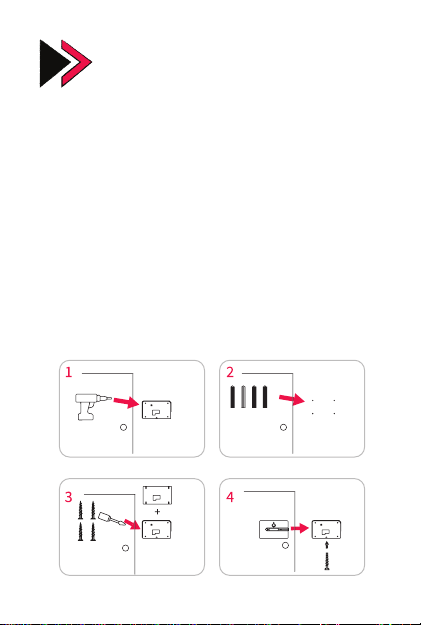
Place the wall mounting bracket at the instal-
lation location and mark the installation points
with a pencil.
Drill the points marked with the help of an
electric drill and insert the dowells into the
holes.
Fix the wall mounting bracket to the wall with
the mount screws.
After placing the doorbell on the wall mount-
ing bracket, x it to this apparatus from the
screw locations at the bottom using hex head
screws.
1.
2.
3.
4.
Product Installation

6
When mounting, use hex head screws to x
the doorbell to the mounting bracket.
Insert the batteries into the battery com-
partment, paying attention to the positive
and negative tips.
1.
2.
Overview
Battery Features:
Motion
Sensor Light
Sensor
Doorbell
Button
USB
Charge
Input
Camera
Microphone
Positive (+) Tip
SD Card
Input Mounting Hole
Negative (-) Tip
Reset Button

7
• Two-way audio convertion,
• PIR motion detection,
• Low power alert,
• Ringing notication.
Technicial Specications
Device Functions:
Resolution: 1080p (1920x1080)
View Angle: 100° Horizontal
IR LED: 940nm, 6 pcs.
Wi-Fi: IEEE802.11b, 802.11g, 802.11n
Sound: Built-in microphone and speaker
Memory: Micro SD Card
Storage: Up to 128GB
Battery: 2 x 2500 mAh 18650 batteries
Charging: 5V 1A Micro USB Input

8
• Plug in the apparatus.
• Ring the doorbell while holding down the
“SET” button on the apparatus.
• After the device detects the signal from the
doorbell, the LED light will ash to indicate that
the pairing is complete.
• After the pairing is completed, you can check
whether the pairing is successful by ringing the
doorbell.
Bell Apparatus Overview
Connecting the Bell Apparatus to the
Doorbell
Ringtone Level
Adjustment
Ringtone
Setting
Power
Input
Frontside
Mode/Pairing
Button

9
• Volume adjustment by pressing the volume
button
• Ringtone change by pressing the ringtone
button
• 4 different sound levels
You can select one of the following modes by
pressing the SET button:
Ringtone + ashing light
Ringtone only
Ringtone + constant light
No Ringtone + ashing light
(silent mode)
Bell Apparatus Technicial
Specications
Device functions:
Using the SET button
Operating Voltage: AC 90-250V
Operating Temperature: -10°C – 50°C
Wireless Range: 120 m (open area)
Ringtone: 38 different ringtones
Sound Level: 4 different levels
1. Mod:
2. Mod:
3. Mod:
4. Mod:

10
You can try the ringtones by pressing the ring-
tone setting button.
You can reset the Bell Apparatus by holding
down the SET button for 10 seconds.
Download the Fonri WiFi app by scanning the
QR code below or searching “Fonri WiFi”on
Google Play/App Store.
Downloading the
Fonri WiFi App
Using Ringtone Setting Key:
Resetting the Bell Apparatus:
Warning:
Fonri WiFi app can only be used on smart-
phones and tablets.
If you do not receive a veri cation code dur-
ing registration, try it again later.
1.
2.

11
Intergrating the
Doorbell to the App
Click the (+) sign in the upper right corner
of the “Devices” menu.
Select “Cameras” from the left menu, then
select “Doorbell”.
1.
2.

12
Press and hold the reset button for 5 sec-
onds to reset the device. After a successful
reset, the device’s light should ash quickly.
Then the device will be ready for pairing.
Select your Wi-Fi network and enter its
password.
Click ‘Next’. Put the phone at front of door-
bell camera at a distance around 15-20 cm
and let the doorbell scan the QR code gen-
erated. When you hear that the connection
has been made, press “I have heard the
beep” to proceed.
3.
4.
5.

13
6.
7.
Wait for a while for the doorbell to conne-
ct. You can track the connection status from
the application.
Rename the device by clicking the icon and
press “Done”.

14
1.
2.
3.
4.
5.
6.
7.
8.
9.
10.
11.
Settings
Resolution
Battery
Sound
Fit to Screen
Hour
Full Screen
Take a Screenshot
Speak
Record a Video
Other Options
Using the Device
Functions
1
2
9
10
5
3
8
11
4
6
7

15
• Replay
• Gallery
• Screen Color
• Night Mode
• Anti-Vibration
• PIR Motion Sensor
• Siren
• Edit
• Messages
• Cloud
• Features

16
El dispositivo solo admite la banda Wi-Fi de
2,4 GHz.
La aplicación Fonri WiFi solo se puede usar
en teléfonos inteligentes y tabletas.
El timbre inteligente admite tarjetas SD con
8–128 GB de almacenamiento.
Se recomienda formatear la tarjeta SD an-
tes de insertarla en el dispositivo. No debe
insertar ni quitar la tarjeta SD cuando el tim-
bre está encendido.
Si la memoria de tarjeta SD está llena, el
dispositivo comenzará a sobrescribir auto-
máticamente el metraje más antiguo
Para preguntas, puede usar el menú Perl >
Preguntas Frecuentes y Comentarios en la
aplicación Fonri WiFi.
1.
2.
3.
4.
5.
6.
Información Importante
ES

17
Contenido del Paquete
Timbre
Soporte de
Montaje en
Pared
4 x Tornillo de
Montaje en Pared
Aparato
de Timbre
Llave
Allen
4 x Taco
Manual de
Usuario
2 x 2500mAh
Batería 18650
3 x Tornillo de
Cabeza
Hexagonal

18
Coloque el soporte de montaje en el lugar
de instalación y marque los puntos de insta-
lación con un lápiz.
Perfore los puntos marcados con la ayuda
de un taladro eléctrico e inserte los tacos en
los agujeros.
Fije el soporte de montaje a la pared con
los tornillos de montaje.
Después de colocar el timbre en el soporte
de montaje, fíjelo a este aparato de las ubi-
caciones de los tornillos en la parte inferior
usando tornillos de cabeza hexagonal.
1.
2.
3.
4.
Instalación del Producto

19
Al realizar el montaje, utilice tornillos de
cabeza hexagonal para jar el timbre al so-
porte de montaje.
Inserte las baterías en el compartimiento,
prestando atención a las puntas positiva y
negativa.
1.
2.
Vista General
Características de Batería:
Sensor de
Movimiento
Sensor
de Luz
Botón
de timbre
Entrada de
carga USB
Camera
Micrófono
Positivo (+) Tip
Ranura de
Tarjeta SD Agujero de
Montaje
Punta Negativa
Botón de
Restablecimiento

20
• Conversación de audio bidireccional,
• Detección de movimiento PIR,
• Alerta de energía baja,
• Notificaciones de sonido.
Especicaciones
Técnicas
Funciones del Dispositivo:
Resolución: 1080p (1920x1080)
Ángulo de Visión: 100° Horizontal
IR LED: 940nm, 6 Uds
Wi-Fi: IEEE802.11b, 802.11g, 802.11n
Sonido: Micrófono y Altavoz Integrados
Memoria: Micro SD Card
Almacenamiento: hasta 128GB
Batería: 2 x 2500 mAh 18650
Carga: Entrada 5V 1A Micro USB
Table of contents
Languages:
Other FONRI Accessories manuals
Popular Accessories manuals by other brands

HYTROL
HYTROL ProSort 100 Elite Operating, installation and maintenance manual

Craftsman
Craftsman 486.24218 owner's manual

Delta Electronics
Delta Electronics CANopen Communication Module DVPCOPM-SL Applications manual

Topcon
Topcon LS-B200 instruction manual

kenall
kenall SSIS SERIES installation instructions

SenseAnywhere
SenseAnywhere AiroSensor Getting started