Force Controls 1050CS User manual

MODEL 1050CS
Please note that the Model 1060CS has been discontinued and replaced with
the 1050CS. The 1060CS can still be repaired however it cannot be ordered as
new. The 1050CS has incorporated many improvements gained from 30 years
of experience of its predecessor in the field. The 8060CS has been replaced
with the 8050CS incorporating the same improvements.
INSTRUCTIONS
1. Mount the spacer on the bottom of the gauge with the screws provided.
2. Rotate the micrometer dial clockwise until the micrometer dial stops.
3. Place the seaming chuck adapter on the micrometer dial and install it in the seamer as if it
were a can. Be sure that the gauge and seaming chuck adapter are aligned with the
centerline of the can-closing seamer.
4. Rotate the micrometer dial counterclockwise by hand until solid contact is made with the
seaming chuck.
5. Note the reading of the micrometer dial and rotate it using the loading wrench counter
clock-wise .035” for spring seamers of .020” for solid seamers. Note the circled numbers
on the dial face closest to the recorded load. These circled number indicate the amount
the gauge has reduced I length in thousands of an inch. Rotate the micrometer dial again
by the amount shown in the circled reading. Here is an example: For .035” deflection of a
can holding chuck spring, if the load indicated hand reads 300 pounds when the
micrometer dial is rotated .035”, the closest circled number reading is 3. Rotate the
micrometer dial an additional.003”. At this position the gauge will indicate the correct lead
at the corrected shut height. The actual deflection of the can closing spring is .035” even
though the gauge has been rotated .038.
6. To calculate the closing force: Actual force = corrected dial reading + weight of gauge +
weight of the adapter + weight of spacer. The 1060CS and 1050CS weighs 3 lbs. and the
8060CS weighs 5 lbs. Weigh your own adapter and spacer. For example: if corrected load
is 310 lbs. and adapter and spacer weigh 7 lbs. actual load + 310 + 3 + 7 =320 lbs. for the
1060CS.
CARE OF FORCE GAGE
Always store gage and wrench in protective case when not in use
Do not drop the gage
Do not tamper with openings or screws on the gage
Try to keep the gage clean and dry
Only the Force Controls is qualified to repair and recalibrate the force gage. Send
force gage back to the factory for any repairs that may be necessary.
Do not attempt any repairs or adjustments yourself
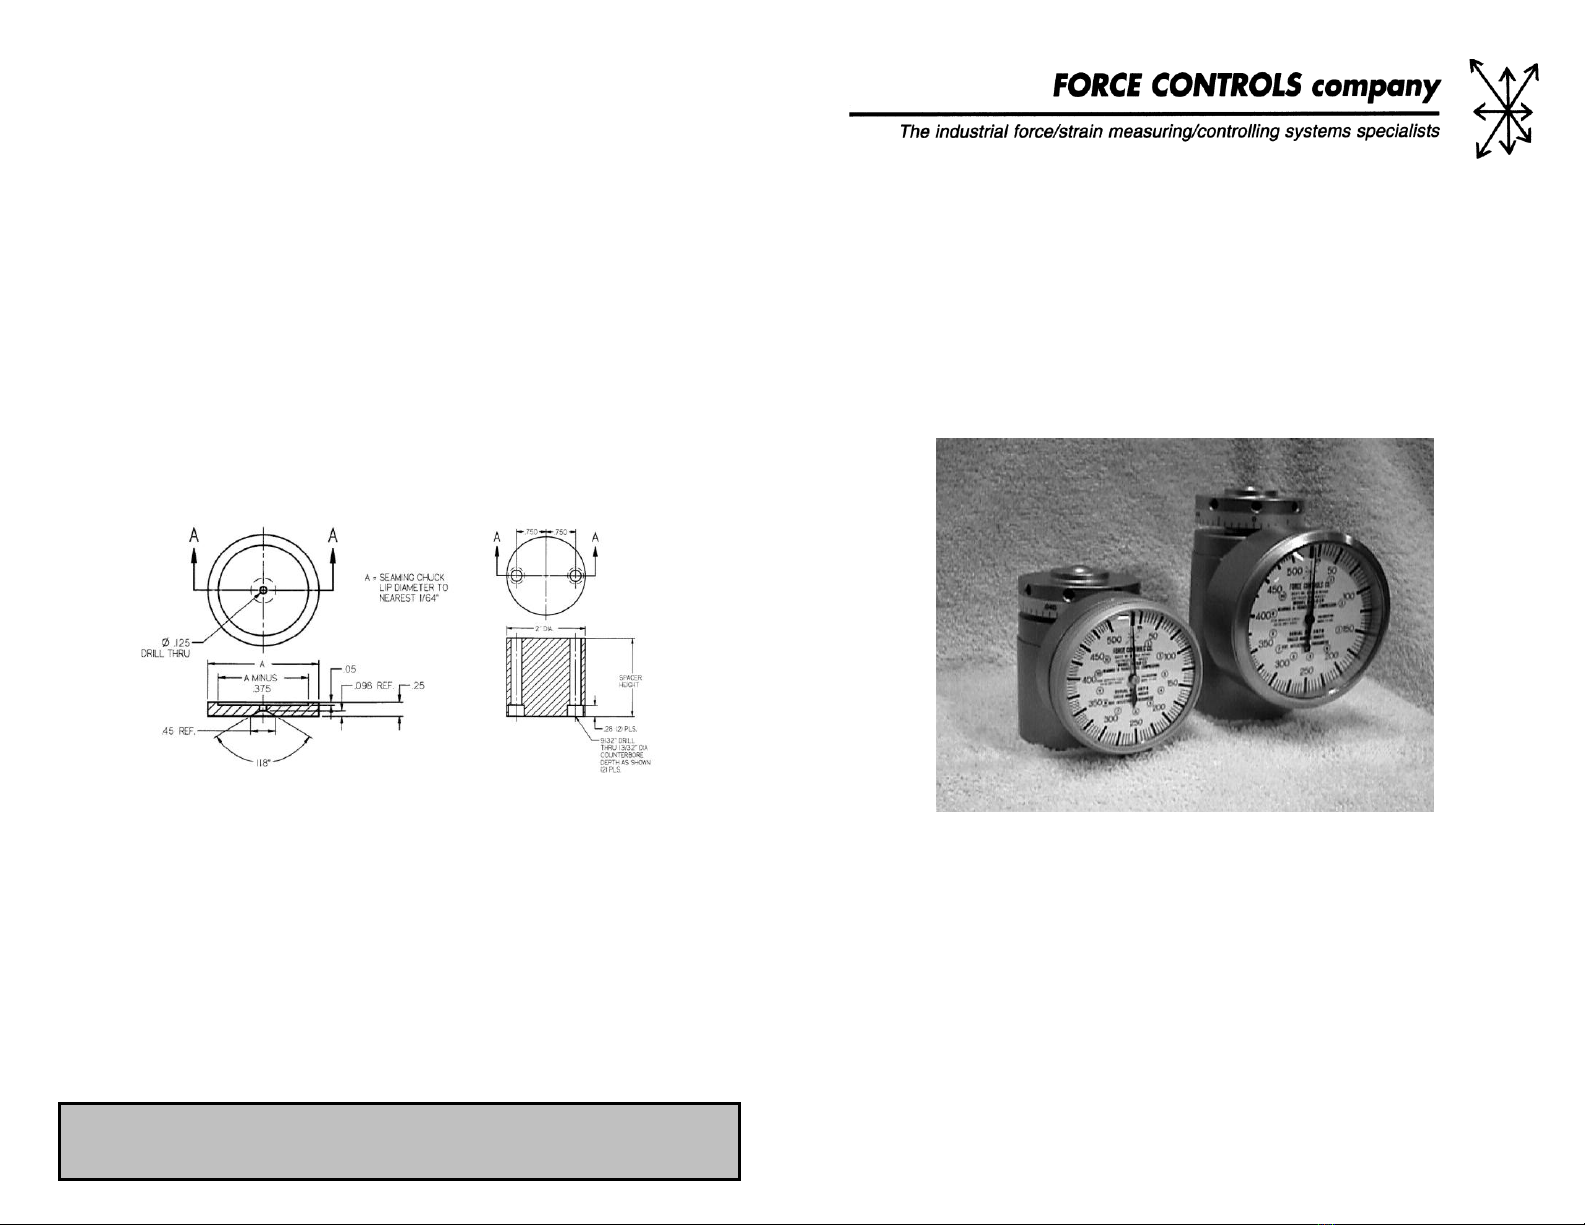
SPACERS AND SEAMING CHUCK ADAPTORS
The gage is supplied complete with case and loading wrench. However the
seaming chuck adapter and spacer need to be ordered separately. The seaming
chuck adapter and spacer allows the force gauge to fit in the seamer in such a
way that the three together simulates a can of the same height that is being
closed on the seamer. Determining the length of the spacer to order is easy.
Just take the height of the can size that you are using and subtract three inches
for the models1060CS and1050CS. Subtract 4.25 inches for the 8060CS. The
remainder is the height of the spacer to order. Determining the “A” dimension
that is needed to order a seaming chuck adapter is just as easy. The “A”
dimension is the same as the diameter of the can being used. Cans are
normally referred to as a 401X504 or a 603X510, etc. This means that in the first
example, the diameter is 4 1/16” and the diameter is 5 ¼”. The first number (4)
is inches. The second (01) is the number of 1/6ths. Hence 4 1/16”. This is a
standard in the caning industry, and will assist you in determining the “A”
dimension without having to measure the can that you are planning to use with
the gage.
RECOMMENDED SEAMING RECOMMENDED SPACER
CHUCK ADAPTER
New Cell Warranty: Any repairs needed on new cells within 120 days of invoice
will, be performed at no charge.
Recalibration and repairs.......................................$450.00
Certified calibration certificate ................................$50.00
Replacement pin wrench............................................$5.00
Plastic carrying case ................................................$30.00
Spacer .......................................................................$25.00
Spacer 3” or greater..................................................$50.00
Seaming chuck adaptor ...........................................$50.00
WARNING
Cells are not covered by warranty if external indicator adjustment screws
have been unplugged and or tampered with.
Mechanical Force Gauges for Can Closing Equipment
Instruction Manual for Models
1050CS, 1060CS
8050CS, 8060CS
For service: Send force gage in its protective case to:
Force Controls Company
4574 Elizabeth Lake Road
Waterford, MI 48328
(248) 738-7133
FAX 738-7134
www.forcecontrols.com
Please include contact information with the force gage
This manual suits for next models
3


