
Introduction
An Introduction – Before You Build
The Pompeii Oven is a set of free plans that describes
how to build a traditional Italian brick pizza oven. The oven
is constructed using firebricks, specialist refractory
materials and high temperature insulators, and basic
building materials. The refractory materials can be
purchase either from Forno Bravo, or from your local
masonry supply store, while the basic materials can be
easily found at any building supply stores (Home Depot,
Lowes, B&Q, etc.). Forno Bravo also provides Pompeii
Oven Kits, which contain the core refractory and insulating
components for the Pompeii Oven plans.
It's a great oven, and a great project. Much like Open
Source Software, these plans are freely accessible for
your use, though Forno Bravo reserves all rights and the
plans cannot be copied, or re-distributed without our
approval. If you are curious why the plans are free (really),
read our Why Free page (see Appendix 3). Otherwise, join
our User Group (http://www.fornobravo.com/forum) and
have fun!
A Little History
Wood-fired brick ovens and pizza have been with us since
the dawn of civilization. Both have been discovered in the
excavations of virtually every ancient civilization, with the
brick oven reaching its modern form in ancient Rome. The
brick ovens uncovered in ancient Pompeii and Naples are
in wonderful shape, and could start baking today with only
minor restoration -- the Pompeii Oven is named in their
honor. When you have a minute, take a look at our ancient
Pompeii Oven Photographs (http://www.fornobravo.com/
pompeii_oven/pompeii_photos/ventarch.html).
In modern Italy, the basic Pompeii Oven design is used to
build the brick ovens you see in pizzerias and private
homes and gardens. The wood-fired oven is great for
cooking virtually anything that can be cooked in an
ordinary oven, including pizza, roasts, Focaccia,
vegetables and bread. The oven can bake at high and low
heat, and it excels at roasting and grilling. It heats up
quickly and is efficient at holding the high heats required
for cooking the perfect three-minute Vera Pizza
Napoletana. The Pompeii Oven is also very efficient with
wood fuel and at holding heat. If you are interesting in
reading more about the theory behind the Pompeii Oven
design, read our Why Round description in the eBook
introduction.
There are literally millions of round wood-fired ovens in
Italy, putting you in very good company should you decide
to build a Pompeii Oven at your home. The brick oven is
as common in Italy as the BBQ is in the U.S., and our goal
is to bring these great ovens into the English-speaking
mainstream. Today, hundreds of Pompeii Ovens have
been built around the world, including the US, Canada,
UK, Ireland, France, Belgium, Denmark, Sweden, Russia,
the Czech Republic, Bahrain, Saudi Arabia, Iraq, Japan,
China, Malaysia, the Philippines, Thailand, Mexico, Brazil,
the Virgin Islands, Australia, New Zealand, South Africa--
and more Pompeii Ovens are being built every day.
It is not necessary to have professional masonry skills to
construct the oven, as evidenced by the numerous
successful Pompeii Ovens already constructed by
individuals with no special construction skills other than a
strong desire to reap the benefits of their labor.
We know that there are other plans for building a brick
oven, but we are confident that the Pompeii Oven is the
right design for virtually every homeowner. Heck, 60
million Italians couldn't be wrong about their round brick
ovens. Contact us if you have any questions on brick oven
design and performance. Take a look at Forno Bravo
Photos (http://www.fornobravo.com/pizza_oven_photos/
introduction.html) for inspiration -- there are hundreds of
brick oven photos.
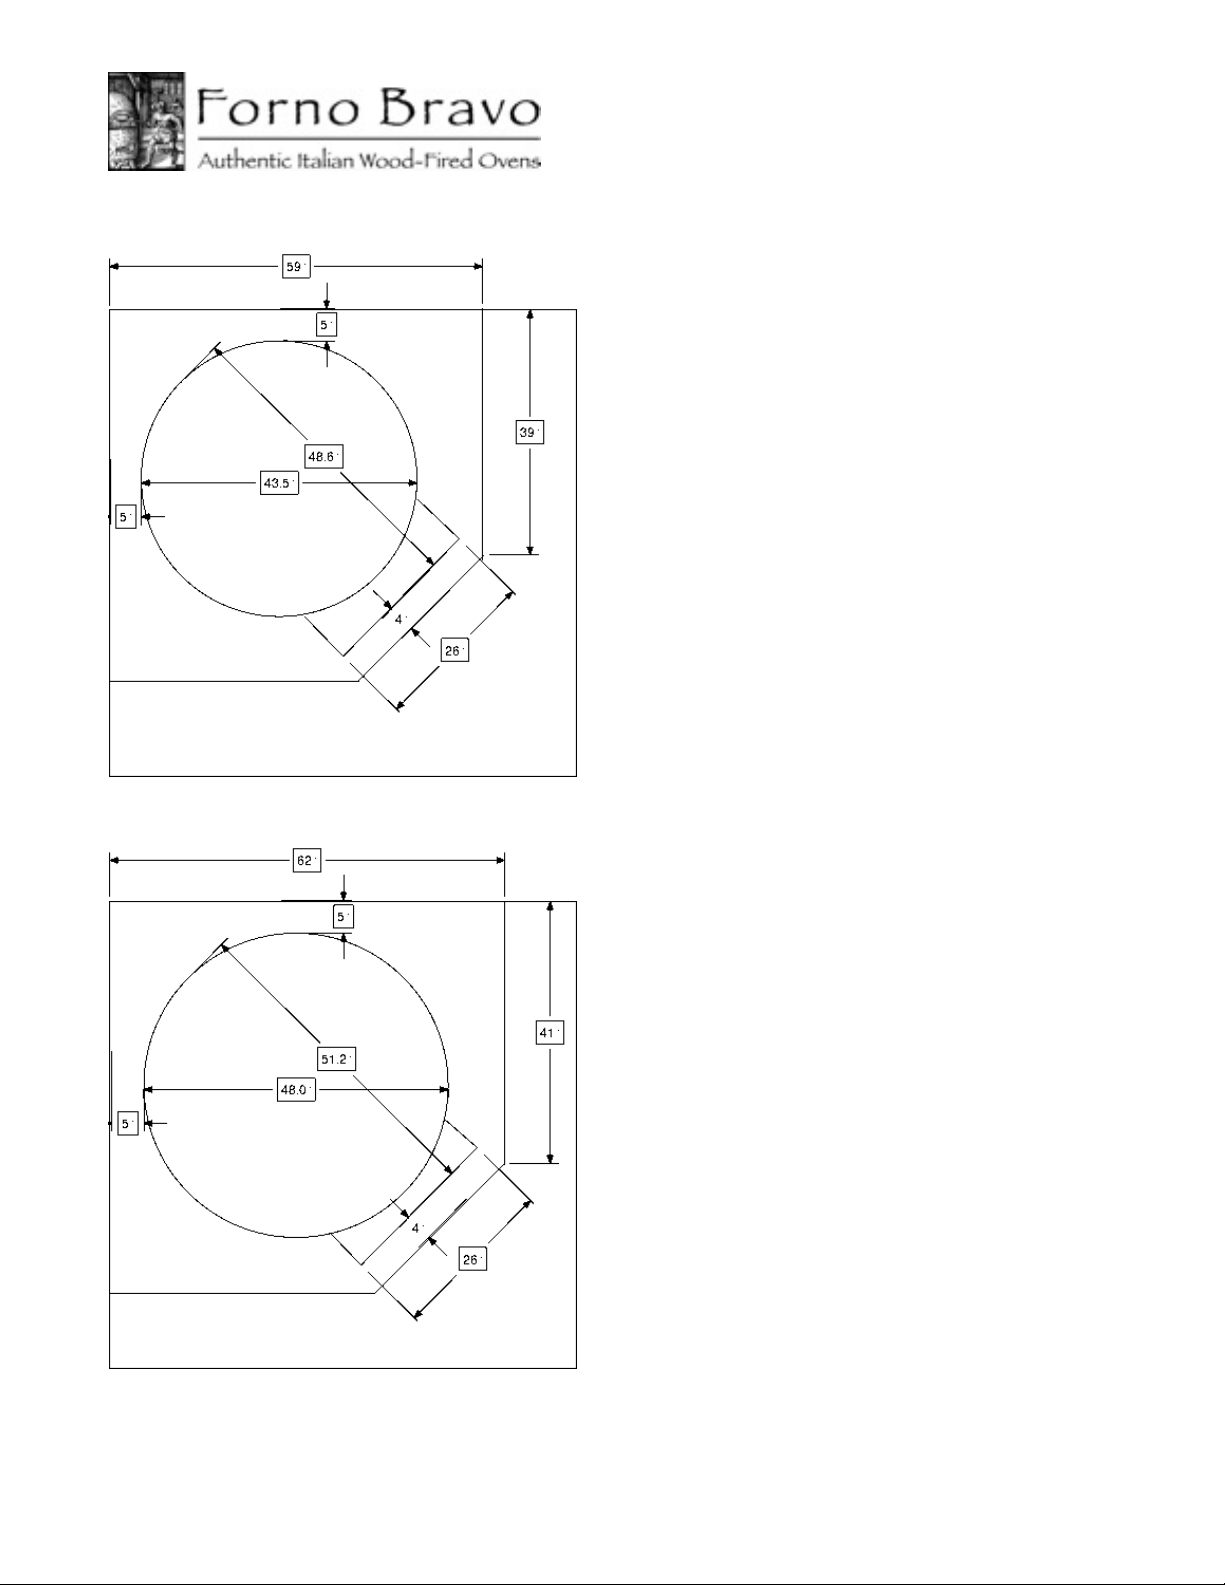
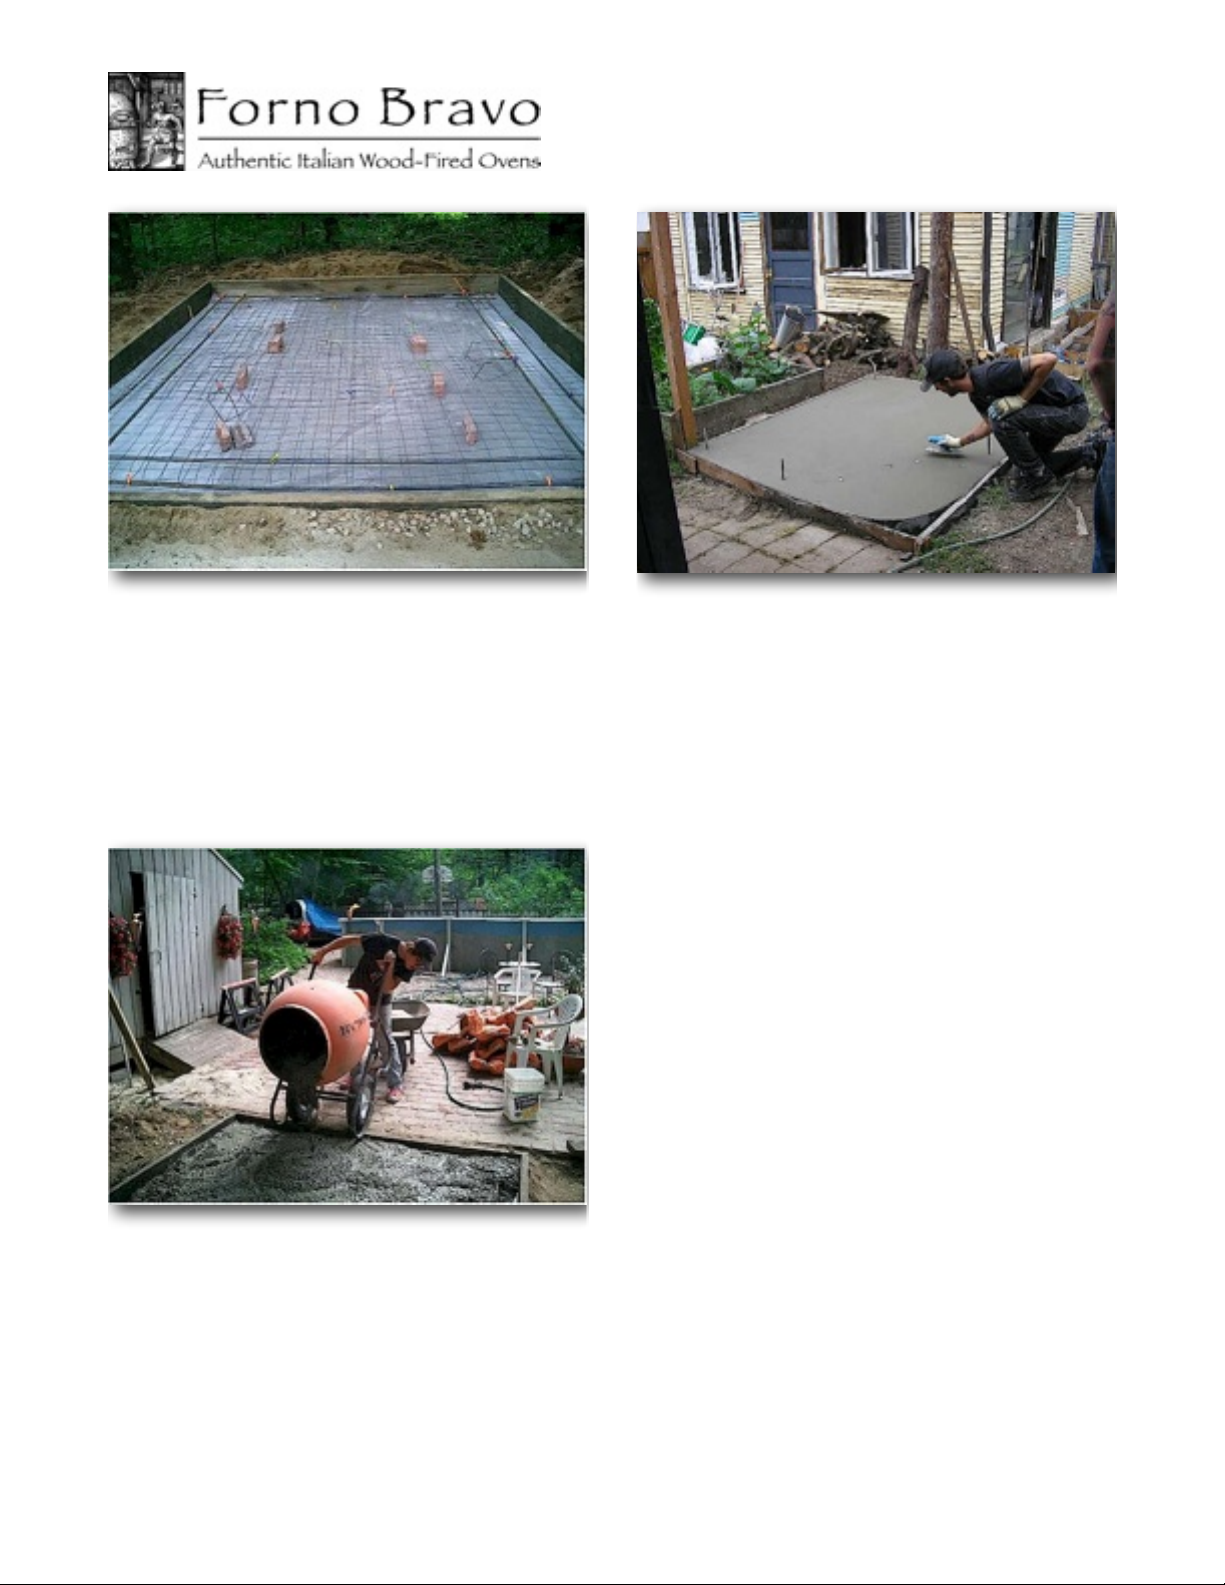
Oven Size
The plans describe 36" and 42" (internal diameter) brick
oven sizes. You can either follow these directions closely,
building your oven to the same dimensions we describe,
or you can make modifications to meet your specific size
!Pompeii Oven Instructions
© Forno Bravo, LLC 2007-2009. All Rights Served. Ver. 2.0 4


 Installation and operating instructions")


