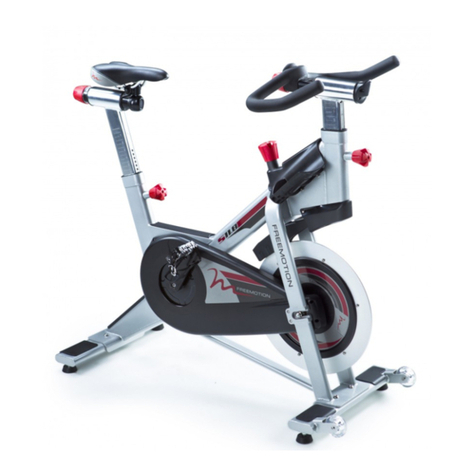
FREE MOTION Le Tour de France FMEX81912.1 User manual

www.freemotionfitness.com
РУКОВОДСТВО
ПОЛЬЗОВАТЕЛЯ
Модель No. FMEX81912.1
СерийныйNo.
Впишите в поле вверху серийный
номер изделия.
Ярлык с серийным
номером
(под основанием)
Если у Вас есть вопросы, ли-
бо в случае, если какие-то
детали повреждены или от-
сутствуют, обратитесь в
Службу Поддержки Клиентов
(см. последнюю страницу
данного Руководства).
ЕСТЬ ВОПРОСЫ?
ВНИМАНИЕ
Перед использованием изде-
лия ознакомьтесь со всеми
приведёнными в руководстве
инструкциями и мерами пред-
осторожности. Сохраните дан-
ное руководство.

2
СОДЕРЖАНИЕ
РАЗМЕЩЕНИЕ ПРЕДУПРЕЖДАЮЩЕГО ЯРЛЫКА.. . . . ..
. . . . . . . . . . .. . . . . . . . . ... . . .. . . . . . . . . . . . . . . . . . . . . . .2
. . . МЕРЫ ПРЕДОСТОРОЖНОСТИ . . . . . . . . . . . . . . . . . .. . . . . .. . . . . . . . . . . . . . . . .. .. . . . . . . . . . . . . . . . . . . . . 3
ПЕРЕД ТЕМ, КАК НАЧАТЬ . . . . . . . . . . . . . . . . . . . . . . . . . . . . . . . . . . . . . . . . . . . . . .. . . . . . . . . . . . . . . . . . .5
.СПЕЦИФИКАЦИЯ ДЕТАЛЕЙ. . . . . . . . . . . . . . . . . . . . . . . . . . . . . . . . . . . . . . . . . . . .. . . . . . . . . . . . . . . . . . .6
СБОРКА. . . . . . . . . . . . . . . . . . . . . . . . . . . . . . . . . . . . . . . . . . . . . . . . . . . . . . . . . . . . .. . . . . . . . . . . . . . . . . . .7
. . . . . . . . . . . .ИСПОЛЬЗОВАНИЕ ВЕЛОТРЕНАЖЁРА. . . . . . . . . . . . . . . . .. . . . . . . . . . . . . . . . . . . . . . . . . . . . . 10
.СООТВЕТСТВИЕ СТАНДАРТАМ. . . . . . . . . . . . . . . . .. . .. .. .. ... ... ... . . . . .. . .. . . . .. . .. . .. . . . . . . . . . . . . . . . . .26
СПИСОК ДЕТАЛЕЙ. . . . . . . . . . . . . . . . . . . . . . . . . . . . . . . . . . . . . . . . . . . . . . . . . . .. . . . . . . . . . . . . . . . .28
.СБОРОЧНЫЙ ЧЕРТЁЖ . . . . . . . . . . . . . . . . . . . . . . . . . . . . . . . . . . . . . . . . . . . . . . .
КАК ОБРАТИТЬСЯ В СЛУЖБУ ПОДДЕРЖКИ КЛИЕНТОВ . .. . .. . ... . . . . .. . .. . . . .. . . . . . . . . . . . . . . . . . . . . .30
См. последнюю страницу
ГАРАНТИЯ. . . . . . . . . . . . . . . . . . . . . . . . . . . . . . . . . . . . . . . . . . . . . . . . . . . . . См. последнюю страницу
РАЗМЕЩЕНИЕ ПРЕДУПРЕЖДАЮЩЕГО ЯРЛЫКА
На этом рисунке показано место размещения преду-
преждающего ярлыка. Если ярлык отсутствует, ли-
бо читается с трудом, обратитесь в Службу Под-
держки (см. последнюю страницу Руководства) с
просьбой о его бесплатной замене. Разместите
ярлык в указанном месте. К изделию прилагаются
ярлыки на разных языках. Разместите их рядом, если
требуется. Примечание: размеры ярлыка на рисунке
могут не соответствовать его фактическим размерам.
- Неправильное использо-
вание изделия может при-
вести к тяжёлым травмам.
- Перед началом использо-
вания прочтите Руководст-
во пользователя и сле-
дуйте его инструкциям и
предупреждениям.
- Не подпускайте к трена-
жеру детей.
- Помните, что педали про-
должают вращение даже
после Вашей остановки.
- Вращающиеся педали
могут нанести травмы.
- Снижайте скорость вра-
щения педалей контроли-
руемым образом.
- Вес пользователя не
должен превышать 159 кг.
- Тренажёр должен быть
установлен на ровной го-
ризонтальной поверхности.
- Тренажёр не предназна-
чен для использования в
медицинских целях.
- Если данный ярлык по-
вреждён или утерян, либо
если текст не читается,
замените его.
ВНИМАНИЕ
ДЕРЖИТЕ РУКИ НА БЕЗО-
ПАСНОМ РАССТОЯНИИ ВО
ВРЕМЯ РАБОТЫ
ОСТОРОЖНО
FREEMOTION и IFIT зарегистрированные товарные знаки ICON Health & Fitness, Inc. LE TOUR DE
FRANCE зарегистрированный товарный знак Société du Tour de France. Google Maps товарный знак
Google Inc. ANT+™ товарный знак Garmin Ltd. или дочерних компаний. Polar зарегистрированный то
варный знак Polar Electro Oy. Wi-Fi зарегистрированный товарный знак Wi-Fi Alliance. WPA и WPA2
являются товарными знаками альянса компаний Wi-Fi-альянс.

3
1.
2.
3.
4. Тренажер должен быть размещён в
месте, где за его использованием
будет осуществляться контроль.
5.
6.
7.
8.
9. Подключайте тренажёр к электросети с
заземлением (см. стр.10).
10. Не меняйте шнур питания или или ис-
пользуйте адаптер для подключения
шнура питания к неправильному
разъему. Держите шнур питания вдали
от нагретых поверхностей. Не исполь-
зуйте удлинитель.
11. Не пользуйтесь тренажёром, если
сетевой шнур или вилка повреждены,
или если тренажёр работает некорректно.
12.
13. Занимайтесь в подходящей одежде, не
слишком свободной, иначе она может
попасть в движущиеся части тренажёра.
Для защиты ступней всегда надевайте
спортивную обувь.
14. Вес пользователя тренажера не
должен превышать 159 кг.
МЕРЫ ПРЕДОСТОРОЖНОСТИ
ВНИМАНИЕ: Чтобы снизить риск ожогов, возгораний, ударов электрическим то-
ком или травм, прочитайте все важные меры предосторожности и инструкции в данном руко-
водстве перед началом использования тренажера. Компания FreeMotion Fitness не несет ответ-
ственности за травмы и повреждения имущества, полученные при использовании данного
оборудования.
Владелец тренажера обязан проин-
формировать всех пользователей
тренажера о мерах предосторож-
ности и правилах использования.
Перед началом тренировок проконсуль-
тируйтесь у своего врача. Это особенно
важно, если вы старше 35 лет или ранее
имели проблемы со здоровьем.
Используйте тренажер только так, как
описано в данном руководстве.
Храните и используйте велотренажер в
помещении, в защищённом от влаги и
пыли месте. Не ставьте его в гараж, на
крытую террасу или близко к воде.
Тренажёр должен стоять на ровной поверх-
ности, чтобы вокруг него оставалось не ме-
нее 0,6 м свободного пространства. Для
защиты пола или ковра от повреждений
кладите под велотренажер подстилку.
Регулярно проверяйте, надёжно ли затя-
нут крепёж. Все изношенные детали сле-
дует немедленно заменять.
Не подпускайте к тренажёру детей
младше 13 лет и домашних животных.
ОПАСНО: Всегда отключайте сете-
вой шнур, когда тренажер не используется
или перед его чисткой. Выполнять любые
процедуры, кроме описанных в руководст-
ве, может только представитель авторизо-
ванной сервисной службы.

4
15. Будьте внимательны при подъеме и
спуске с тренажера.
16. Пульсомер — не медицинский прибор. На
его точность могут влиять различные
факторы. Прибор помогает оценивать об-
щие тенденции частоты сердцебиений во
время выполнения упражнений.
17. Занимаясь на тренажёре, всегда держите
спину прямо, не выгибайте её.
18. Чрезмерная физическая нагрузка может
привести к серьёзным травмам или смер-
тельному исходу. Если во время занятий
вы почувствовали слабость или боль, не-
медленно прекратите занятие и отдохните.
СОХРАНИТЕ ЭТИ ИНСТРУКЦИИ

5
Благодарим вас за приобретение ультрасовремен-
ного велотренажера LE TOUR DE FRANCE®.
Модель LE TOUR DE FRANCE существенно
отличается от обычных велотренажеров. С полной
персонализацией, консоль с Wi-Fi , наклонной
системой, имитирующей реальную местность, и
целым рядом других иновационных функций
велотренажер LE TOUR DE FRANCE создан,
чтобы вы наслаждались велоездой в домашних
условиях.
Педаль/Ремешок
Маховик
ПЕРЕД ТЕМ, КАК НАЧАТЬ
Колесо
Регулировожные
ножки
Силовой кабель
Длина: 132 см
Ширина: 61см
Вес: 61кг
Сиденье
Переключение
передач
Поручень
*Бутылка в комплект не входит
Ради удобства и безопасности внимательно
прочтите данное руководство перед началом
использования тренажёра. Если после прочте-
ния у вас возникнут вопросы, взгляните на лице-
вую обложку данного руководства. Для получе-
ния помощи необходимо знать модель и серий-
ный номер изделия. Расположение бирки с
серийным номером указано на лицевой обложке
руководства.
Прежде чем продолжить чтение, ознакомьтесь с
частями тренажёра, обозначенными на рисунке
ниже.
Держатель
Консоль
Ручка опоры
Выключатель
Регулировожные ножки
Ручка опоры
Регулировочная ручка
Ручка
Держатель бутылки*

6
СПЕЦИФИКАЦИЯ
M10 x 60мм Болт (115)–4
Шайба
(112)–4
Контргайка
(116)–4
M5 x 10мм
Выпуклый винт
(125)–4
M4 x 10мм
Винт (12)–4
M4 x 8мм
Винт (129)–4
Используйте рисунок ниже для идентификации крепёжных деталей. Число в скобках под каждым изобра-
жением — это порядковый номер детали в списке СОСТАВНЫХ ЧАСТЕЙ в конце данного руководства.
Число после скобок — это количество деталей, требуемое для сборки. Примечание: Если деталь от-
сутствует в комплекте крепежа, проверьте, не установлена ли она на своё место.

7
1
4
116
115
112
2
•
•
•
•Не используйте электроинструмент, чтобы
не повредить крепеж.
•Для сборки потребуются следующие
инструменты (в комплект не входят):
3 мм шестигранный ключ
6 мм шестигранный ключ
крестовая отвертка
рожковый ключ на 17мм
1.
2
2. Соедините переднюю опору (3) с основа-
нием (2) при помощи двух болтов M10 x
60mm (115), двух шайб M10 (112) и двух га
ек M10 (116).
3
116
115
112
2
СБОРКА
Сборка осуществляется вдвоем.
Расположите все сборочные единицы на
свободной поверхности и удалите упаковоч-
ный материал. Не выбрасывайте упаковку
пока не соберете тренажер полностью.
Для определения мелких частей см. стр. . .
Соедините заднюю опору (4)соснованием
(2) при помощи двух болтов M10 x 60мм
(115), двух шайб M10 (112) и двух гаек M10
(116).

8
Scaled 125%
Scaled 125%
66
66
7
11
125
129
12
12
10
B
A
A
4
3
4.
Пока ваш помощник придерживает консоль
(10) возле основания консоли (66), со-
едините провода и кабель консоли (B) с со-
ответствующими корпусными проводами и
кабелем (A). Избыток длины уложите в
консоль и основание консоли.
Важно: Не пережмите провода и кабели
(A, B). Закрепите консоль (10) на основании
консоли (66) четырьмя витами с полукруглой
головкой M5 x 10мм (125); наживите все
четыре винта, затем затяните их.
Далее закрепите крышку консоли (11) на
консоли (66) при помощи четырёх винтов
M4 x 10мм (12); наживите все четыре
винта, затем затяните их.
3. Пока ваш помощник придерживает основание
консоли (66) рядом со стойкой поручня (7),
пропустите корпусные провода и кабель (A)
кверху сквозь основание консоли.
Не пережмите провода и кабель (A). При-
крепите основание консоли (66) к стойке по-
ручня (7) четырьмя винтами M4 x 8 (129); на-
живите все винты, а потом затяните их.
Не пережмите
провода и кабель (A)
Удалите четыре винта M4 x 10мм (12) исни-
мите крышку консоли (11) сконсоли (10);
отложите эти детали в сторону.
Не пережмите
провода и кабели
(A) и (В)

9
2
55
154, 159
5
6.
5. Аккуратно положите тренажёр на бок.
Найдите на корпусе (2) сетевой разъём (143).
Пропустите соответствующий сетевой шнур
(154,159) сквозь хомут-фиксатор (55), и
соедините шнур с сетевым разьёмом. Затем
затяните хомут-фиксатор.
Верните тренажёр в вертикальное
положение.
ВАЖНО: Смотри схему-вклейку ниже.
Если вы заменяете или устанавливаете
педали (56), не забудьте установить
педальные шайбы (162) между педалями
и шатунами (16, деталь 21 не показана).
143
56
16
162
Теперь, когда велотренажёр собран, проверьте, всё ли установлено правильно, и работает ли трена-
жёр должным образом. Перед началом использования тренажёра убедитесь, что все детали надёжно
затянуты. В комплект могут быть включены запасные детали. Для защиты пола или ковра от
повреждений кладите под велотренажёр специальный коврик.

10
Подключите
кабель питания
с соответствую-
щим контактом
заземления к
розетке с зазем-
лением, которая
правильно
установлена и
заземлена в
соответствии со
всеми местными нормами и правилами.
Розетки должна быть рассчитана на номи-
нальное напряжение 120 вольт.
A temporary
adapter may
be used to
connect the
power cord
to a 2-pole
receptacle
as shown
at the right
if a properly
grounded
outlet is not
available.
The lug or wire extending from the adapter must
be connected with a metal screw to a permanent
ground such as a properly grounded outlet box cover.
Some 2-pole receptacle outlet box covers are not
grounded. Before using an adapter, contact a quali-
fied electrician to determine whether the outlet box
cover is grounded. The temporary adapter should
be used only until a properly grounded outlet can
be installed by a qualified electrician.
WARRANTY INFORMATION
The warranty for this product does not cover damage
or equipment failure caused by electric wiring not in
compliance with electrical codes or the specifications
in this manual, or failure to provide reasonable and
necessary maintenance as outlined in this manual.
Any failure or damage caused by unauthorized service;
misuse; accident; negligence; improper assembly or
installation; debris resulting from any destruction activi-
ties in the product’s environment; rust or corrosion as a
result of the product’s location; alterations or modifica-
tions without written authorization; or failure on your
part to use, operate, and maintain the product as set
forth in this manual will void the warranty.
2-pole Receptacle
Adapter
Lug
Metal Screw
КАК ПОЛЬЗОВАТЬСЯ ВЕЛОТРЕНАЖЕРОМ
КАК ПОДКЛЮЧИТЬ СЕТЕВОЙ КАБЕЛЬ В США И
КАНАДЕ
Данное изделие должно быть заземлено. Для
электрического тока заземление является путём
снаименьшим сопротивлением, т.о., при сбое
или поломке устройства риск поражения током
снизится. Сетевой шнур данного изделия снаб-
жён вилкой сзаземляющим контактом.
ОПАСНО: Из-за неправильного под-
ключения заземляющего провода может возник-
нуть повышенная опасность поражения электри-
ческим током. Если вы не уверены, правильно ли
заземлён тренажёр, попросите квалифицирован-
ного специалиста проверить это. Не пытайтесь
заменить вилку сетевого кабеля, идущего в
комплекте с тренажёром — если вилка не подхо-
дит к вашей розетке, вызовите электрика для
установки подходящей розетки.

11
HOW TO PLUG IN THE POWER CORD IN EUROPE
OR AUSTRALIA
This product must be earthed. If it should malfunc-
tion or break down, earthing provides a path of least
resistance for electric current to reduce the risk of
electric shock. This product’s power cord has an
equipment-earthing conductor and an earthing plug.
IMPORTANT: If the power cord is damaged, it must
be replaced with a manufacturer-recommended
power cord.
Follow the steps below to plug in the power cord.
1. Plug the indicated end of the power cord into the
socket on the frame.
2. Plug the power cord into an appropriate outlet that
is properly installed and earthed in accordance with
all local codes and ordinances.
WARRANTY INFORMATION
The warranty for this product does not cover damage
or equipment failure caused by electric wiring not in
compliance with electrical codes or the specifications
in this manual, or failure to provide reasonable and
necessary maintenance as outlined in this manual.
Any failure or damage caused by unauthorized service;
misuse; accident; negligence; improper assembly or
installation; debris resulting from any destruction activi-
ties in the product’s environment; rust or corrosion as a
result of the product’s location; alterations or modifica-
tions without written authorization; or failure on your
part to use, operate, and maintain the product as set
forth in this manual will void the warranty.
IT
FR/SP
UK
GR
RU
HU
AUS
Socket on Frame
Power Cord
IT
FR/SP
UK
GR
RU
HU
AUS
IT
FR/SP
UK
GR
RU
HU
AUS
Outlet
UK Australia
Outlet
DANGER: Improper connection of
the equipment-earthing conductor can result
in an increased risk of electric shock. Check
with a qualified electrician or serviceman if
you are in doubt as to whether the product
is properly earthed. Do not modify the plug
provided with the product—if it will not fit
the outlet, have a proper outlet installed by a
qualified electrician

12
FEATURES OF THE TRAINING BIKE
Measuring Watts
Each training bike is individually calibrated to measure
your power output and to allow you to monitor your
watts and RPMs directly on the console.
By monitoring your watts and RPMs, you can see how
hard you are training and make sure that you are chal-
lenging yourself and improving.
The Incline System
The training bike can incline and decline to realistically
simulate outdoor terrain. When you create maps of
your actual training routes on iFit.com (see the console
instructions beginning on page 14 for more informa-
tion), the training bike will automatically incline and
decline to match the terrain of your training routes.
The Handlebar Shifters
The training bike allows you to shift gears just like
you do on your road bike. The right and left handlebar
shifters simulate front and rear derailleurs that you can
configure to match the gearing setup of your road bike
(see the console instructions beginning on page 14
for more information).
Pedaling Form Features
The training bike has multiple features to help you
develop correct pedaling form:
Freewheel—The training bike has a freewheel that
simulates a road bike rather than a fixed-drive spin
bike. This discourages you from letting your feet coast
through the top and bottom of your pedal stroke.
Flywheel—The flywheel on the training bike has the
correct inertia to allow you to pedal smoothly while
encouraging you to use good pedaling form.
HOW TO ADJUST THE GEOMETRY OF THE
TRAINING BIKE
The training bike can be adjusted to match the geom-
etry of your road bike to promote correct form and to
ensure proper training of the muscles. Make adjust-
ments in small increments, and then pedal the
training bike to test the adjustments.
How to Adjust the Angle of the Saddle
You can adjust the angle of the saddle to the posi-
tion that is most comfortable. You can also adjust the
saddle forward or backward for increased comfort or to
adjust the distance to the handlebar.
To adjust the
saddle, first loosen
the hex nuts on the
saddle clamp a few
turns. Next, tilt the
saddle upward or
downward or slide
the saddle forward
or backward to the
desired position.
Then, retighten the hex nuts.
How to Adjust the Saddle Carriage
To adjust the posi-
tion of the saddle
carriage, loosen
the carriage knob,
move the saddle
carriage forward
or backward to the
desired position,
and then firmly
tighten the carriage
knob.
Hex
Nuts
Saddle
Clamp
Carriage
Knob

13
How to Adjust the Saddle Post
For effective training, the saddle should be at the
proper height. As you pedal, there should be a slight
bend in your knees when the pedals are in the lowest
position.
To adjust the saddle
post, first loosen the
post knob and pull
it outward. Then,
move the saddle
post upward or
downward, release
the post knob into
an adjustment
hole in the saddle
post, and firmly
tighten the post knob. Make sure that the post knob is
engaged in an adjustment hole. IMPORTANT: Do not
adjust the saddle post beyond the stop mark on
the saddle post.
How to Adjust the Handlebar Post
To adjust the
handlebar post,
first loosen the
post knob and pull
it outward. Then,
move the handle-
bar post upward or
downward, release
the post knob into
an adjustment hole
in the handlebar
post, and firmly tighten the post knob. Make sure that
the post knob is engaged in an adjustment hole.
IMPORTANT: Do not adjust the handlebar post
beyond the stop mark on the handlebar post.
How to Adjust the Handlebar Carriage
To adjust the
position of the
handlebar, loosen
the carriage knob,
move the handlebar
forward or back-
ward to the desired
position, and then
firmly tighten the
carriage knob.
HOW TO LEVEL THE TRAINING BIKE
If the training bike rocks slightly on your floor during
use, turn one or both of the leveling feet on the front or
rear stabilizer (see the drawing on page 5) until the
rocking motion is eliminated.
HOW TO USE THE PEDALS
To use the toe cage side of the pedals (see the draw-
ing on page 5), insert your shoes into the toe cages
and pull the ends of the toe straps. To adjust the toe
straps, press and hold the tabs on the buckles, adjust
the toe straps to the desired position, and then release
the tabs.
To use the clip-in side of the pedals, you must wear
cycling shoes. To clip into the pedals, press the cleats
on your cycling shoes firmly into the slots in the pedals
until they snap into place. To unclip from the pedals,
twist your cycling shoes outward from the pedals.
HOW TO MAINTAIN THE TRAINING BIKE
Inspect and tighten all parts of the training bike regu-
larly. Replace any worn parts immediately.
To clean the training bike, use a damp cloth and a
small amount of mild detergent.
For maximum performance and safety, replace the
pedals every year. To purchase pedals, see the back
cover of this manual.
IMPORTANT: To avoid damage to the training bike
and to prevent injury to the user, use only manu-
facturer-supplied pedals. Other pedals may not be
designed for use in fitness clubs or indoor cycling
studios and may be dangerous.
Post
Knob
Post
Knob
Carriage
Knob

14
Maverick
EBFM81912
FMEX81912.0
CONSOLE DIAGRAM
MAKE YOUR FITNESS GOALS A REALITY WITH
IFIT.COM
With your new iFit-compatible fitness equipment, you
can use an array of features on iFit.com to make your
fitness goals a reality:
Exercise anywhere in the world with
customizable Google Maps™.
Download training workouts designed to
help you reach your personal goals.
Measure your progress by competing
against other users in the iFit community.
Upload your workout results to the iFit cloud
and track your accomplishments.
Set calorie, time, or distance goals for your
workouts.
Choose and download sets of weight-loss
workouts
Go to iFit.com to learn more.
Watch high-definition videos with simulated
workouts.

15
FEATURES OF THE CONSOLE
The advanced console offers an array of features
designed to make your workouts more effective and
enjoyable.
When you use the manual mode of the console, you
can change the incline (resistance) of the training bike
and change gears with the touch of a button.
While you exercise, the console will display continu-
ous exercise feedback, including watts and pedaling
cadence feedback.
During your workout, you can do intervals at any time
to measure your performance over short periods of
time. The console will record and display your results
for each interval.
You can also measure your heart rate using an optional
heart rate monitor.
In addition, the console offers twenty-four Le Tour de
France workouts. Each workout automatically changes
the incline (resistance) of the training bike to match the
real terrain of the Le Tour de France bicycle race and
allows you to change gears to maintain your desired
pedaling cadence.
The console also features new iFit technology that
enables the console to communicate with your wireless
network. With iFit technology, you can download per-
sonalized workouts, create your own workouts, track
your workout results, and access many other features.
See www.iFit.com for complete information.
You can even connect your personal audio player to
the console sound system and listen to your favorite
music or audio books while you exercise.
To turn on the power, see this page. To learn how to
use the touch screen, see page 16. To set up the
console, see page 16.
HOW TO TURN ON THE POWER
IMPORTANT: If the training bike has been exposed
to cold temperatures, allow it to warm to room tem-
perature before you turn on the power. If you do
not do this, you may damage the console displays
or other electrical components.
Plug in the power cord
(see HOW TO PLUG IN
THE POWER CORD on
page 10). Next, locate
the power switch on the
underside of the frame near
the power cord. Press the
power switch to the reset
position.
The display will then turn on and the console will be
ready for use.
Note: When you turn on the power for the first time,
the incline system may calibrate automatically.
The training bike will move upward and downward as
it calibrates. When the training bike stops moving, the
incline system is calibrated.
IMPORTANT: If the incline system does not cali-
brate automatically, see step 4 on page 24 and
manually calibrate the incline system.
IMPORTANT: The console features a display demo
mode, designed to be used if the training bike is
displayed in a store. If the demo mode is turned on,
the console will not turn off and the display will not
be reset when you finish exercising. To turn off the
demo mode, see step 8 on page 23.
Reset
Position

16
HOW TO USE THE TOUCH SCREEN
The console features a tablet with a full-color touch
screen. The following information will help you become
familiar with the tablet’s advanced technology:
• The console functions similarly to other tablets. You
can slide or flick your finger against the screen to
move certain images on the screen, such as the
displays in a workout. However, you cannot zoom in
and out by sliding your fingers on the screen.
• To type information into a text box, first touch the text
box to view the keyboard. To use numbers or other
characters on the keyboard, touch the ?123 button.
To view more characters, touch the Alt button. Touch
the Alt button again to return to the number key-
board. To return to the letter keyboard, touch the
ABC button. To use a capital character, touch the
button with an upward-pointing arrow. To use mul-
tiple capital characters, touch the arrow button again.
To return to the lowercase keyboard, touch the arrow
button a third time. To clear the last character, touch
the button with a backward-facing arrow and an X.
• Use these buttons
on the console to
navigate the tablet.
Press the home but-
ton to return to the
main menu. Press the
center button to access the settings menu (see page
22). Press the back button to return to the previ-
ous screen.
HOW TO SET UP THE CONSOLE
Before using the training bike for the first time, follow
the steps below to set up the console.
1. Connect to a wireless network.
Note: To access the internet, download iFit work-
outs, and use some other features of the console,
the console must be connected to a wireless
network. See HOW TO USE THE WIRELESS
NETWORK MODE on page 25 to connect the
console to your wireless network.
2. Check for firmware updates.
First, see step 1 on page 22 and step 2 on page
24 and select the maintenance mode. Then,
see step 3 on page 24 and check for firmware
updates.
3. Calibrate the incline system.
First, see step 1 on page 22 and step 2 on page
24 and select the maintenance mode. Then,
see step 4 on page 24 and calibrate the incline
system of the training bike.
4. Create an iFit account.
On your computer, smartphone, tablet, or other
internet-capable device, open an internet browser
and go to www.iFit.com. Follow the prompts on the
website to sign up for your iFit membership. If you
have an activation code, select the code activation
option.
The console is now ready for you to begin training. The
following pages explain the various workouts and other
features that the console offers.
To use the manual mode, see page 17. To use a
Le Tour de France workout, see page 18. To use
a set-a-goal workout, see page 19. To use an iFit
workout, see page 20.
To use the sound system, see page 21. To use
the internet browser, see page 21. To use the
equipment settings mode, see page 22. To use
the maintenance mode, see page 24. To use the
wireless network mode, see page 25.
Note: If there is a sheet of plastic on the display,
remove the plastic.
The console can display speed and distance in either
miles or kilometers. To find which unit of measurement
is selected, see step 14 on page 23.

17
HOW TO USE THE MANUAL MODE
1. Touch the screen or begin pedaling to activate
the console.
See HOW TO TURN ON THE POWER on
page 15.
2. Select the main menu.
When you turn on the console, the main menu will
appear on the screen after the console boots up.
Touch the home button at the bottom of the screen
to return to the main menu at any time.
Touch the Start button to start a manual workout.
3. Change the incline (resistance) of the training
bike as desired.
As you pedal, change the incline (resistance) of the
training bike by pressing the Grade increase and
decrease buttons on the console.
You can also change the incline of the training
bike by pressing the shifter buttons. To increase
the incline, press the front and rear buttons on the
right shifter simultaneously; to decrease the incline,
press the front and rear buttons on the left shifter
simultaneously.
Note: After you press a button, it will take a
moment for the training bike to reach the selected
incline level. You will hear the incline motor
while the incline is changing. This is normal.
CAUTION: The training bike can move through
a broad range of incline levels. Hold the handle-
bars and be prepared for the training bike to
move when you change the incline.
4. Change gears as desired.
You can set up the training bike to simulate
your road bike. To select the gearing option(s)
for the training bike, see step 7 on page 22.
Note: The training bike simulates gears; there are
no actual gears.
Change gears by pressing the buttons on the
shifters. Note: After you press a button, it will take
a moment for the training bike to change to the
selected gear. To avoid damaging the shift-
ers, do not pull on the shifters or squeeze the
shifters.
Press the buttons on the left shifter to change the
front gear; press the buttons on the right shifter to
change the rear gear.
On the left shifter, press the front button to increase
the resistance; press the rear button to decrease
the resistance.
On the right shifter, press the front button to
increase the resistance; press the rear button to
decrease the resistance.
The numbers of the currently selected front and
rear gears will appear in the display on the screen.
5. Follow your progress.
The console offers several display modes. The
display mode that you select will determine which
workout information is shown.
To select the desired display mode, simply flick or
slide the screen. You can also view additional work-
out information by touching the red boxes on the
screen.
If desired, adjust the volume level by pressing the
Volume increase and decrease buttons on the
console.
To pause the workout, stop pedaling or touch either
the back button or the home button at the bottom
of the screen. To continue the workout, touch the
Resume button. To end the workout session, touch
the End Workout button.
When you touch the End Workout button, a work-
out summary will appear on the screen. After you
view the workout summary, touch the Finish button
to return to the main menu. You may also be able
to either save or publish your results using one of
the options on the screen.

18
6. Do intervals if desired.
During a workout, you can use the interval screen
to measure your performance for short periods of
time. To select the interval screen, simply flick or
slide the screen.
To begin an interval, touch the Start button. To end
the current interval, touch the Lap button. You can
add as many intervals as desired to your workout.
The console will record data for each interval that
you can view at any time during your workout. The
interval screen will show a list of the recorded inter-
vals. Scroll the screen to view data for the desired
interval.
7. Wear a heart rate monitor and measure your
heart rate if desired.
You can wear an optional heart rate monitor to
measure your heart rate. Note: The console is
compatible with ANT+™ and POLAR™ heart rate
monitors.
When your heart beat is detected, your heart rate
will be shown in the display on the screen.
8. When you are finished exercising, unplug the
power cord.
When you are finished exercising, press the power
switch to the off position and unplug the power
cord. IMPORTANT: If you do not do this, the
electrical components of the training bike may
wear prematurely.
HOW TO USE A LE TOUR DE FRANCE WORKOUT
1. Touch the screen or begin pedaling to activate
the console.
See HOW TO TURN ON THE POWER on
page 15.
2. Select the main menu.
See step 2 on page 17.
3. Select a Le Tour de France workout.
To select a Le Tour de France workout, first touch
the cyclist button at the bottom of the screen. The
workouts menu will appear on the screen.
Next, select the Tour de France button. Then,
select the desired workout. Note: It may be neces-
sary to scroll the screen to view all the workout
options.
The screen will show the name, the estimated
duration, and the distance of the workout. The
screen will also show the approximate number of
calories you will burn during the workout and a map
of the workout. Note: You may be able to select
other variables for the workout on this screen.
4. Start the workout.
Touch the Start Workout button to start the workout.
The workout may have a warm-up segment. To
skip the warm-up segment, touch the Skip button.
To select warm-up segment options for the training
bike, see step 15 on page 23.
Each workout is divided into several segments.
One incline level (resistance) is programmed for
each segment. Note: The same incline level may
be programmed for consecutive segments.
During the workout, the screen will show a map of
the route and a marker indicating your progress.
Touch the buttons on the screen to select the
desired map options.
The profiles display will show your progress. To
view the profiles display, flick or slide the screen.

19
At the end of the first segment of the workout, the
incline will automatically adjust to the incline level
for the next segment.
When the incline changes, the resistance of the
pedals will also change. To maintain a steady
pedaling cadence, change gears by pressing the
buttons on the shifters.
Note: You can manually override the incline set-
tings by pressing the Grade buttons. To return to
the programmed incline settings of the work-
out, touch the Follow Workout button.
Note: The calorie goal is an estimate of the
number of calories that you will burn during the
workout. The actual number of calories that you
burn will depend on various factors such as
your weight. In addition, your pedaling cadence
will affect the number of calories you burn.
To pause the workout, stop pedaling or touch either
the back button or the home button at the bottom
of the screen. To continue the workout, touch the
Resume button. To end the workout, touch the End
Workout button.
The workout will continue in this way until the last
segment ends. A workout summary will appear on
the screen. After you view the workout summary,
touch the Finish button to return to the main menu.
You may also be able to either save or publish your
results using one of the options on the screen.
5. Follow your progress.
See step 5 on page 17.
6. Do intervals if desired.
See step 6 on page 18.
7. Wear a heart rate monitor and measure your
heart rate if desired.
See step 7 on page 18.
8. When you are finished exercising, unplug the
power cord.
See step 8 on page 18.
HOW TO USE A SET-A-GOAL WORKOUT
1. Touch the screen or begin pedaling to activate
the console.
See HOW TO TURN ON THE POWER on
page 15.
2. Select the main menu.
See step 2 on page 17.
3. Select a set-a-goal workout.
To select a set-a-goal workout, touch the Set A
Goal button on the screen.
To set a customized goal for your workout, touch
the button for the desired goal. Then, touch the
increase and decrease buttons on the screen to
enter your goal and to select other variables for the
workout. The screen will show the duration and dis-
tance of the workout, and the approximate number
of calories you will burn during the workout.
4. Start the workout.
The workout may have a warm-up segment. To
skip the warm-up segment, touch the Skip button.
To select warm-up segment options for the training
bike, see step 15 on page 23.
Touch the Start button to start the workout.
The workout will function in the same way as the
manual mode (see page 17).
Note: You can manually override the incline set-
tings by pressing the Grade buttons. To return to
the programmed incline settings of the work-
out, touch the Follow Workout button.
The workout will continue until you reach the goal
that you set. A workout summary will appear on
the screen. After you view the workout summary,
touch the Finish button to return to the main menu.
You may also be able to either save or publish your
results using one of the options on the screen.

20
Note: The calorie goal is an estimate of the
number of calories that you will burn during
the workout. The actual number of calories that
you burn will depend on various factors, such
as your weight. In addition, if you manually
change gears or the incline during the work-
out, the number of calories you burn will be
affected.
5. Follow your progress.
See step 5 on page 17.
6. Do intervals if desired.
See step 6 on page 18.
7. Wear a heart rate monitor and measure your
heart rate if desired.
See step 7 on page 18.
8. When you are finished exercising, unplug the
power cord.
See step 8 on page 18.
HOW TO USE AN IFIT WORKOUT
To use an iFit workout, the console must be connected
to a wireless network (see HOW TO USE THE
WIRELESS NETWORK MODE on page 25). An iFit
account is also required.
1. Add workouts to your schedule on iFit.com.
On your computer, smartphone, tablet, or
other device, open an internet browser, go to
www.iFit.com, and sign in to your iFit account.
Next, navigate to Menu > Library on the website.
Browse the workout programs in the library and join
the desired workouts.
Then, navigate to Menu > Schedule to view your
schedule. All of the workouts that you have joined
will appear on your schedule; you can arrange or
delete the workouts on your schedule as desired.
Take time to explore the iFit.com website before
you log out.
2. Begin pedaling or press any button on the
console to turn on the console.
See HOW TO TURN ON THE POWER on
page 15.
3. Select the main menu.
See step 2 on page 17.
4. Log in to your iFit account.
If you have not already done so, touch the Login
button to log in to your iFit account. Enter your
iFit.com username and password and touch the
Login button.
To switch users within your iFit account, touch the
user button at the bottom of the screen. If more
than one user is associated with your iFit account,
a list of users will appear. Touch the name of the
desired user.
5. Select an iFit workout.
IMPORTANT: Before iFit workouts will
download, you must add them to your schedule
on iFit.com (see step 1).
To download an iFit workout from iFit.com to
the console, touch the Map, Train, Video, or Lose
Wt. button. The next workout of that type in your
schedule will then download. Note: You may be
able to access demo workouts through these but-
tons, even if you do not log in to your iFit account.
Table of contents
Other FREE MOTION Exercise Bike manuals

FREE MOTION
FREE MOTION FMEX82910.0 User manual

FREE MOTION
FREE MOTION r8.3 User manual

FREE MOTION
FREE MOTION Tour de France FMEX81912.0 User manual

FREE MOTION
FREE MOTION S 11.5 User manual

FREE MOTION
FREE MOTION CoachBike b22.7 User manual

FREE MOTION
FREE MOTION FMEX3256P.1 User manual

FREE MOTION
FREE MOTION VMEX81418.0 User manual

FREE MOTION
FREE MOTION upright bike c7.7 User manual

FREE MOTION
FREE MOTION r8.9b User manual

FREE MOTION
FREE MOTION SFEX13811.1 User manual