Freeplay EH4 User manual

olar Energy Hub
Solar powered lighting system and mobile phone charger
Model: EH4
User Guide / Instruction Manual

1. GENERAL AFETY
Before using your Energy Hub please read this
manual carefully. Do not discard this manual, it contains
instructions for installing and maintaining your system.
Follow the installation instructions carefully.
2. ENERGY HUB CONTENT
Your system should include all the illustrated components
below. In the unlikely event that there is anything missing,
please contact the local distributor you purchased the
product from.
3. OVERVIEW - HOW IT WORK
The solar panel absorbs sunlight and turns it into
electricity. The battery in the Energy Hub then stores the
energy for later use.
The Controller in the Energy Hub protects
against: • Over charging
• Under charging
• Short circuit and overload
The Energy Hub contains a built-in, state of the art Li-ion
battery which is rechargeable and can be replaced if
necessary. The battery level LED indicators give battery
state of charge. They illuminate for a short period after
the LED bulbs have been switched on. The Energy Hub
also has a USB port to charge external devices like
mobile phones. Energizing the USB port is triggered by
activation of any the switches, either O or O /OFF.
The Energy Hub is also rechargeable via the micro USB
port.
Energy Hub Controller x 1 LED Bulbs x 2 PV olar Panel x 1 Cables
Sunlight Converted
into Current
Electronic
Current released
Sunlight
is absorbed
ee our entire product range: www.freeplayenergy.com
Model: EH4
olar Energy Hub
Solar powered lighting system and mobile phone charger

4. IN TALLATION & U ING YOUR ENERGY HUB
(A) olar Panel
• Place the solar panel in a position directly facing the sun where
it can receive the strongest possible sunlight.
• The solar panel should be installed in a well ventilated location –
good ventilation will help to generate more energy and extend
the life of the product.
•The solar panel will perform best when set up at 90° to
direct sunlight.
WAR I G: The solar panel is water resistant OT waterproof.
Do not submerge in water or ex ose the anel to a continual flow of water.
(B) Energy Hub Controller
• Place the Energy Hub Controller on a stable flat surface in an
area that is safe from the unit being knocked or caused to fall.
The controller should be placed in a dry, shady place.
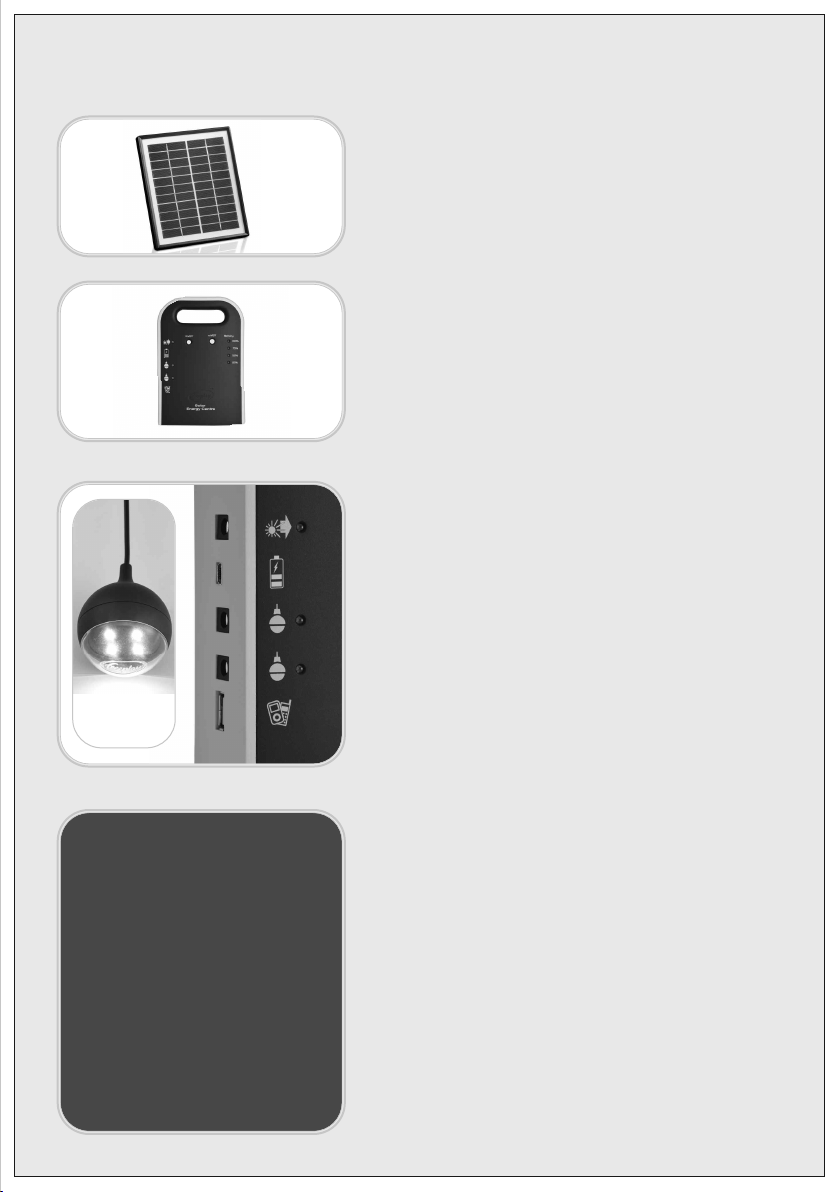
(C) Electrical Connections
• Connect the cable of the first LED bulb to the socket marked
with a picture of a light bulb.
• Connect the cable of the second LED bulb to the remaining
socket marked with a picture of a light bulb.
• To recharge from the sun, connect the cable from the solar panel
to the socket marked with a picture of the sun.
• To recharge from a USB source, connect to the Micro USB port.
(D) Using your Energy Hub
• Place the solar panel in the sun as instructed in 4A above. The
charging LED will illuminate.
• The battery level LED indicators give battery state of charge.
They illuminate for a short period after the LED bulbs have been
switched on.
• There are two O /OFF switches, each of these switches a bulb.
The bulbs have two settings, “endurance” and “full”. The full
setting delivers 100 lumens of light per bulb. The endurance
setting delivers 60 lumens of light per bulb, and increases the
shine-time of the bulb. The switch sequence is:
OFF / E DURA CE / FULL / OFF.
• The LED bulbs are water resistant and can be used outside but
do not submerge them in water or expose them to a continual
flow of water.
• To charge a phone, connect a standard USB cable, (or a
multi-tip cable if supplied), to the charging port marked with a
picture of a mobile phone. The USB port is switched on by the
activation of any of the O /OFF switches. It is not necessary to
have a bulb O in order to charge a phone. Any activation of the
switches energizes the USB port. If a light is not required during
phone charging, the bulb may be switched OFF again and the
port will remain energized.
5. RECHARGING YOUR
ENERGY HUB
From the Sun
• Plug the solar panel connector into the
socket marked with an image of the sun.
Follow steps A above. When charging,
the LED next to the socket will illuminate.
From a USB Source
• To recharge from a USB source, connect
a USB cable into the Micro USB port.
RECOMMENDATION: Please charge the
Energy Hub for a full day before first use.

PECIFICATION
OLAR ENERGY HUB EH4
Solar Panel Power, Size & Cable
4W 22.5*19.5cm; 5 Metres
Internal Battery
Li-ion 5200mAh
Light Output
(2 x 1W bulbs on high setting) 2 x 100 lumens = 200 lumens
USB Output
5V, 500mA
Battery Charging Time
7 to 8 hrs in full sunlight conditions or via USB Port
Daily solar runtime
(2 bulbs on high setting) 6 Hours*
Full Battery Runtime High Setting
9 Hours*
Life span
Solar module
o less than 15 Years
LED Light
50,000 hours
Battery
More than 1,000 cycles
ee our entire product range: www.freeplayenergy.com
MAINTENANCE
To make sure that the battery remains in good
condition the Energy Hub should be fully
charged at least once a month.
olar Module - clean the glass surface of the
module as necessary. Use water and a cloth- a
mild detergent can be used. Protect the cables
from stress by placing them where they will not
be trodden on.
If the controller is to be used outside, please
place the unit in a protective housing keeping it
free from dust and water.
The Energy Hub is a maintenance free design
and there are no user serviceable parts. The
battery is replaceable and is accessible by
removing the screws on the rear panel of the
Energy Hub.
If you have any problems please follow the steps
in this manual or contact the distributor you
purchased the kit from.
Freeplay Energy Ltd, 10th Floor, 6 Mitre Passage, Greenwich, London, SE10 0ER
WARRANTY
Freeplay Energy Ltd, undertakes that, if within 2
(two) years of purchase, this product or any
part thereof is proved to be defective by reason
of faulty workmanship or materials, we will, at
our option repair or replace the same free of
charge for labor or materials on condition that:
The original invoice or sales receipt (indicating
the date of purchase, product type and dealer’s
name) is presented together with the defective
unit.
The complete unit is returned to the
manufacturer or country distributor,
postage paid.
The unit has not been serviced, maintained,
repaired, taken apart or tampered with by any
person not authorised by the manufacturer.
This warranty is in addition to your statutory
rights.
FCC Compliance
This device complies with Part 15 of the FCC
Rules. Operation is subject to the following
conditions:
(1) this device may not cause harmful
interference, and (2) this device must accept
any interference received, including interference
that may cause undesired operation.
*Mobile phone charging can reduce daily solar runtime of lights.
Popular Switch manuals by other brands

Cisco
Cisco 11503 - CSS Content Services Switch Configuration guide

OSEE
OSEE SAC6840N user manual

Magnetrol
Magnetrol STI R Series Installation and operating manual

StarTech.com
StarTech.com 8STMSTMDP122DP Quick install guide

Johansson
Johansson 9744MC user manual

Avocent
Avocent SwitchView DVI Quick installation guide