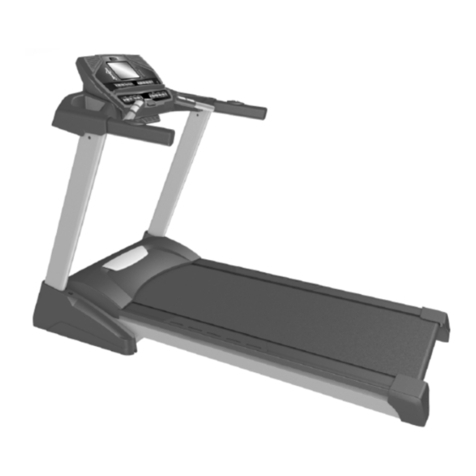
Freespirit C 249 30186 0 User manual

C 249 30186 0
OWNER’S MANUAL
ASSEMBLY‧OPERATION‧MAINTENANCE
WARRANTY‧PART ORDERING
CAUTION:
Exercise of a strenuous nature, as is customarily done on this equipment, should not be
undertaken without first consulting a physician. No specific health claims are made or implied as they
relate to the equipment.
IMPORTANT:
Read all instructions carefully before using this product. Retain this owner’s
manual for future reference.
SEARS CANADA INC.
‧
‧‧
‧
TORONTO , ONTARIO M5B 2B8

1
TABLE OF CONTENTS
Warranty……………………………… 2
Safety Precautions……………………. 3-4
Before you Begin……………………. 5
Assembly Check List…………………. 6
Assembly……………………………… 7-8
Folding………………………………… 9
Treadmill & Monitor Operation…….. 10-16
Parts list……………………………….. 17-20
Overview Drawing……………………. 21-22
Trouble Shooting……………………… 23
Adjustment…….……………………… 24
Maintenance…………………………... 25-27
Training guidelines…………………… 28-30
Stretching……..………………………. 31-32
Ordering Replacement parts ……….. 33
Service and Parts ……………………. 34

2
WHAT DOES THIS WARRANTY COVER? This warranty covers your Free Spirit Treadmill against
defects in material and workmanship when used for the purpose intended, under normal conditions and
provided it receives proper care.
HOW LONG DOES THE COVERAGE LAST? This warranty lasts for one year on all parts and
labour, 3 years on motor only and 10 years on the frame from date of purchase. This warranty is not
transferable and is extended only to the original owner.
WHAT WILL SEARS DO? Sears will provide a replacement part at no charge for any part found
defective in workmanship or materials during the warranty period.
WHAT DOES THIS WARRANTY NOT COVER? This warranty does not cover fitness products
which are (1) used for commercial or other income producing purposes, or (2) subject to misuse, neglect,
accident or unauthorized repairs and alterations. Some provinces do not allow the exclusion or limitation
of incidental or consequential damages, so the above limitation or exclusion may not apply to you.
HOW DO YOU GET SERVICE? In order to obtain service as provided by this warranty, contact your
nearest Sears Canada Inc. service center.
WHAT DOES THIS WARRANTY COVER? This warranty covers your treadmill motor against
defects in material and workmanship when used for the purpose intended, under normal conditions and
provided it receives proper care.
HOW LONG DOES THE COVERAGE LAST? This warranty lasts for three years from date of
purchase. This warranty is not transferable and is extended only to the original owner.
WHAT YOU NEED TO DO? You need to record the date of purchase in the area provided below.
You must keep your receipt which shows the date of purchase of your treadmill. We suggest you staple it
to this page.
WHAT WILL SEARS DO? Sears provide a replacement part at no charge for any part found defective
in workmanship or materials during the warranty period.
WHAT DOES THIS WARRANTY NOT COVER?
This warranty does not cover fitness products which
are (1) used for commercial or other income producing purposes, or (2) subject to misuse, neglect,
accident or unauthorized repairs and alterations. Some provinces do not allow the exclusion or limitation
of incidental or consequential damages, so the above limitation or exclusion may not apply to you.
HOW DO YOU GET SERVICE?
In order to obtain replacement parts as provided by this
warranty, contact your nearest Sears Canada Inc. store or service center.
WARRANTY
MANUFACTURER LIMITED WARRANTY, REPAIR AND SERVICE
SEARS THREE
-
YEAR MOTOR WARRANTY

3
IMPORTANT SAFETY INFORMATION
THIS UNIT IS INTENDED FOR HOUSEHOLD USE ONLY
READ ALL INSTRUCTIONS BEFORE USING THIS TREADMILL
CAUTION: Before starting any exercise program, it is recommended that you consult your physician.
WARNING: Connect this unit to a properly grounded outlet only.
DANGER: To reduce the risk of electric shock, always unplug the treadmill from the electrical outlet immediately after
using and before cleaning.
WARNING
To reduce the risk of burns, fire, electric shock, or injury to persons
:
1. Use 120 volt a.c. household current on a dedicated circuit.
Grounding Instructions
This product must be grounded. If it should malfunction or breakdown, grounding provides a path of least resistance for electric current to reduce the
risk of electric shock. This product is equipped with a cord having an equipment-grounding conductor and a grounding plug. The plug must be
plugged into an appropriate outlet that is properly installed and grounded in accordance with all local codes and ordinances. See diagram below for
grounding methods.
2. It is the responsibility of the owner to ensure that all users of this treadmill are adequately informed of all warnings and
precautions.
3. The use of an extension cord with this product is not recommended. If an extension cord is needed, use a short (less than 10 feet)
heavy gauge (14 gauge or better) extension cord with a three prong (grounded) plug and receptacle.
4. Never leave the treadmill unattended when plugged in. Remove the safety key and unplug the unit from the outlet when not in use
and before removing or replacing parts.
5. Never operate the treadmill if it has a damaged cord or plug, if it is not working properly, if it has been dropped, damaged, or
exposed to water. Never move the treadmill belt while the power is turned off.
6. Do not pull the treadmill by the power supply cord or use cord as a handle. Keep cord away from heated surfaces and open
flames.
7. Fitness equipment must always be installed and used on a flat surface. Do not use outdoors or near water. Do not place the unit
on a loose rug or uneven surface. It is recommended to use an equipment mat to prevent the unit from moving while it is being
used, which could possibly scratch or damage the surface of your floor. It is recommended to have a minimum of 3 metres safe
clearance on all sides of the treadmill while in use.
8. Keep the treadmill indoors, away from moisture and dust. Do not put the treadmill in a garage, covered patio or near water.
9. Do not operate the treadmill where aerosol products are used or where oxygen is being administered.
10. Read, understand and test the emergency stop procedure before using the treadmill (see operation and adjustment)
11. Do not insert any objects into any openings.
12. Inspect and properly tighten all parts of the treadmill regularly.
13. Keep children and pets away from this equipment at all times while exercising.
14.Handicapped individuals should have medical approval and close supervision when using this treadmill.
15. Do not place hands or feet under the treadmill. Always keep hands and legs off of the treadmill when others are using it.
16. Never turn on treadmill while standing on treadbelt. Always hold the handrails while using the treadmill. Always return the
treadmill to the slowest speed to provide for safe dismount and low speed restart.
17.To disconnect, turn all controls to the off position, then remove plug from outlet.
4
18.Do not attempt to raise, lower or move the treadmill until it is properly assembled. See assembly instruction and to fold and move
the treadmill. Care must be taken when lifting or moving the equipment, so as not to injure your back. Always use proper lifting
techniques. You must use any attachments that are not recommended by the manufacturer.
19. Use the treadmill only for its intended use as described in this manual. Do not use any attachments that are not recommended by
the manufacturer.
20. User weight should not exceed 350lbs (160 kg).
21. Never allow more than one person on the treadmill at once.
22. Warm up 5 to 10 minutes before each workout and cool down 5 to 10 minutes afterward. This allows your heart rate to gradually
increase and decrease and will help prevent straining muscles.
23. Never hold your breath while exercising. Breathing should remain at a normal rate in conjunction with the level of exercise
being performed.
24. Start your program slowly and very gradually increase your speed and distance.
25. Always wear suitable clothing and footwear while exercising. Do not wear loose fitting clothing that could become entangled with
the moving parts of your treadmill. Do not walk or jog barefoot, in stocking feet or loose fitting shoes or slippers.
26.This treadmill is intended for in-home use only. Do not use the treadmill in any commercial, rental or institutional setting.
WARNING: Before beginning any exercise program consult your physician. This is especially important for
individuals over the age of 35 or persons with pre-existing health problems. Read all instructions before using any
fitness equipment. We assume no responsibility from personal injury or property damage sustained by or through the
use of this product.

5
Before you begin.
Thank you for purchasing our product. Even though we go to great efforts to ensure the quality of each product we
produce, occasional errors and /or omissions do occur. In any event should you find this product to have either a
defective or a missing part please contact us for a replacement.
This product has been designed for home use only. Product liability and guarantee conditions will not be applicable to
products being subjected to professional use or products being used in a gym center.
This exercise equipment was designed and built for optimum safety. However, certain precautions apply whenever you
operate a piece of exercise equipment. Be sure to read the entire manual before assembly and operation of this
machine.
Before reading further, please familiarize yourself with the parts that are labeled in the drawing below.
MAX. USER WEIGHT 160 KGS
Safety Key
Incline Adjustment Switch
Handpulse
Speed Adjustment Switch
Handgrip Tube
Upright
Running Belt
Console
Fan Assembly
Wheel
Main Frame
Motor cover
Circuit breaker
On / off switch

6
ASSEMBLY CHECK LIST
#135. M3 x 18mm
Phillips Head Bolt (3pc)
#30. Lubricant (1pc)
#75. Safety Key (1pc)
#132. M6 Allen Wrench (1pc)
#131. Combo M5 Allen Wrench
and Screwdriver (1pc)
#130. 5/16” x ½”
Button Head Bolt (12 pcs)

7
ASSEMBLY

8
ASSEMBLY INSTRUCTIONS
STEP 1
It will take two people to assemble your unit. Remove all the components from the carton.
STEP 2
Connect the computer extension cable (50) to the lower computer cable (49).
NOTE: Ensure that the wire is safely inserted in the upright to avoid pinching the computer wire.
STEP 3
Fasten the right upright (4) into the frame base (2) securing with four button head bolts 5/16” x 1/2”
(130) using the combination wrench / screwdriver (131).
Repeat for left upright (5).
HAND TIGHTEN ONLY FOR NOW
STEP4
Connect the computer extension cable (50) to the upper computer extension cable (48) from the
console support (6).
Connect the speed switch w/cable (54) to the upper speed cable (37) from the console support (6).
Connect the incline switch w/cable (55) to the upper incline cable (38) from the console support (6).
STEP 5
Install the console support assembly (6) into the right and left uprights (4,5) securing with four button
head bolts 5/16” x ½” (130) using the combination wrench / screwdriver (131).
HAND TIGHTEN ONLY FOR NOW
NOTE: Carefully insert the cables inside the console assembly, so that you do not pinch and cut the
cables when fastening the console assembly.
STEP 6
Connect the cable from the cooling fan assembly (137) to the back of the console (52).
Attach the cooling fan assembly (137) to the top of the console assembly (52) securing with three
button head bolts M3 x 18mm (135) using the combination wrench / screwdriver (131).
ENSURE THAT ALL NUTS AND BOLTS ARE NOW FIRMLY TIGHTEN

9
MOVING YOUR TREADMILL
Before moving the treadmill turn the power switch off located on front of the motor cover and unplug the power
cord.
Caution: You must be able to safely lift 20 kg (45lbs) in order to raise\lower and move the treadmill.
To protect the floor or carpet from damage, place a mat under the treadmill. Keep the treadmill out of direct
sunlight. Do not leave the treadmill in the storage position in temperatures above 85 degrees Fahrenheit.
Folding
Ensure the incline angle of the treadmill is at it lowest position.
Lift the treadmill running deck until it is locked by the locking pedal as shown in FIGURE 2-3.
Unfolding
Apply slight forward pressure at the rear roller area to relieve pressure on the locking system. Hold the treadmill
running deck with your left hand. Pull the clenching pedal with your right hand and slowly lower the treadmill
running deck as shown in FIGURE 1. The treadmill running deck will lower unassisted when it reaches about waist
high.
Moving
Before moving the treadmill, fold the treadmill to the stored position as described above. Hold the handgrip tubes
and carefully move the treadmill to your desired location as shown in FIGURE 4.
To reduce the risk of injury, use extreme caution while moving the treadmill, do not attempt to move the treadmill
over an uneven surface.
Do not attempt to move the treadmill over uneven surface.

10
Operation of Your Treadmill
Getting familiar with the control panel
Getting Started:
Power the treadmill on by plugging it into an appropriate wall outlet, then turn on the power switch located at
the front of the treadmill below the motor hood. Ensure that the safety key is installed, as the treadmill will not
power on without it.
When the power is turned on, all the lights on the display will light for a short time. Then the Time and Distance
windows will display Odometer readings for a short time. The Time window will show how many hours the
treadmill has been in use and the Distance window will show how many miles.
(or kilometers if the treadmill is set to metric readings) the treadmill has gone. Then the treadmill will enter idle mode, which is the
starting point for operation.
Quick-Start Operation:
STEP 1: Press and release the Start key to wake display up (if not already on).
Note: Installing the tether key will also wake up the console.
STEP 2: Press and release the Start key to begin belt movement, at 0.5 mph, then
adjust to the desired speed using the Fast / Slow keys (console or hand rail). You may also use the rapid speed
keys 2 through 12 to adjust the speed.

11
STEP 3: To slow tread-belt press and hold the Slow key (console or hand rail) to the desired speed. You may
also press the rapid speed adjust keys, 2 through 12.
STEP 4: To stop the tread-belt press and release red Stop key.
Pause/Stop/Reset Feature:
STEP 1: When the treadmill is running the pause feature may be utilized by pressing the red Stop key once. This
will slowly decelerate the tread-belt to a stop. The incline will go to zero percent. The Time, Distance and
Calorie readings will hold while the unit is in the pause mode. After 5 minutes the display will reset and return
to the start up screen.
STEP 2: To resume your exercise, when in Pause mode, press the Start key. The speed and incline will return to
their previous settings.
Pause is executed when the Stop button is pressed once. If the Stop key is pressed a second time, the
program will end and a workout summary will be displayed. If the Stop button is pressed a third time, the
console will return to the idle mode (start up) screen. If the Stop button is held down for more than 3
seconds the console will reset.
Incline Feature:
•
Incline may be adjusted anytime after belt movement.
•Press and hold the Adjust keys (console or hand rail) to achieve desired level of effort. You may also
choose a more rapid increase / decrease by selecting desired key, 2 through 12, on left hand side of console
(incline).
•The display will indicate incline percent as adjustments are made.
•Incline will remain in it’s position when display is turned off.
Dot Matrix Center Display (Manual Operation):
Twenty rows of Red “dots” (8 high) indicate each segment of a workout. The dots are only to show an approximate level
(speed/incline) of effort. They do not necessarily indicate a specific value - only an approximate percent to compare levels of
intensity. In Manual Operation the Speed / Incline dot matrix window will build a profile “picture” as values are changed during a
workout.
Next to the Dot Matrix window are three LEDs labeled: Track, Speed and Incline, along with a Display button. When the Track LED
is lit the Dot matrix displays the Track profile, when the Speed LED is lit the Dot matrix displays the Speed profile and when the
Incline LED is lit the Dot Matrix displays the Incline profile. You may change the Dot Matrix profile view by pressing the Display
button. After scrolling through the three profiles, by pressing the Display button, the Dot matrix will automatically scroll through the
three displays showing each one for four seconds. The LED associated with each profile will blink while that view is displayed. One
more press of the Display button will return you to the Track profile.
1/4 Mile Track*:
The 1/4 mile track will be displayed around the dot matrix window. The flashing dot indicates your progress. Once
the 1/4 mile is complete this feature will begin again.
Pulse Grip Feature:
The Pulse (Heart Rate) console window will display your current heart rate in beats per minute during the
workout. You must use both stainless steel sensors on the front cross bar to display your pulse. Pulse value
displays anytime the upper display is receiving a Grip Pulse signal. You may not use the Grip Pulse feature
while in Heart Rate Control.
Note: Refer to Important Safety Instructions (page 3) concerning Pulse Grip operation.

12
Calorie Display:
Displays the cumulative calories burned at any given time during your workout.
Note: This is only a rough guide used for comparison of different exercise sessions, which
cannot be used for medical purposes.
Speakers:
The console has 2 built-in Speakers. You may Plug an Audio Source (CD player, MP3, Computer,etc.) into the
Jack on the Left side of console.
There is no volume control on console, volume must be controlled by Audio Source.
To Turn Treadmill Off (Blank out Display):
Two methods accomplish this: Use either one.
(1) Display will automatically turn off (blank out) after 30 minutes (no key operations) in
Pause / Stop mode.
(2) Remove tether cord.
Programmable Features
This treadmill offers 5 factory preset programs, 2 user defined programs, 2 H.R.C. programs and one manual
program. Each preset program has a maximum speed level that is displayed when a desired workout is
chosen. The maximum speed that the particular program will achieve will be displayed in the Speed window. The
included user programs (User 1 and User 2) are for custom workouts.
To Select a Program:
STEP 1: Press the desired PROGRAM key. Press enter to select the program. The display will prompt you through
the programming or you can just press Start to begin the program with default values.
STEP 2: If enter was pressed, the Time window will blink with the default value of 20 minutes. You may use any
of the up/down keys to adjust the time. After adjusting, or to accept the default, press enter.
(Note: You may press start at any time during the programming to start the program.)
STEP 3: The Calorie window will now be blinking a value, which is your Body Weight. Entering the correct body
weight will affect the calorie count. Use the Up/Down keys to adjust, then press enter.
A note about the Calorie display: No exercise machine can give you an exact calorie count because there are too
many factors which determine exact calorie burn for a particular person. Even if someone is the exact same body
weight, age and height, their calorie burn may be very different than yours. The Calorie display is to be used as a
reference only to monitor improvement from workout to workout.
STEP 4: The pulse window will now be blinking a value, which is your Age. Entering your correct age affects the
Heart Rate Control programs. Use the Up/Down keys to adjust, then press enter.
Your age determines the maximum heart rate you may achieve. Since the Heart Rate control features are based on a
percentage of your maximum heart rate, it is important to enter the correct age for these features to work properly.
STEP 5: The Speed window will now be blinking the preset top speed of the selected program. Use the Up/Down
keys to adjust, then press enter. Each program has various speed changes through out, this allows you to limit the
highest speed the program can reach.

13
User Programs:
STEP 1: Select User 1 or User 2 via the PROGRAM key then press Enter. Note that the dot matrix display
portion will have a single row of dots at the bottom (Unless there is a previously stored program).
STEP 2: Note the clock (Time) window is flashing. Use the Adjust
▲▼
keys to adjust up from 10 minutes (if
desired). Press ENTER key. This is a must to continue even if time is not adjusted.
STEP 3: The Calorie window will now be blinking a bodyweight value. Enter your bodyweight and press Enter.
STEP 4: The Pulse window will now be blinking an Age value. Adjust the age and press enter.
STEP 5: The first column (segment) will now be blinking. Using the Fast / Slow keys, adjust the speed level to
your desired effort for the first segment then press enter. The second column will now be blinking. Repeat the
above process until all segments have been programmed. The first column will be blinking again. This is for the
incline programming. Repeat the above process to program all segments for incline.
STEP 6: Press the Start button to begin the workout and also save the program to memory.

14
TARGET HEART RATE
●
The old motto, “no pain, no gain”, is a myth that has been overpowered by the benefits of exercising
comfortably. A great deal of this success has been promoted by the use of heart rate monitors. With the proper use
of a heart rate monitor, many people find that their choice of exercise intensity is either too high or too low and
exercise is much more enjoyable by maintaining their heart rate in the desired benefit range.
To determine the benefit range in which you wish to train, you must first determine your Maximum Heart Rate.
This can be accomplished by using the following formula: 220 - User’s Age = Maximum Heart Rate. If you enter
your age during programming of the console the console will perform this calculation automatically. This is used
for the HR control programs. After calculating your Maximum Heart Rate, you can decide upon which goal you
would like to pursue. The two most popular reasons for, or goals of exercise, are cardiovascular fitness (training for
the heart and lungs) and weight control. The black
columns on the chart above represent the
Maximum Heart Rate for a person whose age is
listed at the bottom of each column. The training
heart rate, for either cardiovascular fitness or
weight loss, is represented by two different lines
that cut diagonally through the chart. A definition
of the lines’ goal is in the bottom left-hand corner
of the chart. If your goal is cardiovascular fitness
or if it is weight loss, it can be achieved by training
at 90% or 70%, respectively, of your Maximum
Heart Rate on a schedule approved by your
physician. Consult your physician before
participating in any exercise program.
With all Heart Rate Control treadmills, you may
use the heart rate monitor feature without using the
Heart Rate Control program. This function can be used during manual mode or during any of the nine different
programs. The Heart Rate Control program automatically controls incline.

15
USING A HEART RATE TRANSMITTER
How to wear your wireless chest strap transmitter:
1. Attach the transmitter to the elastic strap using the locking parts.
2. Adjust the strap as tightly as possible as long as the strap is not too tight to remain comfortable.
3. Position the transmitter with the Free Spirit logo centered in the middle of your body facing away from your
chest (some people must position the transmitter slightly left of center). Attach the final end of the elastic strap by
inserting the round end and, using the locking parts, secure the transmitter and strap around your chest.
4. Position the transmitter immediately below the pectoral muscles.
5. Sweat is the best conductor to measure very minute heart beat electrical signals. However, plain water can also
be used to pre-wet the electrodes (2 black square areas on the reverse side of the belt and either side of transmitter).
It’s also recommended that you wear the transmitter strap a few minutes before your work out. Some users, because
of body chemistry, have a more difficult time in achieving a strong, steady signal at the beginning. After “warming
up”, this problem lessens. As noted, wearing clothing over the transmitter/strap doesn’t affect performance.
6. Your workout must be within range - distance between transmitter/receiver – to
achieve a strong steady signal. The length of range may vary somewhat but generally stay close enough to the
console to maintain good, strong, reliable readings. Wearing the transmitter immediately against bare skin assures
you of proper operation. If you wish, you may wear the transmitter over a shirt. To do so, moisten the areas of the
shirt that the electrodes will rest upon.
Note: The transmitter is automatically activated when it detects activity from the user’s heart. Additionally, it
automatically deactivates when it does not receive any activity. Although the transmitter is water resistant, moisture
can have the effect of creating false signals, so you should take precautions to completely dry the transmitter after
use to prolong battery life (estimated transmitter battery life is 2500 hours). The replacement battery is Panasonic
CR2032.
Erratic Operation:
Caution! Do not use this treadmill for Heart Rate Control unless a steady, solid Actual Heart Rate value
is being displayed. High, wild, random numbers being displayed indicate a problem.
Areas to look for on interference:
(1) Treadmill not properly grounded - A must!
(2) Microwave ovens, T.V.’s, small appliances, etc.
(3) Fluorescent lights.
(4) Some household security systems.
(5) Perimeter fence for a pet.
(6) Loose treadmill console / upright.
WARNING!
DO NOT USE THE HEART RATE CONTROL PROGRAM IF YOUR HEART RATE
IS NOT REGISTERING PROPERLY ON THE TREADMILL’S DISPLAY!
Special Operations of Heart Rate Functions:
All treadmills that are factory equipped with a Heart Rate Control system have many distinct features both in the
Heart Rate Control program and during heart rate monitoring. This section will give you a more detailed
background to use your treadmill in the most effective manner.

16
How the Heart Rate Control Program Works:
Heart Rate Control uses your treadmill’s incline system to adjust your heart rate.
Increases and decreases in elevation affect heart rate much more efficiently than changes in speed. Additionally,
changes in incline keep you in control of the machine’s speed instead of the machine controlling you.
Selecting a Heart Rate Control Program:
You have the option, during the setup mode, to choose either the Weight Control (H-1) program or the
Cardiovascular (H-2) program. Weight Control attempts to maintain your heart rate at 70% of your Maximum
Heart Rate. Cardiovascular attempts to maintain your heart rate at 90% of your Maximum Heart Rate. Your
Maximum Heart Rate is based upon a formula that subtracts your age from 220. Your age input is performed during
the setup mode.
CAUTION!
The target value used in H-1 and H-2 programs is a suggestion only for normal, healthy individuals. Do
not exceed your limits! You may not be able to obtain your chosen target. If in question, enter a higher
age value that will set a lower target goal.
Heart Rate Control Operation
CAUTION!
Intended for wireless transmitter chest strap only.
Do not use Pulse Grip bar for Heart Rate Control. You must
receive a strong / steady value in heart rate window.
STEP 1:
Press HR1 or HR2 button.
STEP 2: The Pulse window will be blinking, showing the default HR for this program. You may adjust it and
press enter if you want or just press enter to accept the default value.
STEP 3: The Calorie will now be blinking showing bodyweight. Adjust and press enter or press enter to accept
default.
STEP 4:
The Pulse window will now be blinking showing age. Adjust and press enter or press enter to accept
default.
STEP 5: The Time window will now be blinking. Adjust the time and press enter.
STEP 6: Press Start to begin program.

17
Parts List – 30186-1622968
KEY NO. PART NO. DESCRIPTION Q'TY
1
296801
Main Frame
1
2
296802
Frame Base
1
3
296803 Incline Bracket
1
4
296804 Right Console Mast
1
5
296805 Left Console Mast
1
6
296806 Console Support
1
7
296807 Deck Cross Brace
1
8
276808 Outer Slide
1
9
276809 Ineer Slide
1
10
276810 Link
1
11
276811 Link Shaft
1
12
276812
Shaft Bushing
2
13
276813
Fastening Bracket
2
14
276814
Clevis Pin
1
15
276815
Fastening Bushing
1
16
276816
Dual Rota-Spring
1
17
276817
Release Lever
1
18
276818
ChenChing Roat-Spring
1
19
276819
Cylinder
1
20
276820
Drive Belt
1
21
276821
Front Roller W/Pulley
1
22
276822
Rear Roller
1
23
276823
Running Deck
1
24
276824
Running Belt
1
25
276825
Foam (A)
2
26
276826
Foam (B)
2
27
276827
Steel Rope Drawspring
1
28
276828
Wire Clamp
1
29
276829
Wire Tie Mount
6
30
276830
Lubricant
1
31
276831
Steel Rope Weldment
1
32
276832
Bottom Motor Plate
1
34
296834
Motor
1
35
276835
Incline Motor
1
36
296836
Controller
1
37
276837
800mm_Speed Cable (Upper)
1
38
276838
800mm_Incline Cable(Upper)
1
39~2
276839-2
Handpulse Wire, Coiled
1
39~3
276839-3
Handpulse Assembly Top
2

18
KEY NO.
PART NO. DESCRIPTION Q'TY
39~4
276839-4
Handpulse Assembly Bottom
2
39~5
276839-5
Handpulse End Cap
2
40
276840
Sensor W/Cable
1
41
276841
Breaker
1
42
276842
Power Socket
1
43
276843
On/Off Switch
1
44
276844
Power Cord
1
45
276845
100m/m x 764 x 764_Connecting Wire (Black)
1
46
276846
300m/m x 764 x 764_Connecting Wire(White)
1
47
276847
300m/m x 764 x 764_Connecting Wire (Black)
1
48
276848
800 m/m_Computer Cable (Upper)
1
49
276849
1150 m/m_Computer Cable (Lower)
1
50
276850
1300 m/m_Computer Cable (Middle)
1
51
276851
Sensor Rack
1
52~1
296852-1
Top Console Cover
1
52~2
296852-2
Bottom Console Cover
1
52~3
296852-3
Book Rack
2
52~4
296852-4
Beverage Holder
1
52~5
296852-5
Face Plate Lens Cover
1
52~22
296852-22
700m/m_Speaker W/Cable
1
52~23
296852-23
250m/m_Speaker W/Cable
1
52~24
296852-24
200m/m_Amplifier
1
52~25
296852-25
400m/m_Power Cord Of Amplifie
1
52~27
296852-27
3x10 m/m_Self Tapping Screw
2
52~28
296852-28
3x8m/m_Self Tapping Screw
6
52~29
296852-29
Plastic Washer
6
53
296853
Top Motor Cover
1
54
296854
Speed Adjustment Switch W/Cable
1
55
296855
Incline Adjustment Switch W/Cable
1
56
276856 Cushion
6
57
276857
Ø60 ×35L_Transportation Wheel(A)
2
58
276858
Ø62 x Ø32 x 30L_Transportation Wheel(B)
2
59
276859
30 x 60_Square End Cap
2
60
296860
1275m/m_Foot Rail
2
61
276861
Ø38_Button Head End Cap
2
62
296862
Frame Base Cap (L)
1
63
296863
Frame Base Cap (R)
1
64
296864
Non-Slip Rubber (L)
1
65
296865
Non-Slip Rubber (R)
1

19
KEY NO. PART NO. DESCRIPTION Q'TY
66
296866
Handgrip Side Cap (R)
2
67
296867
Handgrip Side Cap (L)
2
68
296868
Rear Adjustment Base (L)
1
69
296869
Rear Adjustment Base (R)
1
70
276870
Motor Cover Anchor
5
71
276871
Ø10 x Ø24 x 3T __Nylon Washer(A)
2
72
276872
Ø50 x Ø13 x 3T__Nylon Washer(B)
4
73
296873
Foot Pad
2
74
276874
Motor Bracket
1
75
296875
Safety Key
1
76
276876
Belt Guide
2
77
276877
Wheel Sleeve
2
78
276878
Magnet
2
79
276879
Computer Cable Drawspring
2
80
276880
1/2" x 1-1/4" _ Carriage Bolt
2
81
276881
1/2" x 1"_Hex Head Screw
2
82
276882
3/8" x 4-1/2"_Socket Head Cap Screw
1
83
276883
3/8" x 3-3/4"_Hex Head Screw
1
84
276884
3/8" x 1-1/2"_Hex Head Screw
1
85
276885
3/8" x 3/4"_Hex Head Screw
4
86
276886
3/8" x 2"_Thumb Head Socket Screw
2
87
276887
5/16" x 1"_Button Head Socket Screw
2
88
276888
5/16" x 2-3/4"_Button Head Socket Screw
2
89
276889
M8 x 60m/m_Hex Head Screw
1
90
276890
M8 x 80m/m_Socket Head Cap Screw
2
91
276891
M8 x 50m/m_Flat Head Countersink Screw
2
92
276892
M8 x 25m/m_Flat Head Countersink Screw
6
93
276893
M3 x 10m/m_Phillips Head Screw
1
94
276894
M5 x 20m/m_Phillips Head Screw
1
95
276895
M8 x 12m/m_Hex Head Screw
2
96
276896
5/16" x 42 m/m_Button Head Socket Screw
1
97
276897
M5_Nyloc Nut
1
98
276898
1/2" _Nyloc Nut
4
99
276899
3/8" _Nyloc Nut
2
100
2768100
5/16" _Nyloc Nut
3
101
2768101
M8_Nyloc Nut
1
102
2768102
3/8" _Nut
3
103
2768103
M3_Nut
1
104
2768104
Ø35 x Ø5/16" x 1.5T_Flat Washer
2
105
2768105
Ø25 x Ø10 x 2.0T_Flat Washer
4
106
2768106
Ø19 x Ø10 x 1.5T_Flat Washer
2
Table of contents
Other Freespirit Treadmill manuals

Freespirit
Freespirit C 249 29279 0 User manual

Freespirit
Freespirit 123-30313-0 User manual

Freespirit
Freespirit Free Spirit C 249 30860 0 User manual

Freespirit
Freespirit 30519 User manual

Freespirit
Freespirit Free Spirit C 249 30120 0 User manual

Freespirit
Freespirit 30516 User manual

Freespirit
Freespirit 30518 User manual

Freespirit
Freespirit 123 30410-0 User manual

Freespirit
Freespirit 722.30822 User manual

Freespirit
Freespirit C 249 30087 0 User manual