Scrub
• Wash all parts thoroughly before assembling or painting. The parts may have mold
release on them from the casting process preventing the paint from adhering. Scrub
all cast metal and resin parts with dish soap (Dawn brand is best) and/or an abrasive
cleanser such as Comet and hot (tap) water. Use an old toothbrush to get into all the
details on the parts, rinse and let dry.
Assembly
• We recommend spraying all resin parts with a good quality automotive primer before
painting.
ŸGlue the life rings to the sides of the wheelhouse over the peg.
ŸGlue the wheelhouse base into the bottom of the wheelhouse with the indexing
rectangle facing downward so that it will fit into one of the 3 rectangular openings in
the deck.
ŸIt may be easier to paint everything separately before gluing together, so this is a
good time to paint all parts if desired.
ŸGlue the clear lens to the front of the spotlight. Glue the assembled spotlight into the
hole on the roof of the wheelhouse.
ŸThere are 2 options to build this kit. Decide if you want to build it with the wheelhouse
foreward or aft.
ŸGlue the wheelhouse to the deck in the position you have chosen. NOTE: If you’re
using the foreward position, be sure to push the wheelhouse base indexing rectangle
forward as far as it will go to allow enough room for the mast and ring behind it.
Likewise, if you are using the aft position, push it back all the way.
ŸAssemble the mast and boom using the included copper wire. Fig 1
ŸGlue the Mast Ring onto the bottom of the Mast pushing it up
enough to allow some of the Mast to extend. Fig 1 *NOTE: if
positioning the wheelhouse in the aft position, you will need to trim
some of the mast ring off on the boom side of the mast to fit up
against the fish well.
ŸGlue the fish wells into the remaining 2 openings on the deck.
ŸGlue the Mast Winch onto the Mast just below the pivot point.
ŸGlue the Mast assembly in the appropriate hole either just in front of
or just behind the Wheelhouse.
ŸGlue the Deck Storage Box in the remaining hole on the deck
between the fish wells.
ŸWorking one window at a time, place a clear window piece into a recess on the
outside of the window frame on the wheelhouse. Holding the plastic in place, apply a
small amount of glue to each corner of the window frame allowing the glue to wick
down and under the clear plastic. This technique glues the window in place without
getting any glue on the plastic. Repeat for the remaining windows.
ŸGlue the ship’s wheel, located on the brass sheet, to the inside front of the
wheelhouse so that it is just visible through the front window opening.
ŸGlue the Anchor Winch Drum onto the Winch Base and glue the assembled winch
into the hole on the deck in the bow.
ŸAttach the Anchor to one end of the chain using a jump ring. Thread the other end of
the chain through one of the bow holes and over the windlass on the Anchor Winch.
Glue the end of the chain to one of the chain locker holes located just behind the
anchor winch on the deck.
ŸWheelhouse in Forward Position only: Using a #68 drill bitt, drill a hole up through
the bottom of the forward rail. This will give you a tie off point. Tie a length of rope to
the front loop at the top of the mast and insert the other end of the rope into the
drilled hole at front of the bow.
Fig 1
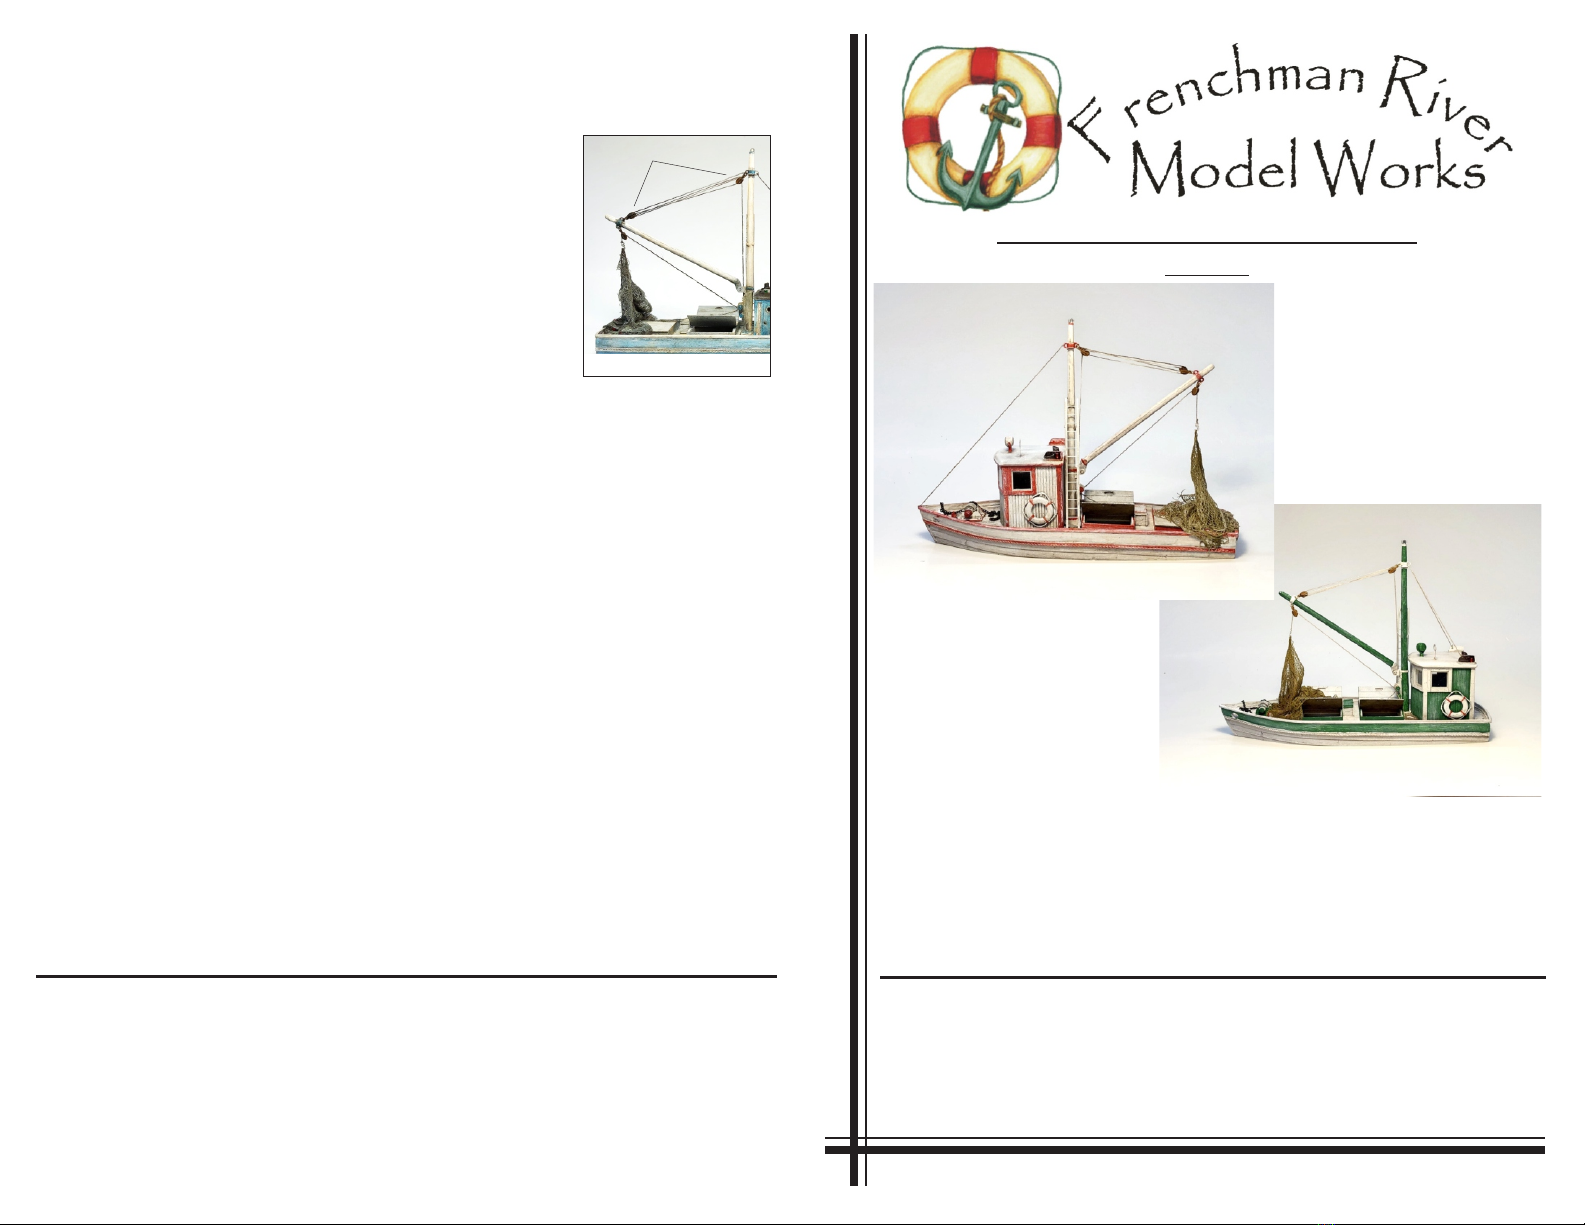
Frenchman River Model Works O/On30 1:48 Scale Fishing Boat
Kit Contents
Recommendations
Before assembly or painting, read and understand assembly sequence. Some items in the
kit may be difficult to paint once the kit is totally assembled, so you may want to pre-paint some
parts/assemblies as you go. You may paint your model with any hobby paints, acrylics, oil/enamels
or lacquers. We recommend using powdered pastel chalks in yellows, reds, browns, and black,
brushed on with a fairly stiff short bristled paintbrush for that old weathered and dirty look. After
painting, assembly, and detailing, we recommend misting on a few coats of gloss or matte acrylic
clear spray (depending on the look you are after). Caution: Mist lightly and allow to dry a few
minutes between coats to prevent solvents in spray from softening and possibly causing the paint
to run! Use your imagination and above all, have fun!
We recommend that you use cyanoacrylate instant glue (C.A. Glue) to assemble your
kit as regular plastic cement will not work on resin kits. We also recommend that you purchase or
make a one-drop glue applicator. You can use a thin piece of wire or a large needle and bend a
slight hook at one end, dip this hook into a drop of CA glue and it will apply a drop of glue exactly
where you want it. A dental pick with a hooked end or even a small crochet hook works great.
You may also use this glue and your glue applicator to fill small air bubbles and gaps in the resin
parts. Our kits have very little “flash” and require very little cleaning, however, it is hard to totally
eliminate some small air bubbles and gaps on certain cast resin parts, but they are easy to fill. You
can fill these with hobby putty/filler or, our favorite method is to spray the spot to be filled with
CA Accelerator then apply a drop of glue with the applicator. It will usually set up instantly.
Repeat until the void is filled slightly above surrounding surface. When it’s set up, sand smooth
and you’re finished. Frenchman River Model Works offers a line of quality products to assist you.
Clean
• Even though the parts in our kits require very little cleaning, there will be some
areas such as parting lines that may need some work. Using a fine, flat needle file, sharp
hobby knife, and/or sand paper, clean areas as needed. Be careful you don’t sand off any
details. There may be a thin film called “flash” in the window, porthole openings and
openings in the forward hull (for ropes and anchor chain). Carefully cut this away. Fill any
air bubbles using the techniques described in “Recommendations”.
1 Single Block Pulley
Window Glazing
Material
4” Chain
Netting
12’ Rope
1 Green Bead
1 Red Bead
1 Clear Beads
8 Fishing Floats
Brass Detail Sheet
Fish Well Doors
2 Double Block Pulleys
4 Jump Rings
1 Copper Wire
Resin Parts
Waterline Hull
Wheelhouse
Wheelhouse Base
2 Fish Wells
Deck Gear Box
Mast
Boom
Mast Ring
2 Life Rings
Miscellaneous Parts
Metal Parts
Winch Base
Winch Drum
Mast Winch
Anchor
Searchlight