manuals.online logo
Brands
  1. Home
  2. •
  3. Brands
  4. •
  5. Frigidaire
  6. •
  7. Refrigerator
  8. •
  9. Frigidaire LGHB2869LF3 Owner's manual

Frigidaire LGHB2869LF3 Owner's manual

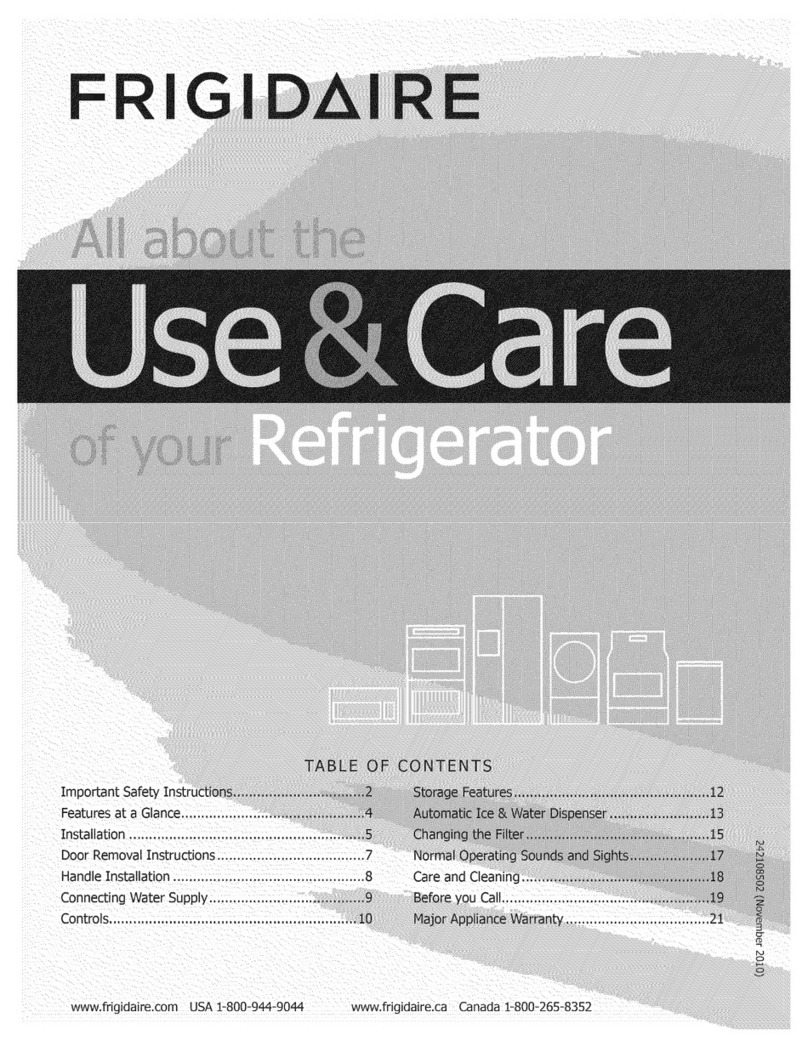
TABLE OF CONTENTS
Important Safety Instructions ................................. 2 S_ge Features ...........................................
Features at a Glance.............................................. _ S_r, ng _0d and Sav,ng Enekgy ..................... iiii
Instalation........................................................... 5 Ne_al _pe#ating SoUnds and Sigh_ ..............
Door Removal Instructions ..................................... 9 Changing the Filer ........................................
Installing Door Handles ........................................ 11 Care and Cleaning .........................................
Connecting Water Supply ..................................... 13 Before you Call..............................................
Controls .............................................................. 14 Major App iance Warranty .................
Automatic Ice & Water Dispenser ......................... 17
Automatic Ice Maker - Freezer .............................. 19
C3
s
www.frigidaire.com USA1-800-944-9044 www.fdgidaire.ca Canada 1-800-265-8352
Pleasereadallinstructionsbeforeusingthis
refrigerator,
For your Safety
o DO NOT store or use gasoline, or other flammable
liquids in the vicinity of this or any other appliance.
Read product labels for warnings regarding
flammability and other hazards.
DO NOT operate the refrigerator in the presence of
explosive fumes.
Avoid contact with any moving parts of automatic
ice maker.
Remove all staples from the carton. Staples can
cause severe cuts, and also destroy finishes if they
come in contact with other appliances or furniture.
Definitions
This isthe safety alert symbol. It is used to alert
you to potential personal injury hazards. Obey all safety
messages that follow this symbol to avoid possible injury
or death.
DANGER indicates an imminently hazardous situation
which, if not avoided, will result in death or serious
WARNING indicates a potentially hazardous situation
which, if not avoided, could result in death or serious
Doors
Handles are secure and tight
Door seals completely to cabinet on all sides
13 Freezer drawer is level across the top
Leveling
Refrigerator is level, side-to-side and tilted
1/4" (6mm) front-to-back
13 Toe grille is properly attached to refrigerator
13 Cabinet is setting solid on all corners
Electrical Power
13 House power turned on
13 Refrigerator plugged in
Ice Maker
13 House water supply connected to refrigerator
13 No water leaks present at all connections -
recheck in 24 hours
13 Ice maker is turned ON
13 Ice & water dispenser operates correctly
Final Checks
t:3 Shipping material removed
I::3 Fresh food and freezer temperatures set
CI Crisper humidity controls set
I:3 Registration card sent in
CAUTION indicates a potentially hazardous situation
which, if not avoided, may result in minor or moderate
IMPORTANT indicates installation, operation or
maintenance information which is important but not
hazard-related.
Child Safety
Destroy or recycle the carton, plastic bags, and any
exterior wrapping material immediately after the
refrigerator is unpacked. Children should NEVER
use these items to play. Cartons covered with rugs,
bedspreads, plastic sheets or stretch wrap may become
airtight chambers, and can quickly cause suffocation.
Proper Disposal of your Refrigerator or
Freezer
Risk of child entrapment
Child entrapment and suffocation are not problems of the
past. Junked or abandoned refrigerators or freezers are
still dangerous - even if they will sit for "just a few days".
If you are getting rid of your old refrigerator or freezer,
please follow the instructions below to help prevent
accidents.
Proper Disposal of Refrigerators/Freezers
We strongly encourage responsible appliance recycling/
disposal methods. Check with your utility company or
visit www.recyclemyoldfridge.com for more information
on recycling your old refrigerator.
Before you throw away your old refrigerator/
freezer: E
*Remove doors.
o Leave shelves in place
so children may not
easily climb inside.
Have refrigerant
removed by a qualified ..........
service technician.
These guidelines must be followed to ensure that
safety mechanisms in this refrigerator will operate
Fault Interrupter (GFI) circuit. Do not use an
extension cord or adapter plug.
If the power cord is damaged, it should be replaced
by an authorized service technician to prevent any
risk.
Never unplug the refrigerator by pulling on the
power cord. Always grip the plug firmly, and
pull straight out from the receptacle to prevent
damaging the power cord.
Unplug the refrigerator before cleaning and before
replacing a light bulb to avoid electrical shock.
Performance may be affected if the voltage varies
by 10% or more. Operating the refrigerator with
insufficient power can damage the compressor.
Such damage is not covered under your warranty.
Do not plug the unit into an electrical outlet
controlled by a wall switch or pull cord to prevent
the refrigerator from being turned off accidentally.
Pressing and holding the On/Off button for 3
seconds, located on the temperature control panel,
will disable your refrigerator's cooling system but does
not disconnect the power to the light bulb and other
electrical components. To turn off power to your
refrigerator you must unplug the power cord from the
electricaloutlet................
Grounding type
wall receptacle
fDo not, under -'_
any circumstances,
cut, remove, /
or bypass the /
Electrical information
The refrigerator must be plugged into its
own dedicated 115 Volt, 60 Hz., 15 Amp, AC
only electrical outlet. The power cord of the
appliance isequipped with a three-prong grounding
plug for your protection against electrical shock
hazards. It must be plugged directly into a properly
grounded three prong receptacle. The receptacle
must be installed in accordance with local codes
and ordinances. Consult a qualified electrician.
Avoid connecting refrigerator to a Ground
Power cord with
3-prong grounded plug
To avoid personal injury or property damage, handle
tempered glass shelves carefully. Shelves may break
suddenly if nicked, scratched, or exposed to sudden
temperature change.
Features may vary according to model
Can
Rack
(select models)
S!
Shelves
Crisper
Drawer
Air Filter
(above ice bin)
(select models) Tncandescent Light (select models)
iceFlipper Guide LED Light (select models)
Haker
Water
Filter Dairy
_artment
(select models_
Filter
_illSafe TM
Shelves
Flipper
Hullion
Crisper
Drawer
Door
Bin
(select models)
Adjustable
Hinges Haker Freezer Baskets
Toe
Grille
Required Tools
You will need the following tools:
Components Provided:
Top Hinge Top Hinge
Cover Front Cover Rear
Screw_ _Screw
_,_ L....
sHi%
Tools Necessary:
Head 3/8" Fixed
Wrench
This Use & Care Guide provides general installation and
operating instructionsfor your model. We recommend
using a service or kitchen contracting professional to
install your refrigerator. Use the refrigerator only as
instructed in this Use & Care Guide. Before starting
the refrigerator, follow these important first steps,
Location
- Choose a place that is near a grounded, non-GFCI,
electrical outlet. Do Not use an extension cord or
an adapter plug.
- If possible, place the refrigerator out of direct
sunlight and away from the range, dishwasher, or
other heat sources.
- The refrigerator must be installed on a floor that is
level and strong enough to support a fully loaded
refrigerator.
• Consider water supply availability for models
equipped with an automatic ice maker.
Do Not install the refrigerator where the temperature
will drop below 55°F (13°C) or rise above 110°F
(43°C). The compressor will not be able to maintain
proper temperatures inside the refrigerator.
Do Not block the toe grille on the lower front of your
refrigerator. Sufficient air circulation is essential for the
proper operation of your refrigerator.
Installation
- Allow the following clearances for ease of
installation, proper air circulation, and plumbing
and electrica! connections:
Sides & Top 3/8inch (9.5 mm)
Back 1 inch (25.4 ram)
If your refrigerator is placed with the door hinge side
against a wall, you may have to allow additional space
so the door can be opened wider.
Door opening
The refrigerator doors are designed to shut by
themselves within a 20 degree opening.
Your refrigerator should be positioned to allow easy
access to a counter when removing food. For best use of
refrigerator drawers and freezer baskets, the refrigerator
should be in a position where both can be fully opened.
LevelingFreezer Drawer (ifnecessary)
DO NOT remove center screw from freezer drawer.
This is a factory adjustment.
To level the freezer drawer:
1Check gasket sea! around top, bottom, and sides of
freezer drawer.
2 If gasket is not sealed, open drawer and slightly
loosen four (4) drawer screws (two (2) on each
side) to allow drawer to rotate.
Close drawer and recheck the sea! on the gasket
(A). Open the drawer grabbing by the sides in the
center (B). Be careful not to rotate the drawer.
4 Tighten four (4) drawer screws.
5Recheck gasket sea!.
6 Install the toe grille by fitting into place.
Level Refrigerator &Adjust Doors
(if necessary)
Guidelines for final positioning of your refrigerator:
*All four corners of the cabinet must rest firmly on
the floor.
*The sides should tilt !/4 inch (6 mm) from front to
back (to ensure that doors close and seal properly).
Doors should align with each other and be level.
Host of these conditions can be met by raising or
lowering the adjustable front rollers,
To level the cabinet using the front rollers:
1Slightly open freezer drawer. Lift the toe grille and
gently pull forward (see illustration).
Toe Grille Must
/_ li _ Fit In Slot On /H_L \ I
' f% 1 Anti-tip Bracket (_'1 /I
, _ _ _]l_d' Screw/Washer _II _:_ 11
\_ Assembly
2 You can raise or lower each door. use a 3/8 inch
socket wrench to turn the adjustment screws (1
per side).
To raise: turn adjustment screw clockwise.
To lower: turn adjustment screw counterclockwise.
3Ensure both doors are bind-free with their seals
touching the cabinet on all four sides and that
cabinet isstable.
4 After unit is leveled, lower anti=tip leg until it
contacts the floor.
Anti4ip
To adjust the door stop:
Door stop is adjustable between 85 to 145 degrees,
View shown is looking up at the bottom of the
refrigerator door.
5Re-tighten screw.
Re-tighten Screw
Adjustable Door Stop
IOpen door to provide access to screw.
2 Loosen screw.
3 Adjust door to desired location.
6 Ensure door stops in desired location before
resuming normal use.
To level the doors using the adjustable lower
hinge (select models):
1Remove all food items from door bins on door
being adjusted.
2 Open doors to 90 degrees.
3 Loosen or remove screw.
O Loosen or Remove
Screw
©
4
Adjusting Door
Rotate door stop until it makes contact with the
lower hinge.
Bottom of Door
Loosen/Remove Screw
Adjustable hinge should only be used after doors have
been leveled with rollers.
4Lift the door while adjusting the washer. To raise
the door, rotate washer clockwise (when viewed
from the bottom). To lower door, rotate washer
counter-clockwise when viewed from the bottom).
Raising/Lowering Door
Re-tighten the screw, ensuring it is between the
spokes of the washer. Screw will not be tight, just
insert until it is flush with the hinge.
Screw
To adjust the flipper mullion:
1 Loosen the screw located on the flipper mu!lion
hinge.
Adjusting Flipper Mullion Screw
2Adjust flipper mullion height. For proper
connection with the flipper mullion guide, there
should be a separation about the thickness of a
coin (0.060 inches, or 1.5 mm) between the guide
and flipper mullion.
If after adjusting doors higher the door makes a
popping/clicking sound, remove screw and replace with
the longer one supplied in the handle package.
Adjusting Flipper Mullion Height
3Re-tighten screw.
Getting through narrow spaces
If your refrigerator will not fit through an entrance area,
you can remove the doors. Check first by measuring the
entrance.
To prepare for removing the doors:
1 Make sure the electrica! power cord is unplugged
from the wall outlet.
2 Open the freezer drawer and remove the toe grille
(see "[nstallation" section).
3 Remove any food from the door shelves and close
the doors.
To remove the top hinge covers:
1 Remove the two (2) screws from each cover over
the top door hinges.
2 Lift inside edge of hinge cover and tilt back.
covo, = w c0vo,
Top.!,ge _//_---:.\. so,ow
Hinge/ II /"
To remove the refrigerator doors:
1 Trace lightly around the door's top hinges with a
pencil. This makes reinstallation easier.
2Disconnect the harness by grasping both sides of
the connector firmly, depress the latch, and pull
apart. Remove the two (2) screws from the top
hinge. Lift the door off of the bottom hinge and set
it aside.
3Detach the water tube from the connector
located behind the refrigerator and pull the tube
back out to the front of the unit. The connector
releases when you press inward on the outer
sleeve while pushing the tube toward the
connector then while continuing to hold in the
sleeve, pull the tube away.
DO NOT remove the ground screw from hinge.
Youwillbepullingapproximatelythree(3)feetof
watertubefromthebackoftherefrigerator.
4 Unscrewthethree(3)lowerhingescrewsand
hingeif necessary.
To reinstall the right door, reverse the above steps.
Lower Hinge Removal
Once both doors are in place, ensure they are aligned
with each other and level (Please see the "Installation"
section for more details), and replace the top hinge cover.
Be sure doors are set aside in a secure position where
they cannot fall and cause personal injury, or damage
to the doors or handles.
Removing Freezer Drawer
1 Open freezer drawer.
2 Remove drawer screws on right and left sides (two
(2) screws on each side).
Drawer _J Drawer
Screw
DO NOT remove center screw from freezer drawer.
Drawer is heavy. Use caution when lifting.
3Lift drawer up and out to remove.
Installing Freezer Drawer
1 With lower slides pulled out, hang drawer onto
slide brackets ensuring pins on each side are fully
inserted into slots on each side.
il0
Drawer
Assembly
iIo )
Fully Extend
Drawer Slides
Slot_
ii!!iiii
Cabinet
2 Reinstall four (4) drawer screws (two (2) per side),
tighten down, and close drawer (C).
ii_i i
Install Screws
(2) Each
3
4
5
Check gasket sea! around top, bottom, and sides of
freezer drawer.
If gasket is not sealed, open drawer and slightly
loosen four (4) drawer screws (two (2) on each
side) to allow drawer to rotate.
Close drawer and recheck the seal on the gasket
(A). Open the drawer grabbing by the sides in the
center (B). Be careful not to rotate the drawer.
Push Against
Freezer Drawer
6 Tighten four (4) drawer screws.
7 Recheck gasket sea!.
8Install the toe grille by fitting into place.
Door Handle Mounting Instructions for Frigidaire Gallery ®
1 Remove handles from carton and any other protective packaging.
2 Position fresh food handle end over upper and lower pre-installed shoulder bolts (A) that are fastened into door,
ensuring the holes for the set screws are facing towards the opposite door.
3 While holding handle firmly against door, fasten upper and lower Allen set screws (B) with supplied Allen wrench.
4 Repeat steps 2 and 3 to install opposite handle. Ensure the holes for the set screws are facing towards the first door.
5Position freezer handle end over left and right pre-installed handle mounts that are fastened to the door, ensuring
the holes for the set screws are facing down.
6While holding handle firmly against door,looselytighten far right Allen setscrew (B) with supplied Allen wrench until there is
no gap between handle and door.
7Still holding the handle firmly to the door,firmly tighten far left Allen set screw (B) with supplied Allen wrench.
8 Return to the far right Allen set screw (B) and firmly tighten with supplied Allen wrench.
All set screws should be tightened so the screw is below the surface of the handle. The handles should be drawn
tight to freezer and refrigerator doors with no gaps. Opening the opposite door while tightening the Allen screw
makes installation easier.
The door handle may loosen over time or if it was installed improperly. If this happens, tighten the set screws on the
handles.
Mounting Refrigerator Handles
Mounting Freezer Handle
Door Handle Mounting Instructions for Frigidaire Professional ®
1 Remove handles from carton and any other protective packaging.
2 Position fresh food handle end over upper and lower pre-installed shoulder bolts (A) that are fastened into door,
ensuring the holes for the set screws are facing towards the opposite door.
3 While holding handle firmly against door, fasten upper and lower Allen set screws (B) with supplied Allen wrench.
4 Repeat steps 2 and 3 to install opposite handle. Ensure the holes for the set screws are facing towards the first door.
5Position freezer handle end over left and right pre-installed handle mounts that are fastened to the door, ensuring
the holes for the set screws are facing down.
6 While holding handle firmly against door, looselytighten far right Allen set screw (B) with supplied Allenwrench until there is
no gap between handle and door.
7 Still holding the handle firmly to the door,firmly tighten far left Allen set screw (B) with suppliedAllen wrench.
8 Return to the far right Allen set screw (B) and firmly tighten with supplied Allen wrench.
9 Firmly tighten the insideAllen set screws.
All set screws should be tightened so the screw is below the surface of the handle. The handles should be drawn
tight to freezer and refrigerator doors with no gaps. Opening the opposite door while tightening the Allen screw
makes installation easier.
The door handle may loosen over time or if it was installed improperly. If this happens, tighten the set screws on the
handles.
Mounting Refrigerator Handles
Mounting Freezer Handle
m m m
To avoid electric shock, which can cause
death or severe personal injury, disconnect
the refrigerator from electrical power before
connecting a water supply line to the refrigerator.
To Avoid Property Damage:
•Copper or Stainless Steel braided tubing is
recommended for the water supply line. Water
supply tubing made of ¼ inch plastic is not
recommended to be used. Plastic tubing greatly
increases the potential for water leaks, and the
manufacturer will not be responsible for any
damage if plastic tubing is used for the supply line.
• DO NOT install water supply tubing in areas
where temperatures fall below freezing.
•Chemicals from a malfunctioning softener
can damage the ice maker. If the ice maker
is connected to soft water, ensure that the
...................softener is maintained and working properly, .......................
Ensure that your water supply line connections comply
with all local plumbing codes.
Before Installing The Water Supply Line, You Will Need:
= Basic Tools: adjustable wrench, flat-blade
screwdriver, and PhillipsTMscrewdriver
o Access to a household cold water line with water
pressure between 30 and 100 psi.
A water supply line made of 1/4inch (6Atom) OD,
copper or stainless steel tubing. To determine the
length of tubing needed, measure the distance
from the ice maker inletvalve at the back of the
refrigerator to your cold water pipe. Then add
approximately 7 feet (2.1 meters), so the refrigerator
can be moved out for cleaning (as shown).
A shutoff valve to connect the water supply line to
your household water system. DO NOT use a self-
piercing type shutoff valve.
A compression nut and ferrule (sleeve) for connecting
a copper water supply line to the ice maker inlet valve.
Check with your local building authority for
recommendations on water lines and associated
materials prior to installingyour new refrigerator.
Depending on your local/state building codes, Frigidaire
recommends for homes with existing valves itsSmart
Choice®water line kit 5305513409 (with a 6 ft. Stainless
Steel Water Line) and for homes without an existing
valve, Frigidaire recommends its Smart Choice® water
line kit 5305510264 (with a 20 ft. Copper Water Line
with self-tapping saddle valve). Please refer to www.
frigidaire.corn/store for more information.
To Connect Water Supply Line To Ice Maker inlet Va_e
1. Disconnect refrigerator from electric power source.
2. Place end of water supply line into sink or bucket.
Turn ON water supply and flush supply line until
water is clear. Turn OFF water supply at shutoff
valve.
3. Remove plastic cap from water valve inlet and
discard cap.
4. If you use copper tubing -Slide brass
compression nut, then ferrule (sleeve) onto water
supply line. Push water supply line into water valve
inlet as far as it will go (1/4inch/6A mm). Slide
ferrule (sleeve) into valve inlet and finger tighten
compression nut onto valve. Tighten another half
turn with a wrench; DO NOT over tighten. See
Figure 1.
If you use stainless steel tubing -The nut and
ferrule are already assembled on the tubing. Slide
compression nut onto valve inlet and finger tighten
compression nut onto valve. Tighten another half
turn with a wrench; DO NOT over tighten. See
Figure 2.
5. With steel clamp and screw, secure water
supply line (copper tubing only) to rear panel of
refrigerator as shown.
6. Coil excess water supply line (copper tubing only),
about 21/2turns, behind refrigerator as shown and
arrange coils so they do not vibrate or wear against
any other surface.
7. Turn ON water supply at shutoff valve and tighten
any connections that leak.
8. Reconnect refrigerator to electrical power source.
Stem
P_astic Water Tubing Clamp
to ice Maker Brass
Compression Nut
Ferrule
Copper
wateHMe
_\ Water Valve
Bracket
_-=-Valve Inlet
Copper water IMe
(Include enough tubing in loop to agow
moving refrigerator out for cleaning.)
Steel
Clamp
_- Stainless
Steel
water line
Va,v''n,;i
---Water Valve
Steel water line
Figure 1 Figure 2
Alter connecting_e water supply,referto "How to Prime
the Water SupplySystem" for important information about
priming an empty water supply system.
Your refrigerator'swater supply systemincludesseveraltubing
lines,a water filter, a water valve,and a water tank. Toensure
that your water dispenserworks properly,this system must
be completely filled with water when your refrigerator isfirst
connected to the householdwater supply line.
ice off Press and huld for thr_ (3} _'or_s
(F e_/Fo_ to _um _l_eice t_r _ON or _'OFF%
Ice _4ake0 _Uro#lg the ke fn_r 'OFff' d_-)b[es
the ce dispens#_ _e_ure Ne_her
_'CUBE" IIo_ _CRUSH" w_l/operate w_h
the ice I_!r "OFF"
quiel_ f_reeze Activates a faster rat_ [e_ ffeez#_9 food
aod Intrenches ke pr_Ju_.tiort #__ffe
W_vanthe flesh foo_ak:e nwke_ is turn_ off; _e ;e
_n#_e busk_ should be trarlde_red to the ffcKezeror
dt_arded to pr_vent Z_rom o_,_ting
P13rf_zer ke _T_k_ _3e Autom_C _e MakeP_eezef
i_ght O_ /Off
e_4r¢l to¢_ Press and hold for thr_ (3) _:orlds _o
activate aa_ deactivate This re_riets
uod_ir_J cbar_ges to U)e re#igerator's
set_r_gS an_ prevents u_ of the ice
a[X_water dis_en_
water _[ "_b_Khto di_lay _[k_ condition status,
Press asd i_otd for thr_ (3} _co_lds t#
r_[ after [_ter char_e_
a_ fi_er _ooch to d_s£[ay fi;_e_s#att_, Press
aud he_d_orthree (3) _coI_s to r_s_
after filter d_aoge_
dls_a¥ e#-off [bgglesthe temperature d_spla'# C_
C/FToud_ to t_gle dSp_ay from Rahree
he_t to CeNius,
_efau|t _i_gs _-k_Idto R_et all refrigerator S_ic_jS
sud_ _ temp, a_d temp dlsp_ayto
their f_:_P/de_au[t _e[tI_gs
_ Pros a_ ho_ for three (3} seconds
_otufa off the coolir_g sysiem to dean
the rc4dg_ator. It a[93 t_ms _ the
ice#ake_; all d{sr_eoser fu_ctious, The
te_erature di_pkaywill read OFE
Your i_frigerater is e_luipped w4th a tuu_b (ontro_ pane_
A iS en}yrl_L_£_ry tO#e_ttly teuah _be control par_L
T/_I_ are thr_ (:I) d&spenser _s_3d_z_
1Wate_
Ice Cubes
3 Crush_ ke
A 9reesl Indicator _ight will _ i/Juminat¢_ above the a<tJve
P_ing the _[ o./_ _con do_ oat _um of
powe# _u your refdgerato_ Yea rr_e_ unpl_ the power
cord from the _f_ outlet,
Setting cooling temperatures
1 Down (v) and Up (A) indicators are located beside
the displayed temperatures.
2Press the v or A indicator to adjust the temperature
to the desired setting.
The temperature display will begin to blink with the
first touch. After five (5) seconds of inactivity, the
display will beep to accept the new temperature.
After 10 seconds, the display times out and returns
to the basic display.
Alarms
Door Ajar
High Temp
Power Fail
If the door has been left open for an
extended period of time, an alarm will
sound and the door ajar indicator will
illuminate on the display. Pressthe
alarm reset key to reset any system
alarms.
In the event of a high temperature
condition, the temperature display
will blink and display "HI". After 20
minutes, the high temp alert will
be illuminated. Press alarm reset to
acknowledge the alarm, at which time
the highest temperature reached will
be displayed and the refrigerator will
resume normal operation. All other
modes are turned off until the alarm is
acknowledged.
In the event of a power failure, the
power fail alert will be illuminated.
Press alarm reset to acknowledge the
alarm. Other modes may be turned off
until the alarm is acknowledged. When
the power fail alert is acknowledged,
the refrigerator will resume normal op-
eration. The high temp alarm may also
be illuminated until a safe operating
range temperature has been reached.
Sabbath Hode
The Sabbath Mode isa feature that disables portions
of the refrigerator and its controls in accordance with
observance of the weekly Sabbath and religious holidays
within the Orthodox Jewish community.
Sabbath Mode is turned ON and OFF by pressing
and holding both the freezer "v" and refrigerator "A"
indicators for five (5) seconds. The display shows "Sb"
while in Sabbath mode.
In the Sabbath Mode, the High Temp alarm is active for
health reasons. If a high temperature alarm
is activated this for
during time, example
due to a door left ajar, the alarm will sound
intermittently for about 10 minutes. The
alarm will then silence on its own and a red
high temperature icon will display. The high temp icon
will continue to display, even if the door is closed, until
the Sabbath mode is exited and the icon reset. The
refrigerator will function normally once the door is closed
without any violation of the Sabbath/Holidays.
For further assistance, guidelines for proper usage and a
complete list of models with the Sabbath feature, please
visit the web at http:\\www.star=k.org.
While in Sabbath Mode, neither the lights, dispenser,
nor the control panel will work until Sabbath Mode is
deactivated.
Refrigerator stays in Sabbath Mode after power failure
recovery. It must be deactivated with the buttons on
the control panel.
Although you have entered the Sabbath Mode, the ice
maker will complete the cycle it had already initiated.
The ice cube compartment will remain cold and new ice
cubes can be made with standard trays.
LCD Controls
User Interface
Your refrigerator is equipped with a user interface display.
It is only necessary to touch the panel. There is no need
to press with force.
Touch an icon (Water/Cube/Crush) to activate the
desired dispenser mode.
light on-off
control lock
options
On /Off
Press and hold for three (3) seconds
to activate and deactivate. The
Lock icon will be displayed in the
LCD window. This restricts unde-
sired changes to the refrigerator's
settings and prevents use of the ice
and water dispenser.
Touch to display options menu.
Use the menu buttons to scroll
down to either freezer or refrigera-
tor temp to adjust temperatures.
Use the Temp Adjust buttons to ad-
just the temperature to the desired
setting.
Press the SET button to accept the
new temperature setting.
Press options button to exit the
main menu.
power on=off Press and hold for three (3) seconds
to turn off the cooling system to
clean the refrigerator. It also turns
off all dispenser functions. The tem-
perature display will read "OF",
Pressing the power off icon does not turn off power to
your refrigerator. You must unplug the power cord from
the wall outlet: ....................................................................................................................................................................................................................................................................
Priming the water supply system
For proper dispenser operation, recommended water
supply pressure should fall between 30 psi and 100
psi. Excessive pressure may cause water filter to
malfunction. ...................
1 Begin filling the tank by pressing and holding a
drinking glass against the water dispenser paddle.
2Keep the glass in this 7"
position until water
comes out of the
dispenser, It may
take about 1_/2
minutes,
3Continue dispensing
water for about four
(4) minutes to flush the
system and plumbing
connections of any
impurities (stopping to empty the glass as necessary).
The water dispenser has a built-in device that shuts off
the water flow after three (3) minutes of continuous
use. To reset this shutoff device, simply release the
dispenser paddle.
Ice maker operation & care
After the refrigerator is installed properly and has cooled
for several hours, the ice maker can produce ice within
24 hours. The ice maker will fill the ice bin from the rear,
You must dispense some ice to force the ice forward in
the bin. This will allow the bin to fill completely.
Your ice maker isturned on at the factory so it can work
as soon as you install your refrigerator. If you cannot
connect a water supply, set the ice maker's On/Off icon
to Off and turn off the water supply valve; otherwise,
the ice makers fill valve may make a loud chattering
noise when it attempts to operate without water.
Turning the fresh food ice maker on and
off
Ice production iscontrolled by the ice maker's On/Off
icon on the control panel. Press and hold the "Ice Off"
icon for three (3) seconds to turn the ice maker "ON" or
"OFF". Where the ice maker is "OFF" the red LED above
the icon will be illuminated.
Turning off the ice maker will disable the ice dispenser.
You wi!! still be able to dispense water........................................................................................
The ice maker also has a built-in plastic signal bale arm
that automatically stops ice production when the ice bin
isfull. This signal arm should not be used to manually
stop the ice maker. ........
Using the ice maker after installation
Before making ice for the first time, be sure to prime
the water supply system. Air in new plumbing lines can
result in two (2) or three (3) empty ice maker cycles.
Furthermore, if the system is not flushed, the first ice
cubes may be discolored or have an odd flavor.
On occasion, unusually small ice cubes may be noticed
in the bucket or in dispensed ice. This could occur in
normal operation of the ice maker. If you start seeing
these more frequently, it may be an indicationof low
water pressure or the water filter needs to be replaced.
As the water filter nears the end of its useful life and
becomes clogged with particles, less water isdelivered
to the ice maker during each cycle. Remember, if it's
been six (6) months or longer since you last changed
your water filter, replace the water filter with a new one.
Poor quality household water may require the filter to be
changed more frequently.
How
1
2
4
5
to change ice sizes
Pressthe CUBES key once to enable cube function.
Press CUBES key a second time to adjust cube size.
Small is the default.
Use the plus (+) and minus (-) keys to scroll
through small, medium, and large cube sizes.
Press the plus (+) key once to select medium ice
cubes.
Press the plus (+) key again to select large ice
cubes.
The screen will return to standby mode when
another function is selected or after 10 seconds of
no user activity. The display will stay in the CUBES
function.
maker/dispenser tips
If your refrigerator is not connected to a water
supply or the water supply is turned off, turn off
the ice maker by holding the On/Off soft-touch
icon and the water shut-off valve for three (3)
seconds.
o The following sounds are normal when the ice
maker is operating:
- Motor running
- Ice dropping into ice bin
- Water valve opening or closing
- Running water
- When dispensing ice, you will hear a snapping or
clicking sound when the ice chute opens and closes.
- If you need a large quantity of ice at one time, it is
best to get cubes directly from the ice bin.
- Ice cubes stored too long may develop an odd
flavor. Empty the ice bin as explained below.
• When dispensing cubed ice, it is normal to have a small
quantity of little piecesalong with the whole cubes.
If the water supply to your refrigerator is softened, be
sure the softener is properly maintained. Chemicals
from a water softener can damage the ice maker.
Cleaning the ice
maker
Clean the ice maker and
ice bin at regular intervals,
especially prior to vacation or
moving.
1 Turn off the ice maker.
2 Remove the ice bin by
pulling straight out.
Removing Ice Bin
3Empty and carefully clean the ice bin with mild
detergent. Do not use harsh or abrasive cleaners.
Rinse with clear water.
4 Allow the ice bin to dry completely before replacing
in the freezer.
5Replace the ice bin. Turn the ice maker on.
Remove and empty the ice bin if:
An extended power failure (one hour or longer)
causes ice cubes in the ice bin to melt and freeze
together, jamming the dispenser mechanism.
You do not use the ice dispenser frequently. Ice
cubes will freeze together in the bin, jamming the
dispenser mechanism.
Remove the ice bin and shake to loosen the cubes or
clean as explained above.
NEVER use an ice pick or similar sharp instrument to
break up the ice. This could damage the ice bin and
dispenser mechanism.
To loosen stuck ice, use warm water. Before replacing
When removing or replacing the ice bin, DO NOT
rotate the auger in the ice bin. If the auger is
accidentally rotated, you must realign the auger by
turning it in 90 degree turns (see below) until the ice
bin fits into place with the drive mechanism. If the
auger is not properly aligned when replacing the ice
bin, the refrigerator will produce no ice. The fresh food
door also may not close properly causing warm air to
leak into the flesh food compartment.
Adjusting Ice Bin Auger
Ice maker operation & care
After the refrigerator is installed properly, the ice maker
can produce ice within 24 hours. It can completely fill an
ice bin in about three (3) days.
When using the ice maker for the first time and in order
for the ice maker to work properly, it is necessary to
clear air from water filter tubing. Once ice maker begins
making ice, allow the bucket to fill completely, then
discard the first TWO (2) FULL buckets of ice. It will
take at least two (2) days to completely fill the bucket on
regular ice making mode or 1 1/2days on fast ice mode.
The ice maker produces approximately four (4) pounds of
ice every 24 hours depending on usage conditions.
Your ice maker is turned on at the factory so it can
work as soon as you install your refrigerator. If you
cannot connect a water supply, lift the ice maker's wire
signal arm to turn it off. Otherwise, the ice maker's
fill valve may make a loud chattering noise when it
attempts to operate without water.
Turning the ice maker on and off
Ice production iscontrolled by lifting/lowering the ice
maker's wire signal arm. To gain access to the ice
maker, pull the freezer drawer out. Lift the wire signal
arm to turn the ice maker OFF and lower the wire signal
arm to turn it ON.
]
J
Signal Arm
o The following sounds are normal when the ice
maker is operating:
Motor running
Ice dropping into ice bin
Water valve opening or closing
Running water
Ice cubes stored too long may develop an odd
flavor. Empty the ice bin as explained below.
Quick Ice Function
Your refrigerator is equipped with a Quick Ice Function,
that increases ice production. This function terminates
automatically.
Cleaning the ice maker
If the water supply to your refrigerator is softened, be
sure the softener is properly maintained. Chemicals
from a water softener can damage the ice maker.
Clean the ice maker and ice bin at regular intervals,
especially prior to vacation or moving.
1 Turn off the ice maker.
2 Remove the ice bin.
3Empty and carefully clean the ice bin with mild
detergent. Do not use harsh or abrasive cleaners.
Rinse with clean water.
4 Allow the ice bin to dry completely before replacing
in the freezer.
5Replace the ice bin. Turn the ice maker on.
Remove and empty the ice bin if:
An extended power failure (one hour or longer)
causes ice cubes in the ice bin to melt and freeze
together.
Remove the ice bin and shake to loosen the cubes or
clean as explained above.
Ice maker tips
= If your refrigerator is not connected to a water
supply or the water supply is turned off, turn off
the ice maker by lifting wire signal arm.
NEVER use an ice pick or similar sharp instrument to
break up the ice. This could damage the ice bin and
dispenser mechanism.
To loosen stuck ice, use warm water. Before replacing
the ice bin, make sure it is comp!ete!y dry:.........................................................................................
Toavoidinjuryfrombreakage,handletemperedglass
shelvescarefully.
Featuresmayvaryaccordingtomodel.
Crispers
Crisper drawers are designed for storing fruits,
vegetables, and other fresh produce.
Your refrigerator includes SpillSafeTM glass shelves that
are designed to catch and hold accidental spills.
You can easily adjust shelf positions in the fresh food
compartments to suit your needs. The shelves have
mounting brackets that attach to slotted supports at the
rear of each compartment.
To change the position of ashelf:
1 Before adjusting a shelf, remove all food.
2 Lift the front edge up and pull the shelf out.
3 Replace by inserting the mounting bracket hooks
into the desired support slots.
4 Lower the shelf and lock into position.
Shelf features
Full SpilISafe TM Shelf
Half SpilISafe TM Shelf
Opening Crisper Drawer
Crisper humidity control
Crisper drawers includea sliding contro! for adjusting the
humidity inside the crisper. Leafy vegetables keep best
when stored with the Humidity Control set on Higher
Humidity. Fresh fruits keep best when stored with the
Humidity Control set on Lower Humidity.
Vegetables Fruits
hi ............. [o
_ihu Imd}ty contro_J
"g e Lower
Humidity Humidity
Adjusting Crisper Humidity
To remove the Crisper Drawer for cleaning:
1 Pull the drawer out until it stops.
2 Lift the front slightly and remove the drawer.
Drawers
Your refrigerator includesa variety of storage drawers.
These drawers are located in fixed positions at the
bottom of the fresh food compartment.
Removing Crisper Drawer

Other Frigidaire Refrigerator manuals

Frigidaire FPHI1887KF - Gallery 18.2 cu. Ft. Top Freezer... User manual

Frigidaire

Frigidaire FPHI1887KF - Gallery 18.2 cu. Ft. Top Freezer... User manual

Frigidaire FRT21BSDS User manual

Frigidaire

Frigidaire FRT21BSDS User manual

Frigidaire FRS23F4C User manual

Frigidaire

Frigidaire FRS23F4C User manual

Frigidaire FRS26TS7DW2 User guide

Frigidaire

Frigidaire FRS26TS7DW2 User guide

Frigidaire FFTR1222QM0 Owner's manual

Frigidaire

Frigidaire FFTR1222QM0 Owner's manual

Frigidaire GHSC39EGP User manual

Frigidaire

Frigidaire GHSC39EGP User manual

Frigidaire FRT18IL6D User manual

Frigidaire

Frigidaire FRT18IL6D User manual

Frigidaire FRT8HIS6F User manual

Frigidaire

Frigidaire FRT8HIS6F User manual

Frigidaire FRT21H7AS User manual

Frigidaire

Frigidaire FRT21H7AS User manual

Frigidaire FRS26RLEC User manual

Frigidaire

Frigidaire FRS26RLEC User manual

Frigidaire FRS23F4DB2 User manual

Frigidaire

Frigidaire FRS23F4DB2 User manual

Frigidaire FGUS2637LE Installation instructions

Frigidaire

Frigidaire FGUS2637LE Installation instructions

Frigidaire FRT21S6AW2 User manual

Frigidaire

Frigidaire FRT21S6AW2 User manual

Frigidaire FRS26W2AW3 User guide

Frigidaire

Frigidaire FRS26W2AW3 User guide

Frigidaire FRS26HR4D User manual

Frigidaire

Frigidaire FRS26HR4D User manual

Frigidaire FRT18HB5J Instruction Manual

Frigidaire

Frigidaire FRT18HB5J Instruction Manual

Frigidaire FRS26WGHW0 User manual

Frigidaire

Frigidaire FRS26WGHW0 User manual

Frigidaire FRS6L9EES Instruction Manual

Frigidaire

Frigidaire FRS6L9EES Instruction Manual

Frigidaire FRS22ZGH User manual

Frigidaire

Frigidaire FRS22ZGH User manual

Frigidaire FGHS2655K User manual

Frigidaire

Frigidaire FGHS2655K User manual

Frigidaire FRT18KG4D User manual

Frigidaire

Frigidaire FRT18KG4D User manual

Frigidaire FRS26KF6C User manual

Frigidaire

Frigidaire FRS26KF6C User manual

Frigidaire FRT21IQRJ User manual

Frigidaire

Frigidaire FRT21IQRJ User manual

Frigidaire GLHT188WHW3 Guide

Frigidaire

Frigidaire GLHT188WHW3 Guide

Popular Refrigerator manuals by other brands

GE Profile PGSS5NFZSS Dimensions and installation information

GE

GE Profile PGSS5NFZSS Dimensions and installation information

ITT KS 840 Instruction booklet

ITT

ITT KS 840 Instruction booklet

Campomatic FR360SS instruction manual

Campomatic

Campomatic FR360SS instruction manual

Haier HR-915C user manual

Haier

Haier HR-915C user manual

arcelik 2485 CEI Instruction

arcelik

arcelik 2485 CEI Instruction

Whirlpool WRS325FDAM Installation instructions and owner's manual

Whirlpool

Whirlpool WRS325FDAM Installation instructions and owner's manual

Atlas NFS 166 user manual

Atlas

Atlas NFS 166 user manual

Hoshizaki RTC-90MNA instruction manual

Hoshizaki

Hoshizaki RTC-90MNA instruction manual

Flavel FC5050F Operating insructions

Flavel

Flavel FC5050F Operating insructions

Sharp SJ-F90PS Operation manual

Sharp

Sharp SJ-F90PS Operation manual

Panasonic NR-BE647ASQA operating instructions

Panasonic

Panasonic NR-BE647ASQA operating instructions

John Lewis JLBIFF1809 user manual

John Lewis

John Lewis JLBIFF1809 user manual

Electrolux EI28BS51I S Energy guide

Electrolux

Electrolux EI28BS51I S Energy guide

Siemens iQ500 K IS Series user manual

Siemens

Siemens iQ500 K IS Series user manual

Gram KF3135-90 user guide

Gram

Gram KF3135-90 user guide

U-Line U-2218RGLINT-00A user guide

U-Line

U-Line U-2218RGLINT-00A user guide

DONGBU DAEWOO ELECTRONICS RN-271N Service manual

DONGBU DAEWOO ELECTRONICS

DONGBU DAEWOO ELECTRONICS RN-271N Service manual

AEG FAVORIT 66602VI0P user manual

AEG

AEG FAVORIT 66602VI0P user manual

manuals.online logo
manuals.online logoBrands
  • About & Mission
  • Contact us
  • Privacy Policy
  • Terms and Conditions

Copyright 2025 Manuals.Online. All Rights Reserved.