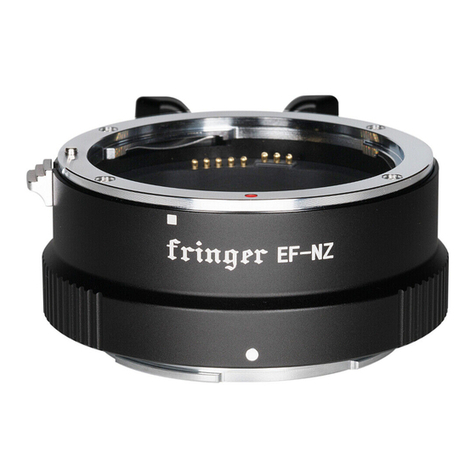
Fringer EF-GFX Pro User manual

1
Fringer EF-GFX Pro User’s Manual
1. Introduction
This product is compatible with Canon EF mount and Fujifilm G mount protocols. It can control
lens’ aperture electronically, auto focus and report lens information for EXIF recording.
There is a built-in electronic aperture ring just like native GF lenses. And it employs contactless
sensors so that you don’t need to worry about wearing problems. In addition to the electronic
aperture ring, the adapter supports more unique features including Phase Detection AF (on GFX100 &
GFX100S only, so far), IBIS, Lens IS and In-camera LaCA (Lateral Chromatic Aberration) Correction,
etc.
2. Compatibility
This adapter works on G mount cameras. However, due to capability differences of different
camera models, its performance may vary.
On cameras without PDAF support, such as GFX50s, GFX50r and GFX50s II, adapted lenses can
only work in the CDAF mode. Most of lenses on the tested and optimized lens list should work
normally in the AF-S mode. However, as many EF mount lenses are not designed for contrast AF, AF
speed may be slow. And AF accuracy may not be good, either. Meanwhile, AF-C mode is not supported.
If AF performance can’t satisfy you, MF is recommended.
On cameras with PDAF support, such as GFX100 and GFX100S, tested and optimized lenses AF
much faster and more accurate. In some circumstances, the experience of using adapted lenses on
these cameras is just like using a DSLR. Thus, if you are about to purchase a new G mount camera to
use EF lenses, the 102M pixel models are highly recommended.
We have tested and optimized over 110 models of EF mount lenses. Compare to lenses not on the
list, tested and optimized ones work better in both PDAF and CDAF modes. However, the EF mount is a
EF mount
Lens release
G mount
including a dust proof rubber ring
Electronic aperture ring
(Open→Close-A-C)
MicroUSB port
for firmware update

2
huge system and there are so many different lens models. A lot of them have not been tested and
optimized, yet. Most of them would work on the adapter with a lower performance. And a small
amount of them may not be compatible. If you encounter poor AF performance or compatibility issues,
please wait for us to test and optimize that lens and support it in future firmware updates.
When using zoom lenses with variable maximum aperture that haven’t been tested and optimized,
the aperture value displayed may not be correct.
See the attached list at the end for tested and optimized lens models.
3. Function descriptions
3.1 Lens self-test (for lenses NOT tested and optimized only)
When you install a lens not tested/optimized on the adapter and power on the camera for the first
time, the adapter may drive the AF module to the close end and then to infinity. After that, the camera
will reboot to finish the self-test and calibration process. During the process, please do not touch the
focus ring of the lens, or you may interfere with the calibration. If there is something wrong with the
self-test procedure, the AF function may not be in a normal state. If that happens, turning on and then
turning off the camera at once will clear the calibration data stored. Installing another lens and
powering on the camera will do the same.
Tested and optimized lenses don’t do this.
3.2 Full frame or medium format selection (35mm mode on/off)
EF mount lenses are designed for full frame cameras. Its image circle covers a 36mm x 24mm
sensor. But the dimension of the sensor of GFX cameras is about 44mm x 33mm. Thus, many EF lenses
can’t fully cover it at all and may cause dark corners/vignetting and distortion, etc. It’s normal and not
the malfunction of the adapter.
By default, the camera menu item “35mm mode” is set to “auto”. Images will be cropped to
36x24mm automatically when an adapter and an EF lens are attached. (Be noted, it won’t do that auto
crop if focus bracketing support is enabled in SETTINGS.INI on the adapter. Check section 3.6.1 for
more details.) Thus, usually you won’t see the issues mentioned above. But, since some of the EF
lenses do cover the medium format sensor, you may force the camera to capture 44x33mm images by
setting “35mm mode” to “off” on camera menu.
3.3 Setting aperture and shutter speed value
Setting aperture value through electronic aperture ring:
Looking down to the top of the camera, turning the ring right tells the camera to stopping down,
and vice versa. Each step equals to 1/3 EV. When it is turned to the smallest aperture position, one

3
more step brings it to the A (Auto mode) under which the aperture will be decided by the camera (P or
S mode). Now if the ring is turned right one more step further, it will be set to C (Command mode). The
aperture ring logic described above is exactly the same as native GF lenses.
Setting aperture value through command dial on the camera:
Instead of using the aperture ring, you may also set the aperture value through the command dial
on the camera body by turning the aperture ring to the right most, i.e., C position, as described earlier.
Be noted that the front dial of some GFX cameras may be used for both ISO and aperture settings. On
those camera models, you may need to press the front dial before setting the aperture value if it is in
the ISO setting mode. To avoid the conflicts of ISO and aperture settings on those cameras, electronic
aperture ring is the preferred way of setting the aperture.
Caution: For zoom lenses with variable maximum aperture, please zoom it to the wide end
before moving aperture ring between A/C position and smallest aperture setting position.
Manually setting shutter speed is suggested! If you set shutter speed to auto, when
environment brightness changes during view finding, the lens aperture blades may move frequently
with a little noise and slightly flashing of LCD or EVF. Native GF lenses behave the same. But their
aperture motor moves so fast and silently that you will never notice. However, EF lenses’ aperture
motor moves slower and noisier. If you want to avoid it, please manually set shutter speed. You may
still set shutter speed to auto if that’s tolerable. Be noted that if “PREVIEW EXP./WB IN MANUAL
MODE” on the camera menu is set to “OFF”, the described issue may occur even the shutter speed is
set manually.
For zoom lenses with variable maximum aperture that haven’t been tested and optimized,
aperture values may not be displayed correctly. Primes, zooms with fixed maximum aperture, and all
lenses optimized don’t have this issue.
3.4 Setting AF modes
Due to the limitation of EF lenses who are designed for 35mm
cameras, when using them on GFX cameras, there may be distortions
in the edge areas that damage the performance of auto focus. Thus,
please avoid using focus points in those areas if possible. Focus
points in the 5 or 7 rows in the middle are usually safe to be chosen.
In most cases, the rest of focus points work, too. But the AF accuracy
and success rate may decrease.
On cameras with PDAF, e.g., GFX100 and GFX100S, the size of the focus points may affect AF
performance. If AF success rate or accuracy issues are encountered, you may try different AF point
size settings. Usually, the smaller focus point setting may bring more accuracy. But it may need more

4
lights and details in the small area covered by the focus point to work, or the success rate may become
poorer. In contrast, the bigger focus point setting may bring higher AF success rate. But accuracy may
decrease.
On cameras with PDAF, e.g., GFX100 and GFX100S, both AF-S and AF-C modes are supported. In
many circumstances, AF performance is similar to that of a DSLR. But if the camera doesn’t support
PDAF, e.g., GFX50S, GFX50R and GFX50S II, only AF-S mode is supported as CDAF is used instead of
PDAF. And AF performance is poorer. That is normal and not the malfunction of the adapter. In both
PDAF and CDAF modes, face/eye detection AF works.
We have tried our best to make EF lenses work better on G mount. But please understand that
different lens and camera system will never collaborate like a native system. Sometimes even lenses
optimized may encounter AF issues. You may try to improve its accuracy by half pressing shutter
release button more than once before releasing the shutter. Or you may try AF-C instead of AF-S
mode (on GFX100 and GFX100S only). If necessary, please change to the MF mode.
When you want to use MF mode, please set AF/MF switch on the lens to the MF position. The
camera will be set to the MF mode automatically.
Most of lenses that are not on the tested and optimized lens list should work normally. But since
PDAF isn’t supported and CDAF performs poorer, you may encounter slow and inaccurate AF.
Sometimes MF would be the only choice. Or you may wait for the lens to be added to the list by future
firmware updates.
3.5 Lens built-in IS and camera IBIS functions
This product supports both lens IS (or OS, VC) and IBIS functions. But they don’t work at the same
time. You may choose between them. When the camera is powered on or entering the shooting mode
from the playback mode, the IS switch on the lens decides which one is activated, lens IS or IBIS. “On”
status of the switch at that time enables lens IS and disables IBIS, and vice versa. IBIS will be
automatically enabled if the lens doesn’t have IS function at all. In most cases, IBIS works better than
lens IS unless the lens is a very long telephoto one.
Whatever lens IS or IBIS is chosen, the stabilization function is controlled by “IS MODE” menu item.
If it’s set to “Continuous” (Mode 1), IS functions are activated all the time. When it’s set to “Shooting
only” (Mode 2), lens IS function is enabled when the shutter release button being half-pressed and
disabled about 2 seconds after its release while IBIS function is only enabled during the exposure.
Because of the ages of some EF lenses, the old design may limit their ability of instant activation of IS
module. Thus, “Shooting only” mode may not work reliably for them. In that case, “Continuous” mode
is suggested.
Caution: To make IBIS works properly, please turn off focus bracketing support in SETTINGS.INI

5
on the adapter. Check section 3.6.1 for more details.
3.6 Advanced settings
Begin with firmware 1.10, user configurable software switches are added.
Connect the adapter to a computer with the USB cable coming with the adapter. A drive named
“FRINGER” appears. In the root folder there is a file named “SETTINGS.INI”. It’s in format of ordinary
INI files. Do not modify it unless you know how to do that. If you want to restore it to default, just
remove it. The adapter will re-generate it when the next time it works on a camera body.
3.6.1 Focus bracketing support
Description:
By default, the focus bracketing on camera menu is grayed out. To use that function, you need to
modify SETTINGS.INI as following.
Item name:
FocusBracketing
Item value:
0 (default): focus bracketing menu item disabled
1: focus bracketing menu item enabled
Caution:
1) When setting focus range and begin position, don’t manually turn focus ring! Always use AF to
drive focus point to the position you want. Or the focus bracketing function may not work properly.
2) When “FocusBracketing=” is set to 1 in the SETTINGS.INI, the adapter is set to native mode and
some functions of the camera may change, such as the 35mm auto mode will not crop automatically,
IBIS may not work properly any more, etc.
3.6.2 Move AF to infinity when powering off/switching to playback mode
Description:
On one hand, lenses with external focus design such as some STM lenses may not be convenient to
be stored in a bag when its AF isn’t on infinity. Moving AF to infinity automatically when powering off
(or switching to playback mode) is preferred. On the other, some of them, e.g. EF85/1.2L II, may have
very heavy front elements so that the experience of moving it to/from infinity every time switching
the camera to/from playback mode is really bad. To make your own choice, you may modify
SETTINGS.INI as following.
Item name:
PowerOffInfinity

6
Item value:
0 (default): Only enabled for some STM lenses, EF50/1.4, Sigma 70/2.8 ART, etc.
1: Enabled for all lenses.
4. Firmware update
You need a PC or Mac and a Micro B USB cable, i.e., the one coming with the adapter, to upgrade it.
1) Download new firmware from Fringer’s website. For example, ‘EFGF_100.BIN’ is v1.00.
2) Get the adapter off the camera. Make sure not to connect the adapter with the computer while it is
installed on a camera body.
3) Plug the USB cable to the Micro USB port on the adapter.
4) Connect the other end of the cable to a USB port of your PC or MAC. Then a mobile drive named
‘FRINGER’ emerges. Open ‘VERSION.TXT’ on that drive and check current firmware version (the
line begins with ‘Version:’).
5) If upgrading is needed, copy the downloaded firmware file to the drive named ‘FRINGER’. Wait for
about 20 seconds. Ignore any error messages about the drive. The adapter would disconnect itself
and reconnect. The ‘FRINGER’ drive would appear again. If it doesn’t reconnect automatically, you
may manually disconnect the USB cable and reconnect it with the computer.
6) Check VERSION.TXT again and make sure its firmware version has changed to the new one.
Note: Do not copy files other than the official firmware to the adapter.
Troubleshooting:
Some of the cables in the market are for charging only and not suitable for data transfer. Thus, if
you can’t find the “FRINGER” drive when adapter is
connected to the computer, check your cable!
You may also read the adapter’s firmware version by
Fujifilm’s method, i.e., press and hold DISP button before
powering on the camera. The “Lens version” on the
screen is actually the adapter’s firmware version. See the
following figure.
5. Tested and optimized lens list (firmware v1.10)
1
Canon EF 14mm f/2.8 L II USM
2
Canon EF 24mm f/1.4L II USM
3
Canon EF 28mm f/1.8 USM
4
Canon EF 35mm f/1.4L USM
5
Canon EF 35mm f/1.4L II USM
6
Canon EF 35mm f/2 IS USM
7
Canon EF 40mm f/2.8 STM
8
Canon EF 50mm f/1.2L USM

7
9
Canon EF 50mm f/1.4 USM
10
Canon EF 50mm f/1.8 STM
11
Canon EF 85mm f/1.2L USM
12
Canon EF 85mm f/1.2L II USM
13
Canon EF 85mm f/1.4 L IS USM
14
Canon EF 85mm f/1.8 USM
15
Canon EF 100mm f/2.8L IS USM
16
Canon EF 135mm f/2 L USM
17
Canon EF 135mm f/2 L USM + 1.4X
18
Canon EF 135mm f/2 L USM + 2X
19
Canon EF 180mm f/3.5 L USM
20
Canon EF 180mm f/3.5 L USM + 1.4X
21
Canon EF 180mm f/3.5 L USM + 2X
22
Canon EF 200mm f/2 L IS USM
23
Canon EF 200mm f/2 L IS USM + 1.4X
24
Canon EF 200mm f/2 L IS USM + 2X
25
Canon EF 200mm f/2.8L II USM
26
Canon EF 200mm f/2.8L II USM + 1.4X
27
Canon EF 200mm f/2.8L II USM + 2X
28
Canon EF 300mm f/2.8L IS II USM
29
Canon EF 300mm f/2.8L IS II USM + 1.4X
30
Canon EF 300mm f/2.8L IS II USM + 2X
31
Canon EF 300mm f/4 L USM
32
Canon EF 300mm f/4 L USM + 1.4X
33
Canon EF 300mm f/4 L IS USM
34
Canon EF 300mm f/4 L IS USM + 1.4X
35
Canon EF 400mm f/2.8L IS II USM
36
Canon EF 400mm f/2.8L IS II USM + 1.4X
37
Canon EF 400mm f/2.8L IS II USM + 2X
38
Canon EF 400mm f/4 DO IS II USM
39
Canon EF 400mm f/4 DO IS II USM + 1.4X
40
Canon EF 400mm f/5.6 L USM
41
Canon EF 600mm f/4L IS USM
42
Canon EF 600mm f/4L IS USM + 1.4X
43
Canon EF 11-24mm f/4L USM
44
Canon EF 16-35mm f/4L IS USM
45
Canon EF 16-35mm f/2.8L II USM
46
Canon EF 16-35mm f/2.8L III USM
47
Canon EF 17-40mm f/4L USM
48
Canon EF 24-105mm f/4L IS II USM
49
Canon EF 24-70mm f/2.8L II USM
50
Canon EF 24-70mm f/2.8L USM
51
Canon EF 24-70mm f/4L IS USM
52
Canon EF 70-200mm f/2.8L IS USM
53
Canon EF 70-200mm f/2.8L IS USM + 1.4X
54
Canon EF 70-200mm f/2.8L IS USM + 2X
55
Canon EF 70-200mm f/2.8L IS II USM
56
Canon EF 70-200mm f/2.8L IS II USM + 1.4X
57
Canon EF 70-200mm f/2.8L IS II USM + 2X
58
Canon EF 70-200mm f/2.8L IS III USM
59
Canon EF 70-200mm f/2.8L IS III USM + 1.4X
60
Canon EF 70-200mm f/2.8L IS III USM + 2X
61
Canon EF 70-200mm f/4L USM
62
Canon EF 70-200mm f/4L USM + 1.4X
63
Canon EF 70-200mm f/4L IS USM
64
Canon EF 70-200mm f/4L IS USM + 1.4X
65
Canon EF 70-200mm f/4L IS II USM
66
Canon EF 70-200mm f/4L IS II USM + 1.4X
67
Canon EF 70-300mm f/4.5-5.6 DO IS USM
68
Canon EF 70-300mm f/4-5.6 IS II USM
69
Canon EF 70-300mm f/4-5.6L IS USM
70
Canon EF 100-400mm f/4.5-5.6 L IS II USM
71
Canon EF 200-400mm f/4L IS USM
72
SIGMA 14mm F1.8 DG HSM A017
73
SIGMA 20mm F1.4 DG HSM A015
74
SIGMA 24mm F1.4 DG HSM A015
75
SIGMA 28mm F1.4 DG HSM A019
76
SIGMA 35mm F1.4 DG HSM A012

8
77
SIGMA 40mm F1.4 DG HSM A018
78
SIGMA 50mm F1.4 DG HSM A014
79
SIGMA 70mm F2.8 DG MACRO A018
80
SIGMA 85mm F1.4 DG HSM A016
81
SIGMA 105mm F1.4 DG HSM A018
82
SIGMA 105mm F2.8 EX DG OS HSM MACRO
83
SIGMA 135mm F1.8 DG HSM A017
84
SIGMA 500mm f/4.5 EX DG APO HSM
85
SIGMA 14-24mm f/2.8 DG HSM A018
86
SIGMA 24-35mm F2.0 DG HSM A015
87
SIGMA 24-70mm f/2.8 DG OS HSM A017
88
SIGMA 60-600mm f/4.5-6.3 DG OS HSM S018
89
SIGMA 70-200mm f/2.8 DG OS HSM S018
90
SIGMA 70-200mm f/2.8 DG OS HSM S018 + 1.4X
91
SIGMA 70-200mm f/2.8 DG OS HSM S018 + 2X
92
SIGMA 100-400mm F5-6.3 DG OS HSM C017
93
SIGMA 120-300mm f/2.8 DG OS HSM S013
94
SIGMA 120-300mm f/2.8 DG OS HSM S013 + 1.4X
95
SIGMA 120-300mm f/2.8 DG OS HSM S013 + 2X
96
SIGMA 150-500mm f/5-6.3 APO DG OS HSM
97
SIGMA 150-600mm F5-6.3 DG OS HSM C015
98
SIGMA 150-600mm F5-6.3 DG OS HSM S014
99
TAMRON SP 35mm F1.4 Di USD F045
100
TAMRON SP 35mm F/1.8 Di VC USD F012
101
TAMRON SP 45mm F/1.8 Di VC USD F013
102
TAMRON SP 85mm F/1.8 Di VC USD F016
103
TAMRON SP 15-30mm F/2.8 Di VC USD A012
104
TAMRON SP 15-30mm F/2.8 Di VC USD G2 A041
105
TAMRON 17-35mm f/2.8-4 Di OSD A037
106
TAMRON SP 24-70mm F/2.8 Di VC USD G2 A032
107
TAMRON 35-150 f/2.8-4 Di VC OSD A043
108
TAMRON SP 70-200mm F/2.8 Di VC USD G2 A025
109
TAMRON SP 70-210mm F/4 Di VC USD A034
110
TAMRON 100-400mm F/4.5-6.3 Di VC USD A035
111
TAMRON SP 150-600mm F/5-6.3 Di VC USD G2 A022
112
TAMRON SP 200-500mm F/5-6.3 Di LD (IF)
This manual suits for next models
1
Table of contents
Other Fringer Camera Accessories manuals