Frontier OS18-0007G-LI Owner's manual

Owner & Operator’s Manual
(Item No. OS18-0007G-LI)
Warning! Failure to follow the
instructions can cause serious injury.
This manual contains safety
instructions.
Read this manual and the motor
manual before starting to use the
equipment.
Original Instructions


Welcome to the
Frontier family!
Congratulaons on the purchase of your new
Frontier sawmill. You made a great choice!
In 1993, Norwood introduced the world to
the very rst aordable portable sawmill: the
original LumberMate. That was a turning point.
Norwood opened a world of opportunies for
everyone — for outdoorsmen, crasmen, hard-
working families, hobbyists and professional
sawyers. Today, Norwood connues to lead
the sawmill revoluon: Norwood has over 85
patents, more than the rest of the industry
combined, and Norwood equipment is hard at
work in over 100 countries worldwide.
In 2017, Norwood launched Froner, an ultra-
aordable line of portable sawmills. In doing so,
even more hard-working families can unlock the
value in their trees by owning their own solid,
dependable and safe sawmill that they can be
proud of.
Both your Froner and you, as a Froner owner,
are part of the legendary Norwood legacy.
Norwood created all elements of the design
of your Froner using our high standards of
innovave engineering, leveraging several of our
patents. Your Froner is built to deliver hours of
producve and fun sawing.
Don’t forget to visit Norwood’s Sawmill.TV, our
on-line “TV” channel dedicated to sawmills and
successful sawmilling. It is a great resource to
learn everything from how to get started, to
advanced sawmilling techniques, to bite-sized
tech ps.
Thank you for placing your trust in us. We’re
right behind you to help you make the most of
your new Froner sawmill. We wish you all the
best with your sawmilling journey.
A. Dale
Executive Director
Norwood Industries Inc.

Text: D. Vanderheyden
First Edition: 2023-04-10
Latest Revision: 2023-04-10
Copyright © 2019, 2022 Norwood Industries Inc. All rights
reserved. No part of this publication may be reproduced in any
form or by any means without permission in writing from the
publisher, Norwood Industries Inc.
The color orange as it relates to sawmills, edgers, skidders & related equipment,
the “chevron” graphic, the LumberJack®mascot, and the trade-names Norwood®,
LumberMax®, LumberPro®, LumberMate®, LumberMan®, LumberLite®, LM Pro®,
PortaMill®, SkidMate®, BladeMate®, SabreTooth®, SabreBar®, SabreChain®,
HD38®, HD36®, LM30®, MN27®, LM29®, MN26®, Trekker®, Duradeck®, Sawyer-
Assist®, Sawmill TV®, Omega®, Intelliset®, ProSetter™, Frontier®, OS®, OS18®,
OS23®, OS27®, OS31®, OS35®, Make Your Mark™, “Forest. Fun. Freedom.™”
& MultiMate®are registered trademarks owned by Norwood Industries Inc. in
multiple jurisdictions. Functional and design elements of Norwood sawmills and
log handling equipment are protected by registered patents and pending patents
in multiple jurisdictions.
U.S. Patent Nos. 6,932,555, 9,102,074, 7,784,387, 8,215,216, 8,261,645,
8,261,647, 8,276,493, 8,820,727, 9,676,116, 10,843,370, D816742, D818013,
D834623, D831711, D639,319, D654,101, D638,040 & 8,479,628 — Canada
Patent Nos. 2,432,863, 2,488,216, 132823, 2,541,734, 2,687,619, 2,687,622,
2,687,623, 2,688,407, 2,696,974, 2,782,909, 2,806,456, 2,800,791, 2,969,794,
3,037,006, 3,097,733, 3,092,814, 3,101,140, 3,124,208, 3,109,307, 3,127,409,
3,128,969, 3,141,581, 134185, 133049, 169785, 169786, 169787, 196297, 198385
& 169788 — EU Patent Nos. EP 2,746,009 B1, EP 2,332,706 B1, EP 2,332,683
B1, EP 2,684,631, EP 2,332,704, EP 2,759,384, 1117196-0001; 001212393-
0001; 001217277-0001, 001214662-0001, 003736255-0001, 003736255-0002,
003736255-0003, 003736255-0004, 008465066-0001 — UK Patent Nos.
6124839, 6138704, 6151320 — Brazil Patent Nos. BR30 2012 003601-1, BR10
2013 025882-2, BR10 2013 025883-0, PI 1004044-7, PI 1010352-0, DI 7001877-4,
DI 7001876-6 & PI 1009180-7 — Australia Patent Nos. 202111414, 201710613,
201710614, 201710616, 201710615, 202016960, 2021257893 — China Patent
Nos. 4192870, ZL202130153443.5, ZL201810569852.0. Other patents pending in
multiple jurisdictions.
Norwood Industries Inc. is constantly developing its equipment.
Wereserve the right to make changes to the design, construction and
finish of our equipment without notice.
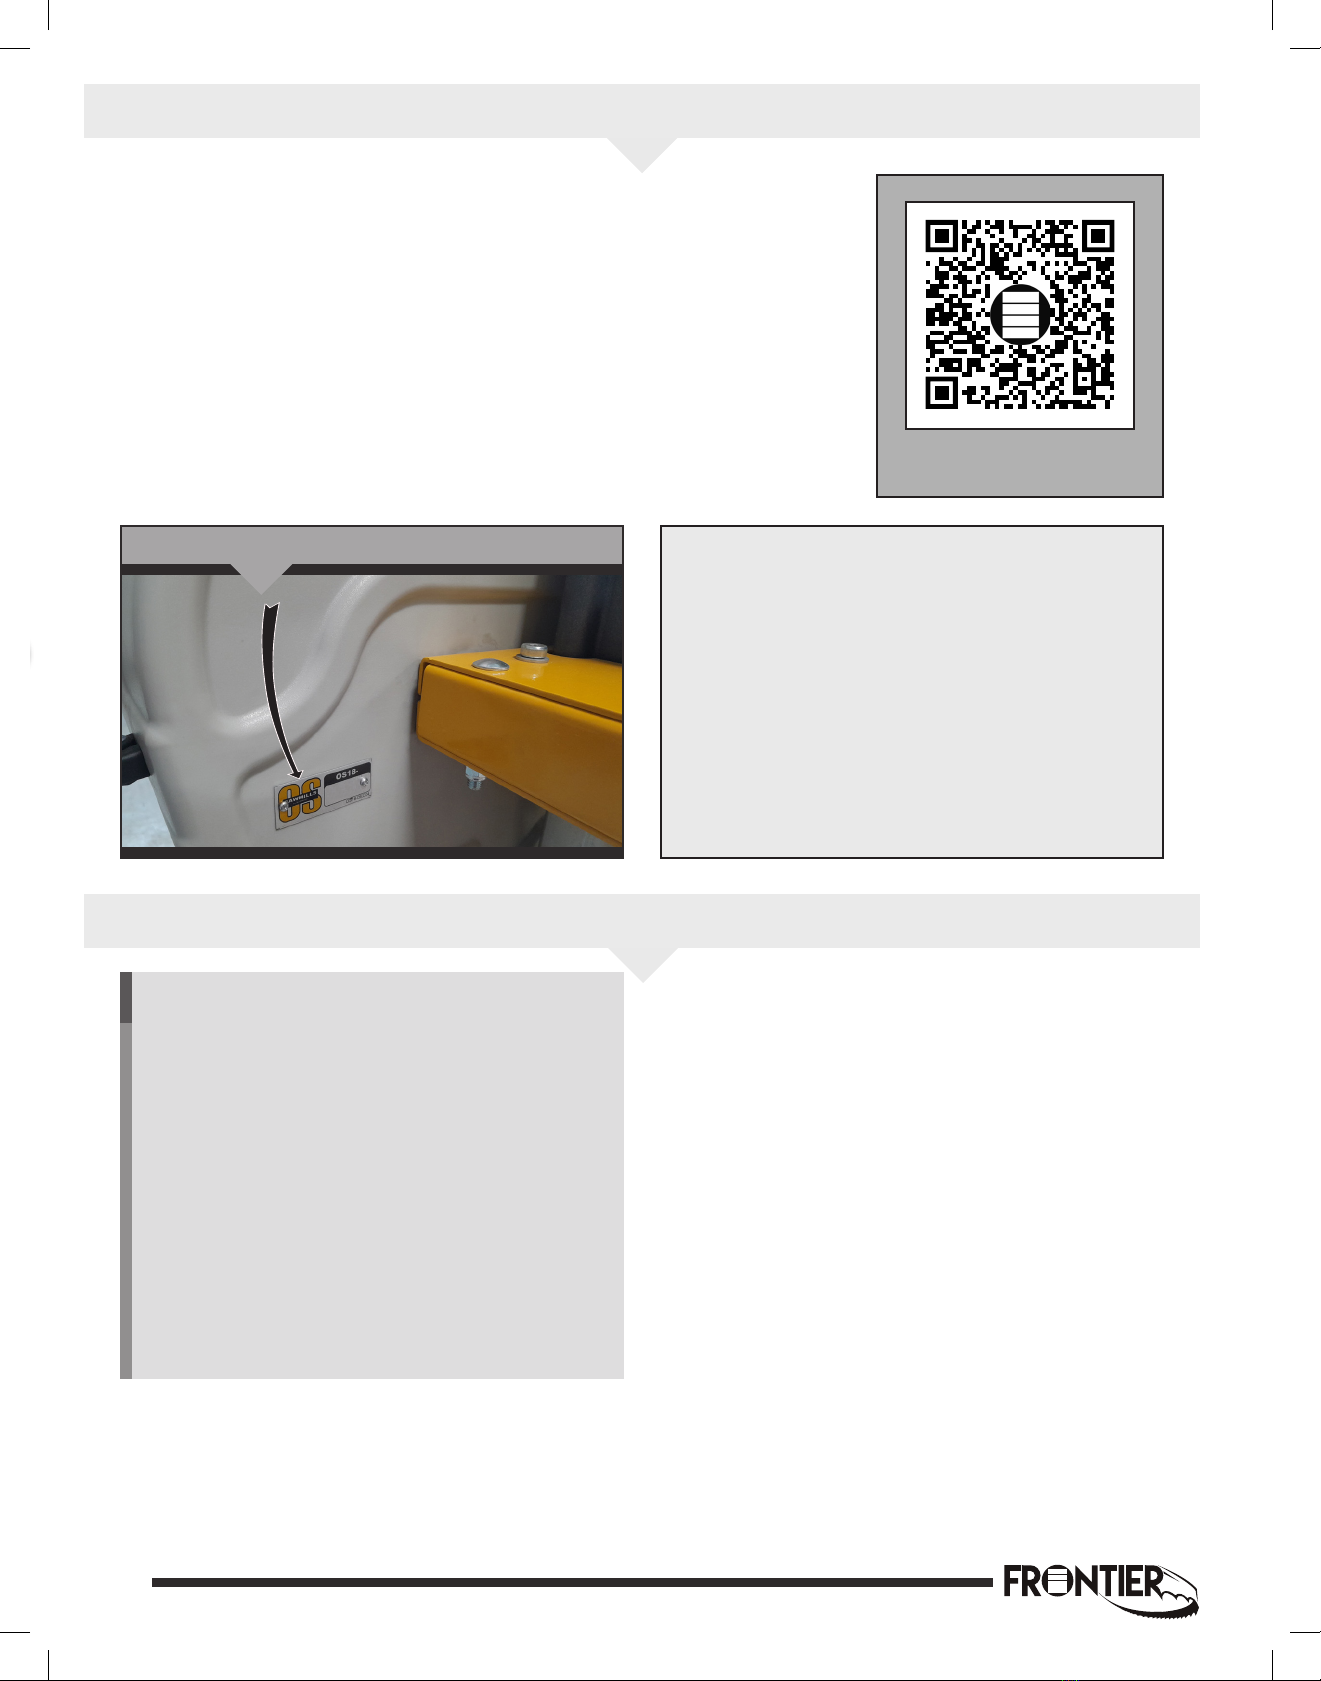
Photographs and illustrations in this manual may show optional
attachments or previous models and parts.
Toll-Free: 1-800-408-9995 (U.S. & Canada)
Telephone: +1-705-325-0030 (International)
E-mail: info@FrontierSawmills.com
Website: www.FrontierSawmills.com
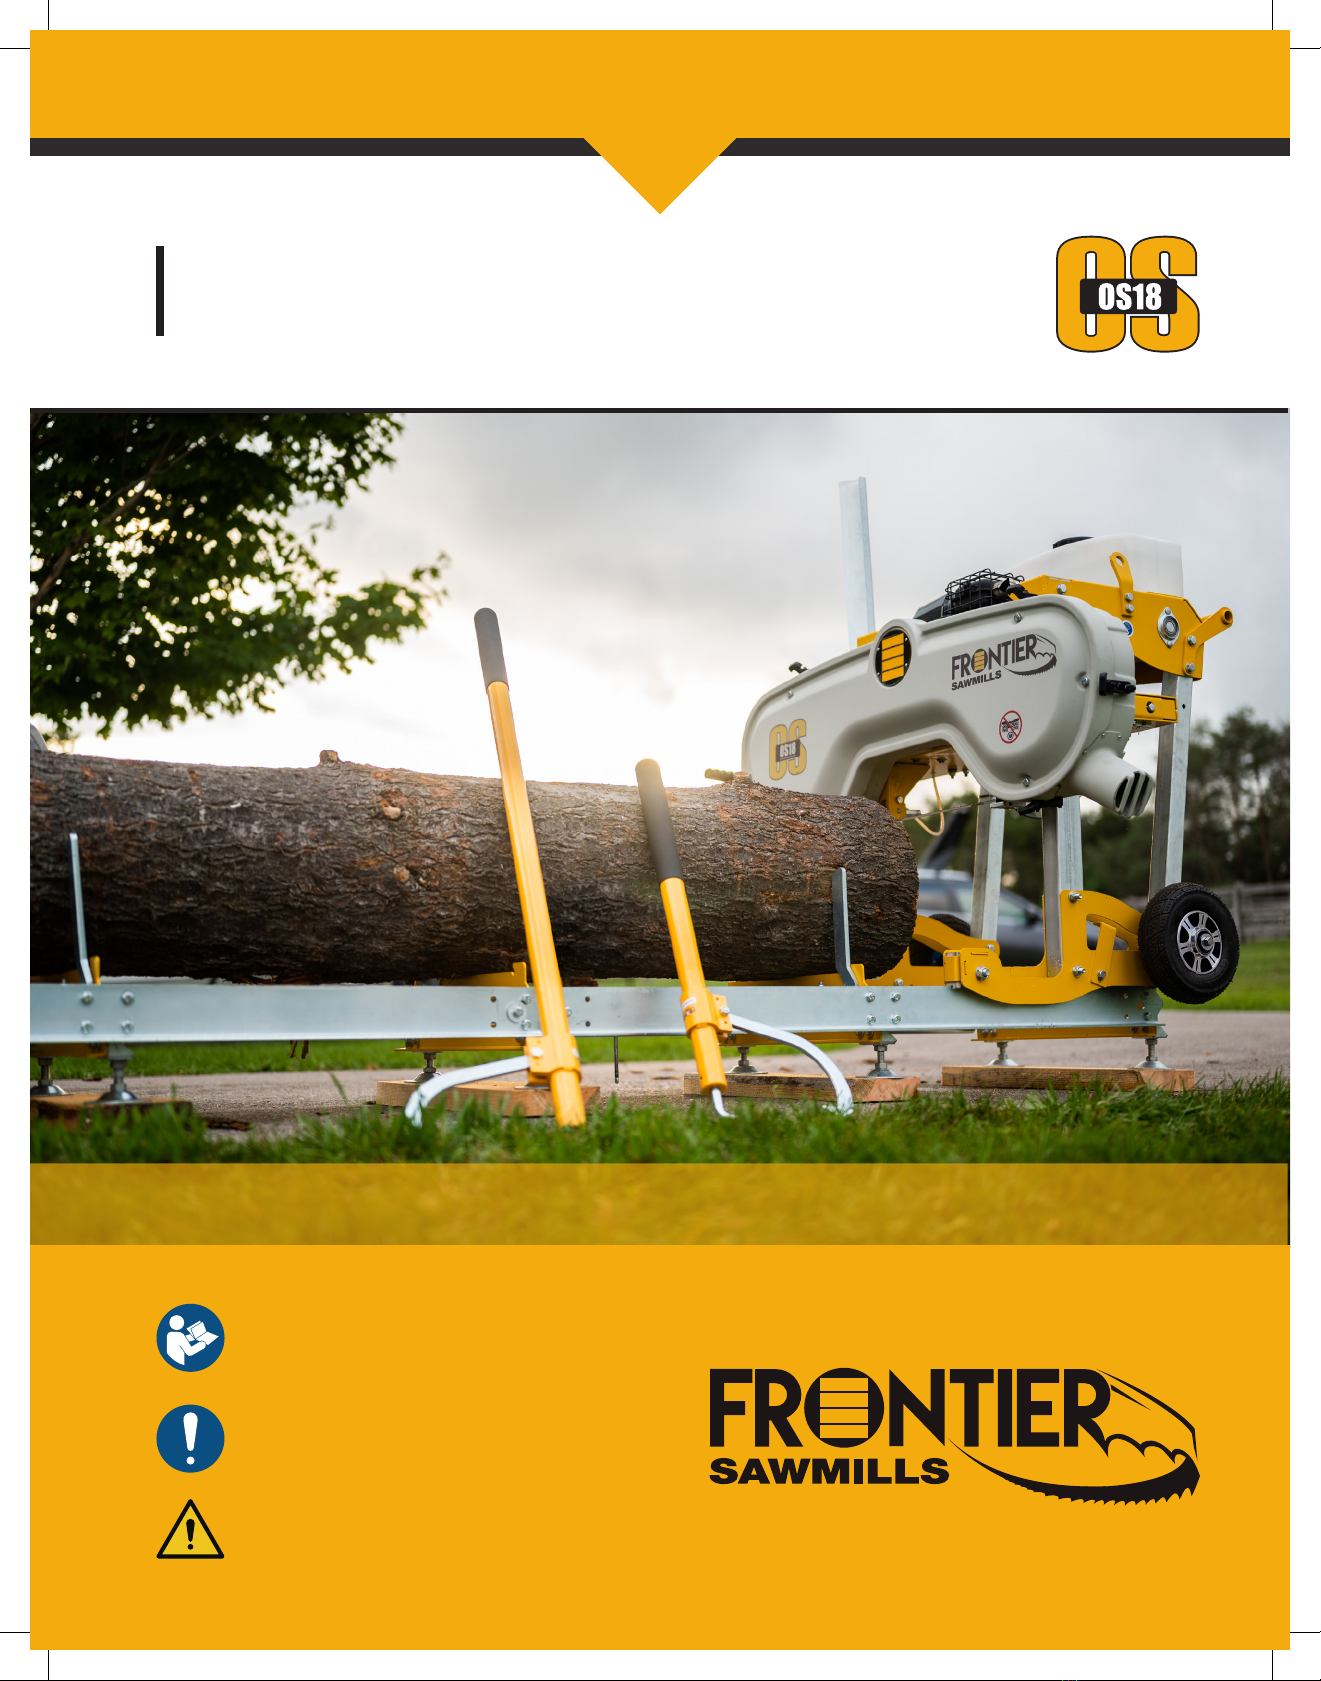
Frontier Sawmills are designed, manufactured and
distributed by:
Norwood Enterprise
2267 15/16 Side Road East
Oro-Medonte ON L0L 1T0
Canada
Norwood Sawmills U.S.A. Inc.
730 Young Street, Suite 900
Tonawanda NY 14150
United States of America
®

vi
Contents
Before You Begin A–2
Overall View ...........................................................................A–3
Warranty Registration ..................................................................A–4
Warranty Policy and Disclaimers ........................................................A–4
Safety Instructions.....................................................................A–6
Safety Equipment ....................................................................A–6
The Operator ........................................................................A–7
The Worksite ........................................................................A–7
Operating the Equipment..............................................................A–8
Maintaining the Equipment ............................................................A–10
Moving the Equipment ................................................................A–10
Storing the Equipment ................................................................A–11
OS18 Technical Data ...................................................................A–12
Box/Bag Contents .....................................................................A–14
Assembly & Installation Instructions ....................................................A–19
Tools Required.......................................................................A–19
Torque Chart ........................................................................A–19
Bed & Cross Bunk Assembly B–2
Carriage Assembly C–2
Winch Shaft and Cable Installations .....................................................C–12
Winch Drum Installation and Adjustment ................................................C–18
Push Handle Assembly and Dolly Wheel/Axle Installation .................................C–28
Carriage Installation D–2
Method 1 ...........................................................................D–2
Method 2 ...........................................................................D–3
Sawdust Chute, Track Sweeper, and M10 Hex Nut Cap Installation..........................D–6
Emergency Stop Installation and Throttle Cable Connection ...............................D–10
Water Tank Installation .................................................................D–14
Drive Belt and Idler Belt Installation .....................................................D–18
Blade Guide Block Assembly Installation ................................................D–20
Band Blade Installation, Tensioning and Tracking .........................................D–22
Blade Guide Block Assembly Adjustments ...............................................D–28
Blade Horizontal Adjustment............................................................D–31
Depth of Cut Scale Installation and Adjustment ..........................................D–32
Greasing and Oiling....................................................................D–38

vii
Contents
Operating Instructions E–2
Choosing a Site......................................................................E–2
Setting Up the Sawmill ................................................................E–2
Starting and Stopping.................................................................E–2
Sawlogs ............................................................................E–3
Log Table ...........................................................................E–3
Loading Logs ........................................................................E–3
Adjusting the Cut.....................................................................E–4
Blade Handling & Coiling ..............................................................E–4
Blade Replacement & Installation.......................................................E–5
Norwood Blades .....................................................................E–6
Sawing Procedures ...................................................................E–6
Maintenance and Troubleshooting F–2
Problems and Solutions ................................................................F–4
Blade Tracking / Bandwheel Alignment ..................................................F–4
Engine..............................................................................F–5
Blades & Blade Maintenance ..........................................................F–6
Inaccurate Cuts ......................................................................F–8
Sawhead and Carriage................................................................F–9
Gas/Water Cap ......................................................................F–11
Parts List .............................................................................F–12
Reorder Kits & Bags ...................................................................F–16
Declaration of Conformity ..............................................................F–20
Optional Attachments and Accessories G–2
Auto Blade Lube System ...............................................................G–3
Leveling Legs/Feet (Set of 10 or Set of 4 (per bed Extension)) .............................G–8
Leveling Foot (Set of 10 or Set of 4 (per bed Extension)) ..................................G–10
Log Loading Assist Ramp and Log Loading Ramp Packages ..............................G–12
Accessorize Your Frontier Z-2

For your own safety and the safety of others,
do not begin working with this equipment or
handle blades before having read and
understood this entire manual, the engine
manual, the instructions enclosed with optional
accessories and the decals posted on the equipment.
Save this manual, your engine manual and instructions
enclosed with optional accessories and review them
frequently for continued safe operation of the equipment.
For your own safety and the safety of others, ensure that
others who intend to use this equipment do not begin
working with this equipment or handle blades before
having read and understood this entire manual, the
engine manual, the instructions enclosed with optional
accessories and the decals posted on the equipment.
Whenever this symbol appears, a tip follows
that will simplify operations or improve the
results.
This manual, the engine manual and the instructions
enclosed with optional accessories should be considered
a permanent part of the sawmill, should remain with the
sawmill and should be delivered to the new purchaser if
the sawmill is resold.
Insert your instructions for your optional
accessories and your engine manual into this
manual for safekeeping.
SAWMILL TV
The ultimate video channel
dedicated to sawyers and
successful sawmilling.
• 100s of Sawmill Videos
• From the ABCs to Advanced
• Pro-Sawyer Tips & Tricks
• Build Your Sawmill Savvy
• Assembly Instruction Videos
Watch on-line at: www.sawmill.tv
A–2
A
Before You Begin

Overall View
A. Carriage
B. Winch crank handle weldment
C. Blade guide block assembly
D. Push handle assembly
E. Log rest
F. Log dog
G. Cross bunk
H. Safety limit switch (inside guard)
I. Rear guard and front cover
J. Blade tension “T” handle assembly
K. Water tank w/ cap
L. Fuel tank
M. Depth of cut scale
N. Winch adjustment controls
O. Emergency stop button (kill switch)
P. Bed end stops
Q. Track sweepers
R. Serial number
S. Engine pull cord
T. Adjustable blade guide
U. Carriage stop latch assembly
V. Carriage lifting plate
Non-Operator’s Side
(Left)
Operator’s Side
(Right)
Carriage Finish End
(Forward)
Carriage Start End
(Backward)
EF
M
I
J
A
O
K
N
V
T
PG
B
R
D
U
C
S
L
Q
H
A–3

Warranty Registration
DISCLAIMER
Norwood Industries Inc. & Norwood Sawmills
U.S.A. Inc. disclaim any responsibility or
liability, in negligence or otherwise, for any
injuries, damages or losses of any kind arising
during the course of assembling, operating or
handling this equipment, options, accessories
or blades howsoever caused.
Responsibility for final inspection of the
Frontier OS parts and components, and the
assembly, maintenance and safe use of the
equipment, lies solely with the person(s) who
assembles and operates the equipment and
handles blades.
Warranty: Norwood Industries Inc. & Norwood Sawmills
U.S.A. Inc. warrant that each new Frontier OS will be
free, under normal use and maintenance, from any
defects in workmanship and materials for a period of one
year from the date of purchase by the original purchaser.
Should any trouble develop during this one-year period,
return the defective part (and any other parts if called
for), freight prepaid, to Norwood. Warranty coverage
commences from the date of purchase by the original
purchaser.
If, after inspection, Norwood determines that the trouble
is attributable to faulty workmanship or material at the
time of manufacture, Norwood will repair or, at its option,
replace the part at no charge.
This Warranty does not cover:
a. The engine which is warranted directly by the engine
manufacturer;
b. Normal maintenance services;
c. Repairs required where alterations have been
made to the equipment, or as a result of the
attachment or installation of any parts or devices on
the equipment other than those manufactured by
Norwood specifically for the equipment;
d. Repairs required after repairs have been made, or
attempted to be made, by others;
SCAN ME
Whether you bought your Frontier OS sawmill directly from Norwood or from a
dealer, we want to ensure you fully benefit from the warranty, get great service, and
receive the right spare parts. Please complete your warranty registration within 30
days from the purchase date.
Register your sawmill on-line today at:
www.frontiersawmills.com/warranty-registration
You can also scan the QR code on this page with your smart phone, or register by
sending an e-mail to: info@FrontierSawmills.com
Be sure to include the following information: Name,Address,Telephone, E-mail,
Date of Purchase, Place of Purchase, Sawmill Model, Sawhead Serial Number.
Record your equipment identication numbers here!
Sawhead Serial Number:
Engine Series/ Serial Number:
Original Date of Purchase:
Warranty Policy and Disclaimers
#Serial Number Location
A–4

e. Repairs required as a result of collision, accident,
misuse, abuse or lack of required maintenance;
f. Repairs required because the equipment has not
been assembled correctly;
g. Consumable items such as belts or blades;
h. Chips, scratches, rust or blemishes in finish;
i. Batteries (which are covered under warranty by the
manufacturer).
Frontier Sawmills are protected by zinc plating
and industrial-grade powder coating. These
finishes can chip or blemish during use or
when exposed to certain conditions. To reduce
onset of corrosion or blemishing, avoid exposing the
sawmill to salt, either from winter roads or airborne
particles of sea salt.
It’s always a good idea to keep spare parts on
hand to ensure that your milling operation
stays on schedule, particularly if you intend to
mill commercially. At a minimum, you should
keep adequate stock of blades, spare belts, bearings,
blade guides and track sweepers.
Norwood Industries Inc. & Norwood Sawmills U.S.A.
Inc. warrant that new Frontier spare parts (except
consumable items such as belts and blades) will be free,
under normal use and maintenance, from any defects in
workmanship and materials for a period of forty-five days
from the date of purchase by the original purchaser.
To Obtain Warranty Service: Contact Frontier Sawmills
to obtain a Return Number, return the part(s), at your
expense, to Norwood Industries Inc. along with your
name and contact information, assigned Return Number,
equipment serial number and date of original purchase
from Frontier Sawmills.
Disclaimer: Norwood Industries Inc. & Norwood
Sawmills U.S.A. Inc. disclaim any responsibility for loss
of time, use of the product or revenues; transportation
costs; or any other indirect, incidental or consequential
damage, inconvenience or commercial losses from the
sale or use of this equipment, howsoever caused.
Frontier Sawmills ships all blades and parts,
including warranty parts, in the U.S.A. by UPS
(1–7 business days delivery standard) and
Frontier Sawmills ships all blades and parts,
including warranty parts, in Canada by regular mail
(3–12 days). Frontier Sawmills ships all blades and parts,
including warranty parts, outside of North America by
regular surface mail (30–90 days). To ensure that your
milling operation stays on schedule, particularly if you
intend to mill commercially, it’s a good idea to order your
blades and spare parts early. If you need blades or parts
on an emergency basis, we are happy to quote expedited
courier service for you at your request.
Disclaimer: Norwood Industries Inc. & Norwood
Sawmills U.S.A. Inc. disclaim liability for any
implied warranties, including implied warranties of
‘merchantability’ and ‘fitness for a specific purpose’ after
the one-year term of this Warranty.
The provisions contained in this written warranty are
not intended to limit, modify, take away from, disclaim or
exclude any warranties set forth in any provincial, state
or federal legislation.
The foregoing disclaimers, and those set out elsewhere
in this manual, apply both during and after the one-year
term of this Warranty.
Entire Written Warranty: This Warranty is the only
and the entire written warranty given by Norwood for
Norwood products. No dealer or his agent or employee
is authorized to extend or enlarge on this warranty on
behalf of Norwood by any written or verbal statement or
advertisement.
Use only original parts from Norwood and use
these only for their purpose(s) expressly
approved by Norwood. Using unauthorized
parts or using parts for unapproved purposes
may cause accidents, injury or damage to the equipment
or personal property.
Disclaimer: Norwood Industries Inc. & Norwood
Sawmills U.S.A. Inc. disclaim liability for any accidents,
injury or damage to the equipment or personal
property caused by the equipment when equipped with
unauthorized parts, equipped with parts for unapproved
purposes or modified in any other way.
IMPORTANT: We want you to be happy with your
Norwood equipment and our service. If you are
uncomfortable with any of our warranty policies,
disclaimers, or safety instructions, please return all of
the equipment intact to Norwood within 30 days of the
original date of purchase for a refund of the purchase
price (less shipping and handling).
Equipment Identification: Each Frontier Sawmill is
assigned an unique serial number for identification
purposes; this number is located on the non-operator
side of the rear guard. Each engine is assigned either
a unique serial number or a series number to identify
the production run; this number is located on the engine
block.
Norwood will not service or sell parts for its
equipment without exact identification of the
individual sawmill unit.
A–5

The sawmill, its options,
accessories, engine and
blades (the “equipment”) are
extremely dangerous and can
cause severe injury or death.
To avoid serious injury, the
equipment must always be
handled, operated and stored with the utmost
care and good judgment and in accordance
with all warnings, cautions, instructions and
procedures contained in this manual, in the
engine manual, in the instructions enclosed
with optional accessories and on the decals
posted on the equipment. Failure to use good
judgment or to follow any of these warnings,
cautions, instructions and procedures can
result in severe injury or death.
WARNING! This symbol means “Pay Extra
Attention” and is always followed by a warning
about a danger that can cause severe injury.
This symbol means “Pay Attention” and is
always followed by a caution or warning of
great importance for safety or sawing results.
For your own safety and the safety of others,
do not begin working with this equipment
before having read and understood this entire
manual, the engine manual, the instructions
enclosed with optional accessories and the decals
posted on the equipment.
Save all instructions for future reference. Keep all decals
in place, clean and readable. Replace any damaged or
missing decals without delay.
WARNING! Cutting tools: Incorrect use of the
equipment or unsafe blade handling can cause
life-threatening injuries. Blades are extremely
sharp and dangerous.
WARNING! Sawhead drop danger: Pressing
downward, even slightly on the winch brake
tensioner assembly, will release the winch
brake. Releasing the winch brake will cause
the sawhead to drop quickly and violently and may cause
serious injury.
Safety Instructions
DISCLAIMER
Norwood Industries Inc. and Norwood Sawmills
U.S.A. Inc. disclaim any responsibility or
liability, in negligence or otherwise, for any
injuries, damages or losses of any kind arising
during the course of assembling, operating or
handling this equipment, options, accessories
or blades howsoever caused.
Responsibility for final inspection of the
sawmill parts and components, and the
assembly, maintenance and safe use of the
equipment, lies solely with the person(s) who
assembles and operates the equipment and
handles blades.
AThe machine is only used for cutting wood and any
other purpose is prohibited.
Safety instructions are found in this section of this
manual, in other sections throughout this manual, in the
engine manual, in the instructions enclosed with optional
accessories and on the decals posted on the equipment.
Safety Equipment
AWARNING! Never use the machine without all the
safety equipment correctly installed.
ATest all the safety equipment before each use.
Ensure that you fully understand the safety features on
the sawmill and their functions.
Emergency Stop
The emergency stop cuts the power. The emergency
stop button must be reset before the machine can be
started again. Test the emergency stop once a day: Start
the engine and press on the emergency stop. If it does
not shut the engine "OFF", it is not working; therefore,
stop using the equipment and contact Frontier Sawmills
immediately to order a replacement (Part # MILL-ESB1M).
Rear Guard and Front Cover
The machine is equipped with a rear guard, front cover,
and a safety limit switch installed on the rear guard. The
machine cannot operate without these protections in
place. Test the safety limit switch once a day: Remove
the front cover and attempt to start the engine. If the
engine starts, the safety limit switch is not working;
therefore, stop using the equipment and contact
Frontier Sawmills immediately to order a replacement
(Part # FRON-SFTY1).
A–6

Bed End Stops
These mechanical stops prevent the carriage from
rolling off the tracks. Inspect once a day that the end
stops are in place and not damaged. If one of the end
stops is missing or damaged, stop using the equipment
and contact Frontier Sawmills immediately to order a
replacement (Part # OS18-B0014 in OS18-BOX #2).
The Operator
APersons under the age of 18 may not work with the
equipment or handle blades.
AOnly persons who meet all of the following
requirements are qualified to operate the equipment
or handle blades.
Qualified operators:
a. Have read and fully understood all the warnings,
cautions, instructions and procedures in this manual,
the engine manual and all instructions enclosed with
optional accessories, and on all decals posted on
the equipment,
b. Are well rested,
c. Are in good physical health with good eyesight,
d. Have not consumed alcohol or drugs, and
e. Are not taking medication that can impair judgment,
reaction times, mobility, alertness or otherwise cause
negative side effects.
Persons who fail to meet any of these requirements are
not qualified to use the equipment or handle blades.
Wear protective gloves when working with the
equipment or handling blades. Risk of cutting
injuries when handling blades. Blades and
engine can be hot immediately after sawing.
Wear approved hearing protection when
operating the equipment. Hearing can be
permanently impaired after only short
exposure to high-frequency sounds.
Wear approved close-fitting safety goggles
when working with the equipment or handling
blades.
Wear approved protective footwear with saw
protection, steel toe-cap and non-slip sole
when working with the equipment or handling
blades.
Wear full-length protective pants when working
with the equipment or handling blades. Never
wear loose-fitting clothing, scarves, jewelery or
similar long items that can get caught when
working with the equipment. Always secure loose hair
before working with the equipment.
Wear respiration protection when working with
the equipment. Long term inhalation of
sawdust and the engine’s exhaust fumes can
represent a health risk.
The Worksite
AOperate the equipment and handle blades in full
daylight or under adequate site lighting cast from at
least four sides to minimize shadows.
AKeep the work area clean, free of clutter, pets,
children, obstacles, hazards or distractions.
AKeep all children and animals well away from the
equipment and blades at all times.
AA broken blade can be ejected out of the sawdust
chute at high velocity. Keep all people and pets
completely clear of the path of the sawdust chute.
Remember that, as the carriage moves, so do the
blade and the path of the sawdust chute.
AThe risk of blade breakage increases when a blade
is not properly and regularly profiled and maintained
and/or when a blade is used past its service life.
AIllustration below depicts view of work site as
seen from above. It sets out the minimum safety
distance for persons other than the operator. While
operating the equipment, the operator must be within
the stipulated area* bounded between the broken
line and the nearest side of the sawmill.
AWhile the equipment is running, persons other than
the operator must observe the safety distances
stipulated in the illustration.
AThe minimum safety distance away from the
equipment for persons other than the operator on
the left side of the sawmill (the side opposite the
operator’s side) is 15 m (50 ft) due to the risk of
blades being ejected out of the sawdust chute. On all
other sides of the equipment, the minimum distance
away from the equipment for persons other than the
operator is 6 m (20 ft).
*Operator’s working space while sawing
6 m
20 ft
6 m
20 ft
15 m 50 ft
6 m 20 ft
A–7

AKeep hands, limbs and all body parts completely
clear of the blade, cables and any other moving
parts. Remember that, as the carriage moves, so do
the blade, cables and other moving parts. Keep clear
of all danger areas.
ANever operate the gasoline (petrol) powered engine
in enclosed areas. Operate the gasoline-powered
engine only outside in a well-ventilated area. The
exhaust gases of the engine can cause nausea,
delirium, and potentially death unless adequate
ventilation is present.
ARisk of being crushed by the carriage.
ARisk of tripping on the tracks or the cross-bunks.
ANever walk on the tracks or the cross-bunks.
ANever step across the tracks.
ARisk of being crushed between the sawmill and a
moving log.
ASet up the equipment on level ground so that there is
at least 3 m (10 ft) of level ground around the tracks
and that there are no obstacles within that area.
ADo not stand between the pile of logs and the
equipment.
AAlways stand at the side of the pile of logs when
handling the logs. Never stand where you are at risk
of being hit by a rolling log.
AKeep at least a 5 lb fully-charged ABC dry-chemical
fire extinguisher visible and easily accessible at the
worksite.
AKeep a fully-stocked first-aid kit visible and easily
accessible at the worksite.
ANever work alone. Make sure that there are other
adults within hearing distance should you need to
call for help.
Operating the Equipment
ACutting tools: Stand behind the carriage and keep
both your hands on the push handle while operating
the equipment. Never stand in front of the carriage or
blade. Never pull the carriage through the cut.
ASawhead drop danger: Pressing downward, even
slightly on the winch brake tensioner assembly, will
release the winch brake. Releasing the winch brake
will cause the sawhead to drop quickly and violently
and may cause serious injury.
AThe clutch mechanism is extremely sensitive: Even
the slightest touch on the throttle handle weldment of
the push handle assembly, when the engine is idling,
can engage the clutch and thereby cause the blade
to spin. Never open the front cover while the engine/
motor is running.
ABefore opening the front cover, turn the engine ON/
OFF switch to the "OFF" position and shut the fuel
off at the engine. Consult your engine manual for
safe shutdown procedures to prevent accidental
ignition. If your sawmill is equipped with an electric
motor, also disconnect (unplug) the power supply
electrical cable from your electrical outlet.
ACoiled blades can spring apart with considerable
force and unpredictably in any direction. Handle
coiled blades, including those packaged in boxes,
with the utmost care.
AThe front cover is shatter resistant to temperatures
as low as -20 °F (-28 °C). Never operate the
equipment in temperatures at or below -20 °F (-28 °C).
AEnsure that the equipment is assembled and
maintained in accordance with this manual, the
engine manual and the instructions enclosed with
optional accessories.
ANever use the equipment to cut anything other than
clean logs or lumber.
ANever add hardware or attachments of any kind
to the equipment other than those manufactured
by Norwood Industries Inc. specifically for the
equipment. Never modify the equipment.
Before operating the equipment, ensure that:
»all maintenance procedures have been properly
carried out;
»the blade is disengaged;
»the equipment stands firmly and securely and the
tracks are fully supported along their full length;
»the carriage retaining brackets, the bed end stops,
and the carriage stop latch assembly are properly
and securely installed;
»all components, fasteners, cables and parts are
properly and securely installed and in good working
order;
»all safety features are properly and securely installed
and in good working order including, but not limited
to, the engine circuit safety kill switch (emergency
stop button), the safety limit switch, the sawdust
chute and the front cover are correctly installed and
securely locked; and
»the blade is correctly installed, properly tensioned
and aligned, and can rotate freely in the correct
A–8

direction.
Before each cut, ensure that:
»no person other than the operator and no pets are
within the minimum safety distances;
»the worksite is free of objects that the operator can
trip over, hazards or distractions.
»the blade will clear the log rests and log dogs;
»the tracks are free of debris;
»the log is firmly secured with the log clamping
mechanisms;
»the adjustable blade guide will clear the widest
portion of the next cut by 1 in (25 mm) and is
secured in place;
»the front cover is correctly installed and securely
locked; and
»the operator is wearing all personal protective
equipment.
AAt regular intervals during operation, ensure that
no person other than the operator and no pets are
within the minimum safety distances.
ATurn the engine/motor off if you are going to leave
the operating station behind the carriage, even
just temporarily, for example when loading or
repositioning logs or removing lumber.
Burn danger! The engine and muffler get very
hot during operation and remain very hot for a
long time after operation. Do not touch.
ANever overreach. Keep proper footing at all times.
ADiscontinue operating the equipment or handling
blades if you become fatigued or distracted.
AStay focused and alert. Watch what you are doing.
Use common sense.
AMoving parts! In case of broken blade or belt, the
bandwheels may keep turning for an extended
period of time. The operator must wait for the
bandwheels to come to a complete stop before
leaving the operating station behind the carriage.
Never attempt to shorten the deceleration time of the
bandwheels by grabbing them with your hands or
using an intermediate tool to do so. Never approach
the front of the carriage or attempt to open the front
cover while any parts are moving.
ABefore releasing the push handle or not otherwise
holding the carriage, secure the carriage against
uncontrolled movement along the track by engaging
the carriage stop latch assembly.
ARefuel before operating the sawmill when the engine
is cold; never refuel when the engine is hot.
When operating the gasoline (petrol) powered engine:
Fire danger! Gasoline, its vapors and oil are
extremely flammable. Burn injuries can be
life-threatening.
ANever operate the gasoline (petrol) powered engine
with a fuel or oil leak. The leaking fuel or oil could
potentially come in contact with hot surfaces and
ignite into flames. If you spill fuel, turn off the engine
immediately and clean the area right away. If you get
fuel on your clothing, change immediately.
ATo avoid fire or explosion, never smoke while
refueling or handling fuel. Never permit smoking,
welding, grinding, blade sharpening or any sparks or
flames near the engine, fuel tanks or fuel.
ATo avoid fire or explosion, always turn the engine off
before refueling.
ARefuel before operating the sawmill when the engine
is cold; never refuel when the engine is hot.
If your sawmill is equipped with an electric powered
motor:
Risk of electric shock! Hazardous voltage
inside the disconnect box, starter box and at
the electric motor can cause shock, burns or
death.
AElectrical short danger! Ensure that you do not short
out any part of the electrical system. Shorting out
the electrical system can cause both of the sawhead
support cables to simultaneously break suddenly
and the sawhead to drop violently causing serious
injury.
AAlways keep the terminals protected by plastic/ a lid.
ANever short out the positive and negative terminals
on the battery. Do not allow any metal objects to
come into contact with the positive and negative
battery terminals such that it could cause an
electrical short.
ARoutinely inspect the battery cables for wear. Any
break in the insulating casing of the battery cables
creates a risk of electrical short.
AOnly a qualified electrician can open the electrical
equipment. All electrical installation, service and
maintenance work must be performed by a qualified
electrician and must be performed in accordance
to applicable electrical codes. Failure to do so can
A–9

result in serious injury or death.
ABefore installing, servicing or maintaining any of
the electrical equipment, turn the ignition switch to
the "OFF" position and remove the ignition switch,
disconnect the sawmill battery ground terminal and
disconnect (unplug) the power supply electrical
cable from your electrical outlet. Follow all applicable
electrical codes.
AIf you have any reason to suspect that there
is anything wrong with the electrical system,
immediately disconnect (unplug) the power supply
electrical cable from your electrical outlet, turn the
ignition switch to the "OFF" position and remove
the ignition key, disconnect the sawmill battery
ground terminal and contact a qualified electrician to
service the electrical equipment. Do not operate the
equipment until it has been serviced by a qualified
electrician and certified fully safe to operate.
AUse the proper battery, 12 volt with a minimum of
330 C.C.A. Connect the RED battery cable to the
positive terminal of the battery, tighten securely. Then
connect the BLACK battery cable to the negative
terminal of the battery, tighten securely.
Maintaining the Equipment
AAlways ensure that all the equipment, its
components, fasteners, cables and parts are
properly maintained and adjusted and in good
working order before operation.
ABefore performing any service, maintenance,
cleaning, repairs or adjustments, before opening
the front cover, before removing or installing blades,
before moving the sawmill and before storing the
equipment, turn the engine ON/OFF switch to the
"OFF" position, and shut the fuel off at the engine.
Consult your engine manual for safe shutdown
procedures to prevent accidental ignition. If your
sawmill is equipped with an electric motor, also
disconnect (unplug) the power supply electrical cable
from your electrical outlet.
ABefore performing any service, maintenance,
cleaning, repairs or adjustments, before opening
the front cover, before removing or installing blades,
before moving the sawmill and before storing the
equipment, lower the sawhead to its lowest position.
AOnly service the engine before operating the sawmill
when the engine is cold; never service the engine
when the engine and muffler are hot.
AKeep operating handles dry, clean and free of oil.
ANever clean the saw blade or bandwheel on this
equipment while the blade, bandwheel or any parts
are in motion.
AIf you need to disassemble some parts, keep them
all together in one box and ensure that, when you
reassemble them, you do so correctly, use all of the
parts and that the box is empty.
AUse only original parts from Frontier Sawmills.
Moving the Equipment
Before moving the sawmill, make sure that all parts are
securely fastened and will not fall or be lost. Keep all
loose parts together in a box to make sure the parts are
not lost.
The saw carriage and the bed must not be lifted or
transported simultaneously; the saw carriage and the
bed must each be lifted and transported separately and
by forklift truck or the like.
ARisk of being crushed by the carriage and bed.
Keep all people and pets at least 6 m (20 ft) from
the equipment while it is being loaded, suspended,
moved and unloaded.
ADanger of tipping. Do not transport on uneven
terrain.
ABefore moving the sawmill, lower the sawhead to its
lowest position.
Lifting the saw carriage: Disconnect the carriage
retaining brackets and lift the saw carriage with reliable
straps securely affixed to both carriage lifting plates
located at the top of the saw carriage. Use the carriage
lifting plates shown on the “Overall View” at the front of
this manual.
Lifting the bed: Lift the bed slowly and carefully with the
use of forks of a forklift truck or the like positioned under
the bed tracks. Place a protective layer of wood securely
on the top surface of the lift forks. Centered along the
side of the bed, insert the forks all the way under the bed
so that both tracks are securely balanced and supported.
Securely strap the tracks to the lift forks.
See the “Technical Data” section in this manual for
equipment weights.
A–10

Storing the Equipment
AWhen storing the equipment, turn the engine ON/
OFF switch to the "OFF" position, shut the fuel
off at the engine and remove the blade. Consult
your engine manual for safe shutdown procedures
to prevent accidental ignition, and take any other
measures necessary to prevent unauthorized
operators from accessing or starting the equipment.
If your sawmill is equipped with an electric motor,
also disconnect (unplug) the power supply electrical
cable from your electrical outlet.
AEnsure that the front cover is correctly installed and
securely locked.
ALower the sawhead to its lowest position.
AAlways store the equipment in a secure and locked
location completely inaccessible by children or any
persons.
AWhen not in use or when unattended, even for short
periods of time such as during breaks, remove the
blade from the sawmill and store it in a location
inaccessible by children or any persons. In addition
to being a wise safety precaution, removing the
blade from the sawmill ensures that it is not stored
under tension and so prevents premature blade
fatigue.
AWhen not in use, secure the carriage to the bed
with the carriage stop latch assembly to prevent the
carriage from being blown or inadvertently rolled
along the track.
AAlways store all blades in a secure and locked
location completely inaccessible by children or any
persons.
A–11

A–12
OS18 Technical Data
CAPACITY
Maximum Log Diameter 18” (45.7 cm)
Maximum Board Width 16.6” (42.2 cm)
Maximum Board Length (with standard bed before extensions) 98” (248.9 cm)
Maximum Log Capacity (with standard bed before extensions) 500 lbs (226 kg)
Engine Type and Size 212 cc (7 hp) Lifan 170F
BED DIMENSIONS
Length of Standard Bed Before Extensions 10’ 9.4” (3.29 m)
Length of Bed Extensions 5’ (1.52 m)
Distance Between Tracks 24.0” (61.0 cm)
Width 26.1” (66.3 cm)
Height (of standard bed, before accessories and extensions) 8.4” (21.3 cm)
Weight (of standard bed, before accessories and extensions) 99 lbs (45 kg)
SAW CARRIAGE DIMENSIONS
Length 57.8” (146.8 cm)
Width 43.0” (109.2 cm)
Height 44.8” (113.8 cm)
Weight 300 lbs (136 kg)
Feed Speed Manual
BANDSAW BLADE
Blade Type and Size 107.5" (2730mm) x 1.125" (28mm)
Bandwheel Size (with bandwheel/blade interface belts) 14” (35.6 cm)
Bandwheel Rotation Speed 1117 RPM
Blade Surface Speed 4 080 FPM (20.73 m/s)
SOUND LEVELS
Sound Pressure in the Operator’s Area* 88 dB(A) k=4 dB
Sound Power (Calculated)* 109.4 dB(A) k=4 dB
Vibration Level* < 2.5 m/s2
Other Data
Water Container 12 L
* Typical distribution measurements for vibration levels at the push handle at 1 m/s2. The above sound level figures quoted are
emission levels and are not necessarily safe working levels. Whilst there is a correlation between the emission and exposure levels,
this cannot be used reliably to determine whether or not further precautions are required. Factors that influence the actual level
of exposure of the workforce include the characteristics of the work room and the other sources of noise etc. i.e. the number of
machines and other adjacent processes. The permissible exposure level can also vary from country to country. This information,
however, will enable the user of the machine to make a better evaluation of the hazard and risk.
Frontier Sawmills is constantly developing its equipment. We reserve the right to make changes to the design, construction and
finish of our equipment without notice.

A–13

A–14
Box/Bag Contents
Each bag or box in your sawmill shipment is marked with its own individual code. Below is a list
of each sawmill bag or package code with its contents. During the assembly process, identify
the location of each part by referring to this box/bag contents list. If your order includes optional
attachments, refer to the optional attachment assembly instructions included in the optional
attachment boxes for their box contents.
ITEM QTY. DESCRIPTION
1OS35 - BOX #1
24 1 1/2" nut - regular hex nut
26 4 5/8 x 3" bolt - hex bolt
27 4 5/8" nut - nylon insert lock nut (thin)
28 8 5/8" washer - spacer washer (41/64" x 1" x .065")
53 2 Carriage inner frame plate (OS18)
55 2 Carriage outer frame plate (OS18)
58 4 Carriage wheel (c/w two 5/8" bearings) - Kit (OS18)
59 8 Carriage wheel spacer - 0.50 " height (OS18, OS23, OS27, OS31 & OS35)
76 1 Handle - Revolving (1/2 - 13 GN598-31)
109 2 M10 x 10 mm screw - cup point socket set screw
142 4 Track sweeper bracket - Frontier (OS18, OS23, OS27, OS31, OS35)
156 1 Winch crank handle weldment (OS18)
1OS18-BOX #2
33 3 Bed end stop (OS18)
57 1 Carriage stop latch assembly (OS18)
62 20 Cross bunk corner bracket (OS18)
1OS18-BOX #3
52 1 Bushing - Rubber (LM34, ML26, HD36, LM29, MN26, OS18)
54 2 Carriage lifting plate (OS18, OS23, OS27, OS31, OS35)
82 1 Knob - M8 female hand knob (Seven arm grip-style with through-hole)
98 1 M8 nut - nylon insert lock nut
101 1 M8 washer - flat washer
105 2 M10 hex nut cap
129 2 Sawhead lift cable pulley assembly w/bearing (OS18, OS23, OS27, OS31, OS35)
136 1 Spring - Compression (15/32" OD, 1 1/2" OAL, 0.062" wire)
146 4 Vertical post gusset (OS18)
151 1 Winch (drum) cable (HD36, LM34, LM29, ML26, MN26, OS18, OS23, OS27, OS31, OS35)
153 1 Winch brake drum cover (OS18, OS23, OS27, OS31, OS35)
154 1 Winch brake tensioner assembly (OS18, OS23, OS27, OS31, OS35)
157 1 Winch drum adjustment bracket (OS18, OS23, OS27, OS31, OS35)
158 1 Winch end plate (Non-operator side) (OS18)
159 1 Winch end plate (Operator side) (OS18)
1 OS18-BOX #4
63 1 Depth of cut - Scale c/w decal (9/8" 8/4" 6/4" 4/4" 3/4") (OS18)
155 1 Winch cover (OS18)
160 1 Winch shaft cover weldment (OS18)
Box
Bag
Table of contents