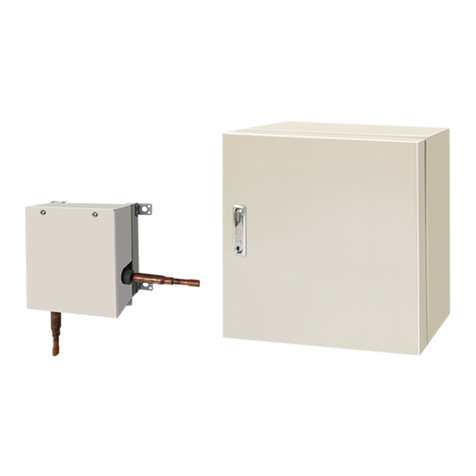
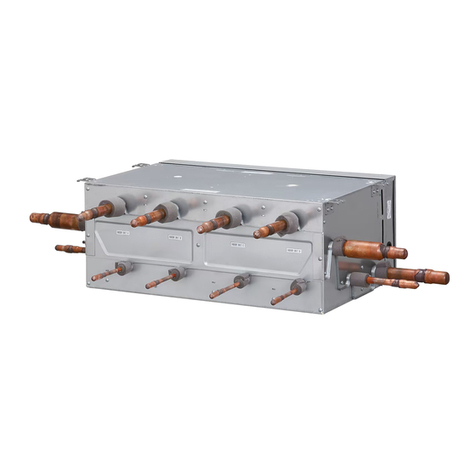
Fujitsu UTW-SCBYA User manual

To be saved for
future consultation
Document n° 1395-1 ~ 09/02/2010
Werftstrasse 20
40549 Düsseldorf - Germany
Subject to modications without notice.
Non contractual document.

Complies with:
- Low voltage directive 73/23/CEE, under standard EN 60335-1.
- Electromagnetic compatibility Diretive 89/336/CEE
Installation and operating manual "1395 - EN"
Control Box
- 2 -

Contents
Designation . . . . . . . . . . . . . . . . . . . . . . 4
Package . . . . . . . . . . . . . . . . . . . . . . . . 4
Control box . . . . . . . . . . . . . . . . . . . 4
Specications . . . . . . . . . . . . . . . . . . . . . 4
Description. . . . . . . . . . . . . . . . . . . . . . . 5
Operating principle . . . . . . . . . . . . . . . . . . 6
Installation . . . . . . . . . . . . . . . . . . . . . . . 7
Installation of the control box . . . . . . . . . . 7
Outdoor sensor . . . . . . . . . . . . . . . . . 7
Room thermostat (option). . . . . . . . . . . . 7
Room control unit (option) . . . . . . . . . . . 7
DHW sensor (option) . . . . . . . . . . . . . . 8
Electrical connections . . . . . . . . . . . . . . . . . 9
Start-up . . . . . . . . . . . . . . . . . . . . . . . 10
Conguring room thermostat . . . . . . . . . . . . 10
Conguring room control unit . . . . . . . . . . . . 10
User interface, room control unit (option)
and room thermostat (option) . . . . . . . . . . . . 12
Setting the slope of heating . . . . . . . . . . . . . 14
Temperature control . . . . . . . . . . . . . 14
Manual adjustment . . . . . . . . . . . . . . 14
Self-adaptation . . . . . . . . . . . . . . . . 14
Parametering the setting . . . . . . . . . . . . . . 16
General . . . . . . . . . . . . . . . . . . . . 16
Setting parameters . . . . . . . . . . . . . . 16
List of function lines (settings, diagnosis, status) . . 16
Conguration 1, 2, 5 or 7 : . . . . . . . . . . . . . 29 Hydraulic connections . . . . . . . . . . . . 29
Electrical connections. . . . . . . . . . . . . 29
Parametering the setting . . . . . . . . . . . 29
Special cases . . . . . . . . . . . . . . . . . 29
Faults displayed on the control box . . . . . . . . . 35 Information display . . . . . . . . . . . . . . . . . 35
Start-up . . . . . . . . . . . . . . . . . . . . . . . 36
Start-up check-list . . . . . . . . . . . . . . . . . . 36
Before starting-up . . . . . . . . . . . . . . . 36
Starting-up . . . . . . . . . . . . . . . . . . 37
Settings sheet . . . . . . . . . . . . . . . . . . . . 38
Start-up data sheet . . . . . . . . . . . . . . . . . 39
Installation and operating manual "1395 - EN" - 3 -
Control Box

Control system for heating and domestic hot water,
depending on weather conditions and room temperature.
This control box is suitable for a heating system
consisting of a monobloc heat pump (see table below),
a heating circuit and a domestic hot water circuit.
gure 1 - Description
gure 2 - Ohmic value of the outdoor sensor
-50
1000
10000
43907
2490
338
-25 0 25 50 75
° C
QAC34
Control Box
Outdoor sensor QAC34
• 1 package :
- Control box (regulator, user interface).
- Outdoor sensor QAC34.
- Supply voltage : 230 V~ +/- 10 %.
- Nominal frequency : 50 Hz.
Installation and operating manual "1395 - EN"
Control Box
- 4 -
Monobloc heat pump Control Box
Model Output Code
WPYA080LA 8 kW UTW-SCBYA
WPYA100LA 10 kW
• DHW kit (UTW-KDWXA)
- for connecting a DHW tank
(with built-in electrical backups).
• Boiler connection kit (UTW-KBSXA)
- for connecting a boiler to the heat pump.
• Room thermostat (UTW-C55XA)
- For correcting the ambient temperature.
• Room control unit (UTW-C75XA)
- For correcting the ambient temperature and
programming the heat pump.
• Swimming pool kit (UTW-KSPXA)
This regulation allows :
- Heating in winter.
- Production of domestic hot water* (provided that
combined with a DHW tank).
Cooling in summer (for oor heating-cooling system or
fan-convectors).
- Installation with boiler connection as a supplementary
heating for the coldest days.
* : These options require the use of additional kits.

241,4
436,4
172,2
300
13
gure 3 - Dimensions in mm
gure 4 - Control box components
Front view
Back viewSide view
Legend :
1. Start/stop switch.
2. User interface.
3. Interface and power card.
4. Regulator.
5. Terminal blocks.
6. DHW power relay.
Installation and operating manual "1395 - EN" - 5 -
Control Box

The regulation controls the internal temperature
based on the outdoor temperature measurement
and governed by the temperature control. The room
thermostat (optional) provides a corrective action for the
temperature control.
- The heating circuit's initial temperature is controlled by
the temperature control.
- The power of the heat pump is modulated according to
ow heating temperature via the "inverter" compressor.
- The daily timer program enables you to dene
the periods for comfortable or reduced ambient
temperature.
- Summer/winter mode switchover is automatic.
- Control of the supplementary boiler*.
- The room thermostat* (optional) provides a corrective
action for the temperature control.
- Domestic hot water* : Heating time programme, control
of the operation of the DHW circulation pump.
- Managing the cooling.
- Anti-legionella cycle for domestic hot water.
- The frost protection works in all modes of operation
and has priority over other functions.
* If the heat pump is equipped with optional equipment and
the associated kits.
Two domestic hot water (DHW) temperatures can be
parametered : nominal temperature (line 1610 to 50 °C)
and reduced temperature (line 1612 to 25 °C).
The default heat pump program (line 560, 561 and 562)
is set for nominal temperature from 0.00 to 5.00h and
for reduced temperature for the rest of the day.
This optimizes electrical consumption while ensuring
comfortable availability of hot water.
Setting for reduced temperature can be useful to prevent
the DHW from switching on too often and for too long
during the day.
The production of domestic hot water (DHW) is triggered
when the temperature in the tank falls 7°C (setting from
line 5024) below the set temperature.
The heat pump produces the domestic hot water,
which is then additively heated, if required, by electrical
backup heating inside the tank.
Depending on how the parameter (1620) is set, nominal
temperature can be reached 24h/day or only at night or
depending on the heat pump programme.
The regulating of the temperature of domestic hot water
has priority over the heating circuit by switching the
directional valve.
The production of DHW takes priority over heating;
nevertheless the production of DHW is controlled by
cycles that control the times assigned to the heating
and the production of DHW in the event of simultaneous
demand.
A function to switch from "reduced" to "nominal" is
provided on the front of the user interface.
(see ref. 1, gure 9, page 12).
If the heating installation is equipped with a DHW
circulation pump, the pump's operation during DHW
cycles can be parametered.
Anti-legionella cycles can be programmed.
Installation and operating manual "1395 - EN"
Control Box
- 6 -

Install at a place that can withstand the weight of the
control box and install positively so that the box will not
topple or fall.
The outdoor sensor is required for the heat pump to
operate correctly.
Consult the tting instructions on the packaging.
Place the sensor on the coldest part, generally the
northern or north-eastern side.
In any case, it must not be exposed to the morning sun.
It must be installed so as to be easily accessible but at
least 2,5 m from the oor.
It is essential that it avoid any sources of heat such as
ues, the upper parts of doors and windows, proximity
to extraction vents, the underneath of balconies and
under-eave areas which would isolate the sensor from
variations in the outdoor air temperature.
- Connect the outdoor sensor to the M and B9 terminals
on the heat pump control board (see gure 8).
Consult the tting instructions on the packaging.
The sensor must be installed in the living room area on
a very uncluttered wall, 1.5 m above the oor.
Avoid direct sources of heat (chimney/ue, television,
cooking hobs), draughty areas (ventilation, door, etc.).
Air leaks in the seals in the constructions are often
translated into cold air blowing through the electrical
conduits. Lag the electrical conduits if there is a cold
draught on the back of the IR sensor.
- Connect the sensor to one of the and
terminals (see gure 8).
Consult the tting instructions on the packaging.
The room control unit must be installed in the living area
to approximately 1,5 m above the ground, a wall well
clear.
Avoid direct sources of heat (chimney/ue, television,
cooking hobs), draughty areas (ventilation, door, etc.).
Air leaks in the seals in the constructions are often
translated into cold air blowing through the electrical
conduits. Lag the electrical conduits if there is a cold
draught on the back of the IR sensor.
- Connect the room control unit : terminals on (),
on () and on ()
1
3
2
300 mm
Ø 6 mm
*
*
**
**
gure 5 - Access gure 6 - Installing the box
* 2 screws included
** plugs not included
Installation and operating manual "1395 - EN" - 7 -
Control Box

If the installation is equipped with a DHW tank (with
electric back-up) :
- Place the domestic hot water sensor in the housing for
the cylinder sensors.
- Connect the domestic hot water sensor to terminal
BX1 and M (see gure 8).
gure 7 - Connections to terminals
gure 8 - Connections to regulator (accessories and options)
1
L
2
N
L
N
3
1
2
3
COM
4
5
6 7 8
N
9
L
10
11
12
L
13
N
14
L
15
N
OUTDOOR
UNIT
BOILER
CONNECT.
BOILER
VALVE
DHW. BACK UP
SUPPLY
DHW. BACK UP
CONNECT
16 17 18
L
19
N
Electricity
supply 230 V
green / yellow
red
blue
brown
Interconnection between
the heat pump and the
control box
Boiler supply 230 V
options
Distribution valve
(deviation boiler)
Power supply
to the electrical
back-ups 230 V
Connection to
the DHW tank
resistance
2
1
3
2
1
CL-
CL+
G+
M
M
B9
M
BX1
CL-
CL+
QX4
N
EX6
EX5
EX4
Outdoor sensor
DHW sensor*
DHW distribution
valve*
5
Room thermostat*
ou
Room control unit*
options
External fault
Tariffs,
day / night,
peak times/
off-peak times
Power shedding
or EJP
(peak day removal)
External
component
contact**
(faults, load
shedder,
power meter)
** If the control device does not provide a potential-free contact, the contact must be relayed to create equivalent wiring.
In all cases, please refer to the instruction manuals for the external components (load limiting device, power meters) to create the wiring.
For the outdoor sensor, use a 2 x 0,75 mm² cable.
For the room thermostat, use a 2 x 0,5 mm² telephone type cable.
For the room control unit, use a 3 x 0,5 mm² telephone type cable.
Installation and operating manual "1395 - EN"
Control Box
- 8 -

The electrical installation must be conducted in
accordance with the prevailing regulations.
The electrical connections must only be made when all
the other tting operations have been completed (xing,
assembly, etc.).
The heat pump must be supplied with power by
special protected leads from the electric panel
via 2-pole circuit breakers specially dedicated to the
heat pump : Curve D.
The electrical installation must necessarily be equipped
with a 30mA differential protection.
- Ensure that the general electrical power supply has
been cut off before starting any repair work.
- It is essential to maintain the live-neutral polarity when
making the electrical connections.
- Tighten the cables using the cable glands to prevent
the conductors from disconnecting accidentally.
- Ensure that the ground wire is longer to prevent
accidental disconnections.
"
• Connecting to regulation cards
- Remove the corresponding connector and make the
connection.
• Connecting to spring terminals :
Rigid wires
- Strip away around 10 mm from the end of the wire.
- Slide the wire into the opening provided for this
purpose.
- Push the spring with a screwdriver so that the wire
enters the cage.
- Remove the screwdriver and then check that the wire
is jammed in the cage by pulling on it.
Flexible wires
- Use the ends and proceed as before.
• Make the connections in accordance with the
diagram gure 7.
- Connect the interconnection cable between
terminals 1, 2, 3 and 4 (earth) of the control box and
the terminals 1, 2, 3 and earth of the heat pump.
• DHW tank with electrical back-up heating (option)
- Connect the distribution valve to connector
QX4, eath and N.
- Connect the domestic water sensor to terminal
BX1 and M.
- Conect the DHW back-up to terminals 17 (earth),
18 and 19.
- Connect the back-up electrical supply to terminals
14, 15 and 16 (earth).
- Connect the distribution valve (deviation boiler)
to the termianls 11 (earth), 12 and 13.
- Connect the boiler supply to terminals
8, 9 and 10 (earth).
• Floor heating system
Heated oor thermal safety fuse.
- The installer is responsible for connecting the heated
oor’s safety system. Thermal safety will stop the
heat pump if the temperature in the oor is too high.
The heated oor's safety system must cut the electrical
supply of the heat pump with a relay.
• Contract with the power provider :
The heat pump’s operation can be controlled to suit
special contracts (e.g. off-peak, day/night).
In particular, domestic hot water (DHW) at Nominal
temperature will be produced during the off-peak hours
when electricity is cheaper.
- Connect the "Power Provider” contact to input EX5.
- Set the parameter (1620) to "Off-peak hours".
• 230V on input EX5 = "Peak hours" information activated
(Basic setting / Modication possible line 5989,
menu Conguration).
• Power limitation or EJP (peak day removal) :
Power limitation is intended to reduce electrical
consumption when this is too high compared to the
contract with the power provider.
- Connect the power limiting device to input EX4, the
back-ups for the heat pump and the DHW stop in the
event of over-consumption by the dwelling.
• 230 V on input EX4 = power limitation in progress.
(Basic setting / Modication possible line 5987,
menu Conguration). (Operating line 2920)
• External faults the heat pump :
Any component of carryforward of information
(thermostat, pressure switch, etc.) may signal an
external problem and stop the heat pump.
- Connect the external component to input EX6.
• 230 V on input EX6 = stoppage of heat pump
(the system displays Error 369).
Installation and operating manual "1395 - EN" - 9 -
Control Box

- Ensure that the startup switch of the control box
is set to .
- Close the installation's main circuit breaker.
(or in winter), in order
to allow the compressor to pre-heat, engage the
installation's main circuit breaker (power supply
to the heat pump) some hours before starting up
the tests.
- Switch-on the startup switch of the control box
().
To ensure that inputs EX4, EX5 and EX6 operate
correctly : Check that the live-neutral polarity of
the electrical supply is correct.
When the power is switched on and every time
that the ON/OFF button is switched off and
then switched on again, the heat pump will take
approximately 4 minutes to start up, even if the
setting is requesting heating.
During the regulator initialisation phase, the display
shows all the symbols and then "Data, update"
and then "State heat pump".
- Make all the specic adjustments to the setting
(Installation conguration) :
- Press the key OK
OK
.
- Hold down the key for 3s and select the level of
access used with the aid of the knob .
- Conrm with the key OK
OK
.
Parameter the heat pump's setting (consult the
settings' list page 16).
In case of error 10, the regulating system uses an
average initial outdoor temperature of 0°C and requires
some time to update this temperature.
To avoid this situation, the sensor must be connected
correctly. Re-initialise parameter 8703 (commissioning
level, consumer diagnostic menu).
To congure the room thermostat and connect it to the
appropriate heating zone :
- Hold down the presence key for more than 3 seconds.
The room thermostat displays RU and a number
ashes.
- Turn the wheel to choose the zone 1.
- Hold down the presence key, the room thermostat
displays P1 and a ashing number.
1 : Automatic recording: a correction of the setting with
the button is adopted without any particular conrmation
(timeout) or by pressing the mode key.
2 : Recording with conrmation: a correction of the
setting with the button is not adopted until the mode key
is pressed.
- Press the presence key again, the room thermostat
displays P2 and a ashing number.
0 : OFF : all the operating elements are engaged.
1 : ON : the following operating elements are locked :
Switching over the heating circuit's operating mode
Adjusting the comfort setting
Changing the operating level
The room thermostat displays OFF for 3 seconds when
a locked button is pressed.
During commissioning, after an initialisation period of
approx. 3 minutes, the user’s language must be set :
- Press the key OK
OK
.
- Choose menu "Operator section".
- Choose language.
- Select the language (, Deutsch, Français,
Italiano, Nederlands, Español, Português, Dansk…)
Installation and operating manual "1395 - EN"
Control Box
- 10 -

Installation and operating manual "1395 - EN" - 11 -
Control Box

gure 9 - User interface of the control box
Auto
ESC OK
RESET
0 4 8 12 16 20 24
gure 10 - Room control unit (option)
Auto
ESC OK
0 4 8 12 16 20 24
1
2
3
4
5
7
12
8
6
gure 11 - Room thermostat (option)
°C
Auto 5
10
11
12
Installation and operating manual "1395 - EN"
Control Box
- 12 -

Ref. Function Denitions
1 Selecting the DHW operating mode
(Domestic hot water)
Marche
Arrêt
- If the installation is tted with a DHW tank.
- On : Production of DHW according to the time program.
- Off : No domestic hot water heating, anti-frost function is active.
- Manual start button : Hold down the DHW key for 3 seconds (Switch from
"reduced" to "nominal" until the next time the DHW timer switches over).
2 Digital display - Operating control, readout of the current temperature, of the heating mode
and of any faults .
- View the settings.
3 Exit "ESC" - Quit the menu.
4 Navigation and setting - Selecting the menu.
- Setting parameters.
- Adjusting the ambient temperature setpoint.
5 Selecting the heating mode - Heating operating according to the heating programme
(Summer/winter mode switchover is automatic).
- Constant comfort temperature.
- Constant reduced temperature.
- Stand-by mode with anti-frost protection
(Provided that the heat pump's electrical power supply is not interrupted).
6 Information display - Various data (page 35).
- Reading error codes.
- Information concerning maintenance, special mode.
7 Conrm "OK" - Input into the selected menu.
- Conrmation of the parameter settings.
- Conrmation of the adjustment to the comfort temperature setting.
8 Selecting cooling mode
Auto
- Cooling operating according to the heating programme
(Summer/winter mode switchover is automatic).
9 Reset
(hold down the key for 3 sec)
- Reinitialising the parameters and cancelling error messages.
- Do not use during normal operation.
10 Digital display - Operating control, readout of the current temperature, of the heating mode
and of any faults .
11 Control knob - Adjusting the ambient temperature setpoint.
12 Presence key - Comfort / Reduced switchover.
On
Off
Installation and operating manual "1395 - EN" - 13 -
Control Box

The heat pump's operation is subject to the temperature
control.
The set temperature for the water in the heating circuit
is adjusted according to the outdoor temperature.
The temperature control may be chosen automatically
by the machine (self-adaptation) or set manually by the
installer (Parameters 720, 721 and 726).
If there are thermostatic valves on the installation, these
must be fully open or adjusted for higher than the normal
set temperature.
During installation, the temperature control must be
parametered according to the heat emitters and the
dwelling's insulation.
The temperature control' curves (gure 12) refer to an
ambient setting of 20°C.
The slope of the temperature control (parameter 720)
determines the impact of the variations in the outdoor
temperature on the initial heating temperature variations.
The higher the slope, the more a slight reduction in the
outdoor temperature causes a signicant increase in
the ow water temperature in the heating circuit.
The off-set in the temperature control (parameter 721)
modies the initial temperature of all the curves, without
modication of the slope (gure 13) .
The corrective actions in the case of any inconvenience
are detailed in the table (gure 14).
When this function is active (parameter 726), the
temperature control is automatically adjusted; it is
therefore futile to modify the slope or the off-set in the
temperature control (parameters 720 and 721).
When this function is rst activated, the end user
may experience some inconvenience for a few days.
This period of no more than a week is required by
the regulator to determine the slope and off-set in the
temperature control. We advise against changing the
temperature settings during this period.
The following instructions must be observed for the
self-adaptation system to operate correctly :
- A room thermostat must be connected.
- The inuence of the ambient temperature
(parameter 750) must be set between 1 and 100%.
- Depending on the installation, the room thermostat may
have a greater or lesser inuence on the temperature
control. The room in which the room thermostat is
installed must not contain any thermostatic valves.
If this is the case, the valves must be open fully.
Installation and operating manual "1395 - EN"
Control Box
- 14 -

gure 12 - Heating curve slope (line 720)
gure 13 - Heating curve displacement (line 721)
40
50
60
70
-20-15-10
-55
10
-4,5
+4,5
Température extérieure (°C)
Temp. départ chauffage
(°C)
20
0,5
Pente loi d'eau
Translation
0
10
30
0
30
Outdoor temperature (°C)
Heating ow
temperature (°C)
Curve off-set
Heating curve slope
0,5
gure 14 - Corrective actions in the case of discomfort
&
&
&
&
&
&
&
&
&
Sensations...
...in mild weather ...in cold weather Curve slope
(line )
Curve off-set
(line )
No correction
No correction
No correction
No correction
No correction
OK OK
OK
OK
OK
OK
Cold
Cold
Cold Cold
Cold
Hot
Hot
Hot
Hot
Hot
Hot Cold
No correction
Corrective actions on the temperature control :
90
80
70
60
50
40
30
° C
100
° C
20 -20
10
1
0,75
1,75
0,5
0,25
1,25
-100
2
1,5
2,25
2,5
Boiler connection application
Heat pump application only
Heating curve slope
Classic
temperature
radiator
Low
temperature
radiator
Floor heating
system
Heating ow temperature °C
Outdoor temperature °C
Installation and operating manual "1395 - EN" - 15 -
Control Box

Only the parameters accessible to levels :
- End user.
- Commissioning level.
- Engineer level.
Are described in this document.
The access levels are specied in the second column of
the table by means of the letters , and .
The OEM parameters are not described and require a
manufacturer’s access code.
- Choose the desired level.
- Scroll the menu list.
- Choose the desired menu.
- Scroll the function lines.
- Choose the desired line.
- Adjust the parameter.
- Check the setting by pressing .
- To return the menu, press .
If no setting is made for 8 minutes, the screen returns
automatically to the basic display.
Basic
display
OK
Brief press End user
OK OK OK
Time of day and date Hours / minutes 1 Hours 1...24 h
Operator section Day / month 2 Minutes 0...60 min
Time prog heating circuit 1 Year 3
Press for
3 seconds
End user Commissioning Engineer OEM
Time of day and date Hours / minutes 1
Operator section Day / Month 2
Time prog heating circuit 1 Year 3
Start of summer time 4 01.01...31.12
End of summer time 5
Line Function Setting range or display Setting
increment
Basic setting
1Hours / Minutes 00:00... 23:59 1
2Day / Month 01.01... 31.12 1
3Year 1900... 2099 1
5Start of summer time (Day / Month) 01.01... 31.12 1
6End of summer time (Day / Month) 01.01... 31.12 1
The change of hour will appear at 3:00 am rst Sunday after the regulated date.
20 Language English, Français, Italiano,
Nederlands
22 Info Temporary | Permanent
26 Operation locking On | Off
27 Programming locking Off | On
28 Direct adjustment Automatic storage...
Storage with conrmation
Installation and operating manual "1395 - EN"
Control Box
- 16 -

Line Function Setting range or display Setting
increment
Basic setting
46 Operation HCP (domestic hot water pump command, output QX2)
Commonly with HC1 or Independent (if independent, see timer program 3 / HCP)
70 Software version (Display)
500 Pre-selection (Day / Week)
Mon-Sun Mon-Fri Sat-Sun Monday Tuesday…
501 1st phase On (start) 00:00... --:-- 10 min
502 1st phase Off (end) 00:00... --:-- 10 min
503 2nd phase On (start) 00:00... --:-- 10 min
504 2nd phase Off (end) 00:00... --:-- 10 min
505 3rd phase On (start) 00:00... --:-- 10 min
506 3rd phase Off (end) 00:00... --:-- 10 min
516 Default values, Circuit 1 No, Yes
Yes + OK : The default values memorised in the regulator replace and cancel the customised heating programmes.
Your customised settings are therefore lost.
Domestic hot water pump program, lines 540 to 556.
If the installation is tted with a DHW tank. (Only with the DHW kit option).
560 Pre-selection (Day / Week)
Mon-Sun Mon-Fri Sat-Sun Monday Tuesday…
561 1st phase On (start) 00:00... --:-- 10 min
562 1st phase Off (end) 00:00... --:-- 10 min
563 2nd phase On (start) 00:00... --:-- 10 min
564 2nd phase Off (end) 00:00... --:-- 10 min
565 3rd phase On (start) 00:00... --:-- 10 min
566 3rd phase Off (end) 00:00... --:-- 10 min
576 Default values No, Yes
Yes + OK : The default values memorised in the regulator replace and cancel the customised heating programmes.
Your customised settings are therefore lost.
600 Pre-selection (Day / Week)
Mon-Sun Mon-Fri Sat-Sun Monday Tuesday…
601 1st phase On (start) 00:00... --:-- 10 min
602 1st phase Off (end) 00:00... --:-- 10 min
603 2nd phase On (start) 00:00... --:-- 10 min
604 2nd phase Off (end) 00:00... --:-- 10 min
605 3rd phase On (start) 00:00... --:-- 10 min
606 3rd phase Off (end) 00:00... --:-- 10 min
616 Default values No, Yes
Yes + OK : The default values memorised in the regulator replace and cancel the customised heating programmes.
Your customised settings are therefore lost.
Installation and operating manual "1395 - EN" - 17 -
Control Box

Line Function Setting range or display Setting
increment
Basic setting
641 Preselection Period 1 to 8
642 Start (Day / Month) 01.01... 31.12 1
643 End (Day / Month) 01.01... 31.12 1
648 Operating level (during the holidays) Frost protection, Reduced
710 Comfort heating setpoint from reduced setpoint to 35°C 0,5 °C
712 Reduced setpoint from frost protection setpoint…
to comfort setpoint
0,5 °C
714 Frost protection setpoint from 4°C…
to reduced setpoint
0,5 °C
716 Comfort setpoint max 20 °C... 35 °C 1 °C
720 Heating curve slope (See gure 12). 0,1... 4 0,02
721 Heating curve displacement -4,5 °C... 4,5 °C 0,5 °C
726 Heating curve adaption (see § 3.2.3) Off, On
730 Summer / Winter heating limits 8 °C... 30 °C 0,5 °C
When the average of the outdoor temperatures over the past 24 hours reaches 18°C, the regulator switches off the
heating (as an economy measure).
During summer mode, the display shows "Eco". This function is only active in automatic mode.
732 24-hour heating limit -10 °C... 10 °C 1 °C
This function enables you partially to offset the automatic summer / winter switchover during the intermediate seasons.
Increasing the value delays the switchover to summer regime.
Decreasing the value advances the switchover to summer regime.
This function is only active in automatic mode.
740 Flow temp setpoint min (for fan convectors) 8... 95 °C 1 °C
741 Flow temp setpoint max 8... 95 °C 1 °C
Floor heating system = 50 °C / Higher temperature radiator = 65 °C
750 Room inuence 1%... 100% 1%
If the installation is tted with a room thermostat :
This function enables you to choose the ambient temperature's inuence on the setting.
If no value is entered, the setting is made based on the temperature control.
If the parameter is set at 100%, the setting is only based on the ambient temperature.
790 Optimum start control max
(Early start to switch to the comfort setting.).
0... 360 min 10 min
791 Optimum stop control max
(Early stop to switch from the comfort setting to the
reduced setting.).
0... 360 min 10 min
800 Reduced setp increase start -30... 10 °C 1 °C
801 Reduced setp increase end -30... 10 °C 1 °C
830 Mixer valve boost 0... 50 °C 1 °C
834 Actuator running time 30... 873 s 1 s
Installation and operating manual "1395 - EN"
Control Box
- 18 -

Line Function Setting range or display Setting
increment
Basic setting
850 Floor curing function (gure 15)
- Off : Early interruption of the current programme, programme inactive
- Functional heating
- Curing heating
- Functional heating + curing heating
- Curing heating + functional heating
- Manually
Manual mode enables you to programme your own concrete slab drying time.The function ends automatically after
25 days.
851 Floor curing setp manually
(if line 850 = manual)
0... 95 °C 1 °C
This function enables you to set the custom concrete slab drying temperature. This temperature remains xed.
The concrete slab-drying programme stops automatically after running for 25 days.
856 Floor curing day current 0... 32
857 Days complete.current 0... 32
900 Operating mode changeover None, Protection mode,
Reduced, Comfort, Automatic
1
Operating mode at end of concrete slab drying period
"
50
45
40
35
30
20 50
25
55
1 15 7
X
10 18
25
15
1
gure 15 - Diagram of the concrete slab drying programmes
Heating ow temperature °C
Functional heating + Curing heating
Curing heating
Day
Functional
heating
Installation and operating manual "1395 - EN" - 19 -
Control Box

Line Function Setting range or display Setting
increment
Basic setting
901 Operating mode Off, Automatic
902 Comfort cooling setpoint 17... 40 °C 0,5 °C
907 Release 24h/day, Time program HC,
Time program 5 / Cooling
If the installation is tted with a DHW tank, set the parameter 907 to "Time program 5 / Cooling"
(In order to activate cooling only during the day and leave the DHW system to operate during the night).
908 Flow temp setp at OT 25°C 6... 35 °C 0,5 °C
Starting cooling temperature setting for an outdoor temperature of 25 °C.
909 Flow temp setp at OT 35°C 6... 35 °C 0,5 °C
Starting cooling temperature setting for an outdoor temperature of 35 °C.
912 Cooling limit at OT --, 8... 35 °C 0,5 °C
If the outdoor temperature is lower than this reading, cooling mode is deactivated.
913 Lock time at end of heating --, 8... 100 1 h
The time delay for operating in cooling mode after having operated in heating mode and vice versa.
918 Summer comp start at OT 20... 50 °C 1 °C
The comfort setting (902) is increased in line with the outdoor temperature rising above this reading.
919 Summer comp end at OT 20... 50 °C 1 °C
Above this reading, the comfort setting (902) is no longer affected by an increase in the outdoor temperature.
920 Summer comp setp increase --, 1... 10 °C 1 °C
Maximum increase in the comfort setting (902).
30
20
18
16
°C
°C
25 35
908
909
Flow temperature setpoint
Outside temperature
gure 16 - Slope
of the cooling curve
92 0
91 9918
902
°C
°C
Comfort ambient temperature setpoint
Outside temperature
In summer, the comfort setting for cooling (Line 902) is offset
upwards in line with the increase in outdoor temperature.
The saves on cooling power and prevents too great a
differential between the ambient indoor and outdoor
temperatures.
Remark : Summer compensation explains the difference
between the value set on Line 902 (or on the setting knob)
and the reading on line 8740.
gure 17 - Compensation
for the comfort setting
Installation and operating manual "1395 - EN"
Control Box
- 20 -
Table of contents
Other Fujitsu Control Unit manuals
Popular Control Unit manuals by other brands

Siemens
Siemens NIM-1W installation instructions

Bray
Bray 19L Series Installation, operation and maintenance manual

MX
MX Atmos Zone Fitting instructions

Sony
Sony MVS-6000 user guide

elsner elektronik
elsner elektronik KNX A3-B2 Installation and adjustment

Pentair
Pentair F251 Installation & maintenance instructions