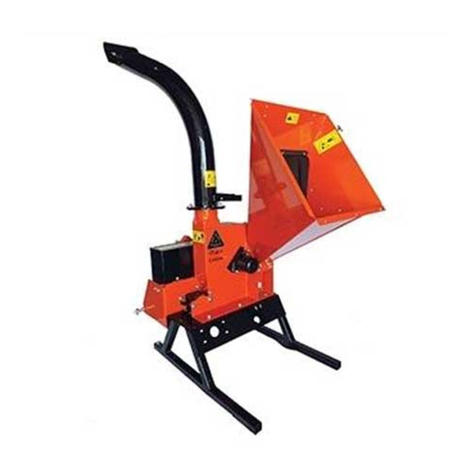
Full Boar FBPWC-208 User manual

KNOW YOUR PRODUCT
INSTRUCTION MANUAL
WARNING: Read all safety warnings and instructions before use. Failure
to follow the warnings and instructions may result in electric shock, fire and/or
serious injury. Save these instructions for future reference.
0418
• 208CC BRIGGS & STRATTON
ENGINE CR950 (13R2)
• 50MM MAX. CUTTING DIAMETER
6.5HP PETROL
WOOD CHIPPER

2
SPECIFICATIONS - MODEL NO. FBPWC-208
KNOW YOUR PRODUCT
1
6
12
3
2
57
9
4
Engine specications:
Make: Briggs & Stratton CR950 (13R2)
Power: 6.5HP
Type: OHV 4 Stroke, air cooled
Fuel type: 91 Oct unleaded petrol
Oil type: 4 Stroke SAE30, 10W30
Fuel tank capacity: 3.0 litres
Oil capacity: 600ml
Displacement: 208cc
Speed: 3,600rpm (max.)
Spark plug: Champion QC12YC
or equivalent
Wood chipper specications:
Max. cutting capacity Ø:50mm green material,
30mm dry material
Blades: 2, 178mm long
Working speed: 3,500rpm (under load)
Wheel diameter: 255mm
Tyre pressure: 20 psi
Drive belt: 1525
Noise level: 110 db
Weight: 104kg
11
8
10
13
14
15

3
KNOW YOUR PRODUCT (cont.)
1. Discharge chute cover
2. Hopper inlet
3. Muffler
4. Hopper
5. Fuel tank
6. Oil filler cap
7. Transport Handle
8. Foot mounting bracket
9. Base frame
10. Emergency stop
11. Engine On/Off switch
12. Wheel x 2
13. Air filter
14. Blade shaft cover
15. Discharge chute
16. Axle
17. Hex key
18. Spanners x 2
19. Spark plug tool
20. T-Bolt & washer x 4
21. M10 Handle assembly fasteners x 2
22. M8 Foot mounting bracket fasteners x 2
15
9
8
47
12
20
22
19
21
16
17 18

4
SPECIFICATIONS....................................................... Page 02
KNOW YOUR PRODUCT........................................... Page 02
INTRODUCTION........................................................ Page 05
SAFETY INSTRUCTIONS........................................... Page 05
ASSEMBLY..................................................................Page 09
PRE-OPERATION CHECK.......................................... Page 13
OPERATION...............................................................Page 15
MAINTENANCE......................................................... Page 20
TRANSPORT & STORAGE..........................................Page 24
TROUBLESHOOTING................................................ Page 25
CONTENTS................................................................ Page 26
DESCRIPTION OF SYMBOLS.....................................Page 27
WARRANTY................................................................ Page 28
TABLE OF CONTENTS

5
INTRODUCTION
WARNING! When using this equipment, basic safety precautions,
including the following, should always be followed to reduce risk of fire, electric
shock, personal injury and material damage.
SAFETY INSTRUCTIONS
Read and understand the manual prior to operating this tool.
Save these instructions and other documents supplied with this tool for future reference.
Congratulations on purchasing a Full Boar petrol wood
chipper.
It has been designed for shredding garden material such
as trees, branches, hedge cuttings, leaves and general
woody garden material. It is best suited for branches up
to 50mm diameter green and 30mm diameter dry.
Engine manual
The engine manufacturer is responsible for all engine-
related issues with regards to performance, power rating,
specifications, warranty and service. Please refer to the
Engine Manufacturer owner/operator manual, packed
separately with your unit, for more information.
GENERAL SAFETY WARNINGS
RISK OF EXPLOSION OR FIRE
What can happen:
¥ Spilled petrol and its vapours can become ignited from cigarette sparks, electrical arcing,
exhaust gases and hot engine components such as the muffler.
¥ Heat will expand fuel in the tank which could result in a fire.
¥ Operating the tool in an explosive environment could result in a fire.
¥ Muffler exhaust heat can damage painted surfaces, melt any materials sensitive to heat
(such as siding plastic, rubber or vinyl) and damage live plants. Keep hot tool away from
other objects.

6
GENERAL SAFETY WARNINGS (cont.)
¥ Improperly stored fuel could lead to accidental ignition. Fuel improperly secured could get
into the hands of children or other unqualified persons.
How to prevent it:
¥ Shut off engine and allow it to cool before adding fuel to the tank.
¥ Use care when filling the tank to avoid spilling fuel. Move tool away from fuelling area
before starting engine.
¥ Keep maximum fuel level 20mm below top of tank to allow for expansion.
¥ Operate and refuel in well ventilated areas free from obstructions. Never re-fuel indoors.
¥ Store fuel in a approved container (AS/NZS 2906-1999) for petrol. Store in a secure
location away from the work area. Make sure the container is clearly marked "fuel".
RISK TO BREATHING
What can happen:
¥ Breathing exhaust fumes can cause serious injury or death.
How to prevent it:
¥ Operate tool in a well ventilated area. Avoid enclosed areas.
¥ Never operate unit in a location occupied by other people or animals.
SAVE THESE INSTRUCTIONS
1) Work area
a) Keep work area clean and well lit. Cluttered and dark areas invite accidents.
b)
Do not operate petrol tools in explosive atmospheres, such as in the presence of
ammable liquids, gases, or dust. Power tools create sparks which may ignite the dust or
fumes.
c) Keep children and bystanders away while operating a petrol tool.
Distractions can cause you to lose control.
2) Personal safety
a) Stay alert, watch what you are doing and use common sense when operating a
petrol tool. Do not use a power tool while you are tired or under the influence of drugs,
alcohol, or medication. A moment of inattention while operating power tools may result in
serious personal injury.
b) Use safety equipment. Always wear eye protection. Safety equipment such as a
dust mask, non-skid safety shoes, hard hat, or hearing protection used for appropriate
conditions will reduce personal injuries.
c) Remove any adjusting key or wrench before turning the tool on. A wrench or a key
that is left attached to a rotating part of the petrol tool may result in personal injury.
d) Do not overreach. Keep proper footing and balance at all times. This enables better
control of the petrol tool in unexpected situations.
e) Dress properly. Do not wear loose clothing or jewellery. Keep your hair, clothing and
gloves away from moving parts. Loose clothes, jewellery or long hair can be caught in
moving parts.
f) If devices are provided for the connection of dust extraction and collection facilities
ensure that these are connected and properly used. Use of these devices can reduce
dust-related hazards.

7
GENERAL SAFETY WARNINGS (cont.)
3) Petrol tool use and care
a) Do not force the petrol tool. Use the correct petrol tool for your application. The
correct petrol tool will do the job better and safer at the rate for which it was designed.
b) Do not use the petrol tool if the switch does not turn it on and off. Any petrol tool
that cannot be controlled with the switch is dangerous and must be repaired.
c) Turn tool off completely before making any adjustments, changing accessories, or
storing petrol tools. Such preventive safety measures reduce the risk of starting the
petrol tool accidentally. Hair can be caught in moving parts.
d) Store idle petrol tools out of the reach of children and do not allow persons
unfamiliar with the petrol tool or these instructions to operate the petrol tool. Petrol
tools are dangerous in the hands of untrained users.
e) Maintain petrol tools. Check for misalignment or binding of moving parts, breakage
of parts and any other condition that may affect the petrol tool’s operation. If
damaged, have the petrol tool repaired before use. Many accidents are caused by poorly
maintained petrol tools.
f) Keep cutting tools sharp and clean. Properly maintained cutting tools with sharp cutting
edges are less likely to bind and are easier to control.
g) Use the petrol tool, accessories and tool bits etc., In accordance with these
instructions and in the manner intended for the particular type of petrol tool, taking
into account the working conditions and the work to be performed. Use of the petrol
tool for operations different from intended could result in a hazardous situation.
h) This appliance is not intended for use by persons (including children) with reduced
physical, sensory or mental capabilities, or lack of experience and knowledge, unless
they have been given supervision or instruction concerning use of the appliance by a
person responsible for their safety.
i) Children should be supervised to ensure that they do not play with the appliance.
4) Service
a) Have your petrol tool serviced by a qualied repair personnel using only identical
replacement parts. This will ensure that the safety of the petrol tool is maintained.
WOOD CHIPPER SAFETY WARNINGS
Safe operating practices
Training
Become familiar with the owner’s manual before attempting to operate this equipment.
Preparation
1) Do not allow children to operate this equipment;
2) Do not operate this equipment in the vicinity of bystanders;
3) Do not run engine powered machines in an enclosed area since the exhaust from an engine contains
carbon monoxide, which is colourless, odourless, and tasteless; carbon monoxide can be extremely
dangerous in enclosed areas;
4) Wear ear protection and safety glasses at all times while operating the machine;
5) Avoid wearing clothing that is loose fitting or that has hanging cords or ties;

8
WOOD CHIPPER SAFETY WARNINGS
6) Only operate the machine in open space (e.g. not close to a wall or other fixed object) and on a firm,
level surface;
7) Do not operate the machine on a paved or gravel surface where ejected material could cause injury;
8) Before starting the machine, check that all screws, nuts, bolts, and other fasteners are properly secured
and that guards and screens are in place. Replace damaged or unreadable labels;
9) Use extra care in handling fuels. They are flammable and the vapours are explosive. The following
points should be observed:
−Use only an approved container;
−Never remove the fuel cap or add fuel with the power source running. Allow engine and exhaust
components to cool before refuelling;
−Do not smoke;
−Never refuel the machine indoors;
−Never store the machine or fuel container inside where there is an open flame, such as a water
heater;
−If fuel is spilled, do not attempt to start the power source, but move the machine away from the area
of spillage before starting;
−Always replace and securely tighten the fuel cap after refuelling;
−If the fuel tank is drained, this should be done outdoors.
Operation
1) Before starting the machine, look into the feeding chamber to make certain that it is empty;
2) Keep your face and body away from the feed intake opening;
3) Do not allow hands or any other part of the body or clothing inside the feeding chamber, discharge
chute, or near any moving part;
4) Keep proper balance and footing at all times. Do not overreach. Never stand at a higher level than the
base of the machine when feeding material into it;
5) Always stand clear of the discharge zone when operating this machine;
6) When feeding material into the machine be extremely careful that pieces of metal, rocks, bottles, cans
or other foreign objects are not included;
7) If the cutting mechanism strikes any foreign objects or if the machine should start making any unusual
noise or vibration, shut off the power source and allow the machine to stop. Disconnect the spark plug
wire from the spark plug (electric unit disconnect from supply) and take the following steps:
−Inspect for damage;
−Check for and tighten any loose parts ;
−Have any damaged parts replaced or repaired with parts having equivalent specifications.
8) Do not allow processed material to build up in the discharge zone; this may prevent proper discharge
and can result in kickback of material through the feed intake opening;
9) If the machine becomes clogged at the inlet opening or discharge chute shut-off the power source
and disconnect the spark plug wire or remove the ignition key before clearing debris in the inlet
opening or discharge chute. Keep the power source clear of debris and other accumulations
to prevent damage to the power source or possible fire. Remember that operating the starting
mechanism on engine powered machines will still cause the cutting means to move;
10) Keep all guards and deflectors in place and in good working condition;
11) Do not tamper with the power source governor settings; the governor controls the safe maximum
operating speed and protects the power source and all moving parts from damage caused by over-
speed. Seek authorised service if a problem exists;
12) Do not transport this machine while the power source is running;
13) Shut off the power source and disconnect the spark plug lead (electric unit disconnect from supply)
whenever you leave the work area;
14) Do not tilt the machine while the power source is running.


9
Circlip
Base Frame
WOOD CHIPPER SAFETY WARNINGS (cont).
ASSEMBLY
CAUTION! Some parts are heavy, two-person lift may be required to avoid injury.
Wheels & Axle
Parts required: Wheel x 2 (12) and Axle (16)
1. Slide a wheel (12) with valve stem facing
out onto the axle (16) (fig. 1).
Note: Slide the first wheel on the circlip side
of the axle (16).
2. To secure, place the wheel washer and nut
onto the axle. Tighten the nut (fig. 2)..
Note: Only assemble one wheel (12) at this
stage.
WARNING! Ensure the tool has been shut off and completely stopped before
performing any of the following operations.
Fig. 1
Fig. 2
Maintenance and storage
a) When the machine is stopped for servicing, inspection, or storage, or to change an accessory, shut
off the power source, disconnect the spark plug wire from the spark plug (electric unit disconnect
from supply), make sure that all moving parts have come to a complete stop and, where a key is fitted
remove the key. Allow the machine to cool before making any inspections, adjustments, etc.
b) Store the machine where fuel vapour will not reach an open flame or spark. For extended storage
periods, run the unit dry of fuel. Always allow the machine to cool before storing;
c) When servicing the cutting means be aware that, even though the power source will not start due
to the interlock feature of the guard, the cutting means can still be moved by a manual starting
mechanism.

10
KNOW YOUR PRODUCTASSEMBLY (cont).
Circlip
Base Frame
Base Frame
3. Slide the axle through the hole in the base
frame (9) and out the other side (fig. 3).
Note: The circlip on the axle (16) will prevent
the wheel (12) touching the base frame
(9).
4. Place the second wheel (12) on the
protruding end of the axle (16) and secure
in place with the wheel washer and nut.
Tighten the nut..
Note: By tightening the wing bolt on the axle
frame (fig. 4) the axle (16) will be held in
position and allow the wheel nuts to be
tightened fully.
5. Check and maintain tyre pressure at
20 psi.
Fig. 3
Fig. 4
Transport Handle
Parts required: Transport handle (7) and M10 Handle assembly fasteners x 2 (21)
1. Place the transport handle (7) on the base frame (9). Align the holes in the handle (7) and
the base frame (9). From the handle assembly fasteners (21), insert each bolt with washer
from the top. Secure in place with nut (fig. 5,6).
Fig. 6Fig. 5

11
ASSEMBLY (cont).
Fig. 7
Foot Mounting Bracket
Parts required: Foot mounting bracket (8) and
M8 Foot mounting bracket fasteners x 2 (22)
1. Align the holes in the foot mounting
bracket (8) with those in the base frame
(9) and secure in place using the two bolts
and nuts from the foot mounting bracket
fasteners (22). Using a 12mm spanner
securely tighten both nuts (fig. 7).
Hopper
Parts required: Hopper (4) and T-bolt x 2 (20).
1. Place the hopper (4) in position on the
base frame (9) above the cutting blades
and slide it across so that the pins of the
frame engage the hinges on the hopper (4)
(fig. 8).
2. Slide the mounting bracket on the
underside of the hopper (4) so that the two
holes align with those in the frame (fig. 9).
3. Secure in place using two T-bolts and
washers (20). Firmly tighten by hand
turning clockwise (fig. 10).
Fig. 8
Fig. 9 Fig. 10
WARNING! DO NOT place hands or any other body parts inside the cutter head
opening. DO NOT touch the blades with your hands or any other body parts.

12
ASSEMBLY (cont.)
Discharge Chute
Parts required: Discharge chute (15) and T- bolt x 2 (20)
1. Place the discharge chute (15) in position
on the rear of the base frame (9) and slide
it across so that the pins of the frame
engage the hinges on the discharge chute
(15), (fig. 11).
2. Slide the mounting bracket on the
underside of the discharge chute (15) so
that the two holes align with those in the
frame (fig. 12).
3. Secure in place using two T-bolts and
washers (20). Firmly tighten by hand
turning clockwise (fig. 13).
Fig. 11
Fig. 12 Fig. 13
IMPORTANT! Ensure the hopper (4) and discharge chute (15) are fitted and secured
with T-bolts (20) otherwise the safety interlock will prevent the motor from starting.

13
PRE-OPERATION CHECK
Adding Oil
OFF
ON
Fig. 14
Note: The wood chipper is shipped without oil and must be filled before starting. Engine
sump capacity 600ml. (Use SAE30 or 10W30 oil).
1. Be sure to check that the wood chipper is on a level surface with the engine stopped.
2. Remove the oil filler cap (6), and wipe
the dipstick with a clean rag. Check the
oil level by inserting the dipstick in the
filler hole without screwing it in and then
removing it again (fig. 14).
3. If the oil level is below the end of the
dipstick, refill ( use a funnel, do not tip
wood chipper) until it registers on the
halfway mark of the dipstick (fig. 15).
Use premium quality 4-stroke engine oil.
Recommended SAE30 or 10W30 for most
climate conditions in Australia.
H
L
H
L
Fig. 15
CAUTION! Using non-detergent oil or 2-stroke engine oil could shorten the
engines service life.
Air lter
The air filter (13) must always be in perfect working order, to prevent debris and dust from
being sucked into the engine thus reducing the efficiency and life of the engine.
¥ Always keep the air filter (13) free of debris and in perfect working order.
¥ If necessary, replace the filter with an original spare part. Incompatible filtering can impair
the efficiency and life of the engine.
¥ Never start the engine without the air filter (13) assembled.
¥ To change the air filter (13) refer to the maintenance section of the engine instruction
manual.

14
PRE-OPERATION CHECK (cont.)
Adding Fuel
Note: Only use unleaded 91 RON (Research Octane Number) petrol. Purchase fuel in
quantities that can be used every 30 days to prevent gum or foaming inside the
container and/or fuel tank
1. Place the wood chipper on a flat level
surface.
2. Ensure the engine is switched OFF.
3. Remove the fuel cap from the top of the
fuel tank (5).
4. Using a funnel, carefully fill the tank (5) with
fuel (fig. 16).
5. Fasten the fuel cap and clean any spillage.
WARNING! Keep away from cigarettes, smoke and sparks when refuelling the
engine. Always refuel in a well-ventilated location.
WARNING! Be careful not to spill fuel when refuelling. Spilled fuel or fuel vapour
may ignite. If any fuel is spilled, make sure the area is dry before starting the engine.
WARNING! Do not over fill the fuel tank.
WARNING! Do not refill tank while engine is running or hot.
Fig. 16
Drive Belt
To ensure optimum power from the engine the drive belt must be in good condition and
operate under proper tension. To remove, install and inspect the drive belt refer to the
maintenance section of this instruction manual.
Spark plug
¥ Use only the spark plug that is recommended for this wood chipper.
¥ Make sure that the electrode is clean and the air gap is correct (refer to the specs of the
spark plug manufacturer).
¥ To remove, install and inspect the spark plug refer to the maintenance section of the
engine instruction manual.
CAUTION! Not all spark plugs for engines are the same.

15
2. FUEL - Move the fuel lever to the right,
OPEN position.
3. CHOKE - Move the choke lever to the left,
choke (closed) start position.
Note:If the engine is still hot, closing the
choke is not necessary.
4. THROTTLE - Move the throttle lever
slightly left towards
the symbol.
5. STARTER - Grip the recoil starter and
slowly pull until resistance is felt, then pull
the recoil starter rapidly.
Allow the rope to rewind slowly and if
necessary, repeat this procedure until the
engine starts.
6. Once started move the choke lever right
(run) position and open the throttle lever
further left - run at full speed.
OPERATION
1. ENGINE ON/OFF SWITCH - Move the engine on/off
switch to the ON position.
OFF
ON
OFF
ON
Starting the Engine (g 17,18,19)
WARNING! Ensure you have filled the engine sump with engine oil before starting
the engine. The dipstick must indicate the oil level is at maximum for the unit to
start.
Fig. 17
WARNING! Prior to starting the engine ensure the hopper (4) is empty. Ensure you
wear safety gloves, safety glasses and earmuffs when the wood chipper is in use.
Throttle
Choke
Fuel
Pull Start
OFF
ON
Throttle
Choke
Fuel
Pull Start
OFF
ON
Fig. 18
Fig. 19
IMPORTANT! Ensure the hopper (4)
and discharge chute (15) are fitted and
secured with T-bolts (20) otherwise the
safety interlock will prevent the motor
from starting.

16
OPERATION (cont.)
Stopping the Engine
1. Move the throttle lever fully right towards the .... indicator (fig. 20), move the engine
on/off switch to the OFF position (fig. 21) and fuel lever left, closed position (fig. 22).
OFF
ON
OFF
ON
Fig. 20 Fig. 21 Fig. 22
Emergency Stop
If the engine is stopped using the emergency
stop button (10) (fig. 23), reset the button by
rotating it right until it pops up. The button
must be reset in order to start the engine.
OFF
ON
Fig. 23
Chipping & Shredding
WARNING! The wood chipper is not suitable for materials including glass, metal
plastic bags, stones, fabric, vines, soft leafy material and waste without firm
consistency (eg kitchen waste).
WARNING! To prevent damage to the wood chipper it is recommended that
garden material greater than 50mm in diameter (green) or 30mm in diameter (dry) is
not fed into hopper.
The following types of material can be used in the wood chipper
¥ Trees, including roots.
¥ Branches.
¥ Waste from cut branches.
¥ Waste from hedge trimming.
¥ Bamboo

17
OPERATION (cont.)
1. Feed the material to be shredded into the
hopper inlet (2).
2. Once the material makes contact with the
blades it will be pulled into the machine,
no need to push it in.
Note:The wood chipper may clog if too much
fine material is fed in. To prevent clogging, mix fine material with larger material.
3. When finished, stop the engine as described in "Stop the engine" section of this
manual.
Tips
Following the below procedures will improve operation and prolong the life of the wood
chipper.
¥ Trees and branches should be shredded shortly after they are cut. They become extremely
hard once dry and the maximum cutting diameter is reduced.
¥ Garden waste such as fresh foliage, creepers and vines contain a lot of moisture, this can
result in material sticking to the cutter head. Such material should be allowed to dry for a
few days before being fed into the shredder.
¥ Always check material before shredding, ensure it does not contain any stones or nails as
this may severely damage the shredder.
¥ Material that contains dirt will rapidly blunt the cutting blades and should be avoided.
¥ For roots, always remove dirt and stones before chipping.
¥ When chipping large material, process one branch at a time.
¥ During the chipping process, place the larger side first (trunk side before branch) in order
to get good chipping.
STAY CLEAR
CAUTION! Stay clear of the
discharge chute opening the chips
that are expelled can hurt you or may
cause serious injury (fig. 24).
Fig. 24

18
OPERATION (cont.)
Discharge Chute Cover (g. 25)
The discharge chute has an adjustable cover (1), this is used to direct where the chippings
are expelled
Clearing Jammed Blades
If the blades become jammed, this is usually caused by attempting to shred material that is
too large.
1. Loosen, do not remove, the four bolts.
2. Adjust up or down as required.
Note:In the upper most position the
chippings will fall further away.
3. When adjustment is completed, firmly
tighten bolts.
1. Stop the engine.
2. Remove the hopper (4) and discharge chute (15) (fig. 26-27). Ensure both are free of any
obstructions.
CAUTION! Blades are sharp, handle with care. It is recommended to use gardening
or safety gloves when handling or cleaning the blades.
Fig. 25
Fig. 26
Fig. 24
Fig. 27

19
OPERATION (cont.)
3. To allow access to the blade shaft remove
the two nuts from the blade shaft cover
(14) (fig. 28 ).
4. Rotate the blade shaft as required using
the 17mm spanner (fig. 29).
5. Carefully clean out the cutting and
discharge area. Ensure that all debris
is removed to prevent the blades from
clogging. The discharge area should be
free of all organic matter (fig. 30).
6. Once the blades are completely clean
refit blade shaft cover (14),hopper (4) and
discharge chute (15).
Fig. 28
Fig. 29
Fig. 30

20
MAINTENANCE
¥ The engine should be cool enough to touch before performing any maintenance.
¥ Inspect and maintain the wood chipper before each use. If the wood chipper has been
used previously, it must be inspected and maintained before each subsequent use.
¥ Always shut off the engine before inspecting, cleaning, adjusting, or repairing the wood
chipper.
¥ Remove debris from the engine, muffler, and moving parts. Debris on a hot engine can
be a fire hazard. Clean debris and chaff from the engine cylinder head, cylinder head
fins, blower housing rotating screen, and muffler areas.
¥ After the first 25 hours of use the engine oil requires to be replaced, and then every
50 hours after that. Refer provided engine manual for further engine maintenance
procedures.
CAUTION! Avoid contact with hot muffler.
Replacing Blades
The blades supplied with the wood chipper are re-sharpened and will become blunt over
a period of time. Additional blades & bolts can be obtained as spare parts. Always replace
both blades at the same time. Ensure the blades are kept in good condition and correct
clearance is maintained.
CAUTION! Blades are sharp, handle with care. It is recommended to use gardening
or safety gloves when handling or cleaning the blades.
1. Stop the engine.
2. Remove the hopper (4)
3. To allow access to the blade shaft remove the two nuts from the blade shaft cover (14)
(fig. 31).
4. Rotate the blade shaft as required using the 17mm spanner (fig. 32).
Fig. 31 Fig. 32
Table of contents
Popular Chipper manuals by other brands

Farmi
Farmi 381 HFC OPERATION, MAINTENANCE AND SPARE PARTS MANUAL

Wallenstein
Wallenstein BXC34 Operator's manual

Kohler
Kohler DK2 Power OPC524 Starting instructions

Billy Goat
Billy Goat THE TERMITE TKD502SP Operator owner's manual

Farmi Forest
Farmi Forest FARMI 260 OPERATION, MAINTENANCE AND SPARE PARTS MANUAL

YAAHKIEH
YAAHKIEH MC100 Series user manual