Full Boar FBT-5700 User manual

INSTRUCTION MANUAL
WARNING: Read all safety warnings and all instructions. Failure to follow the
warnings and instructions may result in electric shock, fire and/or serious injury.
Save all warnings and instructions for future reference.
• 5.5HP Motor
• 25cm Compaction Depth
PLATE
COMPACTOR
0116

Engine Specification:
Motor Power: 5.5hp
Engine Type: 4 Stroke, Air Cooled
Fuel Type: 91Oct Unleaded Petrol
Fuel Tank Capacity: 3.6 Litres
Oil Capacity: 600mL
Engine Capacity: 163cc
Engine Speed: 3600rpm
Compactor Specification:
Vibration Frequency: 5,500vpm
Centrifugal Force: 11kN
Compaction Depth: 25cm
Travel Speed: 25m/min
Plate Size: 530x370mm
Plate Thickness: 6mm
oise Level: 91db
2
1. Throttle Lever
2. Handle Assembly
3. Trolley Wheels Assembly
4. Muffler
5. Air Filter
6. Fuel Tank
7. Enginge On/Off Switch
8. Oil Fill Plug
9. Exciter
10. Lifting Handle
11. Compacting Plate
12. Engine Deck
13. Recoil Starter Handle
14. Paving Pad Kit
SPECIFICATIONS – MODEL NO. FBT-5700
KNOW YOUR PRODUCT
14
4
6
2
13
11
15
16
17
18
12
15. M10 x 30 Bolt for Paving Pad x 6
16. M10 x 30 Bolt for Wheels x 2
17. M10 x 65 Bolt for Handle x 2
18. M5 x 25 Bolt for Throttle x1
1
3
5
7
8
9
10

3
SPECIFICATIONS
KNOW YOUR PRODUCT .
INTRODUCTION ...
SAFETY INSTRUCTIONS ..
ASSEMBLY ..
SET-UP .
OPERATION ..
MAINTENANCE . ..
TROUBLE SHOOTING .
CONTENTS ...
WARRANTY
Page 2
Page 2
Page 4
Page 4
Page 6
Page 8
Page 10
Page 11
Page 14
Page 16
Page 17
TABLE OF CONTENTS

4
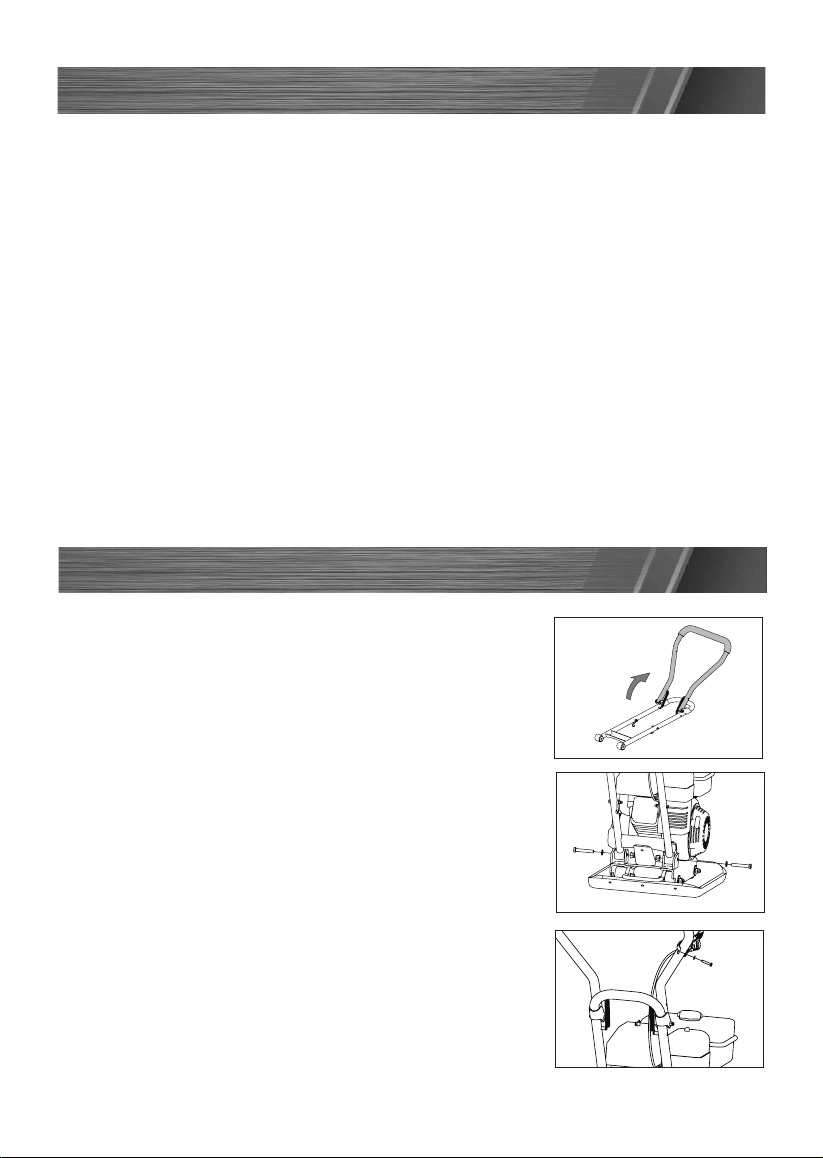
Congratulations on purchasing a Full Boar Plate Compactor.
Your Full Boar Plate Compactor FBT-5700 has been
designed for paving projects like driveways, landscaping
or preparing foundations for concreting.
1) WORK AREA
a) Do not operate plate compactor in explosive atmospheres, such as in the
presence of flammable liquids, gases or dust. Engine may create sparks which
may ignite the dust or fumes.
b) ever run engine in an enclosed area. Exhaust gases contain deadly,
poisonous carbon monoxide, which has no odour or taste. Exposure may cause
loss of consciousness and may lead to death.
c) Keep by-standers, children and visitors away while setting up plate
compactor. Distractions can result in mistakes.
d) Keep the engine at least 1 metre (3 feet) away from buildings and other
equipment during operation. Do not place flammable objects close to the
engine. Procedure should be followed to prevent fire hazards and to provide
adequate ventilation.
2) PERSO AL SAFETY
a) Stay alert, watch what you are doing and use common sense when operating
this plate compactor. Do not attempt to use plate compactor while tired or
under the influence of drugs, alcohol or medications. A moment of inattention
while operating power tools may result in serious personal injury.
b) Dress appropriately. Do not wear loose clothing or jewellery. Contain long
hair. Keep your hair, clothing and gloves away from moving parts. Loose
clothes, jewellery or long hair can be caught in moving parts.
c) Do not overreach. Keep proper footing and balance at all times. Proper
footing and balance enables better control of the plate compactor in unexpected
situations.
d) Use safety equipment. Always wear eye protection. Dust mask, non-skid safety
shoes and hard hat must be used for appropriate conditions.
3) PLATE COMPACTOR USE A D CARE
a) Store idle plate compactor out of reach of children and other untrained
persons. Plate compactor are dangerous in the hands of untrained users.
b) Maintain plate compactor. Keep the engine and muffler free of grass, leaves,
excessive grease or carbon build up to reduce the chance of a fire hazard. Properly
maintained plate compactors are less likely to malfunction and cause injury.
c) Check for misalignment or binding of moving parts, breakage of parts and
any other condition that may affect the plate compactor operation. If
damaged, have the plate compactor serviced before using. Accidents can be
caused by poorly maintained plate compactors.
INTRODUCTION
GENERAL SAFETY INSTRUCTIONS

5
GENERAL SAFETY INSTRUCTIONS cont.)
d) Always shut off the engine, allow the engine to cool and remove the spark
plug before performing any maintenance. Such preventative measures
reduce the risk of starting the plate compactor accidentally.
e) ever douse or squirt the unit with water or any other liquid. Keep
handles dry and clean; free from oil and grease. Allows for better control of
the plate compactor.
4) SERVICE
a) Plate compactor service must be performed only by qualified repair
personnel. Service or maintenance performed by unqualified repair personnel
could result in injury.
b) When servicing a plate compactor, use only identical replacement parts.
Follow instructions in the Maintenance Section of this manual. Use of
unauthorized parts or failure to follow maintenance instructions may create a
risk of injury and may void your warranty.
ADDITIONAL SAFETY RULES FOR PLATE COMPACTOR
1) ever refuel while engine is running or hot. Fuel spilled on a hot engine could
result in a fire or explosion.
2) Use caution when handling petrol. Refuel in well-ventilated area. Do not overfill
fuel tank and do not spill fuel. Make sure tank cap is closed properly. Petrol is
extremely flammable and is explosive under certain conditions.
3) ever run the engine in an enclosed or confined area. Exhaust contains poisonous
carbon monoxide gas; exposure may cause loss of consciousness and may lead to
death.
4) Be careful not to touch the muffler while it is hot. To avoid severe burns or fire
hazards, let the engine cool before transporting or storing it indoors. The muffler
becomes very hot during operation and remains hot for a while after stopping the
engine. Exhaust may contain chemicals that may cause cancer or reproductive harm.
5) Keep hands, fingers and feet away from the base plate. Grip the handle of the
plate compactor firmly with both hands.
6) Always operate the machine from behind, never pass or stand in front of the
machine when the engine is running.
7) ever place tools or any other item under the plate compactor.
8) If the unit strikes a foreign object, stop the engine, disconnect the spark plug,
thoroughly inspect the machine for any damage, and repair the damage before
restarting and operating the machine.
9) Do not overload the machine capacity by compacting too deep in a single pass or
at too fast a rate.
10) ever operate the unit at high transport speeds on hard or slippery surfaces.
11) Exercise extreme caution when operating on or crossing gravel drives, walks, or
roads. Stay alert for hidden hazards or traffic.
12) Do not carry passengers.
13) ever leave the plate compactor unattended while the engine is running.

6
ADDITIONAL SAFETY RULES FOR PLATE COMPACTOR cont.)
Fitting the Handle
1. Unfold the handle assembly (2). (Fig. 1)
2. Mount the handle assembly (2) as shown. Ensure the
handle assembly (2) ends slot into the channels provided
by the engine deck (12). Place flat washers, followed by
M10x65 hex bolts (17) on the outer side, and tighten
with lock nuts on the inner side. (Fig. 2)
3. Secure the throttle control (1) onto the upper handle
with M5 x 25 washer and bolt (18). (Fig. 3)
4. Fasten the throttle control cable with cable fasteners (not
provided).
Fig.1
Fig.2
Fig.3
14) Always stop the engine when walking from one location to another.
15) Stay away from the edge of ditches and avoid actions that may cause the plate
compactor to topple over.
16) Always ascend slopes carefully to prevent the plate compactor from toppling over
onto the operator.
17) Always park the unit on a firm and level surface and shut the plate compactor off.
18) Limit the hours of operation and take periodic breaks to minimize repetition and
reduce exposure to vibration to your arm. Reduce the speed and force in which you
do the repetitive movement.
This appliance is not intended for use by person (including children) with reduced
physical, sensory or mental capabilities, or lack of experience and knowledge, unless
they have been given supervision or instruction concerning use of the appliance by a
person responsible for their safety.
Children should be supervised to ensure that they do not play with the appliance.
ASSEMBLY

Important: This assembly section will require 2 people. Attempting to assemble this
on your own can cause injury.
Fitting The Folding Wheels
1. Line up the holes in
the wheel assembly
frame (3) and engine
deck (12). The arms of
the wheel assembly
frame should sit
outside the engine
deck. Slide M10 x 30
bolts (16) through the
holes from one side, then lock nuts from the other side and tighten. (Fig. 4)
ote: Before compacting, fold up the wheels (3) and secure with hooks as shown. (Fig. 5)
Fitting the Paving Pad
The transparent rubber paving pad (14) reduces the vibration when compacting solid slabs of
concrete, stones, slates and bricks. It also reduces the
chance of cracking the paving slabs when coming into
contact with the base plate.
1. Place the paving pad (14) on a flat surface.
2. Wheel the plate compactor over the paving pad, making
sure the pad is aligned with the compacting plate (11).
3. Fix paving pad (13) to the back of the plate compactor
first. Align the holes in the compacting plate, paving
pad and bracket.
4. Secure in place with lock washers and bolts M10x30 (15).
(Fig. 6)
5. Fold the wheels up and secure with hooks on the handle assembly (2).
6. Using the front lifting handle (10), lift the front of the plate compactor with one hand and
with the other hand, pull the paving pad forward to align with the holes in compacting
plate (11).
7. Use the remaining bracket and M10x30 bolts and nuts (15) to secure.
8. Use a spanner to fully tighten all bolts.
7
ASSEMBLY
Fig.5
Fig.6
Fig.4
B
A

8
PRE-OPERATION INSPECTION
Environment Conditions
The operation of a four-stroke (91 unleaded) engine is affected by:
1. Temperature
a. Working in low temperatures could lead to difficult cold starting.
b. Working in very high temperatures could lead to difficult hot starting due to evaporation
of the fuel.
c. Ensure the correct oil is used according to the operating temperatures. (Refer to Engine
Oil section on Pg 9).
2. Altitude
a. When there is a considerable increase in altitude, the load on the machine should be
reduced and heavy work load should be avoided.
E GI E OIL I SPECTIO
WAR I G! Engine oil has been drained for shipping. Failure to fill engine sump with
oil before starting the engine may result in permanent damage and will void warranty.
ote: This unit is fitted with an oil sensor. Failure to fill the engine sump to maximum level
(600mL) before first use may result in inability to start the plate compactor.
Before starting ensure an oil inspection is conducted. Always use high quality oils, select
their viscosity grade according to the operating temperatures.
1. Remove engine oil fill plug (8) and clean on a cloth or rag.
2. Re-insert the oil fill plug momentarily. Remove and look at the oil fill plug to determine
oil level.
3. I f oil level is low, fill engine sump with oil.
4. After finishing, replace and secure the oil fill plug.
ote: It is recommended that SAE-10W-30 (multi viscosity) oils are used at temperatures
from 5 to 35ºC and synthetic oils 5W-30 (multi viscosity) is used for temperatures -5 to 5ºC.
To change or top up the engine oil, refer to either the maintenance section (pg 11) of this
instruction manual, or to the engine manual.
FUEL I SPECTIO
WAR I G! Fuel has been drained for shipping. Failure to fill fuel tank with petrol
before starting the engine may result in permanent damage and will void warranty.
WAR I G! Do not over fill the fuel tank.
WAR I G! Do not smoke while re-fueling.
1. Use unleaded petrol with a minimum of Octane 91.
2. Use clean, fresh fuel; purchase fuel in quantities that can be used every 30 days, to
prevent gum or foaming inside the container and/or fuel tank.
3. Do not use fuel which contains methanol.
4. Do not add oil or any kind of fuel additive.
!
!
!
!

Air Filter
The air filter (5) must always be in perfect working order, to prevent debris and dust from
being sucked into the engine thus reducing the efficiency and life of the machine.
1. Always keep the air filter (5) free of debris and in perfect working order.
2. If necessary, replace the filter with an original spare part. Incompatible filtering can
impair the efficiency and life of the engine.
3. Never start the engine without the air filter (5) assembled.
To change the air filter (5) refer to the maintenance section of this instruction manual.
Checking V-Belt(s)
To ensure optimum power transmission from the engine to the exciter (9), the V-belt(s)
must be in good condition and operate under proper tension.
1. Turn off engine. Engine must be cool.
2. Remove the belt guard to access the V-belt(s).
3. Check the condition of the V-belt(s). If any Vbelt is cracked, frayed, or glazed, it
should be replaced as soon as convenient.
4. Check the V-belt tension by squeezing them in the centre. The normal deflection on
each side should be 9mm (3/8”) to 13mm (1/2”) with moderate pressure from your
thumb or finger.
On new machines or after installing a new belt, check belt tension after first 20
hours of operation. Check and adjust belt every 50 hours thereafter.
Spark Plugs
Caution: Not all spark plugs for engines are the same.
1. Use only the spark plug that is recommended for this plate compactor.
2. Check the length of the thread, because if the thread is to long is will damage the
engine beyond repair.
3. Make sure that the electrode is clean and the air gap is correct (refer to the specs of
the spark plug manufacture).
To remove, install and inspect the spark plug refer to the maintenance section of this
instruction manual.
9
PRE-OPERATION INSPECTION cont.)

10
OPERATION
WAR I G! Before first use, ensure you have filled
the engine sump with engine oil before starting the
plate compactor. The oil fill plug (8) must indicate
the oil level is at maximum for the unit to start for
the first time.
Starting the Engine
1. Move the choke lever to the left/closed position and fuel
lever to the right/open position (Fig. 7).
ote: If the engine is already warm, you can leave the choke
in the right/open position.
2. Move the throttle lever (1) up 4 clicks toward the fast
position. (Fig. 10)
3. Turn the engine on/off switch (7) to the ON position.
(Fig. 8)
4. Gently pull the recoil starter handle (13) until you feel
resistance, then pull briskly all the way out. Slowly return
the handle to original position. (Fig 9).
5. Once the engine has started, allow it to warm up for
2minutes. Once warm, move the choke lever to the right
to open.
6. The throttle control (1) can now be adjusted to obtain the desired speed.
Adjusting the Throttle
Caution: Have a firm grip on the handle before adjusting the
throttle.
The throttle is used to regulate the RPM of the engine, which
also controls the speed at which the plate compactor travels.
The plate compactor is designed to run at an engine speed
(engine take off shaft) of 3600rpm (Normally considered full
throttle). Running the engine at lower rpm’s will result in a
decrease of compaction force and lower travel speed. It will
create excessive “out-of-synch” vibrations resulting in poor
compaction, maneuverability, excessive wear to the machine,
and discomfort to the operator.
1. To increase the speed of the engine, move the throttle control (1) up. (Fig. 10)
2. To decrease the speed of the engine, move the throttle control (1) down. (Fig. 10)
Stopping the Engine
1. Move the throttle lever (1) down to slow the engine speed
and allow to idle for 10-20 seconds.
2. Turn the engine on/off switch (7) to the off position and
move the fuel lever to the left/closed position. (Fig. 11)
Fig.7
Fig.8
Fig.9
Faster Slower
Fig.10
Fig.11
!

11
MAINTENANCE
!
Maintaining your compactor will insure long life to the machine and its components.
Preventive Maintenance
1. Turn off engine. Engine must be cool.
2. Inspect the general condition of the plate compactor. Check for loose screws,
misalignment or binding of moving parts, cracked or broken parts, and any other
condition that may affect its safe operation.
3. Remove all debris from the plate compactor with a soft brush, vacuum, or
compressed air.
4. Clean the bottom of the compactor base as soon as it begins to pick up soil being
compacted. The unit cannot do a good job if the bottom surface is not smooth and
clean.
WAR I G! ever use a “pressure washer” to clean your plate compactor.
Water can penetrate tight areas of the unit and cause damage to spindles,
pulleys, bearings, or the engine. The use of pressure washers will result in
shortened life and reduce serviceability.
Changing the Engine Oil
1. While the engine is still warm, remove the oil fill plug and
then use a 17mm spanner to loosen the nut on oil drain
hose (Fig.12). Be careful not to lose the rubber seal inside
the nut.
2. Lower the drain hose into a suitable container to catch
the used oil. Allow the oil to drain completely then
reinstall the rubber seal and oil drain hose. Ensure it is
secured properly.
3. Refill the engine sump with 600ml of recommended
engine oil (refer to pg 8), then replace the oil fill plug.
Changing Air Filter
1. Remove the air filter cover (5) by unscrewing and removing the wingnut, washer
and cover.
2. Remove and inspect the filter. It must be intact and clean. If it isn't, either clean or
replace the filter.
3. Replace the filter, filter cover, washer and secure with the wingnut.
Spark plug removal, installation and inspection
1. Remove the spark plug lead.
2. Using a spanner, remove the spark plug.
3. Clean the electrode with a metal brush and remove any carbon build-up.
4. Using a thickness gauge, check for the right gap (0.6-0.8mm) between the centre
electrode and side electrode.
5. Refit the spark plug and tighten with a spanner.
Fig.12

12
MAINTENANCE cont.)
Tensioning V-Belt(s)
Proper belt tension is critical to good performance.
Proper adjustment will assure long belt life. Too much or
too little belt tension will cause premature belt failure.
1. Loosen the lock nuts B, leaving enough space
between the nut and bracket.
2. Loosen 4 engine mount bolts (do not remove) only
enough to move the engine forward.
ote: Two of the engine mount bolts are not shown in Fig. 13. They are located on the
opposing side of the engine deck.
3. Push engine toward the back of the plate by
turning the adjustment bolts A to remove any
slack in V-belt(s). (Fig. 13)
WAR I G! When adjusting the belt(s),
make sure that the clutch pulley is in
alignment with exciter pulley.
4. Tighten the engine mount bolts.
5. When the V-belt tension is correct, tighten the lock nuts B against the bracket.
6. Replace the belt guard.
If the adjustment bolts run out of adjustment, the belt(s) may have to be replaced.
Replacing V-Belt(s)
Only fit A725 V-belts to this plate compactor. This type of V-belt is available as a
common spare part. Both V-belts should be replaced at the same time because
they will wear evenly through normal use. Work on one belt at a time.
1. Loosen the lock nuts B and bolts A shown in above figure (Fig. 13).
2. Loose 4 engine mount bolts (do not remove) only enough to move the engine forward.
3. Slide the engine toward the front of plate and slip
the old V-belt(s) off of the pulley and install the
new V-belt(s) in their place.
4. Position the V-belt(s) over the engine pulley.
5. Move the engine back.
WAR I G! When adjusting the belt(s),
make sure that the clutch pulley is in
alignment with exciter pulley.
6. When the V-belt tension is correct, tighten the engine mount bolts and the lock nuts B.
7. Replace the belt guard.
WAR I G! When removing or installing the drive belt(s), be careful not to
get your fingers caught between the belt and pulley.
!
!
!
V-beltClutch pulleyExciter pulley
Fig.14
V-beltClutch pulleyExciter pulley
Fig.15
AB
Fig.13

MAINTENANCE cont.)
13
!
Exciter Lubrication
The exciter housing is pre-serviced using Automatic
Transmission Fluid Dextron III, Mercon, EXXON (ESSO)
NUTO H-32 or its equivalent. Change fluid after 200
hours of operation.
1. Let exciter (9) cool before changing exciter oil.
2. Remove the belt guard and V-belt(s).
3. Loosen the bolts that hold the engine deck (12) to the
compacting plate (11).
4. Lift the engine deck (12), with the engine attached,
from the compacting plate (11). (Fig. 16)
5. Remove the drain plug from the top of the exciter
housing (9). Tilt the compacting plate (11) upside
down so oil can drain from the exciter housing.
Examine oil for metal chips as a precaution to future
problems. (Fig. 17)
6. Return compacting plate to the upright position.
7. Fill the exciter housing (9) with the recommended
exciter oil. (Fig. 18)
WAR I G! Do not overfill – overfilling can
result in excessive temperatures in the exciter.
8. Apply pipe sealant to drain plug and reinstall into top
of exciter housing.
9. Reinstall engine deck (12), V-belt(s) and belt guard.
Ensure all bolts are fully tightened.
Engine maintenance
Refer to the Engine Manual included in your plate compactor for the information on engine
maintenance. Your engine manual provides detailed information for performing the tasks.
Fig.16
Fig.17
EXCITEREXCITERSHAFT
200 ml
Fig.18

TROUBLE SHOOTING
14
Problem Cause Remedy
Engine fails to start. Spark plug wire disconnected. Attach spark plug wire securely
to spark plug.
Out of fuel or stale fuel. Fill with clean, fresh gasoline.
Throttle control lever not in
correct starting position.
Move throttle control lever to
start position.
Choke not in ON Position. Throttle must be positioned at
choke for a cold start.
Blocked fuel line. Clean the fuel line.
Fouled spark plug. Clean, adjust gap, or replace.
Engine flooding. Wait a few minutes to restart, but
do not use choke.
Engine runs erratically. Spark plug wire loose. Connect and tighten spark plug
wire.
Unit running on CHOKE. Move choke lever to OFF.
Blocked fuel line or stale fuel. Clean fuel line. Fill tank with clean,
fresh gasoline.
Water or dirt in fuel system. Drain fuel tank. Refill with fresh
fuel.
Dirty air cleaner. Clean or replace air cleaner.
Engine overheats. Engine oil level low. Fill crankcase with proper oil.
Dirty air filter. Clean or replace air filter.
Air flow restricted. Remove blower housing and clean.
Engine speed does
not increase properly
when throttle lever is
adjusted.
Debris interfering with throttle
linkage. Clean dirt and debris.
Compactor is difficult to
control when pounding
(machine jumps or
lurches forward)
Too high engine speed on
hard ground.
Set the throttle lever at lower
speed.
Oil level is too low Fill engine sump with oil to
maximum capacity (600mL).

15
DESCRIPTION OF SYMBOLS
Power tools that are no longer usable should not be disposed
of with household waste but in an environmentally friendly way.
Please recycle where facilities exist. Check with your local
council authority for recycling advice.
Recycling packaging reduces the need for landfill and raw
materials. Reuse of recycled material decreases pollution in the
environment. Please recycle packaging where facilities exist.
Check with your local council authority for recycling advice.
mm Millimetre cm Centimetre
cc Cubic centimetre
/min Revolutions or
reciprocation per minute
vpm Vibrations per minute
Read instruction manual Warning
Wear eye and ear protection Wear gloves
Horse Power
Decibel
KiloNewton
hp
db
kN
CARING FOR THE ENVIRONMENT

16
CONTENTS
1 x FBT-5700 Plate Compactor
1 x Trolley Wheels Assembly
1 x Handle Assembly
1 x Paving Pad Kit
1 x Spark Plug Socket
1 x M5 x 25
2 x M10 x 65
2 x M10 x 30
6 x M10 x 30
1 x Instruction Manual
Distributed by:
Ozito Industries Pty Ltd
AUSTRALIA (Head Office)
1-23 Letcon Drive, Bangholme Victoria, Australia, 3175
Telephone: 1800 069 486

WARRANTY EXCLUSIONS
The following actions will result in the warranty being void.
If the tool has been operated on a supply voltage other than that specified on the tool.•
If the tool shows signs of damage or defects caused by or resulting from abuse, accidents•
or alterations.
Failure to perform maintenance as set out within the instruction manual.•
If the tool is disassembled or tampered with in any way.
The warranty excludes damage resulting from product misuse or product neglect.
•
•
This warranty is given by Ozito Industries Pty Ltd.
ABN: 17 050 731 756
Ph.1800 069 486
Australia/New Zealand (Head Office)
1-23 Letcon Drive, Bangholme, Victoria, Australia 3175
FB1
WARRANTY
TO ENSURE A SPEEDY RESPONSE PLEASE HAVE THE MODEL NUMBER AND DATE OF
PURCHASE AVAILABLE. A CUSTOMER SERVICE REPRESENTATIVE WILL TAKE YOUR CALL
AND ANSWER ANY QUESTIONS YOU MAY HAVE RELATING TO THE WARRANTY POLICY
OR PROCEDURE.
The benefits provided under this warranty are in addition to other rights and remedies which
are available to you under law. The warranty covers manufacturer defects in materials,
workmanship and finish under normal use.
1 YEAR WARRANTY
Your product is guaranteed for a period of 12 months from the original date of purchase.
If a product is defective it will be repaired in accordance with the terms of this warranty.
Warranty excludes consumable parts, for example: wheels, bearings.
Our goods come with guarantees that cannot be excluded under Australian Consumer law &
Consumer Guarantees Act 1993 (NZ). You are entitled to a replacement or refund for a major
failure and to compensation for other reasonably foreseeable loss or damage. You are also
entitled to have the goods repaired and replaced if the goods fail to be of acceptable quality
and the failure does not amount to a major failure.
`Australia 1800 069 486
New Zealand 0508 069 486
YOUR WARRANTY FORM SHOULD BE RETAINED BY YOU AT ALL TIMES. IN ORDER TO MAKE A
CLAIM UNDER THIS WARRANTY YOU MUST RETURN THE PRODUCT TO YOUR NEAREST
BUNNINGS WAREHOUSE (see www.bunnings.com.au or www.bunnings.co.nz for store locations)
WITH YOUR BUNNINGS REGISTER RECEIPT. PRIOR TO RETURNING YOUR PRODUCT FOR
WARRANTY PLEASE TELEPHONE OUR CUSTOMER SERVICE HELPLINE:
Table of contents