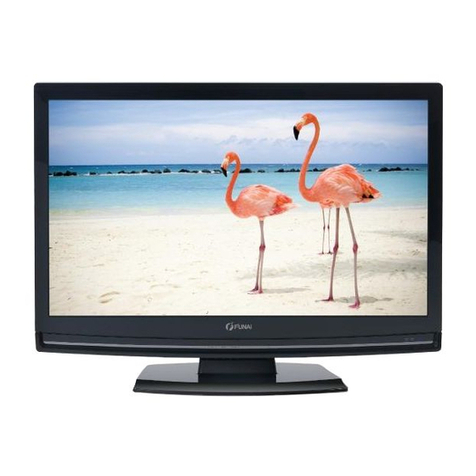
FUNAI 39FW702 User manual

2
39FW702
98cm(38.6 inch) 1080p LCD HD Television
INDEX
SAFETY INFORMATION................................................... 3
SUPPLIED ACCESSORIES .............................................. 4
INSTALLING THE BATTERIES ........................................ 4
ATTACHING THE BASE ................................................... 5
MOUNTING THE UNIT ON YOUR FURNITURE
................. 5
SET-UP FOR ANTENNA ................................................... 6
SET-UP FOR AC PLUG .................................................... 6
TURN ON THE UNIT ......................................................... 7
AUTO TUNING .................................................................. 7
SELECTING A CHANNEL................................................. 8
ADJUSTING THE VOLUME .............................................. 8
HOOK-UP FOR HDMI........................................................ 9
HOOK-UP FOR PC............................................................ 9
HOOK-UP FOR YPbPr .................................................... 10
HOOK-UP FOR COMPOSITE ......................................... 10
HOOK-UP FOR COAXIAL............................................... 11
HOOK-UP FOR HEADPHONE........................................ 11
UNIT INFORMATION....................................................... 12
OPERATIONS.................................................................. 14
Watching a TV Programme .......................................... 14
Favorite......................................................................... 14
Sleep Timer .................................................................. 14
Switching the Input Mode ............................................. 14
Picture Format .............................................................. 14
Playback Mode............................................................. 15
DETAIL SETTINGS...................................................... 19
Channel Settings .......................................................... 19
Screen Settings ............................................................ 19
Picture Adjustment ....................................................... 20
Sound Adjustment ........................................................ 20
Timer Settings .............................................................. 21
Setup Adjustment ......................................................... 22
OTHER INFORMATION .................................................. 23
Trademark Information ................................................. 23
Cabinet Cleaning.......................................................... 23
Panel Cleaning ............................................................. 23
Servicing....................................................................... 23
TROUBLESHOOTING GUIDE ........................................ 24
SPECIFICATIONS ........................................................... 25
MULTIMEDIA FORMAT .................................................. 27
#76#26A'0HO2CIG/QPFC[1EVQDGT#/

3
English
CAUTION
1. Do not attempt to open the cabinet. There are no user
serviceable parts inside. Refer all servicing to qualified
service personnel.
2. Slots and openings in the cabinet and the sides or bottom
are provided for ventilation. To ensure reliable operation
and to protect the unit from overheating, these openings
must not be blocked or covered. Avoid installation in
enclosed spaces such as bookcases unless proper
ventilation is provided.
3. Keep the unit away from radiators and other heat sources.
4. Do not push objects of any kind into the unit through the
cabinet slots or openings as they could touch electrically
live parts or short circuit parts resulting in a fire or electric
shock.
5. To prevent fire or shock hazard, do not expose this unit to
dripping or splashing, no objects filled with liquids, such
as vases, should be placed on the unit.
6. Use the unit on a horizontal (flat) surface only.
7. Do not place any combustible objects on the unit
(candles, etc.).
8. The LCD panel used in this unit is made of glass.
Therefore, it can break when the unit is dropped or
applied with impact. Be careful not to be injured by broken
glass pieces in case the LCD panel breaks. The LCD
panel is a very high technology product with 921,600 thin
film transistors, giving you fine picture details.
Occasionally, a few non-active pixels may appear on the
TV screen as a fixed point of blue, green or red. Please
note that this does not affect the performance of your unit.
9. Disconnect the mains plug to switch off when the unit
becomes faulty or not in use.
10. The mains plug shall remain readily operable.
11. Read the manual instructions to ensure correct and safe
installation and interconnection of the unit in multimedia
systems.
12. Keep a distance of 20cm around the ventilation openings
of the unit.
13. Batteries (battery pack or batteries installed) shall not be
exposed to excessive heat such as sunshine, fire or the
like.
POWER SUPPLY
The main power supply is engaged when the main plug is
plugged in a 100-240 V~, 50Hz/60Hz AC outlet. To operate
the unit, press (power) to turn on the unit.
WARNING:
• Never use a gas duster on this TV. The gas trapped inside of
this unit may cause ignition and explosion.
• TO REDUCE THE RISK OF FIRE OR ELECTRIC SHOCK, DO
NOT EXPOSE THIS APPARATUS TO RAIN OR MOISTURE.
• Do not place the unit on the furniture that is capable of being
tilted by a child or an adult leaning, pulling, standing or climbing
on it. A falling unit can cause serious injury or even death.
• LIVE PARTS INSIDE. DO NOT REMOVE ANY SCREWS.
A Note about Recycling
Battery Precautions
• Be sure to follow the correct polarity as indicated in the
battery compartment. Reversed batteries may cause
damage to the device.
• Do not mix different types of batteries together (e.g. Alkaline
and Carbon-Zinc or rechargeable batteries like ni-cad, ni-
mh, etc.) or old batteries with fresh ones.
• If the device is not to be used for a long period of time,
remove the batteries to prevent damage or injury from
possible battery leakage.
• Do not try to recharge batteries; they can overheat and rupture.
SAFETY INFORMATION
WARNING: To prevent the
spread of fire, keep candles
or other open flames away
from this product at all times
CAUTION:
TO REDUCE THE RISK OF ELECTRIC SHOCK, DO NOT
REMOVE COVER (OR BACK). NO USER SERVICEABLE
PARTS INSIDE. REFER SERVICING TO QUALIFIED
SERVICE PERSONNEL.
The lightning flash with arrowhead symbol, within
an equilateral triangle, is intended to alert the
user to the presence of uninsulated “dangerous
voltage” within the apparatus’s enclosure that
may be of sufficient magnitude to constitute a risk
of electric shock to persons
The exclamation point within an equilateral
triangle is intended to alert the user to the
presence of important operating and
maintenance (servicing) instructions in the
literature accompanying the apparatus.
WHEN CARRYING THIS UNIT
• At least 2 people are required when carrying
this unit.
• Make sure to hold the upper and bottom
frames of the unit firmly as illustrated.
This unit’s packaging materials are recyclable
and can be reused. Please dispose of any
materials in accordance with your local
recycling regulations. This product consists of
materials which can be recycled and reused if
disassembled by a specialised company.
The crossed out wheeled dust bin symbol
indicates that batteries and/or accumulators
must be collected and disposed of separately
from household waste. If the battery or
accumulator contains more than the specified
values of lead (Pb), mercury (Hg), and/or
cadmium (Cd) defined in the Battery Directive
(2006/66/EC), then the chemical symbols for lead (Pb),
mercury (Hg) and/or cadmium (Cd) will appear below the
crossed out wheeled dust bin symbol. By participating in
separate collection of batteries, you will help to assure the
proper disposal of products and batteries and thus help to
prevent potential negative consequences for the environment
and human health. For more detailed information about the
collection and recycling programmes available in your country,
please contact your local city office or the shop where you
purchased the product.
The use of the symbol indicates that this
product may not be treated as household
waste.By ensuring this product is disposed of
correctly, you will help prevent potential
negative consequences for the environment
and human health, which could otherwise be
caused by inappropriate waste handling of this
product.For more detailed information about
recycling of this product, please contact your local city office,
your household waste disposal service or the shop where you
purchased the product.
Pb, Hg, Cd
#76#26A'0HO2CIG/QPFC[1EVQDGT#/
4
Installation of Wall Mount (Optional)
The Wall Mount Kit can help install the TV on the wall.
For more information about wall mounting, please refer to the instructions provided along with the Wall Mount
Kit.
When wall mounting the product, please contact qualified personnel.
If users choose to install the TV on their own, the producer is not responsible for any damages caused either to
the product or to the persons.
Please refer to the self explanatory diagram.
SUPPLIED ACCESSORIES
•Recommended batteries : AAA, 1.5V x 2
INSTALLING THE BATTERIES
P
#76#26A'0HO2CIG/QPFC[1EVQDGT#/

5
English
ATTACHING THE BASE
MOUNTING THE UNIT ON YOUR FURNITURE
Screw this unit on your furniture tightly using wood screw (not supplied) in the hole at the back of the base as
shown.
•Screw dimension : 5.1 x 20 mm
#76#26A'0HO2CIG/QPFC[1EVQDGT#/
6
SET-UP FOR ANTENNA
SET-UP FOR AC PLUG
HDMI
D-SUB(VGA)
VGA AUDIO
YPbPr
Pr
Pb
Y
USBCOAXIAL OUTR / L - AV IN - VIDEO
ANTENNA IN
PHONES
ANTENNA input jack
#76#26A'0HO2CIG/QPFC[1EVQDGT#/
7
English
TURN ON THE UNIT
•After plugging in the unit, just press (on the remote or the TV) to turn it on.
AUTO TUNING
You have to setup channels to watch TV.
1Press MENU to display the setup menu.
2Use Ż/ Źto select [CHANNEL] in the setup menu.
3Use Ÿ/ źto select [Auto Tuning] in the Channel menu, and press OK to start tuning to setup channels.
•For detailed operation procedure, refer to “Channel Settings” (p. 19).
Enter Exit
Move Menu
ATV Manual Tuning
Programme Edit
CHANNEL
Auto Tuning
#76#26A'0HO2CIG/QPFC[1EVQDGT#/

8
SELECTING A CHANNEL
ADJUSTING THE VOLUME
Volume 31
P
#76#26A'0HO2CIG/QPFC[1EVQDGT#/
9
English
HOOK-UP FOR HDMI
HOOK-UP FOR PC
USBCOAXIAL OUTR / L - AV IN - VIDEO
ANTENNA IN
PHONES
HDMI
D-SUB(VGA)
VGA AUDIO
YPbPr
Pr
Pb
Y
HDMI input jack
USBCOAXIAL OUTR / L - AV IN - VIDEO
ANTENNA IN
PHONES
HDMI
D-SUB(VGA)
VGA AUDIO
YPbPr
Pr
Pb
Y
VGA AUDIO input jack
D-SUB (VGA) input jack
#76#26A'0HO2CIG/QPFC[1EVQDGT#/
10
HOOK-UP FOR YPbPr
HOOK-UP FOR COMPOSITE
USBCOAXIAL OUTR / L - AV IN - VIDEO
ANTENNA IN
PHONES
HDMI
D-SUB(VGA)
VGA AUDIO
YPbPr
Pr
Pb
Y
YPbPr (Component video) input jacks
Audio (L/R) input jacks
USBCOAXIAL OUTR / L - AV IN - VIDEO
ANTENNA IN
PHONES
HDMI
D-SUB(VGA)
VGA AUDIO
YPbPr
Pr
Pb
Y
Composite video input jack
Audio (L/R) input jacks
#76#26A'0HO2CIG/QPFC[1EVQDGT#/
11
English
HOOK-UP FOR COAXIAL
HOOK-UP FOR HEADPHONE
USBCOAXIAL OUTR / L - AV IN - VIDEO
ANTENNA IN
PHONES
HDMI
D-SUB(VGA)
VGA AUDIO
YPbPr
Pr
Pb
Y
Coaxial digital audio output jack
USBCOAXIAL OUTR / L - AV IN - VIDEO
ANTENNA IN
PHONES
HDMI
D-SUB(VGA)
VGA AUDIO
YPbPr
Pr
Pb
Y
Headphone audio output jack
#76#26A'0HO2CIG/QPFC[1EVQDGT#/

12
1. (Power) (p. 7)
Press once to turn the unit on and press it once
more to put the unit into standby mode.
2. S MODE “[Sound Mode]” (p. 20)
3. P MODE “[Picture Mode]” (p. 20)
4. FAV FAV
5. Number buttons (p. 8)
Selects the desired channel in TV mode.
6. AUDIO
7. (p. 14)
To adjust the volume.
8. (Mute) (p. 14)
9. RED / GREEN / YELLOW / BLUE
“[Programme Edit]” (p. 19)
10. EXIT (p. 14)
Exit the menu.
11. MENU (p. 19)
12. INPUT (p. 14)
13. SLEEP (p. 14)
14. ASPECT (p. 14)
15. (Play / Pause) / (Skip backward) /
(Skip forward) / (Stop) / (Rewind) /
(Fast-forward)
16. FAV
17. (p. 14)
To browse a channel.
18. DISPLAY
Display the channel number or input source.
19. Ÿ/ ź/ Ż/ Ź(Cursor) (p. 14)
20. OK
UNIT INFORMATION
16
17
18
19
20
15
14
1
2
3
4
6
5
7
9
8
10
11
12
13
P
71
121117
•VOL. Ż/Ź(Front panel) works same function as
Ż/Ź(cursor) on the menu.
•INPUT (Front panel) works same function as OK to
determine the setting menu.
•PROG. Ÿ/ ź(Front panel) works same function as
Ÿ/ ź(cursor) on the menu.
#76#26A'0HO2CIG/QPFC[1EVQDGT#/
13
English
21. USB terminal (p. 15)
22. Coaxial digital audio output jack (p. 11)
23. Composite video input jack (p. 10)
24. Audio (L/R) input jacks (p. 10)
25. Antenna input jack (p. 6)
26. Headphone audio output jack
27. AC power cord
28. HDMI input jack (p. 9)
29. VGA AUDIO input jack (p. 9)
30. D-SUB (VGA) input jack (p. 9)
31. YPbPr (Component video) input jacks (p. 10)
32. Standby / Power indicator
Lights up red when the unit goes into standby
mode.
Light off when power is on.
33. Infrared sensor window
Receives the infrared rays transmitted from the
remote control.
21
25
22
26
31
28
29
27
32/33
30
24
23
•Data input from USB flash memory only.
•User should not connect any devices to the USB terminal
such as digital camera, keyboard, mouse, etc. (because
these will not work.)
•The software update is, in most cases, handled by an
authorised service person or in some circumstances the
user may be asked to do the software update themselves.
•The HDMI socket is guaranteed to be used for single source
only. It does not guarantee any adaptor, switches or other
connecting device for the purpose of multiple sources. The
usage of such device even if it is capable is at customer risk.
#76#26A'0HO2CIG/QPFC[1EVQDGT#/
14
Watching a TV Programme
To select a channel
Use repeatedly to select your desired
channel, or use the Number buttons to enter a
specific channel number, then press OK for quicker
access.
(e.g.) If you want to select the channel 24 without
pressing OK, press 2first, then press 4within 3
seconds.
To adjust the volume
Use to increase / decrease the audio
volume.
Press to turn the sound on / off temporarily.
Favorite
You can easily locate a favorite channel.
1Press FAV while watching a programme to show
the favorite channel list.
2Use Ÿ/ źto select the channel you want, then
press OK.
3Press EXIT to exit.
Sleep Timer
The sleep timer can be set for the unit to go to the
standby mode after an incremental period of time.
1Press SLEEP repeatedly to change the sleep
time period.
Switching the Input Mode
You can select a desired input mode from available
sources.
1Press INPUT.
2Use Ÿ/ źto select the input mode you want,
then press OK.
Picture Format
You can select a desired TV screen size. Press
ASPECT button repeatedly to switch the TV screen
display mode.
Available options are as mentioned below.
OPERATIONS
Read this first
These operations are accessible by remote control.
Some may also be accessible by controls on the main
unit.
•You can recover the original volume by pressing again
or .
•You can set favorite channel at “[Programme Edit]” (p. 19).
•Use FAV to select the favorite channel while
watching a programme.
•Use to move to the previous or next page.
•This unit need few seconds to memorise the favorite
setting.
•If you unplug the AC power cord immediately after the
setting, It will not be registered in the memory.
1 TF1 HD
2 France 2 HD
6 M6HD
Favorite List
ATV
ATV
ATV
ENTER
•Each time you press SLEEP, the timer increases from
10 minutes up to 240 minutes.
•Press SLEEP repeatedly until [Off] appears to cancel the
sleep timer.
•If the unit goes into standby mode, the sleep timer will be
cancelled.
SD:
[16:9], [4:3], [Zoom1], [Zoom2]
HD:
[16:9], [4:3], [Just Scan]
PC:
[16:9], [4:3]
•You cannot set screen display mode in playback mode.
•You can set another way at “[Aspect Ratio]” (p. 22).
•Only 16:9 aspect ratio avaliable for Full HD resolution in PC
input.
Media
PC
HDMI
ATV
AV
YPbPr
Input Source
OK Enter
#76#26A'0HO2CIG/QPFC[1EVQDGT#/

15
English
Playback Mode
This unit can play JPEG picture, MP3 music and video
files from USB flash drive.
Setup for playback
You must connect the USB flash memory to USB
terminal of this unit (shown below).
1Press INPUT to display the input mode and use
Ÿ/ źto select [Media], and then press OK.
[PHOTO]
2Use Ż/ Źto select [PHOTO] and press OK to
enter.
3Use Ż/ Źto select [C] and press OK to enter
your file.
4Use Ÿ/ ź/ Ż/ Źto select the desired file, then
press OK.
Operation in Slideshow
Press OK or DISPLAY to display the menu.
•If you want to exit this mode, select any other input mode.
Refer to “Switching the Input Mode” (p. 14).
•You can check Multimedia Specification. Refer to
“MULTIMEDIA FORMAT” (p. 27)
USB2.0
1 / 1
PHOTO
•The check box is displayed at the right bottom by pressing
the OK. The files having the check box are played by
pressing . If they are not selected, then all playable files
in the folder are played.
•If you put audio files into same folder of picture files, you can
play music during the slideshow.
:
Press to play or pause the slideshow.
/ :
Press to skip the file backward or forward.
:
Press to stop the slideshow.
[Repeat] :
Use Ż/ Źand press OK to select the repeat mode;
[Repeat None], [Repeat 1] or [Repeat All] in order.
[Music] :
Use Ż/ Źto select [Music] and press OK to play,
then the music file in the same folder play
automatically.
[Playlist] :
Use Ż/ Źand press OK to select [Playlist] to show
the playlist.
[Info.] :
Use Ż/ Źand press OK to select [Info.] to show the
details.
[Rotate] :
Use Ż/ Źto select right-handed or left-handed rotate
and press OK to turn the picture by 90 degrees.
[Zoom In] :
Use Ż/ Źto select [Zoom In] and press OK to zoom
in the display.
[Zoom Out] :
Use Ż/ Źto select [Zoom Out] and press OK to
zoom out the display.
[Move View]:
Use Ż/ Źand press OK to select [Move View] to
move viewing location during zoom in the display.
Delete
Return
PHOTO
#76#26A'0HO2CIG/QPFC[1EVQDGT#/
16
[MUSIC]
2Use Ż/ Źto select [MUSIC] and press OK to
enter.
3Use Ż/ Źto select [C] and press OK to enter
your file.
4Use Ÿ/ ź/ Ż/ Źto select the desired file, then
press OK.
Operation in Playback
Press OK or DISPLAY to display the menu.
•The check box is displayed at the right bottom by pressing
the OK. The files having the check box are played by
pressing . If they are not selected, then all playable files
in the folder are played.
USB2.0
1 / 1
MUSIC
Delete
MUSIC
:
Press to play or pause the music playback.
/ :
Press to rewind or fast-forward the music playback.
/ :
Press to skip backward or forward a music file.
:
Press to stop the music playback.
[Repeat] :
Use Ż/ Źand press OK to select the repeat mode;
[Repeat None], [Repeat 1] or [Repeat All] in order.
[MUTE] :
Use Ż/ Źand press OK to select [MUTE] to mute.
[Playlist] :
Use Ż/ Źand press OK to select [Playlist] to show
the playlist.
[Info.] :
Use Ż/ Źand press OK to select [Info.] to show the
details.
[Goto Ti..] :
Use Ż/ Źand press OK to select [Goto Ti..] to move
the time you want in the playback.
#76#26A'0HO2CIG/QPFC[1EVQDGT#/
17
English
[MOVIE]
2Use Ż/ Źto select [MOVIE] and press OK to
enter.
3Use Ż/ Źto select [C] and press OK to enter
your file.
4Use Ÿ/ ź/ Ż/ Źto select the desired file, then
press OK.
Operation in Playback
Press OK or DISPLAY to display the menu.
•The check box is displayed at the right bottom by pressing
the OK. The files having the check box are played by
pressing . If they are not selected, then all playable files
in the folder are played.
USB2.0
1 / 1
MOVIE
Delete
MOVIE
:
Press to play or pause the video playback.
/ :
Press to rewind or fast-forward the video playback.
/ :
Press to skip backward or forward a video file.
:
Press to stop the video playback.
[Repeat] :
Use Ż/ Źand press OK to select the repeat mode;
[Repeat None], [Repeat 1] or [Repeat All] in order.
A-B Repeat :
Use Ż/ Źand press OK to select the limited repeat
mode; [Set A], [Set B] or [None] in order.
[Playlist] :
Use Ż/ Źand press OK to select [Playlist] to show
the playlist.
[Info.] :
Use Ż/ Źand press OK to select [Info.] to show the
details.
[Slow F..] :
Use Ż/ Źand press OK to select [Slow F..] to play
slow.
[Step Fo..] :
Use Ż/ Źand press OK to select [Step Fo..] to play
frame-by-frame playback.
[Goto Ti..] :
Use Ż/ Źand press OK to select [Goto Ti..] to move
the time you want in the playback.
#76#26A'0HO2CIG/QPFC[1EVQDGT#/
18
[TEXT]
2Use Ż/ Źto select [TEXT] and press OK to
enter.
3Use Ż/ Źto select [C] and press OK to enter
your file.
4Use Ÿ/ ź/ Ż/ Źto select the desired file, then
press OK.
Operation in Playback
Press OK or DISPLAY to display the menu.
Note for playback
•The check box is displayed at the right bottom by pressing
the OK. The files having the check box are played by
pressing . If they are not selected, then all playable files
in the folder are played.
•If you put audio files into same folder of text files, you can
play music during the playback.
:
Press to play or pause the playback.
/ :
Press to move previous or next page in the file.
USB2.0
1 / 1
TEXT
Delete
Return
TEXT
/ :
Press to skip backward or forward the file.
:
Press to stop the playback.
[Music] :
Use Ż/ Źand press OK to select [Music], then the
music file in the same folder play automatically.
[Playlist] :
Use Ż/ Źand press OK to select [Playlist] to show
the playlist.
[Info.] :
Use Ż/ Źand press OK to select [Info.] to show the
details.
•The USB flash memory is not supplied with this unit.
•The unit recognises a USB flash memory only.
Do not use a USB hub and an extension cord between the
USB flash memory and the unit.
Always connect the USB flash memory to this unit directly.
•It is not guaranteed that all USB flash memory can be
supported on this unit.
•FUNAI cannot be held responsible if your USB flash
memory is not supported, nor will FUNAI accept any liability
for damage or loss of stored data.
•A USB flash memory that required its own driver or the
device with a special system such as fingerprint recognition
are not supported.
•Be sure to keep a backup copy of the original files on your
device before you play them back on this unit. We have no
responsibilities for damage or loss of your stored data.
•To avoid damaging the USB flash memory and the unit
always turn off the unit before you remove the USB flash
memory.
•This unit is not allowed to use the USB flash memory which
requires external power supply (500 mA or more).
•The unit can recognise up to 198 files including directories
under one directory, and it can recognise the depth of
directory up to 30.
•This unit may not be recognised if the length of the file
names is too long. Only English and Thai characters can be
recognised.
•This unit does not support MTP(Media Transfer Protocol) or
the file other than FAT and FAT32 file system. If the file is
not supported, an error message appears.
•When the unit does not recognise the USB flash memory,
try reconnecting it.
•Playing the files recorded with high bit rates, the images can
be interrupted in some occasions.
•This unit does not support external subtitles.
•This unit cannot play back a file which goes over the limit of
file restriction.
•For USB input the maximum resolution display is 720p.
#76#26A'0HO2CIG/QPFC[1EVQDGT#/
19
English
Channel Settings
You can edit the channel settings.
1Use Ż/ Źto select [CHANNEL].
[Auto Tuning]
You can scan the channels in your area automatically.
2Use Ÿ/ źto select [Auto Tuning], then press
OK to start scanning.
[ATV Manual Tuning]
You can search channels manually in your area.
2Use Ÿ/ źto select [ATV Manual Tuning], then
press OK.
3Use Ÿ/ źto select [Current CH], then use Ż/
Źto select the channel you want.
4Use Ÿ/ źto select [Color System], then use Ż
/ Źto select the system you want.
5Use Ÿ/ źto select [Sound System], then use
Ż/ Źto select the system you want.
6Use Ÿ/ źto select [Fine-Tune], then use Ż/ Ź
to adjust the setting.
7Use Ÿ/ źto select [AFC], then use Ż/ Źto
select [On] or [Off].
8Use Ÿ/ źto select [Search], then use Ż/ Źto
search a channel.
[Programme Edit]
You can edit the programme settings.
2Use Ÿ/ źto select [Programme Edit], then
press OK to enter Programme Edit list.
Screen Settings
You can edit the screen settings in PC mode.
1Use Ż/ Źto select [SCREEN].
[Auto Adjust]
You can change the screen settings automatically.
2Use Ÿ/ źto select [Auto Adjust], then press
OK.
DETAIL SETTINGS
Read this first
Before adjust each setting, press MENU to display the
menu.
To exit the menu, press EXIT.
•When the scanning is completed, the lowest memorised
analogue channel will be displayed.
•If you press MENU during the scanning, this operation will
be stopped and a confirmation display will appear, then you
can cancel scanning.
Move EnterMenu Exit
Auto Tuning
ATV Manual Tuning
Programme Edit
CHANNEL
•If you set to [On], this unit searches a near channel
automatically.
[Delete] (RED) :
Press RED to delete the current channel.
[Rename] (GREEN) :
Press GREEN and use Ÿ/ ź/ Ż/ Źto change the
current channel name.
[Move] (YELLOW) :
Press YELLOW and use Ÿ/ źto move the current
channel.
[Skip] (BLUE) :
Press BLUE to skip the current channel.
[FAV] (FAV) :
Press FAV to register the current channel.
Move EnterMenu Exit
Auto Adjust
H-Offset
V-Offset
Clock
Phase
SCREEN
30
30
30
0
#76#26A'0HO2CIG/QPFC[1EVQDGT#/
20
[H-Offset] / [V-Offset] / [Clock] / [Phase]
You can change the screen settings manually.
2Use Ÿ/ źto select the item you want, then
press OK, and then appear the setting display,
adjust the setting using Ż/ Ź.
Picture Adjustment
You can adjust the picture settings according to your
personal preference.
These settings are automatically stored after exiting
the picture menu.
1Use Ż/ Źto select [PICTURE].
[Picture Mode]
2Use Ÿ/ źto select [Picture Mode], then press
OK.
3Use Ÿ/ źto select [Dynamic], [Standard],
[Mild] or [Personal], then press OK.
[Contrast] / [Brightness] / [Color] / [Tint] /
[Sharpness]
2Use Ÿ/ źto select the item you want. Then
press OK, and the setting display will appear.
3Adjust the setting using Ż/ Ź.
[Color Temperature]
You can change the color tone of the picture.
2Use Ÿ/ źto select [Color Temperature], then
press OK.
3Use Ÿ/ źto select [Cool], [Medium] or
[Warm], then press OK.
[Noise Reduction]
You can reduce noise level.
2Use Ÿ/ źto select [Noise Reduction], then
press OK or Ź.
3Use Ÿ/ źto select [Off], [Low], [Middle] or
[High], then press OK.
[Dynamic Contrast]
You can set the dynamic contrast mode.
2Use Ÿ/ źto select [Dynamic Contrast], then
press OK.
3Use Ÿ/ źto select [On] or [Off], then press OK.
Sound Adjustment
You can adjust the sound settings according to your
personal preferences.
1Use Ż/ Źto select [SOUND].
[Sound Mode]
2Use Ÿ/ źto select [Sound Mode], then press
OK.
3Use Ÿ/ źto select [Standard], [Music],
[Movie], [Sports] or [Personal], then press OK.
•While adjusting each setting, you can change the setting
item using Ÿ/ ź.
•You can change picture mode easily using P MODE on the
Remote Control. Press P MODE repeatedly to select the
picture mode you want. In this function, you can also assign
the picture mode individually to each input mode.
•You can adjust the settings, if you set [Personal] in
[Picture Mode].
•While adjusting each setting, you can change the setting
item using Ÿ/ ź.
Move EnterMenu Exit
Picture Mode
Contrast
Brightness
Color
Tint
Sharpness
Color Temperature
Noise Reduction
Medium
Middle
Standard
50
50
50
50
30
PICTURE
Dynamic Contrast Off
•You can change sound mode easily using S MODE on the
Remote Control.
•Press S MODE repeatedly to select the sound mode you
want.
•While adjusting each setting, you can change the setting
item using Ÿ/ ź.
Move EnterMenu Exit
Sound Mode
Treble
Bass
Balance
Surround Sound
SPDIF Mode
On
PCM
Auto Volume
Standard
50
50
0
Off
SOUND
#76#26A'0HO2CIG/QPFC[1EVQDGT#/

21
English
[Treble] / [Bass] / [Balance]
You can set left / right speaker setting.
2Use Ÿ/ źto select the item you want. Then
press OK, and the setting display will appear.
3Adjust the setting using Ż/ Ź.
[Auto Volume]
If set to [On], sudden changes in volume will be
reduced automatically, for example, during
commercials or when switching channels.
2Use Ÿ/ źto select [Auto Volume], and then
select [On] or [Off] using Ż/ Ź.
[Surround Sound]
You can set to the sound modes for more spatial or
surround sound reproduction.
2Use Ÿ/ źto select [Surround Sound], and
then select [On] or [Off] using Ż/ Ź.
[SPDIF Mode]
2Use Ÿ/ źto select [SPDIF Mode] and then
select [PCM], [Auto] or [Off] using Ż/ Ź.
Timer Settings
You can change Timer setting.
1Use Ż/ Źto select [TIMER].
[Sleep Timer]
The sleep timer can be set for the unit to go to the
standby mode after an incremental period of time.
2Use Ÿ/ źto select [Sleep Timer], then press
OK.
3Use Ÿ/ źto select the time you want, then
press OK.
[Auto Standby]
You can set the time to turn off the display power
automatically.
In spite of this setting, the unit goes into standby mode
automatically if there is no signal input from the
antenna terminal and no user operation for 15 minutes.
2Use Ÿ/ źto select [Auto Standby], then press
OK.
3Use Ÿ/ źto select the time you want, then
press OK.
[OSD Timer]
You can set the time to turn off the OSD display.
2Use Ÿ/ źto select [OSD Timer], then press
OK.
3Use Ÿ/ źto select the time you want, then
press OK.
•You can adjust [Treble] and [Bass] settings, if you set
[Personal] in [Sound Mode].
•While adjusting each setting, you can change the setting
item using Ÿ/ ź.
AUTO:
The SPDIF output is the same with the input sound format.
PCM:
The SPDIF output is PCM format, regardless of the input
sound format.
OFF:
Turn OFF the SPDIF output.
•You can also set it using the Remote Control. Refer to
“Sleep Timer” (p. 14).
Move EnterMenu Exit
Sleep Timer
Auto Standby
OSD Timer
Off
4 H
15s
TIMER
#76#26A'0HO2CIG/QPFC[1EVQDGT#/
Other manuals for 39FW702
1
Table of contents
Other FUNAI LCD TV manuals

FUNAI
FUNAI LT5-M32BB User manual

FUNAI
FUNAI F20LCTE-A User manual

FUNAI
FUNAI LED32-H9000M User manual

FUNAI
FUNAI LT6-M19WB User manual

FUNAI
FUNAI LT850-M32 - SERVICE User manual

FUNAI
FUNAI Symphonic CWF20L6 User manual

FUNAI
FUNAI LF320EM4 A User manual

FUNAI
FUNAI LED40-H9825M User manual

FUNAI
FUNAI 26FL532/10 User manual

FUNAI
FUNAI LT6-M19BB User manual

FUNAI
FUNAI LT840-M22 User manual

FUNAI
FUNAI LCD-C32B7 User manual

FUNAI
FUNAI Symphonic CSTL2006 User manual

FUNAI
FUNAI LT6-M32BB User manual

FUNAI
FUNAI LC5-D32BB User manual

FUNAI
FUNAI LED22-H820M User manual

FUNAI
FUNAI LCD-B1504 User manual

FUNAI
FUNAI 32FL532/10 User manual

FUNAI
FUNAI LC320SLX User manual

FUNAI
FUNAI LT6-B32BB User manual