FUNAI 40FDB7555 User manual

FUNAI BRANDࠉNEW PRODUCT LOGO (revised edition㸧1,APR.,2010
40FDB7555
ENGLISH

English - 2 -
Safety Information
To operate your TV in extreme ambient conditions
may cause the damage of the device.
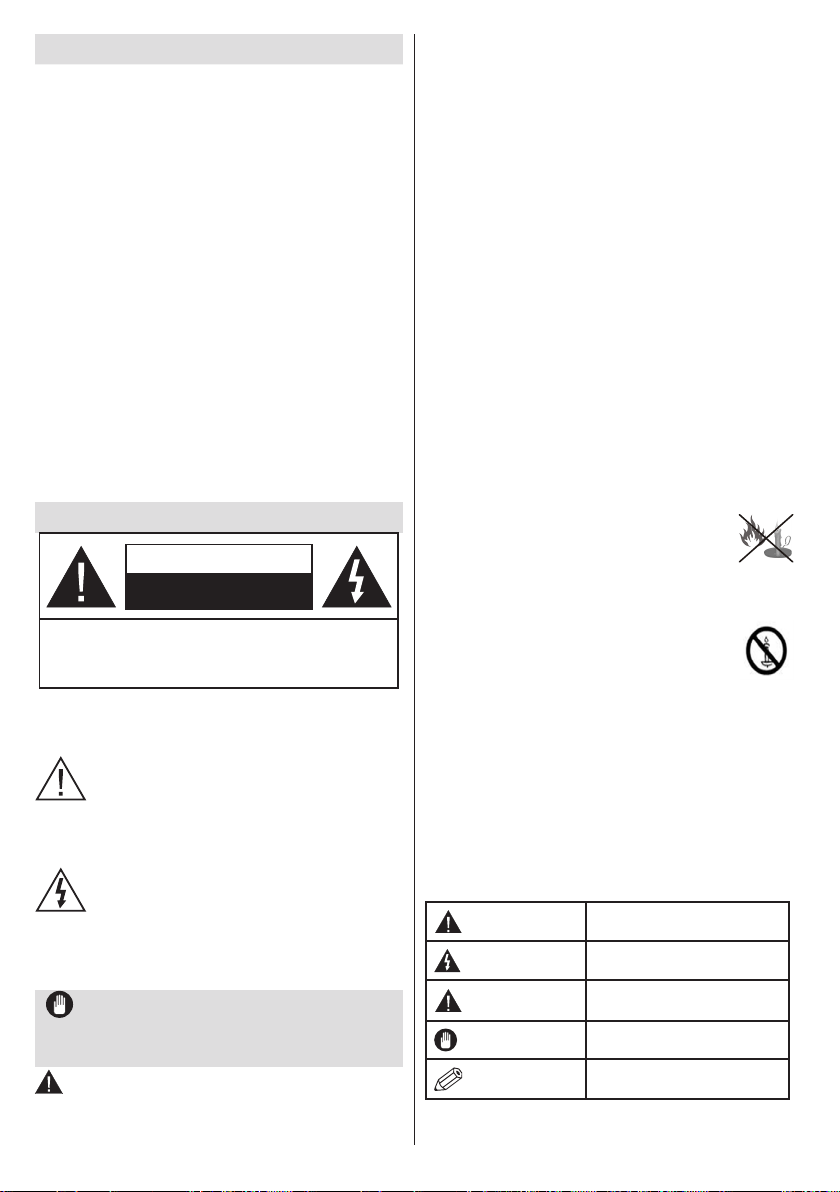
CAUTION
RISK OF ELECTRIC SHOCK
DO NOT OPEN
CAUTION: TO REDUCE THE RISK OF ELECTRIC SHOCK DO
NOT REMOVE COVER (OR BACK).
NO USER-SERVICEABLE PARTS INSIDE. REFER
SERVICING TO QUALIFIED SERVICE PERSONNEL.
Note : Follow the on screen instructions for operating the
related features.
If there is lightning or storms, or if the TV is not
going to be used for a while (e.g. if going away
on holiday), disconnect the TV set from the
mains. The mains plug is used to disconnect TV
set from the mains and therefore it must remain
readily operable.
The exclamation point within an equilateral
triangle is intended to alert the user to
the presence of important operating and
maintenance (servicing) instructions in the
literature accompanying the appliance.
IMPORTANT - Please read these
instructions fully before installing or
operating
WARNING: Never let people (including
children) with reduced physical, sensory or
Contents mental capabilities or lack of experience and / or
knowledge use electrical devices unsupervised.
•For ventilation purposes, leave a free space of at
least 10 cm all around the set.
•Do not block ventilation holes.
•Do not place the TV on sloping or unstable surfaces,
the TV may tip over.
•Use this device in moderate climates.
•The power cord plug should be easily accessible. Do
not place the TV, furniture, etc. on the power cord.
Adamagedpowercord/plugcancausereorgive
you an electric shock. Handle the power cord by the
plug, do not unplug the TV by pulling the power cord.
Never touch the power cord/plug with wet hands
as this could cause a short circuit or electric shock.
Never make a knot in the power cord or tie it with
other cords. When damaged it must be replaced,
thisshouldonlybedonebyqualiedpersonnel.
•Do not use this TV in a humid or damp place. Do
not expose the TV to liquids. If any liquid falls into
the cabinet unplug the TV and have it checked by
qualiedpersonnelbeforeoperatingitanyfurther.
•Do not expose the TV to direct sunlight or other heat
sources.
•The TV should not be placed near to open
amesorsourcesofintenseheatsuchas
an electric heater.
•Excessive sound pressure from earphones and
headphones can cause hearing loss.
•Ensurethatnoopenamesources,such
as lit candles, are placed on top of the TV.
•To prevent injury, this TV must be securely
attached to the wall in accordance with the
installation instructions (if the option is available).
•Occasionally, a few non-active pixels may appear
onthescreenasaxedblue,greenorredpoint.
Please note that this does not affect the performance
of your product. Take care not to scratch the screen
withngernailsorotherhardobjects.
•Before cleaning, unplug the TV from the wall socket.
Only use a soft, dry cloth while cleaning.
Warning Serious injury or death risk
Risk of electric shock Dangerous voltage risk
Caution Injury or property damage risk
Important Correctly the system operate
Notice Additional notes marked
Safety Information ..................................................1
Getting Started .......................................................2
Notications&Features&Accessories.................. 2
Features .................................................................2
Connect Power ......................................................3
Remote Control .....................................................4
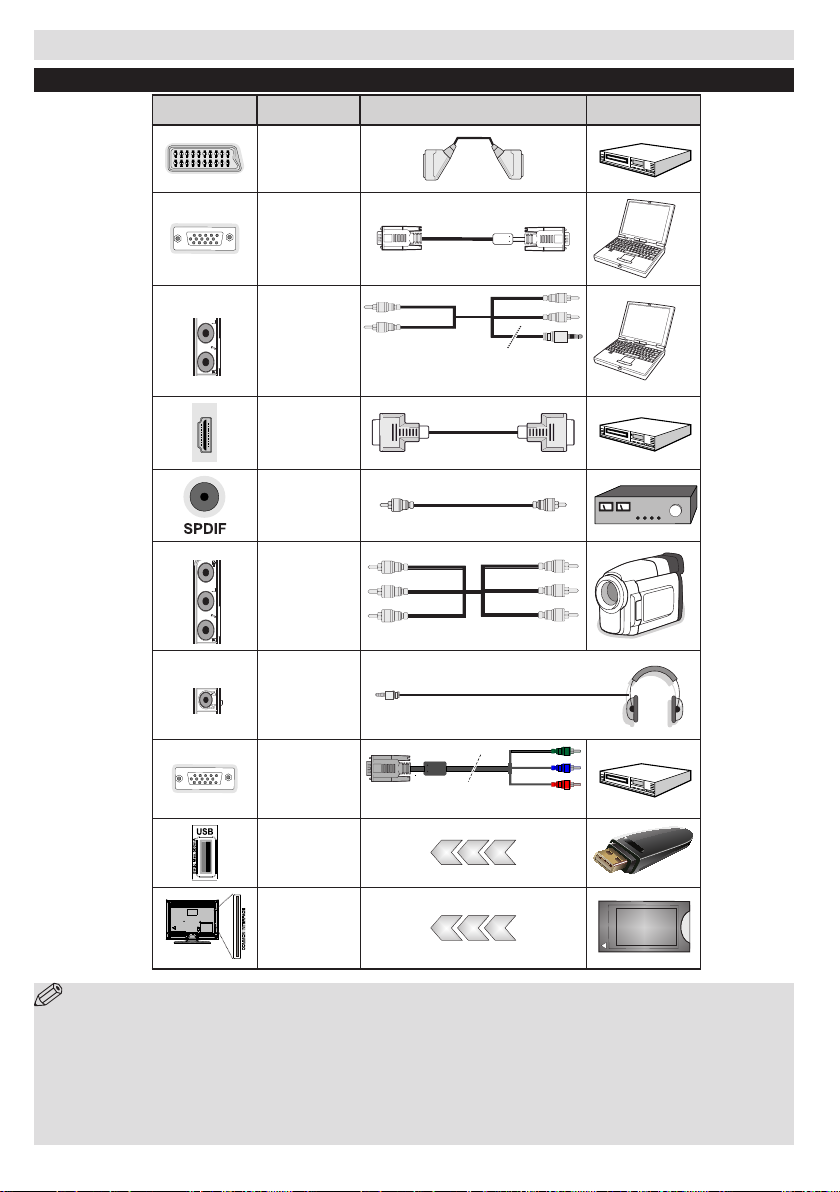
Connections............................................................5
First Time Installation - USB Connections ..............6
TV Menu Features and Functions ..........................7
General TV Operation ............................................9
Using the Channel List ...........................................9
Teletext ...................................................................9
Digital Teletext ........................................................9
ConguringParentalSettings.................................9
Electronic Programme Guide (EPG) ......................9
Software Upgrade.................................................10
Troubleshooting&Tips.........................................10
Quick Menu ..........................................................10
PC Input Typical Display Modes .......................... 11
AV and HDMI Signal Compatibility ...................... 11
Supported File Formats for USB Mode ................12

Getting Started
English - 3 -
Notications&Features&Accessories
Environmental Information
This television is designed to consume less energy
to help save the environment. To reduce energy
consumption, you should take the following steps:
If you set the Power Save Mode as Eco, the TV will
switch to energy-saving mode. The Power Save Mode
settings can be found In the ‘Picture’ section of the
Main Menu. Note that some picture settings will be
unavailable to be changed.
If Picture Off is selected, “Screen will be off in
3 seconds.” message will be displayed. Select
PROCEED and press OK to continue. The screen
will be off immediately.
When the TV is not in use, please switch off or
disconnect the TV from the mains plug. This will also
reduce energy consumption.
StandbyNotications
1. If the TV does not receive any input signal (e.g.
from an aerial or HDMI source) for 5 minutes, the
TV will go into standby. When you next switch-
on, the following message will be displayed:
“Standby Cause No Signal” Press OK to
continue.
2. If the TV has been left on and not been operated
for a while, the TV will go into standby. When
you next switch-on, the following message will
be displayed. “Standby Cause No Operation”
Press OK to continue.
Features
•Remote controlled colour TV.
•Fully integrated digital/cable TV (DVB-T/C)
•HDMI inputs are for connecting a device that has
a HDMI socket.
•USB input.
•OSD menu system.
•Scart socket for external devices (such as DVD
Players, PVR, video games, etc.)
•Stereo sound system.
•Teletext.
•Headphone connection.
•Automatic programming system.
•Manual tuning.
•Automatic power down after up to six hours.
•Sleep timer.
•Child lock.
•Automatic sound mute when no transmission.
•NTSC playback.
•AVL (Automatic Volume Limiting).
•PLL (Frequency Search).
•PC input.
•Plug&Play for Windows 98, ME, 2000, XP, Vista,
Windows7,Windows8.1.
•Game Mode (Optional).
Accessories Included
•Remote Control
•Batteries: 2 x AAA
•Instruction Book
TVControlSwitch&Operation
1. Up direction
2. Down direction
3. Programme/Volume / AV / Standby-On selection
switch
The Control button allows you to control the Volume/
Programme/ Source and Standby-On functions of
the TV.
To change volume: Increase the volume by pushing
the button up. Decrease the volume by pushing the
button down.
To change channel: Press the middle of the button,
the channel information banner will appear on screen.
Scroll through the stored channels by pushing the
button up or down
To change source: Press the middle of the button
twice, the source list will appear on screen. Scroll
through the available sources by pushing the button
up or down.
To turn the TV off: Press the middle of the button down
and hold it down for a few seconds, the TV will turn
into standby mode.
Getting Started

English - 4 -
Inserting the Batteries into the Remote
Remove the screw that secure the battery compartment
coveronthebacksideoftheremotecontrolrst.Liftthe
cover gently. Insert two AAA batteries. Make sure the
(+) and (-) signs match (observe correct polarity). Place
the cover back on. Then screw the cover back on again.
Connect Power
IMPORTANT: The TV set is designed to operate on
220-240V AC, 50 Hz socket. After unpacking, allow
the TV set to reach the ambient room temperature
before you connect the set to the mains. Plug the
power cable to the mains socket outlet.
Antenna/Cable Connection
Connect the “aerial” or “cable TV” plug to the AERIAL
INPUT (ANT) socket located on the back of the TV.
Notication
TRADEMARK ACKNOWLEDGMENT
Manufactured under license from Dolby Laboratories.
Dolby and the double-D symbol are trademarks of
Dolby Laboratories.
The terms HDMI and High-Definition Multimedia
Interface, and the HDMI Logo are trademarks or
registered trademarks of HDMI Licensing LLC in the
United States and other countries.
Dear Customer,
By connecting an HDMI cable to your Funai LCD
TV,youhavetouseonlya certiedHDMIcableto
guarantee a sufcient immunity against parasitic
frequency radiation.
AcertiedHDMIcablecanbeidentiedbytheHDMI
logo on the cable or the cable package.
Information for Users on Disposal of Old
Equipment and Batteries
[European Union only]
These symbols indicate that equipment with these
symbols should not be disposed of as general
household waste. If you want to dispose of the product
or battery, please consider the collection systems or
facilities for appropriate recycling.
Notice: The sign Pb below the symbol for batteries indicates
that this battery contains lead.
Products
Battery
Specication
TV Broadcasting PAL B/G D/K
Receiving Channels VHF (BAND I/III) - UHF
(BAND U) - HYPERBAND
Digital Reception Fully integrated digital
terrestrial-cable TV(DVB-T-C)
Number of Preset
Channels 1000
Channel Indicator On Screen Display
RF Aerial Input 75 Ohm (unbalanced)
Operating Voltage 220-240V AC, 50Hz.
Audio German+Nicam Stereo
Audio Output Power
(WRMS.) (10% THD) 2 x 6
Power Consumption
(Max) 75W
Weight 12,50 kg
TV Dimensions DxLxH
(with foot) 220x923x588mm
TV Dimensions DxLxH
(without foot) 98x923x544mm
Operation
temperature and
operation humidity:
0ºCupto40ºC,85%
humidity max

Getting Started
English - 5 -
Remote Control
123
456
0
LANG.
BACK
MENU
OK
EXIT
Q.MENU
/
V
/
VP
P
7 8 9
.,/@
1. Standby: Switches On / Off the TV
2. Numeric buttons: Switches the channel, enters a
number or a letter in the text box on the screen.
3. TV: Displays channel list / Switches among broadcast
types / Switches to TV Source
4. Mute: Completely turns off the volume of the TV
5. Volume +/-
6. Menu: Displays TV menu
7. Navigation buttons: Helps navigate menus, content
etc. and displays the subpages in TXT mode when
pressed Right or Left
8. OK: Conrmsuserselections,holdsthepage(inTXT
mode), views channel list (DTV mode)
9. Back/Return: Returns to previous screen, opens index
page(inTXTmode)
10. Media browser: Opens the media browsing screen
11. Info: Displays information about on-screen content,
showshiddeninformation(reveal-inTXTmode)
12. My button 1 (*)
13. Coloured Buttons: Follow the on-screen instructions
for coloured button functions
14. Language: Switches between sound modes (analogue
TV), displays and changes audio/subtitle language
(digital TV, where available)
15. Subtitles: Turns subtitles on and off (where available)
16. Rapid reverse: Moves frames backwards in media
such as movies
17. No function
18. Play: Starts to play selected media
19. Stop: Stops the media being played
20. Rapid advance: Moves frames forward in media such
as movies
21. Pause: Pauses the media being played
22. Screen: Changes the aspect ratio of the screen
23. Text: Displays teletext (where available), press again
to superimpose the teletext over a normal broadcast
picture (mix)
24. My button 2 (*)
25. EPG (Electronic programme guide): Displays the
electronic programme guide
26. Exit: Closes and exits from displayed menus or returns
to previous screen
27. Quick Menu: Displays a list of menus for quick access
28. Internet: Opens the portal page, where you can reach
many web based applications
29. Programme +/-
30. Swap: Quickly cycles between previous and current
channels or sources
31. Source: Shows all available broadcast and content
sources
Using My button 1 (**)
PressMYBUTTON1 for veseconds when ona
desired source, channel or link, until the “MY BUTTON
IS SET” message is displayed on the screen. This
confirms that the selected MY BUTTON is now
associated with the selected function.
Using My Button 2 (***)
PressMYBUTTON2 for veseconds when ona
desired source, channel or link, until the “MY BUTTON
IS SET” message is displayed on the screen. This
confirms that the selected MY BUTTON is now
associated with the selected function.

Getting Started
English - 6 -
NOTE: When connecting a device via the YPbPr or Side AV input, you must use the supplied connection
cables to enable connection. See the illustrations above. |You can use YPbPr to VGA cable (not supplied) to
enable YPbPr signal via VGA input. |You cannot use VGA and YPbPr at the same time. |To enable PC audio, you
will need to use the SIDE AV CONNECTION cable’s WHITE & RED inputs. |If an external device is connected via
the SCART socket, the TV will automatically switch to AV mode.|When receiving DTV channels (Mpeg4 H.264)
or while in Media Browser mode, output will not be available via the scart socket. |When using the wall mounting
kit (optional), we recommend that you plug all your cables into the back of the TV before mounting on the wall. |
Insert or remove the CI module only when the TV is SWITCHED OFF. You should refer to the module instruction
manual for details of the settings.
Connections
Connector Type Cables Device
Scart
Connection
(back)
VGA
Connection
(back)
SIDE AV PC/YPbPr
Audio
Connection
(side) Side Audio
YPbPr or PC Connection Cable
(Not supplied)
HDMI
Connection
(back)
SPDIFF
Connection
(back)
SIDE AV Side AV
(Audio/Video)
Connection
(side) (Not supplied)
HEADPHONE Headphone
Connection
(side)
YPbPr Video
Connection
(back) PC to YPbPr Connection Cable (Not supplied)
USB
Connection
(side)
CI
Connection
(side)
CAM
module

Getting Started
English - 7 -
Switching On/Off
To Switch the TV On
Connect the power cord to the 220-240V AC, 50 Hz.
To switch on the TV from standby mode either:
Press the “ ” button, P+ / P- or a numeric button on
the remote control.
Press the side function switch until the TV comes on
from standby.
To Switch the TV Off
Press the “ “ button on the remote control or press
the side function switch until the TV switches into
standby mode.
To power down the TV completely, unplug the
power cord from the mains socket.
Note: When the TV is switched to standby mode, the standby
LED can blink to indicate that features such as Standby
Search, Over Air Download or Timer is active. The LED can
also blink when you switch on the TV from standby mode.
First Time Installation
When turned on for the first time, the language
selection screen is displayed. Select the desired
language and press OK.
The First Time Installation (FTI) screen will be
displayed next. Set your preferences using the
navigationbuttons and whennished, press OKto
continue.
You can activate Store mode option to be available
in “Other settings” menu and your TV’s features will
beillustratedonthetopofthescreen.Aconrmation
screen will be displayed. Select YES to proceed.
If Home Mode is selected, Store mode will not be
available after the First Time Installation. Press OK
button to continue.
Default PIN code can change depending on the
selected country.
If you are asked to enter a PIN code for viewing a
menu option, use one of the following codes: 4725,
0000 or 1234.
Aerial Installation
If you select AERIAL option from the Search Type
screen, the television will search for digital terrestrial
TV broadcasts.
NOTE: You can press MENU button to cancel.
After all the available stations are stored, the Channel
List will be displayed on the screen. If you like how the
channels are sorted according to the LCN (*), please
select “Yes” and than press OK.
Press MENU button to quit channel list and watch TV.
(*) LCN is the Logical Channel Number system that
organizes available broadcasts in accordance with a
recognizable channel sequence (if available).
Cable Installation
If you select CABLE option and press OK button on
the remote control. To continue, please select YES
and press OK. To cancel operation, select NO and
press OK. You can select frequency ranges from
this screen.
Enter the frequency range manually by using the
numeric button.
Note: Searching duration will change depending on the
selected search step.
Media Playback via USB Input
You can connect a 2.5” and 3.5” inch (hdd with external power
supply) external hard disk drives or USB memory stick to your
TV by using the USB inputs of the TV.
IMPORTANT! Back up your files before making
any connections to the TV. Manufacturer will not be
responsibleforanyledamageordataloss.Certain
types of USB devices (e.g. MP3 Players) or USB hard
disk drives/memory sticks may not be compatible
with this TV.
While formatting a USB hard disk that has 1TB (Tera
Byte) or more file capacity, you can experience
problems with the formatting process. Do not
repeatedly quickly plug and unplug the drive. This
may cause physical damage to the USB player and
USB device itself. Do not pull out USB module while
playingale.
Media Browser Menu
Youcanplayphoto,music,andmovielesstoredona
USB disk by connecting it to your TV. Connect a USB
disk to one of the USB inputs located on the side of
the TV. Pressing the MENU button while in the Media
Browser mode will access the Picture, Sound and
Settings menu options. Pressing the MENU button
again will exit from this screen. You can set your Media
Browser preferences by using the Settings Menu.
Loop/Shufe Mode Operation
Start playback with and
activate
TV plays next file and loop
the list.
Start playback with OK and
activate
thesamelewillbeplayedina
loop (repeat).
Start playback with OK/ and
activate thelewillbeplayedinashufe.
First Time Installation - USB Connections

English-8-
TV Menu Features and Functions
Picture Menu Contents
Mode You can change the picture mode to suit your preference or requirements. Picture mode
can be set to one of these options: Cinema, Game, Dynamic and Natural.
Contrast
Sets the lightness and darkness values of the screen.
Brightness Sets the brightness value for the screen.
Sharpness Sets the sharpness value for the objects displayed on the screen.
Colour Sets the colour value, adjusting the colors.
Power Save Mode To set the Power Save Mode as Eco, Picture Off and Disabled.
(When the Mode is Dynamic, Power Save mode is automatically set as disabled.)
Backlight
(Optional)
This setting controls the backlight level. The backlight function will be inactive if the
Power Save Mode is set to Eco. The backlight cannot be activated in VGA, Media
Browser mode or while the picture mode is set to Game.
Noise Reduction If the broadcast signal is weak and the picture is noisy, use the Noise Reduction
setting to reduce the amount of noise.
Advanced Settings
Dynamic Contrast
You can change the Dynamic Contrast ratio to desired value.
Colour Temp Sets the desired colour tone.
Picture Zoom
Sets the desired picture size from picture zoom menu.
Note: Auto (Only available in Scart mode with SCART PIN8 high voltage/low voltage
switching)
Film Mode
Films are recorded at a different number of frames per second to normal television
programmes.Turnthisfeatureonwhenyouarewatchinglmstoseethefastmotion
scenes clearly.
Skin Tone Skin tone can be changed between -5 and 5.
Colour Shift Adjust the desired colour tone.
RGB Gain YoucancongurethecolourtemperaturevaluesusingtheRGBGainfeature.
Reset Resets the picture settings to factory default settings.(Except Game Mode)
Autoposition (in
PC mode) Automatically optimizes the display. Press OK to optimize.
H Position (in PC
mode)
This item shifts the image horizontally to the right hand side or left hand side of the
screen.
V Position (in PC
mode)
This item shifts the image vertically towards the top or bottom of the screen.
Dot Clock (in PC
mode)
Dot Clock adjustments correct the interference that appear as vertical banding in dot
intensive presentations like spreadsheets or paragraphs or text in smaller fonts.
Phase (in PC
mode)
Depending on the resolution and scan frequency that you input to the TV set, you may
see a hazy or noisy picture on the screen. In such a case you can use this item to get a
clear picture by trial and error method.
While in VGA (PC) mode, some items in Picture menu will be unavailable. Instead, VGA mode settings will be added to the
Picture Settings while in PC mode.

English - 9 -
TV Menu Features and Functions
Sound Menu Contents
Volume Adjusts the volume level.
Equalizer Selects the equalizer mode. Custom settings can be made only when in user mode.
Balance This setting is used for emphasizing left or right speaker balance.
Headphone
Sets headphone volume.
Sound Mode You can select a sound mode. (If the selected channel supports).
AVL (Automatic
Volume Limiting) Functionsetsthesoundtoobtainxedoutputlevelbetweenprogrammes.
Digital Out
Sets digital out audio type.
Settings Menu Contents
Conditional Access Controls conditional access modules when available.
Language
Congureslanguagesettings(maychangedependingonthecountryselected)
Preferred and current settings will be available. Current settings can be changed
only if the broadcaster supports.
Parental
Enter correct password to change parental settings. You can easily adjust menu
lock, maturity lock (may change depending on the country selected) and child lock
in this menu. You can also set new pin number.
Timers Sets sleep timer to turn off the TV after a certain time. Sets timers for selected
programmes.
Date/Time Sets date and time.
Sources Enables or disables selected source options.
Other Settings: Displays other setting options of the TV set:
Menu Timeout Changes timeout duration for menu screens.
Scan Encrypted
Channels
When this setting is on, the search process will locate the encrypted channels as
well.
Blue Background Activates or deactivates the blue background system when the signal is weak or
absent.
Software Upgrade ToensurethatyourTValwayshasthemostuptodatermware.
Application Version Displays application version.
Hard of Hearing Enables any special feature sent from the broadcaster.
Audio Description
Audio description refers to an additional narration track for blind and visually
impaired viewers of visual media, including television and movies. You can use this
feature, only if the broadcaster supports that additional narration track.
Auto TV Off
You can set the timeout value of auto off feature. When the timeout value is
reached and the TV has not been operated for a selected time, the TV will go into
standby mode.
Standby Search
(Optional)
If the Standby Search is set to On, when the TV is in standby mode, available
broadcasts will be searched. If the TV locates any new or missing broadcasts,
a menu screen will be displayed, asking you whether or not to execute these
changes. Channel list will be updated and changed after this process.
Store Mode (Optional) If you are displaying the TV in a store, you can activate this mode. Whilst Store
Mode is enabled, some items in the TV menu may not be available.
Power Up Mode Thissettingconguresthepowerupmodepreference.

English - 10 -
TV Menu Features and Functions
Install and Retune Menu Contents
Automatic Channel
Scan (Retune)
(If available)
Displays automatic tuning options. Digital Aerial: Searches and stores aerial
DVB stations. Digital Cable: Searches and stores cable DVB stations. Analogue:
Searchesandstoresanaloguestations.DigitalAerial&Analogue:Searchesand
storesaerialDVBandanaloguestations.DigitalCable&Analogue:Searchesand
stores cable DVB and analogue stations.
Manual Channel Scan This feature can be used for direct broadcast entry.
Network Channel
Scan Searches for the linked channels in the broadcast system.
Analogue Fine Tune Youcanusethissettingfornetuninganaloguechannels.Thisfeatureisnot
available if no analogue channels are stored.
First Time Installation Deletes all stored channels and settings, resets TV to factory settings.
General TV Operation
Using the Channel List
The TV sorts all stored stations in the Channel List. You can edit this channel list, set favourites or set active
stations to be listed by using the Channel List options.
Teletext
Press " ”button to enter. Press again to activate mix mode. Press once more to exit. Follow the instructions
displayed on digital teletext screen.
Digital Teletext
Press "”button to view digital teletext information. Operate it with the coloured buttons, cursor buttons and the
OK button. The operation method may differ depending on the contents of the digital teletext. Follow the instructions
displayed on the digital teletext screen. When the "”button is pressed again, the TV returns to television broadcast.
ConguringParentalSettings
To prohibit viewing of certain programmes, channels and menus can be locked by using the parental control system.
To display parental lock menu options, the PIN number should be entered. The factory default PIN number is
0000. After coding the correct PIN number, parental settings menu will be displayed.
Menu Lock: Menu lock setting enables or disables the menu access.
Maturity Lock: When set, this option gets the maturity information from the broadcast and if this maturity level
is disabled, disables access to the broadcast.
Child Lock: When Child Lock is set, the TV can only be controlled by the remote control. In this case the
control panel buttons will not work.
Set PIN:DenesanewPINnumber.
Default PIN code can change depending on the selected country.
If you are asked to enter a PIN code for viewing a menu option, use one of the following codes: 4725, 0000
or 1234.
Electronic Programme Guide (EPG)
Some, but not all channels send information about the current and next programmes. Press the button
to view the EPG menu.
Red button (Prev Day): Displays the programmes of previous day.
Green button (Next day): Displays the programmes of the next day.
Yellow button (Zoom): Expands programme information.
Blue button (Filter): Viewslteringoptions.

English - 11 -
SUBTTL: Press SUBTITLE button to view Select
Genre menu. Using this feature, you can search the
programme guide database in accordance with the
genre. Info available in the programme guide will
be searched and results matching your criteria will
be listed.
INFO: Displays, in detailed, information on the
programme selected.
Numeric buttons (Jump): Jumps to the preferred
channel directly via numeric buttons.
OK: Displays programme options.
Text (Search): Displays “Guide Search” menu.
(Now) : Shows the current programme.
Software Upgrade
YourTViscapableofndingandupdatingautomatically
via the Aerial/Cable signal.
Software upgrade search via user interface
Simply navigate on your main menu. Choose Settings
and select Other Settings menu. In Other Settings
menu navigate on to the Software for Upgrade item
and press OK button to check for a new software
upgrade.
3 AM search and upgrade mode
While the TV is connected to an aerial signal. If
Automatic scanning in the Upgrade Options menu
is enabled, the TV wakes up at 03:00 and searches
broadcast channels for new software upgrades. If
new software is found and downloaded successfully,
the next time the TV powers up , it will have the new
software version.
Note: If the TV fails to come on after the upgrade unplug the
TV for 2 minutes and plug in again.
Troubleshooting&Tips
Tv will not turn on
Make sure the power cord is plugged in securely to
wall outlet. The batteries in the remote control may
be exhausted. Press the Power button on the TV.
Poor picture
• Have you selected the correct TV system?
• Low signal level can cause picture distortion. Please
check antenna access.
• Check if you have entered the correct channel
frequency if you have done manual tuning.
• The picture quality may degrade when two devices
are connected to the TV at the same time. In such
a case, disconnect one of the devices.
No picture
•No Picture means that your TV is not receiving a
transmission. Have you selected the correct button
on the remote control? Try once more. Also make
sure the correct input source has been selected.
•Is the antenna connected properly?
•Is the antenna cable damaged?
•Are suitable plugs used to connect the antenna?
•If you are in doubt, consult your dealer.
No sound
•Has the TV been set to mute? To cancel mute, press
the “ ” button, or increase the volume level.
•Sound is coming from only one speaker. Is the
balance set to one extreme? See Sound Menu
section.
Remote control - does not operate
•The batteries may be exhausted. Replace the
batteries.
Input sources - can not be selected
•If you cannot select an input source, it is possible
that no device is connected. if not
•Check the AV cables and connections if you have
tried to connect a device.
Quick Menu
Quick Settings menu allows you to access some
options quickly. This menu includes Power Save
Mode, Picture Mode, Equalizer Settings, Favourites
and Sleep Timer options. Press Q.MENU button
on the remote control to view quick menu. See the
following chapters for the details of the listed features.

English - 12 -
AV and HDMI Signal Compatibility
Source
Supported Signals
Available
EXT
(SCART)
PAL 50/60 O
NTSC 60 O
RGB 50 O
RGB 60 O
Side AV PAL 50/60 O
NTSC 60 O
PC/
YPbPr
480I,480P 60Hz O
576I, 576P 50Hz O
720P 50Hz,60Hz O
1080I 50Hz,60Hz O
1080P 50Hz,60Hz O
HDMI1
480I 60Hz O
480P 60Hz O
576I, 576P 50Hz O
720P 50Hz,60Hz O
1080I 50Hz,60Hz O
1080P
24Hz, 25Hz
30Hz, 50Hz,
60Hz
O
(X: Not Available, O: Available)
In some cases a signal on the TV may not be displayed
properly. The problem may be an inconsistency with standards
from the source equipment (DVD, Set-top box, etc. ). If you
do experience such a problem please contact your dealer and
also the manufacturer of the source equipment.
PC Input Typical Display Modes
The following table is an illustration of some of the
typical video display modes. Your TV may not support
all resolutions. Your TV supports up to 1920x1080.
Index Resolution Frequency
1800x600 56 Hz
2800x600 60 Hz
31024x768 60 Hz
41280x768 60 Hz
51360x768 60 Hz
61280x1024 60 Hz
71280x960 60 Hz
81280x1024 60 Hz
91400x1050 60 Hz
10 1600x1200 60 Hz
11 1920x1080 60 Hz

English - 13 -
Supported File Formats for USB Mode
Media Extension Format Notes
Video .mpg,
.mpeg MPEG1-2 MPEG1:768x576@30P,MPEG2:1920x1080@30P
.vob MPEG2
1920x1080@30P
.mp4 MPEG4,Xvid,
H.264
.mkv H.264,
MPEG4,VC-1
.avi MPEG2,
MPEG4,Xvid,
H.264
.v H.264/VP6/
Sorenson
H.264/VP6:1920x1080@30P
Sorenson:352x288@30P
.3gp MPEG4 , H.264 1920x1080@30P
Audio .mp3 MPEG1 Layer
2/3
Layer2:32Kbps~448Kbps(Bitrate)/32kHz,44.1kHz,48kHz,16kHz,
22.05kHz, 24kHz (Sampling rate)
Layer3:32Kbps~320Kbps(Bitrate)/32kHz,44.1kHz,48kHz,16kHz,
22.05kHz,24kHz,8kHz,11.025kHz,12kHz(Samplingrate)
(works
only with
video
les)
Dolby Digital 32Kbps~640Kbps(Bitrate)/32kHz,44.1kHz,48kHz(Samplingrate)
AAC 16Kbps~576Kbps(Bitrate)/48kHz,44.1kHz,32kHz,24kHz,22.05kHz,
16kHz,12kHz,11.025kHz,8kHz(Samplingrate)
Dolby Digital
Plus
32Kbps~6Mbps(Bitrate)/32kHz,44.1kHz,48kHz(Samplingrate)
LPCM Unsigned8bitPCM,Signed/Unsigned16bitPCM(big/littleendian),24bit
PCM (big endian), DVD LPCM 16/20/24bit (Bit rate)
/6kHz,8kHz,11.025kHz,12kHz,16kHz,22.05kHz,24kHz,32kHz,
44.1kHz,48kHz,88.2kHz,96kHz,176.4kHz,192kHz(Samplingrate)
IMA-ADPCM/
MS-ADPCM
384Kbps(Bitrate)/8KHz~48KHz(Samplingrate)
LBR 32Kbps~96Kbps(Bitrate)/32kHz,44.1kHz,48kHz(Samplingrate)
Picture
.jpeg
Baseline Resolution(WxH): 17000x10000
Progressive Resolution(WxH): 4000x4000
.bmp -Resolution(WxH): 5760x4096
Subtitle .sub, .srt - -
Table of contents
Other FUNAI TV manuals

FUNAI
FUNAI LCD-A1504 User manual

FUNAI
FUNAI 32FE502W User manual

FUNAI
FUNAI MS-14A MKII User manual

FUNAI
FUNAI F4819T User manual

FUNAI
FUNAI F20LCTE User manual

FUNAI
FUNAI T20M User manual

FUNAI
FUNAI esa RSEC313E User manual

FUNAI
FUNAI LED24-H9001M User manual

FUNAI
FUNAI 32FDI5514 User manual

FUNAI
FUNAI FT4913C User manual

FUNAI
FUNAI 40FDI7514 User manual

FUNAI
FUNAI 40FDB7714 User manual

FUNAI
FUNAI TVCR200 HYPER User manual

FUNAI
FUNAI 32FDV5714 User manual

FUNAI
FUNAI SYLVANA 6413TB User manual

FUNAI
FUNAI 46FD753P User manual

FUNAI
FUNAI FT1321 User manual

FUNAI
FUNAI LED32-H9000M User manual

FUNAI
FUNAI LCD-A3206 User manual

FUNAI
FUNAI F413TB, F419TB User manual