FUNAI 46FD753P User manual

46FD753P
39FL753P
32FL553P / 32FL553
29FL553P / 29FL553
24FL553P / 24FL553
LED LCD HD Television
Instruction Manual
English

2
EN
Contents
UNIT INFORMATION ...................................2
Trademark Information ..............................2
Servicing....................................................2
Cabinet Cleaning.......................................2
Panel Cleaning ..........................................2
Remote Control .........................................3
Control panel .............................................4
Terminal ....................................................5
INITIAL SETUP ............................................6
OPERATIONS ..............................................7
Watching a TV Programme .......................7
Favourite ...................................................7
EPG(Electronic Programme Guide) ..........7
Sleep Timer ...............................................8
Sound Select .............................................8
Subtitle Settings ........................................8
Teletext Settings........................................8
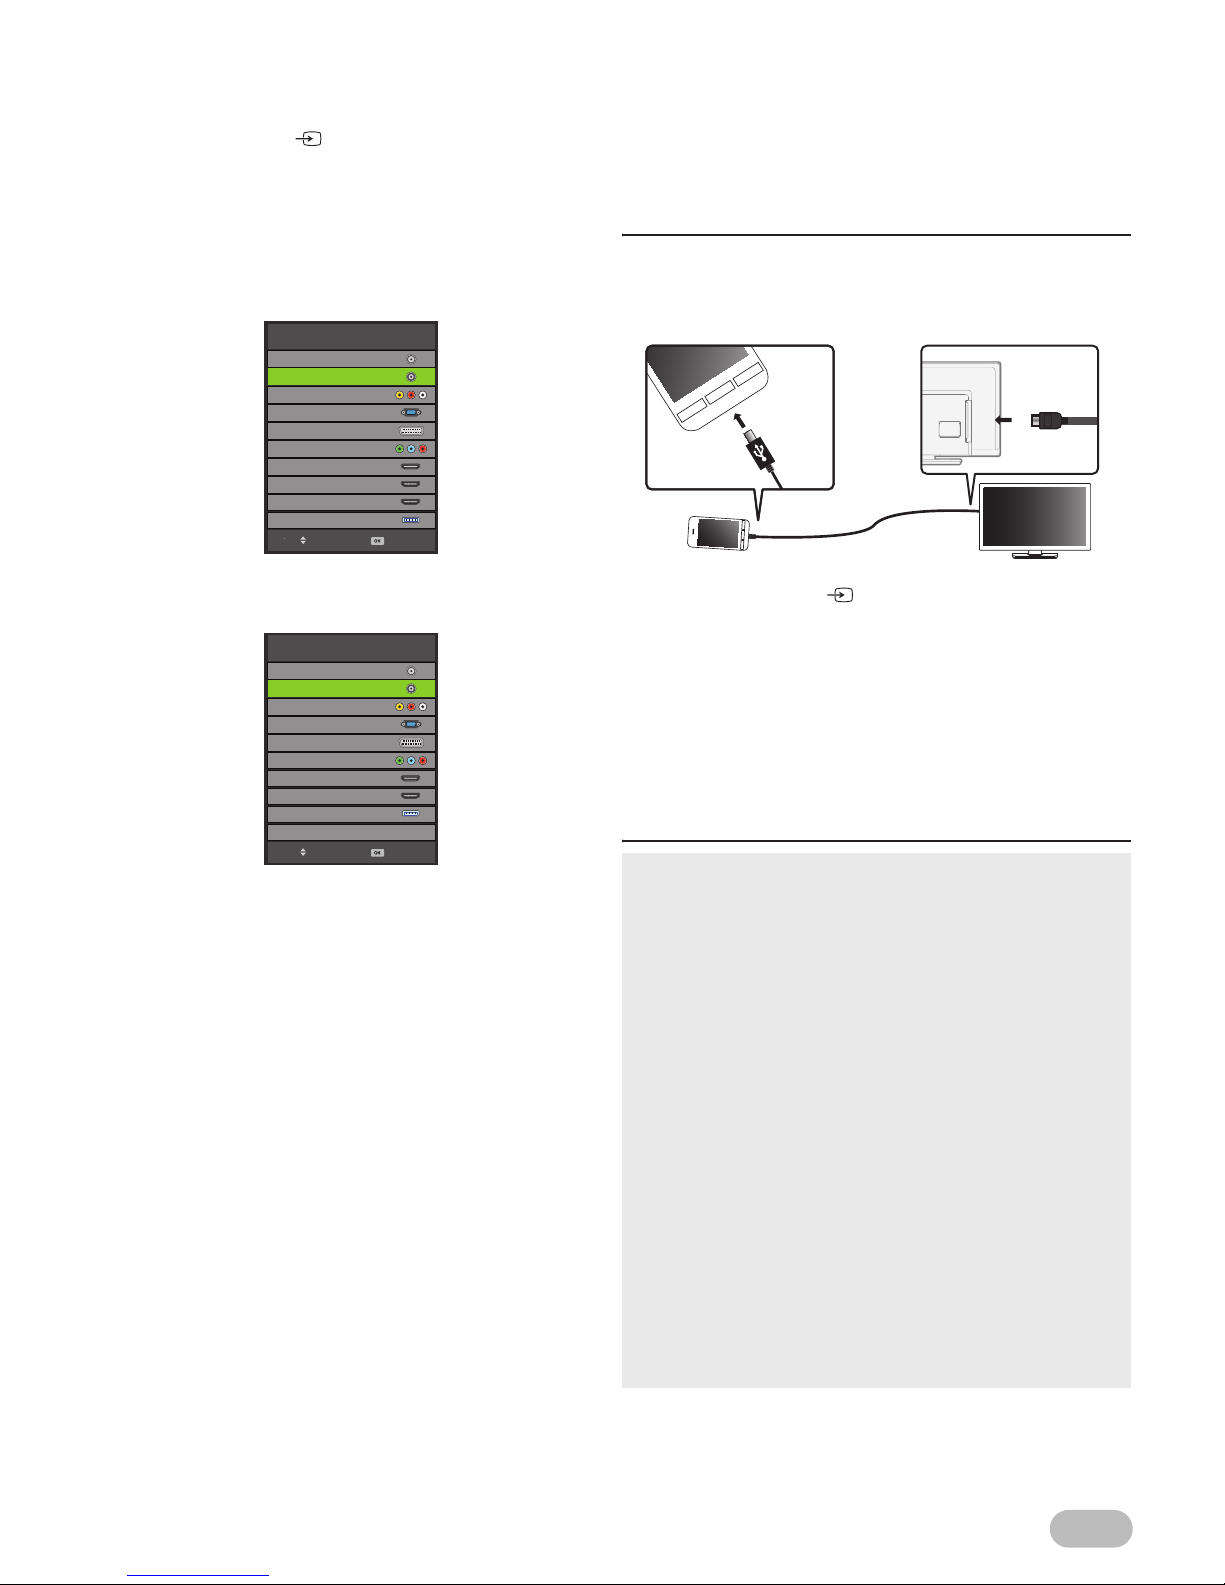
Switching the Input Source Mode..............9
SmartConnect ...........................................9
Recording ................................................10
Photo / Music / Video Playback...............11
OTHER SETTINGS ....................................15
Channel Settings .....................................15
PC Settings .............................................18
Picture Adjustment ..................................18
Sound Adjustment ...................................19
Time Settings ..........................................20
Lock Settings...........................................21
Setup Adjustment ....................................23
Hotel Mode Settings ................................26
TROUBLESHOOTING GUIDE...................28
SPECIFICATIONS......................................30
Input Resolution ......................................32
Multimedia Format...................................32
UNIT INFORMATION
Trademark Information
•Manufactured under license from Dolby Laboratories.
Dolby and the double-D symbol are trademarks of
Dolby Laboratories.
•The terms HDMI and HDMI High-Definition
Multimedia Interface, and the HDMI Logo are
trademarks or registered trademarks of HDMI
Licensing LLC in the United States and other
countries.
•DVB is a registered trademark of the DVB Project.
•The “HD TV” Logo is a trademark of
DIGITALEUROPE.
Servicing
•Should your unit become inoperative, do not try to
correct the problem by yourself. There are no user-
serviceable parts inside. Take the unit to a Service
Centre for servicing.
Cabinet Cleaning
•Gently wipe the front panel and other exterior
surfaces of the unit with a soft cloth.
•Never use a solvent or alcohol. Do not spray
insecticide liquid near the unit. Such chemicals may
cause damage and discoloration to the exposed
surfaces.
Panel Cleaning
•If the LCD panel should require cleaning, wipe it with
a cotton or soft cloth. Before cleaning the panel,
disconnect the power cord.

3
EN
Remote Control
1. (Power)
Turn the unit on and go into the standby mode.
2. SLEEP
Refer to “Sleep Timer” (p. 8).
3. Number buttons
Select the desired channel in TV mode and enters
the password in the PIN code input field.
4. EXIT
Returns to the previous display.
5. Ÿ/ ź/ Ż/ Ź(Cursor)
6. OK
7. MENU
Displays the menu.
8. AUDIO
Select audio language/ mode.
Refer to “Sound Select” (p. 8).
9. /
Adjust the audio volume.
Refer to “To adjust the volume” (p. 7).
10. (Mute)
Turn off the sound.
Refer to “To adjust the volume” (p. 7).
11. RED / GREEN / YELLOW / BLUE
Use for “EPG(Electronic Programme Guide)”
(p. 7) / “[Programme Edit]” (p. 16).
12. DISPLAY
Displays the channel number or input source.
13. SOURCE
Switch the input source mode.
Refer to “Switching the Input Source Mode” (p. 9).
14. PICTURE MODE
Change the picture mode.
Refer to “[Picture Mode]” (p. 18).
15. SOUND MODE
Change the sound mode.
Refer to “[Sound Mode]” (p. 19).
16. FAV / FAV
Use for “Favourite” (p. 7).
17. FAV
Use for “Favourite” (p. 7).
18. EPG
Use for “EPG(Electronic Programme Guide)”
(p. 7).
19.
Select a channel.
Refer to “To select a channel” (p. 7).
20. (Play / Pause) / (Skip backward) /
(Skip forward) / (Stop) / (Rewind) /
(Fast-forward)
Use for “Recording” (p. 10) / “Photo / Music /
Video Playback” (p. 11).
21. REC (Record)
Use for “Recording” (p. 10).
22. (Subtitle)
Displays the subtitle list.
Refer to “Subtitle Settings” (p. 8).
23. (Expand) / (Subpage) / (Hold) /
(Text) / (Reveal) / (Index)
Use for “Teletext Settings” (p. 8).
15
16
17
18
19
22
14
13
1
2
3
4
6
5
7
8
9
10
11
20
12
23
21

4
EN
Control panel This window has no function.
Keys on Rear.
Control Keys are located on the Rear side of the
TV.
1. Standby / Power indicator
(Power on : no light, Standby : red)
2. Infrared sensor window
Receive the infrared rays transmitted from the
remote control.
3. VOL Ż/ Ź
•Watching TV, VOL Ż/ Źon the front panel
works the same function as / .
Refer to “9. / ” (p. 3).
•On the menu, VOL Ż/ Źon the front panel
works the same function as Ż/ Ź(cursor).
4. CH Ÿ/ ź(46FD753P)
PROG Ÿ/ ź(39FL753P/32FL553P/32FL553/
29FL553P/29FL553/24FL553P/24FL553)
•Watching TV, PROG Ÿ/ źand CH Ÿ/ źon
the front panel works the same function as
.
Refer to “19. ” (p. 3).
•On the menu, PROG Ÿ/ źand CH Ÿ/ źon
the front panel works the same function as Ÿ/
ź(cursor).
5. MENU
Refer to “7. MENU” (p. 3).
6. SOURCE
Refer to “13. SOURCE ” (p. 3).
•On the menu, SOURCE on the front panel
works the same function as OK.
7. (Power)
Refer to “1. (Power)”(p. 3).
21
76543
76543
2
1
46FD753P
39FL753P/32FL553P/32FL553/
29FL553P/29FL553/24FL553P/24FL553

5
EN
Terminal 1. AC power cord inlet
2. HDMI (HDMI 1 / HDMI 2) input jacks
3. Coaxial digital audio output jack
4. (Aerial) input jack
5. Headphone audio output jack
6. SCART jack
7. Component video, Composite video and
Audio (L/R) input jacks
8. CI slot
9. USB terminal (p. 10, 11)
10. PC (VGA) input jack
11. Audio input jack for PC connection
HDMI (HDMI 3) input jack for MHL function
P series only - (46FD753P/39FL753P/32FL553P/
29FL553P/24FL553P)
1
1
4
3
2
765
11
10
9
8
39FL753P/32FL553P/32FL553/
29FL553P/29FL553/24FL553P/24FL553
46FD753P
•Data input from USB flash memory only.
•User should not connect any devices to the USB terminal
such as digital camera, keyboard, mouse, etc. (because
these will not work.)
•The software update is, in most cases, handled by an
authorised service person or in some circumstances the
user may be asked to do the software update themselves.

6
EN
INITIAL SETUP
This section will guide you through the unit's initial
setup which includes selecting a language for your on-
screen menu and auto scan, which automatically
scans and memorises viewable channels.
1After making all the necessary connections, turn
on the unit pressing .
2Use Ż/ Źto select the location.
3
Use
Ÿ/ ź
to select
[OSD Language]
, the
n select
the language you want, using Ż/ Ź.
4Use Ÿ/ źto select [Country], then select the
country you want, using Ż/ Ź.
5Press OK to enter [Auto Tuning].
6Use Ÿ/ źto select [Tune Type], then select
[DTV], [ATV] or both channels, using Ż/ Ź.
7Use Ÿ/ źto select [Digital Type], then select
[DVB-T] or [DVB-C], using Ż/ Ź.
8Use Ÿ/ źto select [Scan Type], then select
[Full] or [Quick], using Ż/ Ź.
9Use Ÿ/ źto select the item you want, and then
adjust the setting, using Ż/ Ź.
10 Press OK to start scanning.
•If you select [Retail Mode], the confirm message will
appear.
Auto Tuning
First Time Installation
Home Mode
Germany
Country
English
OSD Language
Auto Tuning
Quick
Auto
Symbol Rate
Auto
Frequency
Auto
Network ID
Scan Type
DVB-T
Digital Type
ATV + DTV
Tune Type
Back Start
•When scanning starts, confirmation menu will appear.
•To turn back previous page, pressing MENU button in
[Auto Tuning] menu.
•In case when not all available cable channels are found
through [Full] scanning mode, these programs can be
scanned by selecting [Quick] mode. Please note, that
[Quick] mode scanning can take additional time.
•Depending on cable TV provider specification, correct
subscription to cable signals cannot be guaranteed.
•When the scanning is completed, the lowest memorised
digital or analogue channel will be displayed.
•If you press MENU during channel scanning, this operation
will be paused, then press MENU again to exit the initial
setup.
•You can set the setup again. Refer to “[First Time
Installation]” (p. 25)

7
EN
OPERATIONS
Watching a TV Programme
To select a channel
Use repeatedly to select your desired
channel, or use the Number buttons to enter a
channel number, then press OK for quicker access.
(e.g.) If you want to select the channel 24 without
pressing OK, press 2first, then press 4within 3
seconds.
To adjust the volume
Use /to adjust the audio volume.
Press to turn on or off the sound right away.
Favourite
You can easily find a favourite channel.
1Press FAV while watching a programme to show
the favourite channel list.
2Use Ÿ/ źto select the channel you want, then
press OK.
3Press EXIT to exit.
EPG(Electronic Programme Guide)
For Digital TV operation
You can easily find a channel or see the detailed
channel information. EPG gives you scheduled
information of the TV programme.
1Press EPG to display [PROGRAMME GUIDE]
menu and use Ÿ/ źto select a channel.
[Record] : RED
Select the programme you want and press RED to reserve
the recording.
[Remind] : GREEN
Select the programme you want and press GREEN to
remind the reservation.
[Prev Day] : YELLOW
Press YELLOW to move to the page of previous day.
[Next Day] : BLUE
Press BLUE to move to the page of next day.
[Move View] : Ÿ/ ź/ Ż/ Ź
It is possible to use Ÿ/ ź/ Ż/ Ź(Cursor).
[Details] : DISPLAY
Press DISPLAY to display the detail information.
[Exit] : EXIT
Press to exit the menu.
Read this first
These operations are accessible by remote control.
Some may also be accessible by controls on the main
unit.
•You can recover the original volume by pressing again
or /.
•You can set favourite channel at “[Programme Edit]” (p. 16).
•Use FAV / to select the favourite channel while
watching a programme.
•Use Ż/ Źto move to the previous or next page.
Page Up/Down Select
Favorite List
DTV
DTV
DTV
DTV
DTV
4 LCI4
3 European sport
2 France 2 HD
1 TF1 HD
PROGRAMME GUIDE
DetailsMove View Exit
20 Jan 2013 08:17:51 20 Jan 2013
06:45 - 08:25 20 Jan 2013
The Wing in the sky/ The cherry tree/ The Road of flower
Weather
NNN News
Sports News
Japanese Cartoon
Traffic and Weather
06:45-07:00
07:00-09:00
09:00-10:00
10:00-10:55
10:55-11:15
1 TF1 HD
2 France 2 HD
3 European Sport
4 LCI 4
5 AFC
Prev Day Next DayRecord Remind

8
EN
Sleep Timer
The sleep timer can be set the unit to go to the standby
mode after an incremental period of time.
1Press SLEEP repeatedly to change the sleep
time period.
Sound Select
For Digital TV operation
Press AUDIO to display currently selected audio
language with the number of available ones and press
repeatedly to cycle through them.
For Analogue TV operation
Press AUDIO to display currently selected audio mode
and press repeatedly to cycle through the available
audio mode.
(e.g.)
Subtitle Settings
You can change the subtitle settings used for TV
programmes.
1Press (Subtitle) to display the subtitle
language list.
2Use Ÿ/ źto select the subtitle language you
want, then press OK.
Teletext Settings
You can change the teletext settings used for TV
programmes.
1Press (Text) to turn on the teletext decoder.
2Press (Text) repeatedly to show the teletext in
transparent mode.
3Press EXIT to turn off the teletext decoder.
•Available options are; Off / 10min / 20min / 30min / 60min /
90min / 120min / 180min / 240min.
•Press SLEEP repeatedly until [Off] appears to cancel the
sleep timer.
•If the unit goes into standby mode, the sleep timer will be
cancelled.
Dolby D : Dolby Digital sound
Dolby D+ : Dolby Digital Plus sound
AAC : HE-AAC sound
MPEG : MPEG sound
NICAM STEREO Mono
[NICAM DUAL I NICAM DUAL II Mono
NICAM MONO Mono
Stereo Mono
DUAL I DUAL II
Mono
•To enlarge fonts, press .
•To select the teletext subpages, press .
•To directly select the page numbers shown at the bottom of
the TV screen, use RED / GREEN / YELLOW / BLUE.
•To call up the hidden information, press .
•To hold the current page, press .
•To go back to the start page, press .

9
EN
Switching the Input Source Mode
You can switch the input source mode to TV mode or
external input mode.
1Press SOURCE .
2Use Ÿ/ źto select the input mode you want,
then press OK.
46FD753P/39FL753P/32FL553P/29FL553P/
24FL553P
32FL553/29FL553/24FL553
SmartConnect
This unit can display the screen of other device with
MHL function and use the remote control of this unit to
operate it.
During the connection, the device is charged up.
Setup for SmartConnect
You must connect the HDMI cable to HDMI3/MHL input
jack of this unit and micro USB cable to the device with
MHL function (shown below).
1Press SOURCE to display the input source
mode.
2Use Ÿ/ źto select [HDMI3/MHL] on the list,
then press OK to display the screen of the
connected device.
3Release the lock of the connected device and
use remote control to operate it.
Note for SmartConnect
HDMI3/MHL
HDMI2
HDMI1
YPbPr
SCART
PC
DTV
ATV
AV
Media
Input Source
Move Select
Media
HDMI2
HDMI1
YPbPr
SCART
PC
DTV
ATV
AV
Input Source
Move Select
•If you want to exit this mode, select any other input source
mode. Refer to “Switching the Input Source Mode” (p. 9).
•HDMI1 and HDMI 2 input jacks do not accept the function.
•Available features are limited on remote control operation.
•Use HDMI and micro USB cable. If you use any other cable,
we cannot guarantee.
•The connected cable between the unit and a device is not
supplied with this unit.
•We do not guarantee the device with all MHL function can
be supported on this unit.
•Funai cannot be held responsible if your device is not
supported, nor will Funai accept any liability for damage or
loss of stored data.
•Be sure to keep a backup copy of the original files on your
device before you play them back on this unit. We have no
responsibilities for damage or loss of your stored data.
•To avoid damaging the connecting device and the unit
always turn off the unit before you unconnect the cable.
•When the unit does not recognise the connected device, try
reconnecting it.
•For details, please access: http://www.mhlconsortium.org/

10
EN
Recording
This unit can record a TV programme. Use a USB flash
memory for saving the data.
Setup for Recording / Playback
You must connect the USB flash memory to USB
terminal of this unit (shown below).
1Press SOURCE to display the input source
mode and use Ÿ/ źto select [DTV], then press
OK.
Record
2Select the channel you want, then press REC to
start recording the current programme.
3Press to stop the recording.
Playback
2Press (Index) to call up the recorded list.
3Use Ÿ/ źto select the desired file, then press
OK to start the playback.
Operation in Playback
Press OK to display the menu.
•The USB flash memory is not supplied with this unit.
•USB 2.0 High speed flash memory is recommended.
•The unit recognise a USB flash memory only.
Do not use a USB hub and an extension cord between the
USB flash memory and the unit.
Always connect the USB flash memory to this unit directly.
•We do not guarantee the all USB flash memory can be
supported on this unit.
•If you want to exit this mode, select any other input source
mode. Refer to “Switching the Input Source Mode” (p. 9).
•When you stop the recording, it will return to normal
broadcast television.
•When the storage space of disk is shortage, it will appear a
warning message. Then it stops recording automatically
and returns to normal broadcast television.
Play FB FF Prev. Next Pause Stop
08:31
(0002:50:19)
[00:00:40]
2 France 2 HD
:
Press to play or pause the playback.
/ :
Press to rewind or fast-forward the playback.
Every press on / will rewind or fast-forward
faster up to five.
/ :
Press to skip backward or forward the file.
:
Press to stop the playback.
EXIT:
Press to disappear the menu during the menu
appears.
Recorded List
DeleteMove Play Exit
[6% Used] 01:05:01 Jan
1/1
30/01/2013
Today’s news
Movie: The player
Programme Title Date
1 30/01/2013
2
01:08:31 (00:01:20)
Movie: The player
01:08:31 (00:01:20)
A player starts his carrer in new
school. He founds great competitions
and face off against them. He gets
better rapidly and his team will make
the legend...

11
EN
Photo / Music / Video Playback
This unit can play picture, music and video files. Use
the USB flash memory that contains the files.
Setup for Playback
You must connect the USB flash memory to USB
terminal of this unit (shown below).
1Press SOURCE to display the input source
mode and use Ÿ/ źto select [Media], then
press OK.
Note for Playback
•If you want to exit this mode, select any other input source
mode. Refer to “Switching the Input Source Mode” (p. 9).
•You can check Multimedia Specification. Refer to
“Multimedia Format” (p. 32).
•The USB flash memory is not supplied with this unit.
•The unit recognise a USB flash memory only.
Do not use a USB hub and an extension cord between the
USB flash memory and the unit.
Always connect the USB flash memory to this unit directly.
•We do not guarantee the all USB flash memory can be
supported on this unit.
•Funai cannot be held responsible if your USB flash memory
is not supported, nor will Funai accept any liability for
damage or loss of stored data.
•A USB flash memory that required its own driver or the
device with a special system such as fingerprint recognition
are not supported.
•Be sure to keep a backup copy of the original files on your
device before you play them back on this unit. We have no
responsibilities for damage or loss of your stored data.
•To avoid damaging the USB flash memory and the unit
always turn off the unit before you remove the USB flash
memory.
•This unit is not allowed to use the USB flash memory which
requires external power supply (500 mA or more).
•This unit can be recognised up to 60,000 files in the USB
flash memory.
•This unit may not be recognised if the length of the file
names is too long. Only English characters can be
recognised.
•This unit does not support NTFS or the file other than
FAT16 and FAT32 file system. If the file is not supported,
error message appears.
•When the unit does not recognise the USB flash memory,
try reconnecting it.
•This unit cannot play back a file which go over the limit of
file restriction.

12
EN
[PHOTO]
2Use Ż/ Źto select [PHOTO], then press OK.
3Use Ż/ Źto select [C], then press OK to enter
the file.
4Use Ÿ/ ź/ Ż/ Źto select the desired file, then
press OK.
Operation in Slideshow
•The check box is displayed at the right bottom by pressing
the OK. The files having the check box are played by
pressing . If they are not selected, then all playable files
in the folder are played.
•If you put audio files into the folder of picture files, you can
play music during the slideshow.
MOVIEMUSICPHOTO
USB 2.0
Return
PHOTO
Delete
Aniversary ...
Live 2011. 1..
Marriage cel..
Memory 20...
Kyoto 2010...
Return
Exit
PHOTO
OK / DISPLAY :
Press to display the menu.
[Repeat]:
Use Ż/ Źto select [Repeat] and press OK to
switch the repeat mode: [Repeat None], [Repeat
1] and [Repeat All] in order.
[Music]:
Use Ż/ Źto select [Music] and press OK to play
the music file in the same folder.
[Rotate](right-handed or left-handed rotate):
Use Ż/ Źto select [Rotate] and press OK to turn
the picture clockwise by 90 degrees.
[Zoom In]:
Use Ż/ Źto select [Zoom In] and press OK to
zoom in the display.
The zoom factor: 2x, 4x and 8x
[Zoom Out]:
Use Ż/ Źto select [Zoom Out] and press OK to
zoom out the display.
The zoom factor: 1x, 2x and 4x
[Playlist]:
Use Ż/ Źto select [Playlist] and press OK to
display the playlist.
[Info.]:
Use Ż/ Źto select [Info.] and press OK to
display the information of the current file.
[Move View]:
Use Ż/ Źto select [Move View] and press OK to
enter the move view mode, and use Ÿ/ ź/ Ż/ Ź
to move the picture, if the picture big enough to
surpass the screen.
:
Press to play or pause the slideshow.
/ :
Press to skip backward or forward the file.
:
Press to stop the slideshow.
EXIT:
Press to go back to the previous screen.

13
EN
[MUSIC]
2Use Ż/ Źto select [MUSIC], then press OK.
3Use Ż/ Źto select [C], then press OK to enter
the file.
4Use Ÿ/ ź/ Ż/ Źto select the desired file, then
press OK.
Operation in Playback
•The check box is displayed at the right bottom by pressing
the OK. The files having the check box are played by
pressing . If they are not selected, then all playable files
in the folder are played.
MOVIEMUSICPHOTO
USB 2.0
Return
MUSIC
Delete
New songs ...
Mercury feat...
Reeeed
Ferdinand F..
Return
Exit
MUSIC
OK / DISPLAY :
Press to display the menu.
[Repeat]:
Use Ż/ Źto select [Repeat] and press OK to
switch the repeat mode: [Repeat None], [Repeat
1] and [Repeat All] in order.
[MUTE]:
Use Ż/ Źto select [MUTE] and press OK.
[Playlist]:
Use Ż/ Źto select [Playlist] and press OK to
display the playlist.
[Info.]:
Use Ż/ Źto select [Info.] and press OK to
display the information of the current file.
[Goto Time]:
Use Ż/ Źto select [Goto Time] and press OK to
move the time you want in the playback.
:
Press to play or pause the playback.
/ :
Press to rewind or fast-forward the playback.
/ :
Press to skip backward or forward the file.
:
Press to stop the playback.
EXIT:
Press to go back to the previous screen.

14
EN
[MOVIE]
2Use Ż/ Źto select [MOVIE], then press OK.
3Use Ż/ Źto select [C], then press OK to enter
the file.
4Use Ÿ/ ź/ Ż/ Źto select the desired file, then
press OK.
Operation in Playback
•The check box is displayed at the right bottom by pressing
the OK. The files having the check box are played by
pressing . If they are not selected, then all playable files
in the folder are played.
MOVIEMUSICPHOTO
USB 2.0
Return
MOVIE
Delete
Return
Exit
MOVIE
Une Nouv...
La vida de...
La camis...
Osaka footba...
El coche...
How to use fu...
OK / DISPLAY :
Press to display the menu.
[Repeat]:
Use Ż/ Źto select [Repeat] and press OK to
switch the repeat mode: [Repeat None], [Repeat
1] and [Repeat All] in order.
A-B Repeat:
Use Ż/ Źto select A-B Repeat and press OK to
switch the limited repeat mode: [Set A], [Set B]
and [None] in order.
[Playlist]:
Use Ż/ Źto select [Playlist] and press OK to
display the playlist.
[Info.]:
Use Ż/ Źto select [Info.] and press OK to
display the information of the current file.
[Slow Forward]:
Use Ż/ Źto select [Slow Forward] and press OK
to play slow.
[Step Forward]:
Use Ż/ Źto select [Step Forward] and press OK
to play frame-by-frame playback.
[Goto Time]:
Use Ż/ Źto select [Goto Time] and press OK to
move the time you want in the playback.
:
Press to play or pause the playback.
/ :
Press to rewind or fast-forward the playback.
/ :
Press to skip backward or forward the file.
:
Press to stop the playback.
EXIT:
Press to go back to the previous screen.

15
EN
OTHER SETTINGS
Some settings need to enter PIN code.
Refer to “Lock Settings” (p. 21).
Channel Settings
You can edit the channel settings.
1Use Ż/ Źto select [CHANNEL].
[Auto Tuning]
You can scan the DTV, ATV or both channel in your
area automatically.
2Use Ÿ/ źto select [Auto Tuning], then press
OK.
3Use Ÿ/ źto select [Tune Type], then select
[DTV], [ATV] or both channels, using Ż/ Ź.
4Use Ÿ/ źto select [Digital Type], then select
[DVB-T] or [DVB-C], using Ż/ Ź.
5Use Ÿ/ źto select [Scan Type], then select
[Full] or [Quick], using Ż/ Ź.
6Use Ÿ/ źto select the item you want, and then
adjust the setting, using Ż/ Ź.
7Press OK to start scanning.
< For DVB-T scanning >
[ATV Manual Tuning]
For Analogue TV operation
You can search ATV channel manually in your area.
2Use Ÿ/ źto select [ATV Manual Tuning], then
press OK.
3Use Ÿ/ źto select [Current CH], then use Ż/
Źto select the channel you want.
4Use Ÿ/ źto select [Color System], then use Ż
/ Źto select the system you want.
5Use Ÿ/ źto select [Sound System], then use
Ż/ Źto select the system you want.
6Use Ÿ/ źto select [Fine-Tune], then use Ż/ Ź
to adjust the setting.
7Use Ÿ/ źto select [AFC], then use Ż/ Źto
select [On] or [Off].
8Use Ÿ/ źto select [Search], then use Żor Ź
to start scanning.
Read this first
Before adjust each setting, press MENU to display the
menu.
To exit the menu, press MENU.
•If you set [Lock System] to [On], you have to enter the 6-
digit PIN code you set using the Number buttons.
Auto Tuning
ATV Manual Tuning
DTV Manual Tuning
Programme Edit
Signal Information
CI Information
Schedule List
CHANNEL
Move SelectReturn Exit
Auto Tuning
Quick
Auto
Symbol Rate
Auto
Frequency
Auto
Network ID
Scan Type
DVB-T
Digital Type
ATV + DTV
Tune Type
Back Start
•When scanning starts, confirmation menu will appear.
•To turn back previous page, pressing MENU button in
[Auto Tuning] menu.
•In case when not all available cable channels are found
through [Full] scanning mode, these programs can be
scanned by selecting [Quick] mode. Please note, that
[Quick] mode scanning can take additional time.
•Depending on cable TV provider specification, correct
subscription to cable signals cannot be guaranteed.
•When the scanning is completed, the lowest memorised
digital or analogue channel will be displayed.
•If you press MENU during channel scanning, this operation
will be paused, then press MENU again to exit the initial
setup.
•If you set [Lock System] to [On], you have to enter the 6-
digit PIN code you set using the Number buttons.
•If you set to [On], this unit adjust tuning to near channel
automatically.

16
EN
[DTV Manual Tuning]
For Digital TV operation
You can search DTV channel manually in your area.
2Use Ÿ/ źto select [DTV Manual Tuning], then
press OK.
3Use Ż/ Źto select the channel you want, then
press OK to start scanning.
< For DVB-C scanning >
[CADTV Manual Tuning]
For Digital TV operation
You can search CADTV channel manually in your area.
2Use Ÿ/ źto select [CADTV Manual Tuning],
then press OK.
3Use Ÿ/ źto select [Frequency] and press OK,
then use Ÿ/ źto adjust.
4Use Ÿ/ źto select [Symbol(ks/s)] and press
OK, then use Ÿ/ źto adjust.
5Use Ÿ/ źto select [QAM Type] and press OK,
then use Ÿ/ źto select the type.
6After the settings, press OK to start scanning.
[Programme Edit]
For Digital TV operation
You can edit the programme settings.
2Use Ÿ/ źto select [Programme Edit], then
press OK to show programme edit list.
Delete channels : [Delete]
3Use Ÿ/ źto select the channel you want,
then press RED to delete the current channel.
Setting unshown channels : [Skip]
3Use Ÿ/ źto select the channel you want,
then press BLUE to set the current channel as
unshown channel.
Setting favourite channels : [Fav]
Using Favourite function. Refer to “Favourite” (p. 7).
3Use Ÿ/ źto select the channel you want,
then press FAV to set the current channel as
favourite.
Switching channel number : [Move]
You can switch the current programme with the other
channel number.
3Use Ÿ/ źto select the channel you want,
then press YELLOW, and use the Number
buttons to enter the other channel number you
want to set, then press OK.
New channel number : [Move]
You can place the current programme to new
channel number.
3Use Ÿ/ źto select the channel you want,
then press YELLOW, and use the Number
buttons to enter the unused channel number
you want to set, then press OK.
•If you set [Lock System] to [On], you have to enter the 6-
digit PIN code you set using the Number buttons.
CADTV Manual Tuning
474.000 MHz
6900
QAM 16
Frequency
Symbol(ks/s)
QAM Type
NO SIGNAL
Bad GoodNormal
•You can check favourite channel list at “Favourite” (p. 7).

17
EN
[Schedule List]
For Digital TV operation
You can see the detailed channel information and
reserve TV programme.
2Use Ÿ/ źto select [Schedule List], then press
OK to display the list.
Add new reservasion
3Press YELLOW to display reservation menu.
4Use Ÿ/ źto select service selection, use Ż/ Ź
to select the service you want.
5Use Ÿ/ źto select [Type], use Ż/ Źto select
[Reminder] or [Recorder].
6Use Ÿ/ źto select [Mode], use Ż/ Źto select
[Once], [Everyday] or [Weekly].
7Use Ÿ/ źto select [Start Time], use Ż/ Źto
select the date/time and use Ÿ/ źto adjust.
8Use Ÿ/ źto select [End Time], use Ż/ Źto
select the date/time and use Ÿ/ źto adjust.
9After the adjustment, press OK to save it.
Delete a reservation
3Use Ÿ/ źto select the item you want in
[Schedule List], and then press RED to delete
the reservation.
Edit a reservation
3Use Ÿ/ źto select the item you want in
[Schedule List], and then press BLUE to edit
the reservation.
[Signal Information]
For Digital TV operation
You can see the detail information about the signal.
2Use Ÿ/ źto select [Signal Information], then
press OK to display the detail.
[CI Information]
For Digital TV operation
You can see the detail information about the Common
Interface, if you have inserted the CI card.
2Use Ÿ/ źto select [CI Information], then press
OK to display the detail.
[Once] : on any day you choose, up to 12 months
away
[Everyday] : at the same time on the same channel
every day
[Weekly] : at the same time on the same channel
every week; for example, every Monday
•To edit a reservation, refer to "Add new reservasion".
Schedule List
Delete EditAddMove Exit
[6% Used] 01:05:01 Jan
1/1
30/01/2013
Today’s news
Movie: The player
Programme Title Date
1 30/01/2013
2
01:08:31 (00:01:20)
Movie: The player
01:08:31 (00:01:20)
A player starts his carrer in new
school. He founds great competitions
and face off against them. He gets
better rapidly and his team will make
the legend...
Schedule Setup
40 B_LCN40d
Type Reminder
Mode Everyday
Start Time 01:06 01 Jan
End Time 01:06 01 Jan
Modulation: QAM 64 BackSelect
•We do not guarantee the all cards can be supported on this
unit.
Signal Information
Channel: 21 (474.00MHz)
Quality: 100
Strength: 100
Network: NEOTION NETWORK
Modulation: QAM 64

18
EN
PC Settings
You can adjust the PC screen position, size and phase.
1Use Ż/ Źto select [SCREEN].
[Auto Adjust]
Each setting will be adjusted automatically.
2Use Ÿ/ źto select [Auto Adjust], then press
OK.
[H-Offset] / [V-Offset] / [Size] / [Phase]
Each setting can be adjusted manually.
2Use Ÿ/ źto select the item you want, then
adjust the settings according to your personal
preference.
[Position Reset]
2Use Ÿ/ źto select [Position Reset], then press
OK.
Picture Adjustment
You can adjust the picture settings according to your
personal preference.
These settings are automatically stored after exiting
the picture menu.
1Use Ż/ Źto select [PICTURE].
[Picture Mode]
Each setting will be adjusted manually.
2Use Ÿ/ źto select [Picture Mode], then press
OK.
3Use Ÿ/ źto select [Dynamic], [Standard],
[Mild] or [Personal], then press OK.
Before you begin
You must connect your PC to this unit and select [PC]
at [Input Source]. Refer to “Switching the Input
Source Mode” (p. 9).
[H-Offset] : horizontal picture adjustment
[V-Offset] : vertical picture adjustment
[Size] : clock adjustment
[Phase] : phase adjustment
•After press OK and appear the settings display, you can
adjust them.
SCREEN
Move SelectReturn Exit
Auto Adjust
H-Offset
V-Offset
Size
Phase
Position Reset
50
50
69
50
[Dynamic] :highercontrast
[Standard] : standard
[Mild] : lower contrast
[Personal] : manual setting
•You can change picture mode easily using PICTURE
MODE.
•Press PICTURE MODE repeatedly to select picture mode
you want. In this function, you can set also assign the
picture mode individually to each input mode.
Move SelectReturn Exit
Picture Mode
Contrast 50
Brightness 50
Colour 50
Tint
Sharpness
Backlight
Colour Temp
Noise Reduction
PICTURE
Standard
Normal
50
30
40
Middle

19
EN
[Contrast] / [Brightness] / [Colour] / [Tint] /
[Sharpness]
Each setting can be adjusted manually.
2Use Ÿ/ źto select the item you want, then
press OK, and then appear the setting display,
adjust the setting, using Ż/ Ź.
[Backlight]
You can adjust backlight brightness.
2Use Ÿ/ źto select [Backlight], then press OK,
and then appear the setting display, adjust the
setting, using Ż/ Ź.
[Colour Temp]
You can change the colour tone of the picture.
2Use Ÿ/ źto select [Colour Temp], then press
OK.
3Use Ÿ/ źto select [Cold], [Normal] or [Warm],
then press OK.
[Noise Reduction]
You can adjust to reduce the appearance of digitising
error caused by the compression.
2Use Ÿ/ źto select [Noise Reduction], then
press OK.
3Use Ÿ/ źto select [Off], [Low], [Middle] or
[High], then press OK.
Sound Adjustment
You can adjust the sound settings according to your
personal preferences.
1Use Ż/ Źto select [SOUND].
[Sound Mode]
Each setting can be adjusted manually.
2Use Ÿ/ źto select [Sound Mode], then press
OK.
3Use Ÿ/ źto select [Standard], [Music],
[Movie], [Sports] or [Personal], then press OK.
[Contrast] : contrast adjustment
[Brightness] : brightness adjustment
[Colour] : colour adjustment
[Tint] : redness/greenness adjustment
[Sharpness] : sharpness adjustment
•You can adjust the settings, if you set [Personal] in
[Picture Mode].
[Cold] : bluer tone
[Normal] : average tone
[Warm] : redder tone
[Standard] : standard
[Music] : appropriate for listening to music
[Movie] : appropriate for watching a movie
[Sports] :appropriate for watching a sport programme
[Personal] : manual setting
•You can change sound mode easily using SOUND MODE.
•Press SOUND MODE repeatedly to select sound mode you
want.
Move SelectReturn Exit
50
Sound Mode
Treble
Bass
50
Balance
SPDIF Mode
AD Switch
Standard
0
PCM
Off
SOUND

20
EN
[Treble] / [Bass] / [Balance]
You can set left / right speaker setting.
2Use Ÿ/ źto select the item you want, then
press OK, and then appear the setting display,
adjust the setting, using Ż/ Ź.
[SPDIF Mode]
If this unit is connected with coaxial digital audio
output jack to your device, you can set this mode.
2Use Ÿ/ źto select [SPDIF Mode], then select
[PCM], [Auto] or [Off], using Ż/ Ź.
[AD Switch]
For Digital TV operation
You can adjust audio output setting and volume for
visually impaired.
2Use Ÿ/ źto select [AD Switch], then select
[On] or [Off], using Ż/ Ź.
.
Time Settings
You can change Time setting.
1Use Ż/ Źto select [TIME].
[Clock]
For Digital TV operation
[Clock] will change with the area which you have
selected in the Time Zone.
[Time Zone]
You can set the time zone according to the resident
area.
2Use Ÿ/ źto select [Time Zone], then press OK.
3Use Ÿ/ ź/ Ż/ Źto select the time you want,
then press OK.
[Treble] : high pitched tone adjustment
[Bass] : low pitched tone adjustment
[Balance] : volume balance setting for left and right
speakers
•You can adjust [Treble] and [Bass] settings, if you set
[Personal] in [Sound Mode].
[PCM] :The SPDIF output is PCM format, regardless
of the input sound format.
[Auto] : The SPDIF output is the same with the input
sound format.
[Off] : Turn OFF the SPDIF output.
•Only MPEG sound is available for this function.
•It is not available to adjust the time.
Move SelectReturn Exit
Clock
Time Zone
Sleep Timer
Auto Standby
OSD Timer
20 / Jan 13:12
Berlin GMT+1
Off
4 H
15 S
TIME
This manual suits for next models
7
Table of contents
Other FUNAI TV manuals

FUNAI
FUNAI 40FDI7714 User manual

FUNAI
FUNAI LED32-H9000M User manual

FUNAI
FUNAI FT1321 User manual

FUNAI
FUNAI F4819UV User manual

FUNAI
FUNAI FTV19TC User manual

FUNAI
FUNAI F413TA User manual

FUNAI
FUNAI F9TRF1 User manual

FUNAI
FUNAI LED40-H9825M User manual

FUNAI
FUNAI MS-14A MKII User manual

FUNAI
FUNAI NLC-3216 User manual

FUNAI
FUNAI LED24-H9001M User manual

FUNAI
FUNAI 32FDB5514 User manual

FUNAI
FUNAI LH7-M22BB User manual

FUNAI
FUNAI 32FDV5714 User manual

FUNAI
FUNAI F4813U User manual

FUNAI
FUNAI FT1321 User manual

FUNAI
FUNAI F413TB, F419TB User manual

FUNAI
FUNAI NLC-3216 User manual

FUNAI
FUNAI LCD-A3206 User manual

FUNAI
FUNAI CTV270S User manual