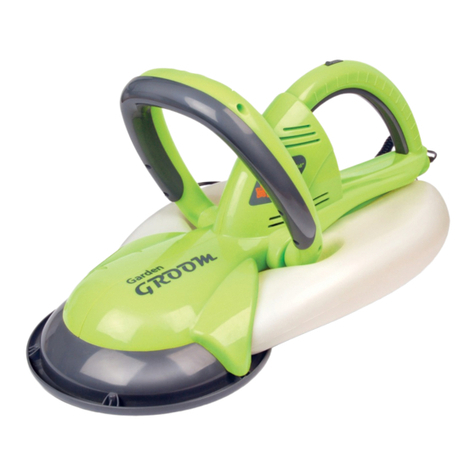
Garden Groom Midi User manual

.1.
a
Instruction manual
Manual de Instrucciones
Mode d’emploi
Bedienungsanleitung
Manuale di istruzioni
Manual de instruções
Gebruiksaanwijzing
Руководство по эксплуатации

.2.
English (Page 3)
Español (Página 12)
Français (Page 22)
Deutsch (Seite 32)
Italiano (Pagina 42)
Português (Página 52)
Nederlands (Pagina 62)
Pусски (стр. 72)

.3.
Contents
Meaning of symbols in instructions 04
Safety instructions 04
Warranty conditions 07
Product contents 07
Device overview 07
Prior to first use 08
Assembly 08
Mounting the collection system 08
Mounting the collecting bin 08
Operation 09
Troubleshooting 10
Technical data 10
Warranty 10
Disposal 11
Dear customer,
We are delighted that you have decided on the “Garden Groom Midi”. This electric safety hedge trimmer
cuts, mulches, and collects cuttings, all in one. The protected blades minimise the risk of injury and the risk of
accidentally cutting through the cord. Thanks to an ingenious switching system, the “Garden Groom Midi” only
operates when both hands are holding the device. The cuttings produced are very fine (1:10) and are conveyed
into the collecting bag. This makes ideal compost, which you can use as an environmentally-friendly fertiliser or
bark mulch substitute. We wish you plenty of enjoyment with your new “Garden Groom Midi”.
Prior to using the unit for the first time, please carefully read through the operating instructions
and store them in a safe place. The instructions are to accompany the device when it is passed
on to others. The manufacturer and importer assume no liability in the event the data in these
instructions has not been observed!
ENG

.4.
Meaning of symbols in instructions
All safety notices are marked with this symbol. Please carefully read through and obey the safety
notices in order to avoid injury to persons and property.
Tips and recommendations are marked with this symbol.
Wear ear protection!
Wear a protective mask!
Always wear protective eyewear
Safety instructions
Proper use
• The device is designed for trimming hedges (max. branch diameter of 10 mm) and is only
intended for use in the garden.
• The appliance is for private use and is not designed for commercial use. Use the appliance only
as described in the instructions. Any other use is considered to be improper use.
• This appliance is not intended to be used by people (including children) with physical, sensory,
or mental limitations and without experience and/or knowledge. Children must be supervised to
ensure that they do not play with the appliance.
Improper use
• All applications with the device that are not listed in the “intended use” are applied as a non-
intended use.
• For any resulting property damage and personal injury incurred due to any misuse thereof shall
be liable to the user of the device.
Remaining risks
• Even with proper use of the tool is always some residual risk that cannot be ruled out. From the
type and construction of the tool, the following potential hazards can be derived:
- Contact with the unprotected shear blade (cut-injury)
- Reaching into the running tool (cut-injury)
- Unforeseen, sudden movement of the cutting material (cut-injury)
- Sling out of parts of the cutting material (risk of injury)
- Damage to the hearing, if there is no prescribed hearing protection worn
- Inhalation of cutting material particle, if there is no prescribed mask worn
Workplace safety
• Keep your workplace clean and well lit while performing cleaning and maintenance tasks.
• Keep pets away from the appliance.

.5.
• Do not work in potentially explosive atmospheres containing flammable liquids, gases, or dusts
using electrical tools.
• Keep away children and people with physical, sensory, and mental limitations whilst using the
electrical tool.
Electrical safety
• The appliance must be connected only to mains sockets that have been properly installed. The
mains socket must still be accessible after the connection has been made. The mains supply must
comply with the technical data for the appliance. The plug may not be changed in any manner.
• The connector plug of the electric tool must fit in the socket. The plug may not be modified in
any way. Do not use any adapter plugs together with electric tools with protective earthing.
• Keep electric tools away from rain or moisture.
• Do not use the cord for purposes other than the intended one such as for carrying the electric
tool, hanging it up or for pulling the plug out of the socket. Keep the cord away from heat, oil,
sharp edges or moving parts of the device. Keep the cord away from the cutting area.
• If you are working with an electric tool outdoors, only use extension cords, which are also
suitable for outdoor use.
• If working with the electric tool in a moist environment cannot be avoided, use a fault-current
circuit breaker.
Personal safety
• Keep children away from the packaging materials. There is a danger of suffocation!
• Be careful, pay attention to what you are doing, and work sensibly with the electrical tool. Do
not use the electrical tool if you are tired or under the influence of drugs, alcohol, or medication.
• Do not work above eye level.
• Pay attention to a sufficient safety distance.
• Wear non-slipping, resistant work gloves that help you hold the handles securely.
• Wear as / in addition to personal safety equipment always safety goggles as well as a mask
and hearing protection.
• Avoid accidental start-ups. Make sure the electrical tool is switched off before you connect it to
the power supply and/or battery and before you pick it up or carry it.
• Avoid an abnormal posture. Make sure you are standing stably and keep your balance at all
times.
• Wear suitable clothing: long pants, long-sleeved shirt, and sturdy shoes with nonslipping soles.
Do not wear clothing that is too wide or short or jewellery. Keep hair, clothing, and gloves away
from moving parts.
• If dust extraction and collection equipment can be mounted, make sure that they are connected
and used properly.
• Keep all body parts away from the cutting blades. Do not try to remove cuttings or hold onto
the material being cut while the blades are running. Remove jammed cuttings only when the
appliance is shut off.
• Carry the device by the handle when the blades are at a standstill.
• Wait until the electrical tool has come to a standstill before putting it down.
• Heavy protective clothing can lead to fast tiring and possibly to a heatstroke. Perform heavy
work in the early morning or later evening hours when the temperature is not as high.
• Familiarise yourself with the appliance before first use. Especially make sure you know how to
switch it off.
• Keep all body parts away from the cutting head during activation.

.6.
• The specified vibration emission value limits the working hours. If you notice a tingling or
discolouration (white) of the fingers then stop working with the tool.
• Warning: The actual value of existing vibration emissions while using the machine may differ
from those in the manual respectively by the manufacturer. This can be caused by the following
factors to be considered before or during any of use:
- Is the machine used correctly?
- Is the method of cutting the material and how it is processed correctly?
- Is the state of use of the machine in the regulatory?
- Sharpness condition of cutting tool and proper cutting tool?
- Are the grips firmly mounted on the machine body?
• If you observe an uncomfortable feeling or a discolouration of the skin from your hands
while using the machine, please immediately stop working. Take adequate breaks from work.
In disregard of adequate work breaks, there may be a hand-arm vibration syndrome.
• There should be occur an appraisal of an utilization factor subjected to the work respectively of
usage the machine and place appropriate work breaks. In this way, the utilization factor during the
entire working time can be significantly reduced. Minimize your risk, you are exposed to vibration.
Maintain the machine following the instructions in the manual.
• Avoid the use of the machine at a temperature of T = 10 ° C or less. Make a work plan so that
the vibration load can be limited.
• A degree of noise from this machine is not avoidable. Postpone noisy operation at licensed
and certain time periods. As the case may be observe rest time periods and restrict the working
hours to a minimum. For your personal protection and protection of people working nearby, an
appropriate hearing protection is worn.
Use and handling of the electrical tool
• Do not overload the device. Use the electrical tool intended for your work.
• Do not use the electrical tool if its switch is defective.
• Remove the plug from the mains socket and/or remove the storage battery before making
adjustments to the appliance, changing accessory parts, or putting the appliance away.
• Keep unused electrical tools out of reach of children. Do not let people use the appliance who
are not familiar with it or who have not read its instructions.
• Keep cutting tools sharp and clean.
• Before use, make sure the cutting head is firmly attached.
• Handle electrical tools with care. Make sure moving parts function perfectly and do not jam and
check whether parts are broken or damaged in such a way that the function of the electrical tool is
impaired. Have damaged parts repaired before using the appliance.
• Always check the appliance for damage before putting it into operation. If the appliance, cable,
or plug show visible damage, they may not be used. Do not use the appliance if it shows signs of
a malfunction.
• If the appliance has a fault, do not attempt to repair it yourself. In the event of damage please
contact Customer Service (see section entitled “Customer Service”).
• Only have the device repaired by a qualified professional.
• Only use original accessories and original spare parts.
• Do not make any changes in the appliance.
• Use the appliance only when it is properly assembled and operational.
• Use the electrical tool, accessories, insert tools, and so on according to these instructions. In
the process, take the working conditions and task to be performed into consideration.
• Before use, familiarise yourself with the environment and pay attention to any sources of


.7.
danger. Avoid stones when using the appliance. During use, pay attention to any (undesired)
objects that should not be cut.
• Do not use the device to cut wet plants or plants with branches thicker than 10 mm so that the
blades to not jam .
• In case of jammed cuttings, switch off the device immediately, wait until the blades come to a
standstill, and then remove the jammed material.
Warranty conditions
The warranty excludes any defects caused by improper use, damage or by attempts by unauthorized persons
to make a repair. This also applies to normal wear of individual components. When using other or non-original
components on the device will void the manufacturer’s warranty.
Product contents
• 1 trimmer
• 1 collecting bin (approximately 5 l)
• 1 collecting bag (approximately 30 l)
• 1 collecting hose
• 1 adapter for mounting the collecting hose
• these operating instructions
Additionally, you will need an extension cord.
Device overview
Switch 2
Safety switch
Switch 1
Mains cord
Locking lever
Collecting bin
Cutting head
Rotary blade
Protective grate

.8.
Prior to first use
• The foil and bag pose a suffocation hazard. Keep children away from the packaging.
• Unpack the machine and the accessories. Using the list of product contents (see “Product contents” section),
check the contents for completeness and possible transport damage. Should you identify any transport
damages, please promptly consult the customer service (see section “Customer service”).
Assembly
• During assembly, do not reach into the cutting unit. The blade is very sharp, you could
injure yourself.
Before you start work, you have to attach the collecting bin (for smaller cuttings) or the collection system (for
larger areas) consisting of the adapter, hose, and collecting bag to the device.
Mounting the collection system
1. If the collecting bin is already mounted on the device, fold the locking lever to the outside and remove
the bin.
2. Set the device down so that the blade is pointing up and hold it in place with one hand on the handle.
3. If necessary, fold the locking lever to the outside with your other hand.
4. Carefully set the wider end of the adapter on the opening on the
side of the cutting head. Make sure that the adapter end is inserted in the
corresponding brackets on the cutting head.
5. Push the top of the adapter down so that the pin on the bottom of the
locking mechanism audibly locks into place.
6. Fold the lever back to its previous position and push it into the indentation
on the adapter.
7. Make sure that the adapter is securely seated.
8. Fit the collecting hose on the adapter and apply the Velcro fastener. The fastener should be pulled as tight
as possible around the adapter to prevent the hose from slipping.
9. Connect the collecting hose and bag with the zipper.
Zipper
Collecting bag Collecting hose Adapter
Velcro fastener
(Similar to that shown)

.9.
Mounting the collecting bin
1. Set the device down so that the blade is pointing up and hold it in place with one hand on the handle.
2. Fold the locking lever to the outside with your other hand.
3. Set the collecting bin on the device with the vents up and the wider, open side pointing towards the
cutting head.
4. Push the bin under the cutting head until it locks into place and then push it down from above. A pin is
located on the bottom of the bin. It must audibly lock into the device’s locking mechanism.
5. Fold the lever back to its previous position and push it into the indentation on the adapter.
6. Make sure that the adapter is securely seated.
Operation
• Keep all body parts away from the cutting blades. Do not attempt to remove cuttings or
take hold of the material being cut when the blades are rotating. Only remove cuttings that
have accumulated in the device after you have deactivated the device and disconnected
the plug from the socket. Wear work gloves when doing so!
• Carry the hedge trimmer by the handle when the blades are not moving.
• Attention! This device generates noise up to 98 dB (A). For this reason, you should wear
adequate ear protection!
• For your safety wear a mask.
• This device runs with an integrated (electrical) motor brake for your convenience and safety. It
ensures that the cutting unit immediately stops when the switches are released.
• Always wear protective eyewear
1. Connect the power plug to an easily accessible socket using an extension cord. The socket must
correspond to the device’s technical data. If the collection accessories have been connected properly, the
operating light will turn on.
2. In order to activate the device, push the safety lock forward (this will release the main switch 1) and depress
the switches 1 and 2. After you have pressed switch 1, you can release the safety lock.However, as soon as
you release one of the switches, the device will deactivate.
3. Move the device evenly over the hedge and back and forth along its sides until you have shaped the hedge
as desired.
4. From time to time, shake any waste located in the hose down into the collection bag. Only in this way is it
possible to work without the cuttings causing a blockage.
5. After use, remove the collecting bin and/or collection system and empty them. Remove any cuttings jammed
in the device.
6. Stow the device and accessories in a place, which is not accessible for children, which is kept locked, and
is dry.

.10.
Troubleshooting
Problem
The device
doesn’t start.
The mains plug has not
been connected to a
socket.
Insert the plug into the socket.
The collection bin and/
or adapter has not been
properly mounted.
Remove the collection bin and/or adapter.
Remount it.
The fuse for the socket is
deactivated.
The collecting bin is full.
The hose of the collection
bag is blocked.
The adapter ejection
chute is blocked.
Check the fuse. Reinsert the fuse or switch it
back on.
Disconnect the mains plug.
Empty the collecting bin.
Disconnect the mains plug. Remove any cuttings
from the hose if necessary.
Disconnect the mains plug. Remove any cuttings
from the chute end.
Attention! Risk of Injury!
Immediately disconnect the device from the power supply. / Do not
activate the device! Consult the customer service.
The device does
not collect any
cuttings.
The blade is
damaged.
Possible Cause Solution
Technical data
Model: GG10
Input voltage: 230–240 V~, 50 Hz
Nominal output: 300 W
Speed without load (rpm): 3400/min
Sound power level LWA: 84 dB (A)
Sound power level LPA: 95 dB (A)
Vibration strength rear handle: 0.98 m/s2
Vibration strength front handle: 1.324 m/s2
Uncertainty factor: K=1.5 m/s2
Safety class: II, IP20
Suited for plants with a diameter of 10 mm.
The specified vibration emission value according to EN 60745.
WARRANTY
This product is covered by a warranty against manufacturing defects subject to the time periods stipulated by
the legislation in force in each country.

.11.
Disposal
The packaging material is recyclable. Dispose of the packaging in an environmentally-friendly
manner and make it available for the recyclable material collection-service.
A symbol of a crossed-out wheeled bin means you should find out about and follow local
regulations about disposing of this kind of product. Do not dispose of this product as you
would other household waste. Dispose of this device in accordance with the corresponding
local regulations.Electrical and electronic devices contain hazardous substances that can have
harmful effects on the environment and/or human health and should be recycled properly.
Made in china
Industex, s.l.
Avda. dels Països Catalans, 34-36-38; 8ª planta.
08950 Esplugues de Llobregat.
Barcelona ( Spain )

.12.
Índice
Significado de los símbolos incluidos en este manual de instrucciones 13
Instrucciones de seguridad 13
Condiciones de la garantía 16
Contenido de la caja del producto 16
Vista general del aparato 17
Antes del primer uso 17
Montaje 17
Instalación del sistema de recogida 17
Montaje del depósito de recogida 17
Funcionamiento 19
Resolución de problemas 20
Características técnicas 20
Garantía 20
Eliminación de los componentes del aparato 21
Estimado cliente:
Nos complace que haya decidido adquirir “Garden Groom Midi”. Este cortador de setos corta, tritura y recoge
los restos cortados de una sola vez. Sus cuchillas protegidas minimizan el riesgo de sufrir daños o de cortar
un cable de manera involuntaria. Gracias a un sistema estudiado de puesta en marcha, “Garden Groom Midi”
funciona solo cuando las dos manos están sobre la máquina. Los restos cortados se trituran en pequeños
trozos (1:10) y se envían a un depósito de recogida. De este modo se facilita la obtención de compost, que
puede aprovecharse posteriormente como abono ecológico o como sustituto de la paja.
Esperamos que quede totalmente satisfecho de su nuevo “Garden Groom Midi”.
Antes de utilizar por primera vez el aparato, le rogamos que lea atentamente estas instrucciones
de uso y que las guarde en un lugar seguro. Si presta el aparato a otra persona, facilítele
también las instrucciones. El fabricante y el importador declinan cualquier responsabilidad en
caso de que no se respeten las indicaciones recogidas en las presentes instrucciones.
ES

.13.
Significado de los símbolos incluidos en este manual de instrucciones
Todas las instrucciones de seguridad están marcadas con este símbolo. Le rogamos que lea
atentamente todas estas indicaciones y que las respete para evitar cualquier daño personal o
material.
Todos los consejos y recomendaciones están marcados con este símbolo.
¡Utilice un protector auditivo!
¡Utilice una mascarilla de protección!
Use siempre gafas de protección
Instrucciones de seguridad
Utilización correcta del aparato
• Este aparato está pensado para cortar setos (las ramas deben tener un diámetro máximo de
corte de 10 mm) y solo debe usarse en jardinería.
• El aparato ha sido concebido exclusivamente para un uso doméstico, no profesional, y debe
usarse solo de conformidad con las indicaciones contenidas en el presente manual. Cualquier
otro uso se considerará inadecuado.
• Este aparato no ha sido concebido para ser utilizado por personas (incluyendo niños) que
tengan algún tipo de discapacidad física, sensorial o mental o que carezcan de la experiencia
o los conocimientos necesarios. Vigile a los niños para asegurarse de que no juegan con el
aparato.
Utilización inadecuada del aparato
• Cualquier uso de este cortador de setos no mencionado en el apartado “Utilización correcta del
aparato” se considerará inadecuado.
• El usuario del cortador de setos será responsable de los daños materiales o personales en
caso de utilización inadecuada.
Riesgos residuales
• Incluso en el caso de un uso adecuado del aparato, siempre existen riesgos que no pueden
evitarse. De las características y estructura del aparato pueden derivarse los siguientes riesgos
potenciales:
- Contacto con la cuchilla no protegida (herida por corte)
- Poner la mano en el cortador de setos en marcha (herida por corte)
- Movimiento imprevisto y repentino del material cortante (herida por corte)
- Desprendimiento repentino de las partes cortantes (riesgo de herida)
- Daños en los oídos si no se usa ningún protector auditivo
- Inhalación de partículas del material cortado si no se usa una mascarilla de protección

.14.
Seguridad en el lugar de trabajo
• Cuando realice trabajos de mantenimiento y limpieza, mantenga el lugar de trabajo limpio y
asegúrese de que esté bien iluminado.
• No deje que los animales domésticos se acerquen al aparato.
• No manipule los aparatos eléctricos en un entorno en el que haya riesgo de explosión debido a
la presencia de líquidos, gases o polvos combustibles o inflamables.
• No deje que los niños o las personas que padezcan alguna discapacidad física, sensorial o
mental se acerquen al aparato eléctrico mientras esté en funcionamiento.
Seguridad eléctrica
• Enchufe el aparato solo a una toma de corriente debidamente instalada. La toma deber
ser fácilmente accesible incluso después de conectar el aparato. La tensión de la red debe
corresponder a las características técnicas del aparato. No realice ningún cambio en el enchufe.
• El enchufe del aparato debe entrar fácilmente en la toma de corriente. Queda totalmente
prohibido realizar cambios en dicho enchufe. No utilice ningún adaptador de corriente con
aparatos eléctricos con toma de tierra.
• Mantenga los aparatos eléctricos alejados de la lluvia y la humedad.
• No utilice el cable eléctrico con otros fines, como por ejemplo para transportar el aparato,
colgarlo o estirar para desenchufarlo de la toma de corriente. Mantenga el cable alejado del
calor, la grasa, aristas cortantes o piezas del aparato en movimiento. Asegúrese de que el cable
permanece lejos de la zona de corte del aparato.
• Si trabaja al aire libre con un aparato eléctrico, utilice únicamente un cable alargador adecuado
para exteriores.
• Si no puede evitar utilizar el aparato eléctrico en un entorno húmedo, use un interruptor
automático de corriente de fuga.
Seguridad de las personas
• No deje los embalajes al alcance de los niños, ¡podrían ahogarse con ellos!
• Tenga cuidado y preste atención a lo que hace: el uso de un aparato eléctrico exige la máxima
diligencia. No utilice el aparato si está cansado o bajo los efectos del alcohol, de drogas o de
medicamentos.
• No trabaje con el aparato a un nivel superior al de los ojos.
• Mantenga unas distancias de seguridad lo suficientemente grandes.
• Use guantes de trabajo antideslizantes y resistentes que le permitan sujetar correctamente el
aparato por las asas.
• Use un equipo personal de protección, y no olvide nunca unas gafas y una mascarilla de
protección y un protector auditivo.
• Evite la puesta en marcha fortuita del aparato. Asegúrese de que el aparato eléctrico está
correctamente apagado antes de enchufarlo a la toma de corriente y/o a una batería, de cogerlo
con la mano o de transportarlo.
• Evite cualquier postura anormal al trabajar. Intente adoptar una posición segura que le permita
mantener el equilibrio en todo momento.
• Use una ropa adecuada: pantalones largos, camisa o jersey de manga larga y calzado rígido
con suela antideslizante. No lleve prendas demasiado anchas o cortas, ni joyas. Mantenga el
pelo, la ropa y los guantes alejados de las piezas en movimiento.
• El aparato dispone de accesorios de recogida y aspiración del polvo, asegúrese de que están
correctamente montados y de que los utiliza de manera adecuada.
• Mantenga todas las partes del cuerpo alejadas de la cuchilla. No intente apartar la hierba
cortada o sujetar las ramas que va a cortar mientras la cuchilla esté en marcha. La hierba cortada

.15.
solo debe retirarse cuando el aparato no esté en funcionamiento.
• El aparato debe transportarse cogiéndolo por el asa y con la cuchilla parada.
• Espere a que el aparato se detenga por completo antes de soltarlo.
• Si usa prendas protectoras muy pesadas puede cansarse rápidamente y sufrir sofocos.
Realice las tareas de jardinería más pesadas a primera hora de la mañana o a última de la tarde,
cuando hace menos calor.
• Familiarícese con el aparato antes de usarlo por primera vez. Sobre todo, asegúrese de que
sabe perfectamente cómo pararlo.
• Mantenga todas las partes del cuerpo alejadas del cabezal de corte cuando lo ponga en
marcha.
• Las vibraciones específicas son conformes con la duración de uso. Si nota una coloración
(blanca) en los dedos, deje de trabajar con el aparato.
• Atención: el valor real de las vibraciones durante el funcionamiento de la máquina puede ser
distinto al indicado en el manual por el fabricante. Esto puede deberse a los siguientes factores,
que deben tenerse en cuenta antes o durante el uso:
- ¿Está utilizando correctamente la máquina?
- ¿El método y el procedimiento de corte son correctos?
- ¿Está la máquina en buen estado?
- ¿La cuchilla está afilada y corta de manera correcta?
- ¿Están bien montadas las asas sobre el cuerpo de la máquina?
• Si nota una sensación desagradable o una decoloración de la piel de las manos
mientras utiliza la máquina, párela, deje de trabajar con ella inmediatamente y haga una
pausa de una duración suficiente. En caso contrario, podría sufrir un síndrome de vibración de las
manos/brazos.
• Calcule el tiempo que va a usar la máquina en relación con el tiempo total que va a dedicar al
trabajo, y organícese para realizar las pausas apropiadas. De esta manera reducirá notablemente
el tiempo que tiene la máquina conectada entre las manos. Reduzca los riesgos si es sensible a
las vibraciones. Sujete la máquina según indican las instrucciones del manual.
• No utilice la máquina si la temperatura ambiente es de 10 oC o inferior. Elabore un plan de
trabajo para limitar las vibraciones.
• Es imposible evitar el ruido que emite la máquina cuando está en funcionamiento. No realice
trabajos ruidosos en los periodos en los que estén prohibidos. Debe respetar los periodos de
silencio y reducir al máximo la duración del trabajo. Para su protección y la de las personas que
trabajen cerca de usted, es imprescindible usar un protector auditivo.
Utilización y manipulación del aparato eléctrico
• No sobrecargue el aparato. Utilice una herramienta eléctrica adecuada para la tarea a realizar.
• No utilice el aparato eléctrico si su enchufe tiene algún defecto.
• Quite el enchufe de la toma de corriente y/o retire las baterías antes de ajustar el aparato, de
cambiar los accesorios o de guardarlo.
• Mantenga las herramientas eléctricas fuera del alcance de los niños. No deje el aparato
en manos de personas que no estén familiarizadas con su uso o que no hayan leído estas
instrucciones.
• Mantenga las herramientas de corte limpias y afiladas.
• Antes de usar la máquina, asegúrese de que el cabezal de corte esté bien sujeto.
• Mantenga adecuadamente los aparatos eléctricos. Compruebe que todas las piezas móviles
funcionen bien y que no queden atascadas, y que no haya piezas rotas o dañadas que puedan
afectar al buen funcionamiento del aparato. Repare las piezas dañadas antes de utilizar de nuevo
la máquina.

.16.
• Antes de cada utilización, asegúrese de que el aparato no tenga daño alguno. Si el aparato,
el cable o el enchufe tienen algún daño visible, no los utilice. No use tampoco el aparato si no
funciona correctamente.
• Si el aparato presenta algún defecto, no intente repararlo usted mismo. En caso de avería,
contacte con el servicio de atención al cliente (véase el apartado “Servicio de atención al cliente”).
• Acuda únicamente a un especialista cualificado para reparar el aparato.
• Utilice solo accesorios y piezas de recambio originales.
• No realice ningún cambio en el aparato.
• Utilice solo el aparato si está completamente montado y funciona de manera correcta.
• Use el aparato eléctrico, sus accesorios y cualquier otra herramienta de conformidad con las
instrucciones suministradas. Tenga también en cuenta las condiciones de trabajo y las tareas que
tenga que realizar.
• Familiarícese con el entorno antes de usar el aparato y tome nota de los posibles peligros.
Cuando esté usando el aparato, evite tocar piedras y tenga cuidado para no cortar objetos que no
quiera cortar.
• Con el fin de no bloquear la cuchilla del aparato, no corte plantas mojadas o que tengan ramas
gruesas de más de 10 mm.
• Si se ha quedado enganchada hierba mojada, desconecte enseguida el aparato y espere a
que se pare por completo la cuchilla antes de retirar la hierba.
Condiciones de la garantía
Queda excluido de la garantía cualquier defecto debido a un uso indebido, a daños o a intentos de reparación
por personas no autorizadas. El desgaste normal de las piezas también queda excluido de la garantía. El uso
en el cortador de setos de piezas distintas o no originales invalida la garantía del fabricante.
Contenido de la caja del producto
• 1 cortador
• 1 depósito de recogida (aprox. 5 litros)
• 1 bolsa de recogida (aprox. 30 litros)
• 1 tubo de recogida
• 1 pieza de fijación del tubo de recogida
• las presentes instrucciones
Además, necesitará un cable alargador.

.17.
Antes del primer uso
• Riesgo de asfixia con las bolsas y plásticos. Mantenga a los niños alejados del material de
embalaje.
• Desembale el aparato y los accesorios. Compruebe el contenido usando como referencia la vista general
(consulte el apartado “Contenido de la caja del producto”), para ver si está completo y si hay algún daño
causado por el transporte. Si comprueba la existencia de daños debido al transporte, contacte inmediatamente
con el servicio de atención al cliente (consulte el apartado “Servicio de atención al cliente”).
Montaje
• Durante el montaje, mantenga las manos alejadas de la cuchilla, ya que está muy afilada y
podría cortarse.
Antes de empezar a trabajar, debe fijar al aparato el depósito de recogida (para cuando corte pequeños
trozos) o el sistema de recogida (para las superficies más grandes), que está compuesto por una pieza de
fijación, un tubo y una bolsa de recogida.
Vista general del aparato
Interruptor 2
Botón de seguridad
Interruptor 1
Cable de alimentación
Palanca de bloqueo
Depósito de recogida
Cabezal de corte
Cuchilla giratoria
Rejilla de protección

.18.
Instalación del sistema de recogida
1. Si el depósito de recogida ya está montado en el aparato, tire de la palanca de bloqueo hacia fuera y
retire el depósito.
2. Coloque el aparato de manera que la cuchilla quede hacia arriba y sujételo por el asa con una mano.
3. Si es necesario, tire hacia fuera de la palanca de bloqueo con la otra mano.
4. Coloque con cuidado el extremo más ancho de la pieza de fijación del tubo sobre la abertura lateral
del cabezal de corte. Asegúrese de que el extremo de la pieza de fijación queda insertado en el soporte
del cabezal de corte.
5. Empuje hacia abajo la parte superior de la pieza de fijación hasta que la
lengüeta de la parte inferior quede enganchada al sistema de bloqueo y
se oiga un clic.
6. Baje la palanca y empújela para que quede en la muesca que hay en la
pieza de fijación.
7. Asegúrese de que la pieza de fijación del tubo ha quedado correctamente
fijada.
8. Coloque el tubo en la pieza de fijación y cierre el velcro. Es importante que el cierre quede ajustado sobre
el tubo para que éste no resbale.
9. Fije el tubo a la bolsa con el cierre por cremallera.
Colocación del depósito de recogida
1. Coloque el aparato de manera que la cuchilla quede hacia arriba y sujételo por el asa con una mano.
2. Con la otra mano, tire de la palanca de bloqueo hacia fuera.
3. Coloque el depósito de recogida en el aparato de manera que las aberturas de ventilación queden hacia
arriba. El lado abierto, más ancho, tiene que quedar orientado hacia el cabezal de corte.
4. Empuje el depósito hasta el tope situado bajo el cabezal de corte y apriete el otro extremo hacia abajo. En
la parte de detrás del depósito hay una lengüeta, cuando quede fijada al sistema de bloqueo del aparato
oirá un clic.
5. Baje la palanca y empújela para que quede en la muesca que hay en el depósito.
6. Asegúrese de que el depósito de recogida ha quedado correctamente fijado.
Cierre de cremallera
Bolsa de recogida Tubo de recogida Pieza de fijación del tubo
Cierre de velcro
(Similar al que se muestra en la imagen)

.19.
Funcionamiento
• Mantenga alejadas todas las partes del cuerpo de las cuchillas. No intente retirar trozos
cortados mientras las cuchillas giren, ni sujetar el material que vaya a cortar. Saque los
trozos cortados que hayan quedado enganchados solo cuando el aparato esté parado y
desconectado de la toma de corriente. ¡Use unos guantes de trabajo para hacerlo!
• Transporte el cortador de setos por el asa, con la cuchilla inmóvil.
• ¡Atención! Este aparato tiene un nivel sonoro máximo de 98 dB (A). ¡Por ello, debe
utilizar un protector auditivo!
• ¡Utilice una mascarilla de protección!
• Para su comodidad y seguridad, este aparato funciona con un freno motor (electrónico)
integrado, que permite inmovilizar inmediatamente la cuchilla en cuanto desconecta el interruptor.
• Use siempre gafas de protección
1. Conecte el aparato a un cable alargador y enchúfelo a una toma de corriente perfectamente accesible y que
corresponda a las características técnicas del aparato. Cuando el accesorio de recogida esté correctamente
instalado, la luz indicadora de funcionamiento se encenderá.
2. Para poner en marcha el aparato, empuje el botón de seguridad hacia delante (de esta manera quedará
liberado el interruptor 1) y pulse los interruptores 1 y 2. Una vez accionado el interruptor 1, puede
desconectar el botón de seguridad. De todos modos, en cuanto desconecte un interruptor, el aparato se
detendrá.
3. Desplace el aparato con movimientos regulares por encima y por los lados del seto, hasta obtener la forma
deseada.
4. De vez en cuando, agite el tubo para que los restos que contiene caigan en la bolsa de recogida. De esta
manera podrá trabajar sin que los trozos cortados obstruyan el tubo.
5. Después de usar el aparato, desmonte el depósito o el sistema de recogida y vacíelos. Si es necesario,
retire los trozos cortados que hayan quedado atascados.
6. Guarde el aparato y sus accesorios en un lugar cerrado, seco y fuera del alcance de los niños.

.20.
Resolución de problemas
Problema
El aparato no se
pone en marcha.
El enchufe no está
conectado a una toma de
corriente.
Enchúfelo.
El depósito de recogida o la
pieza de fijación no están
correctamente montados.
Retire el depósito de recogida o la pieza de fijación
del tubo. Vuélvalos a colocar. Compruebe que la
luz indicadora de funcionamiento está encendida.
Los fusibles de la toma de
corriente han saltado.
El depósito de recogida
está lleno.
El tubo de la bolsa de
recogida está lleno.
La salida de la pieza de
fijación está obstruida.
Compruebe el fusible. Cámbielo o conéctelo de
nuevo.
Desenchufe el aparato y vacíe el depósito de
recogida.
Desenchufe el aparato y, si es necesario, retire
los trozos cortados del tubo.
Desenchufe el aparato. Si es necesario, retire los
trozos cortados del tubo de salida.
¡Atención, riesgo de lesiones!
Desenchufe inmediatamente el aparato de la toma de corriente. / ¡No
ponga el aparato en marcha! Acuda al servicio de atención al cliente.
El aparato no
recoge ningún
trozo cortado.
La cuchilla está
dañada.
Causa posible Solución
Características técnicas
Modelo: GG10
Tensión de entrada: 230-240 V~, 50 Hz
Potencia nominal: 300 W
Velocidad sin carga (rev./min.) 3.400
Nivel sonoro LWA: 84 dB (A)
Nivel sonoro LPA: 95 dB (A)
Potencia de vibración en el asa posterior: 0,98 m/s2
Potencia de vibración en el asa delantera: 1,324 m/s2
Factor de incertidumbre: K = 1,5 m/s2
Clase de protección: II, IP20
Adecuado para cortar plantas con un diámetro de corte máximo de 10 mm
Las vibraciones específicas son conformes con la norma EN 60745
GARANTÍA
Este producto queda cubierto por una garantía contra defectos de fabricación sujeta a los plazos de tiempo
estipulados por la legislación vigente en cada país.
Other manuals for Midi
1
Table of contents
Languages:
Other Garden Groom Trimmer manuals

Garden Groom
Garden Groom Midi User manual

Garden Groom
Garden Groom Pro GG21 User manual

Garden Groom
Garden Groom Garden Groom "Midi" GG10 User manual

Garden Groom
Garden Groom Garden Groom "Midi" GG10 User manual

Garden Groom
Garden Groom GG01 User manual

Garden Groom
Garden Groom GG21 User manual

Garden Groom
Garden Groom Garden Barber User manual

Garden Groom
Garden Groom Volume Bag GG01 User manual