Rok 150-85-50379 User manual

f'
l
I .
I
11
..
;_
,'
33cc Petrol Brush Cutter &Grass Trimmer
150-85-50379
~~
·
~
I
~
(,
/!\
INST
RUCTION
MANUAL
I I
Wrw1
1i
11
r
i:
rrn'
YOIJI'
personal
safety,
I I N 11
11
1fl
lJN
O[
RSTAND
before
u
sing
.
11
f\VI
I
11
'
.1
II
J'
ii
I
llJC
rIDNSI
OR
FU
TURE
REFERENCE
M1
11fl
1
11
1
Chinn
~
( E

TECHNICAL
DATA
MODEL
Main unit
~
t
e
t
ype
Maximum speed of spindle/onnino speed(r/min)
Idle speed of engine(r/minj
Centrifugal speed(r/min)
~
-
__
-_-
__
~-
Measured vibration emission
v111i11
1
at each manipulation (m/s2)
(According to ISO 22867)
Measured sound pressure level L
pA
dB(A)
(According to ISO 22868)
Measured sound power level LwA dB(A) I
(According to ISO 22868)
Guaranteed sound power level
(According to ISO 2000/14/EC) -
Li
ne Max. Cutting Pa
th
/Diameter
of
l
in
e -
Metal blade (
Ty
pe/Diameter)
Rotation direction
of
cutti
ng
device
Type
of
aluminum polo -
150-85
-5
0379
Ce
ntrifugal Clutch; ha
rd
shaft
8,000/10,000
3,000
3,800
Brush
cu
tt
er:
•Io
ft
h
andle
:
3.
1
72
mis'.
l{ljl
ht
1
1011d
le
:27
30
111
/0'
Cl
r
1m~
tnmm
o1
I
dt
h
1111dlo
6 464
111
/•'
I
11111
11
11111<1!0
ll
0
'11
11
1hi·
I
\•
111
111
/M
1
•1111
h 1·
1111
1
•1
ti
'••I I
1111
tA
I
111
1
~•
l1
11
1ll1
l1tl
1111
111111
(I
I
\•
1111
1(
1\i
I\llillh Itilft!f·
i!
)t!
"'
1111
(~
l1111a•1
ll1111t1
\111
I
OI
!
hi
till
t
I• l1lll(A)
1
1'
1
1111
(
/\)
44 Cnl(ljl'.I
~
.
111111
/ '
00
1
11
•11
3-l
oo
lh
, I
4111111•
J
IOl
11111
1p
:'.b
4111111
' I
UJ!ltl
1111
11
I
Count
rn
Ulm
kw
111
0
_t;oo
n
11
0
111111
0 lop)
2 pl
rn
1
1•1
e4
tl
l
II.)
Woi
fJht
whon dry(k{I)
---
Enf
1111
0 N
111
11
0 of
1111
r11
11
11
---
IYf
111
I
h11
j1
hll
11
11
111
111
(
11
11
1
)
M11c11
1
11111
1111
111
1
1ll
(l
1W/t/111
•
11)
(11
111
1111
1d
1
11
1111Wi
iii
11 11
111
111
1:1) -
1·(
1111
lf11
11
1111
I•
•
11
'111
11tp
ll1i
ll
Ill
ll
lllX
1111
q
11111
1
01
1f
11
1111
1
11
1•11
'UlkWl1>
~
--
I
111
Itl
lll
llttl
11
11111
..
11
M
11
t
ft1
..
l t·I
ri.
111
111
1 --
I
111
•1
11
1!•
1
I
11111
I 111k I
II
'·" tl
y(
1111
1
) . --
l
11
1i
h11l
o
11
l Ih
1t
i1
11
11hJ
1111
t 1
11
0
111111110
without
notlco
~
P
t
<3
0!
Air-cooled, 2 cycle; verti•
Piston valve;gasoline e
nb
al
in
e
33
1.017500
I
S5
20
.,.
,
Diaphragm-type
Non-
co
ntact electronic ifJll
ll
f
lll
Recoil type
h1el mi
xe
d with
lu
br
te
11ll11
1 I I
(ratio of 40:1)
96
0
GRAPHIC WARNINGS
Because a trimmer/cutter is a high-speed, fast cu
tt
i
ng
power too
l,
special safety
pre
cau
tions
must be observed
to
reduce t
he
risk of personal injury.
Read
this manual carefully. Be familiar
with the controls and the proper use of the
unit
Know how to shut it off, and how to unhook a
harnessed unit quickly.
&
~
Ci)
10
0
~
.&
~
&
11
..
t
&
£
Ch
olie
control
Iii
ItI
• Warning
• Read the instr
uc
tion manual
• Weareye protection, ear muffles and helmet
• Wearfoot protection
• Wear glove to protect youi 1
1111
1<
1•1
• Beware
of
foot injury by o
u111
1
10
ottachmont
• Beware of thrown objocts hit by cutti
ng
attachmen
t.
Never use wi
th
out prop
er
ly mounte
<d
guard.
Beware of blade thrust
• Beware of falling objects
• Koop bystanders at least 15 m away
• Shorp blade on
th
e safety guard, donot touch
th
e cut off
knife
• I xhomely hot surface. Do not touch a hol mufflor,
oo
ar
box
01
cylinder, you may get burned.
Th
ese parls got oxlr1imoly
hot
fr
om operation and remain hot for a sho
1t
lin11
11111111
t
ho
111111
1s turned off.
• SIOll
pou
ltlon (oh
ok11
olr111rn
l)
Run position
(C
hoko o
p1
111)

.£
£
Always TURN OFF ENGNINE and make sure the cutting tool has
stopped before cleanin
g,
removing
or
adjusti
ng
blade.
WARNING! Nevermodify a trimmer
or
cutter in any way.
Improper u
se
of
the
ma
chine can cause SERIOUS
OR
FA
T
AL
PERSONAL INJURY.
WARNING & DAN
GER
The engine exhaust from this product contains chemicals that can
be
harmful. Ensure
unit is used in well ventilated, outdoor areas_.
__
_ _
___
__.
Specifications, descriptions and illustrati
ve
material in this manual a
re
as accurate
as
known at
the time
of
publication, but are subj
ec
t to change without notice. Illustrations may
in
clude
optional equipment and accessories, and may
not
include all standa
rd
equipment.
SAFETY RULES & PRECAUTIONS
Proper
safety
precautions
mu
st be observec:I.
Like
all
power
equipment
this
unit
must
be
handled carefully.
DO
NOT EXPOSE YOURSELF OR OTHERS TO DANGER.
Follow
th
ese general rules. Do not permit others to use this machine unless they are thoroughly
responsible and have read, and understand the machine manual and are trained in its operation.
•
Secure
the
machine
during
transport
to
prevent
loss
of
fue
l,
damage
or
in
j
ury
.
• Always wear safety goggles for eye protection. D
re
ss properly, do not wear loose clothing or
jewelry that could become caught in moving parts of the unit. Safe, st
urdy,
nonskid footw
ea
r
should always be worn. Long hair should be tied back. It is recommended that legs and feet
be
covered to protect from flying debrisduring operation.
• Inspect
th
e
en
ti
re
machine for loose parts (nuts, bolts, screws, etc.) and any damage. Repair or
replace as necessary before
us
ing
th
e machine.
• DO NOT USE any attachment with this power head otherthan the ones re
co
mmended
by
our
company. Serious injury to the operator or bystanders could result as well as damage
to
the
machine.
• Keep the han
dl
es free from oil and fuel.
•A
lways use proper handles and shou
ld
er strap whencuttin
g.
• Do not smoke while mixing fuel
or
filling tank.
• Do notmix fuel in an enclosed room
or
near opon flames.Assure adequate ventilation.
• Always mix and store the fuel in a properly
ma
rked container that is approved by local codes
and ordinances for such usage.
•N
ever remove the
fu
el tank capwhile the engine is running.
• Neverstart
or
run the engage inside a
cl
osed room
or
building. Fumes from
th
e exhaust contain
dangerous carbon monoxide.
• Never attempt to make engine adjus
tm
en
ts while the unit is running and strapped to the
operator. Always make engine adjustments with the unit resting on a flat, clear surface.
• Do not use the unit
if
it is damaged
or
po
orly adjusted. Never remove t
he
ma
ch
i
ne
's gua
rd
.
Serious injury to the operator or bystanders could result as well as damage to the machine.
•
In
spect t
he
area to be cut and remove all debris that could become entangled in the nylon
cu
ttu
if
Jhead. Also remove any ob
jec
ts that the unit may throw
dur
ing cutting.
• l
<oo
p children away. Onlookers should be kept
at
a safe distance from the work area, at least
1S
Ml
!HE
S (50 FEET).
• N
11
vn1loove the machine unattended.
• lJu nnt
11
so this unit f
or
any job other than those for which it
is
intended as des
cr
ibed in this
manw
1I
• Do 1101 overreach. Keep proper footing and
ba
lance at all times. Do not run the unit
wh
ile
standing 0
11
n ladder
or
on any other unstable footing location
• Keep hundu ond feet clear
of
the nylon cutting head or blade whilo
11nil
In
111
11
so
• Do not u
oo
this type
of
mach
in
e for sweeping away debris.
• Do not uso tho unit when you are tired, ill or underthe influence ormedication, clru
go
or alcohol.
• Only u
se
n
yl
or.
......
tllng head which is free
of
damage.
If
a stone or any othor obu
tu
clo Is hil, stop
the engine and chock the nylon cutting head. A broken or unbalanced nylon cut
ti
ng head must
never
be
used.

FOLLOW
INSTRUCTIONS
FOR
CHANGINGACCESSORIES
• Do not store in a closed area where fuel vapors can reach an open flame from hot
wa
ter
heaters, furnaces, etc. Store only in a locked,
we
ll ventilated area.
• Ensure safe and proper performance
of
your product. The use of any other acce.ssories or
attachments
may
cause a potential hazard or injury to the user, damage to the machine and void
this warranty.
• Clean the machine completely, especially, the fuel tank, its surroundings, and the air cleaner.
• When refueling, be sure to stop the engine and
co
nfirm that it is cooled
dow
n. Never refuel
wh
en the engine is running
or
hot. When gasoline spills, be sure to wi
pe
it up completely dispose
of those materials before starting the engi
ne
.
• Stay clear
of
other workers or
by
standers by
at
least 15 meters/50 feet.
• When ever approaching an operatorof the machin
e,
carefully call his attention and confirm that
the operator stops the engi
ne
. Be careful not to startle
or
distract the operator which can cause
an
unsafe situation.
• Never touch the nylon cutting head or blade when ever the engine is running. If it is necessary
to replace the
pr
otector
or
cutting attachment, be sure to st
op
tho engine and confirm that
the
cutting device has stopped running.
• The engine should be turned offwhen the machine is moved between work areas.
• Be careful not to hit the nylon cutting head against stones, or t
he
ground.
• Unreasonable rough operation will shorten the life
of
the machine as well as create an unsafe
environment for yourselfand those around you.
• Payattention and
be
aware
of
loosening and overheating
of
parts. Ifthere is any abnormality
of
the machine, stop operation immediately and check the machine carefu
lly.
If necessary, have the
machine serviced by an authorized dealer. Never continue to operate a machine which may
be
malfunctioning.
• In start-up or
dur
ing operation
of
the engine, never touch hot parts such as the muffler. the high
volt
ag
e wire
or
the spark·plug.
• After the engine has stopped, the muffl
er
is still hot. Never place the machine
in
any places
where there are flammable materials (drygrass, etc.), co
mb
ustible gasses
or
co
mb
ustible liquids
• Pay special attenti
on
to opera
ti
on
1n
I
lle
ra
in
oriusl aner
th
e rain
as
the
gr
ound may be slippery.
•
If
you slip
or
fall lo
th
o ground
or
tn
to n hal
o,
rolease
th
e throttle lever immediat
ely.
• Be car
ef
ul not to
dr
op lho mach1no
or
llll
1t
u9
t
11n
st obstacles.
• Before proceed
111g
to
ad
iust or repair lhe machine, be sure to st
op
the engine and detach the
spa
rk
plug.
• When the machine is placed in storage for a long time, drain fuel from the fuel tank and
carburetor, clean the parts, move the machine to a safe place and confirm that
th
e engine is
cooled down.
• Make periodic inspections to assure safe and efficient opera
ti
on. For a thorough inspec
ti
on of
yo
ur machin
e,
please contact a dealer.
• Keep the machine away from fire or sparks.
•
When
using the
ma
chine for a long period of time,
if
you experience discomfort, redness
1111d
swelling
of
the fingers followed by whitening and loss
of
feeling, consult your physician bof(ltu
further use.
• Always wear ear protection, loud noise
fo
r long periods can make hearing debase and loud tu
lost hearing.
• Total face and head protection must
be
worn to prevent possible injury.
• Wear no-slip heavy duty work gloves to improve your g
ri
p
on
the brush cutter·handlo CltlVllO
also reduce the t
ra
nsmission
of
m
ac
hine vibration to y
our
hands.
•WARNING
:
Th
e c
utt
er area is still dangerous while the
ma
chine is coasting t
oo
ot
op
.
& •
When transporting, this unit must be handled carefully. Do not
expose you
rs
elf oro
th
ers to dan
ger.
• Envelop the blade before storage. Keep children away from it.
• Neverremove the machine's guard.
• Do not store in a closed area where fuel vapors can reach an open flame from hot water heaters,
furnaces, etc. Only store in a locked, well ventilated area.
• Never place the machine in any places where there are flammable mate
ri
als (dry grass, etc.),
combustible gasses
or
combustible liquids.
•
Wh
en the machine is placed in storage
for
a long time, drain fuel from the fuel tank and
carburetor, cle
an
the parts, move the machine to a safe place and confirm that the engine is
cooled down.
Kickback and Related Warnings
• Kickback is a sudden
re
action to a pinched or snagged rotating whee
l,
backing pad, brush orany
ot
her accessory. Pinching or snagg
in
g causes rapid sta
ll
ing
of
the rotat
in
g accessory which in turn
causes
th
e uncontro
lle
d power tool to be forced in the direction opposite
of
the accessory's rotation
at
the point
of
the bindin
g.
• Forexample, if an abrasive wheel is snagged or pinched by the work piece, the edge of the wheel
that is entering into the pinch point can d
ig
into the sur
fa
ce
of
the material causing the wheel to climb
out
or
kick
out.
The wheelmayeitherjump toward or nway from the operator,depending on direction
of
the wheel's movement at the point
of
pinching Abrasive wheels may also break under these
conditions.
• Kickback is the result
of
power tool misuse and/or incorre
ct
operating procedures or conditions and
can be avoided by
ta
king properprecautions as given below.
a) Ne
ve
r place
your
hand
near
th
e rota
tin
g
accesso
ry
. Accessory may kickback overyour ha
nd.
b)
Do
no
t
position
your
bo
dy
in
the
ar
ea
whe
re
power
t
oo
l
will
move
if k
ic
kb
ack
occurs.
Kickback will propel the tool in direction opposite tothe whee
l'
smovement
at
the point
of
snagging.
c) U
so
special care
wh
en
working
cotners
, sh
ar
p edges etc. Avoid
bouncing
and
snagging
tii
o access
ory
. Corners. sharp edges or bouncing have a tendency to snag the rotat
in
g accessory
nncl
e<
iuse loss of control orkickback.
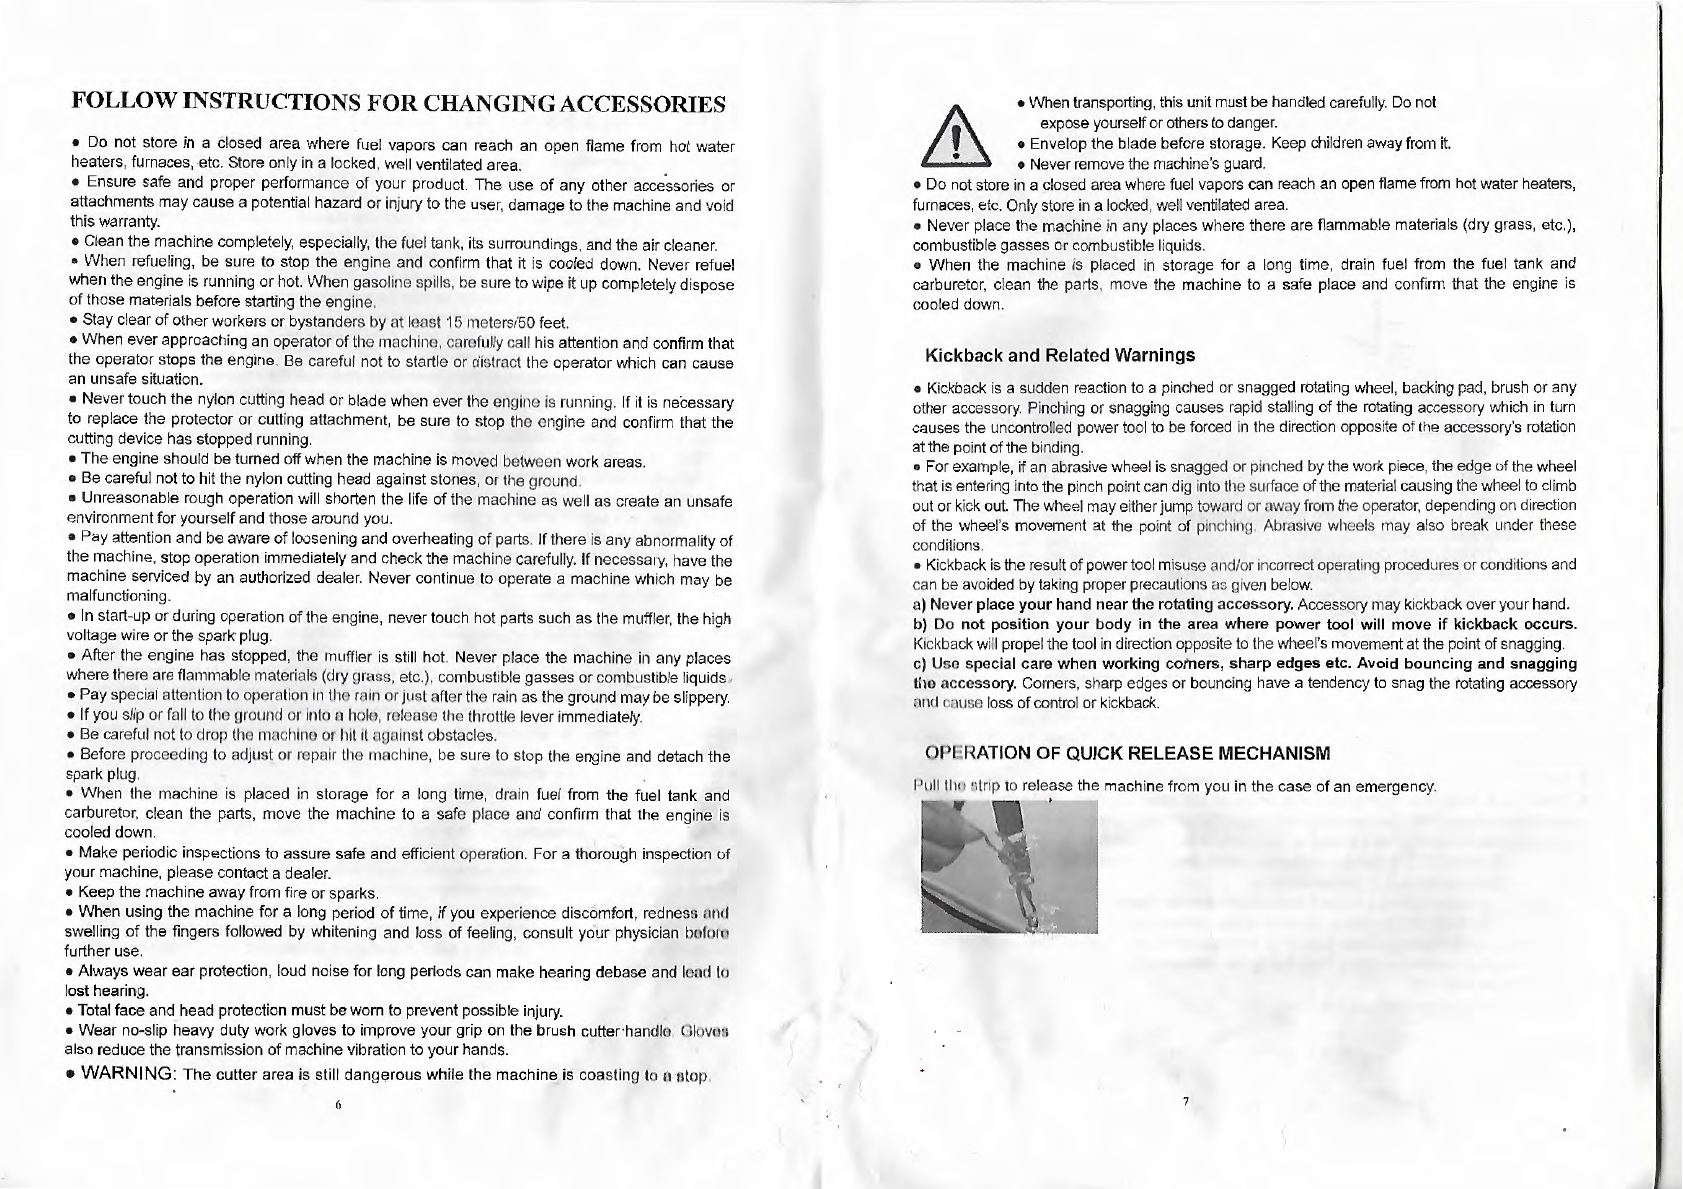
QPl:RATION
OF
QUICK RELEASE MECHANISM
IJ
11
ll
lli
ll
ntnp
10
release the machine from you in
th
e case of an emergency.
.

DESCRIPTION
5
l
..
~~
1
·.
¢'Col
...-:-.
-::~~
-
...-
I .
........
'"-..
~
,f. '
--
~;.
i!A
'
./•
---
~~-
...•
.
I
/T
~
·
·
..
;.
,,,.,
·~,
..
' .
,~
..
...
. . ' ''·
,.,...-.
/'
~·.,
2
12
3 '•
/'>
•
1.
BLADE 3-tooth blade for grass,weed
or
brush cutting application
s.
Ha
rn
ess and metal shield
are required for blade operation.
2. NYLON CUTTER HEAD Contains replaceable nyl
on
trimmi
ng
line that advances
wh
en the
trimmer head is tapped
aga
inst the ground
wh
ile the head is turning
<=1
t normal opera
tin
g speed.
3.
DEBRIS SHIELD Mounted just above the cutting attachmen
t.
Helps prot
es
t operator by
deflecting debris produced during the trimming operation.
Do
not operate unit without shield.
4.
CUT-OFF KNIFE Trims nylon filament to the correct length-7". head to e
nd
of line-when
nylon trimming head
is
bumped
on
th
e ground during operation. line advanc
e.
If trimmer is
operated without a cut-off knife
th
e line becomes too
lo
ng
th
e engine, this will overheat
or
damage
th
e engine.
5. DRIVE S
HA
FTASSEMBLY
Co
nt
~
1
1n
n
n npocla
lly
designed liner flexible drive shaft.
6. IGNITION SWITCH "slide switch" mo
un
lod 0
11
lop of
th
e Thrott
le
Trigger Housir g. Move
switch FORWARD to Run, BACK TO STOP.
7. SAFETY LEVER Before accelerati
on,
compress it please.
8.
THROTTLE TRIGGER Spring l
oa
ded
to
return
to
idle when released. When accel
e;
rating,
press trigger gradually for best operating technique. Do not hold trigger while starting.
9. HANDLE this handle can be adjusted at you convenience for comfort.
10. STARTER HANDLE pull handle until engine start
s,
th
en return handle slowly. DO NOT let
handle snap back
or
damage
to
starter will occur.
11.
CHOKE the choke control is locat
ed
on the top of the filt
er
cover.
12. AIR CLEANER COVER Co
nt
a
in
s replaceable felt element.
13. PRIMER BULB Pushing primer bulb (7 to 10 times before starting),will remove all air r
rn
ct
sale fuel from fuel system and bring fresh fuel to the carburetor.
14
. FUEL TANK LID.
15. FUEL TANK Contains fuel
and
fuel filter.
' i
ASSEMBLY INSTRUCTIONS
INSTALLING THE LOWER SHAFT
Pack the aluminum tube into the connector inside. Make the
convex ball aim at the hole on the connector and then turn the
knob clockwise until it is tight.
INSTALLING HANDLE
Install handle
in
bracket. Position the h
and
le
in
a
comfortable operating position
and
tighten four bolts.
INSTALLING NYLON LINE
CUTIER
HEAD
Al
ig
n holo
in
adapter plate with hole in shaft and
in
stall
locking too
l.
Thread cutter head onto shaft (turning it counter
clockwise) until it
is
tight. Remove locking tool
9
(9)
Convex
billl
Hole
Con~edor
A
l
uminum~
Knob
Pla•
.l1
c•1
~
1
1w
hl
U(
l
fl
CI'
pldlc

INSTALLING BLADE
Secure metal blade between upper and lower plate
with nut.
WARNING
.&
CAUTION
EXCESSIVE VIBRATION
STOP ENGINE IMMEDIATELY
Exce
ss
ive vibration
of
blade means that it is not
properly installed-stop engine immediately and
check blade. Blade not properly
in
stalled will cause
injury
IO
Pl
astics
Stle!
d-
,
@-
l.Wer
plate
~
Bl•d•
~
·Lo
11
er
plate
O- W
ash
er
®-
l!
Jl (LH Thread)
CUTTINGWITHA NYLON HEAD
~;:,~
I
~
t'Wrn!R
C!Jl'I(
11S
~
i
OT
ATION
II
WARNING
&.
DANGER
The proper debris shield must be in place on the
unitwhen nylon cutting line is used, The cutting line
can flap around
if
too much line is exposed.Always
use the plastic debris shield with cut-offknife when
using nylon cutting heads.
For
nearly all cutting, it is good to tilt the li
ne
head
so
th
at contact is made on the part of the li
ne
circle
where the line is moving away
fr
om
you and the
debris shield. (See appropriate) This results in the
debris being thrown away
fr
om you.
WARNING & DANGER
Tilting the head to the wrong side will s
ho
ot
the
debris TOWARDS you.
If
the line head is held flat to
t
he
ground
so
that cutting occurs on the whole line
circle, debris will be
THROW
N at you, drag will sl
ow
the engine down, and you will use up a lot
of
line.
WARNING & DANGER
Use only quality nylon monofilament li
ne
of
the
diameter 2.5mm, N
eve
r use
wi
re or wire-reinforced
line in place
of
nylon trimmer li
ne
. Load your n
yl
on
line cutting head only
wi
th nylon trimmer line
of
t
he
proper diameter.
WARNING & DANGER
U
se
extrema coutlon
wh
on oporntlng over bare
spots and gravel, bocouso
th
o Uno con throw small
rock particles at high speeds. Dubrlo ohlelds on the
unit cannot stop objects
wh
ich bounce or ricochet
off
hard surfaces.

CUTTING WITHA NYLON HEAD
r
mfKiffNG
KNIFE
SI
DE
RAISED
~Oro
~
~
··~\
I
ANGLBTQ
GROOliD
\.
' ·\
\Y
A!L
,J_,,
./
i..~
_.
----
--
- - -
----
-
~I
\:::-0.,.~I
~~,.
12
TRIMM
IN
G:
This is feeding the trimmer carefully into the
material you wish
to
cut. Tilt the head slowly
to
direct debris away from you. If cutting up to a
barri
er
such as fence, wall
or
tree, approach
from an angle where any debris ricocheting off
the barrier will fly away from you, Move the line
head slowly until the grass is cut right up t
he
barrier, but do not jam (overfeed) the
li
ne
into
the barrier. If trimming up to a wire mesh
or
chain linked fence be careful to feed only up
to
wire. If you
go
to far the line will snap off around
t
he
wire. Trimming can
be
done to c
ut
through
weed stems one at a time. Place the trimmer
line head near the bottom
of
the weed-never
high up which could cause the weed to chatter
and catch the l
in
e. Rath
er
than cut t
he
weed
right through, just use the very end of the line to
wear
through the stem slowly.
WARNING
Lt.
DANGER
Do
not
to use a steel blade
fo
r
edg
ing or scalping.
SCALPING AND EDG
IN
G:
B
ot
h of th
ese
are done with the 1
:n
e h
ead
t
i!t
edat a
steep angle Scalping is removing top growth
leaving theearth bea
r.
Edging is trimming the grass back where
it
has
spread over a sidewalk or drive way. During both
edging
and
scalping, ho
ld
the unit at a steep angle
and in a
po
si
ti
on
wh
ere the debris,
and
any
dis
lod
ging
dir
t and stones,
will
not come back
towards you
eve
n
if
it
ri
coch
ets
offthe hard surf
ace.
Although the pic
tu
re
shows how to edge
and
scalp
every operator must
find
for himself the angles
which suits his body size and cuttingsituation.
WARNING& DANGER
Do
not
trim in any area wherethere are strands
of
fencing wire. Wear protective
sa
fety
equipment. Do not cut where you cannot see 1
what the cutting device is cutting. j
'
~
.
~
'
J,
CUTTINGWITHA BLADE
3-tooth metal blade
is
provided with the machi
ne
The metal blade is used for cutting brush and weeds up to 3/4" in diameter.
Use
of
saw blade with this machine is prohibited.
WARN
I
NG
Lt.
D
ANG
ER
DO
NOT
USEA
ll
R
US
II CU
TfE
R
FORCUTI
I
NGT
l
mES.
WARN
I
NG
Lt.
DANGER
Use the shoulder harne
ss
al
all tim
es
ad
ju
st
both harness and ha
rn
ess
clamp
on
th
e unit so that the u
ni
t hangs a few
inches ab
ove
ground level
.T
he
cu
tting
head and the
me
tal debris shield
shou
ld
be
level
in
all directions. Harness
the
unit
on
the right
side
of
your body.
WARNING
Lt.
D
ANGER
Do not cut
with
du
ll
, crack
ed
or
damaged
meta
l blade.
Before
cutt
ing growth, inspect for
obstructions such
as
boulders, metal stakes
or
str
ands
of
wire
from broken fences.
lf
an
obst
ructi
on
ca
n n
ot
be
remo
ved, m
ark
it
s location
so
that
you
can
av
oid it with
the
blade
. R
ocks
and
metal
will dull
or
d
amage
a blade. Wire
ca
n catch
on
the
blade head and O
ap
around
or
be
thrown
into the air.
SCYTHING WEEDS: This is cutting by swinging the blade in a level arc. tt can quickly clear
areas of
fi
eld gra
ss
and weeds. Scything should not be used to c
ut
.large,
to
ugh weeds or
woody growth
s.
NOTE
Do not use a brush blade to cut trees which exceed a diamet
er
of
1/2 to 3/4 inches.
Scythl
nfJ
co
n
be
done in both directions,
or
just in one
way
which results in the debris being
thrown uwoy from you.
That is uolng the side of the blade that it is rotating away from you. Tilt d
ow
n the blade slightly
on this sa.mo side. You will be hit by some
de
bris if you scythe In both dlroctlons.
Cut onlywith the side of the blade that the debris is moving away from you.
If
kickback occurs, the blade may
be
dull,
or
the material so thick and hard thot you should use
other tool instead of this machine.
Do not for
ce
the blade to cut. Do not change the angle of cut after into t
he
wood. Avoid using
any
pressure or leverage which could cause the blade to bind or crack.
13

FUEL & OILMIXTURE
~
Lil
• Never fi
ll
the fuel tankto the verytop.
• Never add fuel to
th
e tank in a closed non-ventilated area.
• Do not add fuel to th
is
unitclose to an openfire or sparks.
• Besureto wipe offspilled
fu
el before attempting to start engine.
• Do not attemptto refuel a hote
ng
in
e.
Fuel used for this model is a mixture of unlead
ed
gasoline and approved engine lubricant.
Whe
n mixing fuel with
tw
o-cycle engine oil, uoo only fuel which contains NO
ET
HANOL or
METHANOL(Types of Alcohol) Use Branded 89 octane or higher
Unleaded fuel is
kn
own to be
of
good qualit
y.
This will help to ov
oi
d possible damage to engl
no
fuel lines and other
en
gine parts.
_l_
]
OIL
-1
PART
FUEL
40
PART
FUEL
MIXTURE
RAT
IO IS 40: I
F
UE
L-40 PART 0 11.-1PART
F
ue
l mixture at the
ra
te o
th
er
th
on 11() I
11
11
1y
cause damage to the engim:,
Pn
uu
rc
11
11
x
tur
e
ratio is correct.
The engine uses tw
o-s
troke
fu
ol.omlx
lw
o of
fl1
ol nnd 2-stroke lubricant 40:1
IMPORT/\NT
Tum
oh
oko
f11
ol
11
111y
1111p1
11nlt1
Hh
nko
ru
ol container
th
oroughly before each use.
Stored
ru
ol tlflO
tl
no
11
0
1111l
x 11
1rn1
1
111
11
1
11
11
111
yr111
oxpool to u
so
within a
mon
th.
Fl
J
hl.
11
Ho
h111mh
11 H
1
111111
1111
•
\II
li
lt{ill I
1
11tl
~
11d
c
il
f\
1\11k
tl
\IWll I
ll
h
1<
11
1jlllltd
lj
llltllly
SI(ll<INU l•lll·I.
011
ly
11
h1rc
1\1
01
11111
olu1
11
1,
u11
lu
11111111
ppn1v
cd
c
111ll
nl
11
ur.
Check and
l'o
ll
ow l
ocn
l
urd
in
unees on type and location of storage
container.
l•I
lilJl\1,i\NI) OIL MIXTURE
ln
~
p
uo
t
i\1
01
tnnk
m
nk
in
g s
ure
that
it.
is
ol
u1
111
1
111d
Jill w
ith
fre
sh
foe
!.
Use
a
111
ix
1t
1r
~
111'40:
I
PR
EPARING
FOR
OPERATIONS
WHEN
MI
XING FUEL WITH TWO CYCLE ENGINE OIL, USE ONLY FUEL
WHICH CONTAINS NO E
TH
ANOL OR METHANOL (TYPES
OF
ALCOHOL).
THIS WILL HELP TO A VOID POSSIBLE DAMAGE TO ENGINE FUEL LINES
AND OTHER ENG
IN
E PARTS.
DO NOT MIX
FU
ELAND OIL DIRECTLY
IN
THE ENGINE FUELTANK. USE THE
MI
XING BOTTLE PROVIDED.
IMPORTA
NT:
Failure to follow proper fuel mix instructions may cause damage
to
the engine.
When preparing
fu
el
mi
xture,
mi
x only the amount needed for the job
yo
u are
to
do.
Do not use fuel that has
be
en stored longer than two month
s.
Fuel
mi
xture
stored longer than this will
re
sult in poor performance and the engine
be
in
g hard
to start.
If
fuel m
ix
has been sto
re
d longer than 2 months it sho
ul
d
be
removed
and filled with a fresh mixture.
WARNING & DANGER
·1 Never fill the
fu
el tank to the ve
ry
top.
:>
Never add fuel to the tank
in
a clo
no
d non-ventilated aroa.
:1
l)o
not add fuel to this unit clo
se
to an open fire or spa
rk
s.
4 Ilo sure to wipe off spill
ed
fuel before attempting to start engine
B
Do
not attempt to re
fu
el a hot engine.
Cl
IJ
•CI<
PO
INTS BEFORE OPERATION
I t:l100
1<
for loose
bo
lt
s.
Nuts and fittings.
/. Cltou
l<
th
e air cleaner for dirt.
Cl
e
an
the airfilter of all dirt etc
.,
before operation.
3
C'l
l1
11
ck to be sure that protector is securely
in
place.
4, Clt
ocl<
to
be
sure that there are no leaks.
WARNING & DANGER
The engine exhaust from this product contains chemicals that can be
harmful. Ensure unit
is
used in well ventilated, outdoor areas.
IS

OPERATIONS
ENGINE STARTING AND STOPPING PROCEDURES
STARTING COLD ENGINE
Move the stop switch to "START" position.
1.
Give a gentle push
on
the primer pump
repeatedly (7-10times) until fuel comes
into the primer pump.
2. Cold Starts: Pull lever up
to
close choke.
3. Pull starter handle until engine flash fires.
4.
Push choke lever downwards (excessive cranking witt\ choke lever wi
ll
ca
use
flooding
of
the engine which will make it difficult to start).
5. Pull starter handle until engine starts.
6.
Allow engine to warm up for a few minutes before using.
STARTING
WARM
ENGINE
• Iffuel tank is not run dry, pull starter one
to
three times a
nd
it should start.
DO NOT U
SE
CHO
KE
• If fuel tonk wno run
dry,
ofl
or
ro
nll
lng repeat steps 3 thru 7 in. STARTING
COLIJ ENGIN
t=
.
ST
OPP
IN
G
TH
E ENG
IN
E
• Move switch to STOP position
16
OPERATIONS
IMPORTANT!
A
CAUTION
Place the
unit
on a flat,
firm
place.
Keep the
cutting
head clear of everything
around
it.
>';:;,.
\,
I
~\
~
'(B
.
~
!~)
I
...
~
~
JL
~
~
1\11'/iltlM
'
WY"\~
M
<,
A
WARNING
,,
Tho p
roduct
is
equipp
ed
with
a centrifugal c
lut
ch m
ec
hanism, so the
cutting
attachment
bogins
to
rotate as
so
on as
the
engine is started
by
putting
th
e
throttle
trigg
er
into
the
otort
posi
tion. When
starting
the
engine, place the
product
onto
the
ground
in a
flat
clear
nrou o
nd
hold
it
firmly
In place so
as
to ens
ure
that
neither
the
cutting
part
nor
the
thro
ttl
o
trigger
come
int
o co
nt
a
ct
with
a
ny
ob
stacle
when
the
engine
starts.
Plun
uo
onsure
that
th
e
cutting
attachme
nt
stops
turning
when
engine
idles,
if
it
is
runn
ing while
engine
idl
es
, please have
it
repaired
by
dealer
or
au
t
horized
technician.
\.,
17

MAINTENANCE & CARE
AIR
FILTER
• Accumulated dust in the air filter will reduce engine efficiency. Increase fuel
consumption and allow abrasive p
ar
ti
cles to pass into the engine. Remove the
airfilter as often as necessary to maintain
in
a clean condition.
• Light surface dustcan readily be removed by tapping thefilter. Heavy deposits
should be washed out in suitable solvent.
• Remove filter cover by loosening air filter cover knob.
ADJUSTING CARBURETOR
NOTE
Do
not adjust carburetor unless necessary.
If
you have trouble with the carburetor, see your
dealer. Improper adjustment may cause engine
damage and void warranty.
FUEL FILTER
• Fuel tank
is
fitted with a filter.
Filter is situated at the free end
of
fuel pipe and
can be pic
ked
outthrough fuel port with a piece
of hooked wire or the like.
• Check the
fu
el filt
er
periodi
ca
lly. Do not a
ll
ow
dust to enter into
fu
el tank. Clogged filter will
cause di
ffi
culty
In
starting eng
in
e or
abnormn
lll1
os
111
o
trn
l1
ll
fJ
o
n
~
1
111
0
or
abnormalities
in e
11
91no
perrormunco
• When filter is drrty, roplaco
t1
1e
filter.
• When the Inside of the fuel tank is dirty, it can be
cleaned by rinsing the tank outwith gasoline.
CHECK SPARK PLUG
• Do not attempt to remove the plug from a hot
engine in order to avoid possible damage to the
threads and personal injury.
18
'\
I
1'1L
1llR
cov
mt
KNOB
~~
..]
TROUBLE SHOOTING
• Clean
or
replace the plug
if
fouled with heavy oily deposits.
• Replace the plug
if
th
e center electrode is worn rounded at the end.
• Spark gap 0.6-0.7mm (.023".028")
• Fastening torque = 145-1
55
kg
.cm (125-135in.lb)
WARNING: Always cover
th
e metal blade with the transportation guard
while transportation and storage. I
TRANSPORT, HANDLING
• The engine should be turned off when the unit
is
moved between work areas.
• After the engine has stopped, the muffler is still hot. Never touch hot parts
such as the muffler.
• Confirm that the
fu
el has not leaked from tank.
EXTENDED STORAGE
• Inspect, clean and repair unit if necessa
ry
.
• Remove all fuel from tank befo
re
storage.
• Start engine-This will consume all
fu
el in
fu
el line and carburetor.
• Remove spark plug and pour one tea spoon of clean motor oil into spark plug
hole of cylinder-re
pl
ace spark plug.
• Store
in
clean,
dry,
dust free area.
JI'
I
/\
ILU
RE
S such as difficulty in starting engine, irregularity
in
functions and
ibnormality in perfo
rm
ance can normally be prevented if careful attention
is
paid
lo o
ll
operating instructions and maintenance procedures.
Should the engine not function properly, check the following;
• Thut the
fu
el system
is
in
g
oo
d condition and fuel isflowing
to
the engine.
•
Tl1
o ignition system is in good condition and the spark plug, sparks correctly;
• Compression of the engine is adequate.
r:AILURE TO START
•
Dl
uposo of
fu
el
in
tank.
• lnsuro that
fu
el is fresh and cle
an
.
• Check
ru
ol filter to make sure it is cle
an
. (Replace filter
if
necessary).
• Make sure air filt
er
elements are clean.
•
In
sta
ll
n
ew,
properly gapped spark plug.
19

TROUBLE SHOOTING GUIDE TROUBLESHOOTING GUIDE
1. FAILURE TO START
symptom probable cause remedy 2. LOW OUTPUT
fuel there is
no
fuel in tank. Add fuel to tank
system fuel filter obstruction. Clean
fu
el filter
spark abnormality
=
symptom
~
probable cause remedy
flameout
wh
en speedup
fu
el filter
bl
ocked. clean fuel filter.
short of fuel. refill tank.
plug replace
fu
el
spark fuel
fu
el Is too dirty. take
ou
t spark plug and
normal there is
wa
ter
in
fuel.
system
fu
el there is too
mu
ch fuel. dry
it.
cylind
er
norm
al
mixture ratio Is improper. mixture proportion needs
to be 40:1
compress high spark plug fouled
wi
th
oi
l clean the oil deposits
deposits.
pressure voltage spark Spark plug insulation
wire pl
ug
damag
e.
replace spa
rk
plug
normal fuel spark Spark gap is too large or
normal sma
ll.
adjusts
par
k gap 0.
6-0.
?m
m
system
th
e smoke is
th
in, muffler fouled with oily clean the oily deposits.
.carburetor spout bnckward deposits.
engine leak Conjoint
su
rf
ace
of
the Retighten both surfaces.
cylinder and crank housing
leak
the end of two crank sh
af
t l
ea
k engine ove
rh
eats. avoid use & allow
it
to cool.
cylinder head fouled with clean the oily deposits.
oily deposits.
3. ENGINE RUNNING UNSTABLE
h
ig
h high voltage wire break replace
normal voltage or broken off.
spa
rk
"'
sy
mptom proba
bl
e cause remedy
engine ignition breaking down there is water
in
fuel spa
rk
in
stead fuel
gap is incorr
ec
t adjust spa
rk
gap 0.6-0.?mm
abnormality coil lead loose. re-t
ig
hten
4.
THE ENGINE SUDDENLY STOPPED
Engine spark plug loose. retighten probable cause remedy
compression co
nj
oi
nt
surface of the
Is
cylinder a
nd
crank eliminate by retighteni
ng
fuel Ignition low housing leaking
fu
e
l.
opork pl
ug
fouled wi
th
oily depos
its
and short circuit clean the oily deposits
h
lg
l1voltage wi
re
disconnected. re-connect
system System High voltage wire and
normal normal Compress spark. lighten the spark plug cap
normal Stop switch failure or repair
or
replace sw
it
ch
short
ci
rcuit ~ - -
21
20

Wa
rr
an
ty
Ag
ain
st
Def
ec
t
Electrical Agencies Ply Ltd ("us",
"w
e" "wholesale
r"
or "
our')
guarantees this product fora full replace
men
t or refund for:
12 months from da
te
of purchase.
This guarantee covers material and workmanship defects only.
In ord
er
for the
gu
arantee
to
be
acted on. the consum
er
mustuso the
pr
oducts strictly in accordancewith th
eir
operati
ng
manualand for
the purpose for which they are intended to
be
used. This
gu
arantee does
no
t apply to defects artsing from abuse, alteration,
unauthorised or unreasonable use,
no
r does itcovergeneral doloriorotion due
to
usage.
We wi!I r
ep
lace the p
ro
duct
or
providea refund to the value of !ho
pur
c
h~so
prlco1f a defectis found in the product
dur
i
ng
theguarantee
pe
riod
of
12 months, subject to verification of the
def
ect and !ho do!o, llfOOf of purchase and
pu
rchase price. Furthermor
e,
in order for
the
gu
arantee to
be
claimed, t
he
defective goods m
us
t
bO
rolurnod to tho point of purchase promptly from the point in time that the
consumer becomesaware
of
t
he
defect in the goods ond inany coso wi
th
in 7
bu
slnosa days.
Th
e pr
oc
ed
ure
forthe consumer to c
la
im the guara
nt
ee is that t
he
product must be roturncd to the p
oi
nt
of
purchaso within 7 business
daysof the consumerbecoming aware
of
the
de
fect
111
the product and subject to t
he
point of
pu
rchase being sat1sfiod l
hol
It •9n gonu:ne
claim within thetime limits prescribed above, then the retailer will conta
ct
the wholesaler for revi
ew
and detormlnollon oe to
wh
ot1
1c
r afull
refund is to
be
provided in relation
to
th
e product
or
whether the product is to be repaired and returned. Tho
wh
oloonlor 1oucrves the
right
to
re
jec
t the guarantee claim
if
itcan
be
pro
ve
d that the goods have
not
been used
111
accordanco w
ith
t
ho
tr 1n1un
d<1<
I
pu
rpose 01
in
acco
rda
nce
with
the
m
anual.
The benefits of this guarantee are additional to anyother righ
ts
and remed
ie
s you may have un
der
la
w.
Once
we
ha
ve
received the produ
ct
and you have
co
mplied wi
th
the guarantee r
equ
irements. o
Jr
costs
,.
•
!M
v
n~
h
t
he
guarantee
claim will
be bo
rn
e by
us
.
No responsibility will
be
taken f
or
pr
oducts lost, damaged or mislaid whi
ls
t in transit.
To
l
ho
cx
tonl
porm
l
ll
od
by low. our lolol lloblll
ly
lor
lotl
~
or
dom
o90
of
ovcry
kind reloled
to
the prod
,.
!n
O"
'l
"'
~f
whatsoever 1s limited
to
tho omounl 1
>0
kl to
lh
o rolollor by you for
lh
o
pr
odu
~
t
or
t
ho
v.1
!
110
of t
ho
product
Our goo
d6
CO
lll
Owllh
gun
r
r
m
t
o
o~
ll
111
t
Ct
lllll
Ot llO
uxtl
ut
lt
KI und
or
t
ho
Australian
C~ns
ume
r
L-
·
\/
. You are !
nt1!1
ed lo a replacementor
roh
md
for n mnjor fnlluro nnd for com1
>0
ll
i!l
l
lO
ll
Bf
or
1111y
o
th
or reasonably
for'
· · l
os
s 0 1
·M
ma9fl
YJ
ll
etre
al
so
ent
itled
to have
tho goods ropmrod
or
rop
lac
od
If
tho goo
ds
follto bo
of
occcptablo
qua
!i
ly
and
th
e :r urc does
not
~
mo.m
l
to a m
•J
or failure.
T1
1ose t
er
ms and conditi
ons
superse
de
and
ex
clude all former and o
il
ie
r representations and arran
gem
e•
'srelating
lo
any guorontooo
on th
is
produc
t.
This includes
any
representations not madeby us re
lat
i
ng
to the performance
of
t1
1e
pr
odu
ct
pr the result Iha! should IO
be
e
xp
ected
fr
om using the product.
A
ddr
e
ss
for
the
retu
rn
of pr
odu
c
ts
: T
he
Point
of
Purchas
e
Im
po
rt
er
and
o
raanisation
pr
oviding
war
ra
nty
·
Electrical A
ge
ncies Ply Ltd (trading
as
Eleda
serv
Tr
adi
ng)
24
Arch
imedes Place, Melroplex
Es
ta
te,
Mu
rar
rie, Brisba
ne
Queensland 4172
Te
le
ph
one: 07 3906 2999
Ema
il
: sales@electaserv
co
m
al
l
22
'l
Table of contents
Other Rok Trimmer manuals