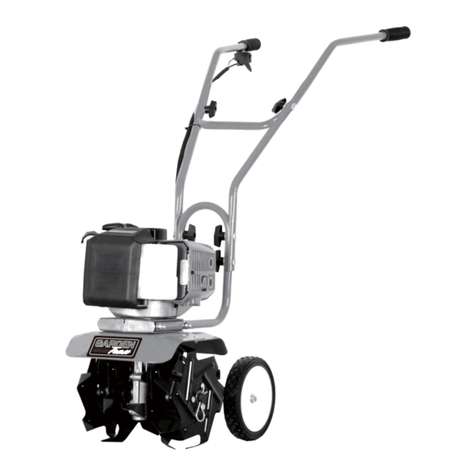
Garden Trax Y4007 User manual

MINI CULTIVATOR & DETHATCHER
INSTRUCTIONS
Y4007
THANK YOU FOR PURCHASING YOUR GARDEN TRAX GARDEN TOOL! IT IS
IMPORTANT THAT YOU READ ALL ASSEMBLY, USAGE AND SAFETY INSTRUCTIONS!
PLEASE TAKE TIME TO READ THIS MANUAL AND FOLLOW ALL INSTRUCTIONS TO
ENHANCE YOUR GARDENING EXPERIENCE! THEN PLEASE REGISTER YOUR
PURCHASE AT WWW.THUNDERBAYPRODUCTS.COM OR BY FILLING OUT AND
IN YOUR WARRANTY CARD.
MAILING

2
TOLL FREE HELP LINE 1 855 691 5969
MODEL Y4007
CONGRATULATIONS...
on purchasing your new GARDEN TRAX MINI CULTIVATOR & DETHATCHER and welcome to
the world of Garden Trax Gardening. We know that you are anxious to get right to work and start
working in your garden, but before you do, it is important that you take a few moments and
familiarize yourself with your new unit and its a s s e m b l y a n d operating instructions. Please read
your owner’s manual and take time to save time. We have worked hard to ensure that your new
unit will be one of the most trouble-free and satisfying pieces of equipment you have ever owned. With
proper care and maintenance, your new equipment will provide many years of service. Please take
the time to read this manual carefully to learn how to correctly assemble, use and maintain your unit.
Unlike big tillers, the Garden Trax Mini Cultivator and Dethatcher weighs only 30.5 lbs. It lifts easily,
handles smoothly and accurately weeds and tills. Unlike other small tillers, it features serpentine
blades that chum the soil up to four inches deep to create a soft, smooth seed bed even in the most
problematic soil. Once you know how to correctly use your new unit, we guarantee you will love it!
CONTENTS
Registration/Introduction/Specifications ---------------------------------------------------- 3
General Safety Rules ------------------------------------------------------------------------------- 4-7
Unpacking & Assembly ---------------------------------------------------------------------------- 8
Operation ----------------------------------------------------------------------------------------------- 9-12
Maintenance ------------------------------------------------------------------------------------------- 13-14
Spark Plug/Carburetor/Tine Installation & Removal ------------------------------------- 15
Wheel and Drag Stake Adjustment ------------------------------------------------------------ 16
Transportation and Storage --------------------------------------------------------------------- 17
Troubleshooting ------------------------------------------------------------------------------------- 18
Handle Bar Parts ------------------------------------------------------------------------------------ 19
Hood & Tine Parts ---------------------------------------------------------------------------------- 20
Transmission Parts -------------------------------------------------------------------------------- 21
Engine Parts ----------------------------------------------------------------------------------------- 22-23
Border-Edger Kit Installation (Optional Accessory) ----------------------------------- 24
Lawn Aerator --------------------------------------------------------------------------------------- 25
MINI CULTIVATOR AND DETHATHER

3
TOLL FREE HELP LINE 1 855 691 5969
MODEL Y4007
MINI CULTIVATOR AND DETHATHER
SPECIFICATIONS
ENGINE DISPLACEMENT 37.7cc
FUEL TANK CAPACITY 17 oz
OIL TYPE 10w30
OIL CAPACITY 2.1 ozs
GAS TYPE Unleaded Regular Gas
SPARK PLUG CMR5H
SPARK PLUG GAP 0.028
TRANSMISSION Gear Drive
GEAR RATIO 32:1
TILLING WIDTH 6" Min to 12" Max
TILLING DEPTH 4" Max
TINE SPEED 250 rpm
WHEEL SIZE 1.375 x 7.0" Diam
UNIT WEIGHT 30.5 lbs
UNIT SIXE (L x W x H) INCHES 23" x 20" x 20"
RATED POWER 1.0 kw
VIBRATION (L Handle: 3.34 m's2)(Right Handle 3.47 m's2) k-1.5 m's2
LpA AT OPERATOR'S POSITION 82.4 dB(A) Kpa - 2.5 dB(A)
LwA 93 dB(A)
KwA 2.5 dB(A)
REGISTRATION
RECORD YOUR MODEL INFORMATION IN THE SPACE BELOW FOR EASY REFERENCE AND BE SURE AND
FILL OUT AND MAIL IN YOUR REGISTRATION CARD FOUND IN YOUR PARTS PACKAGE
MODEL NUMBER
SERIAL NUMBER
ENGINE SERIAL NUMBER
DATE OF PURCHASE
PLACE OF PURCHASE
OWNER’S RESPONSIBILITY AND MODEL SPECIFICAIONS
CORRECT, ACCURATE ASSEMBLY AND SAFE USE OF THIS UNIT IS YOUR RESPONSIBILITY!!!!
READ AND FOLLOW ALL SAFETY INSTRUCTIONS
PAY CLOSE ATTENTION AND FULLY UNDERSTAND ALL SAFETY PRACTICES
CAREFULLY FOLLOW ALL ASSEMBLY INSTRUCTIONS
MAINTAIN THE UNIT ACCORDING TO DIRECTIONS AND SCHEDULE IN YOUR MANUAL
ENSURE ANYONE WHO USES THIS UNIT IS FAMILIAR WITH ALL CONTROLS, PARTS AND SAFETY
●
●
●
●
●

4
TOLL FREE HELP LINE 1 855 691 5969
MODEL Y4007
GENERAL SAFETY RULES
SPECIAL MESSAGES
This manual contains special messages to highlight and bring a en on to poten al safety concerns, machine
damage as well as helpful opera ng and servicing informa on. Please read all the manual to avoid injury and
machine damage.
*NOTE: During the course of this manual, both general and specific inform on is given that may help the operator in
the use, service and maintenance of this unit
IMPORTANT SAFETY PRECAUTIONS
Please read and follow the following on with diligence and care. Always operate the unit according to all
the safety instruc ons and recommenda ons outlined throughout this manual. Anyone who may use the unit
must read and study the instruc ons so that they are familiar with the unit, its controls and safety features.
This symbol is designed to draw your a en on to important safety instruc ons. If these are
not followed, personal safety could be endangered! Read and follow all the safety instruc ons in this
manual before ever a em ng to operate this equipment!
Do not carry or transport the unit from one place to another with the engine running
●When the engine is idling, the nes should not be turning. If they do rotate, contact customer service for support
●Dress appropriately when op g this unit. Never wear sandals, sneakers, open shoes or other light footwear.
Always wear study boots. Never, ever operate this unit with bare feet! Always be conscious of loose ng
clothing that could get caught in moving parts. Always wear safety goggles or glasses when op g unit
●Always keep hands, hair, feet and any loose clothing away from moving parts of unit
●When op g always wear a protec ve hearing device
●Never allow children to operate this unit. Never allow adults who are not familiar with this unit and have not read
the instru ons to operate the unit
●Never operate this unit when under the influence of alcohol or drugs
●Make sure all nuts, bolts and screws are always ght. Use only original equipment parts
●Before making repairs or adjustments, turn offthe unit and allow to cool down. Remove the spark plug wire also
●The muffler and nearby areas can exceed 150°F (65°C) in temperature. Avoid these areas and allow unit to cool
●This engine produces carbon monoxide (an odorless, deadly gas). Never run this unit indoors or in enclosed area
●Before using this unit, carefully inspect area to be led. Remove all foreign objects. Never use above underground
ui including water, gas and electric lines or pipes
●Do not operate this unit in ground with large rocks or obstacles that could damage the unit
●If an object becomes lodged in unit, turn unit off and remove spark plug wire. Allow unit to cool before dislodging
CAUTION!
IMPORTANT!
CAUSE DEATH TO TH
PROCEEDURES ARE IGNORED!
WARNING
California Proposition 65 Warning
states that exhaust from this unit contains chemicals known to the state
of California to cause cancer, birth defects, or other reprodu ve harm
●
E OPERATOR OR BYSTANDERS
AVOID INJURY! THIS SYMBOL AND TEXT HIGHLIGHT
POTENTIAL HAZARDS OR STITUATIONS THAT COULD
THAT COULD OCCUR IF THE HAZARDS OR SAFETY
AVOID DAMAGE! THIS TEXT IS USED TO TELL THE
OPERATOR OF ACTIONS OR CONDITIONS THAT
MIGHT RESULT IN DAMAGE TO THE UNIT!
MINI CULTIVATOR AND DETHATHER

5
TOLL FREE HELP LINE 1 855 691 5969
MODEL Y4007
MINI CULTIVATOR AND DETHATHER
ENGINE SAFETY PRECAUTIONS
CARBON MONOXIDE POISING WARNING
All engines have carbon monoxide contained in their exhaust fumes. It is a deadly, colorless, odorless,
tasteless gas which could be present even though you see or smell no engine exhaust. In an enclosed area
with no ven la on, this gas can linger for days. If inhaled at any level, this gas can cause drowsiness,
headaches, nausea, dizziness, confusion and even death. If you experience any of these symptoms,
immediately seek fresh air and medical a en on.
SAFETY GUIDELINES FOR PREVENTING POISING
●Never run the unit's engine indoors
●Carbon Monoxide can reach dangerous levels quickly, so never try and ven late indoors
●Never use the unit, when exhaust fumes can be pulled into an indoor facility
●Never use the unit in a poorly ven lated outdoor area where exhaust fumes cannot be easily vented
(examples include hilly terrain that enclose an area or a large hole)
●Never use the unit in an enclosed or par ally enclosed area such as tents, carports, basements or
structures with one or more side enclosures
●Always run the unit with the exhaust and muffler pointed away from the operator
●Make sure anyone with you is well away from the unit and never point the exhaust toward a person
GASOLINE FIRES AND FUEL SAFETY
Never use fuel in any place where a spark or flame might be present. Both fuel and its vapors are dangerous
and highly flammable and could ignite. Never use fuel around clothes dryers, hot water or space heaters,
electric motors, etc. Fuel fires spread quickly and are highly explosive. Keep flames and sparks away from
engine and fuel.
PREVENTION OF GASOLINE FIRES
●Never fill your fuel tank indoors. Always fill it outside in a ven lated area
●Never fill with the engine running. Always allow unit to cool before filling unit
●Never drain fuel from the unit in enclosed area
●Always wipe any excess fuel from engine and area before star ng unit
●Allow any spilled fuel to dry a er wiping and before star ng unit
●Always allow me for any vapors to vent before star ng unit
●Always test to make sure fuel cap is secure before star ng unit
●Never run the unit without the fuel cap securely installed
●Never smoke while using this unit
●To prevent fire or explosion by sta c discharge, use only non-metal, portable fuel containers approved by
UL or the ASTM
●Never pour fuel from the units fuel tank
●An adult should always fill the fuel tank
●Never allow anyone under the influence of alcohol or drugs to fill the fuel tank or operate this device
●Never allow children to fill the fuel tank or operate this device
●During break-in period clutch slippage may occur. A er about two hours of normal opera on the clutch
will transfer maximum power to the nes. Always keep clutch free of oil and other moisture

6
TOLL FREE HELP LINE 1 855 691 5969
MODEL Y4007
MINI CULTIVATOR AND DETHATHER
BURNS AND FIRES
Certain parts of this unit such as the muffler, muffler guard and engine parts become extremely hot during the
opera on of this unit. These parts will remain extremely hot even a er the unit has been turned offand
stopped running
Preven on of Burns and Fires
●Never remove the muffler guard from the engine
●Never touch the muffler guard. It is extremely hot and will cause burns
●Never touch engine parts that have become hot during opera on
●Always keep flammable debris away from muffler guard and other hot parts of the engine
The engine of this unit is designed to be operated using a cataly c converter which complies with EPA
requirements.
Steps for Working on the Unit's Engine
●Turn offthe unit's engine switch
●Disconnect the Spark Plug wire from the Spark Plug
●Always place the disconnected Spark Plug wire away from the Spark Plug to prevent arching from the
Spark Plug and metal parts
●Now you may replace parts or repair the unit
●When complete check to make sure all parts that have been removed are ghtly secured
NOTE: All repair parts for this unit must come from the factory or our authorized service center.
Never replace parts that are not specifically designed for this unit and its engine.
1.
Replace Spark Plug Wire
HOT GASES ARE A NORMAL BY PRODUCT OF A
PROPER FUNCTIONING CATALYTIC CONVERTER.
PLEASE FOLLOW ALL SAFETY INSTRUCTIONS TO
PREVENT BURNS AND FIRES!
NEVER ALTER OR MODIFY THE UNIT'S ENGINE
NEVER ALTER OR MODIFY THIS UNIT'S FACTORY
ENGINE. IF YOU DO SO, SERIOUS INJURY OR
DEATH COULD RESULT!
WHEN WORKING ON UNIT OR REPLACING PARTS,
YOU MUST ALWAYS DISCONNECT THE SPART
PLUG WIRE FROM THE SPARK PLUG AND KEEP THE
WIRE SEPERATED FROM THE PLUG
CAUTION!

7
TOLL FREE HELP LINE 1 855 691 5969
MODEL Y4007
MINI CULTIVATOR AND DETHATH
SAFETY DECAL
Garden Trax is a leading manufacturer of outdoor power equipment. This unit had been designed and
manufactured with your safety in mind. It has been manufactured with all the reliability you expect from an
industry leader.
Please read this manual in order to gain the necessary knowledge to operate this unit safely and effec vely.
You will find a safety decal that has been placed on the unit itself to remind you to always use safety first
when opera ng the unit.
The safety decal is shown below in order to familiarize you with its content. Please review the decal now and
if you have any ques ons regarding its meaning, please reread these instruc ons or contact our service
representa ve.
If the decal on the unit should become faded, worn or damaged in any way during the use of your unit, please
refer to the part number and order a new decal from our authorized service center. The decals are easily
applied and will act as a constant visual reminder to and others to always follow safety instruc ons for the
safe and sa sfying opera on of this unit.
READ THIS INSTRUCTION MANUEL CAREFULLY AND THROUGHLY ! KEEP IT IN
A SAFE PLACE FOR FUTURE REFERENCE.
WARNING! ALWAYS CLEAN THE AREA THAT YOU INTEND TO CULTIVATE. THERE
IS A RISK THAT STONES OR OTHER OBJECTS COULD BE THROWN OUT BY THE
TILLER. ALWAYS KEEP BYSTANDERS AND PETS AT A SAFE DISTANCE.
WARNING! NEVER PLACE FEET OR HANDS UNDER THE TILLER DECK WHILE THIS
UNIT IS IN OPERATION.KEEP LOOSE CLOTHING AWAY FROM MOVING PARTS.
WARNING! ALWAYS TURN OFF THIS UNIT AND DISCONNECT THE SPARK PLUG
WIRE BEFORE CLEANING, TRANSPORTING OR MAKING ANY ADJUSTMENTS.
NEVER LEAVE UNIT RUNNING UNATTENDED.
WARNING! THIS UNIT USES BOTH GASOLINE AND OIL… ALWAYS TAKE EXTRA
PRECAUTIONS WHEN OPERATING OR MOVING THIS UNIT.
ER

8
TOLL FREE HELP LINE 1 855 691 5969
MODEL Y4007
MINI CULTIVATOR AND DETHATH
UNPACKING & ASSEMBLY
Unpack your unit by carefully li ing it out of its container. Remove any packing material and cut any plas c
es holding the handlebar pieces to the rest of the assembly
ASSEMBLY
1.
Stand the mini cul vator assembly upright
with nes and wheels on a level surface.
Wheels should be set in the lowest posi on.
DO NOT place the mini cul vator on a high
surface where it can fall and cause property
damage or personal injury
2.
Using two tee handle nuts, two bolts and two
curved washers, assemble the middle
handlebar to the lower handlebar that is
already a ached to the mini cul vator
assembly. (SEE FIGURE 1) The middle
handlebar can be installed in two posi ons
one high and one low. DO NOT OVER
TIGHTEN THE TEE HANDLE NUTS
3.
A ach the upper right and le handlebars to
the middle handlebar using the two
remaining tee handle nuts, bolts, and curved
washers. (SEE FIGURE 1) DO NOT OVER
TIGHTEN THE TEE HANDLE NUTS
WASHER
Y4000.02.01
BOLT,HANDLE CLAMP
FIGURE 1
ER
Y4000.02-03A
Y4000.07
BOLT,HANDLE CLAMP
WASHER
Y4000.02.01
Y4000.02-04A
Y4000.02-02A

9
TOLL FREE HELP LINE 1 855 691 5969
MODEL Y4007
MINI CULTIVATOR AND DETHATH
OPERATION OF UNIT
STEPS FOR WORKING ON ENGINE OR UNIT
●Turn offengine switch
●Disconnect the spark plug wire from spark plug
●Securely place the disconnected spark plug wire safely away from the spark plug and any metal parts. This must
always be done or arching may occur between the spark plug wire and other metal parts
●Repair or replace the part on the engine or unit
●Check all parts that were repaired or removed during repair to ensure that they are secure and fit correctly
●Replace spark plug wire
PR EPAR ING ENGINE FOR STARTING
GAS AND OIL
●
We recommend using non-ethanol gasoline when ever possible. And NEVER use gasoline with an ethanol content
higher than E10, 10% ethanol.
●The unit's engine is shipped WITHOUT OIL
OIL RECOMMENDATIONS
●Oil is a major factor affe ng performance and service
life. Use a quality automo ve detergent oil
●Non-detergent oil can shorten the engine's service life
and 2-stroke oil can damage the engine
●SAE 10W-30 is recommended for general use. See
Chart A showing its recommended temperature range
●With the auger res ng on a level surface with the
engine stopped, p the auger on its carry handle and
remove oil filler cap/dip ck and fill with 10W-30 oil
(See Figure 3)
●Check the engine's oil level before each use or every 10 hours if operated con nuously
●When checking oil level, again p auger on its carry handle and remove ail filler cap/dip Wipe dip ck
clean and reinsert dip k without screwing in to check level. If the level is low fill to the edge of oil filler
hole. Be sure unit is on a level po on as shown (See Figures 3 and 4). Screw cap in securely
FIGURE 3
FIGURE 4
CHART A
10W-30
0 20 40 60 100°F
80
-10 0 10 20 30 40°C
OIL FILLER HOLE
OIL FILLER
CAP/DIPSTICK
OIL LEVEL
ER
●Fresh fuel will help to insure a longer service life for your machine. Please use fresh fuel, purchased within 30
days of the date of use.

10
TOLL FREE HELP LINE 1 855 691 5969
MODEL Y4007
MINI CULTIVATOR AND DETHATHER
OIL CHANGE
Drain the used oil while the engine is warm. Warm oil drains quickly and completely
1. Place a suitable container below the engine to catch the used oil
2. Remove the oil filler cap/dip
3. Tip the ller to drain the used oil through the oil filler opening. Allow the used oil to drain completely
Note: Please disposeof used motor oil in a manner that is compa le withthe environment.We suggest
you take used oil in a sealed containerto yourlocal recycling center or servicesta for
recla n.Do
not throw it in the trash, pour it on the ground, or pour it downa drain
4. With the engine res ng on the carrying handle bar on a level surface, fill with the recommended oil to the
edge of the oil filler hole.... DO NOT OVERFILL (See Figure 1 and 2)
5. Screw on the filler cap/dips securely
FILLING FUEL TANK
1.
Shut-offengine and allow engine to completely cool before refilling the fuel tank
2.
Move to a well ven ted area, outdoors, away from flames and sparks
3.
Clean debris from area around the fuel cap
4.
Loosen fuel cap slowly. Place the cap on a clean, dry surface
5.
Carefully add fuel without spilling
6.
Do not fill gas tank completely full, allow space for fuel to expand
7.
Immediately replace fuel cap and tighten. Wipe off
spilled fuel and allow to dry before star ng engine
No Smoking!
After each 10 hours of use, please check the oil in the crankcase and add as needed;

11
TOLL FREE HELP LINE 1 855 691 5969
MODEL Y4007
MINI CULTIVATOR AND DETHATHER
NORMAL OPERATION
1. The clutch transfer maximum power to the unit nes a er approximately 2 hours of normal opera on.
During this break-in period clutch slippage may occur. The unit's clutch should be kept free of oil and
other moisture to ensure efficient opera on
2. When cul va ng, do not place excessive body weight on the unit. The unit will operate most efficiently
with the use of its own weight
3. Exhaust fumes can be deadly. Never run unit indoors or in an unven lated area
STARTING AND STOPPING THE ENGINE
1. To prevent carbon monoxide poisoning, always start unit outdoors in a well ven lated area
2. Always be aware of gas vapors. Before star ng, make sure is well ven lated area
3. Make sure all air filter holes as well as fuel tank area are free of all debris
COLD ENGINE STARTING
Star ng the engine for the first me or a er running out of fuel or if engine has cooled off
1. Move choke lever to the RUN posi on
NOTE: Choke must be in the RUN position when engaging the primer bulb
2. Use the primer blub to prime unit un l primer hose is full of gas mixture
NOTE: When using primer bulb, allow the primer bulb to completely return to its original po n er each pump
3. Move choke lever to choke posi on
NOTE: In the choke posi on, always move the lever to the Farthest choke posion possible
4. Push rocker switch to the ON posi on
5. Squeeze the thro le control with the right hand. Grasp the starter rope handle and pull out slowly un l
the tension becomes slightly harder. Without le ng the rope retract, pull the starter rope with a rapid,
forearm stroke. Allow rope to return to its original posi on. Repeat step un l unit engages and allow
rope to return to original posi on each me it is engaged
NOTE: If the engine fails to engage a er trying for 5 to 6 pulls, press the primer bulb 1 me and repeat
process
6. Once the engine is engaged and has started running, move the choke lever to the half-choke posi on un l
engine runs smoothly
NOTE: Half-Choke posi on is defined as being half-way between Choke and Run
7. Once unit is running smoothly, move lever to the RUN posi on and engage thro le to the desired speed
NOTE: Do not let the unit idle for extended periods. Always run at FULL throle speed when possible
8. In order to stop unit, move rocker switch to the OFF posi on
IMPORTANT!
FUEL AND FUEL VAPORS ARE HAZORDOUS AND HIGHLY FLAMMABLE. NEVER STORE UNIT INDOORS WITH THE
FUEL STILL IN TANK FOR SATETY REASONS!
ALWAYS USE A CERTIFIED GAS CONTAINER APPROVED BY UNDERWRITERS LABORATORY (UL) OR THE AMERICAN
SOCIETY FOR TESTING AND MATERIALS (ASTM)
WHEN FILLING THE UNIT WITH FUEL, IT SHOULD ALWAYS BE DONE BY AN ADULT
ALWAYS HANDLE FUEL OUTSIDE IN A WELL VENTALATED AREA AWAY FROM FLAME OR SPARKS
DO NOT START ENGINE IF THERE IS FUEL SPILLAGE. ALWAYS CLEAN SPILLAGE FROM UNIT. WIPE CLEAN AND
ALLOW TO DRY BEFORE STARTING UNIT

12
TOLL FREE HELP LINE 1 855 691 5969
MODEL Y4007
MINI CULTIVATOR AND DETHATHER
WARM ENGINE STARTING
1. Move the Choke Lever to the Choke posi on
NOTE: Choke position is defined as moving the lever to the farest Choke position possible
2. Con nue by repea ng Cold Engine Star ng beginning with Step 4
HOT ENGINE STARTING
1. Begin with Step 4 of Cold Engine Star ng
2. If engine does not start, refer to Step 1 of Warm Engine Star ng
DO NOT a empt to start engine in the following ways:
●DO NOT use star ng fluid
●DO NOT spray flammable liquids or vapors into air cleaner, carburetor or spark plug chamber
●DO NOTremove Spark Plug and a empt to start engine. Flammable fuel can spray out & ignite from a
spark from spark plug
During the assembly process
or while operating or
maintaining your auger, if
you have any questions,
please call our Authorized
Service Center at the toll
free number listed

13
TOLL FREE HELP LINE 1 855 691 5969
MODEL Y4007
MINI CULTIVATOR AND DETHATHER
MAINTENANCE
STEPS FOR WORKING ON EQUIPMENT
1. Make sure engine switch is in the off posi on
2. Disconnect the Spark Plug wire from the Spark Plug
3. Secure the Spark Plug wire away from the Spark Plug itself and other metal parts. Make sure this is done to
prevent wire from arching with Plug
4. Replace or repair parts on your unit
5. Once complete, make sure all parts are secure and fit correctly
NOTE: All parts must come from the factory or our authorized Service Center. Never use parts that are not
designed specifically for the unit
6. Once complete, rea ach the Spark Plug wire
MINI CULTIVATOR MAINTENANCE
1. The unit Transmission Case comes with grease that has been packed at the factory. It is recommended by the
factory that the grease level be checked by a qualified service professional to ensure that the grease level is
accurate. If grease is needed, add only molylithium type grease only if the level is below the topof the gears. DO
NOT OVERFILL!
2. Make sure all screws, nuts and bolts are secure and ght
3. Store the unit in a safe cool environment for cold weather opon. Transferring the unit from cold to warm
environments can cause cond on build up
ENGINE MAINTENANCE
1.
Cooling Fins, Air Vents and linkages must always be kept free of dirt and debris. Always make sure they are clean
before each me you use the unit
2.
Never Run this unit without the engine Air Filter properly installed. Engine failure and add onal wear may occur
if air cleaner is not installed properly
3.
Service the Air Filter every 90 days or er 20 or more hours of opera on. Clean Air filter on a daily basis in
PRACTICE SAFETY AT ALL TIMES!!!! ENGINE MUST BE TURNED OFF AND ALLOWED TO COOL AND SPARK
PLUG WIRE MUST BE DISCONNECTED WHENEVER WORKING ON UNIT FOR MAINTENANCE OR REPAIR
TO PREVENT ACCIDENTAL STARTING:
ENGINE MUST BE TURNED OFF AND ALLOWED TO COOL AND SPARK PLUG WIRE MUST BE DISCONNECTED
BEFORE CHECKING OR ADJUSTING ENGINE
MUFFLER AND NEARBY AREA TEMPERATURES MAY EXCEED 150° F (65° C). AVOID THESE AREAS
ALWAYS CHECK UNIT FOR LOOSE SCREWS AND BOLTS. KEEP CONNECTIONS SECURE
NEVER STORE UNIT INDOORS WITH FUEL IN THE TANK. FUEL VAPORS MAY BE PRESENT
ONLY ADULTS SHOULD BE ALLOWED TO USE UNIT OR PREFORM MAINTENANCE ON IT
ENGINE MUST BE TURNED OFF AND SPARK PLUG WIRE DISCONNECTED BEFORE ANY REPAIRS OR
MAINTENANCE IS PREFORMED ON UNIT
CAUTION!
should be cleaned.

14
TOLL FREE HELP LINE 1 855 691 5969
MODEL Y4007
MINI CULTIVATOR AND DETHATHER
KEEPING THE AIR FILTER CLEAN
Never run engine without air cleaner properly installed. Added wear and engine failure may occur if air cleaner is not
installed on engine
Service air cleaner every 3 months or er 20 hours of oper n
Clean filter daily in extremely dusty cond ons
STEPS FOR CLEANING RING STYLE FOAM AIR FILTER
1. Wash in warm water with liquid detergent un irt and debris are removed. Press or squeeze filter when cleaning...
DO NOT TWIST
2. Rinse filter un tergent and dirt are removed
3. Dry filter by wrapping in dry cloth and pressing un water is removed
4. Apply lightweight motor oil or thin based machine oil to en re filter
5. Remove excess oil
6. Rea ach filter and cover to unit
STEPS FOR CLEANING BLOCK STYLE FOAM AIR FILTER
1. Before removing the air filter cover, move the choke lever to the choke pos on (See Figure 5)
2. To remove air filter cover, squeeze the latch tabs on both sides of the cover (See Figure 6)
3. Once the latch tabs are released, remove air filter cover by rota ng the cover away from the engine (See Figure 7)
4. Remove the white plastic cover and the foam filter element (See Figure 8) and replace with anew oiled filter, or
clean the original foam filter with warm water and mild soap by following the previous steps for Cleaning
Air Filter. Remember to thoroughly oil the foam filter with 30 or 40 weight motor oil and squeeze out excess oil
5. Reinstall the foam filter and white plastic cover, pressing it in place to ensure that the foam is fully seated into
its sealed pos on (See Figure 9)
6. Replace the air filter cover so that it fully snaps into place and is secured by the latch tabs. Check that the cover
is securely a ached by pulling slightly on the cover. If the cover does not move when pulled, then it is secure
FIGURE 5 FIGURE 6 FIGURE 7
FIGURE 8 FIGURE 9

15
TOLL FREE HELP LINE 1 855 691 5969
MODEL Y4007
MINI CULTIVATOR AND DETHATHER
SPARK PLUG
THE RECOMMENDED SPARK PLUG FOR THIS UNIT IS A5RTC
1. Always check the Spark Plug at the beginning of each season
2. Disconnect Spark Plug Cap and clean any debris or dirt from around the Spark Plug area
3. Exam the Spark Plug and replace if any of the following have occurred:
a. Ped Electrodes
b. Burned Electrodes
c. Cracked Porcelain
d. Or Deposits around Spark Plug
4. Aer cleaning or replacing, reseat Spark Plug and ghten securely.... rea ach Spark Plug wire
5. When reinstalling original Spark Plug, ghten an add onal 1/2 turn
6. When replacing Spark Plug, adjust Spark Plug Gap to .028" and ghten an add onal 1/8 to 1/4 turn
NOTE: A loose Spark Plug can overheat and damage your engine. Over htening too much could damage the
threads in the cylinder head
CARBURETOR
NEVER TAMPER WITH THE FACTORY SETTING OF THE CARBURETOR
TINE REMOVAL AND INSTALLATION
REMOVING TINES
1. Remove the co er pins from each end of the ne sha
2. Slide each of the four nes off the
INSTALLING TINES
1. First slide the inside nes onto both ends of the ne sh Inside nes are stamped with a either a le er "B" or "C"
2. Slide the outside nes onto the ne sha The outside nes are stamped with either the letter "A" or "D"
3. The nes should be installed so that they are aligned in a sequence of "A,B.C.D" and should be po oned in that
order from le to right when viewed from the user's po on of the mini cul vator
4. Make sure the hub collars on both the right and pair of nes face each other so that there is adequate spacing
between the ne blades (SEE FIGURE 10)
5. Reinsert the co er pins back on each side of the ne sha to lock the nes into place
FIGURE 10 FRONT VIEW
A
B
C
D
Hub Collars
Cotter Pin Cotter Pin
NGK Equivalent plug number CR5HSA

16
TOLL FREE HELP LINE 1 855 691 5969
MODEL Y4007
MINI CULTIVATOR AND DETHATHER
ADJUSTING WHEELS
The wheels on the mini cul vator can be adjusted into two height po ons (SEE FIGURE 11)
1. To adjust the wheels, pull the detent pin out of the rear mounted plas parts mount hole
2. Turn the rear mounted p parts 180 degrees and then put the rear mounted p parts into the rear hanging
board and then replace the detent pin
ADJUSTING THE DRAG STAKE
The Drag Stake is used to regulate the depth of cu v on and also to help maintain direc on and keep the mini
cul vator from leaping forward during op on. Resistance to the forward mo on is achieved when the Drag Stake is
set to its lowest po on allowing deeper cul v on (SEE FIGURE 12)
1. Pull the pin out of the Drag Stake mount hole
2. Posi on the Drag Stake so that the pointed end of the stake is directed downward
3. Once desired depth is reached, reinsert the Drag Stake pin back into the hole
FIGURE 11
FIGURE 12
Always make sure engine is offwhenever maintenance or cleaning is being done on the unit. Ma ke sure unit is
off when using tools and moving the unit from one loca on to the other by any means other than its own power
Never work on excessively steep slopes and always wear quality safety shoes when opera ng this device
Always inspect the area to be cul vated and make sure it is free of any o bjects that could be thrown by the unit
This device should only be operated by suitably trained adult individuals who have read the en re instruc ons
WARNING
High Position
Low Position
Detent Pin
Detent Pin

17
TOLL FREE HELP LINE 1 855 691 5969
MODEL Y4007
MINI CULTIVATOR AND DETHATHER
TRANSPORTING YOUR UNIT
1. A er using your mini cul vator, always allow the unit to cool offbefore transpor ng. Never transport the unit in
an enclosed space within a vehicle as fumes and vapors may build up. They could ignite and cause serious injury or
death
2. If fuel is present in fuel tank, always transport in an open vehicle in an upright po on
3. If an enclosed vehicle must be used, be sure that the fuel tank is empty and any unused gas mixture is secured in a
UL or ASTM approved container
4. Never siphon out gas mixture by mouth
5. Run engine in order to use up any small amount of remaining fuel in carburetor and fuel tank
6. Always run engine in a well v ated area
7. Clean up any spillage around fuel tank and allow to dry
8. Make sure the unit's gas cap is is secur htly before transport
LONG TERM STORAGE
1. If you will not be using your mini cul vator for more than 30 days, you need to prepare it for long term storage
2. Make sure all fuel is removed from gas tank. Run engine to ensure any remaining fuel in carburetor and tank are
used
3. Store unit in a stable, upright and level po on
4. Before storing, wash down unit to remove all dirt and debris from the body of the unit
CAUTION!
TO AVIOID SICKNESS OR EVEN DEATH,
NEVER SIPHON FUEL BY MOUTH
NEVER STORE MINI CULTIVATOR WITH
FUEL STILL IN THE TANK IN AN
ENCLOSED, UNVENTILATED AREA
PRACTICE SAFETY AT ALL TIMES
ALWAYS TURN OFF ENGINE AND
ALLOW UNIT TO COOL
ALWAYS DISCONNECT SPARK PLUG
WIRE BEFORE ATTEMPTING REPAIR OR
MAINTENANCE ON UNIT

18
TOLL FREE HELP LINE 1 855 691 5969
MODEL Y4007
MINI CULTIVATOR AND DETHATHER
TROUBLE SHOOTING
Here at Garden Trax,we strive to build the most durable and best quality designed products. However, all the hard work
and best designs and all the careful maintenance on your part will never assure you that there will never be a problem.
Even the small repair can be annoying. So we have prepared a troubleshooting guide to help you through most of these
easily fixed repairs. The following guide will help you pinpoint the causes of common problems and identify remedies.
For more complicated repairs or any questions you might have concerning your Garden Trax unit, please feel free to
contact your place of purchase or The Garden Trax warranty and authorized service center. We will always be glad to
answer any questions you have,
or help you find suitable assistance. To order parts or inquire about warranty, call, write or
email us at the address found below, under the section ordering repair parts.
PROBLEM POSSIBLE CAUSE REMEDY/ACTION
Engine will not start 1. Power switch off 1. Flip switch to ON position
2. Spark plug wire disconnected 2. Connect spark plug wire to spark plug
3. Out of fuel 3. Refuel
4. Spark plug wet, faulty or improperly
gapped
4. Clean, replace or gap spark plug
5. Throttle control not held open 5. Hold throttle control open when pulling recoil
handle
6. Fuel line hose not positioned in
bottom of gas tank
6. Push fuel line down into fuel in gas tank
Engine runs rough, floods during
operation
1. Dirty air filter 1. Clean or replace air filter
2. Choke partially engaged 2. Turn off choke
3. Carburetor out of adjustment 3. Call factory
Engine is hard to start 1. Stale fuel 1. Drain old fuel and replace with fresh.
2. Spark plug wire loose 2. Make sure spark wire is securely attached to
spark plug
3. Dirty carburetor 3. Clean carburetor, use gas stabilizer,
Refuel with fresh gasoline.”
4. Throttle control not held open 4. Prime unit 3 more times, then hold throttle open
when pulling recoil handle
Engine misses or lacks power 1. Clogged gas tank 1. Remove and clean gas tank
2. Clogged air filter 2. Clean or replace air filter
3. Carburetor out of adjustment or bad 3. Call factory
4. Spark plug wet, faulty or improperly
gapped
4. Clean, replace or gap spark plug
Engine runs, then quits 1. Gas cap not venting 1. Clean or replace gas cap, check vent
2. Plugged fuel filter 2. Clean or replace fuel filter
3. Carburetor out of adjustment or bad 3. Call factory
Engine revs too high 1. Carburetor out of adjustment 1. Call factory
Tines turn at idle 1. Idle speed too high 1. Adjust idle speed lower
2. Broken clutch spring 2. Replace spring

19
TOLL FREE HELP LINE 1 855 691 5969
MODEL Y4007
MINI CULTIVATOR AND DETHATHER
Y4007 HANDLEBAR STRUCTURE PARTS DRAWING & PARTS LIST
13
11
5
7
6
6
12
KEY PART # DESCRIPTION QTY.
1Y4000.02-05
GRIP,HANDLEBAR
2
2HIS RIGHT HAND 1
3
BOLT,PHILLIPS TRUSS HD ZN 10-24x1-1/4
1
4 1
5 NUT,T-HANDLE 6
6 WASHER 8
7 BOLT,HANDLE CLAMP 6
8
TRIGGER ASSEMBLY,LONG THROW W/O CABLE
1
9THROTTLE CABLE 1
10 HANDLEBAR, MIDDLE 1
11 HANDLEBAR, LOWER 1
12 NUT,HEX HD M8 2
13 BOLT HEX HD M8X155
2
HIS LEFT HAND
Y4000.02-04A
Y4000.02-03A
Y4000.02.01
Y43.03A
Y4000.07
Y4000.02-02A
Y4000.02-01
GB6187
GB5787
14
SWITCH,ROCKER 1
10
9
5
76
4
8
2
1
1
3
14

20
TOLL FREE HELP LINE 1 855 691 5969
MODEL Y4007
MINI CULTIVATOR AND DETHATHER
HOOD AND TINES PARTS LIST AND DRAWING
KEY PART # DESCRIPTION QTY.
1 Y4000.01 1
3GB 97.1 2
4Y4000.05-05 2
5Y4000.04-01 2
6Y4000.04.04 1
7Y4000.04.03 1
8Y4000.05.02 1
9GB/T889.1 2
10 GB5787 2
11 Y4000.05-02
1
12 Y4000.05-03
1
13 Y4000.04.02 1
14 1
KEY PART # DESCRIPTION QTY.
15 Y4000.06-01 TINE SHIELD 2
16 GB5787 2
17 GB97.1 WASHER 5 2
18
GB/T889.1
4
1
4
5 7
6
16
8
2
10 14
15
16
13
18
3
9
910
11
12
5
3
4
16
17
17
15
19
19
20
2
1
Y4000.04.01
Y4000.03
140FA ENGINE
TRANSMISSION ASSEMBLY
WASHER 10
WHEEL
HAIR PIN, 5/8-3/4 COTTER
TINE “A” RIGHT OUTSIDE
TINE “B” RIGHT INSIDE
DETENT PIN 5/16 X 1-1/2”
NUT M6 FLANGED HEX HD
BOLT M6 X 20mm FLANGED HEX HD
REAR MOUNTED PLASTIC PARTS
REAR AXLE
TINE “C” LEFT INSIDE
TINE “D” LEFT OUTSIDE
20
20
21
NUT M5
BOLT M5 X 10mm FLANGED HEX HD
BOLT M6 X 45mm FLANGED HEX HD
19 2
20
21
WASHER 6
REAR HANGING BOARD 1
6
GB97.1
GB5787
Y4000.05-06
22 GB 91 PIN 2.5
X30mm
2
22
22
Table of contents
Other Garden Trax Tiller manuals