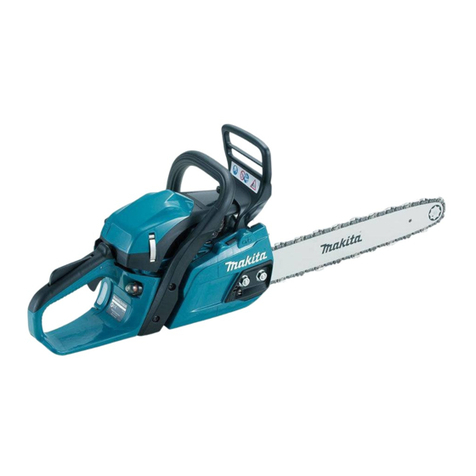
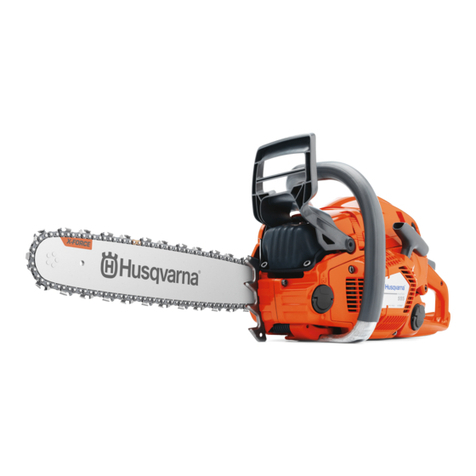
Gardol GMSH 40+ User manual

115860438 Rev.2 12/20/16
GMSH 40+
EN INSTRUCTION MANUAL
IMPORTANT INFORMATION: Please read these instructions carefully and make sure
you understand them before using this unit. Retain these instructions for future reference.
FR
IT
NL
ES
MANUEL D’INSTRUCTIONS
RENSEIGNEMENTS IMPORTANTS: Avant d’utiliser cet appareil, veuillez lire
atentivement les instructions et assurez--vous de les avoir comprises. Conservez les
instructions pour référence ultérieure.
NÁVOD K POUŽITIU
DÔLEŽITÁ INFORMÁCIA: Prečítajte, prosím. Pozorne tento návod k použitiu a
presvedčte sa pred prvým použitím strojja, že všetkému dobre rozumiete.
SK
BETRIEBSANWEISUNG
WICHTIGE INFORMATION: Lesen Sie diese Hinweise zur Handhabung des
Geräts aufmerksam durch. Verwenden Sie es erst, wenn Sie sicher sind, daß Sie
alle Anweisungen verstanden haben und gut aufbewahren.
DE
MANUAL DE INSTRUCCIONES
INFORMACIÓN IMPORTANTE: Lea atentamente las instrucciones y asegúrese de
entenderlas antes de utilizar esta aparato. Conserve las instrucciones para la
referencia en el futuro.
HANDLEIDING
BELANGRIJKE IMPORTANTS: Lees deze handleiding aandachtig en zorg dat u ailes
begrijpt alvorens de kettingzaag te gebruiken en bewaar ze voor toekomstige
raadpleging.
LIBRETTO D’ISTRUZIONI
INFORMAZIONI IMPORTANTI: Leggere le istruzioni attentamente e
capirle bene prima di usare la motosega. Conservare per ulteriore consultazione.

ΡЪКОВОДСТВО ЗА ΡАБОТА
ВАЖНА ИНФОΡМАЦИЯ: Прочетете тези инструкции внимателно, за да ги
разберете преди да използвате това устройство. Запазете това ръководство за
бъдеща справка.
BG
PRIRUČNIK ZA RUKOVANJE
VAŽNE INFORMACIJE: Molimo vas pažljivo pročitajte ove upute prije korištenje
uređaja i budite sigurni da ste ih razumjeli. Sačuvajte ove upute za buduće potrebe.
HR
KASUTUSJUHEND
TÄHTIS INFO :Enne seadme kasutamist lugege need juhised palun tähelepanelikultläbi.
Hoidke need juhised tuleviku tarbeks alles.
EE
KEZELÉSI ÚTMUTATÓ
FONTOS INFORMÁCIO: Kérjük, a gép használata előtt olvassa el figyelmesen az
utasításokat, míg nem bizonyos benne, hogy megértette őket.
HU
ANVÄNDARHANDBOK
VIKTIG INFORMATION: Läs dessa anvisningar noggrant och setill att du förstår dem
innan du använder maskinen och spara dem för framtida behov.
SE
BRUKERHÅNDBOK
VIKTIG INFORMASJON: Vennligst les disse instruksjonene nøye og pass på at De
forstår dem før De bruker enheten og oppbevar den for senere bruk.
NO
BRUGERHÅNDBOG
VIGTIGE OPLYSNINGER: Læs venligst disse instruktioner omhyggeligt og vær sikker
på, at De forstår dem, før De anvender enheden og gemme til senere henvisning.
DK
KÄYTTÖOHJEKIRJA
TÄRKEÄÄ: Lue tämä ohjekirja huolellisesti läpi ennen kuin alat käyttää laitetta. Säilytä
ohjekirja myöhempää käyttöä varten.
FI
NÁVODKPOUŽĺVÁNĺ
DŮLEŽITÁ INFORMACE: Prosíme, než začnete zařízení používat, přečtěte si pečlivě
tyto pokyny a ujistěte se, že jim plně rozumíte.
CZ
SI NAVODILAZA UPORABO
VAŽNA INFORMACIJA: Skrbno preberite ta navodila za uporabo in se
prepričajte, da ste jih razumeli preden uporabite proizvod.

-- 2 --
1. Saw chain
2. Guide Bar
3. Spark Arrester Screen
4. Chain Brake Lever / Hand
Guard
5. Front Handle
6. Starter Handle
7. ON/OFF Switch
8. Throttle trigger lockout
9. Rear Handle / Boot Loop
10. Oil Tank cap
11. Fuel Tank Cap
12. Starter Cover
13. Spiked Bumper
14. Chain Tension Ring
15. Muffler Shield
16. Spark Plug
17. Air Cleaner Cover
18. Choke Lever for Auto
Choke
19. Primer Bulb
20. Throttle trigger
21. Chain Cover Control
Button
22. Chain Catcher
23. Guide-bar Cover
SAFETY FEATURES
Numbers preceding the descriptions correspond with the numbers above to help you locate
the safety feature.
1 LOW KICKBACK SAW CHAIN helps
significantly reduce kickback, or the
intensity of kickback, due to specially
designed depth gauges and guard
links.
3 SPARK ARRESTER SCREEN retains
carbon and other flammable
particles over 0.023 inches (0.6mm)
in size from engine exhaust flow.
Compliance with local, state and
federal laws and/or regulations
governing the use of a spark arrester
screen is the user’s responsi-
bility. See Safety Precautions for
additional information.
4 CHAIN BRAKE LEVER / HAND
GUARD protects the operator’s left
hand in the event it slips off the front
handle while saw is running.
4 CHAIN BRAKE is a safety feature
designed to reduce the possibility of
injury due to kickback by stopping a
moving saw chain in milliseconds. It is
activated by the CHAIN BRAKE lever.
7 STOP SWITCH immediately stops
the engine when tripped. Stop switch
must be pushed to ON position to start
or restart engine.
8 THROTTLE TRIGGER LOCKOUT
prevents accidental acceleration of the
engine. Throttle trigger (20) cannot be
squeezed unless the safety latch is
depressed.
22 CHAIN CATCHER reduces the danger
of injury in the event saw chain breaks
or derails during operation. The chain
catcher is designed to intercept a
whipping chain.
13
1
7
56
11
2
17
20 22
21
14
23
16
18
3
4
10
12
15
19
9
8
Read and understand the Instr-
uction Manual and all warning
labels before using the machine.
Primer Bulb
Wear gloves to protect
your hands
Wear safety boots to protect
your feet
IDENTIFICATION OF SYMBOLS
IDENTIFICATION (WHAT IS WHAT?)

-- 3 --
WARNING: When using gasoline
tools, basic safety precautions, including the
following, should always be followed to
reduce the risk of serious personal injury
and/or damage to the unit. Read all these
instructions before operating this product
and save these instructions.
WARNING: This machine produces
an electromagnetic field during operation.
This field may under some circumstances
interfere with active or passive medical
implants. To reduce the risk of serious or
fatal injury, we recommend persons with
medical implants to consult their physician
and the medical implant manufacturer
before operating this machine.
WARNING: This tool is designed
only for use by one operator and intended
for forest work. This tool is designed only to
be operated with the right hand on the rear
handle and the left hand on the front handle.
The operator must read and understood the
safety requirements in the instruction
handbook and using the appropriate
personal protective equipment (PPE) before
operating this tool. This tool is not designed
for cutting unintended material, such as
rubber, stone, metals or wood products not
clear of foreign objects.
•DO NOT operate a chain saw with one
hand! Serious injury to the operator,
helpers, bystanders, or any combination
of these persons may result from one-
handed operation. A chain saw is
intended for two-handed use.
•DO NOT operate a chain saw when you
are fatigued, under the influence of drugs,
alcohol or medication.
•Use safety footwear, snug-fitting clothing,
protective gloves, and eye, hearing
and head protection devices.
•Use caution when handling fuel. To
avoide fire, move the chain saw at least
10 feet (3m) from the fueling point before
starting the engine.
•DO NOT allow other persons to be near
when starting or cutting with the chain
saw. Keep bystanders and animals out of
the work area.
•DO NOT start cutting until you have a
clear work area, secure footing, and a
planned retreat path from the falling tree.
•Keep all parts of your body away from the
saw chain when the engine is running.
•Before you start the engine, make sure
that the saw chain is not contacting
anything.
•Carry the chain saw with the engine
stopped, the guide bar and saw chain to
the rear, and the muffler away from your
body.
•DO NOT operate a chain saw that is
damaged, improperly adjusted, or not
completely and securely assembled. Be
sure that the saw chain stops moving
when the throttle control trigger is
released.
•Shut off the engine before setting the
chain saw down.
•Use extreme caution when cutting small
size brush and saplings because slender
material may catch the saw chain and be
whipped toward you or pull you off
balance.
•When cutting a limb that is under tension,
be alert for springback so that you will
not be struck when the tension in the
wood fibers is released.
•Keep the handles dry, clean, and free of
oil or fuel mixture.
•Operate the chain saw only in
well-ventilated areas.
•DO NOT operate a chain saw in a tree
unless you have been specifically trained
to do so.
•All chain saw service, other than the
items listed in the user manual safety and
maintenance instructions, should be
performed by competent chain saw
service personnel.
•When transporting your chain saw, use
the appropriate guide bar scabbard.
SAFETY RULES
Whenever the machine is in use,
safety glasses must be worn to
safeguard against flying objects.
Ear protection must also be used
in order to protect to operators
hearing. If the operator is
working in an area where there is
a risk of falling objects a safety
helmet must also be worn.
Make Sure the Chain Brake is
disengaged! Pull Hand Guard/
Chain Br ake bac k to run.
This product is in accordance
with applicable EC directives.
Guaranteed sound power level
LWA accordance with directive
2000/14/EC + 2005/88/EC
Always use two hands when
operating the chain saw.
WARNING:
Danger
108
WARNING! Contacting the
guide bar tip with any object
should be avoided; tip contace
may cause the guide bar to
move suddenly upward and
backward. which may cause
serious injury.

-- 4 --
•Tighten the cap of oil and fuel tank to
prevent the loss of oil and fuel during
transport.
•DO NOT operate your chain saw near or
around flammable liquids or gases
whether in or out of doors. An explosion
and/or fire may result.
•Do not fill fuel tank, oil tank or lubricate
when the engine is running.
•USE THE RIGHT TOOL: Cut wood
only. Do not use the chain saw for
purposes for which it was not
intended. For example, do not use the
chain saw for cutting plastic, masonry, or
nonbuilding materials.
•The first time user should have practical
instruction in manual page 10 (barking
Saw horse) in the use of chain saw and
the protective equipment form an
experienced operator.
•Do not attempt to hold the saw with one
hand only. You cannot control reactive
forces and you may lose control of the
saw, which can result in the skating or
bouncing of the bar and chain along the
limb or log.
•Never run the chainsaw indoors.
Your chainsaw produces poisonous
exhaust as soon as the combustible
engine is started, which may be colorless
and odorless. To use this product can
generate dust, mists and fumes
containing chemicals known to cause
reproductive harm. Be aware of harmful
dust, mist (such as saw dust or oil mist
from chain lubrication) and protect your
self properly.
•Wear gloves and keep your hand warm.
Prolonged use of chainsaws exposing the
operator to vibrations may produce
whitefinger disease. In order to reduce the
risk of whitefinger disease, please wear
gloves and keep your hand warm. If any of
the whitefinger symptoms appear, seek
medical advice immediately.
•When transporting or storing the chain
saw always fit the guide bar cover.
•Drive in the spiked bumper of the chain
saw directly behind the intended hinge
and pivot the saw around this point. The
spiked bumper rolls against the trunk.
•There are 3 parts only, chain, bar and
spark plug, can be replaced by the user
themselves and please use the same
type as showed on the specifications in
the user's manual.
(Type for the plug is NGK CMR7H).
If the other components beyond the prior
parts are defective, then please take your
tools to the nearest Authorized Service
Center for service.
NOTE: This appendix is intended primarily
for the consumer or occasional user. These
models are intended for infrequent use by
homeowners, cottagers, and campers, and
for such general applications as clearing,
pruning, cutting firewood, etc. They are not
intended for prolonged use. If the intended
use involves prolonged periods of opera-
tion, this may cause circulatory problems in
the user’s hands due to vibration.
KICKBACK may occur when the NOSE or
TIP of the guide bar touches an object, or
when wood closes in and pinches the saw
chain in the cut.
Tip contact in some cases may cause a
lightning-fast reverse reaction, kicking the
guide bar up and back toward the operator.
PINCHING the saw chain along the
BOTTOM of the guide bar may PULL the
saw forward away from the operator.
PINCHING the saw chain along the TOP of
the guide bar may PUSH the guide bar
rapidly back toward the operator.
Any of these reactions may cause you to
lose control of the saw, which could result in
serious personal injury.
KICKBACK SAFETY PRECAUTIONS
1. With a basic understanding of kickback,
you can reduce or eliminate the element
of surprise. Sudden surprise contributes
to accidents.
2. Keep a good firm grip on the saw with
both hands, the right hand on the rear
handle, and the left hand on the front
handle, when the engine is running. Use
a firm grip with thumbs and fingers
encircling the chain saw handles. A firm
grip will help you reduce kickback and
maintain control of the saw. Don’t let go.
3. Make sure that the area in which you are
cutting is free from obstructions. Do not
let the nose of the guide bar contact a
log, branch, or any other obstruction
which could be hit while you are
operating the saw.
4. Cut at high engine speeds.
5. Do not overreach or cut above shoulder
height.
6. Follow manufacturer’s sharpening and
maintenance instructions for the saw
chain.
7. Only use replacement bars and chains
specified by the manufacturer or the
equivalent.
NOTE: Low-kickback saw chain is chain
that has met the kickback performance.


-- 5 --
WARNING:
Kickback can lead to
dangerous loss of control of the chain saw
and result in serious or fatal injury to the
saw operator or to anyone standing close
by. Always be alert. Rotational kickback
and pinch-kickback are major chain saw
operational dangers and the leading cause
of most accidents.
Your Chain Saw is provided with a safety
label located on the chain brake lever/hand
guard. This label, along with the safety
instructions on these pages, should be
carefully read before attempting to operate
this unit.
IMPORTANT SAFETY
ASSEMBLY INSTRUCTIONS
WARNING: RED Used to warn that
an unsafe procedure should not be
performed.
WARNING: DO NOT start saw
engine until unit is properly prepared.
WARNING: Always wear protective
gloves when handling chain.
HOW TO READ SYMBOLS AND
COLORS (FIG.1)
WARNING
1. Beware of kickback.
2. Do not attempt to hold saw with one
hand.
3. Avoid bar nose contact.
RECOMMENDED
4. Hold saw properly with both hands.
This unit is designed for occasional
homeowner use and should not be used for
commercial purposes or subjected to heavy
continuous use.
Your new chain saw can be used for a
variety of projects such as cutting firewood,
making fence posts, felling small trees,
limbing, pruning at ground level, and light
carpentry.
Cut only wood or wood products with your
saw.
1. Place power unit on flat surface.
2. Make sure the CHAIN BRAKE®lever is
pulled back into the DISENGAGED
position. (Fig.3A)
3. Loosen button (C) slightly by turning
knob counterclockwise and then turn the
chain tension ring (B) counter-clockwise
to relief chain tension . (Fig.3B)
4. To remove the sprocket cover (A),
remove screw (N) and turn button (B)
counter-clockwise. (Fig.3B)
5. Remove saw chain from around the
guide bar and the sprocket. Slide the
guide bar, from the unit.
6. Place the slotted end of the guide bar
over the bar bolt (D). Slide guide bar
behind clutch drum (E) until the guide bar
stops. (Fig.3C)
7. Spread the chain out with the cutting
edges (F) of the chain pointing in the
DIRECTION OF ROTATION (Fig.3D).
8. Slip the chain around the sprocket (G)
behind the clutch (H). Make sure the
links fit between the sprocket teeth.
(Fig.3E)
Your new chain saw will require adjustment
of chain, filling the fuel tank with correct fuel
mixture and filling the oil tank with lubricating
oil before the unit is ready for operation.
Read the entire user manual before
attempting to operate your unit. Pay
particular attention to all safety
precautions.
Your user manual is both a reference guide
and handbook provided to furnish you
with general information to assemble,
operate and maintain your saw.
RECOMMENDED
Recommended cutting procedure.
Fig. 1
DANGER! BEWARE OF KICKBACK!
Fig. 2A Fig. 2B
BEWARE OF:
ROTATIONAL
KICKBACK
(Fig. 2A)
A = Kickback path
B = Kickback
reaction zone
THE PUSH (PINCH
KICKBACK) AND
PULL REACTIONS
(Fig. 2B)
A = Pull
B = Solid objects
C = Push
ASSEMBLY REQUIREMENTS
GUIDE BAR / SAW CHAIN / CLUTCH
COVER INSTALLATION
INTRODUCTION
1
2
3
4
AA
B
C
B

-- 6 --
Proper tension of saw chain is extremely
important and must be checked before
starting, as well as during any cutting
operation.
Taking the time to make needed
adjustments to the saw chain will result in
improved cutting performance and
prolonged chain life.
WARNING: Always wear heavy duty
glove swhen handling saw chain or making
saw chain adjustments.
CAUTION: A new saw chain
stretches, requiring adjustment after as
few as 5 cuts. This is normal with a new
chain, and the interval between future
adjustments will lengthen quickly.
CAUTION: If saw chain is TOO
LOOSE or TOO TIGHT, the sprocket, bar,
chain, and crankshaft bearings will wear
more rapidly. Study Fig. 5 for information
concerning correct cold tension (A),
correct warm tension (B), and as a guide for
when saw chain needs adjustment (C).
9. Guide the drive links into the groove (I)
and around the end of the bar. (Fig.3E)
NOTE: The saw chain may droop slightly on
the lower part of bar. This is normal.
10. Turn the knob (J) COUNTERCLOCK-
WISE until the TANG (K) is to the end of
its travel. (Fig. 3F)
11. Install the clutch cover making sure the
tang is positioned in the lower hole in the
guide bar. Make sure the chain does not
slip off of the bar.
12. Lock the screw (N) be tight, and follow
step 13 to adjust the chain tension.
13. Turn the tension ring clockwise tight (M);
pull the control button by arrow direction
(L) to turn tightly be clockwise then push
the control button back. (Fig.3G)
NOTE: The guide bar retaining knob is
installed only hand tight at this point
because saw chain adjustment is required.
Follow instructions in Section, Saw Chain
Tension Adjustment.
1. Hold nose of guide bar up and turn
adjustment chain ring (A) CLOCKWISE
to increase chain tension. Turning chain
ring (A) COUNTERCLOCKWISE will
decrease amount of tension on chain.
Ensure the chain fits snugly all the way
around the guide bar. (Fig. 4)
2. After making adjustment, and while still
holding nose of bar in the uppermost
position, tighten the bar retaining
button (B) securely. Chain has proper
tension when it has a snug fit all around
and can be pulled around by gloved
hand. (Fig. 4)
NOTE: If chain is difficult to rotate on
guide bar or if it binds, too much tension
has been applied. This requires minor
adjustment as follows:
A. Loosen the bar retaining knob so they
are finger tight. Decrease tension by
turning the bar adjustment chain ring
COUNTERCLOCKWISE slowly. Move
chain back and forth on bar. Continue to
adjust until chain rotates freely, but fits
snugly. Increase tension by turning bar
adjustment chain ring CLOCKWISE.
B. When saw chain has proper tension,
hold nose of bar in the uppermost
position and tighten the bar retaining
knob securely.
SAW CHAIN TENSION ADJUSTMENT
TO ADJUST SAW CHAIN:
Fig. 5
ABC
Fig. 4
A
B
Fig. 3A
C
Fig. 3B
B
Fig. 3C
F
Fig. 3D
A
D
E
Fig. 3E
J
I
G
H
Fig. 3G Fig. 3F
K
L
M
N
N

-- 7 --
WARNING:The purpose of the
chain brake is to reduce the possibility of
injury due to kickback; however, it cannot
provide the intended measure of protection
if the saw is operated carelessly. Always
test the chain brake before using your saw
and periodically while on the job.
Your chain saw is equipped with a Chain
brake that reduces possibility of injury due to
kickback. The brake is activated if pressure
is applied against brake lever when, as in
the event of kickback, operator’s hand
strikes the lever. When the brake is actuated,
chain movement stops abruptly.
WARNING:Never use straight
gasoline in your unit. This will cause
permanent engine damage and void the
manufacturer’s warranty for that product.
Never use a fuel mixture that has been
stored for over 90 days.
Use regular grade unleaded gasoline
mixed with 40:1 custom 2-cycle engine oil
for best results. Use mixing ratios in Section
FUEL MIXINGTABLE.
Some conventional petrols are being
blended with oxygenates such as alcohol or
an ether compound to meet clean air
standards.Your engine is designed to operate
satisfactorily on any gasoline intended for
automotive use including oxygenated
petrols.
Always refill the chain oil tank each time the
fuel tank is refilled. We recommend using
Gardol Chain, Bar and Sprocket Oil, which
contains additives to reduce friction and
wear and to assist in the prevention of pitch
formation on the bar and chain.
Mix fuel with 2 cycle oil in an approved
container. Use mixing table for correct
ratio of fuel to oil. Shake container to
ensure thorough mix.
WARNING:Lack of lubrication voids
engine warranty.
WARNING:If 2-cycle lubricant
other than Custom Lubricant is to be used, it
must be a premium grade oil for 2-cycle air
cooled engines mixed at a 40:1 ratio. Do not
use any 2-cycle oil product with a
recommended mixing ratio of 100:1. If
insufficient lubrication is the cause of engine
damage, it voids the manufacturer’s engine
warranty for that occurrence.
1. The CHAIN BRAKE is DISENGAGED
(chain can move) when BRAKE LEVER
IS PULLED BACK AND LOCKED. Be
sure the chain brake latch is in the OFF
position. (Fig. 6A)
CHAIN BRAKE MECHANICAL TEST
TO TEST CHAIN BRAKE:
2. The CHAIN BRAKE is ENGAGED (chain
is stopped) when brake lever is in forward
position and the chain brake latch is in
the ON position. You should not be able
to move chain. (Fig. 6B)
NOTE:The brake lever should snap into both
positions. If strong resistance is felt, or lever
does not move into either position, do not use
your saw. Take it immediately to a
professional Service Center for repair.
FUEL
MIXING FUEL
FUEL AND LUBRICATION
Gasoline and Oil
Mix 40:1 Oil Only
FUEL MIXING TABLE
RECOMMENDED FUELS
CHAIN AND BAR LUBRICATION
GASOLINE 40:1 Ratio
Custom Lubricant
1 U.S. Gal. 3.2 oz. 95ml (cc)
5 Liters 4.3 oz. 125ml (cc)
4.3 oz. 125ml (cc)
1 lmp. Gal.
Mixing 40 Parts Gasoline
Procedure to 1 part Lubricant
1ml = 1cc
Fig. 6A Fig. 6B
OFF ON
FUEL AND LUBRICATION

-- 8 --
1. Fill the fuel tank (A) with correct fuel
mixture. (Fig. 7).
2. Fill the oil tank (B) with correct chain and
bar oil (Fig. 7).
3. Be certain the chain brake is engaged
(C) before starting unit (Fig. 7). 1. Make sure the
on/off switch is in
the “I” position.
2. Depress the primer
bulb 10 times.
3. Pull the starter
rope rapidly 4
times. The engine
should start.
4. If the engine still can not start, follow the
step as “To start engine” in this user
manual.
1. Release trigger and allow engine to
return to idle speed.
2. Press STOP switch down to stop engine.
(Figure 9)
NOTE: For emergency stopping, simply
activate CHAIN BRAKE and move
STOP switch down.
1. Place saw on a clear, firm, flat surface.
2. Start engine.
3. Grasp the rear handle (A) with your right
hand (Fig. 10).
4. With your left hand, hold the front
handle (B) [not CHAIN BRAKElever (C)]
firmly (Fig. 10).
5. Squeeze the throttle trigger to 1/3 throttle,
then immediately activate the CHAIN
BRAKElever (C) (Fig. 10).
6. Chain should stop abruptly. When it does,
immediately release the throttle trigger.
7. If chain brake functions properly, turn the
engine off and return the chain brake to
the DISENGAGED position.
1. Move ON/OFF switch to ON “I”
position. (Fig. 8A)
2. Pull choke lever/throttle (A) advance. This
sets choke and advances throttle for
easier starting. (Fig. 8B)
3. Press primer bulb (B) 10 times. (Fig. 8C)
4. With saw on ground, grip front handle
firmly with left hand and place right foot
inside rear handle. Pull starter rope 4
times with right hand. (Fig. 8D)
NOTE: Easy Start significant reduce the
effort required to start the engine. You must
pull the starter rope out far enough to hear
the engine attempt to start. There is no need
to pull the rope briskly-- there is no harsh
resistance when pulling. Be aware that this
starting method is vastly different from (and
much easier than) what you may be used to.
5. Push choke lever (C) in
completely. (Fig. 8E)
6. Pull starter rope quickly until engine
starts.
7. Allow the engine to run for about 10
seconds. Squeeze and release throttle
trigger (D) to idle engine. (Fig. 8F)
8. If the engine does not start up, repeat
the above steps.
OPERATION
ENGINE PRE-START CHECKS
WARNING: Never start or operate
the saw unless the bar and chain are
properlyinstalled.
WARNING: Activate the chain brake
slowly and deliberately. Keep the chain
from touching anything; don t let the saw tip
forward.
WARNING: If chain does not
stop, turn engine off and take your unit to
the nearest Authorized Service Center for
service.
Fig. 7
TO START ENGINE
RE-STARTING A WARM ENGINE
TO STOP ENGINE
Fig. 9
CHAIN BRAKE OPERATIONAL TEST
TEST CHAIN BRAKE AS FOLLOWS:
Fig. 8A Fig. 8B
A
B
Fig. 8C Fig. 8D
Fig. 8E Fig. 8F
D
C
Test the CHAIN BRAKE periodically to
ensure proper function.
Perform a CHAIN BRAKE test prior to initial
cutting, following extensive cutting, and
definitely following any CHAIN BRAKE
service.
-- 8 --
1. Fill the fuel tank (A) with correct fuel
mixture. (Fig. 8).
2. Fill the oil tank (B) with correct chain and
bar oil (Fig. 8).
3. Be certain the chain brake is disengaged
(C) before starting unit (Fig. 8).
1. Make sure the on/off switch is in the “I”
position.
2. Depress the primer bulb 10 times.
3. Pull the starter rope rapidly 4
times. The engine should start.
4. If the engine still can not start, follow the
step as “To start engine” in this user
manual.
1. Release trigger and allow engine to
return to idle speed.
2. Press STOP switch down to stop engine
Figure 9G.
NOTE: For emergency stopping, simply
activate CHAIN BRAKE and move
STOP switch down.
1. Place saw on a clear, firm, flat surface.
2. Start engine.
3. Grasp the rear handle (A) with your right
hand (Fig. 10).
4. With your left hand, hold the front
handle (B) [not CHAIN BRAKElever (C)]
firmly (Fig. 10).
5. Squeeze the throttle trigger to 1/3 throttle,
then immediately activate the CHAIN
BRAKElever (C) (Fig. 10).
6. Chain should stop abruptly. When it does,
immediately release the throttle trigger.
7. If chain brake functions properly, turn the
engine off and return the chain brake to
the DISENGAGED position.
Test the CHAIN BRAKE periodically to
ensure proper function.
Perform a CHAIN BRAKE test prior to initial
cutting, following extensive cutting, and
definitely following any CHAIN BRAKE
service.
1. Move ON/OFF switch to ON “I”
position. (Fig. 9A)
2. Pull choke lever/throttle (A) advance. This
sets choke and advances throttle for
easier starting. (Fig. 9B)
3. Press primer bulb (B) 10 times. (Fig. 9C)
4. With saw on ground, grip front handle
firmly with left hand and place right foot
inside rear handle. Pull starter rope 4
times with right hand. (Fig. 9D)
NOTE: If the engine sounds as if it wants
to start before the 4th pull, end the tugging
of the starter and proceed as described in
the next step.
5. Push choke lever (C) in
completely. (Fig. 9E)
6. Pull starter rope quickly until engine
starts.
7. Allow the engine to run for about 10
seconds. Squeeze and release throttle
trigger (D) to idle engine. (Fig. 9F)
8. If the eingine does not start up, repeat
the above steps.
OPERATION
ENGINE PRE-START CHECKS
WARNING: Never start or operate
the saw unless the bar and chain are
properlyinstalled.
WARNING: Activate the chain brake
slowly and deliberately. Keep the chain
from touching anything; don t let the saw tip
forward.
WARNING: If chain does not
stop, turn engine off and take your unit to
the nearest Authorized Service Center for
service.
Fig. 8
B
A
C
TO START ENGINE
A
B
D
C
RE-STARTING A WARM ENGINE
TO STOP ENGINE
Fig. 9G
CHAIN BRAKE OPERATIONAL TEST
TEST CHAIN BRAKE AS FOLLOWS:

-- 9 --
GENERAL CUTTING INSTRUCTIONS
Adequate lubrication of the saw chain is
essential at all times to minimize friction with
the guide bar.
Never starve the bar and chain of oil.
Running the saw with too little oil will
decrease cutting efficiency, shorten saw
chain life, cause rapid dulling of chain, and
cause excessive wear of bar from
overheating. Too little oil is evidenced by
smoke, bar discoloration or pitch build-up.
NOTE: Saw chain stretches during use,
particularly when it is new, and it will
Your chain saw is equipped with an
automatic clutch driven oiler system. The
oiler automatically delivers the proper
amount of oil to the bar and chain. As the
engine speed increases, so does the oil flow
to the bar pad. There is no flow adjustment.
The oil reservoir will run out at approximately
the same time as the fuel supply runs out.
WARNING: Don't put pressure on
the saw when reaching the end of the cut.
The pressure may cause the bar and chain
to rotate. If the rotating chain strikes some
other object, a reactive force may cause
moving chain to strike the operator.
Felling is the term for cutting down a tree.
Small trees up to 6-7 inches (15-18cm) in
diameter are usually cut in a single cut.
Larger trees require notch cuts. Notch cuts
determine the direction the tree will fall.
Normally felling consists of 2 main cutting
operations, notching (C) and making the
felling cut (D).
Start making the upper notch cut (C) on the
side of the tree facing the felling direction
(E). Be sure you don t make the lower cut
too deep into the trunk.
The notch (C) should be deep enough to
create a hinge (F) of sufficient width and
strength. The notch should be wide enough
to direct the fall of the tree for as long as
possible.
NOTE:Direction of fall (B) is controlled by the
notching cut. Before any cuts are made,
consider the location of larger branches and
natural lean of the tree to determine the way
the tree will fall.
WARNING: A retreat path (A) should
be planned and cleared as necessary before
cuts are started. The retreat path should
extend back and diagonally to the rear of the
expected line of fall, as illustrated in
Fig.11A.
WARNING: Never walk in front of a
tree that has been notched.
Make the felling cut (D) from the other side of
the tree and 1.5 - 2.0 inches (3-5 cm) above
the edge of the notch (C) (Fig.11B)
Never saw completely through the trunk.
Always leave a hinge. The hinge guides the
tree. If the trunk is completely cut through,
control over the felling direction is lost.
Insert a wedge or felling lever in the cut well
before the tree becomes unstable and starts
to move. This will prevent the guidebar from
binding in the felling cut if you have
misjudged the falling direction. Make sure no
bystanders have entered the range of the
falling tree before you push it over.
WARNING: Do not cut down a tree
during high or changing winds or if there is a
danger to property. Consult a tree
professional. Do not cut down a tree if there
is a danger of striking utility wires; notify the
utility company before making any cuts.
CAUTION: If felling a tree on sloping
ground, the chain saw operator should keep
on the uphill side of the terrain, as the tree is
likely to roll or slide downhill after it is felled.
SAW CHAIN / BAR LUBRICATION
AUTOMATIC OILER
occasionally be necessary to adjust and
tighten it. New chain will require adjustment
after about 5 minutes of operation.
FELLING
FELLING A TREE:
Fig. 11A
B
A
GENERAL GUIDELINES FOR FELLING
TREES:
Fig. 11B
Fig. 10
ABC

-- 10 --
FELLING CUT:
WARNING: Before making the final
cut, always recheck the area for bystanders,
animals or obstacles.
Bucking is cutting a fallen log into lengths.
Make sure you have a good footing and
stand uphill of the log when cutting on
sloping ground. If possible, the log should
be supported so that the end to be cut off is
not resting on the ground. If the log is
supported at both ends and you must cut in
the middle, make a downward cut halfway
through the log and then make the
undercut. This will prevent the log from
pinching the bar and chain. Be careful that
the chain does not cut into the ground when
bucking as this causes rapid dulling of the
chain.
When bucking on a slope, always stand on
the uphill side.
1. Use wooden or plastic wedges (A) to
prevent binding the bar or chain (B) in the
cut. Wedges also control felling
(Fig.11C).
2. When diameter of wood being cut is
greater than the bar length, make 2 cuts
as shown (Fig.11D).
1. Log supported along entire length: Cut
from top (overbuck), being careful to
avoid cutting into theground (Fig.13A).
2. Log supported on 1 end: First, cut from
bottom (underbuck) 1/3 diameter of log to
avoid splintering. Second, cut from above
(overbuck) to meet first cut and avoid
pinching (Fig.13B).
3. Log supported on both ends: First,
overbuck 1/3 diameter of log to avoid
splintering. Second, underbuck to meet
first cut and avoid pinching (Fig.13C).
NOTE: The best way to hold a log while
bucking is to use a sawhorse. When this is
not possible, the log should be raised and
supported by the limb stumps or by using
supporting logs. Be sure the log being cut is
securely supported.
A. Hold the saw firmly with both hands and
keep the saw to the right of your body
while cutting.
B. Keep the left arm as straight as possible.
C. Keep weight on both feet.
Limbing a tree is the process of removing
the branches from a fallen tree. Do not
remove supporting limbs (A) until after the
log is bucked (cut) into lengths (Fig.12).
Branches under tension should be cut from
the bottom up to avoid binding the chain
saw.
For personal safety and ease of cutting, the
correct position for vertical bucking is
essential (Fig.14).
WARNING: As the felling cut gets
close to the hinge, the tree should begin to
fall. When tree begins to fall, remove saw
from cut, stop engine, put chain saw down,
and leave area along retreat path (Fig.11A).
WARNING: Never cut tree limbs
while standing on tree trunk.
CAUTION: While the saw is cutting,
be sure the chain and bar are being properly
lubricated.
Fig. 11DFig. 11C
AB
LIMBING
Fig. 12
Fig. 13B
Fig. 13A
Fig. 13C
BUCKING
BUCKING USING A SAWHORSE
VERTICAL CUTTING:
Fig. 14
B
A
C600mm
A

-- 11 --
MAINTENANCE INSTRUCTIONS
All chain saw service, other than items listed
here in your user manual maintenance
instructions, should be performed by a
professional.
A good preventive maintenance program of
regular inspection and care will increase life
and improve performance of your chain saw.
This maintenance checklist is a guide for
such a program.
Cleaning, adjustment, and parts replacement
may be required, under certain conditions, at
more frequent intervals than those indicated.
1. Remove knob (A) holding air filter cover in
place, remove the top cover (B) by
loosening the cover retaining screws.
Cover will lift off. (Fig.15A)
2. Lift the air filter (C) out of air-box (D)
(Fig.15B).
3. Clean air filter. Wash filter in clean, warm,
soapy water. Rinse in clear, cool water. Air
dry completely.
NOTE: It is advisable to have a supply of
spare filters.
4. Install air filter. Install engine / air filter
cover. Make sure latche (E) latch (F) and
cover fit properly. Tighten the cover
retaining knob securely. (Fig.15C &
Fig.15D)
1. Remove the fuel tank cap.
2. Bend a piece of soft wire to from a hook at
the end.
3. Reach into fuel tank opening and hook fuel
line. Carefully pull the fuel line toward the
opening until you can reach it with your
fingers.
NOTE: Do not pull hose completely out of
tank.
4. Lift filter (A) out of tank (Fig.16).
5. Pull filter off with a twisting motion. Discard
filter.
6. Install new filter. Insert end of filter into
tank opening. Make sure filter sits in
bottom corner of tank. Use a long
screwdriver to aid in filter placement if
necessary.
7. Fill tank with fresh fuel / oil mixture. See
Section FUEL AND LUBRICATION.
Install fuel cap.
1. Remove the 2 bolts (A) and pull muffler
out. (Fig. 17A).
2. Remove the 2 screws that holds the cover
(C). (Fig.17B)
3. Discard the used spark arrester screen (D)
andreplace it with a new one.
4. Reasemble the muffler components and
install the muffler to the cylinder. Tighten
securely.
WARNING: Never perform mainten-
ance when the engine is hot, to avoid any
chance of burning hands or fingers.
NOTE: A clogged spark arrester screen will
dramatically reduce engine performance.
WARNING: Never operate your saw
without a fuel filter. The fuel filter should be
replaced after each 20 hours of use. Drain
fuel tank completely before changing filter.
CAUTION: Never operate saw
without the air filter. Dust and dirt will be
drawn into engine and damage it. Keep the
air filter clean!
PREVENTIVE MAINTENANCE
AIR FILTER
TO CLEAN AIR FILTER:
Fig. 15A
A
Fig. 15B
C
D
B
Fig. 15C
E
Fig. 15D
F
F
B
FUEL FILTER
Fig. 16
A
SPARK ARRESTER SCREEN
HOURS OF
EACH
MAINTENANCE
CHECKLIST USE OPERATION
ITEM ACTION
Screws/Nuts/Bolts Inspect/Tighten
Air Filter Clean or Replace
Fuel Filter/Oil Filter Replace
Spark Plug Clean/Adjust/Replace
Spark Arrester Screen Inspect
Fuel Hoses Inspect
10 20
Replace as Required
Replace as Required
Chain brake Inspect
componentsReplace as Required

-- 12 --
NOTE: For efficient operation of saw engine,
spark plug must be kept clean and properly
gapped.
1. Push STOP switch down.
2. Remove knob (A) holding air filter cover in
place, remove the top cover (B) by
loosening the cover retaining screws.
Cover will lift off. (Fig.18A)
3. Disconnect the wire connector (C) from the
spark plug (D) by pulling and twisting at the
same time (Fig. 18B).
4. Remove spark plug with spark plug socket
wrench. DO NOT USE ANY OTHER
TOOL.
5. Check electtrode gaps with wire feeler
gauge and set gaps to .025” (.635mm) if
necessary.
6. Reinstall a new spark plug.
NOTE: A resistor spark plug must be used for
replacement.
NOTE: This spark ignition system meets all
requirements of the Interference-Causing
Equipment Regulations.
1. Remove spark plug.
2. Pull starter rope briskly to clear excess oil
from combustion chamber.
3. Clean and gap spark plug or install a new
spark plug with proper gap.
4. Prepare unit for operation.
5. Fill fuel tank with proper fuel / oil mixture.
See FUEL AND LUBRICATION Section.
Frequent lubrication of the guide bar (railed
bar which supports and carries the saw
chain) sprocket tip is required. Proper
maintenance of the guide bar, as explained in
this section, is essential to keep your saw in
good working condition.
Lubrication of the sprocket tip is
recommended after 10 hours of use or once
a week, which ever occurs first. Always
thoroughly clean guide bar sprocket tip
before lubrication.
The Lube Gun (optional) is recommended for
applying grease to the guide bar sprocket tip.
The Lube Gun is equipped with a needle
nose tip which is necessary for the efficient
application of grease to the sprocket tip.
Storing a chain saw for longer than 30 days
requires storage maintenance. Unless the
storage instructions are followed, fuel
remaining in the carburetor will evaporate,
leaving gum-like deposits. This could lead to
difficult starting and result in costly repairs.
1. Remove the fuel tank cap slowly to release
any pressure in tank. Carefully drain the
fuel tank.
2. Start the engine and let it run until the unit
stops to remove fuel from carburetor.
3. Allow the engine to cool (approx. 5
minutes).
4. Using a spark plug wrench, remove the
spark plug.
1. Press the STOP switch down.
NOTE: It is not necessary to remove the saw
chain to lubricate the guide bar sprocket tip.
Lubrication can be done on the job.
2. Clean the guide bar sprocket tip.
3. Using the Lube Gun (optional), insert
needle nose into the lubrication hole and
inject grease until it appears at outside
edge of sprocket tip (Fig. 20).
CAUTION: Never store a chain saw
for longer than 30 days without performing
the following procedures.
The carburetor was preset at the factory for
optimum performance. If further adjustments
are necessary, please take your unit to the
nearest qualified service technician.
WARNING: Wear heavy duty work
gloves when handling the bar and chain.
CAUTION: The sprocket tip on your
new saw has been pre-lubricated at the
factory. Failure to lubricate the guide bar
sprocket tip as explained below will result in
poor performance and seizure, voiding the
manufacturer’s warranty.
Fig. 17A
A
Fig. 17B
BC
B
B
D
SPARK PLUG
Fig. 18A
A
Fig. 18B
C
D
B
CARBURETOR ADJUSTMENT
STORING A CHAIN SAW
5. Pour 1 teaspoon of clean 2-cycle oil into
the combustion chamber. Pull starter rope
slowly several times to coat internal
components. Replace spark plug. (Fig. 19)
NOTE: Store the unit in a dry place and away
from possible sources of ignition such as a
furnace, gas hot water heater, gas dryer, etc.
Fig. 19
REMOVING A UNIT FROM STORAGE
GUIDE BAR MAINTENANCE
SPROCKET TIP LUBRICATION:
TOOLS FOR LUBRICATION:
TO LUBRICATE SPROCKET TIP:

-- 13 --
WARNING: Always wear protective
gloves during maintenance operations. Do
not carry out maintenance when the engine is
hot.
WARNING: After 3 to 4 of your
sharpening of the cutting teeth, have the saw
chain sharpened in any authorised service.
They will sharpen the depth limiter as well,
which provides the distance.
CHAIN SHARPENING - The pitch of the
chain (Fig. 21) is 3/8” LoPro x .050”.
Sharpen the chain using protective gloves
and a round file of ø5/32” (4mm).
Always sharpen the cutters only with outward
strokes (Fig. 22) observing the values given
in Fig. 21.
After sharpening, the cutting links must all
have the same width and length.
WARNING: A sharp chain produces
welldefined chips. When your chain starts to
produce sawdust, it is time to sharpen.
After every 3-4 times the cutters have been
sharpened you need to check the height of
the depth gauges and, if necessary, lower
them using the flat file and template supplied
optional, then round off the front corner.
(Fig. 23)
WARNING: Proper adjustment of the
depth gauge is as important as proper
sharpening of the chain.
WARNING: Never mount a new
chain on a worn sprocket or self-aligning ring.
WARNING: When having wrong
sharpened chain, there may occur a higher
danger of kickback.
WARNING: All cutting teeth must be
similarly long. Different length of the teeth
can cause rough run of the chain or its
rupture, as well.
4. Rotate saw chain by hand. Repeat
lubrication procedure until the entire
sprocket tip has been greased.
1. To sharpen the saw chain, use the suitable
sharpen-ing tools:
- Round chain file ø5/32”(4mm).
- File leading
- Chain measuring calibre.
These tools can be bought in any
specialsed stores.
2. To gain well shaped sawdust particles, use
sharp chain. If there appears wooden
powder, you must sharpen the saw chain.
GUIDE BAR- The bar should be reversed
every 8 working hours to ensure uniform
wear.
Keep the bar groove and lubrication hole
clean using a bar groove cleaner (optional).
(Fig. 24)
Check the bar rails frequently for wear and, if
necessary, remove the burs and square-up
the rails using a flat file. (Fig.25)
3. Minimum length of the teeth must be 4mm.
If they are shorter, remove the saw chain.
4. Angles, which the teeth are under, must be
followed.
5. To sharpen the chain basically, make 2 to
3 pulls of the file from the inside out.
Most guide bar problems can be
prevented merely by keeping the chain
saw well maintained.
Insufficient guide bar lubrication and
operating the saw with chain that is TOO
TIGHT will contribute to rapid bar wear.
To help minimize bar wear, the following
guide bar maintenance procedures are
recommended.
Chain sharpening requires special tools to
ensure that cutters are sharpened at the
correct angle and depth. For the
inexperienced chain saw user, we
recommend that the saw chain be
professionally sharpened by the nearest
professional Service Center. If you feel
comfortable sharpening your own saw chain,
special tools are available from the
professional Service Center. For
non-experienced users of the chain saw, we
recommend to have the chain sharpened by
a specialist in any authorised service.
Fig. 20
GUIDE BAR MAINTENANCE:
CHAIN SHARPENING:
Fig. 21
Fig. 22 Fig. 23
Fig. 24 Fig. 25

-- 14 --
WARNING: Always stop unitanddisconnect spark plugbefore performingall of the
recommended remediesbelow except remediesthat require operation of theunit.
TROUBLESHOOTING TABLE
CHAIN MAINTENANCE
BREAKING IN A NEW SAW CHAIN:
CHAIN LUBRICATION:
BAR WEAR - Turn guide bar frequently at
regular intervals (for example, after 5
hours of use), to ensure even wear on top
and bottom of bar.
OIL PASSAGES - Oil passages on the bar
should be cleaned to ensure proper
lubrication of the bar and chain during
operation.
NOTE: The condition of the oil passages
can be easily checked. If the passages are
clear, the chain will automatically give off a
spray of oil within seconds of starting the
saw. Your saw is equipped with an
automatic oiler system.
CHAIN TENSION:
Check the chain tension frequently and
adjust as often as necessary to keep the
chain snug on the bar, but loose enough to
be pulled around by hand.
A new chain and bar will need chain
readjustment after as few as 5 cuts. This is
normal during the break-in period, and the
interval between future adjustments will
begin to lengthen quickly.
WARNING:Never have more than 3
links removed from a loop of chain. This
could cause damage to the sprocket.
Always make sure the automatic oiler
system is working properly. Keep the oil
tank filled with Chain, Bar and Sprocket Oil.
Adequate lubrication of the bar and chain
during cutting operations is essential to
minimize friction with the guide bar.
Never starve the bar and chain of lubricating
oil. Running the saw dry or with too little oil
will decrease cutting efficiency, shorten saw
chain life, cause rapid dulling of chain, and
lead to excessive wear of bar from
overheating. Too little oil is evidenced by
smoke or bar discoloration.
PROBLEM
Unit won’t start or starts
but will not run.
Unit starts, but engine
has low power.
Engine hesitates.
No power under load.
Runs erratically.
Smokes excessively.
PROBABLE CAUSE
Incorrect starting procedures.
Incorrect carburetor mixture
adjustment setting.
Incorrect carburetor mixture
adjustment setting.
Incorrect carburetor mixture
adjustment setting.
Incorrect carburetor mixture
adjustment setting.
Fouled spark plug
Fuel filter plugged.
Dirty spark arrester screen.
Dirty air filter.
Incorrectly gapped spark plug.
Incorrect fuel mixture.
CORRECTIVE ACTION
Follow instructions in the User Manual.
Have carburetor adjusted by an Authorized
Service Center.
Have carburetor adjusted by an Authorized
Service Center.
Have carburetor adjusted by an Authorized
Service Center.
Have carburetor adjusted by an Authorized
Service Center.
Clean / gap or replace plug.
Replace fuel filter.
Replace spark arrester screen.
Remove, clean and reinstall filter.
Clean / gap or replace plug.
Use properly mixed fuel (40:1 mixture).

-- 15 --
DECLARATION OF CONFORMITY
EC Declaration of Conformity
(Applies to Europe only)
Aktiebolaget Partner, SE-433 81, Göteborg, Sweden, tel: +46-36-146500, declares
under sole responsibility that the chain saws for forest service Gardol GMSH 40+
from 2016’s serial numbers and onwards (the year is clearly stated in plain text on
the type plate with subsequent serial number), are in conformity with the
requirements of the COUNCIL’S DIRECTIVES:
- of May 17, 2006 ”relating to machinery” 2006/42/EC.
- of February 26, 2014 ”relating to electromagnetic compatibility” 2014/30/EU.
- of December 14, 2005 "relating to the noise emissions in the environment"
2005/88/EC
- of May 8, 2000 ”relating to the noise emissions in the environment” 2000/14/EC.
Conformity assessment procedure according to Annex V of the above directive has
been used.
For information relating to noise emissions, see the Technical data chapter. The
following standards have been applied:
EN ISO 11681-1:2011, EN ISO 14982:2009, ISO 12100:2010, CISPR 12:2013
Notified body: TÜV Rheinland LGA Products GmbH, Tillystrasse 2, D-90431
Nuernberg, Germany, 0197, has carried out EC type examination in accordance
with the machinery directive’s (2006/42/EC) article 12, point 3b. The certificate for
EC type examination in accordance with annex IX, has the number: The certificates
for EC type examination in accordance with annex IX, have the numbers: BM
50351057
The supplied chain saw conforms to the example that underwent EC type
examination.
Changzhou, China. Aug 29 2016
John Thompson, Product and Marketing director EUAP.
(Authorized representative for Aktiebolaget Partner and responsible for technical
documentation.)

-- 16 --
Model No. . . . . . . . . . . . . . . . . . . . . . . . . . . . . . . . . . . . . . . . . . . . . . . . . . . . GMSH 40+
Rated Net Power . . . . . . . . . . . . . . . . . . . . . . . . . . . . . . . . . . . . . . . . . . . . . . . . . . . . . . 1.52 kW
The Usable Cutting Lengths . . . . . . . . . . . . . . . . . . . . . . . . . . . . . . . . . . . . . . . . . . . . . . 38cm
Bar Cutting Length . . . . . . . . . . . . . . . . . . . . . . . . . . . . . . . . . . . . . . . . . . . . . . . . . . . . . 40cm
Chain Pitch . . . . . . . . . . . . . . . . . . . . . . . . . . . . . . . . . . . . . . . . . . . . . . . . . . . . . . . . . . 9,53mm (3/8”)
Chain Gauge . . . . . . . . . . . . . . . . . . . . . . . . . . . . . . . . . . . . . . . . . . . . . . . . . . . . . . . . . . 1.3 mm (0.05”)
Idle Speed Range . . . . . . . . . . . . . . . . . . . . . . . . . . . . . . . . . . . . . . . . . . . . . . . . . . . . . 2700-3300 min-1
Fuel Capacity . . . . . . . . . . . . . . . . . . . . . . . . . . . . . . . . . . . . . . . . . . . . . . . . . . . . . . . . . 250 cm3
Oil Capacity . . . . . . . . . . . . . . . . . . . . . . . . . . . . . . . . . . . . . . . . . . . . . . . . . . . . . . . . . . 150 cm3
Anti Vibration . . . . . . . . . . . . . . . . . . . . . . . . . . . . . . . . . . . . . . . . . . . . . . . . . . . . . . . . . Yes
Drive Sprocket . . . . . . . . . . . . . . . . . . . . . . . . . . . . . . . . . . . . . . . . . . . . . . . . . . . . . . . . 6 Teeth
Easy Start . . . . . . . . . . . . . . . . . . . . . . . . . . . . . . . . . . . . . . . . . . . . . . . . . . . . . . . . . . . . Yes
Auto Choke . . . . . . . . . . . . . . . . . . . . . . . . . . . . . . . . . . . . . . . . . . . . . . . . . . . . . . . . . . . Yes
Chain Brake . . . . . . . . . . . . . . . . . . . . . . . . . . . . . . . . . . . . . . . . . . . . . . . . . . . . . . . . . . Yes
Clutch . . . . . . . . . . . . . . . . . . . . . . . . . . . . . . . . . . . . . . . . . . . . . . . . . . . . . . . . . . . . . . Yes
Automatic Chain Oiler . . . . . . . . . . . . . . . . . . . . . . . . . . . . . . . . . . . . . . . . . . . . . . . . . . Yes
Low Kick-back Chain Type (Oregon) . . . . . . . . . . . . . . . . . . . . . . . . . . . . . . . . . . . . . . 91PJ056X
Type of Guide Bar (Oregon) . . . . . . . . . . . . . . . . . . . . . . . . . . . . . . . . . . . . . . 582684
Net Weight (Without guide bar and chain) . . . . . . . . . . . . . . . . . . . . . . . . . . . . . . . . . . 4.8 Kg
Braking Time (Max.) . . . . . . . . . . . . . . . . . . . . . . . . . . . . . . . . . . . . . . . . . . . . . . . . . . . 0.12 s
Equivalent vibration(front/rear handles) (K=1.5). . . . . . . . . . . . . . . . . . . . . . . . . . . . . . . .6.673/5.792 m/s2
Fuel Consumption . . . . . . . . . . . . . . . . . . . . . . . . . . . . . . . . . . . . . . . . . . . . . . . . . . . . . 530.15 g/kWh
Engine Displacement . . . . . . . . . . . . . . . . . . . . . . . . . . . . . . . . . . . . . . . . . . . . . . . . . . . 40 cm3 (2.4 cu-in)
Chain speed at 133% of maximum engine power speed, m/s . . . . . . . . . . . . . . . . . . . . . 22.8 m/s
Sound levels (see note 1)
Equvialent sound pressure level at the operators ear . . . . . . . . . . . . . . . . . . . . . . . . . . . 99 dB
Noise emissions (see note 2)
Measured sound power level . . . . . . . . . . . . . . . . . . . . . . . . . . . . . . . . . . . . . . . . . . . . . .105 dB(A)
Guaranteed sound power level . . . . . . . . . . . . . . . . . . . . . . . . . . . . . . . . . . . . . . . . . . . . 108 dB(A)
Note 1: Equivalent sound pressure level, according to ISO 22868, is calculated as the time-weighted energy
total for different sound pressure levels under various working conditions. Typical statistical dispersion for
equivalent sound pressure level is a standard deviation of 1.5 dB (A).
Note 2: Noise emissions in the environment measured as sound power (Lwa) in conformity with EC
directive 2000/14/EC.
TECHNICAL DATA SHEET

IDENTIFIKÁCIA SYMBOLOV
-- 17 --
1. Pílová reťaz
2. Vodiaca lišta
3. Mriežka lapača iskier
4. Páčka brzdy reťaze/Kryt
rukoväte
5. Predná rukoväť
6. Rukoväť štartéra
7. Vypínač zapnuté/vypnuté
8. Škrtiaca klapka spúšť
blokovanie
9. Zadná rukoväť/Spúšťací
krúžok
10. Uzáver olejovej nádrže
11. Uzáver palivovej nádrže
12. Kryt štartéra
13. Ozubená opierka
14. Napínací krúžok pílovej reťaze
15. Štít tlmiča výfuku
16. Zapaľovacia sviečka
17. Kryt čističa vzduchu
18. Páčka sýtiča pre
automatický sýtič
19. Palivová pumpička
20. Škrtiaca klapka spúšť
21. Ovládacie tlačidlo krytu
pílovej reťaze
22. Kryt rezacej lišty
23. Kryt vodiace lišty
BEZPEČNOSTNÉ VLASTNOSTI
Čísla pred popisným textom sa zhodujú s vyššie uvedenými číslami a pomáhajú vám
lokalizovať bezpečnostné vlastnosti.
1PÍLOVÁ REŤAZ SMALÝM SPÄTNÝM
NÁRAZOM podstatne znižuje spätné
nárazy alebo intenzitu spätného nárazu
svojimi špeciálne navrhnutými obmed-
zovacími päťkami a spojkami krytu.
3MRIEŽKA LAPAČA ISKIER zachytáva
uhlíky a iné horľavé čiastočky z výfuku
motora s veľkosťou viac ako 0,023
palca (0,6 mm). Používateľ zodpovedá
za súlad so štátnymi a federálnymi
zákonmi alebo predpismi, ktoré určujú
používanie mriežky lapača iskier.
Ďalšie informácie si pozrite v časti
Bezpečnostné opatrenia.
4PÁČKA BRZDY REŤAZE/KRYT
RUKOVÄTE chráni ľavú ruku pilčíka v
prípade jej zošmyknutia z prednej
rukoväte, keď je píla v chode.
4BRZDA PÍLOVEJ REŤAZE je
bezpečnostné zariadenie, ktoré znižuje
možnosť zranenia pri spätnom náraze,
keď sa pílová reťaz zastaví a niekoľko
milisekúnd. Túto brzdu aktivuje
BRZDOVÁ PÁČKA.
7ZASTAVOVACÍ SPÍNAČ umožňuje
okamžité zastavenie motora pri
zaseknutí. Pri štarte alebo reštarte
motora musí byť tento zastavovací
spínač v polohe Zapnuté.
8
22 KRYT REZACEJ LIŠTY znižuje riziko
zraneniav prípadepretrhnutia pílovej
reťazealebojej zošmyknutia z rezacej
lišty počasprevádzky. Kryt rezacej
lišty je navrhnutý tak, aby zabránil
šľahaniu reťazou.
IDENTIFIKÁCIA (ČO JE ČO?)
13
1
7
56
11
2
17
20 22
21
14
23
16
18
3
4
10
12
15
19
9
8
ŠKRTIACA KLAPKA SPÚŠŤ
BLOKOVANIE zabraňuje náhodnej
akcelerácii motora. Spúšť škrtiacej
klapky (20)niejemožné stlačiť,kým ie
jezatlačená bezpečnostná západka.
Pred prvým použitím zariadenia je
nevyhnutné si dôkladne prečítať a
porozumieť pokynom uvedeným v
Návode na obsluhu.
Na ochranu rúk používajte
rukavice.
Palivová pumpička
Používajte vhodnú bezpečnostnú
obuv.

-- 18 -
BEZPEČNOSTNÉ PREDPISY
VÝSTRAHA: Táto motorová píla je
určená len na používanie jednou osobou a
pre prácu v lese. Táto motorová píla je
konštruovaná tak, aby sa pravou rukou
držala za zadnú rukoväť aľavou rukou za
prednú rukoväť. Pilčík si musí prečítať a
porozumieť bezpečnostným požiadavkám,
ktoré sú uvedené vpríručke pre
používateľa apri obsluhovaní tejto
motorovej píly musí používať vhodné
osobné ochranné pomôcky. Táto motorová
píla sa nesmie používať na rezanie
materiálov ako guma, kameň, kovy alebo
výrobky z dreva, v ktorých sa nachádzajú
cudzie predmety.
VÝSTRAHA: Pripoužívaníbenzíno-
VÝSTRAHA: Tento nástrojgeneruje
počas prevádzky elektromagnetické pole.
Toto elektromagnetické pole môže v
niektorých prípadoch rušiť aktívne alebo
pasívne zdravotnícke implantáty. Na
zníženie rizika vážneho alebo smrteľného
zranenia odporúčame osobám, ktoré
používajú zdravotnícke implantáty, aby sa
pred používaním tohto zariadenia poradili
so svojim lekárom a výrobcom
zdravotníckeho implantátu.
•
Ručnú motorovú pílu NEOBSLUHUJTE
jednou rukou! Pri obsluhe jednou rukou
môže dôjsť kvážnemu zraneniu pilčíka,
pomocníkov, okolostojacich alebo
akejkoľvek kombinácie týchto osôb. Túto
motorovúpílu obsluhujte vždy oboma rukami.
•
Ručnú motorovú pílu NEOBSLUHUJTE,
keď ste unavení, pod vplyvom drog,
alkoholu alebo liekov.
•
Pri práci používajte bezpečnostnú obuv,
pohodlný apriliehavý odev, prvky na
ochranu očí, sluchu a hlavy.
•
Spalivom manipulujte opatrne. Z
dôvodu ochrany pred požiarom presuňte
motorovú pílu pred štartovaním motora
minimálne 10 stôp (3 m) od miesta
nalievania paliva.
•
Pri štartovaní alebo pílení ručnou motorovou
pílou sa NESMÚ v blízkosti zdržiavať žiadne
osoby. Zaistite, aby sa na miestevýkonu
prác nezdržovali žiadne osoby ani zvieratá.
•
Pílenie NEZAČÍNAJTE, kým nemáte čisté
pracovisko, obutú bezpečnostnú obuv a
určenú ústupovú trasu od padajúceho
stromu.
•
Keď je motor v chode, k pílovej reťazi sa
nepribližujte žiadnou časťou tela.
•
Pred naštartovaním motora píly sa uistite,
že pílová reťaz sa nedotýka žiadnych
predmetov.
•
Ručnú motorovú pílu prenášajte so
zastaveným motorom, rezacia lišta a pílová
reťaz musia byť vzadu a tlmič výfuku musí
byť ďalej od vášho tela.
•
Ručnú motorovú pílu NEPOUŽÍVAJTE, keď
je poškodená, nesprávne nastavená alebo
ak nie je bezpečne aúplne zmontovaná.
Pri uvoľnení spúšte škrtiacej klapky sa pílová
reťaz musí úplne zastaviť.
•
Pred sklopením ručnej motorovej píly
smerom nadol vypnite motor.
•
Pri pílení malých kríkov a stromčekov
dávajte veľký pozor, pretože do pílovej
reťaze sa môžu zachytiť malé kúsky dreva a
vymrštiť smerom k vám alebo narušiť vašu
rovnováhu.
•
Pripílenínapnutých konárov vezmite do úvahy
riziko spätného nárazu pri uvoľnení pnutia.
Takýto nečakaný pohyb vás môže ohroziť.
•
Rukoväte musia byť suché, čisté a
neznečistené olejom alebo zmesou paliva.
•
Ručnú motorovú pílu používajte len na
dobre vetraných miestach.
VÝSTRAHA:
Nebezpečenstvo
vého motorového náradia je nevyhnutné
dodržiavať bezpečnostné pokyny, vrátane
nasledujúcich, ktoré znížia riziko vážnych
poranení osôb a/alebo poškodenia nástrojov.
Pred použitím tohto produktu si prečítajte všetky
tieto bezpečnostné pokyny a uschovajte ich pre
prípadnú potrebuv budúcnosti.
Pri používaní tohto stroja je
nevyhnutné používať ochranné
okuliare, ktoré ochránia oči pred
odletujúcimi predmetmi. Zároveň je
nevyhnutné používať chrániče slu-
chu pre ochranu sluchu obsluhu-
júceho pracovníka. Ak obsluha
pracuje na mieste so zvýšeným
rizikom padajúcich predmetov, je
nevyhnutné používať ochrannú
prilbu.
Brzda pílovej reťaze musí byť
uvoľnená! Odtiahnite kryt
rukoväte/brzdovú páčku reťaze.
Tento výrobok spĺňa platné
smernice EÚ.
Garantovaná úroveň akustického
výkonu LWA podľa smernice
2000/14/ES a 2005/88/ES
Vždy používajte obe ruky, keď
pracujete s pílou.
POZOR! Kontakt konca lišty s
hocijakýmobjektommôže
spôsobiť nebezpečenstvospä-
tnéhovrhu. Spätný vrhpred-
stavuje najvážnejšiu rizikovú
situáciu pri práci s reťazovou
motorovou pílou.
108

-- 19 -
SPÄTNÝ NÁRAZ môže vzniknúť vtedy, keď
sa ČELO alebo ŠPIČKA rezacej lišty dotýka
predmetov alebo keď sa počas pílenia
drevo zatvorí a zablokuje pílovú reťaz.
Vniektorých prípadoch môže dotyk špičky
vytvoriť okamžitú spätnú reakciu, odraziť
rezaciu lištu nahor aspäť smerom k
pilčíkovi.
STLAČENIE pílovej reťaze pozdĺž
SPODNEJ ČASTI rezacej lišty môže pílu
ODRAZIŤ vpred, smerom od pilčíka.
STLAČENIE pílovej reťaze pozdĺž
HORNEJ ČASTI rezacej lišty môže túto
rezaciu lištu náhle ODHODIŤ smerom k
pilčíkovi. Ktorékoľvek ztýchto reakcií môžu
spôsobiť, že nad pílou stratíte kontrolu a
môže tým dôjsť k vážnemu zraneniu osôb.
BEZPEČNOSTNÉ OPATRENIA PRI SPÄTNOM NÁRAZE
1.
Ak máte základné znalosti o spätnom
náraze, môžete znížiť alebo eliminovať
moment prekvapenia. Náhle
prekvapenie prispieva k úrazom.
2
.
Keď je motor vchode, pílu pevne držte
obidvoma rukami, pravou za zadnú
rukoväť aľavou za prednú rukoväť.
Rukoväte ručnej motorovej píly pevne
obopínajte palcom a prstami ruky.
Pevným uchopením sa zníži spätný
náraz a udržíte si kontrolu nad pílou.
Pílu nepustite.
3
.
Uistite sa, že vmieste, kde pílite, nie sú
žiadne prekážky. Zabráňte, aby sa čelo
rezacej lišty dotýkalo kmeňa akonárov
stromu alebo akéhokoľvek iného
predmetu, ktorého by sa počas pílenia
čelo mohlo dotknúť.
4
.
Píľte s vysokými otáčkami motora.
5
.
Pri pílení sa nepokúšajte píliť na hranici
vášho dosahu anepíľte vo výške nad
plecami.
6
.
Pri ostrení aúdržbe pílovej reťaze
postupujte podľa návodu od výrobcu.
7
.
Používajte len náhradné lišty areťaze,
ktoré určuje výrobca, aleborovnakédiely.
POZNÁMKA:Pílová reťaz so slabým spätným
nárazom je taká reťaz, ktorá vyhovuje sile
spätného nárazu.
•Ručnú motorovú pílu NEPOUŽÍVAJTE na
strome, pokiaľ nie ste na takúto prácu
špeciálne zaškolený.
•Akýkoľvek servisný zásah, okrem položiek,
ktoré sú uvedené včasti Údržba v
Používateľskej príručke, môže vykonať
výhradne kvalifikovaný servisný personál.
•Pri prenášaní ručnej motorovej píly musí byť
na rezacej lište založené ochranné puzdro.
•Utiahnite uzáver olejovej a palivovej nádrže,
aby ste počas prepravy zabránili unikaniu
oleja a paliva.
•S ručnou motorovou pílou NEPRACUJTE v
blízkosti horľavých tekutín alebo plynov bez
ohľadu na to, či ste vo vnútri alebo vonku.
Dôsledkom môže byť buď výbuch, alebo
požiar.
•Keď je motor v chode, nedolievajte do
nádrží palivo ani olej alebo iné mazadlo.
•POUŽÍVAJTE SPRÁVNE NÁRADIE: Píľte
len drevo. Ručnú motorovú pílu
nepoužívajte na iné než určené použitie.
Napríklad, ručnú motorovú pílu nepoužívajte
na pílenie plastu, muriva alebo stavebných
materiálov.
•Je nevyhnutné, aby bol používateľ pred
prvým použitím zaškolený vsúlade s
pokynmi pre prácu sreťazovou pílou (koza
na pílenie) aochranné osobné postriedky,
uvedenými na strane 10, skúseným
operátorom.
•Ručnú motorovú pílu sa nepokúšajte držať v
jednej ruke. Reakčné sily nemôžete ovládať
a môžete stratiť kontrolu nad pílou,
následkom čoho môže rezacia lišta a reťaz
„kĺzať“ a skákať po konári alebo polene.
•Ručnú motorovú pílu nikdy nepoužívajte v
uzavretej miestnosti. Ručná motorová píla
produkuje bezfarebné alebo len
nezapáchajúce jedovaté výfukové plyny
hneď po naštartovaní spaľovacieho motora.
Pri používaní píly sa vytvára prach, hmla a
dymy s obsahom chemikálií, ktoré sú
škodlivé pre reprodukčné orgány. Vezmite
na vedomie škodlivosť prachu, hmly (ako sú
piliny alebo olejová hmla vznikajúca pri
mazaní pílovej reťaze) a preto sa chráňte
vhodnými ochrannými pomôckami.
•Používajterukavice, aby stemali ruky v teple.
Pri dlhšompoužívaní ručných motorových
píl je pilčík vystavený vibráciám, ktoré môžu
viesť k syndrómu „mŕtveho prsta“. Aby sa
znížilo riziko syndrómu mŕtveho prsta,
používajte rukavice a ruky majtev teple.
Ak savyskytne syndróm mŕtveho prsta,
okamžite vyhľadajte lekársku pomoc.
•Počas prenášania alebo skladovania
reťazovej píly musí byť na lište založené
ochranné puzdro.
•Zarazte ozubenúopierkumotorovej píly do
kmeňa v mieste zárezu a otáčajte pílu okolo
osi opierky. Ozubená opierka sa opiera o
kmeň stromu.
•Na reťazovej píle sú len tri prvky, ktorých
údržbuavýmenumôževykonávaťpoužívateľ
– reťaz, lišta a sviečka zapaľovania. Pri
výmene týchtodielovpoužívajtelen rovnaké
typy, ktoré sú uvedené v technických
požiadavkách používateľskej príručky.
(Používa sa zapaľovacia sviečka NGK
CMR7H).
Ak sú nefunkčné iné diely okrem tých, ktoré
sú vyššie uvedené, vykonanie servisu
ručnej motorovej píly zverte autorizovanému
servisnému stredisku.
POZNÁMKA: Tento dodatok je v prvom rade
určený pre zákazníka alebo príležitostného
používateľa. Tieto modely sú určené pre
občasné používanie majiteľmi domov, chát a
rekreantov a pre také bežné používanie, ako
napríklad odstraňovanie, pílenie,
prerezávanie palivového dreva a podobne.
Nie sú určené na dlhodobejšie používanie. Ak
určené používanie trvá dlhšiu dobu, vibrácie
môžu pilčíkovi spôsobiť poruchy krvného
obehu v rukách.
Table of contents
Languages:
Other Gardol Chainsaw manuals

Gardol
Gardol GMSH 50 User manual

Gardol
Gardol GMSE 1535 User manual

Gardol
Gardol GMSE 1335 User manual

Gardol
Gardol GMS-E-40EV User manual

Gardol
Gardol GEK-E 2240 User manual

Gardol
Gardol GEK-E 2240 L User manual

Gardol
Gardol GEK-E 2240 User manual

Gardol
Gardol GAK-E 20 Li OA User manual

Gardol
Gardol GMSE 2045 User manual

Gardol
Gardol GMSE 2245 User manual