USB Device Compatibility
You can use a USB flash drive or the USB cable included with your media player to connect a media player or
mobile device to the USB port.
The stereo is compatible with iAP2 Apple devices such as the iPhone® Xs Max, iPhone Xs, iPhone XR, iPhone
X, iPhone 8 Plus, iPhone 8, iPhone 7 Plus, iPhone 7, iPhone SE, iPhone 6s Plus, iPhone 6s, iPhone 6 Plus,
iPhone 6, iPhone 5s, and iPod touch® (6th generation).
The stereo is compatible with Android devices that support MTP mode.
The stereo is compatible with media players and other USB mass storage devices, including USB flash drives.
Music on USB drives must meet these conditions:
• The music files must be formatted as MP3, AAC (.m4a), or FLAC, files.
• If you connect a portable hard drive, you must connect it to an external power source. The USB port on this
stereo cannot provide power for a portable hard drive.
• The USB mass storage device must be formatted using one of the following systems:
◦ Microsoft®: NTFS, VFAT, FAT1, MSDOS
◦ Apple: HFS, HFSPLUS
◦ Linux: EXT2, EXT3, EX4
Connecting a USB Device
You can connect a USB device to the USB port on the stereo.
You cannot connect a USB device to the remote control. You must connect a USB device to the stereo you are
controlling with the remote control.
1Locate the USB port on the back of the stereo.
2Connect the USB device to the USB port.
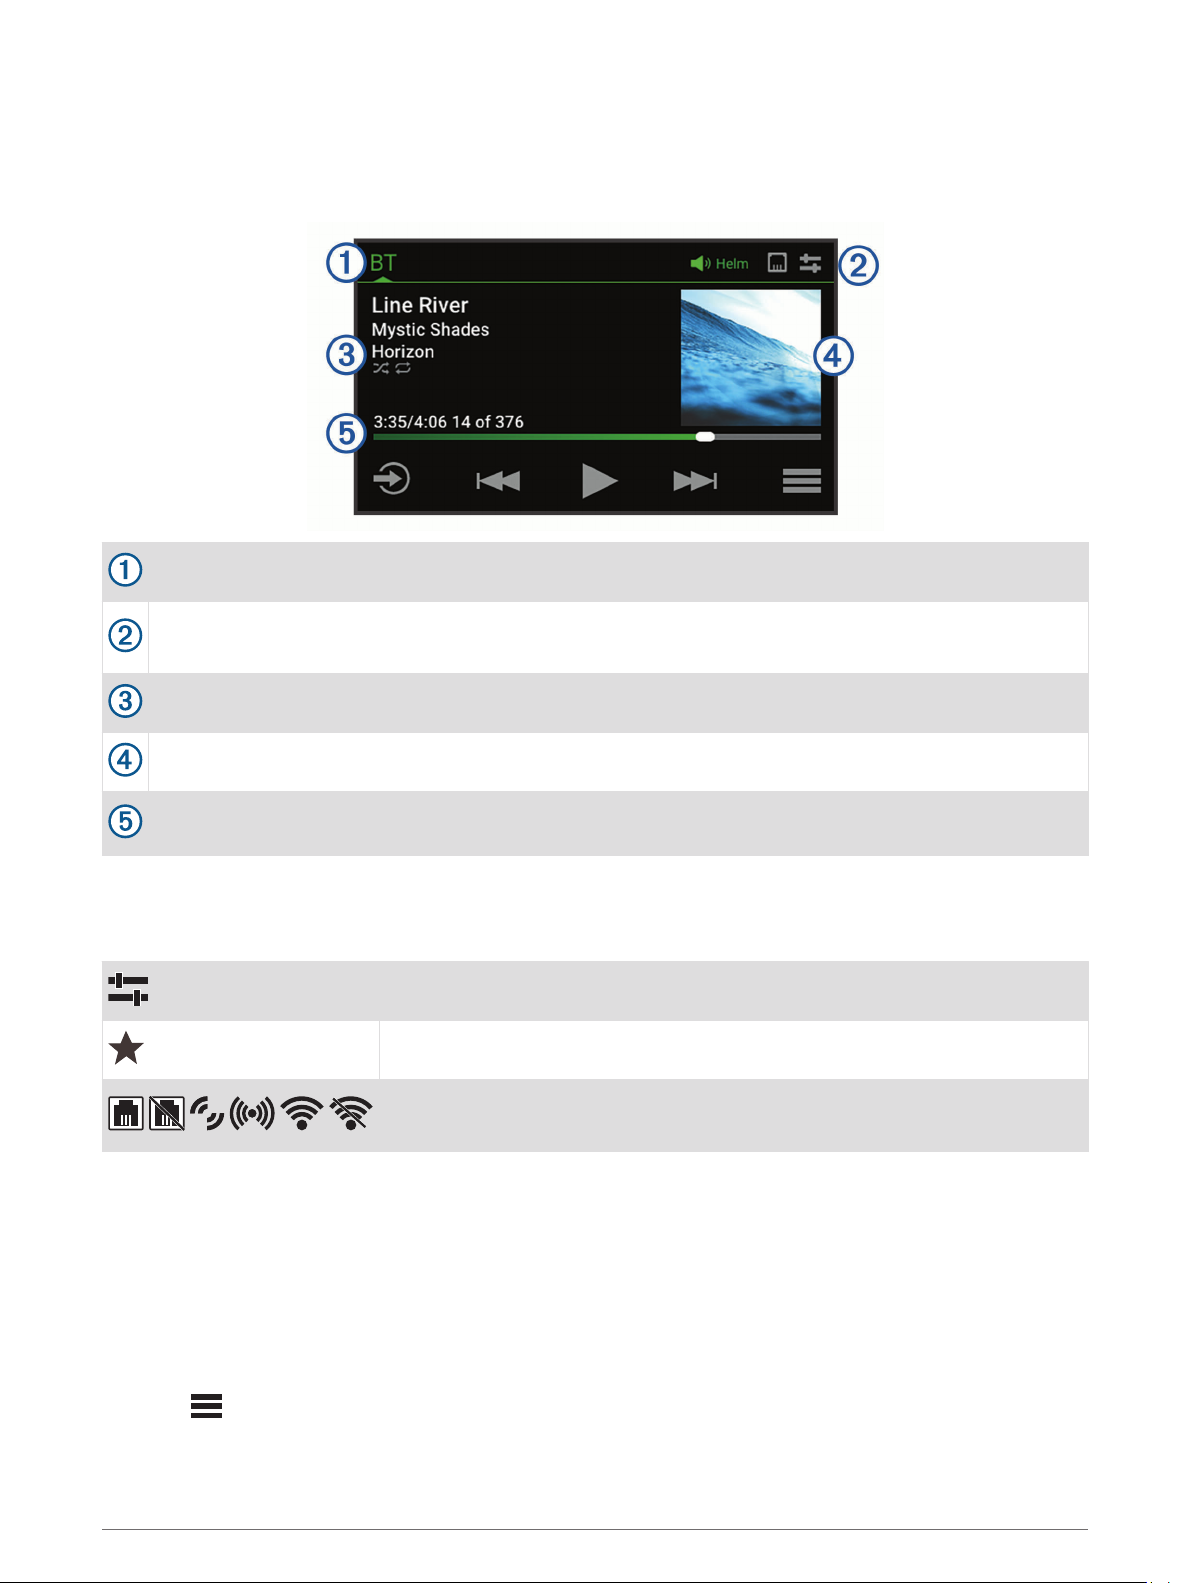
Controlling Music Playback on a USB Flash Drive or Media Player
1Connect a compatible USB flash drive or media player to the stereo.
2Select the USB source.
3Select > USB.
4Select the name of the USB device.
5Browse the music files on the device and begin playback.
You can use the stereo controls to select, play, pause, and skip tracks.
TIP: If the USB media player has a screen and controls, you can use the controls on the USB media player to
control playback.
Controlling Music Playback on a Connected Android Device
You can connect an Android device to the stereo using a USB cable to play media files stored on the Android
device. To play media from an app on the Android device, you should connect the device using Bluetooth
technology instead (Bluetooth Device Playback, page 8).
1Connect a compatible Android device to the stereo using an appropriate USB cable.
2If necessary, enable USB file transfer or MTP on your Android device.
See the documentation available for your Android device for more information.
3Select the MTP source on the stereo.
4Select > MTP.
5Browse the music files on the Android device and begin playback.
You can use the stereo controls to select, play, pause, and skip tracks.
1 FAT includes most types of FAT file systems except exFAT.
10 USB Device Playback