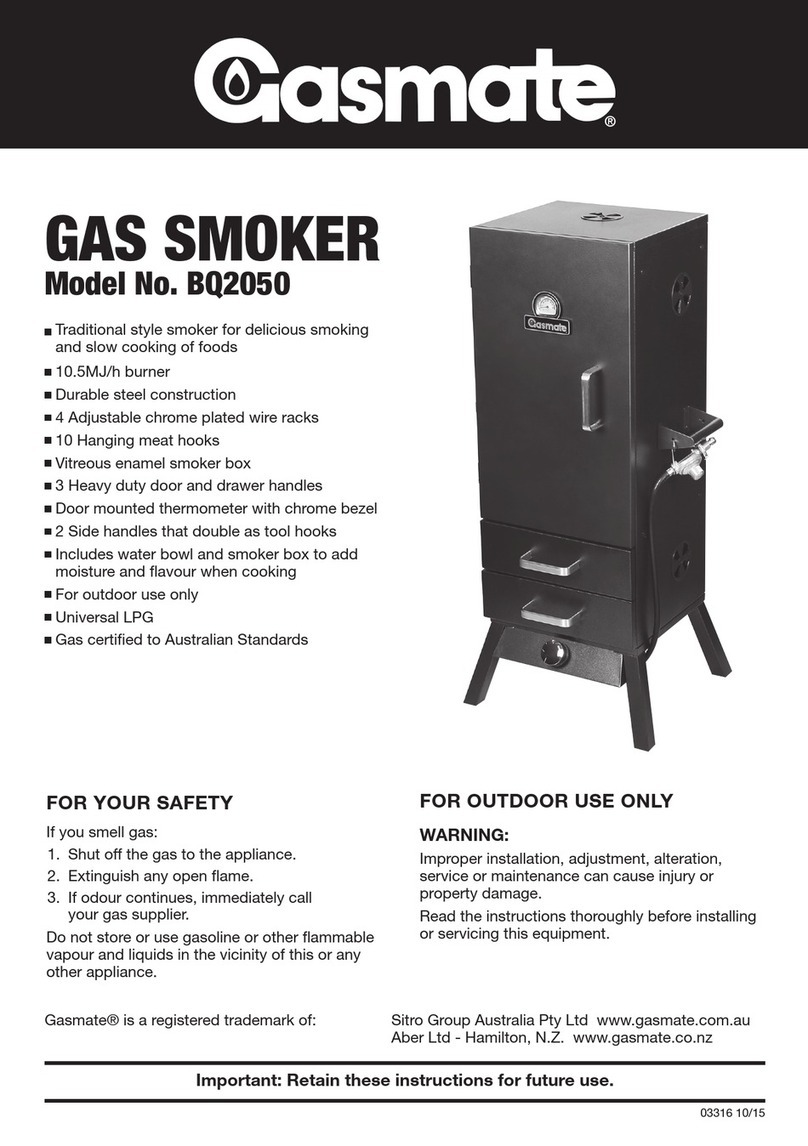
Gasmate GM160-018 User manual

Vertical Gas Smoker
Retain these instructions for future use.
Important: The installer or seller must leave these instructions with the consumer.
4768-07/17
Model No. GM160-018
FOR OUTDOOR USE ONLY - OPERATES ON LPG

2
3
GENERAL INFORMATION
Gas Installation Codes
• Smokers must be used in accordance with AS/NZS
Standard 5601 “Gas Installations”.
• Smokers for use with bottled gas are labelled LPG/ULPG.
• Smokers for use with natural gas are labelled ‘natural
gas’ and must be installed by an authorised person.
Check the gas type sticker attached to the smoker.
Clearances
Minimum Clearances from combustible materials must be:
Rear - 600mm Sides - 600mm Above 900mm
Hose & Regulator Safety
The regulator and hose assembly supplied with the smoker
are suitable for LPG only.
A gas regulator adjusted to have an outlet pressure of
2.75kPA is supplied for connection to the LPG cylinder.
The pressure regulator and hose assembly supplied with
the smoker must be used. Replacement pressure regulators
and hose assemblies must be those specied by the
smoker manufacturer.
When connecting the hose and regulator assembly to the
gas cylinder, take care to avoid unnecessary twisting or
kinking of the exible hose.
The smoker should be installed with the hose regulator
assembly extended to the full length of hose directly away
from the burner (61cm minimum). When so configured,
placement results in maximum cylinder to smoker
distance. Placing cylinder closer than 61cm to the smoker
can overheat the cylinder and cause release of LPG
through relief openings and can result in cylinder fire or
explosion.
After the assembly has been secured, turn on the gas and
check for leaks by brushing a soap and water solution over
all connections.
If you are unable to correct the leak by tightening the
connections, turn off the gas and contact the supplier
immediately.
Always ensure the smoker is kept away from ammable
materials and the gas cylinder clear of any heat source.
When changing over from an empty gas cylinder to a full
one make sure this procedure is carried out in a ame free
atmosphere.
Specifications
Smoker specifications can be found on the data label
attached to the rear panel.
Gas Cylinder Use & Safety
This is a low pressure smoker and must only be used with
the hose and regulator supplied. Your smoker is designed
for use with 9Kg LPG cylinders.
The cylinder should be lled by a reputable gas supplier and
visually inspected and re-qualied at each lling.
Always keep cylinder in an upright position. Always close
the cylinder valve when the smoker is not in use.
Do not subject the cylinder to excessive heat.
Never Store your Gas Cylinder Indoors.
If you store your smoker indoors, ALWAYS disconnect the
cylinder rst and store it safely outside. Cylinders must
be stored outdoors in a well ventilated area out of reach of
children, and must not be stored in a building, garage or
any other enclosed area.
Store the smoker upright in an area sheltered away from
weather conditions. The use of a cover is recommended.
Failure to comply with these instructions could result
in a re or explosion which could cause serious
bodily injury, death or property damage.
Accessible parts may be very hot.
Keep young children away.
Any modications of this smoker may be
dangerous.
Do not move this smoker during use.
Turn off gas supply at the cylinder after use.
Read instructions before using the smoker.
Parts sealed by the manufacturer or their agent
must not be manipulated by the user. This smoker
is only to be used and stored outdoors.
Never operate this smoker wihout a regulator
Do not test for gas leaks with an open ame
If this information is not followed exactly a re
causing death or serious injury may occur. Do
not store a spare gas cylinder under or near this
smoker. Never ll the cylinder beyond 85% full.
If you smell gas
1. Shut off gas to the smoker at its source,
if possible.
2. Extinguish any open ame.
3. Open door.
4. If odour continues immediately call your
gas supplier or re department.
Do not connect your smoker to a gas cylinder
exceeding this capacity.
Never connect an unregulated gas cylinder to your
smoker.
Read carefully before assembling and operating
your smoker.

2
3
Location of your Smoker
DO NOT use your smoker in garages, porches, sheds,
breezeways, or other enclosed areas. Your smoker is to
be used OUTDOORS only. DO NOT use this smoker in a
manner other than its intended purpose. It is NOT intended
for commercial use. The smoker is not intended to be
installed in or on recreational vehicles and/or boats. The
smoker is not to be used as a heater. DO NOT operate the
smoker near or under flammable or combustible materials
such as decks, porches, or carports. A minimum clearance
of 900mm is recommended. DO NOT operate the smoker
under overhead construction. Do not obstruct the ow of
combustion and ventilation air around the smoker housing.
For your safety:
• Do not store or use petrol or other ammable
liquids in the vicinity of this or any other
appliance.
• Do not store empty or full spare gas cylinders
under or near this or any other appliance.
• Keep the gas hose away from hot surfaces. Avoid
unnecessary twisting of hose. Visually inspect the
hose prior to each use for cracks, excessive wear
or other damage. Replace the hose if necessary.
• Never test for gas leaks with a lit match or open
ame. Never light smoker with door closed or
before checking to ensure the burner tube is fully
seated over gas valve orice.
• Never lean over smoker when lighting.
• Never alter or modify the regulator or gas supply
assembly.
• This smoker must not be used indoors.
• Only use in well ventilated areas.
• CARBON MONOXIDE HAZARD - USING THIS
APPLIANCE IN AN ENCLOSED SPACE MAY CAUSE
DEATH. DO NOT USE IN CARAVANS, TENTS,
MARINE CRAFT, CARS, MOBILE HOMES OR
SIMILAR LOCATIONS.
• This appliance shall only be used in an above
ground open-air situation with natural
ventilation, without stagnant areas, where gas
leakage and products of combustion are rapidly
dispersed by wind and natural convection.
Protect Children
Keep children away from smoker during use and until
smoker has cooled after you have nished. Do not allow
children to operate smoker.
Always ensure that no sporting or physical activities are
carried out in close proximity to the smoker during use and
while still hot.
Check Smoker for any Damage
Contact your retailer for assistance regarding replacement
of any damaged or missing parts. Do not operate a
smoker that appears damaged. Smokers for use with gas
cylinders are labelled ‘LPG/ULPG’. Check labelling at the gas
connection on your smoker.
Operate the smoker only on a stable, level,
non-flammable surface such as asphalt, concrete
or solid ground. DO NOT operate the smoker on
flammable material such as carpet or a wood deck.
DO NOT move the smoker while it is in use. Allow
the smoker to cool completely before moving or
storing.
GENERAL INFORMATION
• Use caution when assembling and operating the
smoker to avoid cuts and scrapes from rough or
sharp edges.
• Use caution when lifting and moving the smoker
to avoid strains or back injury. Two people are
recommended to lift or move the smoker.
DO NOT move the smoker while it is in use.
• DO NOT leave the smoker unattended while in
use. Operate the smoker with close supervision.
• DO NOT leave hot ashes unattended until the
smoker cools completely.
• This smoker becomes extremely hot - allow the
smoker to cool completely before handling.
If you must handle the smoker while it is hot,
ALWAYS wear protective oven mitts or heat
resistant gloves when handling the smoker or its
components.
• The water/wood chip tray should not be moved
while the smoker is operating or until the
smoker has cooled sufficiently. This contains hot
ashes and liquids that may cause serious injury.
If you must move these components,
ALWAYS wear protective oven mitts or heat
resistant gloves.
• Dispose of cold ashes by wrapping them in
heavy duty aluminum foil and putting them in a
non combustible container. Be sure there are no
other combustible materials in or near the
container.
• If you must dispose of the ashes in less time
than it takes for them to completely cool,
remove the ashes from the smoker, keeping
them in heavy duty foil, and soak them
completely with water before disposing of them
in a non combustible container.
• Use caution when opening the door of the
smoker while in operation. Keep hands, face,
and body safe from hot steam or flare-ups.
Protect your nose and mouth from smoke
inhalation.

4
5
• DO NOT wear loose clothing while operating the
smoker. Tie back long hair while operating the
smoker. ALWAYS wear fully-covering shoes while
operating the smoker.
• Allow the smoker and its components to cool
completely before conducting any routine
cleaning or maintenance.
• NEVER use glassware, plastic, or ceramic
cookware on or in your smoker.
• NEVER operate the smoker without water in the
water/wood chip tray. NEVER allow the water to
completely evaporate. Check the water level at
least every 2 hours. A sizzling sound may
indicate a low water level. Follow instructions in
this manual for adding water while operating.
• When using flavoring wood, add a sufficient
amount prior to operation to avoid having to
add wood while operating. Adding wood while
operating may splash hot water and cause
serious injury.
• Use of accessories not intended for this smoker
is not recommended and may lead to injury or
property damage.
• Use under high wind conditions that result in
poor burner operation such as blowing out and
flaring should be avoided. If repositioning the
unit does not improve operation under such
wind conditions, the unit should be shut off.
Familiarise yourself with the general information and safety
guidelines located at the front of this manual.
Check:
1. The cylinder is lled. A sloshing sound will be heard when
shaken.
2. The burner controls are in the ‘OFF’ position.
Connecting
1. Ensure cylinder valve is in its full ‘CLOSE’ position.
2. Check for any damage to either the cylinder connection or
the hose. NEVER attempt to use damaged equipment.
3. When connecting the hose to the cylinder tighten the nut
to a positive stop by hand.
4. Open cylinder valve one full turn. If a leak can be heard
at either end of the hose turn cylinder off and tighten
joint. Wait 5 minutes before re-testing and use a soapy
water solution to check the joint. If bubbles appear the
connection will need to be re-tightened.
Refer to P13 for more detailed instructions on connecting
the appliance to the cylinder.
Disconnecting
1. Ensure the burner control is in the ‘OFF’ position.
2. Ensure cylinder valve is in the full ‘CLOSE’ position.
For storage and cylinder exchange, disconnect hose at the
cylinder only, DO NOT disconnect hose from appliance.
Regulator Safety Feature (NZ Only)
All QCC regulators (the part that attaches to the gas cylinder
to regulate the ow of gas) have a safety feature included
that restricts gas ow in the event of a gas leak. You can
inadvertently activate this safety feature without having a
gas leak. This typically occurs when you turn on the gas
using the smoker control knob before you turn on the gas
cylinder valve. If the gas regulator safety feature activates,
the smoker will operate with reduced output as gas ow is
restricted.
These steps should be taken rst to reset the gas regulator
safety device:
1. Ensure the smoker door is open.
2. Turn gas cylinder valve to ‘CLOSE’.
3. Turn off all control knobs.
4. Disconnect the regulator from the gas cylinder.
5. Wait 30 seconds.
6. Reconnect the regulator to the gas cylinder.
7. Leak test the connection using a soapy water solution.
Ensure no bubbles appear before proceeding.
8. Slowly open the gas cylinder valve one turn. Do not put
excessive force on the valve at the full open position, to
avoid damaging the valve.
9. Light smoker as per the instructions provided.
IMPORTANT: The appliance control knob must be in
the ‘OFF’ position before opening the cylinder valve.
GENERAL ASSEMBLY
Connecting & Disconnecting to Gas Source
IMPORTANT: Before connecting and disconnecting
smoker to gas source, make sure burner controls
are in ‘OFF’ position.
CAUTION: When the smoker is not in use, the gas
must be turned off at the cylinder.
Nominal Hourly Gas Consumption
Gas Type Injector Size
Burner
Gas Pressure
kPa
LPG/ULPG 1.11mm 2.75 kPa
15.8MJ/hr

4
5
EXPLODED DIAGRAM
No. Description Qty
1 Air vent 1
2 Smoker Body 1
3 Cooking rack support 8
4 Handle 2
5 Thermometer Base 1
6 Thermometer 1
7 Gasmate Badge 1
8 Upper Door 1
9 Door Hinge 4
10 Door Handle Base 4
No. Description Qty
11 Door Handle 2
12 Lower Door 1
13 Valve Assembly & Regulator 1
14 Control Panel 1
15 Knob Base 1
16 Knob 1
17 Cooking Rack 4
18 Left Leg 2
19 Right Leg 2
20 Heat Shield Plate 1
No. Description Qty
21 Burner 1
22 Ignition Pin 1
24 Burner Box 1
25 Match Holder 1
26 Fastener 1
27 Water/Wood Chip Tray 1
28 Hook 1
29 Latch 2
30 Air Vent Handle 1
PARTS LIST
Make sure you have all items listed under PARTS LIST and HARDWARE CONTENTS before you begin the assembly process.
HARDWARE CONTENTS
No. Drawing Description Qty
AA M6X12 Screw 17
BB M5x10 Screw 7
CC M6 Tailor-made
Nut 4
DD M6x10 Screw 8
No. Drawing Description Qty
EE M6X40 Screw 16
FF M6 Nut 8
GG Washer 8
HH M5x20 Step Screw 1

6
7
ASSEMBLY INSTRUCTIONS
Before assembling the smoker, read these Instructions
carefully.
Assemble the smoker on a at, clean surface.
The smoker is heavy.
NOTE: Do not fully tighten all the nuts during the initial
stages of assembly.
Caution: Sheet metal can cause injury. Wear gloves when
assembling the smoker.
Tools required:
Philips head screwdriver (or cordless drill and bits).
Flat head screwdriver.
Adjustable spanner.
Step 2
Note: With the help of a friend, turn the smoker body to its upright position.
Place the burner assembly (14) under the smoker base as shown. Secure to the cabinet using 7 x M5 x 10 screws (BB)
as shown.
19
AA
18
19
18
19
18
18
19
2
BB
14
19
AA
18
19
18
19
18
18
19
2
BB
14
Step 1
Note: With the help of a friend, turn the smoker cabinet
upside down.
Attach the legs (18 and 19) to the base of the cabinet (2)
using 12 x M6 x 12 screws (AA) as shown.

6
7
ASSEMBLY INSTRUCTIONS
Step 3
Remove the air vent handle, then slot through opening in rear of cabinet.
Secure using 4 x M6 x 12 screws (AA) and 4 x M6 tailor-made screws (CC) to assemble the air vent (E).
Then re-attach the air vent handle.
Step 4
Attach the side carry handles (4) to each side of the cabinet using the holes provided.
Secure with 8 x M6 x 10 screws (DD), 8 x washers (GG) and 8 x M6 nuts (FF).
1
CC
30
AA
30
DD
4
GG
FF
1
CC
30
AA
30
DD
4
GG
FF

8
9
Step 6
Repeat Step 5 to attach the lower door handle (11) to the lower door (12).
ASSEMBLY INSTRUCTIONS
Step 5
Remove the pre-assembled screws and attach the upper door handle (11) by inserting it through the holes in
upper door (8). Secure door handle bracket to the inside of the door.
11
螺钉
8
screw
11
螺钉 12
screw
11
螺钉
8
screw
11
螺钉 12
screw

8
9
ASSEMBLY INSTRUCTIONS
Step 7
Attach the door hinges (4) using 8 x M6 x 40 screws (EE) to the side of the cabinet as shown.
Step 8
Use 8 x M6 x 40 screws (EE) to assemble the upper door (8) and lower door (12) to the hinges.
4
EE
EE
8
12
4
EE
EE
8
12

10
11
ASSEMBLY INSTRUCTIONS
Step 9
Insert the support racks (3) into the four slots on each side of the inside of the upper cabinet and angle downward until
they sit at as shown.
Step 10
Slide the cooking grills (17) into the support racks as shown.
3
17
3
17

10
11
ASSEMBLY INSTRUCTIONS
Step 11
Slide the water/wood chip tray (27) into the lower cabinet as shown.
Step 12
Use 1 x M6 x 12 screw (AA) to secure the regulator hose fastener (26) onto right front leg. Locate the hose through the
fastener to secure the hose above the ground. By securing the hose it prevents the hose from coming in contact with the
hot burner assembly.
Locate the S-hook (28) onto the right side carry handle. When the smoker is not in use, hang the hose/regulator from the
side handle. This will help prevent dirt or other particles from entering the regulator.
27
AA
26
27
AA
26

12
13
ASSEMBLY INSTRUCTIONS
Step 13
Use 1 x M5 x 20 screw (HH) to secure the match holder (25) to the bottom of the side panel of the smoker as shown.
Step 14
Remove the pre-assembled latch screws, then assemble the latches (29) as shown.
HH
25
29
HH
25
29
HH
25
29

12
13
ASSEMBLY INSTRUCTIONS
STEP 15
Ensure cylinder valve is in its full ‘CLOSE’ position.
Check for any damage to either the cylinder connection
or the hose. NEVER attempt to use damaged
equipment. Attach the regulator and hose to your gas
cylinder. Tighten the nut to a positive stop by hand.
STEP 16
Turn on the gas cylinder ensuring that the control knob
on the smoker is turned OFF at this point.
DO NOT ATTEMPT TO LIGHT THE SMOKER!!.
STEP 17
Use a solution of soapy water (dishwashing liquid and
water is fine). Brush it on or use a spray bottle as
shown in the drawing. Ensure the connections have a
good coating.
STEP 18a
If the connection is leaking, bubbles will start to grow
in the soapy solution. If this happens shut off the gas
supply atthe cylinder.
STEP 18b
Tighten the connections using a crescent then repeat
steps 16-17.
STEP 18c
The connection is gas tight when no bubbles grow
around the gas connection.
ASSEMBLY INSTRUCTIONS

14
15
OPERATING INSTRUCTIONS
Pre-Use Procedures
Before you cook food in your smoker, it is important to
“season” your smoker. Seasoning seals the paint and
interior of your smoker to enhance avoring, durability, and
overall performance. This is also referred to as the
“breakin” process.
If your smoker requires any touch-up paint on the inside of
the cabinet, the only time you should apply paint to the
inside is before the seasoning process. Paint should not be
applied to the interior of your smoker after your smoker
has been used. Paint toxins may contaminate your food.
However, if paint becomes necessary after use, see the
section in this manual concerning After Use Safety and
Maintenance.
To season your smoker, simply use it as you normally
would; only do not cook any food. You will need to follow
all of the operating procedures in the next few sections of
this manual.
Using your desired avoring woods and marinades, burn
your smoker at low temperature (around 125°F [50°C]) for
45-60 minutes. Let the smoker cool, and clean out the used
water and wood.
Once seasoning is complete, your smoker’s interior will
have a durable, seasoned coating.
Adding Water
To add water before cooking, simply remove the water/
wood chip tray from the drawer and ll it with water up to
1cm below the rim.
Then replace the tray back into the drawer and slide back
into smoker. To add water while the smoker is hot, pull out
the drawer and add water directly to bowl. DO NOT remove
bowl as it will be HOT.
Cooking Tips:
• Line the water/wood chip tray with aluminum foil before
each use. This will make it easy to clean and help it
last longer.
• To make adding water easier and safer, use a clean
watering can with a long spout.
Adding Wood/Charcoal
To add wood chips before cooking, simply ll the water/
wood chip tray with your choice of avoring hardwood
chips. The amount and type of wood you use is entirely up
to you. One full tray is typically enough for several hours of
smoking. Once lled, slide inside smoker.
To add wood chips while cooking, slide out drawer. Place
the pieces into the water/wood chip tray without removing
the tray from drawer. It is not recommended to remove the
water/wood chip tray while the smoker is in operation.
CAUTION: The water/wood chip tray gets very
hot. Avoid handling them while in use. Always
wear protective oven mitts when handling hot
components.
Cooking Tips - Flavoring Wood:
• Small wood chips work best inside the water/wood
chip tray.
• Use dry hardwoods such as manuka, apple, or cherry.
• Most fruit or nut tree woods produce excellent smoke
avoring.
• Do not use resinous woods such as pine or plywood.
These usually produce unpleasant avoring.
• Let your taste be your guide – experiment with
different types and quantities of wood chunks, chips, or
sticks. You can even mix woods.
• To produce more smoke and to prevent fast burning,
presoak the wood chips in a separate bowl of water for
at least 20 minutes, or wrap the chips in perforated
aluminum foil.
• Most smoke avoring occurs within the rst hour of
cooking. Adding wood chips after the rst hour is
typically not necessary unless extra smoke avoring is
desired.

14
15
LIGHTING PROCEDURES
Igniter Lighting System:
1. Perform leak test at least twice yearly or after
connecting LPG cylinder. Check all connections for
leaks using the “soapy water” test as explained on
page 13.
2. Open the smoker bottom cabinet door. It must always
be open when lighting the smoker.
3. Check for any blockage to the burner. Remove any
foreign objects or matter.
4. Be sure the burner control knob is in the “OFF” position.
5. Open the LPG cylinder valve by turning counter-
clockwise.
6. To light the smoker, push in and turn the burner control
knob counter-clockwise to the HIGH setting. The igniter
will click and light the burner.
7. If ignition does not occur within 5 seconds, turn the
burner control knob off and wait ve minutes for gas
to clear before repeating the steps again. If burner still
fails to light try match lighting the smoker using the
instructions noted below.
8. Once the burner is lit, then close the door to allow heat
to accumulate.
Match Lighting:
1. Repeat steps 1 through 5 of the Igniter Lighting System
above.
2. Attach a match to the match holder attached to the
side of the smoker. Ignite the match and insert into the
hole shown here. Push in and turn the burner
control knob counter-clockwise to the HIGH setting.
Burner ignition can be checked through this hole.
Shutting The Smoker Off
CAUTION: The smoker can become very hot
while in use. Do not touch any portion of the
smoker except for the door handle and burner
control knob. It may be necessary to use
protective gloves.
• Turn the burner control knob off by pushing in and
rotating clockwise. The burner ame should then go
out.
• Turn off the LPG cylinder valve by turning the knob
clockwise until it stops.
• Follow all warnings and safety precautions before
removing meat from smoker or preparing the unit for
storage. Please see page 2 for proper storage
procedures and the important warnings and safeguards
on pages 2-4.

16
17
COOKING INSTRUCTIONS
IMPORTANT: Before each use, clean and inspect
the hose and the connection to the LPG cylinder. If
there is evidence of abrasion, wear, cuts or leaks,
the hose must be replaced before the smoker is
used. Refer to the “leak test” instructions in the
LPG cylinder connection portion of this manual.
• Fill the water/wood chip tray. First add a cup of
avouring wood chips and place the tray inside the
smoker as instructed in the assembly section of this
manual. Also, refer to Cooking Tips for Flavouring
Wood in Operating Instructions section.
• Then pull tray out partially and carefully ll the water
bowl with water or marinade up to 1cm below the rim.
A full bowl will last for approximately 2-3 hours. Do not
overll or allow water to overow from the tray.
• Insert or adjust the cooking grills in to the desired rack
positions. For better access to the food with tongs or
spatulas, make sure the grill wires run front to back as
explained in the assembly section of this manual.
• You are now ready to light the burner. Refer to the
Lighting Procedure on the previous pages of this
manual. The heat from the burner will allow the wood
chips to burn, causing the avoring smoke to
accumulate.
• Place the food on the cooking grills in a single layer
with space between each piece. This will allow smoke
and hot moisture to circulate evenly around all the food
pieces.
• For best results, smoke foods at a constant
temperature of 225° to 250° F (110° to 120° C) as
measured by the temperature gauge mounted on the
front of the smoker. For more tender and heavily
smoked meat, a lower temperature may be preferred.
If time is critical, a higher temperature range is
recommended.
• Check water level periodically and add water if low. For
best results and to retain heat, avoid opening the door
of the smoker while in use. When the door must be
opened, only open it briey. The smoker will quickly
resume cooking temperature after the door is closed.
• Always use a meat probe thermometer to ensure food
is fully cooked before removing it from the smoker.
• After each use, and after the smoker is cooled,
carefully remove the water/wood chip tray from the
bottom of the smoker, empty and clean the tray.
TEMPERATURE CHART
WARNING: To ensure that it is safe to eat,
food must be cooked to the minimum internal
temperatures listed in the table below.
Recommended safe internal temperatures
Fish 62º C
Pork 71º C
Egg Dishes 71º C
Steaks and Roasts of Beef, Veal or Lamb 62º C
Ground Beef, Veal or Lamb 71º C
Whole Poultry (Turkey, Chicken, Duck, etc.) 73º C
Ground or Pieces Poultry (Chicken Breast, etc.) 73º C
Water Bowl Wood Chips

16
17
AFTER USE SAFETY AND MAINTENANCE
• If rust is present on the exterior surface of the smoker,
clean the area with steel wool or emery cloth and use
heavy duty, heat resistant paint.
• NEVER apply additional paint to the interior of the
smoker. If rust is present on the interior of the smoker,
clean it thoroughly with steel wool or emery cloth and
lightly coat the area with cooking oil or cooking spray to
help minimize recurring rust.
• When an LPG cylinder is not connected, and to help
prevent dirt or other foreign particles from clogging the
hose/regulator, hang the end of the hose/regulator
from the side handle using the supplied S-hook.
• To protect your smoker from weather, always keep your
smoker covered while not in use.
• Inspect the ames at the burner by looking through the
front access hole.A good ame should be blue with a
yellow tip 2.5-5cm in length. If ames are excessively
yellow and irregular, oil residue and food deposits may
be collecting on the burner. Try cleaning the burner
surface and the holes to improve the ames. Bad
ames may also be caused by poor gas valve orice-to-
burner attachment. Always let the smoker cool before
cleaning or checking the assembly.
• Use caution when lifting and moving the smoker to
avoid strains or back injury. Two people are
recommended to lift or move the smoker.
• DO NOT store the smoker near gasoline or other
combustible liquids or where combustible vapors may
be present.
• DO NOT store this smoker in an area accessible to
children or pets. Store the smoker in a dry, protected
location.
• DO NOT allow anyone to conduct activities around the
smoker following use until it has cooled. It is hot during
operation.
• DO NOT leave hot ashes unattended until the smoker
cools completely.
• This smoker becomes extremely hot - allow the smoker
to cool completely before handling. If you must handle
smoker while it is hot, ALWAYS wear protective oven
mitts or heat resistant gloves when handling the
smoker or its components. Allow the smoker to cool
before removing and cleaning the grease pan.
• Dispose of cold ashes by wrapping them in heavy duty
aluminum foil and putting them in a noncombustible
container. Be sure there are no other combustible
materials in or near the container.
• If you must dispose of the ashes in less time than it
takes for them to completely cool, remove the ashes
from the smoker, keeping them in heavy duty foil, and
soak them completely with water before disposing of
them in a non-combustible container.
CAUTION: All care and maintenance procedures
are to be performed only while the smoker is
turned off and cooled.
• Clean the water/wood chip tray and cooking grills with
hot, soapy water. Rinse and dry thoroughly. You may
prefer to coat the water/wood chip tray and cooking
grills lightly with cooking oil or cooking spray.
• Frequently check and clean the burner for insects and
insect nests. A clogged tube can lead to re outside the
smoker. Also make sure the smoker does not have any
foreign objects obstructing the ow of combustion and
ventilation air.
• If your temperature gauge seems to be out of
calibration: Remove the heat indicator from the door of
the smoker by loosening and removing the mounting
nut from the inside. There is a second nut mounted on
the back of the heat indicator that can be turned to
adjust the heat indicator needle. Set the needle to the
current outdoor ambient temperature and re-mount the
heat indicator to the door of the smoker.
• To clean the inside and outside of the smoker cabinet,
simply use a damp cloth. Spray-washing with a water
hose is not recommended. All moisture should be
wiped away and not allowed to stand inside or on
top of the smoker. Once cleaned, you may prefer to
lightly coat the interior of the smoker cabinet with
cooking oil or cooking spray.
STORAGE
Before Storing Your Smoker:
• Clean all surfaces.
• When cool and not in use, store your smoker indoors in
a dry location to protect against rusting.
• If storing the smoker outdoors, cover the smoker with a
smoker cover for protection from the weather.

18
19
TROUBLESHOOTING
PROBLEM CAUSE CORRECTION
Burner will not light 1. Check LPG cylinder fuel level.
2. Bad electrode spark.
3. Burner may not be properly seated.
4. Burner may be obstructed.
5. The cylinder valve may be closed.
6. Regulator is not properly seated on
cylinder valve.
1. Replace LPG Cylinder.
2. Check to see if the smoker will match
light. Electrode or collector may need
adjustment.
3. Reseat burner.
4. Clear obstructions from burner.
5. Open cylinder valve.
6. Reseat regulator on cylinder valve.
Fire at control knob 1. Burner holes may be obstructed.
2. Burner is improperly seated on control
valve.
3. Gas connections may be loose.
1. Clear obstructions from burner.
2. Reseat burner on control valve.
3. Leak check and tighten all connections.
Yellow Flames at
burner
1. Burner is obstructed. 1. Clear obstructions from burner.
Flame blows out on
“LOW”
1. Burner holes may be obstructed.
2. Burner is improperly seated on control
3. valve.
4. Smoker is not sufciently pre-heated.
1. Clear obstructions from burner holes.
2. Reseat burner on control valve.
3. Pre-heat grill sufciently.
Burner does not get hot
enough
1. Flow control device has been activated
in regulator.
1. Reset regulator by turning off gas at
LPG cylinder. Disconnecting regulator
from cylinder. Re-attaching regulator to
cylinder.
Smoker is too hot 1. Excess grease build-up causing grease
res.
2. Damaged or faulty regulator.
3. Cook on a lower temperature setting.
1. Clean smoker components thoroughly.
2. Replace with identical replacement
parts.
3. Lower ame height and temperature.

18
19
DIAGRAMMATIC REPRESENTATIONS OF OUTDOOR AREAS
The following figures are diagrammatic representations of outdoor areas. Rectangular areas have been used in these figures –
the same principles apply to any other shaped area.
SAFE APPLIANCE LOCATIONS
This appliance shall only be used in an above ground open-air situation with natural ventilation, without stagnant areas,
where gas leakage and products of combustion are rapidly dispersed by wind and natural convection.
Any enclosure in which the appliance is used shall comply with the following:
An enclosure with walls on all sides, but at least one permanent opening at ground level and no overhead
cover (see Example 1).
Within a partial enclosure that includes an overhead cover and no more than two walls (see Example 2 & 3).
Within a partial enclosure that includes an overhead cover and more than two walls, the following
will apply:
at least 25% of the total wall area is completely open, and
at least 30% of the remaining wall area is open and unrestricted (see Example 4 & 5).
In the case of balconies, at least 20% of the total wall area shall be and remain open and unrestricted.
Gasmate®is a registered trademark of: Sitro Group Australia Pty Ltd www.gasmate.com.au
Aber, Hamilton, N.Z. www.gasmate.co.nz
Gasmate®is a registered trademark of: Sitro Group Australia Pty Ltd www.gasmate.com.au
Aber, Hamilton, N.Z. www.gasmate.co.nz
SAFE APPLIANCE LOCATIONS
This appliance shall only be used in an above ground open-air situation with natural ventilation, without
stagnant areas, where gas leakage and products of combustion are rapidly dispersed by wind and natural
convection.
Any enclosure in which the appliance is used shall comply with one of the following:
An enclosure with walls on all sides, but at least one permanent opening at ground level and
no overhead cover (see Example 1).
Within a partial enclosure that includes an overhead cover and no more than two
walls (see Example 2 & 3).
Within a partial enclosure that includes an overhead cover and more than two walls,
the following will apply:
at least 25% of the total wall area is completely open, and
at least 30% of the remaining wall area is open and unrestricted (see Example 4 & 5).
In the case of balconies, at least 20% of the total wall area shall be and remain open and unrestricted.
The following figures are diagrammatic representations of outdoor areas. Rectangular areas have been used in these
figures - the same principles apply to any other shaped area.

20
PB
This page has been left intentionaly blank
Table of contents
Other Gasmate Smoke Alarm manuals
Popular Smoke Alarm manuals by other brands

Honeywell
Honeywell Silent Knight SD505 installation instructions

Firex
Firex H230CT instruction manual

Rielta
Rielta Ladoga PD-RK installation guide

KingShield
KingShield ASIM VST-IS598IH Installation & operating instructions

Kidde
Kidde HD135F Specification sheet

Ei Electronics
Ei Electronics Ei166R quick start guide

Weller
Weller LASERLINE 150 Translation of the original instructions

Videofied
Videofied ISD Product Install Sheet

Garland
Garland Ongard OG1400 user guide

SOMFY
SOMFY 1875062 user manual

Network Technologies
Network Technologies ENVIROMUX-SDS-120V Installation and operation manual

Siemens
Siemens DELTA Reflex SD9 manual