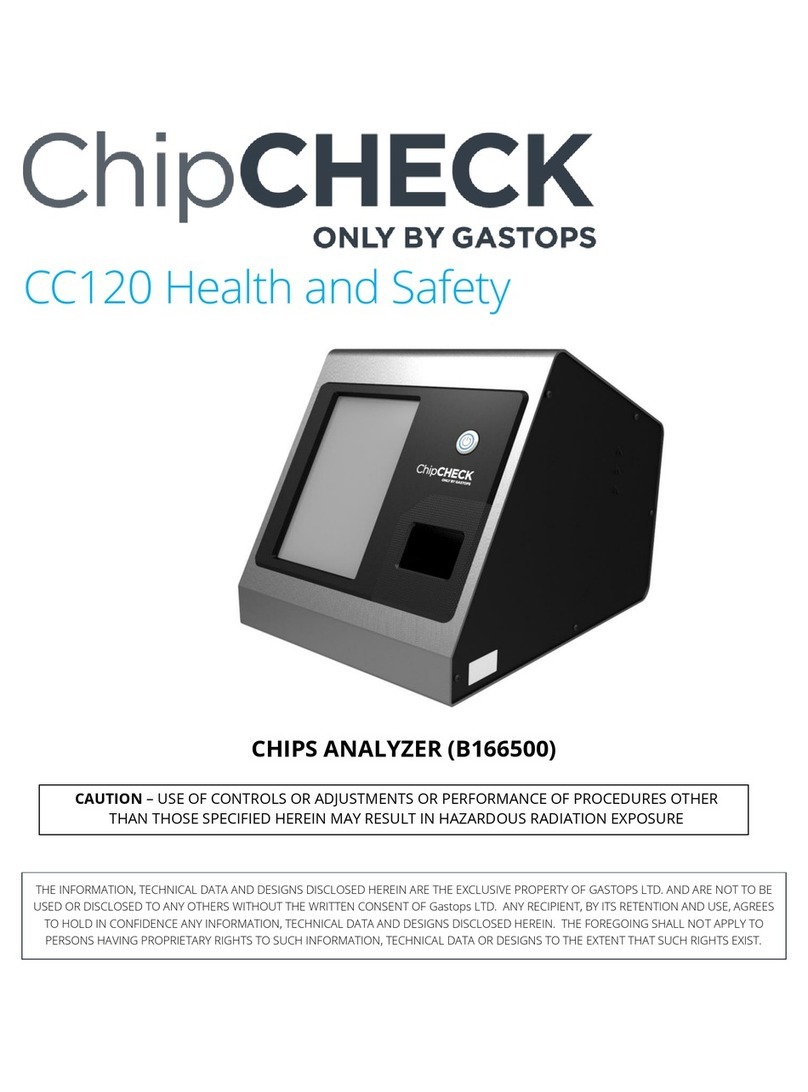
Gastops ChipCHECK CC120 Manual

CC120 Maintenance and Service
CHIPS ANALYZER (B166500)
CAUTION –USE OF CONTROLS OR ADJUSTMENTS OR PERFORMANCE OF PROCEDURES OTHER
THAN THOSE SPECIFIED HEREIN MAY RESULT IN HAZARDOUS RADIATION EXPOSURE
THE INFORMATION, TECHNICAL DATA AND DESIGNS DISCLOSED HEREIN ARE THE EXCLUSIVE PROPERTY OF GASTOPS LTD. AND ARE NOT TO BE
USED OR DISCLOSED TO ANY OTHERS WITHOUT THE WRITTEN CONSENT OF Gastops LTD. ANY RECIPIENT, BY ITS RETENTION AND USE, AGREES
TO HOLD IN CONFIDENCE ANY INFORMATION, TECHNICAL DATA AND DESIGNS DISCLOSED HEREIN. THE FOREGOING SHALL NOT APPLY TO
PERSONS HAVING PROPRIETARY RIGHTS TO SUCH INFORMATION, TECHNICAL DATA OR DESIGNS TO THE EXTENT THAT SUCH RIGHTS EXIST.

Gastops Ltd.
C009423, Rev. 4 page 42
All use of this publication and ChipCHECK by user shall be subject to the restrictions and conditions as set out in this publication.
6.0 Maintenance & Service
The ChipCHECK unit is designed to require a minimum amount of maintenance. The sub-sections below
provide the regular maintenance procedures required for the ChipCHECK unit. In the event of any
equipment failure, Users are strictly forbidden to perform any kind of service. Service activities are
restricted to Gastops authorized technicians who have the appropriate laser safety training.
6.1 Allowable User Maintenance
The ChipCHECK system is contained within an enclosure that acts as protective shielding preventing all
laser radiation above Class 1 to the Operator. This section reviews the recommended, although
infrequent, maintenance that will ensure the longevity and performance of the unit.
It is important to note that this section covers only recommended maintenance and there is absolutely
NO SERVICE ALLOWED by the User where “service” is defined as any action requiring the removal or
opening of an enclosure panel. In the event that the unit requires service, then it shall only be serviced
or repaired by Gastops authorized technicians.
For the maintenance procedures discussed herein, there is no need to remove any covers or modify the
unit. The User is strictly forbidden from modifying the unit, removing any covers, or to alter, interfere,
modify, remove, circumvent, defeat or de-active any safety system or interlocks (refer to Section 2.2.2).
Both the Standardization and Calibration Patches are consumable and will require replacement every
year. When the Standardization patch is replaced, it is recommended that the Containment Window
(refer to Figure 6-1) either be cleaned or replaced. This is due to the slow accumulation of Laser
Generated Air Contaminants (LGACs) that may occur after an extensive number of analyses. Over time,
if these containments become excessive, the overall performance of the unit may be affected.
Figure 6-1 shows all of the components that are accessible during the maintenance of the unit.
Finally, if the fuse blows, then the User is permitted to replace the fuse with the proper part. To ensure
the integrity of the unit, it is recommended that this fuse be sourced directly from Gastops.
Note that, to ensure optimum performance and longevity of the equipment the Gastops in-service
support package must be maintained throughout the life of the equipment.

Gastops Ltd.
C009423, Rev. 4 page 43
All use of this publication and ChipCHECK by user shall be subject to the restrictions and conditions as set out in this publication.
Figure 6-1: Containment Window Location
6.1.1 Replacement of the Containment Window
If the Containment Window is to be completely replaced, then the following procedure must be
followed. Note that gloves are required to complete this procedure and the User must refer to
Figures 6-1, 6-2 and 6-3 to supplement the procedure below.
•In the software interface, navigate to the ‘Welcome’ screen and enter the assigned
‘Maintainer’ pass code (refer to Section 5.1, the Maintainer pass code is provided during
training).
•Once in ‘Maintenance’ mode, press the ‘Conduct Maintenance’ button near the middle of the
screen.
•The Sample Receptacle will automatically displace further outside of the unit providing the
required access to the Containment Window Assembly.
•Remove the Sample Tray, and set it aside.
•Remove the Containment Window from its housing by carefully lifting the metallic cover
located on top of the Sample Receptacle. This cover is held in place by magnets. As a result,
a vertical lift shall remove the lid from the assembly. Be sure to not apply much force to the
Receptacle assembly.
•During this process ensure to not touch the surface of the Containment Window with bare
fingers. Gloves are required.
•Take the replacement Containment Window and place it onto the Sample Receptacle
ensuring that the Containment Window is properly seated on the centering features of the
Receptacle.

Gastops Ltd.
C009423, Rev. 4 page 44
All use of this publication and ChipCHECK by user shall be subject to the restrictions and conditions as set out in this publication.
•Carefully place the metallic cover back over the seated Containment Window – ensure that
the cover is fully seated (note that the Containment Window metallic cover can only be
assembled in one orientation).
•Lastly, return to the software interface and press the ‘Maintenance Complete’ button.
•The full Sample Receptacle will automatically re-insert itself back into the ejection position.
•Replace the Sample Tray, and return to the ‘Welcome’ screen for normal operation.
Figure 6-2: Maintenance – Holder Receptacle Position (Left) Containment Window Assembly (Right)
6.1.2 Cleaning the Containment Window
If the Containment Window is to be cleaned (not replaced), then the following procedure must be
followed. Note that gloves are required to complete this procedure and the User must refer to
Figures 6-1, 6-2 and 6-3 to supplement the procedure below.
•In the software interface, navigate to the ‘Welcome’ screen and enter the assigned
‘Maintainer’ pass code (refer to Section 5.1, the Maintainer pass code is provided during
training).
•Once in ‘Maintenance’ mode, press the ‘Conduct Maintenance’ button near the middle of the
screen.
•The Sample Receptacle will automatically displace further outside of the unit providing the
required access to the Containment Window Assembly.
•Remove the Sample Tray, and set it aside.

Gastops Ltd.
C009423, Rev. 4 page 45
All use of this publication and ChipCHECK by user shall be subject to the restrictions and conditions as set out in this publication.
•Remove the Containment Window from its housing by carefully lifting the metallic cover
located on top of the Sample Receptacle. This cover is held in place by magnets. As a result,
a vertical lift shall remove the lid from the assembly. Be sure to not apply much force to the
Receptacle assembly.
•Place the Containment Window on a non-abrasive, lint free cloth/paper, with its bottom face
pointing upwards (i.e.: the face of the Containment Window that is exposed to the
contaminants placed in a manner that will allow for it to be cleaned).
•During this process ensure to not touch the surface of the Containment Window with bare
fingers. Gloves are required.
•Place one or two drops of Isopropyl Alcohol on the exposed face of the Containment
Window.
•Gently place the non-abrasive, lint free cloth/paper onto the Isopropyl Alcohol and allow for
a few seconds for the Isopropyl to propagate through the cloth.
•Carefully and slowly drag the Isopropyl soaked cloth over the surface of the Containment
Window (pulling parallel to the exposed surface of the Containment Window ensuring no
pressure is applied to the window itself).
•Repeat these steps as required.
•Once the Containment Window is clean, place it back onto the Sample Receptacle ensuring
that the Containment Window is properly seated on the centering features of the
Receptacle.
•During this process ensure to not touch the surface of the Containment Window with bare
fingers. Gloves are required.
•Carefully place the metallic cover back over the seated Containment Window – ensure that
the cover is fully seated against the (note that the Containment Window metallic cover can
only be assembled in one orientation).
•Lastly, return to the software interface and press the ‘Maintenance Complete’ button.
•The full Sample Receptacle will automatically re-insert itself back into the ejection position.
•Replace the Sample Tray, and return to the ‘Welcome’ screen for normal operation.
6.1.3 Replacing the Fuse
In the event that a fuse requires replacement, then the following procedure must be followed.
WARNING:
Disconnect supply before servicing (note that service/servicing can only be completed by
Gastops authorized technicians).
Disconnect supply before replacing fuse.

Gastops Ltd.
C009423, Rev. 4 page 46
All use of this publication and ChipCHECK by user shall be subject to the restrictions and conditions as set out in this publication.
•Power down the ChipCHECK unit by pressing the Power Button on the front of the unit
(Refer to Figure 3-3).
•Switch the Main Power Switch on the Power Entry Module to the off position (Refer to
Figure 3-3).
•Disconnect the ChipCHECK unit’s power cord from the ChipCHECK unit.
•Remove the Fuse Holder and extract the Fuse (see Figure 6-3).
•Insert the new Fuse and then reinsert the Fuse Holder into the Power Entry Module.
•Follow the set up instructions as described in Section 3.3.
Figure 6-3: Power Entry Module and Main Power Switch
6.2 Unit Service (No Allowable Service)
In the event of any equipment failure or component replacement, Users are strictly forbidden to
perform any kind of service. There is absolutely NO SERVICE ALLOWED by the User.
Service activities are restricted to only Gastops authorized technicians who have the appropriate laser
safety training. There are no User serviceable parts. This unit is to be serviced or repaired only by
Gastops authorized technicians.
During servicing all precautions must be taken to avoid possible exposure to laser and collateral
radiation above Class 1. This is a Class 1 laser product that contains a Class 4 laser. Removal of any

Gastops Ltd.
C009423, Rev. 4 page 47
All use of this publication and ChipCHECK by user shall be subject to the restrictions and conditions as set out in this publication.
panels may allow for exposure to Class 4 laser radiation. Such panels include the unit’s side panels,
back panel, and main aluminum wrap. Tamper proof fasteners have been used for your protection.
Only Gastops authorized technicians may remove these fasteners. Users are strictly forbidden from
removing any fastener external to the unit.
6.3 Basic Trouble-Shooting
If you run into any problems with the operation of ChipCHECK, use the trouble-shooting procedures
below in Table 6-1. Should any problem persist, contact your designated customer support
representative (Refer to Section 8.0).
Table 6-1: Basic Trouble-Shooting Procedures
Symptom
Possible Remedy
Software interface does not respond
to user input
•Conduct a complete unit shutdown and power
down. Then power up and restart the unit as
per Section 3.3.
•If this does not work,
then contact Gastops
Customer Support (See Section 8.0).
Error occurs in software that ceases
use of unit
•Conduct a complete unit shutdown and power
down. Then power up and restart the unit as
per Section 3.3.
•If this does not work, then contact Gastops
Customer Support (See Section 8.0).
The unit will not power up
•
Ensure the unit is plugged into an appropriate
100-
240 VAC socket and conduct the typical
power up sequence according to Section 3.3.
•Check and replace the fuse, if necessary (See
Section 6.1.3).
•If that does not work, then contact Gastops
Customer Support (See Section 8.0).

Gastops Ltd.
C009423, Rev. 4 page 48
All use of this publication and ChipCHECK by user shall be subject to the restrictions and conditions as set out in this publication.
Symptom
Possible Remedy
Software interface does not respond
to user input
•Conduct a complete unit shutdown and power
down. Then power up and restart the unit as
per Section 3.3.
•If this does not work,
then contact Gastops
Customer Support (See Section 8.0).
The unit lost connection to one or
more of its internal devices
•Conduct a complete unit shutdown and power
down. Then power up and restart the unit as
per Section 3.3.
•If this does not work, then contact Gastops
Customer Support (See Section 8.0).
The unit fails Standardization
•
Power cycle the unit.
•Repeat Standardization.
•
If Standardization fails three times in a row,
conduct Calibration (See Section 5.4).
The unit
fails both Standardization
and Calibration
•Power cycle the unit.
•
Perform the maintenance sequences defined in
Section 6.0.
•Repeat Calibration and the complete
Standardization.
•
If the unit still fails Calibration, then contact
Gastops Customer Support (See Section 8.0).
Chip Analysis –
“No Particles Found”
result after analysis
•
Verify that the correct Sample Patch was
inserted into the unit for analysis.
•Ensure that the sample under analysis contains
particles larger than 80μm x 80μm.
•Rerun the analysis.
•If the issue persists, then contact Gastops
Customer Support (See Section 8.0).
Chip Analysis – “Analysis Failed” result
after analysis
•Power cycle the unit.
•Rerun the analysis.
•If the issue persists, then contact Gastops
Customer Support (See Section 8.0).
Chip Analysis – “Particles Unclassified”
result after analysis
•Clean the particles on the patch using a drop or
two (only) of Isopropyl Alcohol then rerun the
analysis.
•
If the results are unclassified again, then the
particle alloys are not in the material library.

Gastops Ltd.
C009423, Rev. 4 page 49
All use of this publication and ChipCHECK by user shall be subject to the restrictions and conditions as set out in this publication.
Symptom
Possible Remedy
Software interface does not respond
to user input
•Conduct a complete unit shutdown and power
down. Then power up and restart the unit as
per Section 3.3.
•If this does not work,
then contact Gastops
Customer Support (See Section 8.0).
“Door Interlock fault condition exists.
Servicing is required. Please call
customer support”
•Conduct a complete unit shutdown and power
down. Then power up and restart the unit as
per Section 3.3.
•If this does not work, then contact Gastops
Customer Support (See Section 8.0).
“Sequence contains no matching
element”
“Object reference not set to instance
of an object”
“Out of memory”
“A generic error occurred in GDI+”
•
Conduct a complete unit shutdown and power
down. Then power up and restart the unit as
per Section 3.3.
•If this does not work, then contact Gastops
Customer Support (See Section 8.0).
Unexpected unit shut down
•Restart the system.
•If unit continues to shut down unexpectedly,
then contact Gastops Customer Support (see
Section 8.0).

Gastops Ltd.
C009423, Rev. 4 page 50
All use of this publication and ChipCHECK by user shall be subject to the restrictions and conditions as set out in this publication.
7.0 Transport/Shipping and Storage
7.1 Transport/Shipping
The ChipCHECK unit comes packaged in MIL-STD-810 compliant case for field deployability
(see Figure 7-1).Within the transport case, a removable foam insert protects the front face of the
ChipCHECK unit. When unboxing the unit, this insert must be removed before the ChipCHECK can be
removed from the transport case. To remove the unit from its transport case, simply open the case lid,
lift out the foam insert, and then lift the unit out of the box (see Figure 7-2).
NOTE: Slots for storing accessories can be found in the foam insert, and in the foam lining of the case
underneath the foam insert see Figure 7-3 and 7-4.
Figure 7-1: ChipCHECK Transport Case
Figure 7-2: ChipCHECK Transport Case Interior

Gastops Ltd.
C009423, Rev. 4 page 51
All use of this publication and ChipCHECK by user shall be subject to the restrictions and conditions as set out in this publication.
The unit itself weighs approximately 40 lbs (18 kg). The Transport Case that was provided with the
instrument must be used any time the instrument is moved positions or locations. Where possible, two
people shall transport the unit and the instrument shall be kept in its vertical orientation at all times.
The following procedure must be followed when transporting the instrument:
1. Complete an instrument shutdown in accordance with Section 4.7.
2. Unplug the AC power cable from both the unit and the wall power socket.
3. Open the provided Transport Case by undoing all latches and removing the top cover.
4. Remove the instrument’s accessory foam insert from the Transport Case.
5. Carefully lift the instrument and place it into the Transport Case, within its dedicated custom
foam cut out. Note that there is only one proper orientation for the unit to be placed, otherwise
the Transport Case will not close properly.
6. Replace the instrument’s accessory foam insert, and place all of the instrument’s accessories
and power cable into their respective custom foam cut outs.
7. Replace the Transport Case cover and re-fasten all latches.
8. Lock or fasten each latch (where possible).
9. Where possible, two people shall move the unit (in its transport case) to its new location. The
Transport Case is also equipped with a retractable handle and wheels for single person
transport.
NOTE: Relocation within the same room is acceptable to be completed without using the transport
case; however, the transport case must be used otherwise. Prior to shipment/relocation, ensure
that the lid is fully and firmly attached to the main body of the case with all latches fastened
or locked. All parts, components and accessories required to operate the unit are must be
included in the transport case.
NOTE: The Sample Tray must be removed from the unit and placed in its proper location within the
foam insert prior to transport.

Gastops Ltd.
C009423, Rev. 4 page 52
All use of this publication and ChipCHECK by user shall be subject to the restrictions and conditions as set out in this publication.
Figure 7-3: Transport Case Storage Locations (Foam insert removed)
Figure 7-4: Foam Insert Storage Locations
Space for Operator’s
Manual located
beneath ChipCHECK
unit
Storage slots
beneath foam insert
for Sample Cases
Calibration &
Standardization Patches
Sample Tray
External Keyboard
(optional)
External USB
Hub (optional)
External Mouse
(optional)
Wash Bottle (optional)
Sample Preparation Tools
(optional)
Sample Patches,
Ethernet Adapter
Tweezers (optional)

Gastops Ltd.
C009423, Rev. 4 page 53
All use of this publication and ChipCHECK by user shall be subject to the restrictions and conditions as set out in this publication.
Included in the Transport Case:
Quantity
Description
1x
ChipCHECK Unit
1x
Unit Power Cable
1x Sample Tray (Chip)
200x
Sample Patches
1x Standardization Standard
1x
Calibration Standard
20X Sample Patch Cases
1x
USB Ethernet Adapter
Additional optional accessories may include the following:
•External keyboard
•External mouse
•External USB hub
•Sample preparation tools (tweezers, probe set, wash bottle)
7.2 Storage
When storing the unit temporarily, take note of the environmental limitations defined at the beginning of
the manual and all shipping procedures must be followed (Refer to Section 7.1).

Gastops Ltd.
C009423, Rev. 4 page 54
All use of this publication and ChipCHECK by user shall be subject to the restrictions and conditions as set out in this publication.
8.0 Customer Support
Gastops technical support representatives for ChipCHECK can be reached at:
Phone: 1-613-744-3530
Fax: 1-613-744-8846
Toll Free: 1-800-363-8658
Email: support@gastops.com
Gastops Limited
1011 Polytek Street
Ottawa, ON
K1J 9J3
Canada
Other manuals for ChipCHECK CC120
1
This manual suits for next models
1
Table of contents
Other Gastops Measuring Instrument manuals
Popular Measuring Instrument manuals by other brands
Ambient Weather
Ambient Weather Fischer 1434B-22-B user manual

IFM Electronic
IFM Electronic efector 300 SV Series operating instructions
Berner
Berner 43345 operating instructions
Sofraser
Sofraser MIVI 8001 Technical manual
DAKOTA ULTRASONICS
DAKOTA ULTRASONICS PZX-7 Operation manual

mru
mru NOVAplus biogas user manual
