Gate Tel EZgate User manual
1
GateOpen - User manual Rev. 3 – 20/07/10
EZgate
User manual
Rev. 3 – 20/07/10

2
GateOpen - User manual Rev. 3 – 20/07/10
1. Overview
The GateOpen is a complete system solution for cellular gate\door access control.
The unit stores white list of authorized users; when someone calls the unit, the unit hangs-up
the call and check if the caller ID exists in the list, if it does, a pulse generated by internal
relay, command the gate\door to open.
No call cost for the user.
The unit holds up to 1600 authorized users and up to 400 restricted (limited) users, totally
2000 users.

3
GateOpen - User manual Rev. 3 – 20/07/10
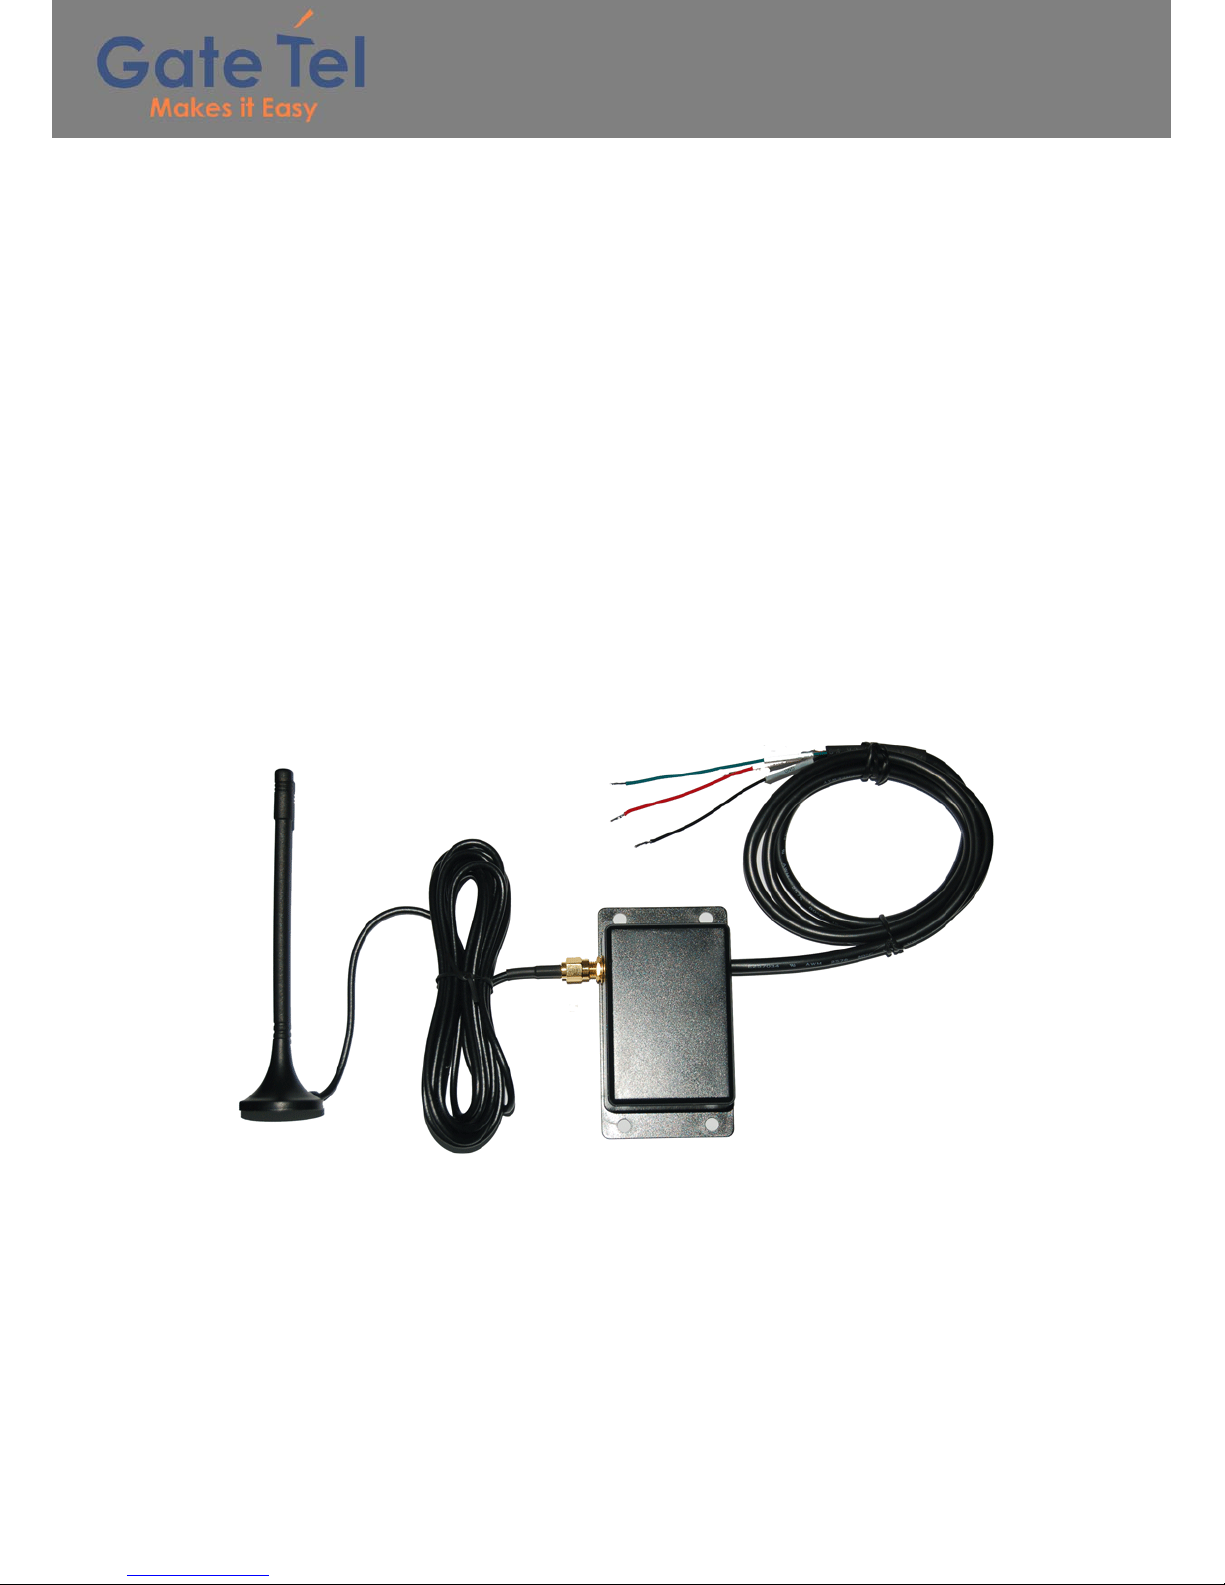
2. General Product Description
2.1 Dimensions
2.2 Weight
120 grams.
2.3 Input voltage
5V-30V DC
2.4 Casing material
The case made from plastic PC
IP54 Avoid exposing the unit to liquid or moisture
4
GateOpen - User manual Rev. 3 – 20/07/10
2.5 Environmental requirements
2.5.1 Temperature range
Ambient temperature
in plastic enclosure Note
Operating
Temperature Range
-20°C to +55°C
The unit is fully
functional in all the
temperature range, and it fully neets the
ETSI specification
–40°C to +85°C
The module is fully functional in all the
temperature range. Temperatures
outside
the range –20°C to +55°C,
might slightly deviate from
ETSI specifications
Storage and Non
Operating
Temperature Range –40°C to +85°C
2.5.2 Air humidity range
5% - 85%
2.5.3 RoHS compliance
All hardware components are fully compliant with the EU RoHS and WEEE Directives
2.6 GSM frequencies
The unit supports quad band GSM frequencies
•GSM-850
•E-GSM-900
•DCS-1800
•PCS-1900

5
GateOpen - User manual Rev. 3 – 20/07/10
3. Installation
3.1 Electronic Gate\Door requirements
The Electronic Gate\Door requires dry contact activation
3.2 SIM card insertion
With a Philips screw driver open the SIM card drawer cover and insert the SIM card.
Make sure the SIM card is capable to receive incoming SMS messages and to identify a
caller ID.
3.4 GSM antenna
The GSM antenna needs to be connected to the SMA connector in the front panel
3.5 Power Supply
The power supply for the GateOpen has to be a single voltage source of POWER 5V-30V
capable of providing a peak during an active transmission. The GateOpen is protected from
supply voltage reversal. An internal fuse ensures an electrical safety according to EN60950.
This fuse is not removable.
3.5.2 Supply voltage requirements
A DC power supply must be connected to the Power input:
• Input voltage range 5V - 30V DC
• Nominal Voltage 12V DC
• Power Supply current rating: min. 1,2A @12V
• Power Supply ripple: max. 120mV
• Input current in idle mode: 25mA @ 12V
• Input average current while GSM network active (call, etc…): 100mA @ 12V
3.7 Unit turning on
After power the unit on, the internal software will finish to be loaded within 3 minutes.
The green LED will be turned on to indicate the unit is ready for use.
3.8 Access the gate\door
A registered user may call the unit and activate it output.
If the user cellular phone blocks its caller ID, he can access the unit by SMS.
If an access control by SMS is desired, the SMS: O (lowercase or uppercase) needs to be
sent to the unit.

6
GateOpen - User manual Rev. 3 – 20/07/10
4. Programming the unit
The unit can be programmed in four ways
1. By a computer with the GTO using serial cable
2. By a computer with the GTO using data call (CSD connection)
3. By a computer with the GTO using GPRS connection (over the internet)
4. By SMS commands
4.1 GTO software
Main screen buttons
4.1.2 Data call connection (CSD connection)
In order to use this option a GSM modem terminal must be used.
Verify with the GSM carrier that both SIM cards (GSM modem terminal and GateOpen unit)
support data calls.
Connect the GSM modem terminal to the computer with a serial cable.
GSM network
Connect
Communication
selection
Select
Language
Save\ Save as -
Save all unit data on
a PC file
Open backup unit
data from a PC file
New unit data file
About
7
GateOpen - User manual Rev. 3 – 20/07/10
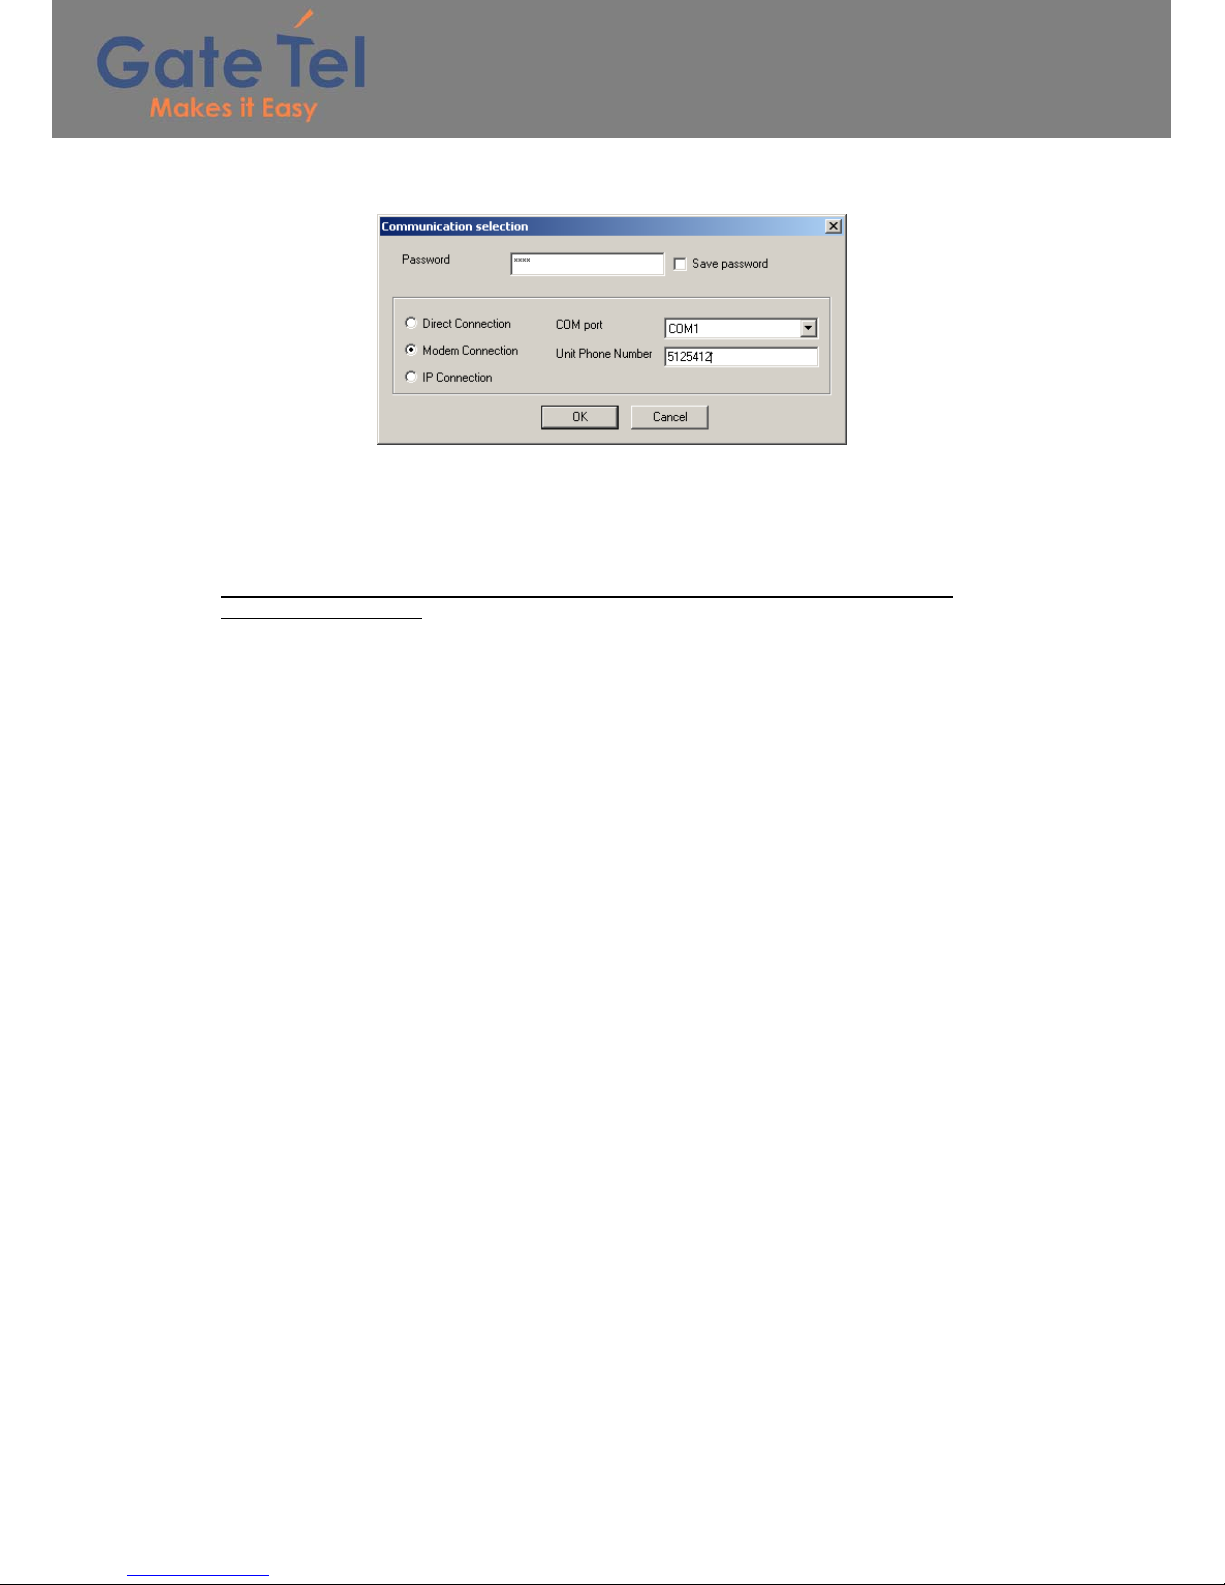
Open the GTO software and click the “communication selection” button
Select “Modem connection” option, insert the unit password (default password is 1234), select
the proper com port, insert the GateOpen phone number and press OK.
Click the “connect” button to establish the connection to the unit; it can take up to one minute
to establish the communication.
When the communication will be established, the disconnect button will appear.
While connected to the unit, the green LED will turn off and no incoming calls for access
control will be accepted.

8
GateOpen - User manual Rev. 3 – 20/07/10
4.1.3 GPRS connection (over the internet)
In order to use this option the GateOpen SIM must support GPRS connection and to have fix
internet IP, contact the GSM carrier to enable these options.
Before a GPRS connection can be establish with the unit, the GPRS parameters must be set
to the unit using direct serial connection, refer to miscellanies screen for more information.
Open the GTO software and click the “communication selection” button
Select “IP connection” option, insert the unit password (default password is 1234), insert the
GateOpen internet IP address and press OK.
Click the “connect” button to establish the connection to the unit; it can take up to one minute
to establish the communication.
When the communication will be established, the disconnect button will appear.
While connected to the unit, the green LED will turn off and no incoming calls for access
control will be accepted.
4.1.4 Change the software language
Click the “Select Language” button, select the wanted language and press OK.
In order the change to take place, the software must be reopened.
Internet

9
GateOpen - User manual Rev. 3 – 20/07/10
4.1.5 Users screen
Manage the users’ whitelist.
All the descriptions below are enabled only after connecting to the unit.
Get the users list from the GateOpen unit:
1. Click the “Retrieve numbers” button
2. Verification screen will popup, Click “Yes”
3. All the users icons will be changes to
4. Wait until the progress bar will fill
5. All the retrieved users icons will be changed to
Compare the GTO users list with the GateOpen unit users list
1. Click the “Quick compare” button
2. Wait few seconds
3. The GTO compares batches of 100 users with the GateOpen unit (1-100, 101-200,
etc…).
If one or more user\s in the batch are different, all the 100 batch users’ icons will be
changes to .
If all 100 users in the batch are equal, the users’ icons will be changed to
Add user:
1. Click on an empty user record or enter its entry number in the “Entry No.” field
2. Enter the phone number field
3. Enter the user name field
4. Select which outputs the user will activate (Relay\output1)
5. Select if the unit will send SMS notify to the personnel numbers when calling with the
“SMS notify” check mark – for more information refer to ”Personnel numbers” in the
“Miscellaneous screen” section
10
GateOpen - User manual Rev. 3 – 20/07/10
6. Click the “Set” button, the selected field will fill with the wanted parameters and its
icon will be changed to
7. The changes will not take place until writing them to the unit
Delete user:
1. Click on a user record or enter its entry number in the “Entry No.” field
2. Click the “Delete” button, the selected field will fill with empty parameters and its icon
will be changed to
3. The changes will not take place until writing them to the unit
Write the users list to the GateOpen unit:
*In this option, the entire user list is being writing to the unit, regardless to the present of the
records in the unit.
1. After finishing adding and deleting users from the list, click the “Write all numbers”
button
2. Wait for the progress bar to fill, it can take several minutes
3. All the written records icons will be changed to
Write the modified users list to the GateOpen unit:
*In this option, only records that marked with icon will be written to the unit.
1. After finishing adding and deleting users from the list, click the “Write modified
numbers” button
2. Wait for the progress bar to fill, it can take several minutes depends on the number of
records marked as
3. All the written records icons will be changed to
Stop the current process with the GateOpen unit:
The processes of retrieve numbers from the unit, write the entire users list\modified users list
to the unit can be stop in the middle by pressing the “stop” button.
The stop procedure may take a few seconds
Export the users’ list to Excel file:
The users’ list can be export to Excel file using the “Export to Excel” button.
Import the users’ list from Excel file:
The users’ list can be import from Excel file using the “Import from Excel” button.
The imported file must be a file that been exported from the GTO software, otherwise an error
will occur.
In order to import Excel file, export en empty Excel file as a template from the GTO software,
change it and import it back to the GTO software.
Search record in the users’ list:
A record can be searched by entry number, phone number or partial user name.
Enter entry number\phone number\partial user name in the correct field and press the search
button next to it.
If the record exists in the list, it will blink four times.

11
GateOpen - User manual Rev. 3 – 20/07/10
4.1.6 Restricted users screen
Manage the restricted users’ whitelist.
A restricted user is able to activate the outputs in three ways:
1. From time to time in specific week days, e.g. 10:30-15:00 on Sunday and Friday
2. From date to date, e.g. from 05/05/07 08:00 to 06/06/07 23:00
3. Number of entries – the user is restricted for certain amount of activations
* In order that the restricted users will work fine, the unit internal clock must be set, for more
information refer to “Unit time” in the “Miscellanies screen” section.
All the descriptions below are enabled only after connecting to the unit.
Get the restricted users list from the GateOpen unit:
1. Click the “Retrieve numbers” button
2. Verification screen will popup, Click “Yes”
3. All the users icons will be changes to
4. Wait until the progress bar will fill
5. All the retrieved users icons will be changed to
Compare the GTO restricted users list with the GateOpen unit restricted users list
1. Click the “Quick compare” button
2. Wait few seconds
3. The GTO compares batches of 50 users with the GateOpen unit (1-50, 51-100,
etc…).
If one or more user\s in the batch are different, all the 50 batch users’ icons will be
changes to .
If all 50 users in the batch are equal, the users’ icons will be changed to
12
GateOpen - User manual Rev. 3 – 20/07/10
Add restricted user:
1. Click on an empty restricted user record or enter its entry number in the “Entry No.”
field
2. Enter the phone number field
3. Enter the user name field
4. Select the user mode and enter the user mode parameters
5. Select which outputs the user will activate (Relay\output1, output2\3)
6. Select if the unit will send SMS notify to the personnel numbers when calling with the
“SMS notify” check mark – for more information refer to ”Personnel numbers” in the
“Miscellaneous screen” section
7. Click the “Set” button, the selected field will fill with the wanted parameters and its
icon will be changed to
8. The changes will not take place until writing them to the unit
Delete restricted user:
1. Click on a restricted user record or enter its entry number in the “Entry No.” field
2. Click the “Delete” button, the selected field will fill with empty parameters and its icon
will be changed to
3. The changes will not take place until writing them to the unit
Write the restricted users list to the GateOpen unit:
*In this option, the entire user list is being writing to the unit, regardless to the present of the
records in the unit.
1. After finishing adding and deleting users from the list, click the “Write all numbers”
button
2. Wait for the progress bar to fill, it can take several minutes
3. All the written records icons will be changed to
Write the modified restricted users list to the GateOpen unit:
*In this option, only records that marked with icon will be written to the unit.
1. After finishing adding and deleting users from the list, click the “Write modified
numbers” button
2. Wait for the progress bar to fill, it can take several minutes depends on the number of
records marked as
3. All the written records icons will be changed to
Stop the current process with the GateOpen unit:
The processes of retrieve numbers from the unit, write the entire restricted users list\modified
restricted users list to the unit can be stop in the middle by pressing the “stop” button.
The stop procedure may take a few seconds
Export the restricted users’ list to Excel file:
The users’ list can be export to Excel file using the “Export to Excel” button.
Import the users’ list from Excel file:
The restricted users’ list can be import from Excel file using the “Import from Excel” button.
The imported file must be a file that been exported from the GTO software, otherwise an error
will occur.
In order to import Excel file, export en empty Excel file as a template from the GTO software,
change it and import it back to the GTO software.
Search record in the restricted users’ list:
A record can be searched by entry number, phone number or partial user name.
Enter entry number\phone number\partial user name in the correct field and press the search
button next to it.
If the record exists in the list, it will blink four times.
13
GateOpen - User manual Rev. 3 – 20/07/10
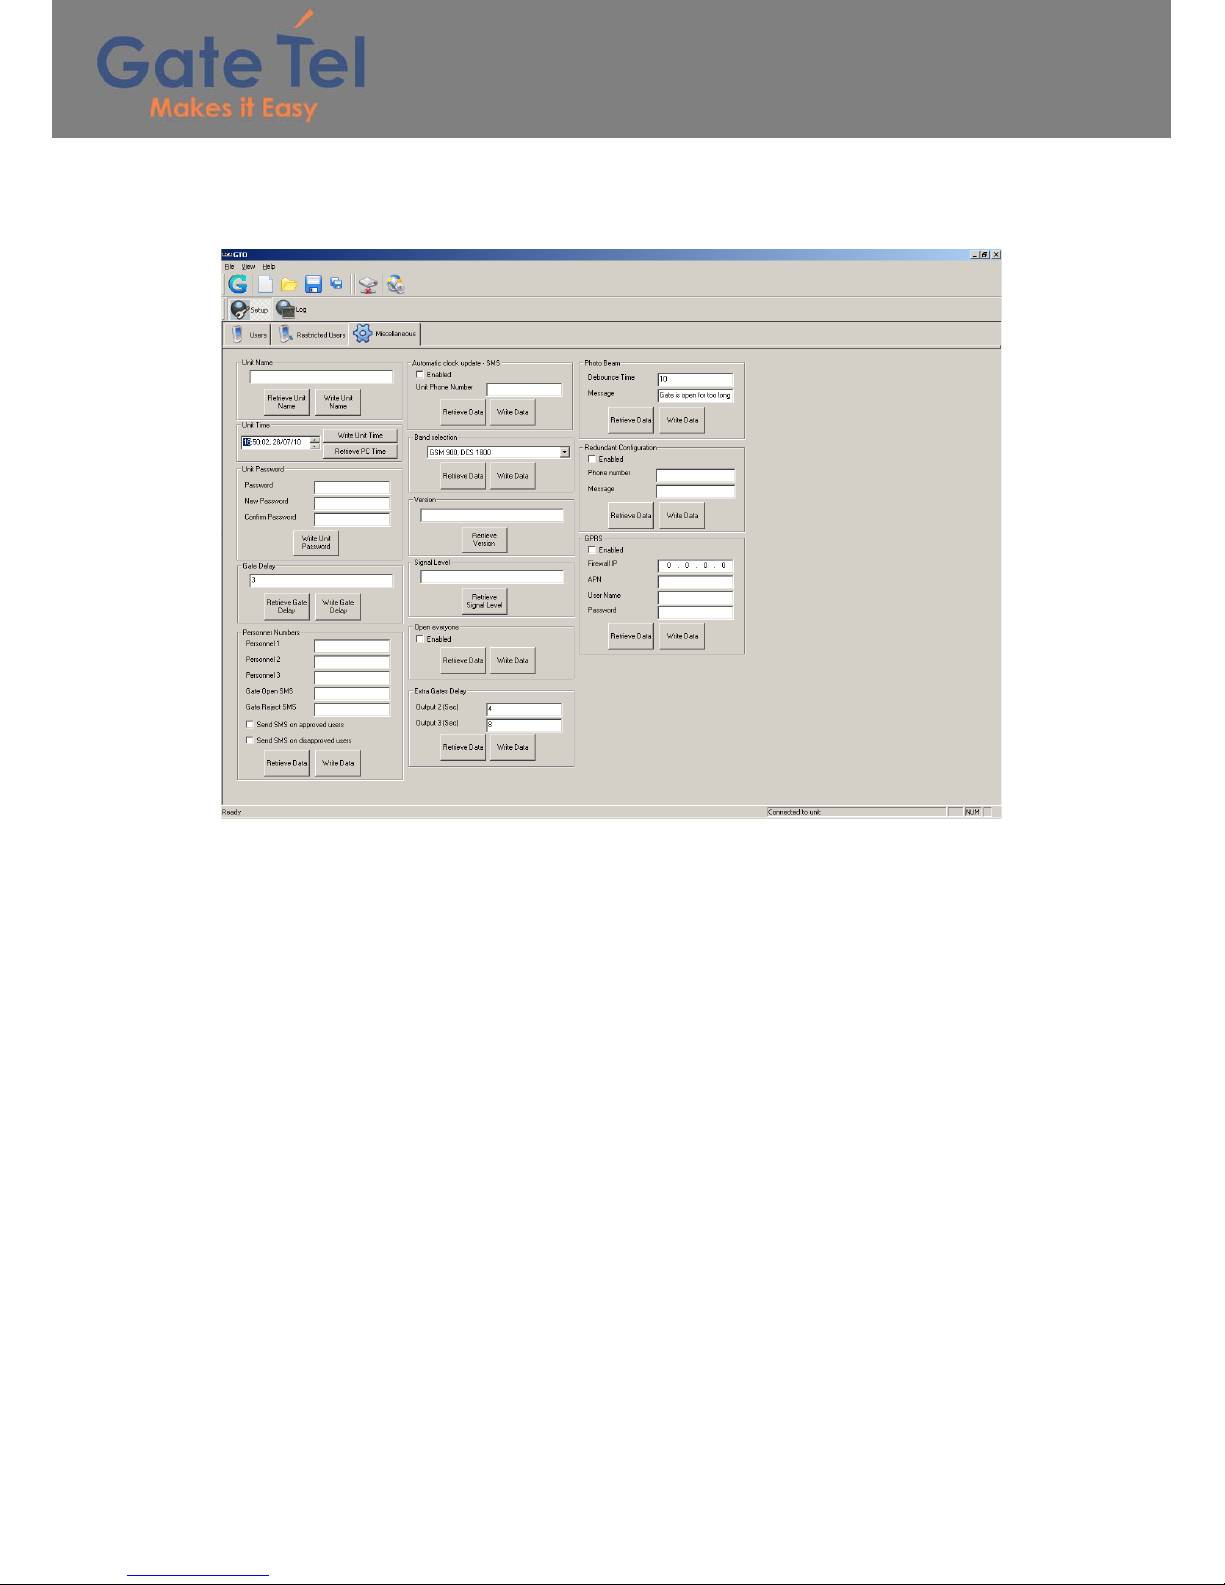
4.1.7 Miscellanies screen
Manage the unit parameters.
Unit name:
Retrieve or write the unit name
Unit time:
In order to write the current time to the unit, retrieve the PC time and then write it to the unit.
The unit clock will be lost when the power turned off.
Unit password:
Define new password for the unit.
The password is used in the connection selection screen.
Default password is 1234.
Gate delay:
Retrieve or write the gate delay in seconds.
Gate delay defines the time that the outputs will be activated.
14
GateOpen - User manual Rev. 3 – 20/07/10
Personnel numbers:
The personnel numbers define the phone numbers that will notify by SMS when the unit
reject\allow an incoming call.
The unit can hold up to 3 personnel numbers.
Approved user SMS syntax:
Phone number: <Caller ID>
<Gate Open SMS>
<Gate Open SMS> - refers to the “Gate Open SMS” fiel
Rejected user SMS syntax:
Phone number: <Caller ID>
<Gate Reject SMS>
<Gate Reject SMS> - refers to the “Gate Reject SMS” field.
Checking the “Send SMS on approved users”:
If an approved user (normal or restricted) calls to the unit, the unit will send the “Approved
user SMS” to the personnel numbers if the user has the “SMS notify” option in its record.
Checking the “Send SMS on disapproved users”:
If a disapproved user (not in the normal\restricted lists or restricted user that is not allowed at
the moment) calls to the unit, the unit will send the “Rejected user SMS” to the personnel
numbers.
Automatic clock update - SMS:
If enabling this feature, the unit sends to itself SMS on startup and updates its internal clock
according to the SMS time stamp.
Unit Phone Number – The phone number of the GateOpen unit.
Band selection:
Retrieve\write the GSM band according to the country GSM support
Version:
Retrieve the GateOpen unit firmware version.
Signal level:
Retrieve the GSM signal level.
Open everyone:
If enabling this feature, the unit will activate the relay (output1) for every phone number that is
calling to the unit, regardless to the users list.

15
GateOpen - User manual Rev. 3 – 20/07/10
GPRS
Retrieve\write the GPRS parameters:
•Enable\disable GPRS
•Firewall IP – the only IP which the unit will get incoming connection from.
Use 0.0.0.0 to allow all IPs
•APN – the cellular network access point
•User name – the cellular GPRS user name
•Password – the cellular GPRS password
After enabling this feature, the unit needs to restart for change to take effect.
4.1.8 Log
Manage the unit log
Retrieve the entire log
Retrieve the entire log from the unit
Most recent long entries
Retrieve the last desire amount of entries from the log
Delete log
Delete all the unit log, confirmation is required
Stop the current process with the GateOpen unit:
The processes of retrieve the entire log and retrieve most recent long entries can be stop in
the middle by pressing the “stop” button.
The stop procedure may take a few seconds
Export the retrieved log entries to Excel file:
The retrieved log entries can be export to Excel file using the “Export log to Excel” button.
Table of contents


