User Manual
Page 7
DPA-2506
Hot warning
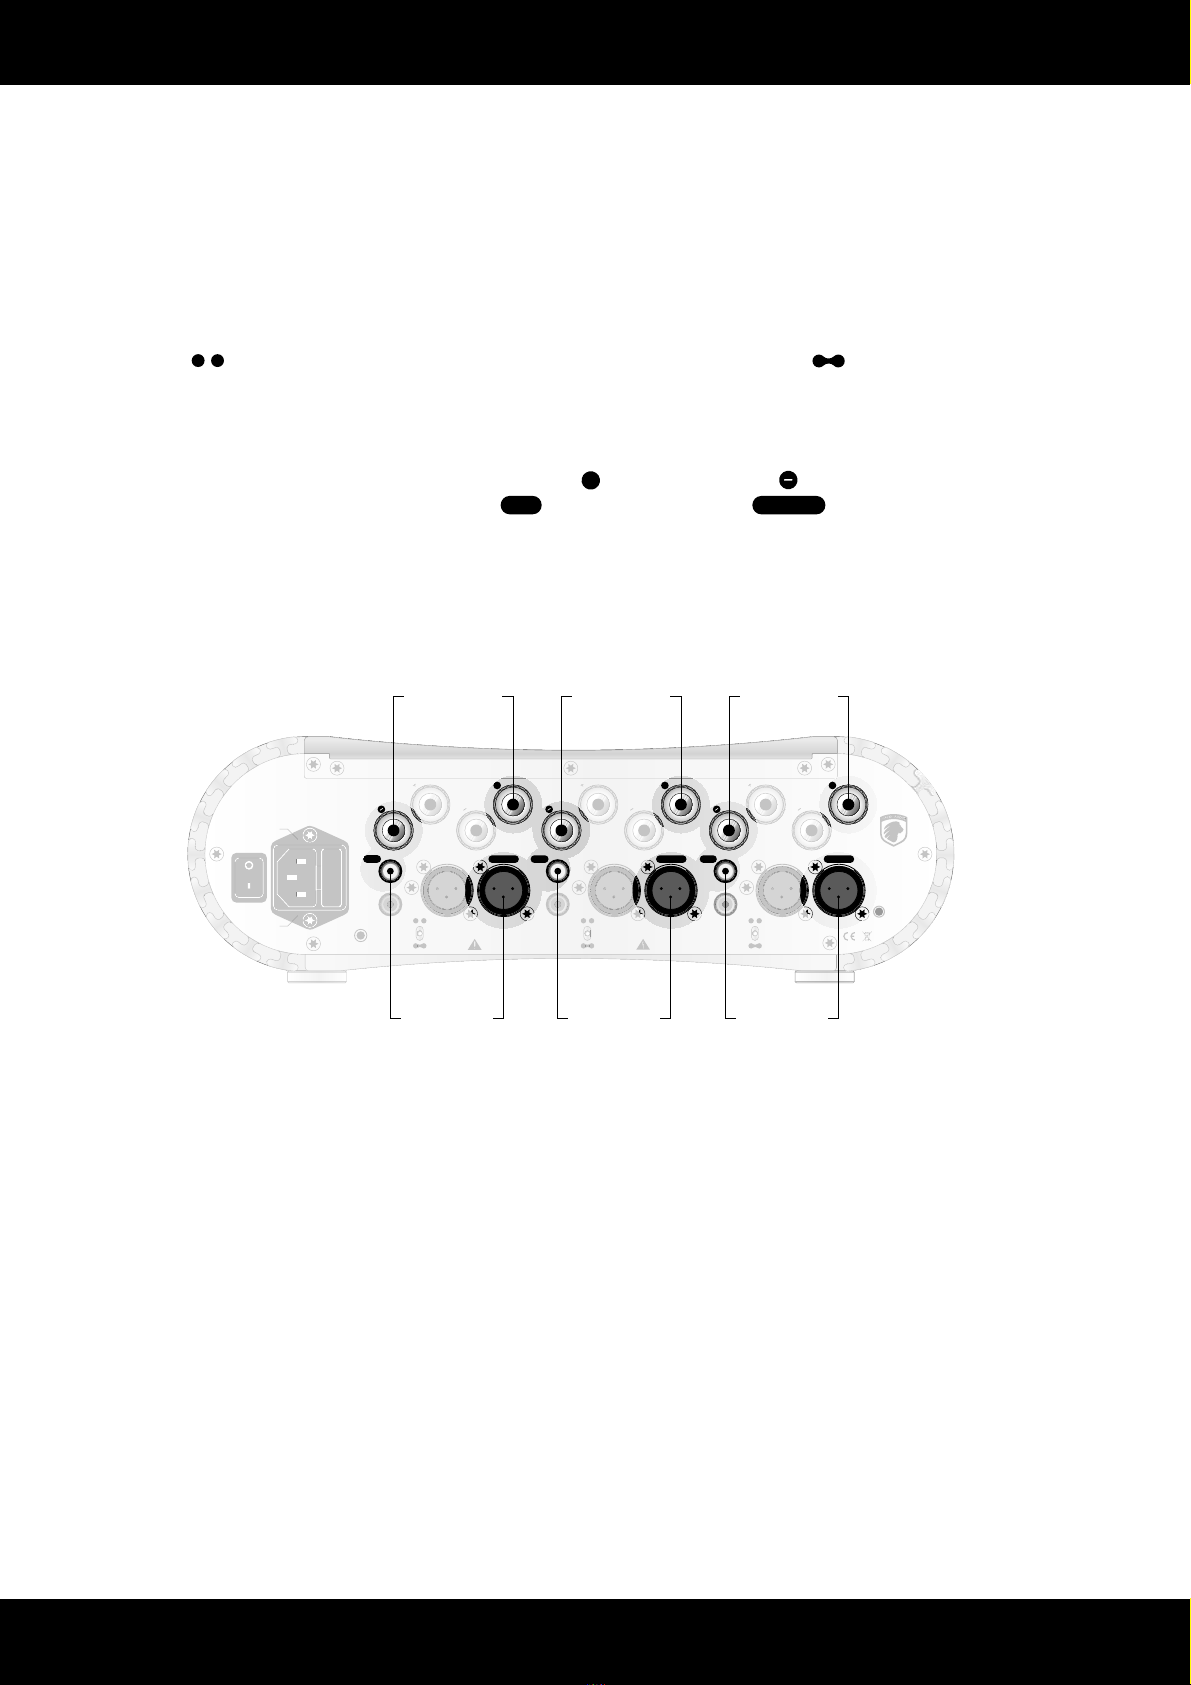
Ch3-4
Ch3-4
Ch1-2 Ch5-6
Ch1-2 Ch5-6
DPA-2506
Failure warning
How does it work?
Power on
Use the mains switch on the back of the amplier to turn it on. The amplier will start up
immediately.
Standby
To set the amplier in standby mode connect it to a piece of equipment (e.g. pre amplier or
integrated amplier) featuring a 12 V trigger with the mini jack cable. The power amplier will go
into standby when the connected equipment goes into standby.
Channel read out
The central display of the amplier will show the number of available channels according to the
current conguration. Please see page 8 for further information about the conguration.
Display dimming
The display can be dimmed by pressing the Display on the back of the amplier. The display is
now turned o except for one LED indicating the dimmed display state. Press the button again
to exit display dimming mode.
Protection warnings
The DPA-2506 is equipped with a sophisticated protection circuit to protect the amplier and/or
the connected equipment in case of failure. The DPA-2506 features two warning signals:
A H(for HOT) sign will be shown in the display due to temperature problems. One or more dots
will ash indicating which output section is failing:
If this happens, turn o the amplier mains switch and wait about 10 minutes for the heat sinks
cool down before turning on the mains again. If a lot of heat is generated within a short period of
time, please check the following:
• The ventilation around the amplier
• The speaker cable and cable connections for the displayed channels
• The specications of the connected loudspeakers for the displayed channels
A F(for FAIL) sign will be shown in the display. One or more dots will ash indicating which
output stage is failing:
Turn o the amplier mains switch and please check the following before turning the mains on
again:
• The speaker cable and cable connections for the displayed channels
• The connected equipment for the displayed channels
• That you are not playing above the clipping area of the amplier
If the amplier keeps failing after the powering up routine, please turn o the amplier and
contact your dealer or national distributor.
DPA-2506
Standby
Display dim
DPA-2506
6 Channels
DPA-2506