Gator Kennels Signature Series User manual
Signature-Series Kennels
Assembly Instructions
www.GatorKennels.com
(970) 622-9885

The tools you will need are:
• Hammer-drill with 3/8 masonry bit.
• 3/8” wrench or Socket.
• ½” wrench or Socket.
• 7/16” wrench or Socket.
• Phillips Screwdriver.
* If attaching to your existing wall, the appropriate wall-anchors
to match your wall construction is needed.
These are the assembly instructions for
Gator Kennels Signature-Series kennels.
The basic steps are the same - regardless of the size/configuration.
Be sure to refer to your quote and any accompanying pages for specific
sizes and layouts!
Some useful items to have are:
• Chalk-line or way to draw straight lines over long distances.
• Power-driver or cordless drill with socket-driver bit.
Page 1 of 14
Gator Kennels Signature-series kennel assembly instructions
Page 1 of 14
Gator Kennels Signature-series kennel assembly instructions
Page 1 of 14

Concrete
Anchors
Post FootMeasure
Stick
Page 2 of 14
Gator Kennels Signature-series kennel assembly instructions
Page 2 of 14
Gator Kennels Signature-series kennel assembly instructions
Page 2 of 14
Wall
3‘
4‘
5‘
Foot should be at least ¼” from any wall
Parts Needed:
1. Mark the corner of the area you want the kennels to sit.
• A chalk-line works great for this!
• All posts right up next to a wall should be at least ¼” away from the
wall to allow space for assembly.
2. Check the corners for square.
If you do not have a square - there is quick way to check for square by measuring!
• Measure 3’ along one line and make a mark.
• Measure 4’ along the other line and make a mark.
• If your corners are square, the measurement between the marks
should be 5’
START 3 foot 4 foot 6 foot
If you are attaching to the wall, use the measure-stick marked: “Wall”
• Set the end of the stick marked “wall” against the wall.
• The other end of the stick will have measurements for the distance from
the wall.
• Set the hole on the stick over the post-foot at the desired location.

Concrete
Anchors
Post FootMeasure
Stick
Page 3 of 14
Gator Kennels Signature-series kennel assembly instructions
Page 3 of 14
Gator Kennels Signature-series kennel assembly instructions
Page 3 of 14
Wall
START 3 foot 4 foot 6 foot
Be sure the new foot is matching your chalk-line
to keep the kennel system square!
Parts Needed:
Post x foot x foot x foot
Set the stick on the hole that corresponds
to the measurement for your project!
Measure-stick in use
3. Place one foot in the corner and anchor it to the ground using the
3/8” concrete anchors.
• Use a 3/8” masonry bit to drill into your concrete floor.
• We recommend drilling at least 3¾” deep.
4. Place the provided measure-stick labeled: “Post” on the foot you just anchored.
• Place another foot at the correct mark on the stick. This will give you
the exact distance needed between the posts.
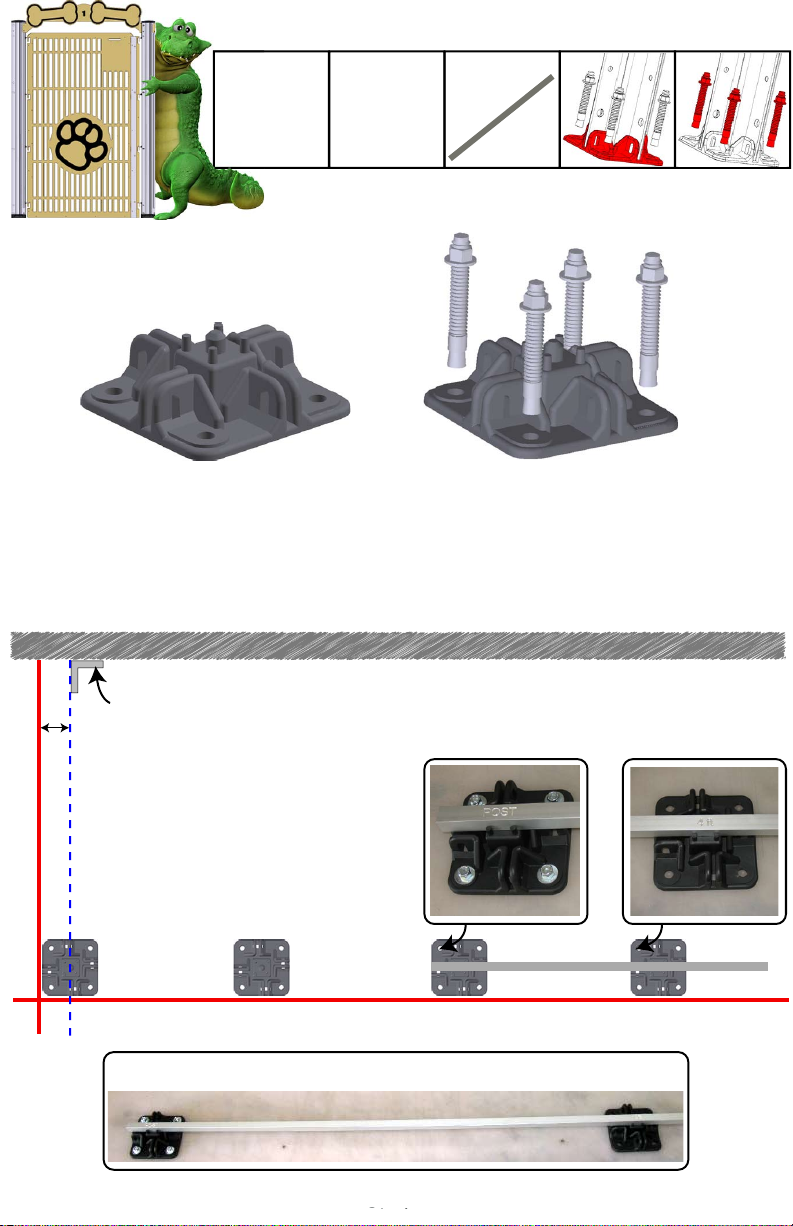
5. Anchor the new foot into place.
6. Continue using the measure-stick until all of the post-feet are in place.
Measure
Stick
Page 4 of 14
Gator Kennels Signature-series kennel assembly instructions
Page 4 of 14
Gator Kennels Signature-series kennel assembly instructions
Page 4 of 14
Wall
START 3 foot 4 foot 6 foot
Parts Needed:
Post x foot x foot x foot
Concrete
Anchors
Post Foot
Measure-stick in use
If you are attaching the kennels to your walls instead of a post:
• Use the 6ft tall wall bracket
• The notched end of the bracket goes UP
• Attach to your wall using the appropriate wall anchor (not provided).
Wall Bracket
2¾”

8. Slide the skirt down the post to cover the concrete anchors.
Page 5 of 14
Gator Kennels Signature-series kennel assembly instructions
Page 5 of 14
Gator Kennels Signature-series kennel assembly instructions
Page 5 of 14
5/16 Flat
Washers
5/16 Nylock
Nuts
Post SkirtPost Hex Bolts
5/16 x 1¼”
Top view of Post:
Parts Needed:
Post
7. Set the posts on the feet and bolt them into place.
• Use the 5/16” x 1¼” Hex-bolt, Flat-washer, and nylock nut.
• Put a flat-washer on BOTH sides of the post for best results!

Page 6 of 14
Gator Kennels Signature-series kennel assembly instructions
Page 6 of 14
Gator Kennels Signature-series kennel assembly instructions
Page 6 of 14
H-Strip*
*only for certain sizes
Panels ¼-20 x ¾”
Bolt
If you have panels more than 4’ wide, there will be three parts to the panels:
Top view of post:
Panel
Panel
Cut-through view of T-nut and bolt assembly
Gate hinge assembly
Bolts on the same as a panel
Eye-bolt
Hinge-frame is ¾” square aluminum tubing.
Parts Needed:
H-strip
(Aluminum)
Upper Panel
- might be slotted
Lower Panel with Gasket
1 2 3
Completed panel
Rubber
(against the floor)
9. Place the panels next to the posts.
• The rubber gasket should go down against the floor.
• It is easiest to have the panel on the square-side of the post
10. Bolt the panels into place.
• Use the ¼-20x¾” bolt to attach the panel to the post.
Square-side of post

Page 7 of 14
Gator Kennels Signature-series kennel assembly instructions
Page 7 of 14
Gator Kennels Signature-series kennel assembly instructions
Page 7 of 14
¼-20 x ¾”
Bolt
Hinge
Bars
Parts Needed:
Gate
Header
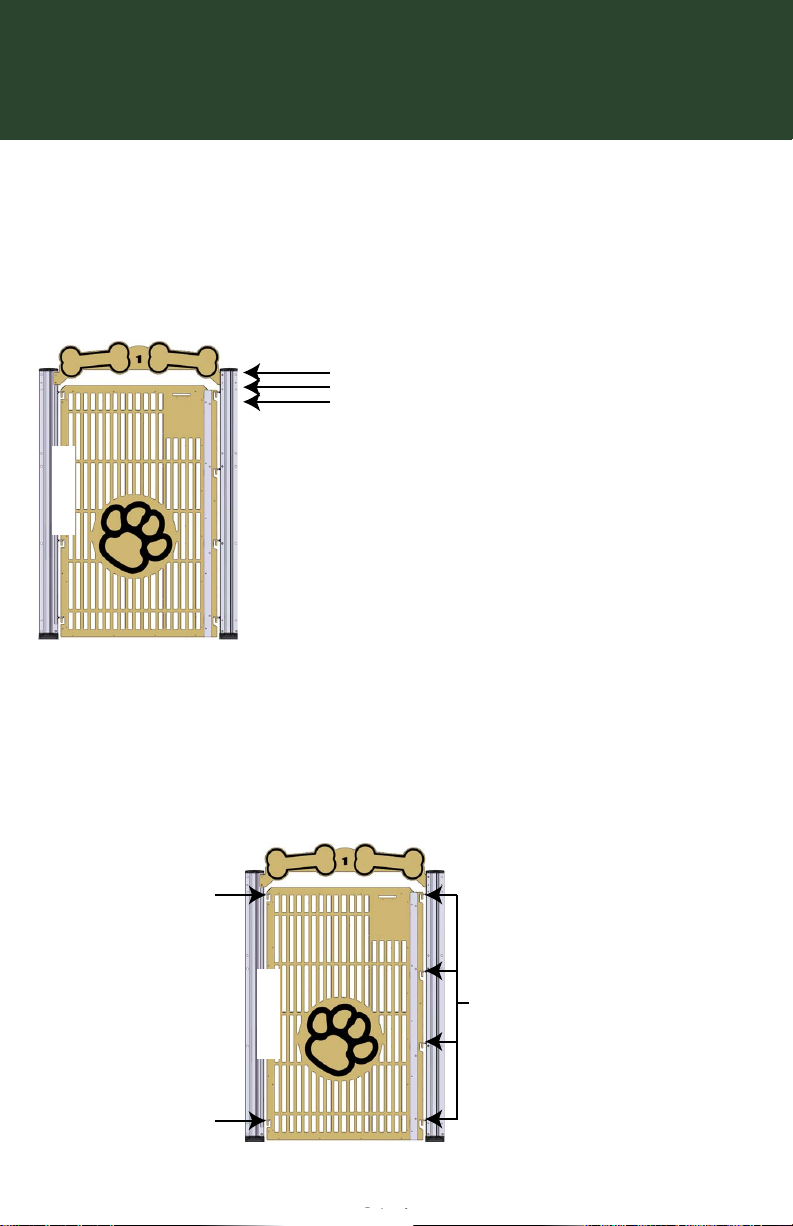
12. Attach the hinge-bars to the gate-posts or wall brackets.
• Use the same ¼-20x¾” bolt to attach the hinge-bars.
• The top hole of the hinge-bar should be the next hole below the
header.
• Bolt hinge-bars on BOTH sides of the gate-area (one will act as the
latch-attachment).
• Point the eyebolts toward each other (into the gate-area).
11. Attach the header to the posts or wall brackets.
• Use the ¼-20x¾” bolt to attach the header to the post.
• These bolt in the top two holes on the post or wall-bracket.
The header helps solidify the top of the posts and adds decoration while
also labeling (numbering) the kennels.
Top view of post:
Gate hinge assembly
Bolts on the same as a panel
Hinge-frame is ¾”
square aluminum tubing.
Eye-bolt
Hinge-bars

Page 8 of 14
Gator Kennels Signature-series kennel assembly instructions
Page 8 of 14
Gator Kennels Signature-series kennel assembly instructions
Page 8 of 14
Parts Needed:
Gate Gate
Latch
¼-20 x 1”
Pan-head
¼“ Nylock
Nut
13 Drop the gate in the eyebolts you want to act as the hinge.
• The gate will NOT reach the other side - yet. Do not worry - we have
more pieces to add.
14. Attach the latch assembly.
• Use the ¼-20x1” pan-head and ¼” Nylock nut to attach the latch to
the gate.
• Holes in the aluminum part of the latch should line up with holes on
the gate.
• The latch should now reach the eyebolts.

Page 9 of 14
Gator Kennels Signature-series kennel assembly instructions
Page 9 of 14
Gator Kennels Signature-series kennel assembly instructions
Page 9 of 14
Latch-lock ¼“ Nylock
Nut
¼-20 x 1”
Pan-head
Safety Screws
Parts Needed:
Be sure latch-lock points
towards the latch!
This is the “locked” position!
15. Attach the gate safety.
In the event a dog can figure out how to push up the gate far
enough to spring it from the hinges, we’ve included a small screw that
keeps that from happening.
• There should be a small hole in the second from the top hinge-pin.
• Insert the safety screw and tighten the nut.
16. Attach the latch-lock.
Some intelligent dogs figure out how to lift the latch. The latch-lock
is designed to keep those dogs from being able to lift the latch.
• Use ¼-20x1” pan-head screws and ¼” nylock nuts to attach the
latch-lock.
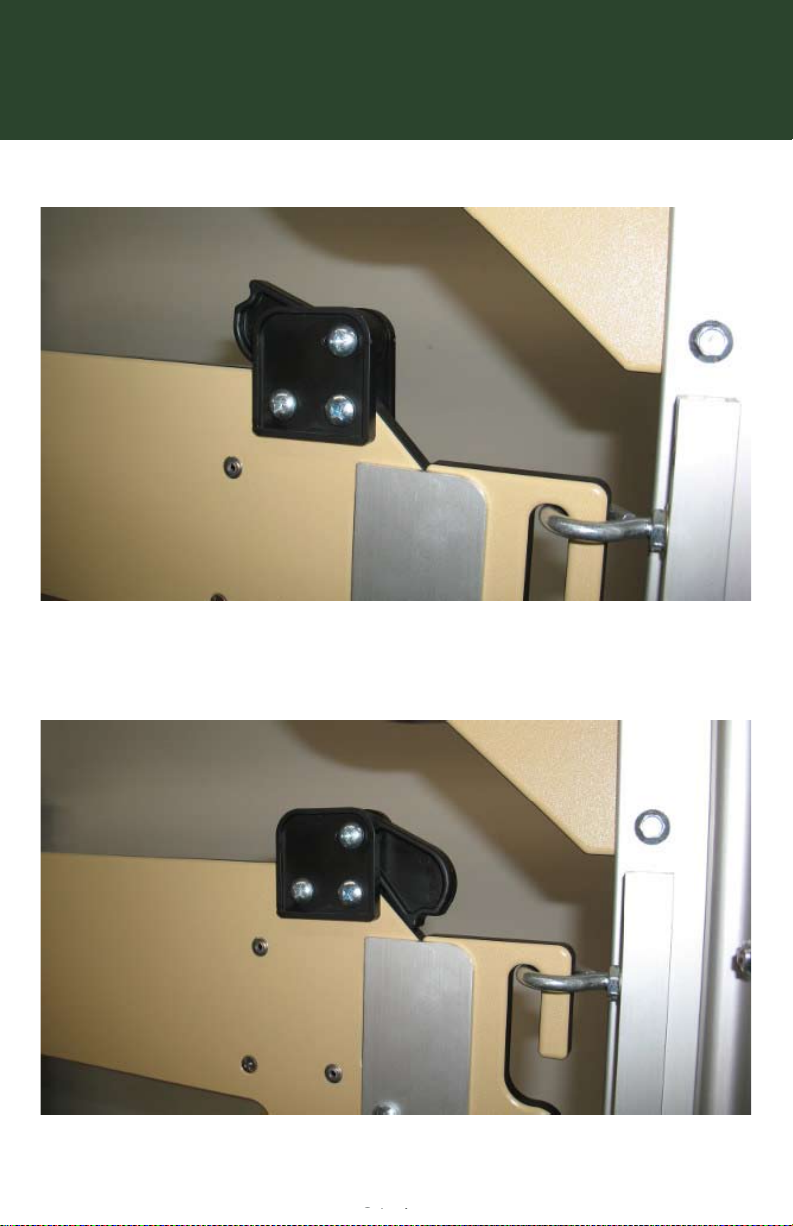
Latch lock open (latch is able to be lifted).
Use this position to open and close the gate.
Latch lock closed (latch is NOT able to be lifted).
Use this position to keep the dogs safely contained.
You can test the operation of the latch-lock
by closing it and trying to lift on the latch.
Page 10 of 14
Gator Kennels Signature-series kennel assembly instructions
Page 10 of 14
Gator Kennels Signature-series kennel assembly instructions
Page 10 of 14
How to operate the Latch-Lock

Page 11 of 14
Gator Kennels Signature-series kennel assembly instructions
Page 11 of 14
Gator Kennels Signature-series kennel assembly instructions
Page 11 of 14
Post Cap Cap Screw
Parts Needed:
17. Attach the post cap.
• The cap helps keep the inside of the post free from hair and it
completes the look of the kennels!
• Pop the cap on the post and use the cap screws to lock it in place.
• Two screws per cap is sufficient.
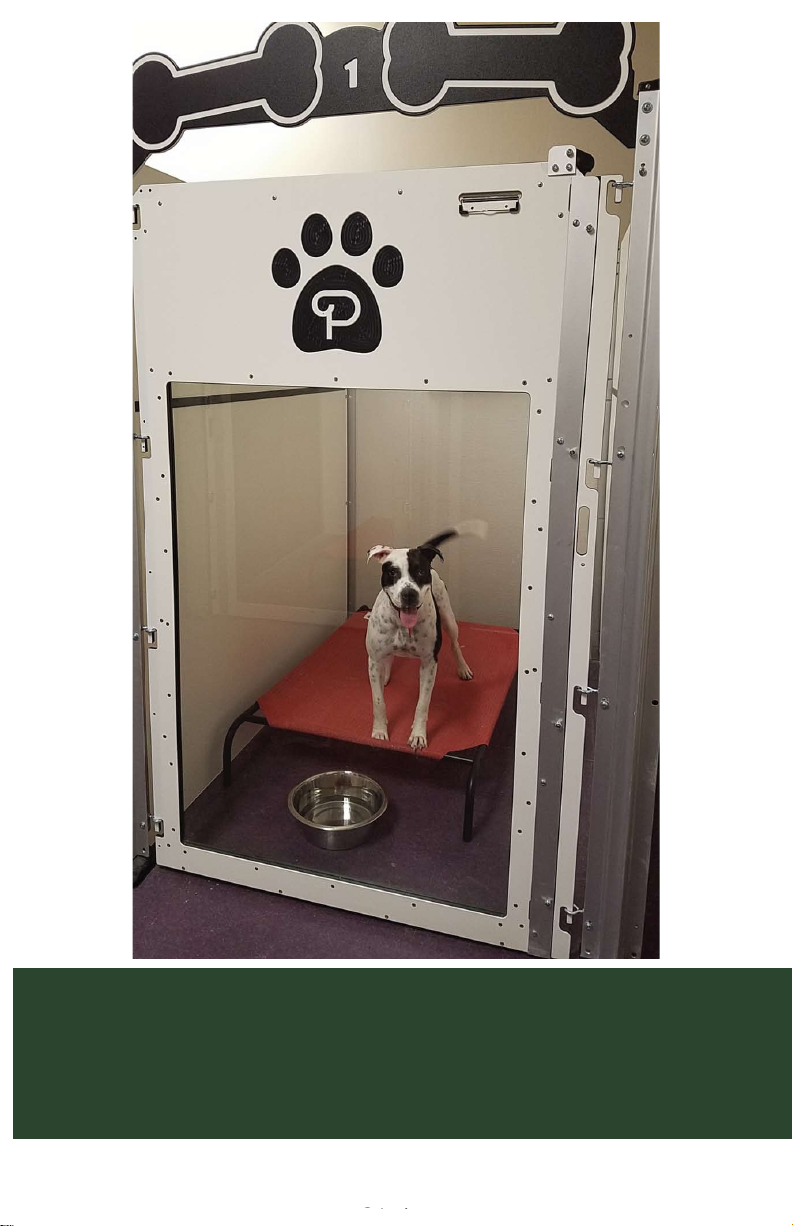
Congratulations!
You have completed the assembly of your kennels!
Enjoy your new kennels!
Page 12 of 14
Gator Kennels Signature-series kennel assembly instructions
Page 12 of 14
Gator Kennels Signature-series kennel assembly instructions
Page 12 of 14
Make a quick adjustment to make the latch work better.
• Loosen the bolts on the header-piece
• Have someone push against the top of the LATCH-Post.
This will push the gate up slightly.
Tighten the bolts to the header while pressure is applied.
Other adjustments to try:
• Screw the TOP eyebolt on the HINGE-side in further.
• Unscrew the BOTTOM eyebolt on the HINGE-side.
Push here while tightening the header-bolts
Latch Adjustment
Page 13 of 14
Gator Kennels Signature-series kennel assembly instructions
Page 13 of 14
Gator Kennels Signature-series kennel assembly instructions
Page 13 of 14
HINGE
Screw this eyebolt in
Screw this eyebolt out
Adjust these eyebolts only if-needed.
HINGE

Gator Kennels are constructed from materials that are naturally anti-
microbial and easy to clean. We know the kennels are a big investments, so
we use materials that are designed to last as long as possible. However,
there are still some chemicals and practices that can damage or prematurely
age the kennels.
Here are some things to avoid:
• The use of cleansing products containing Chlorides, Bromides, Iodides, and
Thiocyanates can discolor and prematurely corrode the kennel (especially the
hardware). Some of these chemicals are also harmful to the animals housed in
the kennels and if not rinsed correctly, can cause chemical burns!
• Animal hair should be removed. Hair can hold unwanted bacteria, urine, and
molds. This increases the smell and promotes disease.
• Do not use steel-wool pads on any surface as you will scratch off any
protective finish and possibly damage the kennel itself.
These steps should prolong the life of the kennels:
• Any cleansing agent you do use should be thoroughly rinsed and NOT allowed
to ‘air-dry’.
• Clean off urine as soon as possible.
• Let the kennels dry between use. This not only helps protect the kennel - but
it reduces the potential for bacteria or mold cross-contamination.
We found some of the best cleansers to use on the kennels is:
Dawn® Dish soap or Scrubbing Bubbles®!
Professional cleansers such as Wysiwash® can be used
- just be sure to rinse!
Kennel Care
Page 14 of 14
Gator Kennels Signature-series kennel assembly instructions
Page 14 of 14
Gator Kennels Signature-series kennel assembly instructions
Page 14 of 14

1828 E 1st Street
Loveland, CO 80537
1828 E 1st Street
Loveland, CO 80537
Custom Animal Enclosures
Dog Kennels, Cat Cages, and Kennel Accessories
Gator Kennels LLC | 1828 East First Street | Loveland, Colorado 80537
Phone 970-622-9885 | Fax 970-622-9886 | © 2020 Gator Kennels LLC
Table of contents
Other Gator Kennels Pet Care Product manuals

Popular Pet Care Product manuals by other brands


Technaxx
Technaxx Fittypet TX-46 user manual

SportDOG
SportDOG SportTrainer 575 quick start guide

Drinkwell
Drinkwell AVALON-AU-17 operating guide

Backyard Discovery
Backyard Discovery 5213 owner's manual

GLA-WEL
GLA-WEL DOG-Sport Operating, Maintenance and Caretaking Instructions

Petsafe
Petsafe Treat & Train quick start guide

PawHut
PawHut D40-006V01 Assembly & instruction manual

Carlson
Carlson 930 owner's manual

Closer pets
Closer pets Mi Bowl CP500 manual

aivituvin
aivituvin AIR21 instruction manual

Evolution Dog Wash
Evolution Dog Wash Evolution Owner's/operator's manual

J&J Global
J&J Global Edenbranch 702001 quick start guide