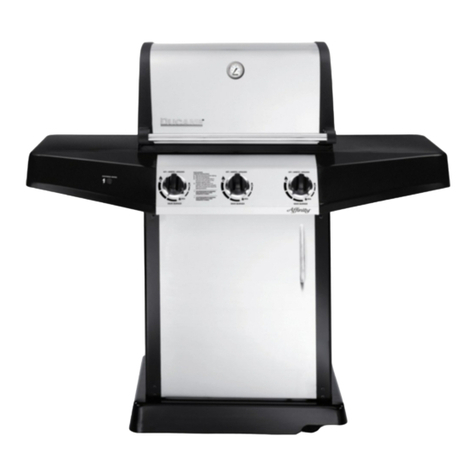
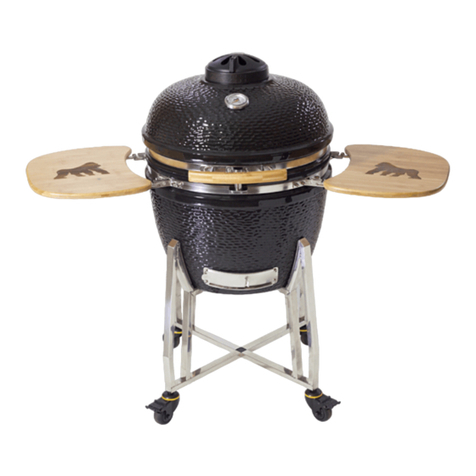
GB Infrared Elite I User manual

1
INFRARED ELITE
MODELS I , II AND III
INFRARED
GAS GRILLS
OWNERS MANUAL
FOR OUTDOOR USE ONLY
Contents:
qLocation Requirements
qAssembly
qGas Requirements
qLP Gas Hook-up
qNatural Gas Hook-up
qOperation
qMaintenance and Cleaning
qReplacement Parts
qTrouble shooting
qWarranty
For Your Safety
If you smell gas:
1. Shut off gas to the appliance
2. Extinguishanyopename
3. Open lid.
4. If odor continues, immediately call your gas
supplieroryourredepartment.
For Your Safety
1. Do not store or use gasoline or other
ammablevaporsorliquidsinthevicinity
of this or any other appliance.
2. An LP cylinder not connected for use shall
notbestoredinthevicinityofthisorany
other appliance.

2
Location Requirements:
WARNING: ThisgrillisDesignCertiedforuseoutdoors
onlyandisnotintendedforuseonrecreational
vehicles or boats.
The“InfraredElite”isdesignedtobeattachedtotheoptional
pedestal/cartorbepermanentlyinstalledonafree-standing
masonryorothersuitablepatioxture.
Minimumclearanceofamobilegrilltoanyadjacent
combustibleconstructioncanbefoundinTableA.
Table A.
Ifyouareinstallingyourgrillasabrick-inormasonrysupported
variation,itshouldbelocatedsotheventilationlouversremain
clearofallobstructions.Thelouversarelocatedinthefrontface
ofthegrillandattherearofthehood.Accumulationofdebrisin
thelouverscancausethegrilltooverheat.Thereshouldbeno
combustibleconstructionabovethegrillwithin6feet.
Theinstallationofyourgrillmustconformtolocalcodesor,in
theabsenceoflocalcodes,witheithertheNationalFuelGasCode,
ANSIZ223,1orCAN/CGA-B149.1,NaturalGasInstallationCodeor
CAN/CGA-B149.2,PropaneInstallationCode.
Combustible Non-Combustible
Construction Construction
Sides 12” 0”
Back 12” 0”

3
ASSEMBLY:
ToolsRequired:
Phillipsheadscrewdriver,adjustablewrench.
PEDESTAL/PORTABLECARTASSEMBLY:
1.Removegrillheadfromcartonandplaceonatsurface.
2.Removepedestal/cartfromcartonandsetuprightwith
castersonground.
3.Openhoodongrillheadandremovewarmingrack,andcooking
gridsandsetaside.
4.Carefullylifthoodassembly,bezelandinnerlineroffof
grillbody.Seegure1.
5.Positiongrillbodyontopofpedestal/cartandfastenwith
seven(7)¼-20x½”boltsforModelIandII,ten(10)for
ModelIIIwithlockingnuts.Seegure2.
6.Drippancannowbeinstalledintoposition.Seegure3.
SIDESHELFASSEMBLY:
1.Removesideshelffromcarton
2.Removethe4-¼”-20x½”boltsfromleftsideofgrill
body.
3.Aligntheholesinsideshelfwiththeholesinthegrillbodyand
fastenwithfourboltsremovedearlier.
4.Ifsecondsideshelfisusedonrightsideofgrillattach
in same manner.

4
Figure1.
Figure2.
Boltsw/
Lockingnuts

5
FINALASSEMBLY:
1.Carefullylifthoodassembly,bezelandinnerlinerand
positionbackongrillbody.
2.Placecookinggridsandwarmingrackinposition.
Makesure“channel”portionofgridisfacingup.
Figure3.
DripPan

6
INFRARED ELITE I
(1 BURNER MODEL)
Note: Eight (8) side shelf screws will need to be removed.
We recommend the grill be on site prior to building in.
Build in (Brick in) Specifications:
For non combustible surround (brick, block, stone etc…)
Front View
Top View
Back View Side View
13”
22 5/16”
22 5/16”
2”
3 1/4”
1 1/2” Hole for
back fed gas
22 5/16”
6” Hood Clearance
Splash
Guard

7
INFRARED ELITE II
(2 BURNER MODEL)
Note: Eight (8) side shelf screws will need to be removed.
We recommend the grill be on site prior to building in.
Build in (Brick in) Specifications:
For non combustible surround (brick, block, stone etc…)
Front View
Top View
Back View Side View
13”
30 1/4”
22 5/16”
2”
3 1/4”
1 1/2” Hole for
back fed gas
22 5/16”
6” Hood Clearance
Splash
Guard

8
INFRARED ELITE III
Note: Eight (8) side shelf screws will need to be removed.
We recommend the grill be on site prior to building in.
Build in (Brick in) Specifications:
For non combustible surround (brick, block, stone etc…)
Front View
Top View
Back View Side View
13”
41 7/16”
22 5/16”
2”
3 1/4”
1 1/2” Hole for
back fed gas
22 5/16”
6” Hood Clearance
Splash
Guard

9
GASREQUIREMENTS:
WARNING:WHENPURCHASEDFORUSEWITHLPGAS,THE
“INFRAREDELITE”GRILLCOMESWITHAREGULATORASSEMBLY
THATUSESAQUICK-CONNECTTYPECOUPLING.THISTYPECOUPLING
CANONLYBEUSEDWITHQUICK-CONNECTSTYLETANKVALVE.
WARNING:THEGASSUPPLYHOSESHOULDBEINSPECTEDPRIOR
TOEACHUSE.DONOTUSEAGASHOSETHATHASABRASIONS,CUTS
OREXCESSIVEWEAR.
WARNING:IFTHEOUTDOORCOOKINGGASAPPLIANCEISNOTIN
USE,THEGASMUSTBETURNEDOFFATTHESUPPLYCYLINDER.
STORAGEOFANOUTDOORCOOKINGGASAPPLIANCEINDOORS
ISPERMISSABLEONLYIFTHECYLINDERISDISCONNECTED
ANDREMOVEDFROMTHEOUTDOORCOOKINGGASAPPLIANCE.
CYLINDERSMUSTBESTOREDOUTDOORSOUTOFREACHOF
CHILDRENANDMUSTNOTBESTOREDINABUILDING,GARAGEOR
ANYOTHERENCLOSEDAREA.
The“InfraredElite”isofferedinoneoftwogascongurationsLPor
Naturalgas.LPmodelsincludepressureregulatorandhoseassembly.
Naturalgasmodelsrequireaseparateregulatorsuppliedwithgrill.LP
modelsrequireastandard20-lb.LPcylinderwithQC
(quickconnect)stylevalve.
PleaseNote:ThePressureregulatorandhoseassemblywiththeoutdoor
cookinggasappliancemustbeused.Replacementpressureregulators
andhoseassembliesmustbethosespeciedforthe“InfraredElite”.
GasSupplySpecications
SUPPLY OPERATING MAINBURNER BURNER
GASTYPE PRESSURE PRESSURE ORIFICESIZE INPUT
Natural 14.0”WCMAX 4.0”WC #49 15,000BTU/HR
5.0”WCMIN
LP 14.0”WCMAX 11”WC #57 15,000BTU/HR
12.0”WCMIN

10
LPGasCylinderSafety:
NOTE:AnLPgascylinderisnotprovidedwiththisgrill.
OnlyD.O.T.approved20-lborCAN/CGA-B339approved
(cylinders,spheresandtubersforthetransportationof
dangerousgoods)LPgascylindersshouldbeused.
Allapprovedcylindersmusthaveanintegralcollardesigned
toprotectthecylindervalvefromdamage.Donotuseortry
torepairadamagedLPgascylinderatanytime.Contact
yourlocalLPgassupplierforreplacement.
q Donotllyourgascylinderbeyond¾full.
q Gascylinderscomewithapressurereliefvalve.Ifa
cylinderissubjectedtoexcessheat,the
reliefvalvewillopenandlethighlyammablegasvapor
and/orliquidescape.Donotstoregascylindersnearan
openameorsourceofheat.Storecylindersonlyinwell
ventilatedareas.
InstallingyourLPgascylinder:
NOTE:Foryoursafety,onlyusetheregulatorandhose
assemblyprovidedasoriginalequipmentwithyourgrill.
NOTE:AreextinguisherforClassA,B,C&Dresshouldbe
readilyavailableatalltimes.
Gascylindershouldbesetuprightsocylindervalveisatthe
top.Thiswillensurepropervalvewithdrawal.
Connectingthecylinder:
1. Turnhandwheeloncylindervalveclockwisealltheway
to close.
2. Turnburnervalvestooffposition.
3. PlacetheLPcylinderbaseintotheholeinpedestal/cart
oorandremoveprotectivecapontankvalve.
See gure 4.

11
Removingthegascylinder:
1. Turnhandwheeloncylindervalveclockwiseuntilit
stops.
2. Removecylinderfromgrillcart.
3. Loosencouplingnutbyturningcounter-clockwise.
NATURALGASINSTALLATION:
CAUTION:Gaspipingtoyourgrillmustbeinaccordance
withlocalcodes.Intheabsenceoflocalcodes,usethe
NationalFuelGasCode,ANSIZ223.1(latestedition)
CAUTION:Thegassupplymustbeturnedoffatthegrill
whenthisapplianceisnotinuse.
Whenorderedfornaturalgas,the“InfraredElite”comes
adjustedfornaturalgas.Aqualiedgasinstallershould
CONNECTINGLPTANKCONT.
4. Inspectregulatorttingsandtankvalvettingandclean
ifnecessary.Replacedamagedpartspriortouse.
5. Insertregulatornippleintothecylindervalveoutlet.
Tightenthecouplingnutbyhand,donotcrossthread
connection. See gure 5.
Figure4. Figure5.

12
NATURALGASINSTALLATIONCONT.
installthegasline.Ashut-offvalveshouldbeinstalledatthe
grill.ThisvalvemustbeC.S.A.DesignCertied.
Thegrillandshut-offvalvemustbedisconnectedfromthe
gassupplypipingsystemduringanypressuretestingofthe
systemattestpressuresinexcess½PSIG(3.5KPa).
GasLeakTest:
WARNING:Donotuseopenametoperformleaktest!
WARNING:Donotattempttousegrillwhenyousmellgasor
failagasleaktest.
Whengasleaktestisperformed,noopenamecanbe
presentneargrill.Testforleakseverytimegasconnectionis
disconnected.
1. Turnallcontrolsoff.
2. Opengassupplyvalve.Applysoapywatersolutionto
allconnectionsincludingfactoryconnections.
3. Ifanybubblescanbeseen,closevalveandtightenthe
connectionwherebubblesappeared.Thenrepeat
steps1and2:Donotover-tightenconnections.
4. Grillcannowbeoperated.

13
Operation:
WARNING!
Beforelightingyourgrillbesuretoreadthissectioncarefully.
WHENLIGHTINGYOURGRILLALWAYSKEEPYOURFACE
ANDBODYASFARAWAYFROMTHEGRILLASPOSSIBLE
Lighting the grill burners:
1. MakesureallknobsareintheOFFposition.
2. Openhood.
3. Turnongassupply.
4. Pushandturnrightpilotvalveknobto“pilot”position.
See gure 6.
5. Rotateigniterknobclockwiseseveraltimes.Youwill
hearasnappingsound,indicatingthatasparkisbeing
deliveredtothepilot.Youmayneedtorotateknob
severaltimesbeforethepilotlights.Checktomake
surepilotislit.See gure 7.
6. Ifthepilotdoesnotlight,turntheknobtotheOFF
positionandwait5minutesbeforerepeatingsteps4
and5.
7. Rotateburnercontrolknob(s)to“High”positionand
burnerswillignite.Leaveburnersathighpositionto
pre-heatgrilltodesiredsearingtemperature.
8. Adjustburnercontrolknob(s)todesiredcookinglevels.
9. Toturnoffgrill,pushinandturnburnercontrolknobs
andthepilotvalveknobtothe“Off”position.
10.NOTE:EliteImodelhasoneburneronly.
Figure6. Figure7.
Ignitor Leftburner
control valve Right burner
control valve Pilot
valve
1”Pilot
Flame
Location

14
OPERATIONCONT.
LIGHTINGBURNERSWITHOUTPILOT:
Ifthepilotburnerisnotworkingproperlytheburnerscan
belitmanually,usingalong(10”)matchorextendednozzle
butane lighter.
MANUALLIGHTINGSTEPS:
1. MakesureallknobsareintheOFFposition.
2. OpenHood.
3. Turnongassupply.
4. Separateleftandrightcookinggrids(EliteIIModel)
tocreateagapincenterofgrillingarea.
5. Lightmatchorlighterandplacethroughgapand
positionoverburnerscreenandrotateburner
controlknobtohighposition.Theburnerwillignite.
6. Immediatelymovecookinggridsbacktotheiroriginal
position.
7. Leaveburnerathighpositiontopre-heatgrilland
followpreviousoperationinstructions.
8. Toturnoffgrill,pushinandturnburnercontrolknobs
andthepilotvalveknobtotheOFFposition.

15
OPERATIONCONT.
INFRAREDGRILLING:
Important:Donotplacefoodoveraburnerthatisnot
operating.Greaseanddrippingswillclogtheburnerports
iftheburnerisnoton.
Grillingoverinfraredburnersisaprocessthatsealsjuicesin
foods.Thisisaccomplishedbysearingthemeatforashort
periodoftimeandnotlettingthejuicesescape.
Theinfraredheatgeneratedbythe“InfraredElite”allows
themeattobeevenlycookedthroughout.Theintense
temperatureoftheburnersurfacewillvaporizedrippingsand
produceaavorfulsmokeabsorbedbyyourfood.
Caution:The“InfraredElite”grillcanbeoperatedatthehighsetting
withthehoodclosedduringnormalcookingduration,butwhencooking
iscompletedgrillmustbeturnedoff.
Cookingwiththe“InfraredElite”
1. Besurethedrippanisinplaceandpushedalltheway
tothebackofthegrill.Note:Drippancanbelined
withaluminumfoilforeaseofcleaning,butbesurenotto
blockfrontventilationspaceabovepanwithfoil.
2. Light the burners using the instructions given.
3. Preheatthegrillafterlightingwithburnercontrolknob
turnedto“high”positionfor5to10minutes.
4. Placethefoodonthegrillandcook2-3minutesfor
initial sear.
5. Turnthefoodandrepeatstep4.
6. Setburnercontrolknobtodesiredcookingleveland
continuecookinguntilthemeatiscookedtoyour
satisfactionturningasnecessary.
7. Turnallknobsto“OFF”andshutoffgassupplywhenyou
arenishedcooking.
8. Cleanthecookinggridsanddrippanaftereachuse.

16
COOKINGHINTS
1. Whenhandlingmeat,useaspatulaortongs,insteadof
afork.Whenmeatispiercedthenaturaljuiceswill
leakout.
2. Uponinitialuse,startoffwithhamburgersorhotdogs
tobecomefamiliarwithinfraredcooking.
3. Reduceexcessiveare-upsby:
A.Trimexcessfat.
B.Pre-heatonhighatleast5-10minutes.
C.Re-positionmeattowardsrearofgrillingareaoron
warmingrackuntilare-upgoesdown.
D.Keepcookinggridscleanaftereachuse.
* The above guide will aid you in achieving excellent
cooking results. The more you use your grill, the better
you and the results will become. Keep in mind several
factors such as outdoor temperature conditions; wind,
humidity, altitude, size, quality and thickness of meat
can inuence results.
COOKING GUIDELINES
Meat Temperature Setting Cooking Time
Steak11/2”Thick Highre3min.eachside 6min.-Rare
Highre2min.eachside.Balance“mediumre 8min.-Medium
Highre2min.eachside.Balance“mediumre 12min.-WellDone
Hamburger1”Thick Highre21/2min.eachside 5min.-Rare
Highre3min.eachside 6min.-Medium
Highre31/2min.eachside. 7min.-WellDone
PorkChop3/4”Thick Highre21/2min.eachside 10min
Balance“medium”re
ChickenPieces Highre2min.perside 15-25min
Balancemediumlowtolowre
WholeChicken Highre10min.Balance“medium”re 1hour20min.

17
MaintenanceandCleaning
Caution:Alwaysallowthegrilltocoolbeforecleaning.Avoid
exposingburnersurfacetowater.
Propermaintenanceandcleaningwillextendthelifeofyour
grill.Regularcleaningwillreduceaccumulationsofdebris,
greaseandfats.Infraredburnersincineratemostdrippings
andfoodparticles,butoccasionallysomeparticlesmay
remain.Forremovaloftheseparticlesturnbothburnerson
highwiththehooddownfor5-10minutes.
CLEANING
DripPan:
Removedrippanfromgrillandcleanwithsoapandwater.
Ifpanislinedwithfoil,removeandreplacefoilandreinstall
pan.
CookingGrids:
Cookinggridscanbecleanedwithagrillcleaningbrush,
whilegridsarestillhotaftereachuse.
StainlessSteelExteriorHousing:
Your“InfraredElite”ismadewiththehighestquality304
stainless steel available. Stainless steel requires very little
maintenance,howeveragoodgradeofstainlesssteelcleaner
shouldbeusedforexteriorcleaning.
PowderCoatedSurfaces:
Powdercoatedsurfacescanbecleanedwithwarmsoapy
waterandrinsedwithcleanwater.
MAINTENANCE
Anoccasionalinspectionofventuriinletsandorice
openingsisrecommended.
Infraredburnermaintenancecanbemaintainedbyoperating
thegrillonhighfor5-10minutesaftereachuse.Anyexcess
accumulationofdebrisonburnersurfacecanberemoved
easily.Removecookinggridsandburnerscreensandvacuum
burnersurfaceeveryfewmonthsorasneeded.

18
Accessories:
Rotisserie(TXS-ROT)
Withthe“InfraredElite”Rotisserieyoucanaddanew
dimensiontoyourgrill.Wholechickens,beef,andporkare
wonderfulwhencookedonrotisserie.
Installing the Rotisserie
1. AttachtheRotisseriebrackettogrillbypushingbracket
betweentopbezelandsidehooduprightusing
(2)10x½”screwsprovided.NOTE:Youmayneedto
loosen(2)screwsthatattachhooduprightto
bezelrsttoallowspacetoinsertbracketsthen
retighten.
2. PositiontheRotisseriemotorontherotisserie
bracketandplugintogroundedoutlet.
UsingyourRotisserie
Caution:DoNotUserotisserieintherain.
1. Removecookinggrids
2. Followburnerlightinginstructions&Preheat
for5-10minutes.
3. Positionthespit-rodinthecenterofthemeat,and
tightenforksintoendsofthemeat.Makesurethe
meatisevenlybalancedontherod.
Note:counter-weightmaybeusedtobalanceirregular
shapedmeat.Turnrotisseriemotoron.
4. Meatcanbecookedatanyheatsetting.“Low”heatis
desirableformostmeatandwillproducejuicer,more
tenderresults.
5. Whennished,besuretoturnbothburnersoff,andturn
offthemotor.
Othercookingaccessoriesavailableforyour“InfraredElite”
includeawoodchipsmoker,steamer,bar-b-quetray,and
griddle,andcanbepurchasedfromyour“InfraredElite”
dealer.

19
ReplacementPartsList
Item Description
cerelm Ceramicelementkitw/gasket
burnpilot Burnerhousingw/PilotBracket
burn Burnerhousing
scrn Burnerscreen
bcv Burnercontrolvalve
pcv Pilotcontrolvalve
bck Burnercontrolknob
pck Pilotcontrolknob
ign Ignitorw/knob
cgrid Cookinggridea. (SpecifyModel)
dpan DripPan (SpecifyModel)
hndl HoodHandle (SpecifyModel)
wrack Warmingrack (SpecifyModel)
orinat Naturalorice
orilp LPorice
regnat Natural regulator
reglp LPregulatorw/hose
TROUBLESHOOTING
PROBLEM PROBABLE CAUSE REMEDY
Pilot will not light A. Lack of gas A. Purge air in gas line.
when rotary ignitor B. Defective ignitor Fill gas cylinder
is turned C. Loose ignitor wire B. Replace ignitor
D.Pilotoriceobstruction C.Re-attachignitorwire
D.Remove&cleanpilotorice.
Athighsettingburner A.Lackofgas A.Adjustregulator,clear
outputistoolow.Burner B.Damagedburnerelement orice.
rumblesoruttersblue B.Replaceburnerelement.
ameatsurface.
Atlowsettingburner A.Lowheatsettingis A.Adjustlowheatsetting.
outputistoohigh adjustedtoohigh

20
“INFRARED ELITE” INFRARED
GAS GRILLS
ALL STAINLESS STEEL CABINET PARTS ARE WARRANTED AGAINST
DEFECTIVE MATERIAL AND/OR WORKMANSHIP FOR LIFETIME TO
THE ORIGINAL CONSUMER BUYER UNDER THE TERMS STATED
BELOW. THIS ALSO INCLUDES RUST AND BURNOUT UNDER NORMAL
HOUSEHOLD USE. DISCOLORATION OR OXIDATION IS EXCLUDED.
NOTE: GRILLS LOCATED NEAR COASTAL AREAS OR EXPOSED TO
SWIMMING POOL CHEMICAL VAPORS ARE NOT COVERED IN
ABOVE WARRANTY.
ALL OTHER PARTS ARE GUARANTEED FOR 5 YEARS UNDER
NORMAL USE.
*IGNITOR WARRANTED FOR 1 YEAR
THISWARRANTYDOESNOTINCLUDETHECOSTOFANYLABOR,
INCONVENIENCE OR PROPERTY DAMAGE DUE TO FAILURE OF THE
PRODUCT,ANDDOESNOTCOVERDAMAGEDUETOMISUSE,ABUSE,
ACCIDENT,DAMAGEARISINGOUTOFTRANSPORTATIONOFTHE
PRODUCT,ORDAMAGEINCURREDTHROUGHCOMMERCIALUSEOF
THE PRODUCT. THIS EXPRESS WARRANTY IS THE SOLE GIVEN BY
THEMANUFACTURERANDISINLIEUOFALLOTHERWARRANTIES,
EXPRESSED OR IMPLIED.
DEFECTIVE PARTS ARE TO BE RETURNED TO THE FACTORY
PREPAID FOR REPAIR OR EXCHANGE WITH PROOF OF PURCHASE.
ALL HANDLING AND SHIPPING CHARGES ARE TO BE PAID BY THE
PURCHASER.
INFRARED ELITE GAS GRILLS MFG. BY
GOLDEN BLOUNT
4301 WESTGROVE DR.
ADDISON,TX75001
(972)250-3113
LIMITED LIFETIME WARRANTY
5 YEAR WARRANTY
WARRANTY CLAIMS
This manual suits for next models
2
