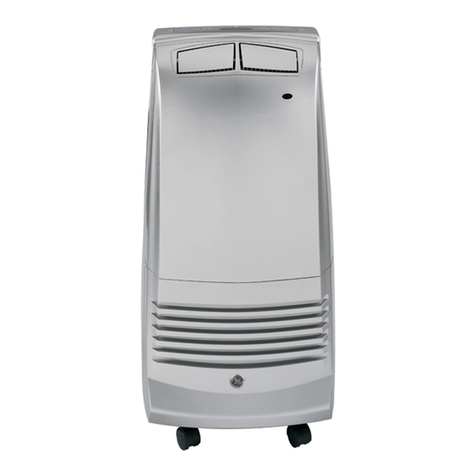
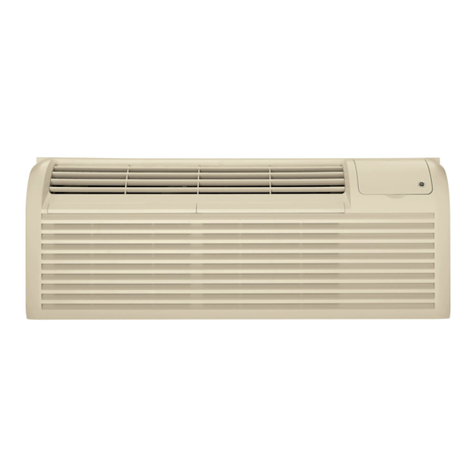
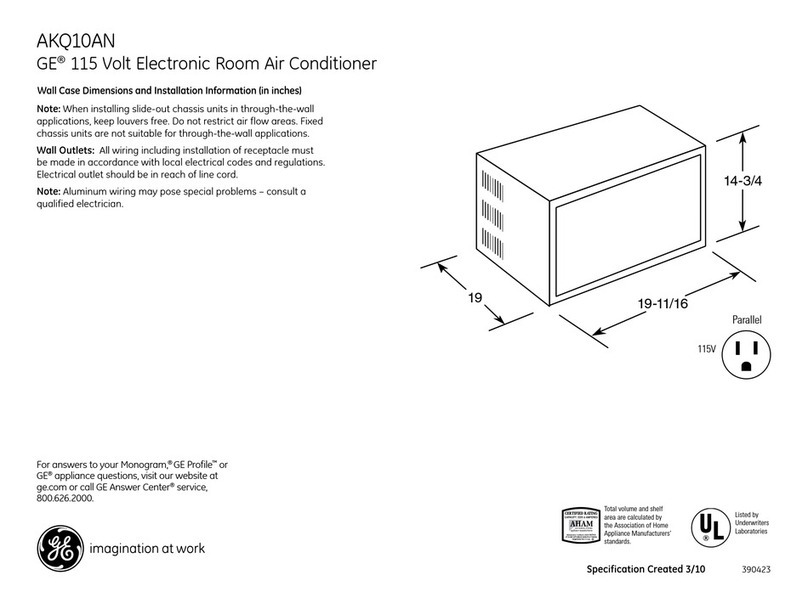
GE AHH18DQT1 Operating instructions

GEAppliances.com
0
0_
Safety Instructions ............. 2,3
Operating Instructions
Controls ........................... 4-6
Care and Cleaning
Air Filter .............................. 6
Outdoor Coils ......................... 6
Installation Instructions ...... 7-12
Troubleshooting Tips ............ 13
Normal Operating Sounds ............ 13
Consumer Support
Consumer Support .......... Back Cover
Warranty for Customers
in the U.S.A........................... 15
O_
0
U
*ENERGY STAR ® labeled product
I
ENERGYSTAR
As an ENERGYSTAR®partner, GE has
determined that this product meets
the ENERGYSTAR®guidelines for
energy efficiency.
Write the model and serial numbers here:
Model #
Serial #
Find these numbers on (] label on the sideof
the air conditioner.
AHH18*
AHMI8*
0010536027 49-7698 12-11 GE

IMPORTANT SAFETY INFORMATION.
READ ALL INSTRUCTIONS BEFORE USING.
WARNING!
Foryour safety, the information in this manual must be followed to minimize the risk of fire, electric
shock or personal injury.
SAFETYPRECAUTIONS
Use this appliance only for its intended
purpose as described in this Owner's
IVlanual.
This air conditioner must be properly
installed in accordance with the Installation
Instructions before it is used.
Never unplug your air conditioner by pulling
on the power cord. Always grip plug firmly
and pull straight out from the receptacle.
Replace immediately all electric service
cords that have become frayed or otherwise
damaged. A damaged power supply cord
must be replaced with a new power supply
cord obtained from the manufacturer and
not repaired. Do not use a cord that shows
cracks or abrasion damage along its length
or at either the plug or connector end.
Turn the unit OFFand unplug your air
conditioner before cleaning.
GEdoes not support any servicing of the
air conditioner. We strongly recommend
that you do not attempt to service the air
conditioner yourself.
For your safety...do not store or use
combustible materials, gasoline or other
flammable vapors or liquids in the vicinity
of this or any other appliance.
All air conditioners contain refrigerants,
which under federal law must be removed
prior to product disposal. If you are getting
rid of an old product with refrigerants, check
with the company handling disposal about
what to do.
If the receptacle does not match the plug,
the receptacle must be changed out by a
qualified electrician.
These R410A air conditioning systems
require contractors and technicians to
use tools, equipment and safety standards
approved for use with this refrigerant.
DO NOT use equipment certified for
R22 refrigerant only.
2
HOW TO CONNECT ELECTRICITY
Do not, under any circumstances, cut or remove
the third (ground) prong from the power cord.
For personal safety, this appliance must be
properly grounded.
DO NOT use an adapter plug with this appliance.
The power cord of this appliance is equipped
with o B-prong (grounding) plug which mutes
with o standard B-prong (grounding) wall outlet
to minimize the possibility of electric
shock hazard from this appliance.
Have the wall outlet and circuit checked by
u qualified electrician to make sure the outlet
is properly grounded.
Where a 2-prong wall outlet is encountered,
it isyour personal responsibility and obligation to
have it replaced with u properly grounded
B-prong wall outlet.
The air conditioner should always be plugged
into its own individual electrical outlet which has
u voltage rating that matches the rating plate.
Power cord includes a current interrupter device.
A test and reset button is provided on the plug
case. The device should be tested on a periodic
basis by first pressing the TESTbutton and
then the RESETbutton while plugged into the
outlet. If the TESTbutton does not trip or if the
RESETbutton will not stay engaged, discontinue
use of the air conditioner and contact a qualified
service technician.
This provides the best performance and also
prevents overloading house wiring circuits which
could cause a fire hazard from overheated wires.
See the Installation Instructions, Electrical
Requirements section for specific electrical
connection requirements.
WARNING!
USEOF EXTENSION CORDS
RISK OF FIRE. Could couse serious injury or
death.
•DO NOT use an extension cord with this
Window Air Conditioner.
•DO NOT use surge protectors or multi-outlet
adaptors with this Window Air Conditioner.
GEAppliances.com
READANDFOLLOWTHISSAFETYINFORMATIONCAREFULLY.
SAVETHESEINSTRUCTIONS

About the controlson the air conditioner
Features and appearance will vary.
Lights next to the touch pads on the air conditioner control panel indicate the selected settings.
NOTE: The display always shows
the room temperature except when
setting the Set temperature or the
Delay timer.
SF))d .odo
® Auto @ Cool ® On
• High • Energy ® Off
Sever
Air Conditioner Controls
Unit powe_;_ll
on/off
Hode select_
O Fan spee_,_lm
O Delay 1-24t_r,,_
O Temperatuee_
set/Delay
Timer Increase
and Decrease
r
.Go°
¢'-Fan_'/
.k2pee_
z4_rJ
Temp /Delay
C'w'D
J
Remote Control
Controls
Power Pad 0
Turns air conditioner on and off.When turned
on,the displaywill show the room temperature.
Display
Showsthe room temperature or time remaining
onthe Delaytimer. Showsthe Settemperature
while setting the temperature in Cool or Energy
Saver modes.The Setlight will turn onwhile
setting.
Oemp and Delay Increase •/Decrease •
Pads
Useto set temperature or delay time.
Temperature can be set in Cool and Energy
Saving and mode.
Mode Pad
Useto set the air conditioner to Fan Only or
Coo/,Energy Saver mode.
Oan Speed Pads
InCoo/,Energy Saving mode:
Useto set the fan speedto Auto, High, Med or
Low on the unit.
InFanOnly mode:
Useto set the fan speedto High, Med, or Low
onthe unit.
Delay Pad
Delay ON--When the air conditioner isoff,it can
be set to automatically come onin 1 to 24 hours
at its previous mode and fan settings.
Delay OFF--Whenthe air conditioner ison,
it can beset to automatically turn offin 1to
24 hours.
How to set:
Pressthe Delay 1-24hr pad on the unit or the
remote control. Eachtouch of the Increase • /
Decrease • pads on the unit or the Increase+
/ Decrease- pads on the remote control will set
the timer in 1-hour intervals.
Toreviewthe remaining time on the Delay
1-24hr timer, pressthe Delay 1-24hr pad on the
unit or the remote control. Usethe Increase• /
Decrease • pads on the unit or the Increase +
/ Decrease- pads on the remote control to set
a new time if desired.
Tocancel the timer, pressDecrease • pad on
the unit or the remote control until the set time
iszero. After :3secondsthe light on the Delay
1-24 hour pad goesoff.
4

GEAppliances.com
Do Not Operate in Freezing Outdoor Conditions
Thiscool-only air conditioner was not designed for
freezing outdoor conditions. It must not be used in
freezing outdoor conditions.
Remote Control
To ensure proper operation, aim the remote
control at the signal receiver on the air
conditioner.
Theremote control signal has a range of
up to 20 feet.
Make sure nothing isbetween the air conditioner
and the remote control that could block the
signal.
Make sure battery isfresh and installed correctly
as indicated on the remote control.
Cool Mode
Usethe Cool mode at Low, Med, High or Auto
Speedfor cooling. Usethe Temperature Increase •
/ Decrease• padsto set the desiredtemperature
between 61% and 86% in 1% increments.
An electronicthermostat isusedto maintain the room
temperature. Thecompressorwill cycleon
and off to keepthe room at the set levelof comfort.
Setthe thermostat at a lowernumber and the indoor
air will become cooler.Setthe thermostat at a higher
number and the indoor air will becomewarmer.
NOTE:Iftheair conditioner isoff and is then turned on
while set to a Cool setting or if turned from a fan
setting to a Cool setting,it may take approximately
3minutes for the compressor to start and coolingto
begin.
Cooling Descriptions
For Normal Cooling-Select the Cool mode and
High orMed fan with a middle set temperature.
For Maximum Cooling--Select the Cool mode
and High fan with a lower set temperature.
For Quieter and Nighttime Cooling-Select the
Cool mode and Low fan with a middle set
temperature.
Energy Saver Mode
Controls the fan.
ON--The fan will cycleon and off with the
compressor.This resultsin wider variations of room
temperature and humidity. Normally usedwhen the
room isunoccupied. NOTE:Thefan may continue to
run for a short time after the compressorcyclesoff.
OFF--Thefan runsall the time, while the compressor
cycles on and off.
Fan Only Mode
Usethe FanOnly Modeat Low, Medor Highfan
speedto provide air circulation and filtering without
cooling. Sincefan-only settings do not provide
cooling, a Settemperature cannot be entered. The
room temperature will appear
in the display.
Auto Fan
Setto Auto for the fan speedto automatically set
to the speedneeded to provide optimum comfort
settings with the set temperature.
If the room needsmore cooling, the fan speed
will automatically increase.Ifthe room needs less
cooling, the fan speedwill automatically decrease.

About the controlsonthe air conditioner
Additional important information.
Air Direction
Usethe leverto adjust the air direction left,right, up
and down.
Careand cleaningof the air conditioner.
Grille and Case
Turn the air conditioner off and removethe plug from Toclean, usewater and a mild detergent. Do not use
the wall outlet before cleaning, bleachor abrasives.
Air Filter
Theair filter behind the front grille should be checked
and cleaned at least every 30 days or
more often if necessary.
Toremove:
Open the inlet grille by pulling downward on the tabs
at the top upper corners of the inlet grille until the
grille is in a 850position. Removethe filter.
Cleanthe filter with warm, soapy water. Rinseand let
the filter dry before replacing it. Donot clean the filter
in a dishwasher.
CAUTION:_oNoro_erotetheair
conditioner without o filter becausedirt and lint will
clog itand reduceperformance.
Outdoor Coils
Thecoils on the outdoor sideof the air conditioner
should be checked regularly. Ifthey are clogged with
dirt or soot,they may be professionallycleaned.
How to Insert the Battery in the Remote Control
-_---1 emove the battery cover by twisting it
according to the arrow direction. A coin can be
usedto twist the cover.
F2-1 Insertnew battery, making surethat the (+)and
(-) of battery are installed correctly.
I-_ Reattachthe cover bytwisting it back
into position.
NOTES:
Useone CR2025 (3V)Lithium battery.
Removethe battery from the remote control if the
system isnot going to be usedfor a long time.
6

I
Installation
Instructions Air Conditioner
r_ Questions? Call 800.GE.CARES (800.432.2737) or Visit our Website at: GEAppliances.com I
BEFORE YOU BEGIN
Reud these instructions completely
ond corefully.
• IMPORTANT - Sovetheseinstructions
forlocolinspector'suse.
• IMPORTANT - Observeollgoverning
codes ond ordinonces.
• Note to Installer- Be sure to leove these
instructions with the Consumer.
• Note to Consumer - Keep these instructions for
future reference.
• Skill level - Instollotion of this opplionce requires
bosic mechonicol skills.
• Completion time - Approximotely 1 hour
• We recommend thor two people instoll
this product.
• Proper instollotion is the responsibility
of the instoller.
Product foilure due to improper instollotion is not
covered under the Worronty.
You MUST use oil supplied ports ond use proper
instollotion procedures os described in these
instructions when instolling this oir conditioner.
(_ ELECTRICAL REQUIREMENTS
Some models require o 115/120-volt AC,
(_ 0-Hz grounded outlet protected with o
15-omp time-deloy fuse or circuit breoker.
The 3-prong grounding plug minimizes the
possibility of electric shock hozord. If the woll outlet
you Non to use is only o 2-prong outlet, it isyour
responsibility to hove it reploced with o properly
grounded 3-prong woll outlet.
©Some models require 230/208-volt AC,
protected with o time-deloy fuse or circuit
breoker. These models should be instolled on
their own single bronch circuit for best
performonce ond to prevent overlooding
house or oportment wiring circuits, which
could couse o possible fire hozord from
overheoting wires.
-&CAUTION:
Do not, under ony circumstonces, cut or remove
the third (ground) prong from the power cord.
Do not chonge the plug on the power cord
of this oir conditioner.
Aluminum house wiring moy present speciol
problems-consult o quolified electricion.
TOOLS YOU WILL NEED
Phillips head screwdriver Drill with 1/8" bit
Flat-blade screwdriver Adjustable Wrench
Pencil Rulerortapemeasure
Level Scissors or knife
Power cord includes o current interrupter device. A
test ond reset button is provided on the plug cose. The
device should be tested on o periodic bosis by first
pressing the TESTbutton ond then the RESETbutton
while plugged into the outlet. If the TESTbutton does
not trip or if the RESETbutton will not stoy engoged,
discontinue use of the oir conditioner ond contoct o
quolified service technicion.

Installation Instructions
PARTS INCLUDED
(Appearance may vary)
Top Mounting Rail Foam Seal
Left and Right Side
Curtains
Installation Bracket (2) Window Lock Bracket
Deloy
_D
Temp /Delay
_9
J
Remote Control
A
13132"
Screws (12)
B
13132"
Screws (6)
C
J
31132"
Screws (8) 2-1/2" Flat Head Bolt
and Lock Nut (2)

Installation Instructions
D WINDOW REQUIREMENTS
•Theseinstructions are for astandard double-hung
window. You will need to modify them for other types
of windows.
• The air conditioner can be installed without the
side curtain panels if needed to fit in a narrow
window. See the window opening dimensions.
• All supporting parts must be secured
to firm wood, masonry or metal.
• The electrical outlet must be within reach of the
power cord.
• Follow the dimensions in the table and illustration
for your model.
Models A B
AHH18DP 17 13/8" min. 28 3/8"- 38"
AHM18DP
I !
B==4]
A
B
(Withside curtain panels)
Y
r_l STORM WINDOW REQUIREMENTS
A storm window frame will not allow the air
conditioner to tilt toward the outside, and will keep it
from draining properly.
To adjust for this, attach a piece of wood to the sill.
WOOD PIECES
WIDTH: 2"
LENGTH:Long enough to fit inside the window
frame.
THICKNESS: To determine the thickness, place a
piece of wood on the sill to make it 1/2" higher
than the top of the storm window frame or the vinyl
frame.
Attach securely with nails or screws provided by the
installer.
1/2" higher
than storm
window
frame
Storm window
frame
1/2" higher
than vinyl frame
_ _(°ns°mewind°ws v/Woo d
FnT[i r5 J4
- r'_ Vinylframe I I
[] PREPARE THE AIR CONDITIONER
rA'l Remove three screws on each side of the case.
Save the screws for use later.
D
re]
Insert a flat head screw driver between the
front grille and the metal case along the sides.
Gently pry the grille from the case. NOTE: Cover
the flat head screw driver with tape to prevent
scratching the case.
Using the handle on the bottom front of the air
conditioner, pull the air conditioner out of the
case. The air conditioner is very heavy so make
sure that it will be resting on a sturdy surface.
\

Installation Instructions
[] PREPARE THE CASE
NOTE:Attach curtains to the air conditioner before
placing the air conditioner in the window.
r_ Install top mounting rail with four type A screws.
r_ Slide left-hand curtain assembly into left end of
top and bottom mounting rail. Repeat for right
hand curtain assembly.
D Fasten curtain retainer strips to the sides of the
outer case with four type A screws on each side.
FI PREPARE WINDOW FOR INSTALLATION
r_ Measure the width of the window opening.
r_ Ivlark the center line on the inside windowsill.
B
A.Width of window opening
B.Center line
rTi INSTALL OUTER CASE IN WINDOW
r_ Place outer case in window. Lower sash until it
rests behind front flange of top mounting rail.
Bottom mounting rail must rest behind window
sill.
Top rail
\ r i / Window sash
........._ ...................... A
5o
, := =, ,_ ..... ,=,
_ o o
_ .........Bottom rail
r_ Expand the curtain panels to fill the window.
Secure with type Cwood screw in top and bottom
corners. If needed, use drill and 1/8" bit to drill pilot
holes for the screws.
r_ use three type C screws to secure the case to the
window sill. Drill pilot holes if necessary.
10

Installation Instructions
[] INSTALL OUTER CASE IN WINDOW
D Thread nut onto bolt, then thread the bolt into
the triangle bracket as shown in the figure
below.
r_ Attach triangle bracket onto bottom of case
using three type B screws for each bracket.
Make sure that the bracket is close enough to
the outside wall that the bolt con touch. Adjust
bolt so that it is snug against the outside wall.
1
NOTE: A block of wood con be placed between
the bolt and the outside wall if the bolt rests
between studs.
I%-ICOMPLETE INSTALLATION
r_ Insert the foam seal behind the top of the lower
window sash and against the glass of the upper
window.
A
A.Top of lower sash
B.Foam seal
r_ Place the window lock bracket as shown. Use
a 1/8" drill bit to drill a starter hole through the
hole in the window lock bracket and into the
upper window.
-ACAUTION:
To prevent broken glass or damage to windows,
on vinyl or other similarly constructed windows,
attach the window locking bracket to the
window side jamb with one type B screw.
D Attach the window lock bracket to the upper
window with a type C screw to secure the
window in place.
Vinyl Wood
r_ Remove backing on bottom seal. Place seal,
adhesive side down, on the bottom of the air
conditioner behind the bottom mounting rail.
®
Seal
-Bottom mounting
rail
Front
11

Installation Instructions
[] RETURN CHASSIS TO THE OUTER CASE
E] Once the case is securely attached to the
window, reinstall the air conditioner. Have two
people lift the air conditioner and slide it into the
case.
_] Snap the front grille back onto the air
conditioner. Use the screws removed at the
beginning of the installation to secure the grille.
RETURN CHASSIS TO THE OUTER CASE
Electrical Shock Hazard
Plug into a grounded 3 prong outlet.
Do not remove ground prong.
Do not use an adapter.
Do not use an extension cord.
Failure to follow these instructions can result in death,
fire, or electrical shock.
D Plug into a grounded B-prong outlet.
Press RESET on the power supply cord. See
Electrical Requirements.
12

Troubleshooting Tips.
:PossibleCauses
Air conditioner
doesnot start
What To Do
Theair conditioner • Hake surethe air conditioner plug ispushed
is unplugged, completely into the outlet.
Thefuse is blown/circuit • Checkthe house fuse/circuit breaker box and replace
breaker istripped, the fuse or reset the breaker.
Power failure. .The unit will automatically restart in the settings last
used after the power isrestored.
•There is a protective time delay (approximately
3 minutes) to prevent tripping of the compressor
overload. Forthis reason, the unit may not start
normal cooling for 3 minutes after it is turned
back on.
The current interrupter •Pressthe RESETbutton located on the power cord plug.
device is tripped. .If the RESETbutton will not stay engaged, discontinue
use of the air conditioner and contact a qualified
service technician.
Air conditioner does Airflow is restricted. • Make surethere are no curtains, blindsor furniture
not cool us it should blocking the front of the airconditioner.
Thetemp control may • Inthe Cool mode, pressthe Decrease vpad.
not be set correctly.
The air filter is dirty. • Cleanthe filter at leastevery 30 days.
Seethe Coreend Cleaningsection.
The room may have been hot. • When the air conditioner isfirst turned on,you need
to allow time for the room to cool down.
Cold air isescaping. • Checkfor open furnace registersand cold air returns.
Cooling coils have iced up. .See "Air conditioner freezing up" below.
Air conditioner Ice blocks the air flow • Setthe controls at High Fanor High Cool and setthe
freezing up end stops the air conditioner thermostat to a higher temperature.
from cooling the room.
The remote control The battery is inserted • Checkthe position of the battery. They should be
is not working incorrectly, inserted inthe opposite (+)and (-)direction.
The battery may be dead. • Replacethe battery.
Water drips outside Hot, humid weather. • Thisisnormal.
The air conditioner is not • Forproper water disposal,make sure the air conditioner
tilted to the outside, slants slightlyfrom the case front to the rear.
Moisture removed from air • Thisisnormal for a short period in areaswith little
end drains into base pan. humidity; normal for a longer period in very humid areas.
Normal Operating Sounds
Youmay heara pinging noisecaused by
water being picked up and thrown against the
condenser on rainy days or when the humidity
is high.This designfeature helpsremove
moisture and improve efficiency.
Youmay hear the thermostat clickwhen the
compressor cycles on and off.
Water will collect in the basepan during
high humidity or on rainy days.Thewater
may overflow and drip from the outdoor side
of the unit.
Thefan may run even when the compressor
does not.
13

Note
14

GEAir Conditioner--One-Vear Limited Warranty. (Forcustomers in theU.S.AJ
All warranty service provided by our Factory Service Centers,
or an authorized Customer Care®technician. To schedule service,
visit us on-line at ge.com, or call 800.GE.CARES (800.432.2737).
Have serial number and model number available when calling
for service.
Stapleyour receipt here.
Proof of the original purchase
date is needed to obtain service
under the warranty.
From the date of the
origina!purchase
GE Will Replace:
Any part of the air conditioner which fails due to a defect in materials or workmanship.
Duringthis limited one-yearwarranty, GEwill also provide, free of charge, all labor and related
service to replace the defective part.
Service trips to your home to teach you how to
usethe product. Replacement of house fuses or resetting of circuit
breakers.
installation, delivery or maintenance. If you
have an installation problem, or if the air conditioner
is of improper cooling capacity for the intended use,
contact your dealer or installer. You are responsible
for providing adequate electrical connecting facilities.
Failure of the product resulting from modifications to
the product or due to unreasonable use including failure
to provide reasonable and necessary maintenance.
Failure due to corrosion on models not corrosion-
protected.
Damage to the product caused by improper power
supply voltage, accident, fire, floods or acts of God.
Incidental or consequential damage caused by possible
defects with this air conditioner.
Damage caused after delivery.
In commercial locations, labor necessary to move the
unit to a location where it is accessible for service
by an individual technician.
EXCLUSION OF IMPLIED WARRANTIES--Your sole and exclusive remedy is product repair as provided in
this Limited Warranty. Any implied warranties, including the implied warranties of merchantability or
fitness for aparticular purpose, are limited to one year or the shortest period allowed by law.
This warranty is extended to the original purchaser and any succeeding owner for products purchased for
home use within the USA. If the product is located in an area where service by aGEAuthorized Servicer is
not available, you may be responsible for atrip charge or you may be required to bring the product to an
Authorized GE Service location for service. In Alaska, the warranty excludes the cost of shipping or service calls
to your home.
Some states do not allow the exclusion or limitation of incidental or consequential damages. Thiswarranty
gives you specific legal rights, and you may also have other rights which vary from state to state. To know
what your legal rights are, consult your local or state consumer affairs office or your state's Attorney General.
Warrantor: General Electric Company. Louisville, KV40225
15

ConsumerSupport.
I_] GEAppliances Website IntheU.S.A.:GEAppliances.com
Have a question or need assistancewith your appliance?Try the GEAppliances Website 24 hours a day,
any day of the year! Forgreater convenience and faster service,you can now download Owner's Manuals,
or even order parts on-line.In Canada: www.GEAppliances.ca
Real Life Design Studio In the U.S.A.:GEAppliances.com
GEsupports the UniversalDesignconcept-products, servicesand environments that can be usedby
people of all ages, sizesand capabilities.We recognizethe needto design for a wide range of physical
and mental abilities and impairments. Fordetails of GE'sUniversalDesignapplications,including kitchen design
ideasfor people with disabilities,check out our Website today. Forthe hearing impaired, pleasecall 800.TDD.
GEAC(800.833.4322).
In Canada, contact: Manager, Consumer Relations, Mabe Canada Inc.
Suite 310, 1 Factory Lane
Moncton, N.B.EIC 9M3
Parts and Accessories In the U.S.A.: GEAppliances.com
Individualsqualified to servicetheir own appliances can have parts or accessoriessent directly to their homes
(VISA,MasterCardand Discovercards are accepted).Order on-line today, 24 hours every day or
by phone at 800.626.2002during normal businesshours.
Instructions contained in this manual cover procedures to be performed by any user. GEdoesnot support
any servicing of the air conditioner. Westrongly recommend that you do not attempt to service the air
conditioner yourself.
Customersin Canada should consult the yellow pagesfor the nearest Mabeservicecenter,
or call 1.800.561.3384.
Contact Us In the U.S.A.: GEAppliances.com
Ifyou are not satisfiedwith the serviceyou receive from GE,contact us on our Website with allthe details
includingyour phone number, or write to: General Manager,Customer Relations
GEAppliances,Appliance Park
Louisville,KY80225
In Canada: www.GEAppliances.ca, or write to: Director, Consumer Relations, Mabe Canada Inc.
Suite 310, 1 Factory Lane
Moncton, N.B.EIC 9M3
16 Printed in China

GEAppliances com
0
Instrucciones de Seguridad... 2,s
Instrucciones de Funcionamiento
Controles ............................. 4
Cuidado y Limpieza
Bobinas Exteriores .................... 5
Filtro de Aire .......................... 5
Instrucciones de InstalaciGn. 6-1o
Consejos para Solucionar
Problemas ......................... 11
Sonidos Normales de
Funcionamiento ..................... 11
Soporte al Cliente
Garantia para Clientes en EE.UU...... 13
Soporte al Cliente .................... 14
AHH18*
AHIVI18 *
O
Producto etiquetado *ENERGYSTAR®
I
ENERGYSTAR
Como socio de ENERGY STAR®,
GEha confirmado que este
producto cumple los directrices
de ENERGYSTAR®relotivos ol
rendimiento energdtico.
Escriba los n_meros de modelo y de serie
aqui:
N°de Modelo
N°de Serie
Estos nOmeros se encuentran en una
etiqueta al costado del acondicionador de
aire
0010536027 49-7698 12-11GE

INFORHACION IHPORTANTE DESEGURIDAD.
LEATODASLASINSTRUCCIONESANTES DE USAR.
Z iADVERTENCIA!
Porsu seguridad,se debe seguir la informaci6n en este manual para minimizar el riesgode
incendios,descargasel6ctricas o lesionespersonales.
2
PRECAUCIONESDESEGURIDAD
Use este electrodom6stico solamente para
el prop6sito determinado seg0n se describe
en el Manual del propietario.
Esteacondicionador de airedebe instalarse
correctamente deacuerdo con las
Instruccionesdeinstalaci6n antes de su uso.
Nunca desenchufesu acondicionador de
aire tirando del cable el6ctrico.Siempre
agarre firmemente el enchufe y tire de
61directamente haciaafuera.
Reemplaceinmediatamente todos los
cables el6ctricosque se hayan pelado o que
sehayan dahado de alguna otra manera.
Un cable de corriente dahado nodebe
repararse,sinoque debeset sustituido por
uno nuevoque seadquiera delfabricante.
No useun cable el6ctrico que muestre
evidenciasdedeterioro,o dahosde
abrasi6n ensu superficie en alguno desus
extremos.
Apague la unidad y desenchufe su
acondicionador de aire antes de limpiar.
GEno est6 no apoya que se le proporcione
ning0n servicioal acondicionador de aire.
Vehementemente recomendamos que
usted no intente proporcionar servicio al
acondicionador de aire usted mismo.
Porsu seguridad...noalmacene ni use
materiales combustibles,gasolinau
otros vapores o liquidos inflamables
en la proximidad de 6steo alg0n otro
electrodom6stico.
Todos losacondicionadores deaire
contiene refrigerantes,los que por Ley
Federaldeben set removidos antes de
desecharlos.Siusted planea deshacersede
alg0n producto que contenga refrigerantes,
p6ngase encontacto con la compahia que
seencarga de recoger su basura para que
le indiquen qu6 hacer.
Si el receptc_culo no coincide con el enchufe,
un electricista calificado debe reemplazar el
recept6culo.
Estossistemas deacondicionadores de
aire R410Arequieren que los contratistas
y t6cnicos usen herramientas, equiposy
est6ndares deseguridad aprobados para
su usocon este refrigerante. NOuse
equipamiento certificado s61opara
refrigerante R22.
COMO CONECTARLA ELECTRIClDAD
Bajoninguna circunstancia,corte o remueva la
tercera p0a (tierra)delcable el6ctrico. Enpos
de la seguridad personal,este electrodom6stico
debesiempre conectarse a tierra.
NO use un enchufe adaptador con este
electrodom_stico.
El cable el6ctrico de este electrodom6stico est6
equipado con un enchufe de tres p0as (tierra)
que combina con un tomacorriente est6ndar
de tres tomas de pared para minimizar la
posibilidad de una descarga el6ctrica.
El cable de alimentaci6n incluye un
dispositivo para interrupci6n de corriente.
Se incluye un bot6n de prueba y de reinicio
en el dispositivo. El dispositivo debe ponerse
a prueba peri6dicamente: primero se presiona
el bot6n de TEST(prueba) y luego RESET
(reinicia) mientras se encuentra enchufado al
tomacorriente. Si el bot6n TEST no se dispara
o si el bot6n RESETno queda enganchado,
deje de utilizar el acondicionador de aire y
comuniquese con un t6cnico calificado.
Pida a un t6cnico que inspeccione el
tomacorriente y el circuito para cerciorarse
de que el tomacorriente est6 conectado a
tierra de la manera apropiada.
Donde exista un tomacorriente de dos
tomas, es su responsabilidad y obligaci6n
personal hacer que dicho tomacorriente
sea reemplazado pot uno de tres tomas
con conexi6n a tierra.
Elacondicionador de aire deberia siempreestar
conectado a un tomacorriente individual con su
circuito devoltaje correspondiente.
Esto proporciona el mayor rendimiento y
ademhs evita que los circuitos del resto de
la casa se sobrecarguen, Io cual podria causar
incendios por el sobrecalentamiento del
cableado.
Ver las Instrucciones de instalaci6n, en la
secci6n Requisitos El_ctricos para los requisitos
especificos de conexi6n.

GEAppliances.com
iADVERTENCIA!
USO DEPROLONGADORES
RIESGO DE INCENDIO. Podda ocasionar
lesiones graves ola muerte.
•NO use un prolongador con este
Acondicionodor de Aire de Ventono.
•NO useprotectores contro picos de corriente ni
odoptodores poro mOItiples tomocorrientes con
este Acondicionodor de Aire de Ventono.
LEAYSIGAESTAINFORMACIONDESEGURIDADCUIDADOSAMENTE.
INSTRUCCIONES

Acerca de los controles enel acondicionador de aire
Los funciones y la apariencia podrdn variar.
Los luces junto a los teclas tdctiles del panel de control del acondicionador de aire indican los configuraciones
seleccionadas.
NOTA: La pantalla siempre muestra la
temperatura del ambiente, excepto al
ajustar las funciones de Temperatura
CotJjgoUl-adao el Temparizador de
. _°F/°C
eed_ Delay
• Auto ® Cool ® On
® High ® EnergyT • Ol f _1_
Saver •
• Ned • Fa_Only
Oncendido/
apagado dela
Unidad _'1_
0
O
O
@
Selecci6n de
modo
Velocidad de[_.l_
ventilador
Retraso de 1 a
2/4hrs.
Incremento
y Reducd6n
de la
Configurad6n
de
Temperatura/
Temporizador
de Retraso
_od_
_pFan_
eed)
Del.e.g_
z4_ZJ
Temp /Delay
C 'D
Controles del Acondicionudor de Aire Control Remoto
Controles
4
Oecla de Encendido
Enciendey apaga el acondicionador de aire.
AIserencendido, la pantalla mostrar6 la
temperatura ambiente.
O antalla
IVluestrala temperatura ambiente o el tiempo
restante en elTemporizador de Retraso.
IVluestrala temperatura Configurada mientras
configura latemperatura en los modos Cool
(Fresco)o EnergySaver(Ahorrode Energfa).La
luzde Configuraci6n seencender6 mientras se
est6 realizando la configuraci6n.
OTeclas de Incremento •/Reducci6n
•de Temperatura y Retraso
Usadopara ajustarI0temperaturacuando
seencuentreenel modoCool(Frio)o Energy
Saver (Ahorro de energia). LaluzdeAjuste se
encender6durante laconfiguraci6n.
Oecla de Modo
Usadopara ajustarel acondicionadorde aire
al modoCool(Frio)oEnergySaver (Ahorrode
energial.
Oeclas de Velocidad del Ventilador
Enmodo Cool IFrio)o Energy Saver IAhorro de
energia):
Use las mismas pura configurar la velocidad del
ventiludor en Auto, High (Alto),Ned (Hedio), o
Low(Bajo)en la unidad.
Enmodo Teclasde FanSpeed iVelocidad del
ventilador)"
Uselasmismas para configurar la velocidad del
ventilador en High (Alto), Med (Medio),o Low
(Bajo)en la unidad.
OTecla de Retraso
Delay ON(Retraso Encendido)-Cuando el
acondicionador de aire se encuentre apagado,
se podr6 configurar para que seencienda
autom6ticamente en un periodo de entre 1
y24 horas en el modo yconfiguraciones del
ventilador previas.
Delay OFF(Retrasodel Apagado)-Cuando el
acondicionador de aire se encuentre encendido,
se podr6 configurar autom6ticamente para que
seapague en un perbdo de entre i y24 horas.
C6mo configurar'.
Presionelatecla Delay 1-24hr (Retrasoentre 1
y24 hrs.)en la unidad o en el control remoto.
Codavez que presionelosteclas Increase
(Incrementar)• / Decrease(Reducir)• de la
unidad o losteclas Increase(Incrementar)+
/Decrease(Reducir)- del control remoto se
ajustar6 el temporizador par intervalos de 1
hora.
Pararevisar el tiempo restante en el
temporizador de Delay 1-24hr (Retrasoentre 1
y24 hrs),presionela tecla Delay1-24hr (Retraso
entre i y24 hrs.)de la unidad o del control
remoto. Uselasteclas Increase(Incrementar) •/
Decrease(Reducir)•de la unidad o las teclas
Increase(Incrementar)+ /Decrease(Reducir)-
del control remoto para configurar un tiempo
nuevo sias[ Iodesea.
Para cancelar el temporizador, presionela tecla
reducir • en Iounidad o en el control remoto,
hasta que el tiempo configurado seacero. Luego
de 5 segundos,Ioluzde latecla Delay 1-24hour
(Retraso de ia 24 horus) seapaga.
This manual suits for next models
5
Table of contents
Languages:
Other GE Air Conditioner manuals

GE
GE AUV05 Operating instructions

GE
GE AKM10AN User instructions

GE
GE APCA10 Series Operating instructions

GE
GE AGM14 Operating instructions

GE
GE AHTT06 Original instructions

GE
GE APFA08 Operating instructions

GE
GE AEHIO* and Operating instructions

GE
GE AIR 116 User manual

GE
GE AJEM12DCD User manual

GE
GE AGW12 Operating instructions
Popular Air Conditioner manuals by other brands

Fujitsu
Fujitsu ASTA30LFC Service manual

Hitachi
Hitachi RAM-55QH4 Service manual

Johnson Controls
Johnson Controls York VIR 40A installation instructions

MegaLife
MegaLife NEBULA GREEN R32 Use and Installation Instructions

Frigidaire
Frigidaire LRA257ST216 installation instructions

Shinco
Shinco SPF1-10C owner's manual