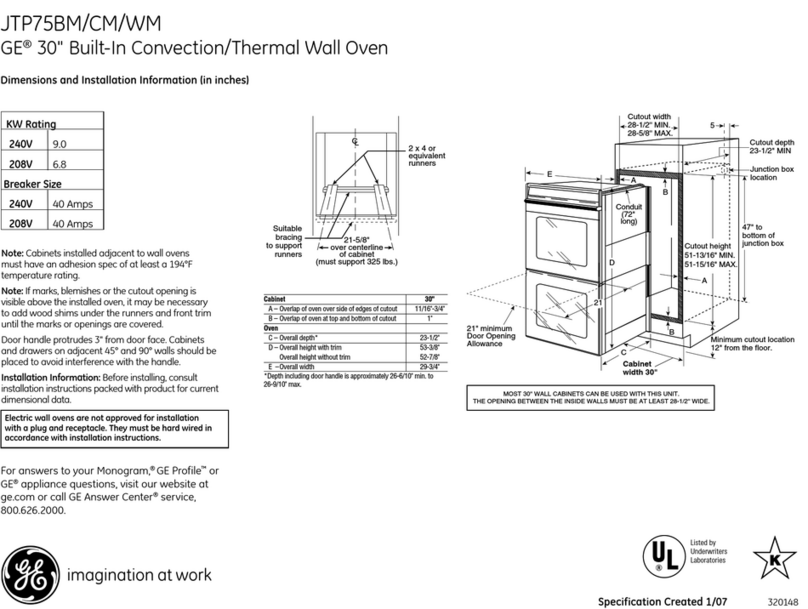
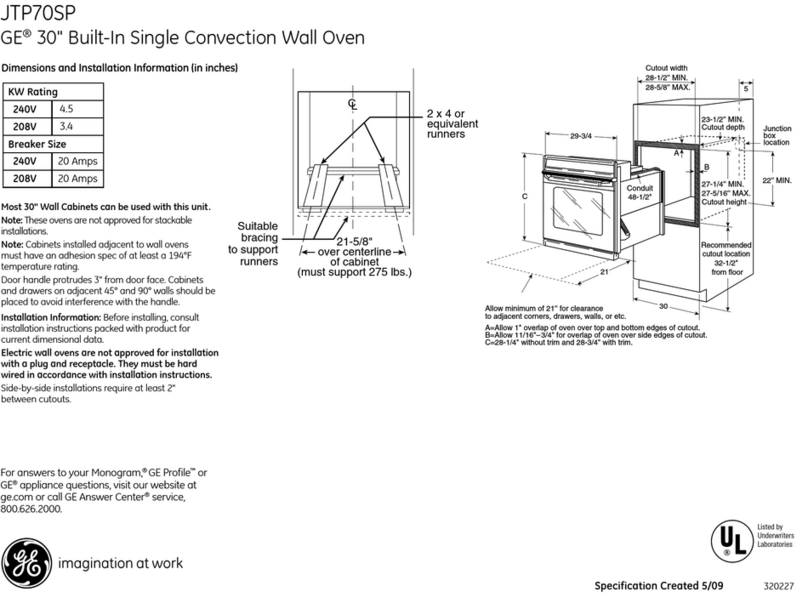
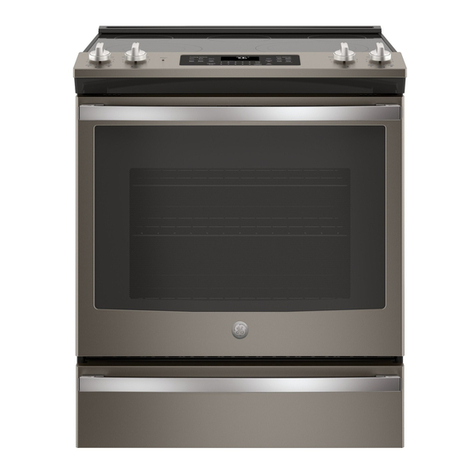
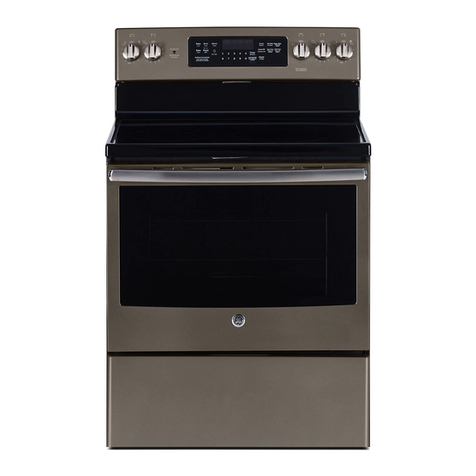
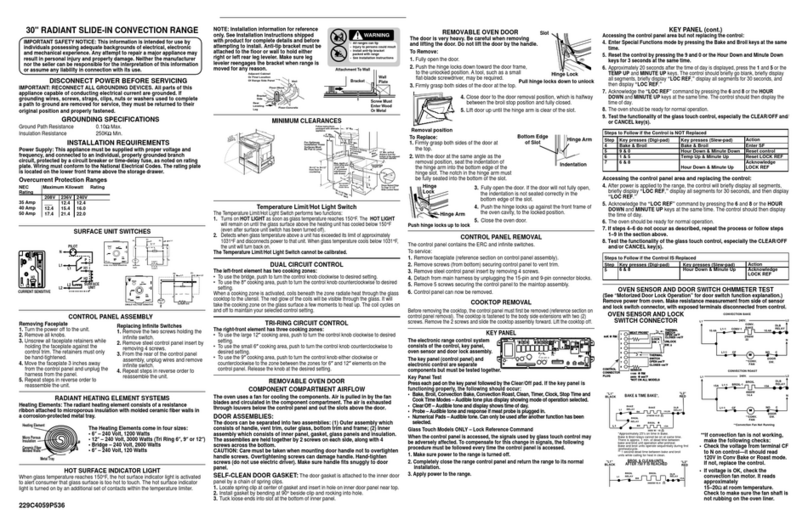
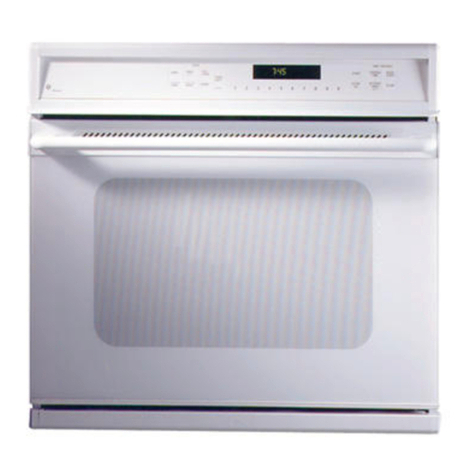
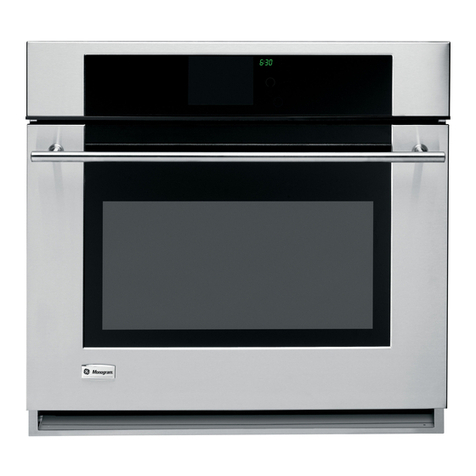
GE JB940 User manual

GEAppliances
©JB940
JB960
JBP85
www.geappfiances.com PartNo. 164D3333P200-1 Pub.No. 49-8973-1 10-99JR

Congratulations!
YouAreNow PartoftheGEFamily.
Welcome to the GE family. We're proud of our quality products and we are
committed to providing dependable sezadce. You'll see it in this easy-to-use Owner's
Manual and you'n hear it in the friendly voices of our customer service department.
Best of all, you'll experience these values each time you use your range. That's
important, because your new image will be part of your family for many years.
And we hope you will be part of ours for a long time to come.
We thank you for buying GE. We appreciate your purchase, and hope you will
continue to rely on us whenever you need quality appliances for your home.
GE& You,A Service Partnership.
IMPORTANT!
Fill out the Consumer Product Registration Card.
Two easy ways toregister your appliance!
• Through the intemet at www.geappliances.com
• Complete and mail the enclosed Product Registration Card
FORYOURRECORDS
Write the model and serial numbers here:
#
#
You can find them on a label behind the storage drawer on the front
of the range frame.
Staple sales slip or cancelled check here.
Proof of the original purchase date is needed to obtain sezvice under
the warranty.
READTHISMANUAL
Inside you will find many helpful hints on how to use and maintain
your range properly.Just a litde preventive care on your part can save
you a great deal of time and money over the life of your range.
IFYOUNEEDSERVICE
You'U find many answers to common problems in the Before YouCarl
For Service section, ffyou review our chart of Troubleshooting Tips first,
you may not need to call for service at all.
If you do need service, you can relax knowing help is only a phone call
away. A list of toll-free customer service numbers is included in the
back section of this manual. Or you can always call the GE Answer
Center ®at 800.626.2000, 24 hours a day, 7 days a week.

IMPORTANTSAFETYINFORMATION.
READALLINSTRUCTIONSBEFOREUSING.
WARNING!
For yoursafety,,the information in this manualmust be followed to minimizethe risk of fire, electric
shock, or to prevent property damage,personal injury, or loss oflife.
WARNINGANti-TIPDEVICE
All rangescantip andinjurycouldresult.
Toprevent accidental tipping of therange, attach it to the wall and floor byinstalling theAnti-"tip
device supplied.
Tocheck if the device is installed and engagedproperly, remove the kick panel or storage drawer
and inspect the rear leveling leg.Make sure it fits securely into the slot
ffyou pull the range out from the wall for any reason, make sure the device is properly
engaged when you push the range back against the wall. If it is not, there is a possible risk of
the range tipping over and causing injury if you or a child stand, sit or lean on an open door.
Please refer to the Anti-Tip device information in this manual. Failure to take this precaution
could result in tipping of the range and injury.
IMPORTANTSAFETYNOtiCE
TheCafifomiaSafeDrinking Water and ToxicEnforcementAct requires the Govemor ofCaliforniato
publish a list of substances known to the state to cause cancer, birth defects or other reproductive
harm, and requires businesses to warn customersof potential exposure to suchsubstances.
Thefiberglassinsulation in serf-clean ovensgivesoff a very small amountofcarbonmonoxide during
the cleaning cycle.Exposurecan be minimizedby venting with an open window or usinga ventilation
fan or hood.
Fluorescent light bulbs contain mercury Ifyour modelhas a surface ligh_ youmustrecycle the
fluorescent light bulb according to local, state and federal codes.
SAFETYPRECAUtiONS
When usingelectricalappliances,basic safetyprecautionsshouldbe followed,includingthefollowing:
B Use this appliance only for its intended
purpose as described in this Owner's Manual.
m Be sure your appliance is properly installed
and grounded by a qualified installer in
accordance with the provided installation
instructions.
WHave the installer show you the location of
the circuit breaker or fuse. Mark it for easy
reference.
WDo not attempt to repair or replace any
part of your range unless it is specifically
recommended in this manual. All other
servicing should be referred to a qualified
technician.
n Before performing any service, disconnect
the range power supply at the household
distribution panel by removing the fuse or
switching off the circuit breaker.
m Do not leave children alone--children
should not be left alone or unattended in
an area where an appliance is in use. They
should never be allowed to sit or stand on
any part of the appliance.
m Do not allow anyone to climb, stand or
hang on the door, storage drawer or
cooktop. They could damage the range
and even tip it over, causing severe
personal injury. 3

IMPORTANTSAFETYINFORMAtiON.
READALLINSTRUCTIONSBEFOREUSING.
AWARNING!
SAFETYPRECAUTIONS
Do not operate the ovenor cooktop controls if the glass is broken. Foodsplatter or cleaningsolution
may penetrate a broken control panel and create a risk of electrical shock. Contact a qualified
technician immediately should yourglass control panel become broken.
Do not store flammable materials in an
oven or near the cooktop.
mCAUTION:Items of interest to children
should not be stored in cabinets above a
range or on the backsplash of a range-
children climbing on the range to reach
items could be seriously injured.
[] Never wear loose-fitting or hanging
garments while using the appliance. Be
careful when reaching for items stored over
the range. Flammable material could be
ignited if brought in contact with hot
surface units or heating elements and may
cause severe burns.
[] Use only dry pot holders--moist or damp
pot holders on hot surfaces may result in
bums from steam. Do not let pot holders
touch hot surface units or heating elements.
Do not use a towel or other bulky cloth in
place of pot holders.
[] Do not use water on grease fires. Never
pick up a flaming pan. Turn the controls
off. Smother a flaming pan on a surface
unit by covering the pan completely with a
well-fitting lid, cookie sheet or flat tray. Use
a multi-purpose dry chemical or foam-type
fire extinguisher.
Flaming grease outside a pan can be put
out by covering it with baking soda or, if
available, by using a multi-purpose dry
chemical or foam-type fire extinguisher.
Flame in the oven can be smothered
completely by closing the oven door and
turning the oven offor by using a multi-
purpose dry chemical or foam-type fire
extinguisher.
[] For your safety, never use your appliance
for warming or heating the room.
U Do not let cooking grease or other
flammable materials accumulate in or
near the range.
[] Do not touch the surface units, the heating
elements or the interior surface of the
oven. These surfaces may be hot enough to
burn even though they are dark in color.
During and after use, do not touch, or let
clothing or other flammable materials
contact the surface units, areas nearby the
surface units or any interior area of the
oven; allow suffident time for coofing fast.
Potentially hot surfaces include the
cooktop, areas facing the cooktop, oven
vent opening, surfaces near the opening,
crevices around the oven door.
REMEMBER:The inside surface of the oven
may be hot when the door is opened.
[] Do not store or use combustible materials,
gasoline or other flammable vapors and
liquids in the vicinity of this or any other
appliance.
[] Keep the hood and grease filters dean
to maintain good venting and to avoid
grease fires.
[] Teach children not to play with the
controls or any other part of the range.
1Always keep dish towels, dish doths, pot
holders and other linens a safe distance
from your range.
[] Always keep wooden and plastic utensils
and canned food a safe distance from
your r_ngc.
[] Always keep combustible wall coverings,
curtains or drapes a safe distance from
your range.
4
COOKMEATANDPOULTRYTHOROUGHLY...
Cookmeatandpoultrythoroughly--meattoatleastan INTERNALtemperatureof 160°Eandpoultry
toatleastanINTERNALtemperatureof 180°ECookingto thesetemperaturesusuallyprotectsagainst
foodbomeillness.
RADIANTSURFACEUNITS
Useproper pan size---select cookware havingflat bottoms large enough to cover the surface unit
heating element Theuse of undersizedcookware willexposea potion of thesurface unit to direct
contact and may result in ignition of clothing. Properrelationshipof cookware tosurface unit will
alsoimprove efficienc_
INever leave the surface units unattended at
high heat settings. Boilovers cause smoking
and greasy spillovers that may catch on fire.
t Only certain types of glass, glass/ceramic,
earthenware or other glazed containers are
suitable for cooktop service; others may
break because of the sudden change in
temperature.
m To ntinirnize the possibility of bums,
ignition of flammable materials and
spillage, the handle of a container should
be turned toward the center of the range
without extending over nearby surface units.
Always turn the surface units off before
removing cookware.
E When preparing faming foods under the
hood, turn the fan on.
H Use care when touching the cooktop. The
glass surface of the cooktop will retain heat
after the controls have been turned off.
MKeep an eye on foods being fried at high or
medium high heat settings.
M Foods for frying should be as dry as
possible. Frost on frozen foods or moisture
on fresh foods can cause hot fat to bubble
up and over the sides of the pan.
iUse little fat for effective shallow or deep
fat frying. Filling the pan too full of fat can
cause spillovers when food is added.
J If a combination of oils or fats will be used
in frying, stir together before heating, or as
fats melt slowly.
m Always heat fat slowly, and watch as it heats.
U Use a deep fat thermometer whenever
possible to prevent overheating fat beyond
the smoking point.
_ Avoid scratching the glass cooktop. The
cooktop can be scratched with items such
as sharp instruments; rings or other
jewelry, and rivets on clothing.
g Do not operate the radiant surface units if
the glass is broken. Spillovers or cleaning
solution may penetrate a broken cooktop
and create a risk of electrical shock.
Contact a qualified technician immediately
should your glass cooktop become broken.
mNever use the glass cooktop surface as a
cutting board.
m Do not place or store items that can melt or
catch fire on the glass cooktop, even when
it is not being used.
E Be careful when placing spoons or other
stirring utensils on glass cooktop surface
when it is in use. They may become hot and
could cause burns.
MClean the cooktop with caution. If a wet
sponge or cloth is used to wipe spills on a
hot surface unit, be careful to avoid steam
bums. Some cleaners can produce noxious
fumes if applied to a hot surface.
NOTE:We recommend that you avoid
wiping any surface unit areas until they
have cooled and the indicator light has
gone off. Sugar spills are the exception to
this. Please see the Cleaning the glass
cooktop section.
BWhen the cooktop is cool, use only the
recommended cleaning cream to clean
the cooktop.
!1To avoid possible damage to the cooking
surface, do not apply cleaning cream to
the glass surface when it is hot.
m After cleaning, use a dry cloth or paper
towel to remove all deaning cream residue.
m Read and follow all instructions and
warnings on the cleaning cream labels.
5

IMPORTANTSAFETYINFORMATION.
READALLINSTRUCTIONSBEFOREUSING.
WARNING!
OVEN
Stand away from the range when opening the ovendoor.Hotair or steam which escapes can cause
bums tohands, face and/or eyes.
I Do not heat unopened food containers.
Pressure could build up and the contamer
could burst, causing an injury.
[] Keep the oven vent unobstructed.
m Keep the oven free from grease buildup.
B Place the oven shelf in the desired position
while the oven is cool. If shelves must be
handled when hot, do not let pot holder
contact the heating elements.
U When using cooking or roasting bags in the
oven, follow the manufacturer's directions.
m Pulfing out the shelf to the stop-lock is a
convenience in lifting heavy foods. It is also
a precaution against bums from touching
hot surfaces of the door or oven walls.
m Do not use the oven to dry newspapers.
If overheated, they can calch on fire.
U Do not use the oven for a storage area.
Items stored in an oven can ignite.
Do not leave paper products, cooking
utensils or food in the oven when not
in use.
[] Do not use aluminum foil to line oven
bottoms, except as suggested in this
manual. Improper installation of
aluminum foil may result in a risk of
electric shock or fire.
SELF-CLEANINGOVEN
Donot use ovencleaners.No commercial ovencleaner or ovenliner protective coating of anykind
should be usedin or around anypart of theoven. Residuefrom oven cleaners will damagethe inside
of the ovenwhen theself-clean cycle is used.
E Do not clean the door gasket. The door
gasket is essential for a good seal. Care
should be taken not to rub, damage or
move the gasket.
[] Before self-cleaning the oven, remove the
broiler pan, grid and other cookware.
[] Be sure to wipe up excess spillage before
starling the serf-cleaning operation.
[] ff the self-cleaning mode malfunctions,
turn the oven offand disconnect the
power supply. Have it serviced by a
qualified technician.
[] Clean only parts listed in this Owner's
Manual.
ReadandfollowthisSafetyInformationcarefully.
SAVETHESEINSTRUCTIONS
6

Usingthesurface units.
Throughout this manual, features and appearance may varyfrom your model
How to Set
Be sure you turn the control knob to
OFFwhen you finish cooking,
Push the knob in and turn in either
direction to the setting you want.
At both OFFand HI the control clicks
into position. You may hear slight
clickingsounds during cooking,
indicating the control is keeping the
power level you set.
AHOTCOOK'FOPindicator light will glow
when any radiant element is turned on,
and will remain on until the surface is
cooled to approximately 150°F.
Indicatorlight will:
comeonwhentheunit ishot tothe touch.
stayon evenafterthe unitis turnedoff
Bglowuntil theunitiscooledtoapproximately
150°£
OFF .....
The WM (warm) setting on the right
REARsurface unit keeps already heated
food warm until ready to serve.
Using the Bridge Burner
To use the bridge burner, turn the
control knob to the BRIDGEBURNER
settings.
For full bridge burner operation, turn
on the rear burner.
To use only the front burner, turn the
control knob to the FRONTBURNER
settings.
Dual Surface Unit Control Knob
Therightfrontsurfaceunithas2 cookingsizesto
selectfromsoyoucanmatchthesizeoftheunit
tothesizeofthecookwareyouareusing.
To use the small (6 inch) surface unit,
turn the control knob to the SMALL
BURNERsettings.
To use the large (9 inch) surface unit,
turn the control knob to the LARGE
BURNERsettings.
7

Usingthesurface units.
Nevercookdirectlyontheglass.
Alwaysusecookware.
i
About the radiant surface units...
The radiant cooktop features heating
units beneath a smooth glass surface.
NOTE:A slightodorisnormalwhena new
cooktopis usedforthefirst time.It is causedby
theheatingof newpartsandinsulatingmaterials
andwill disappearina shorttime.
NOTE:Onsomemodelswithawhiteglass
cookiop,it isnormalforthesurfacetoappear
discoloredwhenit ishot.Thisistemporaryand
willdisappearastheglasscools.
The surface unit willcycle on and off m
maintain your selected control setting.
It is safe to place hot cookware on the
glass surface even when the cooktop
is cool.
Even after the surface units are turned
off, the glass cooktop retains enough heat
to continue cooking. To avoid over-
cooking, remove pans from the surface
units when the food is cooked. Avoid
placing anything on the surface unit until
it has cooled completely.
Waterstains(mineraldeposits)areremovable
usingthecleaningcreamor full strengthwhite
vinega_
WUseofwindowcleanermayleavean
iridescentfilmonthecooktop.Thecleaning
creamwill removethisdiscoloration.
MDon'tstoreheavyitemsabovethecooktop,ff
theydropontothecooktop,theycancause
damage.
lOonotusethesurfaceas acuttingboarc_
Donotslidecookware acrossthe
cooktopbecauseit canscratch the
g/ass_the glassisscratch resistant,not
scratch proof.
Temperature Limiter
Every radiant surface unit has a
temperature limiter.
The temperature limiter protects the
glass cooktop from getting too hot.
The temperature limiter may cycle the
units offfor a time if:
mThepanboilsdry
! Thepenbottomisnot flat
RThepanisoffcente_
mThereisnopanontheunit
8

Selecting typesofcookware.
Thefollowing information will help you choose cool.rare which will give goodperformance on glass cooktops.
!i!i!ilili!!i!i!dilili!i!Jii!_ii!iiiii!ii!iii!ii!iiiii_iiii_i_i<i:
Stainless Steel:
recommended Glass-ceramic:
usable,butnotrecommended
Aluminum:
heavyweightrecommended
Good conductivity. Aluminum residues
sometimes appear as scratches on the
cooktop, but can be removed if cleaned
immediately. Because of its low melting
point, thin weight aluminum should not
be used.
Poor performance. May scratch the
surface.
Stoneware:
usable,butnotrecommended
Poor performance. Mayscratch the
surface.
CopperBottom:
recommended
Copper may leave residues which can
appear as scratches. The residues can be
removed, as long as the cooktop is
Home Canning tips:
Be sure the canner is centered over the
surface unit.
Make sure the canner is flat on the
bottom.
Use recipes and procedures from
cleaned immediately. However, do not let reputable sources. These are available
these pots boil dry. Overheated metal can from manufacturers such as Ball* and
bond to glass cooktops. An overheated Kerr* and the Department of Agriculture
copper bottom pot will leave a residue Extension Service.
that will permanently stain the cooktop if
not removed immediately. To prevent bums from steam or heat, use
caution when canning.
Panswith rounded, curved,ridged
orwarpedbottomsare not
recommended.
Porcelain Enamel Covered CastIron:
recommended
As long as the cookware is covered
completely with porcelain enamel, this
cookware is recommended. Caution is
recommended for cast iron cookware
that is not completely covered with
smooth porcelain enamel, as it may
scratch the glass ceramic cooktop.
Use only flat-bottomed woks.
Wok Cooking
Werecommendthatyouuseonlyaflat-bottoreed
wok.Theyareavailableat yourlocalretail store.
Do not use woks that have support rings.
Placing the ring over the surface unit will
cause a build-up of heat that will damage
the cooktop.
Do not use round bottom woks. You
could be seriously burned if the wok
tipped over.
9

Usingthe ovencontrols.
Throughout this manual, features and appearance may vary from your model.
OvenControl,Clockandtimer FeaturesandSettings
SELF CLEANPad
Touch this pad to select the self-cleaning
function. See the Using the serf-cleaning
oven Section,
oPROBEPad(onsomemodels)
Touch this pad when using the probe to
cook food to the desired internal
temperature.
oBAKEPad
Touch this pad to select the bake function.
oBROILHI/LOPad
Touch thispad to select the broil function.
oCONVECTIONROASTPad
Touch this pad to select roasting with the
convection function.
oOisplay
Shows the time of day, oven temperature,
whether the oven is in the bake, broil or self-
cleaning mode and the times set for the
timer or automatic oven operations.
If "F- anda numberor letter" flashin the displayand the
ovencontrolsignals,thisindicatesa functionerrorcode.
Ifyourovenwasset fora timedovenoperationand
apoweroutageoccurred,theclockandallprogrammed
functionsmustbereset.
Thetimeofdaywillflashinthedisplaywhentherehas
beenapoweroutage.
oCLOCKPad
Touch this pad before setting the clock.
OCOOKINGTIMEPad
Touch this pad and then touchthe number
pads to set the amount of time you want
your food to cook. The oven will shut off
when the cooking time has run out.
oBELAYSTARTPad
Usealong with COOKINGTIMEor SELF
CLEANpads to set the oven to start and stop
automatically at a time you set.
oTOPLIOHTPad
Touch this pad to turn the surface light on
or 0_'.
oOVENLIGHTPad
Touch this pad to turn the oven light on
or off.
0
0
0
START Pad
Must be touched to start any cooking or
cleaning function.
KITCHENTIMERON/OFFPad
Touch this pad to select the timer feature.
Number Pads
Use to set any function requiring numbers
such as the time of day on the clock, the
timer, the oven temperature, the internal
food temperature, the start time and
length of operation for timed baking
and self-cleaning.
O CONVECTIONBAKEPad
Touch this pad to select baking with the
convection function.
oCLEAR/OFFPad
Touch this pad to cancel ALLoven
operations except the clock and timer.
10

Special featuresofyourovencontroL
Yournew touch pad control has additional featuresthat youmay choose to use. Thefollowing are the features
and how you may activate them.
Thespecial feature modes can onlybe activated while the display isshowing the time of day.Theyremain
in the control'smemory until the steps are repeated.
Whenthe display shows your choice, touch the STARTpad. Thespecial features will remain in memoryafter
a power failure.
@
@
12Hour Shut-Off
With thisfeature,shouldyouforgetandleavethe
ovenon,the controlwill automaticallyturnoff the
ovenafter 12hoursduringbakingfunctionsor
after 3hoursduringabroilfunction.
If you wish to turn OFFthis feature, follow
the steps below.
[] Touch the BAKE and BROILHIALO
pads at the same time for :3seconds
until the display shows SE
[] Touch the DELAYSTART pad. The
display will show 12shdn (12 hour
shut-olD. Touch the DELAYSTART
pad again and the display will show
no shdn (no shut-olD.
[] Touch the STARTpad to activate the
no shut-off and leave the control
set in this special features mode.
..o,o.,o,,o,.,.,o.,oo.o=,.,.,oo,,o.
YourovencontrolissettousetheFahrenheit [] Touch the BROILHI/LO pad. The
....................... temperatureselectionsbut youmaychangethis display will show F(Fahrenheit).
to usetheCelsiusselections. [] Touch the BROILHI/LOpad again.
The display will show C(Celsius).[] Touch the BAKE and BROILHI/LO
[_, ,_ pads at the same time for 3 seconds
until the display shows Sh'. [] Touch the START pad.
+ + Tonesatthe Endofa 7-tmedCycle
At the endofatimedcycle,3 sbertbeepswig
soundfollowedbyonebeepeverygsecondsuntil
theCLEAR/OFFpedis touched.Thiscontinual6
secondbeepmaybecanceled
To cancel the 6 second beep:
[] Touch the BAKE and BROILH!/LO
pads at the same time for 3 seconds
until the display shows SE
[] Touch the KITCHENTIMERON/OFF
pad. The display shows CON BEEP
(continual beep). Touch the
KITCHEN TIMERO/V/OFFpad
again. The display shows BEER
(This cancels the one beep
every 6 seconds,)
[] Touch the STABTpad.
11

Specialfeaturesofyourovencontrol
Control Lockout (on some models)
Yourcontrolwill allow youtolockout thetouch
padssotheycannotbeactivatedwhentouched
orcleaningtheglasspanel
To activate this feature:
[] Touch the 9and 0touch pads at the
same time for 3seconds until the
control beeps twice.The display will
show LOCcontinuously and the time
of day if'not blacked out.
NOTE:Allcookingandtimingfunctionswillbe
cancelledwhenlockingoutthecontrol.
[] To unlock the control, touch the
9and 0touch pads at the same time
for 3seconds until the control beeps
twice, and LOCwill be removed from
thedisplay.
i!i_iiiiiiiiiilJill !_ _ii_ ii_i¸
iiii ii i!i
12 Hour, 24 Hour or Clock Black-Out
Yourcontrolissetto usea 12hourclock.
If you would prefer to have a 24 hour
militmy time clock or black-out the clock
display, follow the steps below.
[] Touch the BAKEand BROILHI/LO
pads at the same time for 3 seconds
until the display shows SF.
[] Touch the CLOCKpad once. The
display will show 12hr, If this is
the choice you want, touch the
START pad.
Touch the CLOCKpad again to change to
the 24 hour military time dock. The
display will show 24 hr. If this is the choice
you want, touch the $TARTpad.
Touch the CLOCKpad again to black-out
the clock display. The display will show
OFE.If this is the choice you want, touch
the START pad.
NOTE."If theclockis in theblock-outmodeyou
will notbeabletousetheDelayStartfunction.
12

Cook and Hold
Yournewcontrolbasa conkondholdfeaturethat [] Touch the COOKiNGTiMEpad. The
keepscookedfoodswarmforupto3hoursafter display will show HidOFE
thecookingfunctionisfinishe_ Touch the COOKINGTIME pad again
to activate the feature. The display
will show Hid ON.
To activate this feature, follow the steps
below.
m Touch the BAKEand BROIlIt!lift
pads at the same time for 3 seconds
until the display shows SE
[] Touch the STARTpad to activate
the cook and hold feature and
leave the control set in this special
features mode.
Using Convection Conversion
Byusingthe ConvectionConversionfeatureyou
canautomaticallyconverttheoventemperature
fromregularbakingto ConvectionBake
temperatures.
To convert the oven temperature for
convection baking, follow the steps below.
[] Touch and hold the CONVECTION
BAKEpad for 4 to 5 seconds.
[] Using the number pads, enter
the temperature recommended
in the recipe.
[] Touch the STARTpad.
The display shows the converted
(reduced) temperature. For
example, if you entered a recipe
temperature of350°F., the display
will show 325°F.when it is converted.
[] Touch the CLEAR/OFFpad when
baking is finished.
NOTE:Conversionmust ba set each time you
wantto useit. It isnot heldin memory
/3

Usingtheoven.
Toavoidpossible burns,place the shelvesin the desiredposition beforeyou tum the oven on.
Theevenhas 6sheff pesitiens.
Before you begin...
The shelves have stops, so that when
placed correctly on the supports, they will
stop before coming completely out, and
will not tilt.
When placing and removing cookware,
pull the shelf out until it stops.
On some models, the bake heating
element is under the oven floor.
Do not place foods on the oven bottom
for cooking.
Toremovea sheff,pull it toward you, tilt
the front end up and pull it out.
Toreplace, place the end of the shelf
(stop-locks) on the support, tilt up the
front and push the shelf in.
CAUTION:Whenyouareusingtheshelfin the
lowestposition(,4),youwill needto usecaution
whenpullingthesheffout. Werecommendthat
youpull theshelfoutseveralinchesandthen,
usingtwopotholders,pull theshelfoutby
holdingthesidesof it. Theshelfislowand you
couldbe burnedif youplaceyourhandin the
middleof theshelfandpullall the wayout.Be
verycarefulnot tobumyourhandonthedoor
when usingtheshelfin thelowestposition(A).
How to Set the Oven for Baking or Roasting
[] Touch the BAKEpad.
[] Touch the number pads to set the
desired temperature.
[] Touch the STARTpad.
[] Check food for doneness at
minimum time on recipe. Cook
longer ifnecessmy.
[] Touch the CLEARi0FFpadwhen
cooking is complete.
Type of Food Shelf Position
Frozenpies(oncookiesheet) D
Angelfendcake. O
bundtorpoundcakes
Biscuits.muffins,brownies. CorD
cookies,cupcakes.
layercakes,pies
Casseroles CorD
Turkeyorroastonoffsetshelf A
Preheating and Pan Placement
Preheat the oven if the recipe calls for it.
Preheating is necessary for good results
when baking cakes, cookies, pastry and
breads.
Do not p/ace foods directly on the
eveo fleo_
Topreheat,settheovenat thecorrecttemperature.
Thecontrolwill beepwhentheovenispreheated
andthedisplaywill showyoursettemperature.
Thiswill takeapproximately15-20minutes.
Baking results will be better if baldng pans
are centered in the oven as much as
possible. If baking with more than one
pan, place the pans so each has at least 1"
to 1 L/_"of air space around it. ffbaking
four cake layers at the same time, place
two layers on rack B and two layers on
rack D. Stagger pans on the rack so one is
not directly above the other.
Cut slits in the feiljust like the grid.
74
Aluminum Foil
You can use aluminum foil to line the
broiler pan and broiler grid. However,
you must mold the foil tightly to the grid
and cut slits in it just like the grid.
Without the slits, the foil will prevent fat
and meat juices from draining into the
broiler pan. The juices could become
hot enough to catch on fire. If you
do not cut the slits, you are essentially
frying, not broiling.
Donotusealuminumfoilonthebottomof
theoven.
Never entirely cover ashelf with
aluminum foil. This will disturb the heat
circulation and result in poor baking.
Asmaller sheet of foil may be used to
catch a spillover by placing it on a lower
shelf several inches below the food.

Leave the door open to the broil
stop position. The door stays open
by itseff, yet the proper temperature
is maintained in the oven,
How to Set the Oven for Broiling
[] Place the meat or fish on the broiler
grid in the broiler pan.
[] Follow suggested shelf positions in
the Broiling Guide.
ffyourrangeis connectedto208 volts,rare
steaksmaybebroiledbypreheatingthebroiler
andpositioningthe ovenshelfoneposition
higher.
Use LOBroil to cook foods such as poulu 7
or thick cuts of meat thoroughly without
over-browning them.
[] Touch the BBOILItla.Opad once for
HI Broil.
To change to LO Broil, touch the
BROILHI/[O pad again.
[] Touch the STARTpad.
[_ When broiling is finished, touch the
C£_B/OFFpad.
The size, weight, thickness,
starting temperature,
and your preference
of doneness will affect
broiling times. This guide
is based on meats at
refrigerator temperature.
The U.&Departn_nt of
Agriculture says "Rare b¢efis
popular, but you should know that
cooklng it to on0 140° Fmeans
somefood polsoning organisms may
survive. "(Source:_eFood Book.
_. USDA Rev.
june 1985,)
Broiling Guide
Food
GroundBeef
Beef Steaks
Rarer
Medium
Well Done
Rarer
Medium
WellDone
Chicken
Bakery Product
Bread (toast)
English Muffin
LobsterTaBs
FishFillets
Salmon
Steaks
Fillets
Ham Slices
{precooked)
Pork Chops
Well Done
Lamb Chops
Medium
Well Done
Medium
Well Done
Quantity and/
or Thickness
lb.(4 patties)
l/z to3/d thick
41bs.(12patties)
3/4t01" thick
to 1 _hlbs
_h"thick
2to2_hIbs
1wholecut up
2to2_hlbs,
split lengthwise
Breast
2to4slices
2)split)
24
11b.(V4toV2"thiek)
2(1"thick)
2(Vztoz/dthick)
'/z"thick
1" thick
2(_h"thick)
2(1"thick)about1lb.
211"thick)about10
to12oz
2(l_h" thick)about1lb.
Shelf
Position
P
E
E
O
D
E
C
C
E
F
E
E
D
D
D
D
E
E
E
E
First Side
"time (rain.)
13
15
6
8
10
10
15
2O
25
25
3
3-4
18-20
10
10
6
8
10
15
7
10
9
14
Second Side
Time (rain.)
8
11
4
6
8
8
10-12
20
25
15
1
Do not
turn
OV8[
6
8
10
15
4
9
6
10
Comments
Spaceevenly
Steakslessthan3/4"
thickaredifficult
tocookrare
S_ashfat
Brusheachsidewith
meltedbutte_
Broilskin-side-down
first.
Spaceevenly.Place
Englishmuffinscut-
side-upandbrush
withbutterif desired.
Cutthroughbackof
shell.Spreadopen.
Brushwithmelted
butterbeforebroiling
andafterhalfof
broilingtime.
Handleandturnvery
carefully,Brushwith
lemonbutterbefore
andduringcooking,
if desired
TumcarefullyDonot
turn skinsidedown.
Slashfat
Slashfat
15

Usingthe clock and timer.
Make surethe clockisset to the
correcttimeofda)_
To Set the Clock
The clock must be set to the correct time
of day for the automatic oven timing
functions to work properly. The time of
day cannot be changed during a timed
baking or self-cleaning cycle.
[] Touch the CLOCKpad.
[] Touch the number pads.
[] Touch the STARTpad until the
time of day shows in the display.
The timer is a minute timer only.
The timer does not control oven
operations. The maximum setting on
the timer is 9 hours and 59 minutes,
To Set the Timer
[] Touch the KITCHENTIMER
ON/OFFpad.
[] Touch the number pads until the
amount of time you want shows in
the display. For example, to set 2
hours and 45 minutes, touch 2, 4
and 5in that order. If you make a
mistake touch the KITCHENTIMER
0N/0FF pad and begin again.
[] Touch the STARTpad.
r_] When the timerreaches .'O0,the
"L2--J control will beep 3 times followed
by one beep every 6 seconds until
the KITCHENTIMER0N/0FF pad
is touched.
The6 secondtonecanbecanceledbyfollowing
thestepsin theSpecialfeaturesof youroven
controlsectionunderTonesat theEndofa
TimedCycle.
ToReset the Timer
If the display isstillshowing the time
remaining, you may change it by
touching the KIIBHENTIMEROIg,'OFFpad,
then touch the number pads until the
time you want appears in the display.
If the remaining time is notin the display
(dock, delay start or cooking time are in
the display), recall the remaining time by
touching the KITCHENTIMER0N/0FFpad
and then touching the number pads to
enter the new time you wanL
To Cancel the Timer
Touch the KITCHENTIMERON/OFF
pad twice.
/6

Usingthetimed baking and mastingfeatures.
NOTE: Foodsthat spoil easily-such as milk,eggs, fish,stuffings, poultry and pork-should not be allowed to sit for
more than I hour before or after cooking.Roomtemperaturepromotes the growth of harmful bacteria. Be sure that
the oven light is off because heat from the bulb will speedharmful bacteria growth.
D53C 3C 3C 3 3
C 3053C53CC 3
5 (SD 3C 3 SD
E 3C53 353
How to Set an Immediate Start and Automatic Stop
Theovenwill turnonimmediatelyandcookfora
selectedlengthoftime.At theendof thecooking
time theovenwill turnoff automatically
[] Touch the BAKEpad.
[] Using the number pads, enter the
desired temperature.
[] Touch the COOKINGTIME pad.
The word ON and lO0°will be displayed.
The cook time will begin to count down.
As the oven heats up, the display will show
the changing temperature. When the
oven reaches the tempez-ature you set,
3 beeps will sound.
At the end of timed baking, the oven will
turn off. The end of cycle tone will sound.
NOTE:If yourreciperequirespreheating,you Touch the CLEAR/OFFpad to clear the
thecookingtime.
[] Using the number pads, enter the
desired baking time. The oven
temperature and the cooking time
.......... ...... that you entered will be displayed.
display.
[] Touch the STARTpad.
How to Set a Delayed Start and Automatic Stop
Youcansetthe ovencontroltodelay-startthe If you would like to check the times you
oven,cookforaspecificlengthof timeandthen have set, touch the DEIAYSTARTpad to
tumoffautomatically check the start time you have set or touch
the COOKINGTIME pad to check the
length of cooking time you have set.
Make sure the clock shows the correct
time of day.
[] Touch the RAKEpad.
[] Using the number pads, enter the
desired temperature.
[] Touch the COOKINGTIMEpad.
NOTE:If yourreciperequirespreheating,you
mayneedtoaddadditionaltime tothelengthof
thecookingtime.
[] Usingthenumber pads, enter the
desired baking time.
[] Touch the DElAYSTARTpad.
[] Using the number pads, enter the
time of day you want the oven to turn
on and stm_ cooking.
The oven will turn on automatically. The
word ON and 100"will be displayed. The
cook time will begin to count down.
As the oven heats up, the display will show
the changing temperature. The oven will
cook for the programmed cooking time
and shut offautomatically.
At the end of timed baking, the oven will
turn off. The end of cyde tone will sound.
Touch the CLEAR/0FFpad to clear the
display.
[] Touch the STAR'l'pad.
NOTE:Anattentiontonewill soundif youam
usingtimedbakinganddonot touchtheSTART
padafterenteongthebakingtemperature.
/7

Usingtheprobe (onsomemodels).
Formanyfoods,especially mastsandpoultry, internal food temperature is thebest test for doneness.The
temperatureprobe takes the guesswork out of roasting by cooking foods to the exact donenessyou want
The temperature probe has a
skewer-like probe at one end and a
plug at the other end that goes into
the outlet in the oven.
Use of probes other than the one
provided with this product may resuh in i_i!!i
damage to the probe.
Use the handles of the probe and plug
when inserting and removing them from
the food and outlet.
mToavoiddamagingyourprobe,denotuse
tongstopullonthecablewhenremovingit.
MToavoidbreakingtheprobe,makesurefoodis
completelydefrostedbeforeinserting.
mNeverleaveyourprobethsidetheovenduring
aself-cleaningcycle.
Donotstoretheprobein theoven.
iTopreventpossiblebums,do notunplugthe
probefromtheoutletuntil theovenhas
cooled
After preparing the meat and placing it
on a trivet or on the broiler pan grid,
....... follow these directions for proper probe
+ placement.
Insert the probe completely into the
meat. It should not touch the bone,
fat orgristle.
For roasts with no bone, insert the probe
into the meatiest part of the roast. For
bone-in ham or lamb, insert the probe
into the center of the lowest large muscle.
Insert the probe into the center of dishes
such as meat loafer casseroles.
Insert the probe into the meatiest part of
the inner thigh from below and parallel
to the leg of a whole turkey.
How(onsometo Setmodels)the Oven For Roasting When Using the Probe
........... [] Insert the probe into the food. internal temperature will be shown in
the display.
18
[] Plug the probe into the outlet in the
oven. Make sure it's pushed all the
way in. Close the oven door. Make
sure the probe cable is not touching
the broil element.
[] Touch the PROBEpad.
[] Touch the number pads to set the
desired intemal food or meat
temperature.
[] Touch the BAKE pad.
[] Touch the number pads to set the
desired oven temperature.
[] Touch the STARTpad.
Thedisplaywill flashif theprobeis insertedinto
theoutletandyouhavenotseta probe
temperatureandtouchedthe STARTpad.
After the internal temperature of the
food reaches 100°F., the changing
[] When the internal temperature of
the food reaches the number you
have set, the probe and the oven
tuna offand the oven control signals.
To stop the signal, touch the
C/.EJIR/OFFpad. Use hot pads to
remove the probe from the food.
Do not use tongs to pull on it--they
might damage it.
To change the oven temperature during
the Roast cycle, touch the BAKEpad and
then the number pads to set the new
temperature.
UIftheprobeisremovedfromthefoodbefore
thefinaltemperatureisreached,a tonewill
soundandthe displaywill flashuntil theprobe
isremovedfromtheoven.
Youcan usethe timereven thoughyou
cannotuse timedovenoperationswhile
using theprobe,

Usingtheconvectionoven.
The convection oven fan shuts off when the oven door is opened. DO NOT leave the door open for long periods of
time while using convection cooking or you may shorten the life of the convection heating element
To help you understand the difference
between convection hake and roast and
traditional bake and roast, here are some
general guidelines.
Convection Bake
!Idealfor evenlybrownedbakedfoodscooked
on multipleshelves.
iGoodfor largequantitiesofbakedfoods.
DGoodresultswith cookies,biscuits,brownies,
cupcakes,creampuffs,sweetrolls,angelfood
cakeandbread.
In a convection oven, a fan
circulates hot air over, under and
around the food, This circulating
hot air is evenly distributed
throughout the oven cavit_ As a
result foods are eveniy cooked and
browned---often in less time than
with regular heal Heat comes from the heating element in
the rear of the oven. The convection fan
circulates the heated air evenly over and
around the food. Preheating is not
necessary with foods having a bake time
of over 15 minutes.
Convection Roam
FItGoodforlargetendercutsofmeat,uncovered
Heat comes from the top heating
element. The convection fan circulates
the heated air evenly over and around the
food. Meat and poultry are browned on
all sides as if they were cooked on a
rotisserie. Using the roasting rock
provided, heated air will be circulated
over, under and around the food being
roasted. The heated air seals in juices
quickly for a moist and tender product
while, at the same time, creating a rich
golden brown exterior.
Roastsorpoultryshouldbecookedonthelowest
shelfposition(A)ona shel£
When you are convection roasting it is
important that you use the broiler pan
and grid and the special roasting rack for
best convection roasting results. The pan
is used to catch grease spills and the grid
is used to prevent grease spatters. Place
the meat on the special roasting rack. The
rack holds the meat. The rack allows the
heated air to circulate under the meat
and increase browning on the underside
of the meat or poultry.
lUPlace the shelf in the lowest shelf
position (A).
m Place the grid on the broiler pan and
put the roasting rack over them making
sure the posts on the roasting rack fit
into the holes in the broiler pan.
Adapting Recipes...
You can use your favorite recipes in the
convection oven.
When baking, reduce baking
temperature by 25°F.
No need to preheat when cooking
longer than 15 minutes.
mFormoreinformationonadaptingrecipes,see
theConvectionCookbook.
mUsepensizerecommended.
ZSomepackageinstructionsfor frozen
casserolesor maindisheshavebeen
developedusingcommercialconvectionovens.
Forbestresultsin thisoven,preheattheoven
and usethe temperatureonthepackage.
19

Usingthe convectionoven.
Cookware for Convection Cooking
Before using your convection oven, check
to see if your cookware leaves room for air
circulation in the oven. If you are baking
with several pans, leave space between
them. Also, be sure the pans do not touch
each other or the walls of the oven.
Paper and Plastic
Heat-resistant paper and pl_tic
containers that are recommended
for use in regular ovens can be used in
convection ovens. Plastic cookware that
is heat-resistant to temperatures of
400°F. can also be used, when oven is
below 400 °F.
Metal and Glass
Any type of cookware will work in your
convection oven. However, metal pans
heat the fastest and are recommended
for convection baking.
!Darkenedor matte-finishedpanswill bake
fasterthanshinypans.
MGlassorceramicpanscookmoreslowly
When baking cookies, you will get the
best results ifyou use a fiat cookie sheet
instead of a pan with low sides.
For recipes like oven-baked chicken,
use a pan with low sides. Hot air cannot
circulate well around food in a pan with
high sides.
How to Set the Oven for Convection Baking or Roasting
[] Touch the CONVECTIONBAKEor
CONVECTIONROAST pad.
[] Touch the number pads to set the
___ desired oven temperature.
To change the oven temperature, touchthe or
CONVECTIONBAKE CONVECTION
ROASTpad and then the number pads to
set the new temperature.
When the oven starts to heat the changing
temperature, starting at 100°F., will be
displayed. When the oven reaches the
temperature you set, 3 beeps will sound.
[] Touch the CLEAR,10FFpad when
finished.
NOTE-"Youwill hearafanwhile cookingwith
convection.Thefanwill stopwhenthedooris
openedbut theheatwill not turnoff.
When convection baking with on/'/
Ishelf, follow the sheffposi6ons
recommended in the Using the
oven section,
MuM-Shelf Baking
Because heated air is circulated evenly
throughout the oven, foods can be
baked with excellent results using
multiple shelves.
Multi-shelf baking may increase cook
times slightly for some foods but the
overall result is time saved. Cookies,
muffins, biscuits, and other quick
breads give very good results with
multi-shelf baking.
When baking on 3 shelves, place one
shelf in the bottom (A) position, one on
the 4th (D) position and the offset shelf
in the 6th (F) position.
2O
Other manuals for JB940
2
This manual suits for next models
2
Table of contents
Other GE Convection Oven manuals

GE
GE Convection Grill Combination Microwave Use and care manual

GE
GE GEMONOGRAM ZET837WBWW User instructions

GE
GE JB680STSS Manual

GE
GE Monogram ZMC1095 Series User manual

GE
GE Profile PT920BM Manual

GE
GE MFL38211602 User manual

GE
GE 164D2966P205-1 User manual

GE
GE Monogram ZEK938 User manual

GE
GE Profile PT970SM User manual

GE
GE PEB1590SMSS - Countertop Microwave Oven Manual