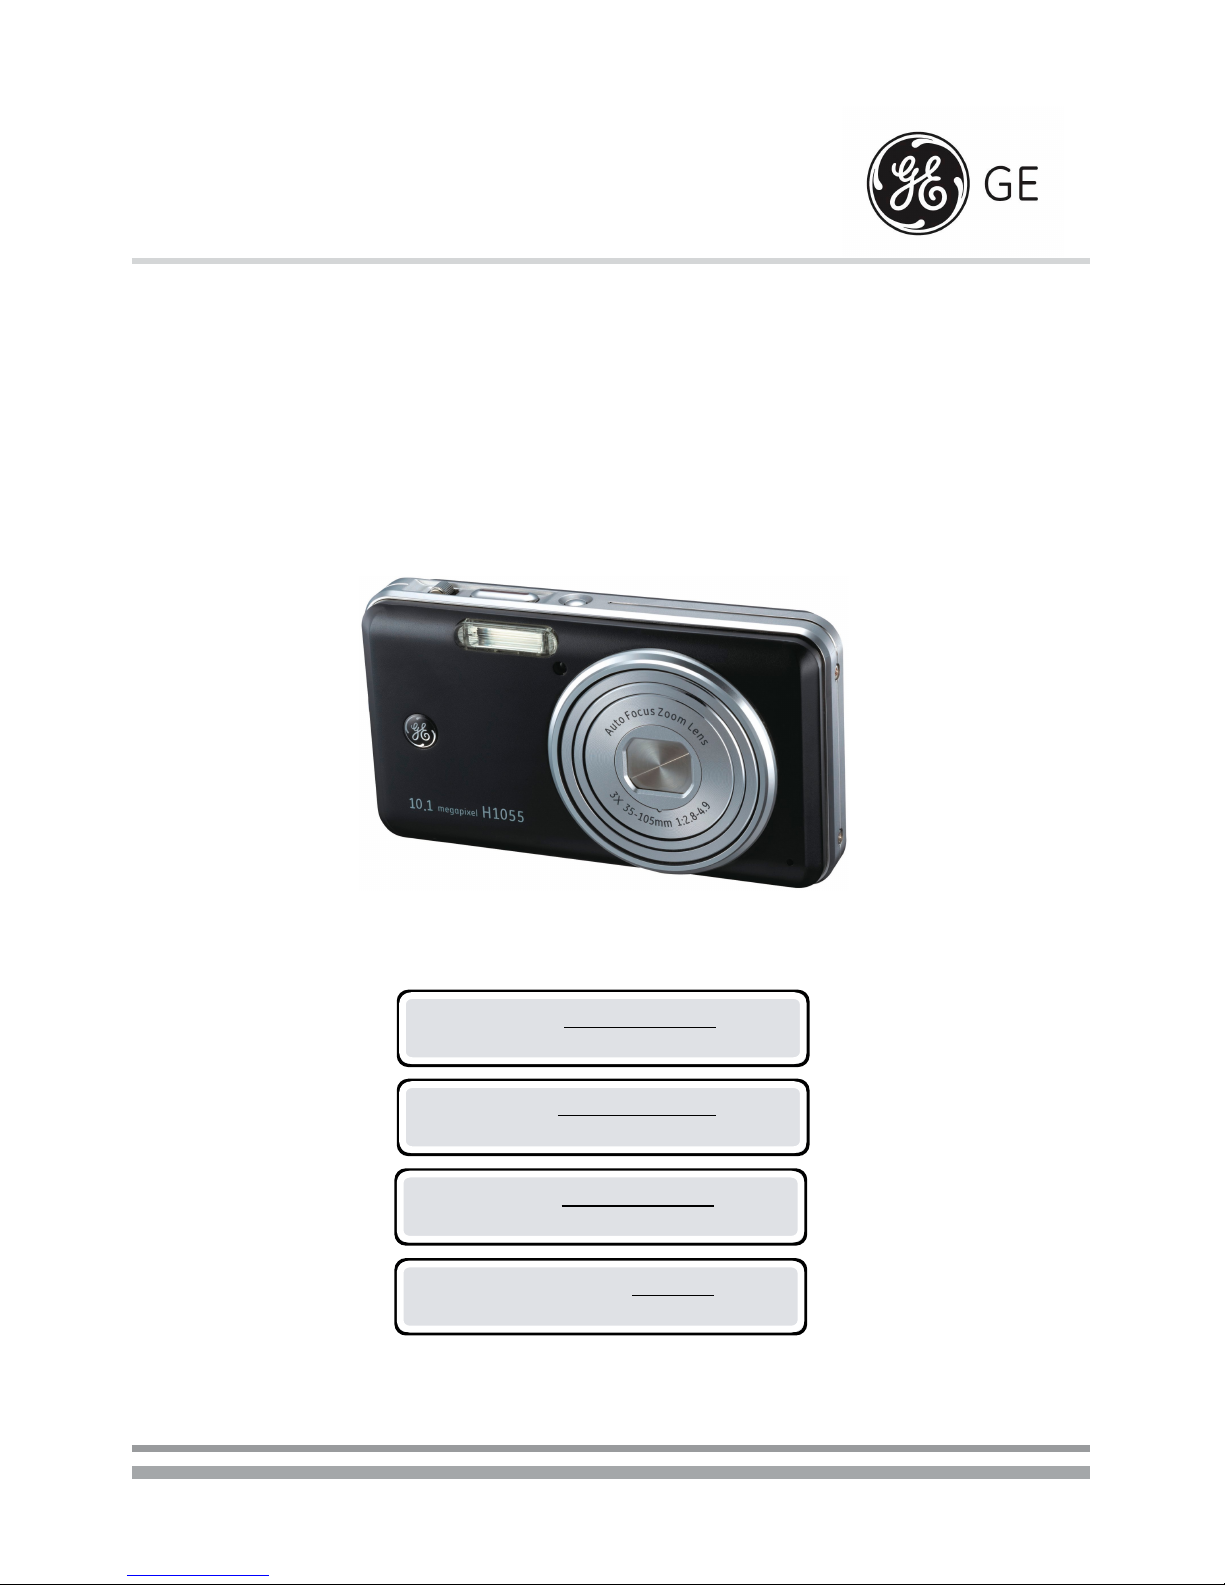
GE H1055 User manual

USER MANUAL
Digital Camera
H1055
ENGLISH P.01
FRENCH P.17
PORTUGUESE P.49
SPANISH P.33


1
EN
Thank you for purchasing GE digital cameras. Please read this manual
carefully and keep it in a safe place for future reference.
Copyright
© Copyright 2007 General Imaging Company All rights reserved.
No part of this publication may be reproduced, transmitted, transcribed,
stored in a retrieval system, or translated into any language or
computer language, in any form, by any means, without the prior written
permission of General Imaging Company.
Trademarks
All trademarks mentioned in this manual are used for identification
purposes only and may be properties of their respective owners.
Unpacking
Your package should contain the camera model you purchased along
with the following items. If anything is missing or appears to be
damaged, please contact your vendor. (The accessories will vary based
on model purchased and are noted below.)
Preface
USB cable
AV cable
CD-ROM
User Manual
User Manual
Warranty card
Wrist strap
Rechargeable
Lithium-ion battery
Battery charger
Quick start guide

2
EN
Camera Views : H1055
megapix
el
10.1 H1055
1 2 3
4
57
6
8
9
10
11
12
13
14
15
WT
16 17 18
19 20 21 22
23

3
EN
Camera Views
1 Flash 13 Self-timer/ Down button
2 AF assist beam/
Timer indicator 14 Func/ok button
3 Lens 15 Flash mode/ Left button
4 Mic 16 Power button
5 LCD screen 17 Shutter button
6 Face detection AF button 18 Zoom scroll wheel
7 Status LED 19 Speaker
8 Mode dial 20 Tripod mount point
9 Menu button 21 USB/ AV port
10 Erase button 22 Memory card/
Battery compartment
11 Exposure compensation/
Up button 23 Wrist strap mount
12 Macro mode/ Right button

4
EN
2. Insert the battery while observing the correct polarity. Use the side of
battery to press down the stopper as shown, allowing the battery to
be inserted properly.
Inserting the battery and SD/SDHC card
1. Slide the battery compartment out and lift it open.
Getting Started
3. Insert an optional SD/SDHC card into the memory card slot as shown.
To remove the SD/SDHC card, open the battery compartment and
gently push the card to release it. Pull the card carefully.
4. Close the battery compartment.
Optional SD/SDHC cards are not included. The use of 64MB to 4GB
memory card is recommended for reliable data storage.

5
EN
Getting Started
Press the Power button to turn the camera on.
To turn o the camera, press the Power button again.
When turned on, the camera will
enter the mode according to the
mode dial setting. You can also
turn the mode dial to change the
modes after the camera is turned
on.
Turning on and off
The GE camera provides a convenient mode
dial that allows you to switch between dierent
modes with ease. All the available modes are
listed as follows.
Using the mode dial
Icon Mode Name Icon Mode Name
Auto Scene
Playback Portrait
Movie Panorama
Image Stabilization Manual
Mode dial
In Scene mode, you can select from a total of 12 scene types to match
your needs. You just need to select the right scene for the occasion and
the camera will automatically adjust to the optimal settings for you.
Scene mode
Icon Mode Name Icon Mode Name Icon Mode Name
Sport Snow Museum
Children Sunset Landscape
Indoor Fireworks Night landscape
Leaf Glass Night portrait
WT
Power button

6
EN
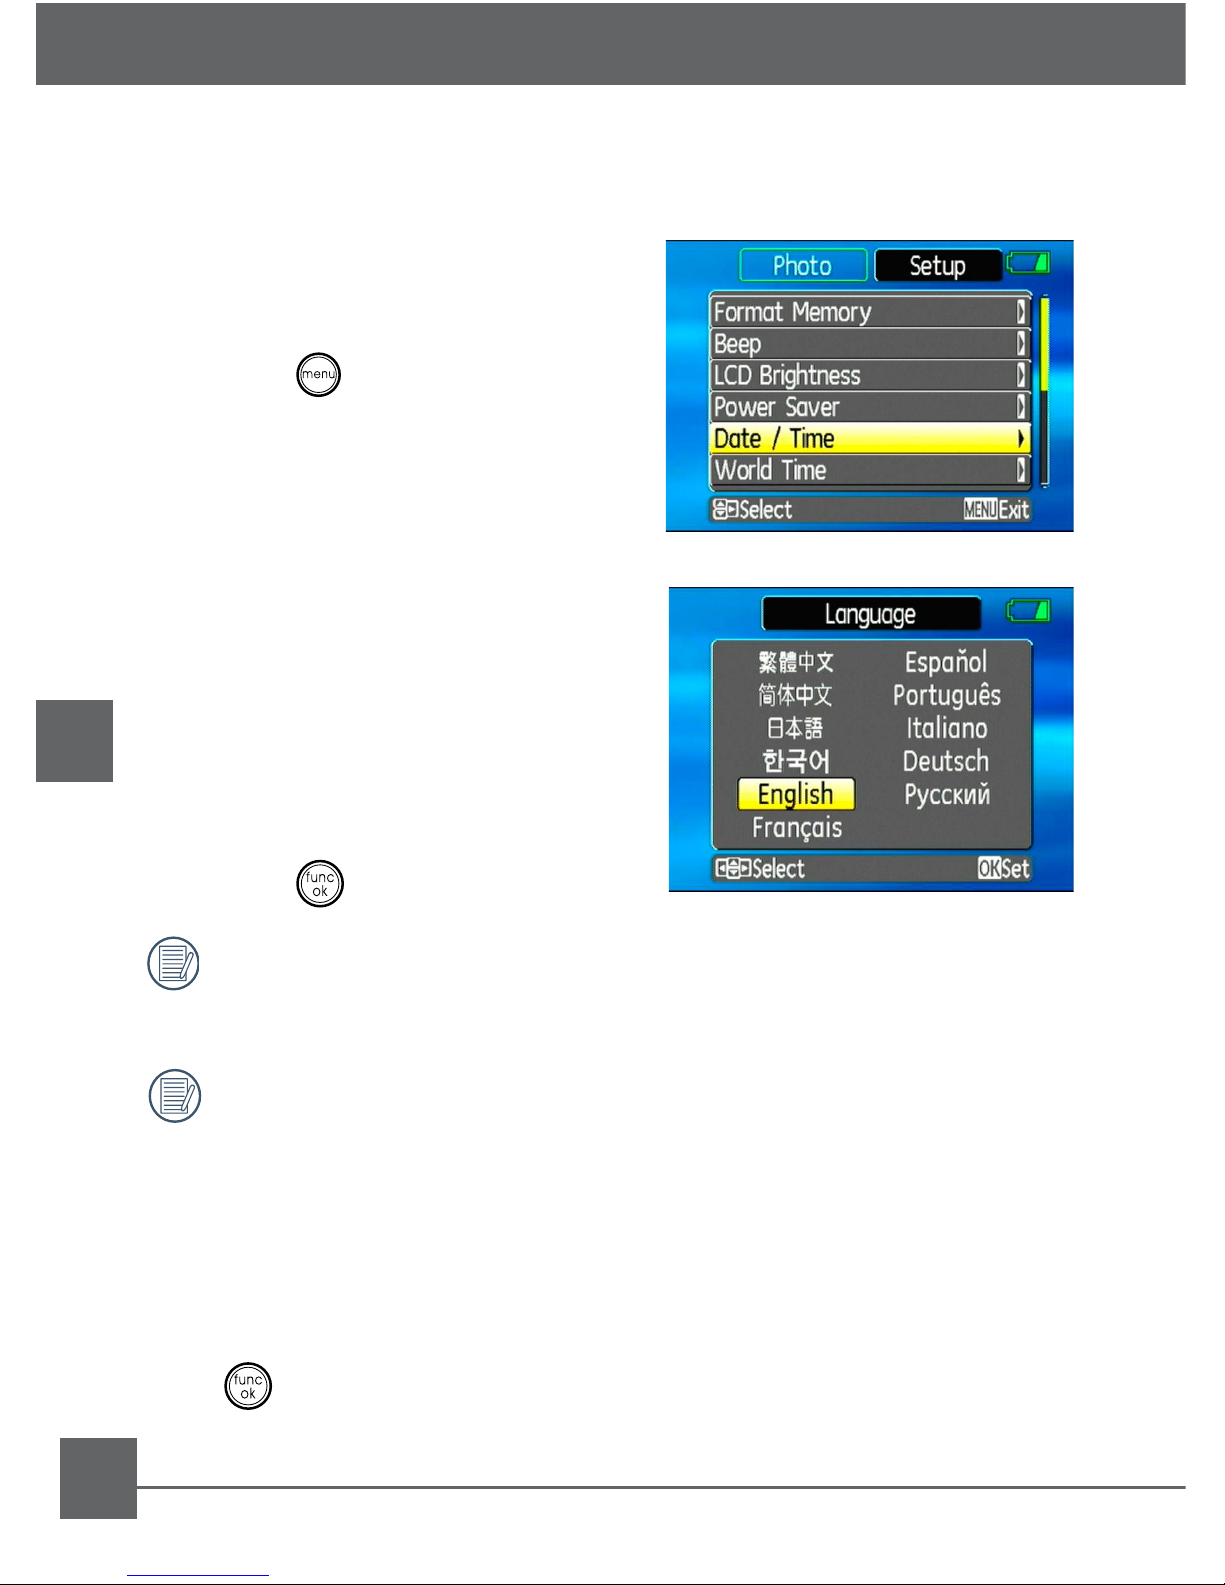
Setting display language, date, and time
When using the camera for the rst time, you need to set the language,
date, and time for your camera in the Setup menu.
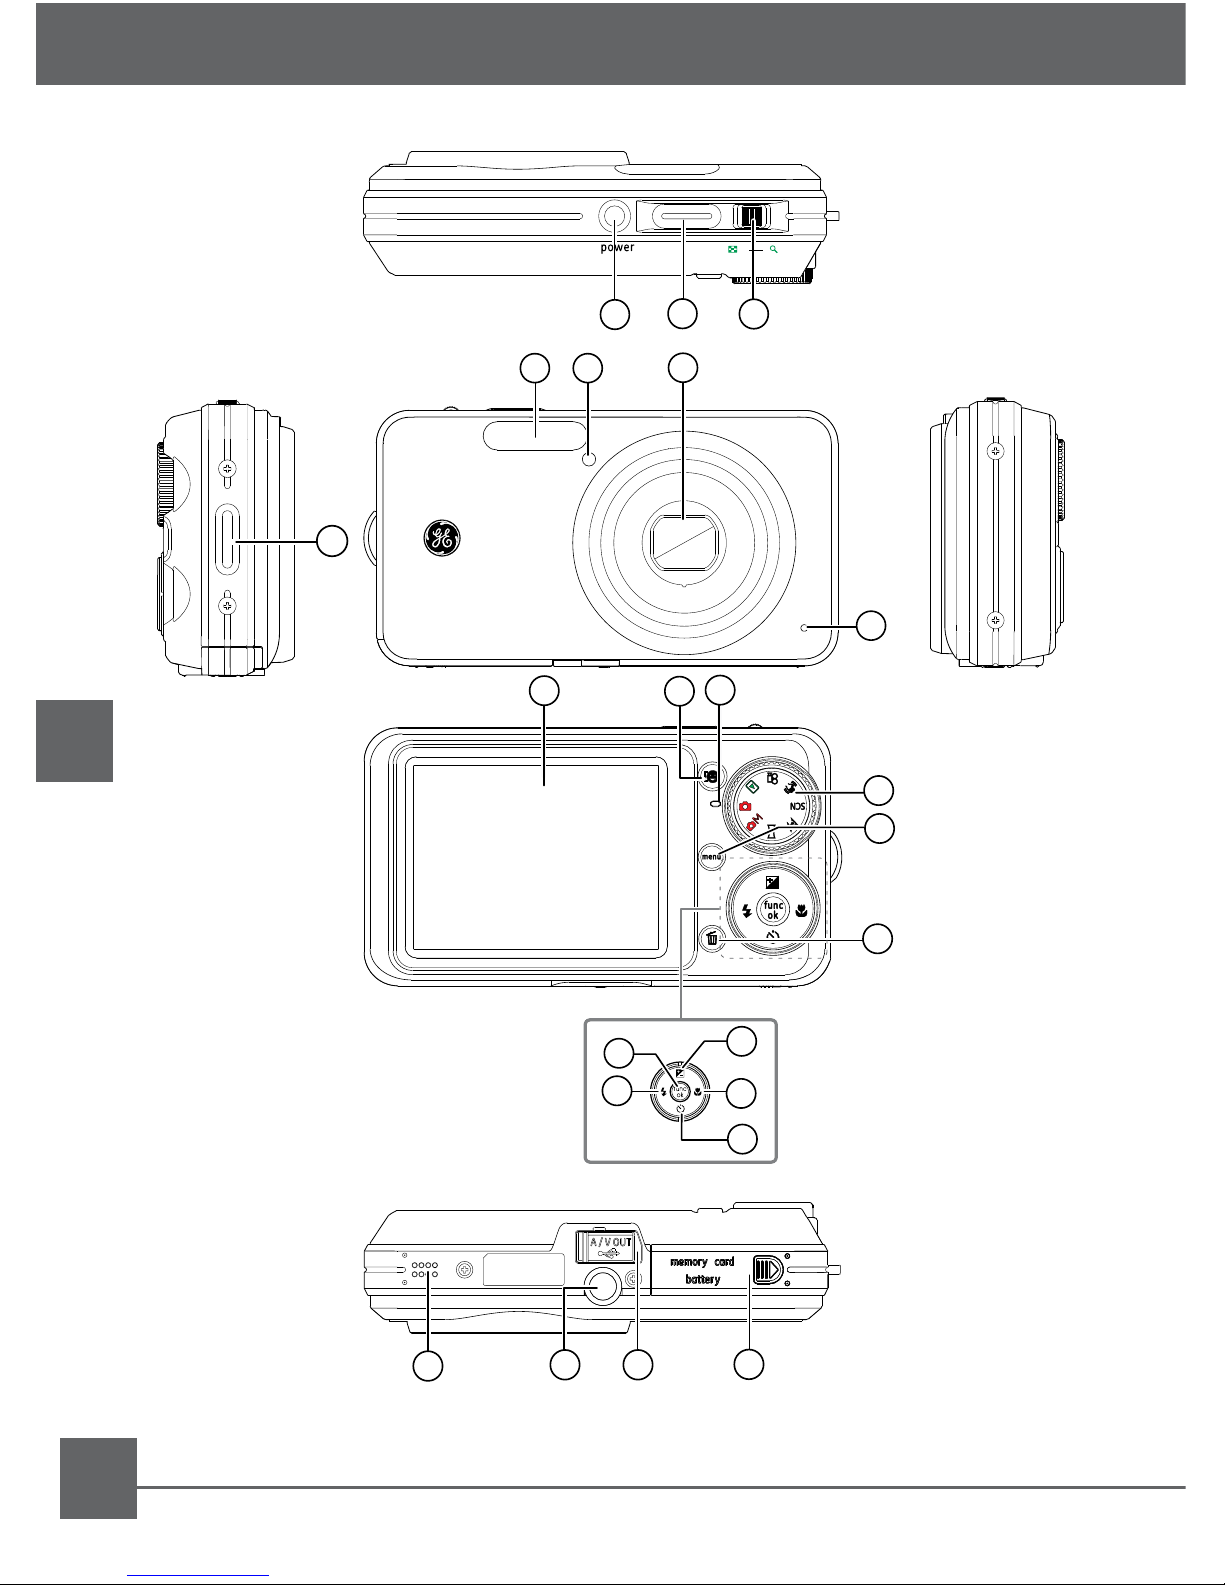
Getting Started
To access the Setup menu, do the
following:
1. Press the Power button to turn the
camera on.
2. Press the button and use the
navigation buttons to select the
Setup menu.
3. Use the Up/Down navigation buttons
to select Date/Time or Language.
Then press the Right navigation
button to enter the setting.
4. (For Date/Time setting) Press the
Left/Right navigation buttons to
highlight each eld and use the Up/
Down navigation buttons to adjust
the value.
5. (For Language setting) Use the
navigation buttons to select the
desired language.
6. Press the button to conrm the
setting.
The Set date/time and language screen will automatically appear
when the camera is turned on the rst time.
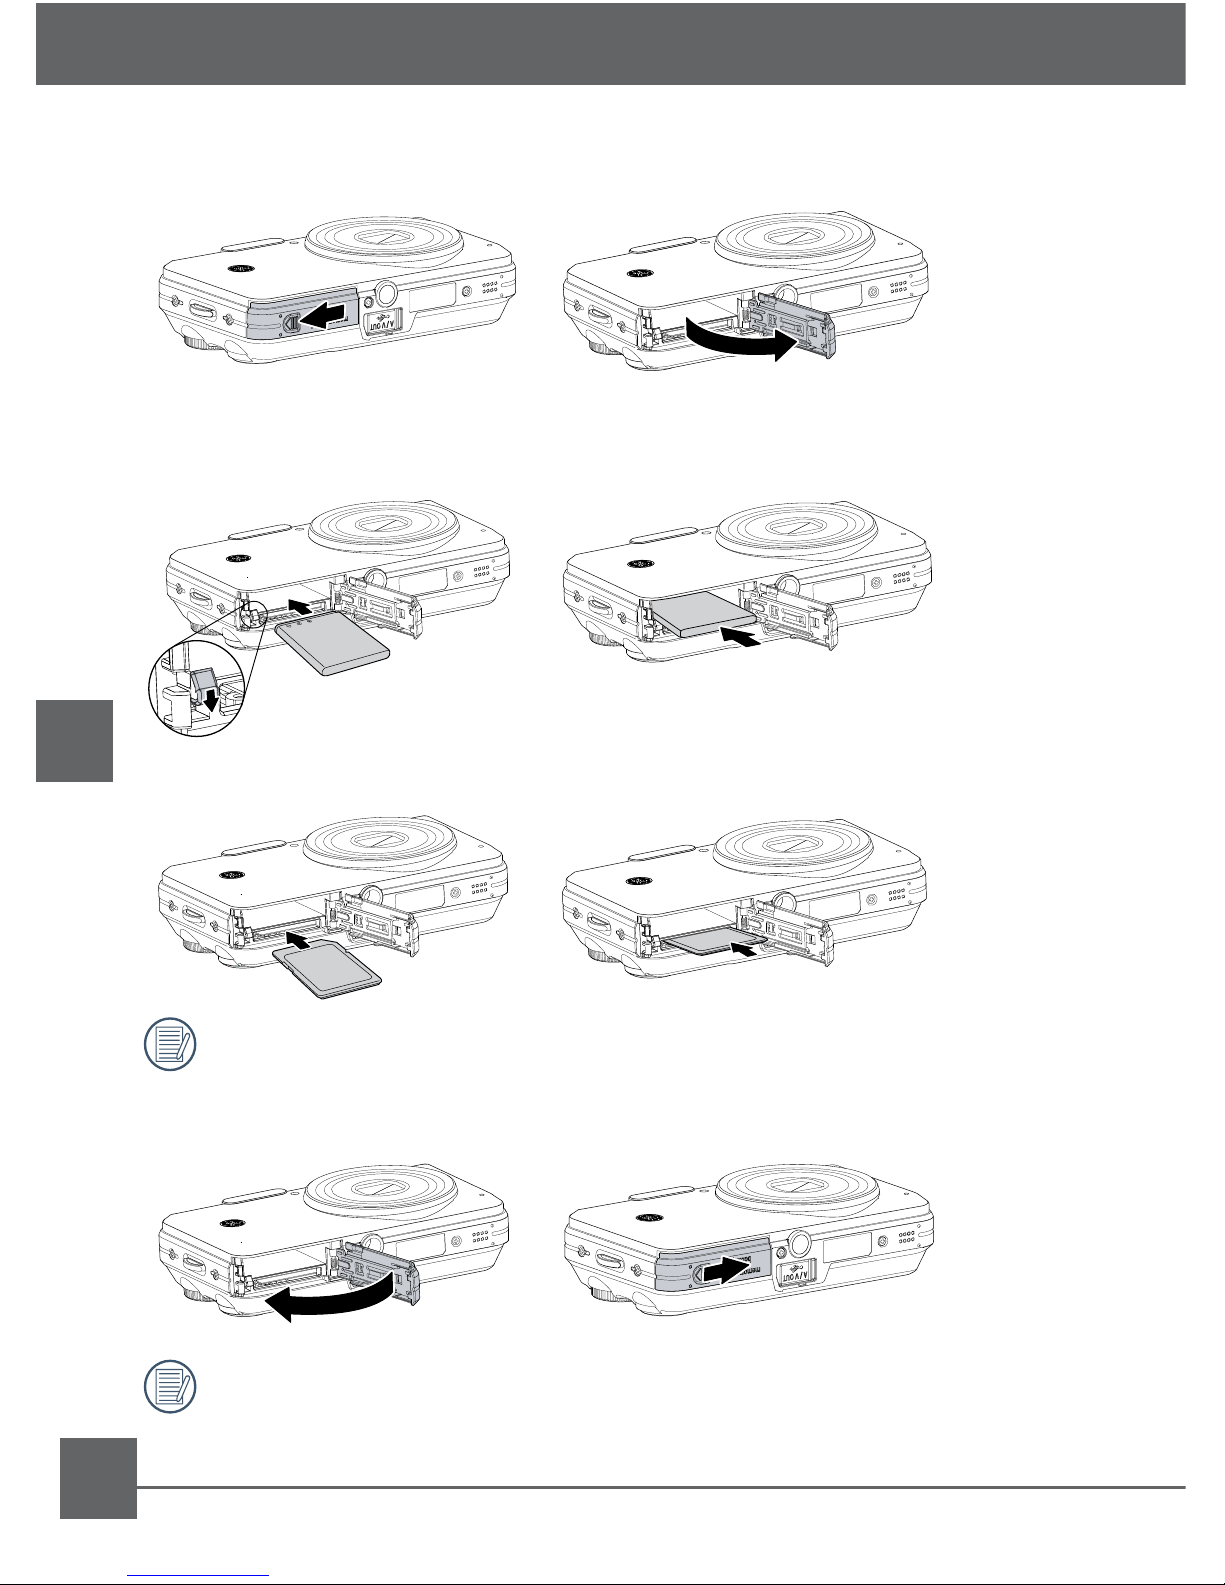
Format Memory
We recommend that you format a memory card before using it for
the rst time after purchasing it, or whenever the card you are
using seems to be the cause of abnormal images.
Please note: formatting enables you to delete all content in the memory
card and built-in memory, including protected photo and movie les.
1. Select the Format Memory setting from the Setup menu as described
previously.
2. Use the Left/Right navigation buttons to select Yes or No, and press
the button to conrm.
3. The current media is formatted.

7
EN
LCD Screen Display
Shooting mode display Playback mode display
1
2
3
4
5
6
7
8
9
10
11
12
13
14
15
16
17
18
19
20
Shooting mode icon
Scene mode icon (only available for
Scene mode)
Light metering method
EV value
Self-timer indicator
Macro mode indicator
Flash mode indicator
Battery status
Face detection “on” indicator
Remaining capacity
Focus frame
Zoom indicator
White balance
ISO speed
Image quality
Image size
Image color
Slow shutter warning indicator
Memory card/internal memory
indicator
EV adjustment slider
1
2
3
4
5
6
7
8
9
10
11
12
13
14
15
16
17
18
Playback mode icon
DPOF le icon
File protection icon
Audio le icon
Video le icon
Memory card/internal memory
indicator
Picture ID
Battery status
Photo audio status
(Press the shutter button to record sound)
(Press the shutter button to play sound)
Recording date and time
Histogram
Aperture value
Shutter speed
Exposure value
Memory capacity
(current picture/ total picture number)
ISO value
WB
Image size
Mode:
10
1
13 14 15 16 17
9
11 12
2 3 4 5 6 7 8
19
18
20
Mode:
10
9
1 2 3 4 5 6 7 8
12
13
14
15
11
18 17 16

8
EN
Auto mode is the easiest mode to take photos. While operating in this
mode, the camera automatically optimizes your photos for best results.
To start shooting, do the following:
1. Set the mode dial to Auto mode ( ).
2. Press the Power button to turn the camera on.
3. Compose your picture on the LCD screen and press the shutter button
halfway to focus on the subject.
4. When the subject is in focus, the Focus Frame that appears on the
center of the LCD screen will turn green.
5. Press the Shutter button fully to capture the image.
Using the zoom function
Basic Operation
Zoom indicator
Shooting in Auto mode
T&W button
WT
WT
_
Your camera is equipped with two types of zoom: optical zoom and
digital zoom. Use the Zoom scroll wheel on the top of the camera to
zoom in or out on your subject while taking pictures.
When the optical zoom factor reaches its maximum value, it stops
momentarily. Keep the (Tele) zoom button depressed and zoom will
switch over to digital zoom automatically.

9
EN
Basic Operation
Function menu
The Function menu allows you to
congure the following settings.
• WB (White Balance)
• ISO speed
• Quality
• Size
• Color
To access the Function menu, do the following:
1. Press the button to enter the Function menu.
2. Use the Left/Right navigation buttons to highlight a function.
3. Use the Up/Down navigation buttons to select a setting.
4. Press the button to conrm your setting.
The WB, ISO, and Color setting is only available when the cam-
era is in the Manual mode.
Function Settings
WB Auto
Day light
Cloudy
Fluorescent
Fluorescent CWF
Incandescent
Manual
ISO Auto
64
80
100
200
400
800
1600
Quality Best quality Fine quality Normal quality
Size You can change the record size settings to suit the purpose of the
image you are about to shoot.
Color O
Vivid
Black & White Sepia

10
EN
Viewing photos and videos
Playback
To view the captured photos and video clips on the LCD screen:
1. Turn your camera to Playback mode. The last recorded photo or video
clip is displayed.
2. Use the Left/Right navigation buttons to scroll through the photos or
video clips stored in the internal memory or memory card.
3. To play a selected video clip, press the button to enter the movie
playback mode.
4. Use the Left/Right navigation buttons to select a program button and
press the button to conrm the selection. The function of each
button is described in the following.
Video menu
1
2
3
4
5
6
7
Exit
Play
Slow motion
First frame
Previous frame
Next frame
Edit
1 2 3 4 5 6 7
Thumbnail view
When in Playback mode, move the zoom scroll wheel to the Wide
position ( ) once to display the thumbnail of photos and video clips
on the screen.
1. Use the zoom scroll wheel to switch between the 2x2, 3x3, and 4x4
thumbnail display.
2. Use Up/Down/Left/Right to select a photo or video clip to view.
If the indicator appears on the LCD, then a movie le is
currently being displayed.
Press the button to restore a preview icon to its original image
size.

11
EN
Using the Delete button
Playback
The camera is equipped with a quick Delete button for you to delete
photos or videoclips without entering the Playback menu.
To delete a photo or video:
1. Turn your camera to Playback mode.
2. Use the navigation buttons to select the photo/video clip you want to
delete.
3. Press the button. The Delete screen appears.
4. Press the Up/Down navigation buttons to select Yes or No. Then press
the button to conrm.
Erased photos/video clips cannot be recovered.
The indicator appears if the picture has a sound le
attached. You can choose to delete the attached sound le
alone or to delete both the picture and the sound le.

12
EN
Using the Menus
Mode:
In still shooting modes, press the button to enter the Photo menu.
To congure the settings:
1. Use the Up/Down navigation buttons to scroll through the menu
items.
2. Press the Right navigation button to enter the submenu.
3. Use the Up/Down navigation buttons to select an option.
4. Press the button to conrm the setting and exit the menu.
For more detailed information on each setting, refer to the User Manual
located on the CD that was included with your camera.

13
EN
Photo menu
Menu items Settings
AF mode Single-AF / Multi-AF
AF-Assist Beam On / O
Expo Metering Spot / Center-Weight / AiAE
Cont. Shot Unlimited/ 5 shots / 5 shots(Last) / Time-Lapse
Grid On / O
Quick Review O/ 1 sec / 2 sec / 3 sec
Digital zoom On / O
Histogram On / O
Slow Shutter O / Manual (2~30sec)
Date Imprint O / Date / Date and Time
Playback menu
Menu items Settings
Protect One / All / Reset
Delete One / All / Selected
DPOF One / All / Reset
Info. Box On / O
Trim To crop a portion of the picture.
Resize 1024X768 / 640X480 / Back
Rotate Counterclockwise 90 degrees /
Clockwise 90 degrees / Back
Slide show Eect / Time Interval / Repeat / Start / Cancel
Red-eye removal Yes / No
Movie menu
Menu items Settings
Expo Metering Spot AE / Center-Weight / AiAE
Stabilization On / O
Setup menu
Refer to the User Manual located on the CD.
Using the Menus

14
EN
Model name H1055
Camera Eective Pixels 10.1 Megapixels
Image Sensor 1/1.7” Charge Coupled Device (CCD)
(Total number of pixels: 10.54 Megapixels)
Focal Length F = 7.5mm (Wide) ~ 22.5mm (Tele)
[35mm lm equivalent] 35mm (Wide) ~ 105mm (Tele)
F number F2.8 (Wide) ~ F4.9 (Tele)
Focusing Range Normal: (Wide) 60cm ~∞
Macro: (Wide) 6cm ~ ∞; (Tele) 40cm ~ ∞
Optical Zoom 3X
Digital Zoom 4.5X digital zoom (Combined Zoom: 13.5X)
Anti-Handshake Electronic Image Stabilization
LCD Display 2.7 inch TFT color LCD
Still Image Size 10MP, 9MP (3:2), 7MP(16:9), 5MP, 3MP, 2MP,
1MP, 0.3MP
Movie Clip Resolution 640x480pixels: 25fps/15fps
320x240pixels: 20fps/15fps
Face-detection Yes
Specications : H1055

15
EN
Model name H1055
Panorama Stitching Yes
Red-eye Removal Yes
Continuous Shooting Approx. 1.39 fps (Large/Fine mode)
Recording Media Internal Memory: 26MB
Other Features PictBridge, ExifPrint Support, Multi-lan-
guage Support (11 languages)
Jacks USB2.0/AV-OUT (Integrated Proprietary
Connector)
Power Rechargeable Lithium-ion Battery GB-40,
3.7V 1050mAh
Shooting Capability
(Battery Performance)
Approx. 210 shots (based on CIPA standards)
Operation Environment Temperature: 0~40oC, Humidity: 0~90%
Dimensions (W x H x D) 103 x 56x 24 mm
Mass Approx. 145g (Body only)
Specications


17
FR
User Manual
Préface
Merci d’avoir acheté cet appareil photo numérique de GE. Lisez attentivement
ce manuel et conservez-le dans un endroit sûr comme référence.
Copyright
© Copyright 2007 General Imaging Company. Tous droits réservés.
Aucune portion de ce document ne peut être reproduite, transmise,
enregistrée ou stockée dans un système de restitution, ni traduite en aucune
langue ou aucun autre langage informatique que ce soit, par quelque moyen
, sans l’autorisation écrite préalable de General Imaging Company
Marques commerciales
Toutes les marques qui sont mentionnées dans ce document sont à titre d’
information uniquement, et peuvent être des marques déposées de leurs
auteurs respectifs.
Déballage
La boîte de l’appareil photo que vous venez d’acheter devrait aussi contenir
les éléments suivants. Si l’un des éléments est manquant ou abîmé,
contactez votre revendeur. (les accessoires dépendent du modèle acheté et
sont indiqués ci-dessous).
Batterie rechargeable
au lithium Manuel d’utilisation
Câble USB CD-ROM Carte de garantie
Bracelet
Câble AV
Chargeur de batterie
Guide de Mise
en route

18
FR
Vues de l’appareil photo : H1055
megapix
el
10.1 H1055
1 2 3
4
57
6
8
9
10
11
12
13
14
15
WT
16 17 18
19 20 21 22
23
Other manuals for H1055
1
Table of contents
Languages:
Other GE Digital Camera manuals