manuals.online logo
Brands
  1. Home
  2. •
  3. Brands
  4. •
  5. GE
  6. •
  7. Dishwasher
  8. •
  9. GE ADW1000 Series User manual

GE ADW1000 Series User manual

Other manuals for ADW1000 Series

5

This manual suits for next models

9

Other GE Dishwasher manuals

GE Triton XL EDW4000 User manual

GE

GE Triton XL EDW4000 User manual

GE GLD5606V Manual

GE

GE GLD5606V Manual

GE GPF40BC User manual

GE

GE GPF40BC User manual

GE GSC3500 User manual

GE

GE GSC3500 User manual

GE GSD400P User manual

GE

GE GSD400P User manual

GE GSD1000 series User manual

GE

GE GSD1000 series User manual

GE GLD5660RSS Manual

GE

GE GLD5660RSS Manual

GE Profile PDW8400 Series User manual

GE

GE Profile PDW8400 Series User manual

GE PDT855SSJSS User manual

GE

GE PDT855SSJSS User manual

GE ZDT800SPF1SS User manual

GE

GE ZDT800SPF1SS User manual

GE Monogram ZBD6890NII User guide

GE

GE Monogram ZBD6890NII User guide

GE GSC3500 User manual

GE

GE GSC3500 User manual

GE Stainless Steel Tub Dishwashers User manual

GE

GE Stainless Steel Tub Dishwashers User manual

GE GSD2000 series User manual

GE

GE GSD2000 series User manual

GE HLD4000 Series User manual

GE

GE HLD4000 Series User manual

GE GSD3310 User manual

GE

GE GSD3310 User manual

GE Appliances GSD4410 User manual

GE

GE Appliances GSD4410 User manual

GE Monogram ZDT975SSJSS User manual

GE

GE Monogram ZDT975SSJSS User manual

GE PDT660SSFSS User manual

GE

GE PDT660SSFSS User manual

GE Profile Series User manual

GE

GE Profile Series User manual

GE GSDS79W User manual

GE

GE GSDS79W User manual

GE GSD940M-20 User manual

GE

GE GSD940M-20 User manual

GE GSC950W User manual

GE

GE GSC950W User manual

GE PDW1800 Series User manual

GE

GE PDW1800 Series User manual

Popular Dishwasher manuals by other brands

Samsung DW-FN320T user manual

Samsung

Samsung DW-FN320T user manual

LG LDS 5811WW Service manual

LG

LG LDS 5811WW Service manual

Elba EDW-B1462D owner's manual

Elba

Elba EDW-B1462D owner's manual

VESTEL NOVUS Series Service manual

VESTEL

VESTEL NOVUS Series Service manual

Bosch SMS4EMW00E Instructions for use

Bosch

Bosch SMS4EMW00E Instructions for use

Global-Tek GT-CR 2 manual

Global-Tek

Global-Tek GT-CR 2 manual

Smeg Dishwasher 85028 Instructions for installation and use

Smeg

Smeg Dishwasher 85028 Instructions for installation and use

LG LD-4080W Service manual

LG

LG LD-4080W Service manual

Bauknecht GCF 625 operating instructions

Bauknecht

Bauknecht GCF 625 operating instructions

Sharp QW-HX13F47EI-EU user manual

Sharp

Sharp QW-HX13F47EI-EU user manual

Asko D5536XLFI operating instructions

Asko

Asko D5536XLFI operating instructions

Modena WP 7134 WVM User manual book

Modena

Modena WP 7134 WVM User manual book

Beko DFN39340X instruction manual

Beko

Beko DFN39340X instruction manual

AEG FAVORIT 65050 VI1P user manual

AEG

AEG FAVORIT 65050 VI1P user manual

Siemens SN23HI37VE user manual

Siemens

Siemens SN23HI37VE user manual

Maytag MDB4651AWB - Tall Tub Dishwasher User instructions

Maytag

Maytag MDB4651AWB - Tall Tub Dishwasher User instructions

Hotpoint Ariston LL 42 Instruction book

Hotpoint Ariston

Hotpoint Ariston LL 42 Instruction book

Siemens SN45ZW56CS user manual

Siemens

Siemens SN45ZW56CS user manual

manuals.online logo
manuals.online logoBrands
  • About & Mission
  • Contact us
  • Privacy Policy
  • Terms and Conditions

Copyright 2025 Manuals.Online. All Rights Reserved.

ge.com
ADW1000 Series
GHDA300 Series
GSD1000 Series
GSD2000 Series
GSD3000 Series
GSD4000 Series
GSM2000 Series
HDA1000 Series
HDA2000 Series
HDA3000 Series
Owner’s Manual
Dishwashers
165D4700P343 49-55023 01-07 JR
Safety Instruct ons . . . . . . . . 2, 3
Operat ng Instruct ons
Care and Cleaning . . . . . . . . . . . . . .12
Control Panels . . . . . . . . . . . . . . . . . . .6
Control Settings . . . . . . . . . . . . . . 4–5
Dial Cycles . . . . . . . . . . . . . . . . . . . . . .7
Flashing Display ights . . . . . . . . . . .8
oading the
Dishwasher Racks . . . . . . . . . . . . . .10
oading Place Settings . . . . . . . . . .11
Optional Accessories . . . . . . . . . . . .12
Using the Dishwasher . . . . . . . . . .8, 9
Troubleshoot ng T ps . . . 13, 14
Consumer Support
Consumer Support . . . . . Back Cover
Warranty . . . . . . . . . . . . . . . . . . . . . 15
Wr te the model and ser al
numbers here:
Model #____________________
Ser al # ____________________
You can find them on a label on the
tub wall just inside the door.
2
Operat ng Instruct ons Safety Instruct onsConsumer Support Troubleshoot ng T ps
IMPORTANT SAFETY INFORMATION
READ ALL INSTRUCTIONS BEFORE USING —
SAVE THESE INSTRUCTIONS
WARNING!
For your safety, the nformat on n th s manual must be followed to m n m ze the r sk of f re,
explos on, electr c shock, and to prevent property damage, personal njury, or death.
WATER HEATER SAFETY
PROPER INSTA ATION AND MAINTENANCE
This dishwasher must be properly installed and located in accordance with the Installation
Instructions before it is used. If you did not receive an Installation Instructions sheet with
your dishwasher, you can receive one by visiting our website at ge.com.
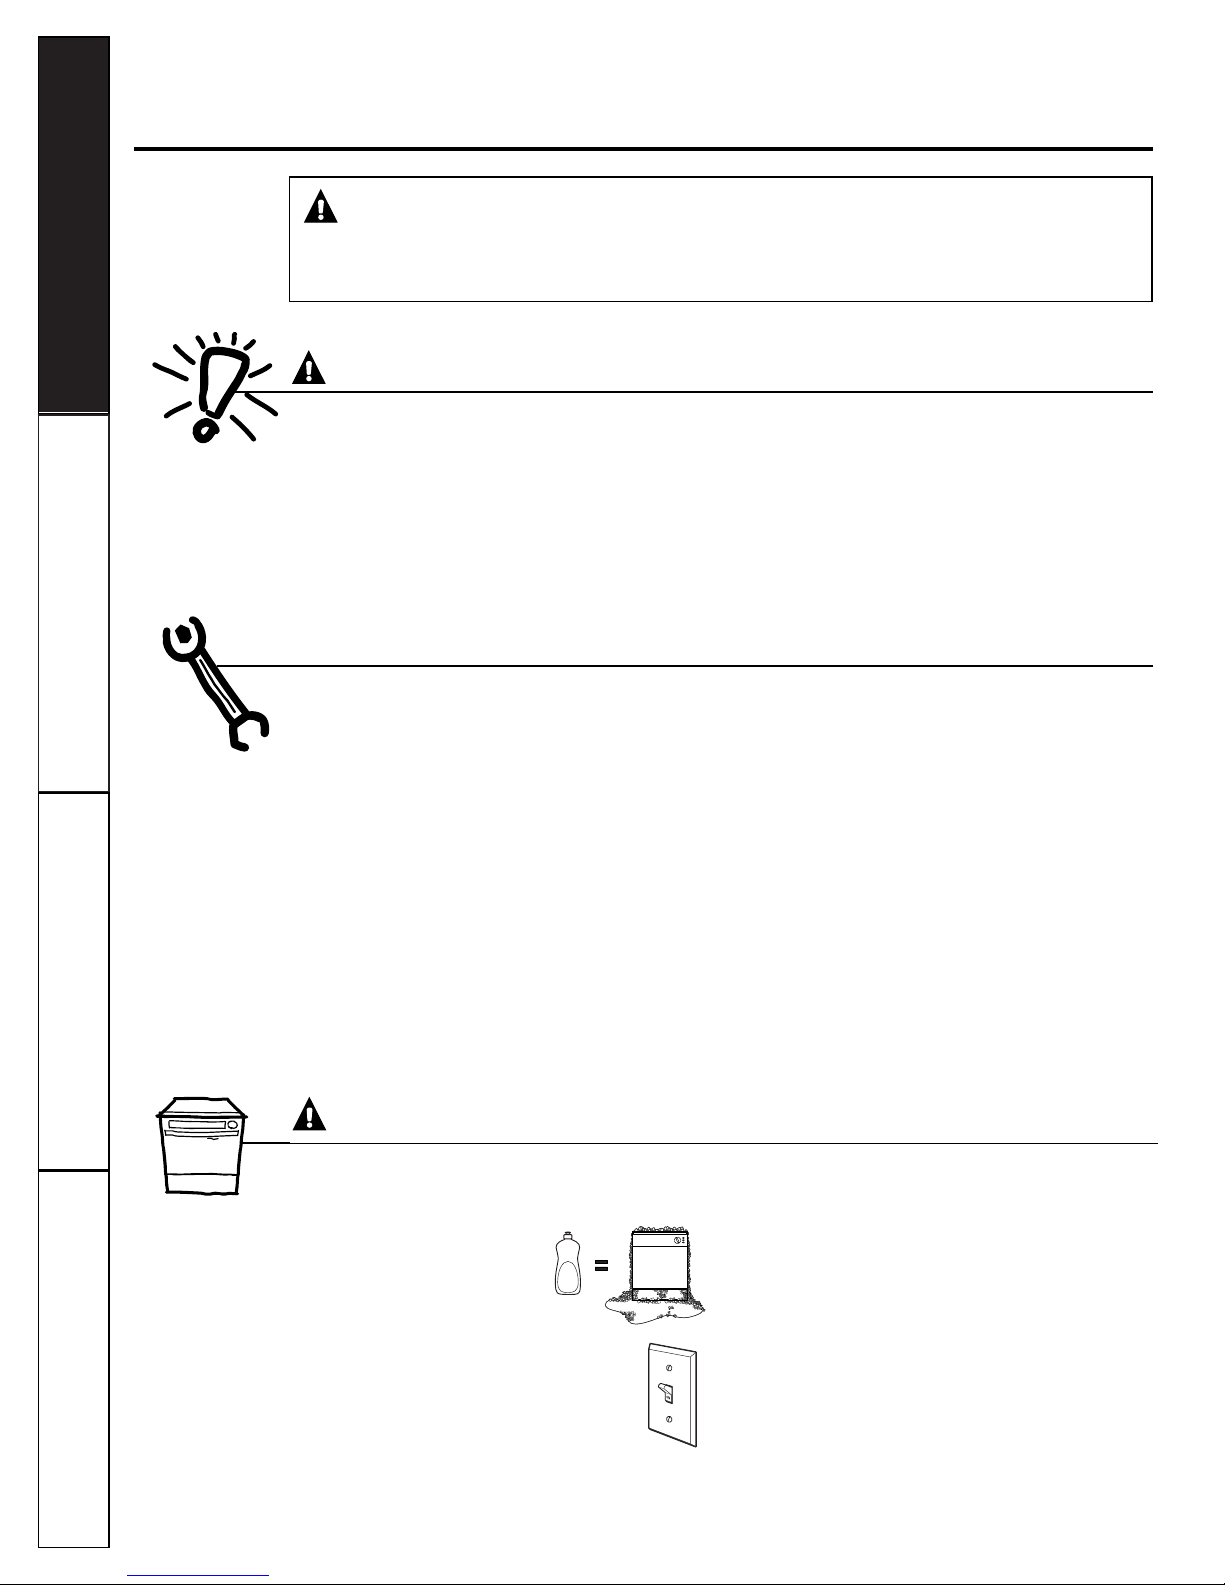
■Contents washed in Anti-bacterial mode, if
available, may be hot to the touch. Use care
before handling.
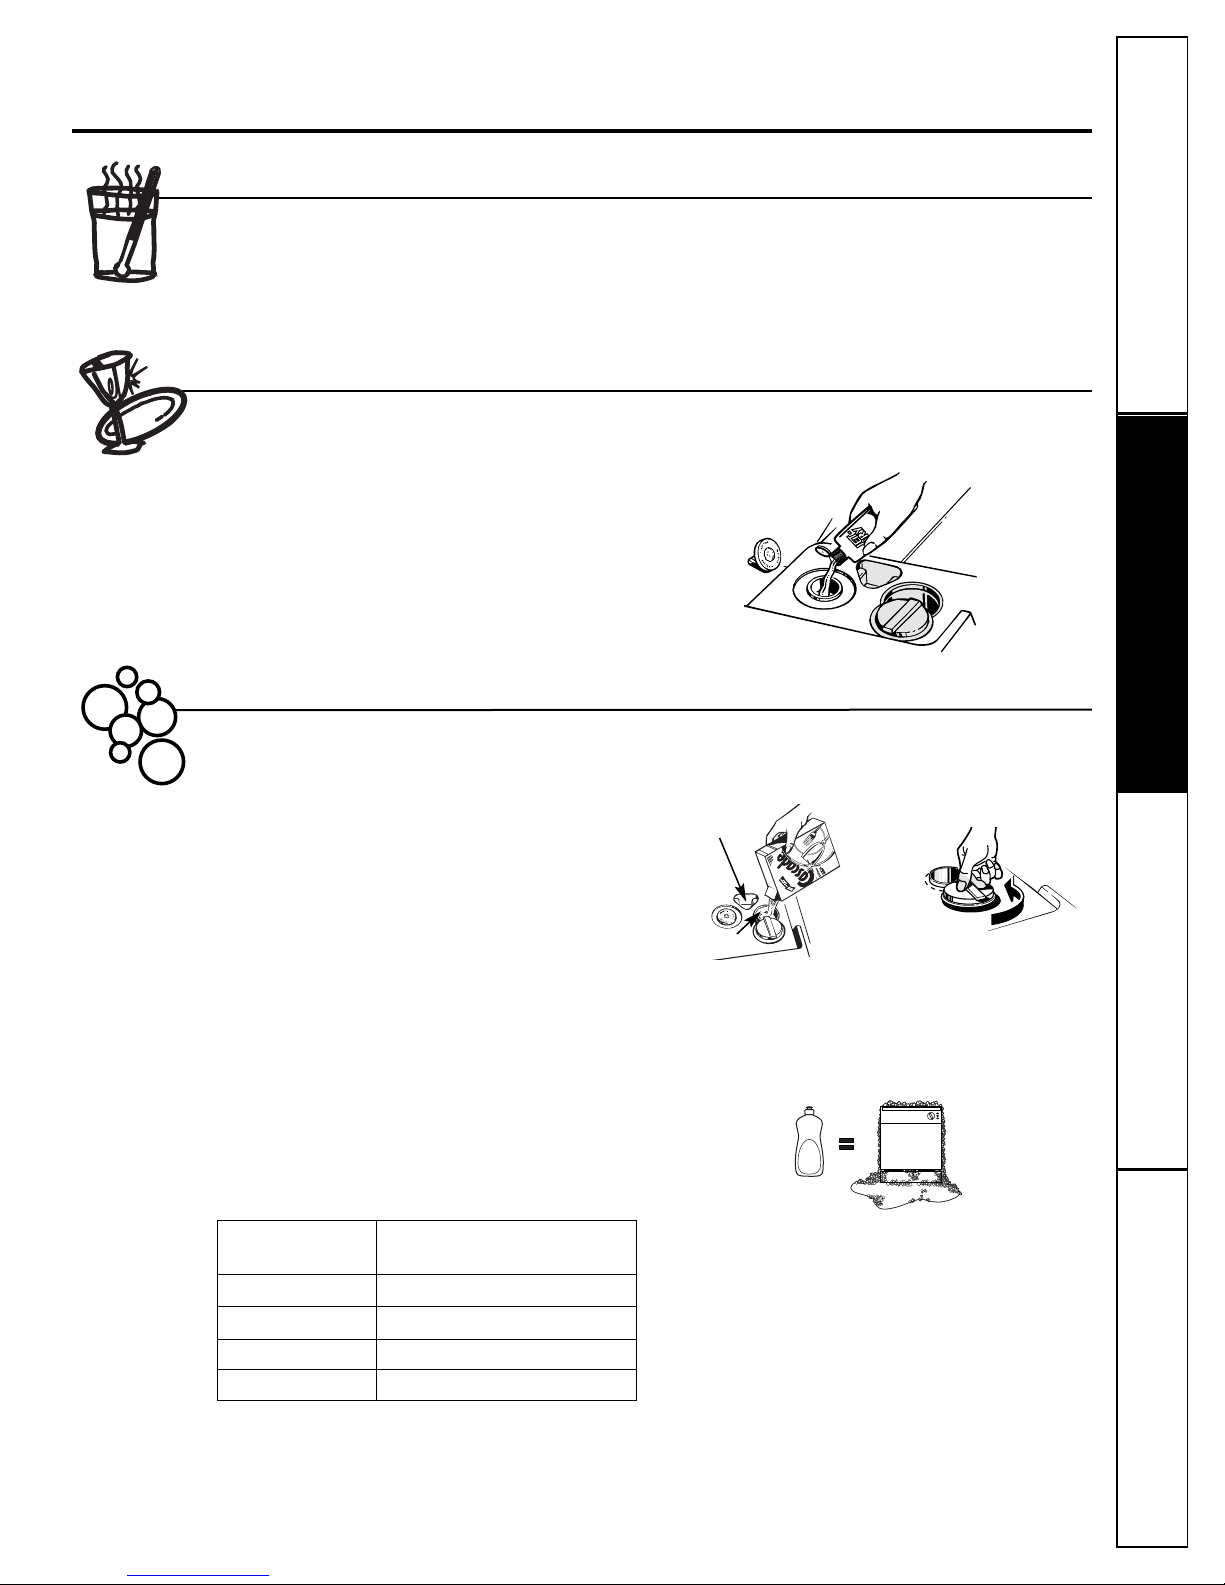
■Using a detergent that is
not specifically designed
for dishwashers will cause
the dishwasher to fill with
suds.
■If your dishwasher is connected to a
wall switch, ensure that the switch is
on prior to use.
■On dishwashers with electronic controls,
if you choose to turn the wall switch off
between wash cycles, allow 5-10
seconds after turning the switch on before
touching START/RESET to allow the control
to initialize.
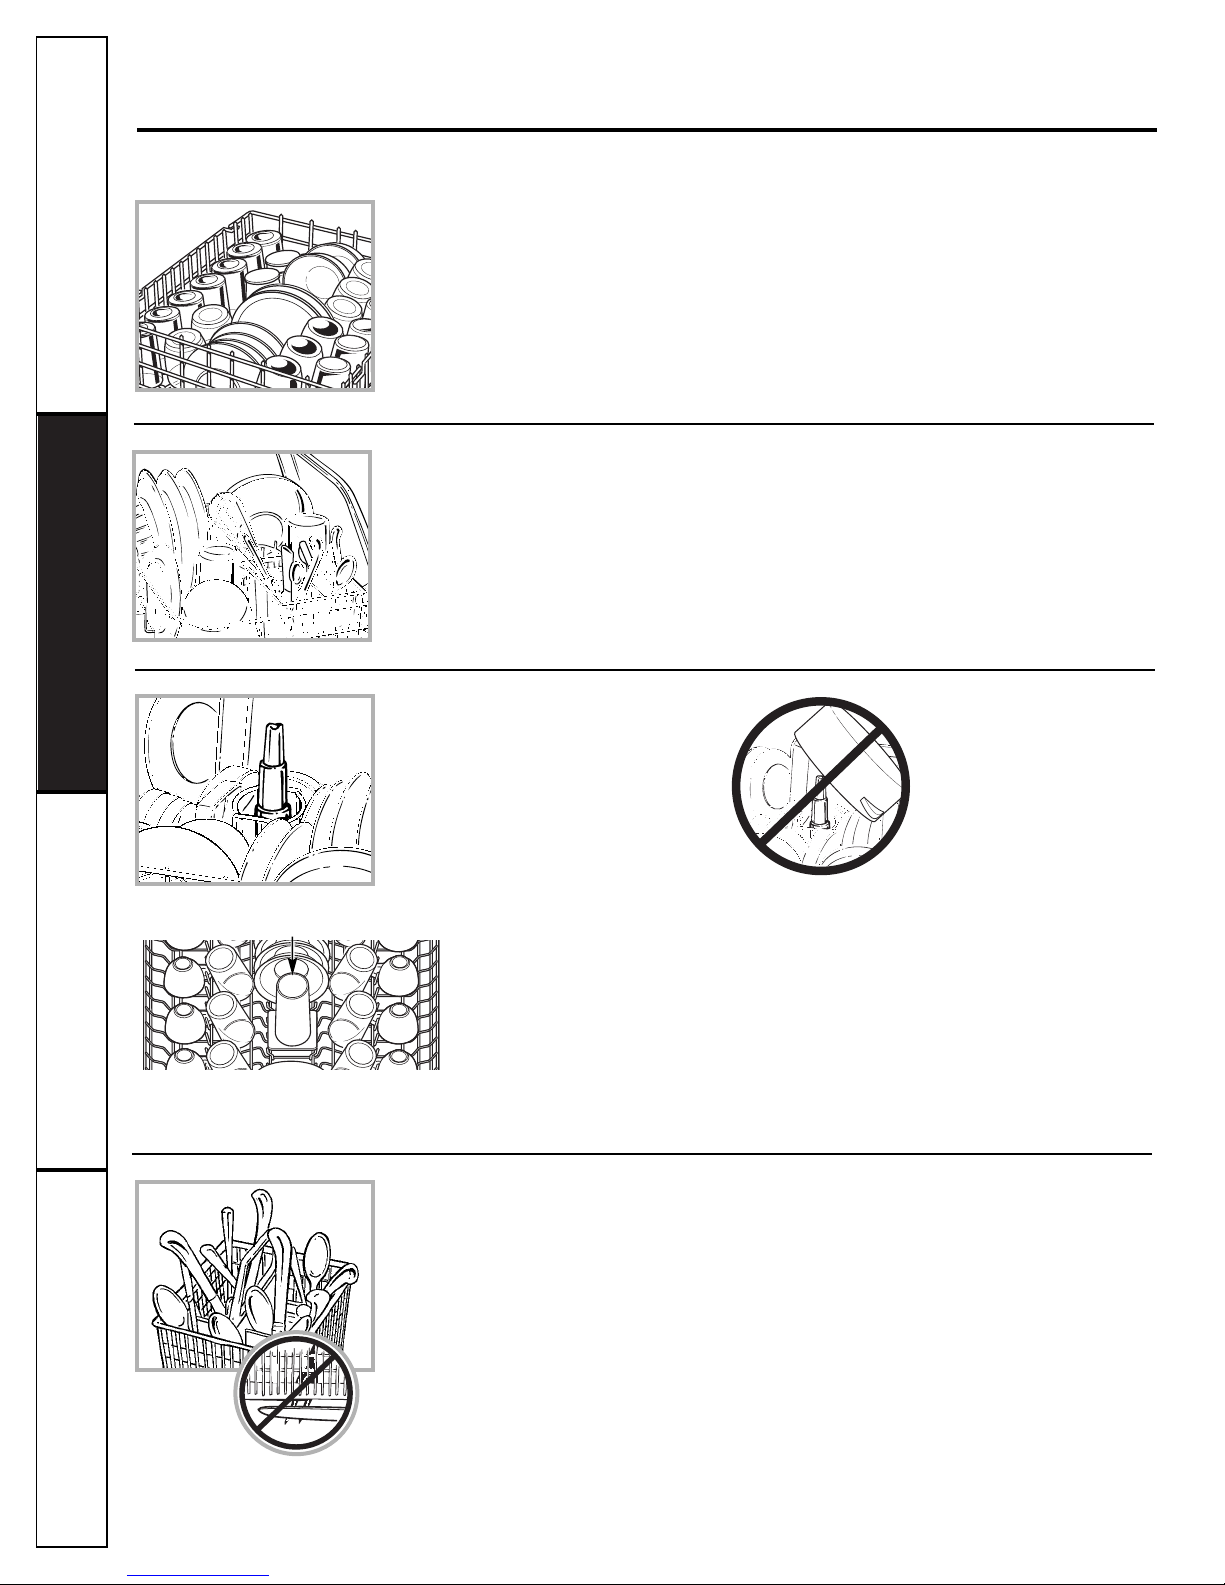
■Non-Dishware Items: Do not wash items such
as electronic air cleaner filters, furnace filters and
paint brushes in your dishwasher. Damage to the
dishwasher and discoloration or staining of the
dishwasher may result.
■Close supervision is necessary if this appliance
is used by or near children.
■oad light, plastic items so they do not
become dislodged and drop to the bottom of
the dishwasher—they might come into contact
with the heating element and be damaged.
■Connect the dishwasher/appliance to a grounded
metal, permanent wiring system; or run an
equipment-grounding conductor with the circuit
conductors and connect to the equipment-
grounding terminal or lead of the appliance.
■Improper connection of the equipment-grounding
conductor can result in a risk of electric shock.
Check with a qualified electrician or service
representative if you are in doubt whether the
appliance is properly grounded.
■Dispose of discarded appliances and shipping
or packing material properly.
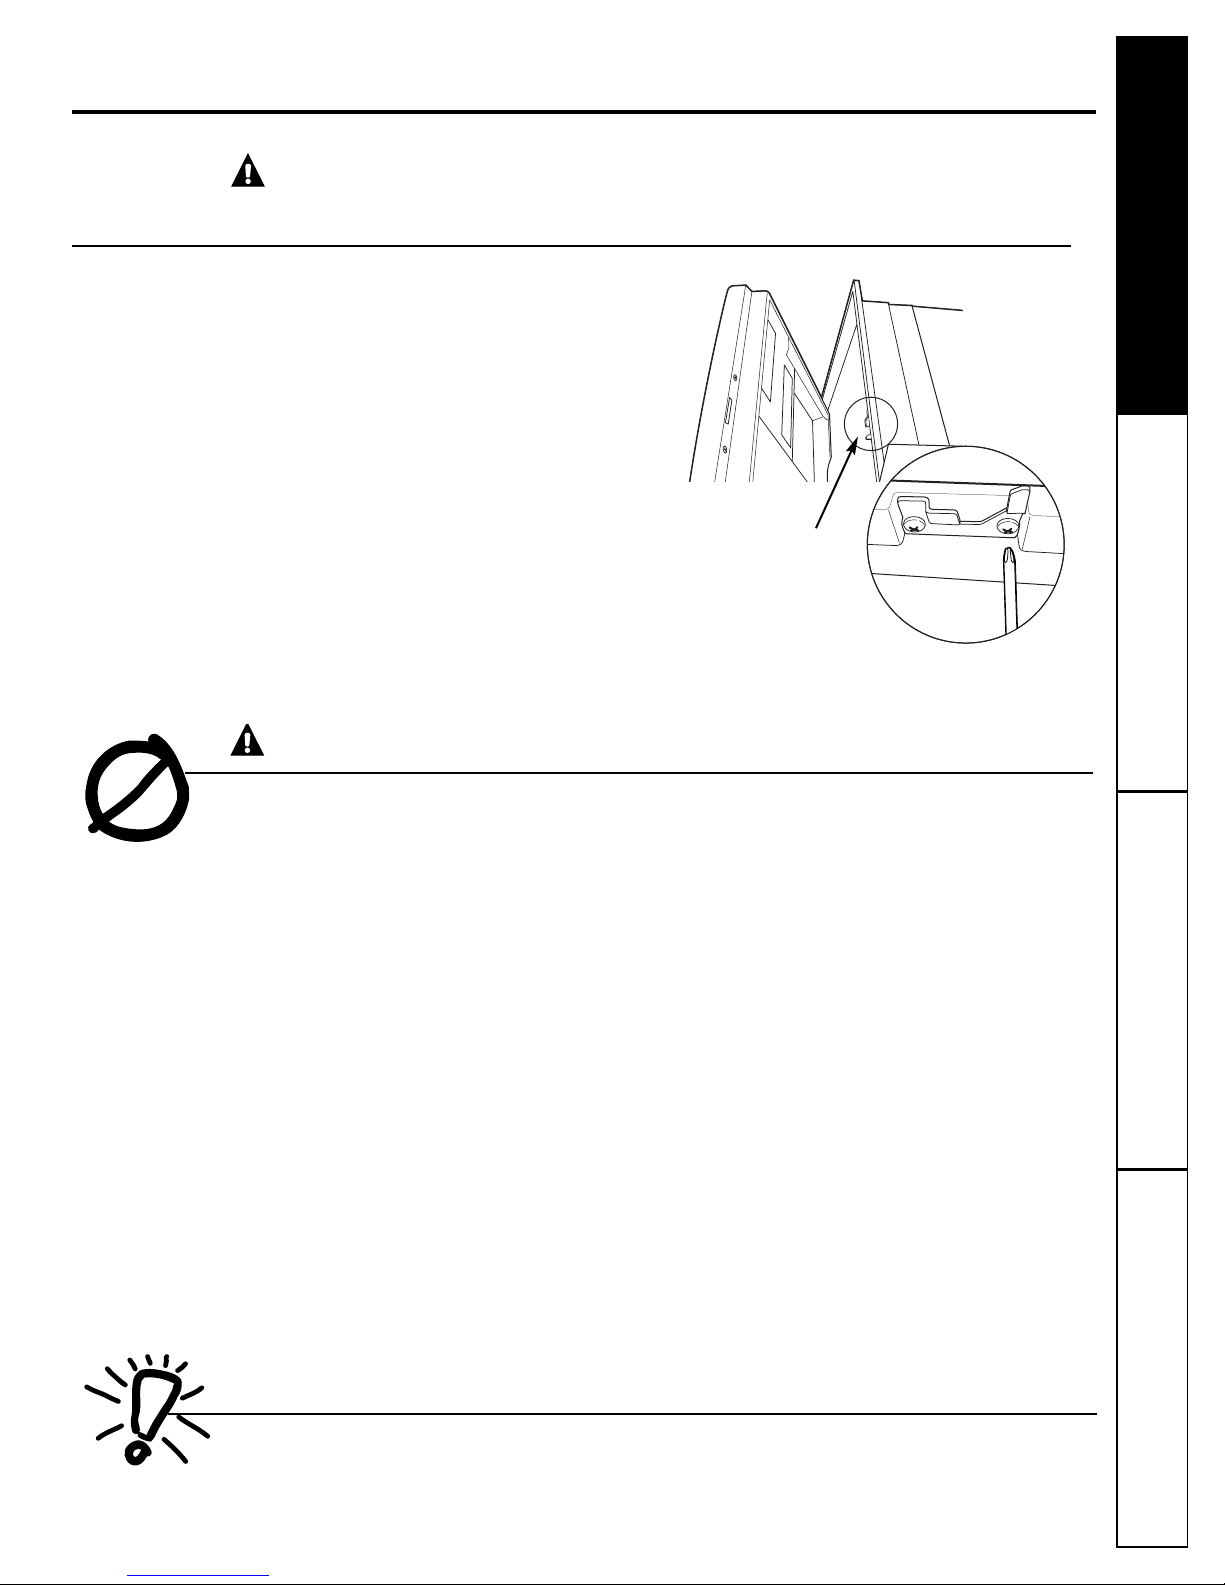
■Do not attempt to repair or replace any part
of your dishwasher unless it is specifically
recommended in this manual. All other servicing
should be referred to a qualified technician.
■To minimize the possibility of electric shock,
disconnect this appliance from the power supply
before attempting any maintenance.
NOTE: Turning the dishwasher off does not
disconnect the appliance from the power supply.
We recommend having a qualified technician
service your appliance.
WARNING!
CAUTION: To prevent m nor njury and property damage
Under certain conditions, hydrogen gas may be produced in a water heater that has not been used
for two or more weeks. HYDROGEN GAS IS EXPLOSIVE.
If the hot water has not been used for two or more weeks, prevent the possibility of damage or injury
by turning on all hot water faucets and allow them to run for several minutes. Do this before using any
electrical appliance connected to the hot water system. This simple procedure will allow any built-up
hydrogen gas to escape. Since the gas is flammable, do not smoke, use an open flame, or use the appliance
during this process.
Consumer Support
Troubleshoot ng T psOperat ng Instruct onsSafety Instruct ons
3
PROPER DISPOSA OF THE DISHWASHER
Junked or abandoned dishwashers are
dangerous…even if they will sit for “just a few
days.” If you are getting rid of your old
dishwasher, please follow the instructions below
to help prevent accidents.
Before You Throw Away Your Old
D shwasher:
■Take off the door of the washing compartment
or remove the door latch keeper (as shown).
WARNING! RISK OF CHILD ENTRAPMENT
Door latch keeper
ge.com
READ AND FO OW THIS SAFETY INFORMATION
CAREFU Y.
SAVE THESE INSTRUCTIONS
■Use this appliance only for its intended purpose
as described in this Owner's Manual.
■Use only powder, tabs, liquid detergents or rinse
agents recommended for use in a dishwasher and
keep them out of the reach of children. Cascade®,
Cascade®Complete and Electrasol®Automatic
Dishwashing Detergents, and Jet-Dry®and
Cascade Crystal Clear®rinse agents have
been approved for use in all GE dishwashers.
■ocate sharp items so that they are not likely
to damage the door seal.
■oad sharp knives with the handles up to reduce
the risk of cut-type injuries.
■Do not wash plastic items unless marked
dishwasher safe or the equivalent. For plastic
items not so marked, check the manufacturer's
recommendations.
■Do not touch the heating element during or
immediately after use.
■Do not operate your dishwasher unless all
enclosure panels are properly in place.
■Do not tamper with controls.
■Do not abuse, sit on or stand on the door or dish
rack of the dishwasher.
■Do not allow children to play around the
dishwasher when opening or closing the door due
to the possibility of small fingers being pinched in
the door.
■Do not discard a dishwasher without first removing
the door of the washing compartment or the latch
keeper.
■Do not store or use combustible materials, gasoline
or other flammable vapors and liquids in the
vicinity of this or any other appliance.
■Do not allow children to play with, on or inside this
or any discarded appliance.
WARNING! When us ng your d shwasher, follow bas c precaut ons,
nclud ng the follow ng:
Operat ng Instruct ons Safety Instruct onsConsumer Support Troubleshoot ng T ps
4
About the d shwasher control panel
Cycles
An indicator light above the selected pad will be ON to indicate which CYCLE has been selected, on some models.
POTS & PANS/ For heavily soiled dishes or cookware with dried-on or baked-on soils.
Everyday dishes may be included.
HEAVY WASH This cycle will not remove burned-on foods.
(on some models)
NORMAL/
For loads of everyday dishes, glasses and cookware with medium soils. NOTE: Many dishes have lighter
NORMAL WASH
soil than normal. Choosing
a cycle other than NORMAL WASH will save energy and water.
SHORT WASH For quickly washing loads of everyday dishes with medium soils
that have not dried on, such as loads
(on some models)
consisting mostly of glasses.
WATER SAVER For dishes with light soils.
LI HT WASH
(on some models)
RINSE ONLY For rinsing partial loads that will be washed later. Do not use detergent.
DRYIN For warming clean dishes and serving plates. This cycle will take approximately 30 minutes.
PLATE WARMER
HOT PREWASH Preheats wash water to the correct temperature.
HOT START
CHINA CRYSTAL For lightly soiled china and crystal.
(on some models)
Control Settings
Opt ons
An indicator light above the selected pad will be ON to indicate which OPTION has been selected, on some models.
HI TEMP Turns on the heater in all final rinse cycles to help prevent spotting on dishware. This option may be
RINSE turned ON or OFF during the wash cycle.
(on some models)
HI TEMP Energizes the heater to boost water temperature in prewash and main wash fill cycles. Recommended
WASH for use with heavily soiled dishes. Option may be turned ON or OFF during the wash cycle.
HEATED DRY Shuts off the drying heat option. Dishes air dry naturally and energy is saved. Open the dishwasher door
OFF to speed drying.
HEATED DRY Turns the heater on for fast drying. This cycle will extend the time to your wash cycle by 30 minutes.
ON DO NOT use with RINSE ONLY cycle.
LOCK
When the LOCK pad is touched twice within 3 seconds, all pads become inoperative. You can lock the controls to
(electronic models
prevent any selections from being made. Or you can lock the controls after you have
started a cycle or selected
only)
DELAY START so the cycle or DELAY START is not interrupted.
Children cannot accidentally start dishwasher by touching pads with this option selected.
To unlock the dishwasher after it has been locked, touch the
LOCK
pad twice within 3 seconds. The light above
the
LOCK
pad will turn off.
DELAY HOURS Delays the start of a wash cycle for up to 8 hours.
(on some models)
RESET Touch RESET to cancel options.
(timer models)
START/RESET Touch START/RESET one time to start dishwasher cycle. Touch START/RESET a second time to pump out
(electronic models) and then turn off the dishwasher. Do not touch START/RESET more than one time unless you intend to
end the cycle.
Consumer Support
Troubleshoot ng T psOperat ng Instruct onsSafety Instruct ons
5
ge.com
Cycle Chart
Model Cycle Water Usage (gal.) Cycle Time (min.)
GSD1100 Hot Start Option12.5 10
Heavy Wash 7.0 120
Normal Wash 5.7 117
Rinse Only 2.2 53
Plate Warmer 0.0 40
HDA1100 Hot PreWash Option12.5 10
ADW1100 Normal Wash 5.7 117
Drying 0.0 40
GSD1300 Hot Start Option12.5 10
GSD2100 Heavy Wash 7.0 120
GSD2101 Normal Wash 5.7 117
ight Wash 4.5 113
Rinse Only 2.2 53
Plate Warmer 0.0 40
HDA2100 Hot PreWash Option12.5 10
Heavy Wash 7.0 120
Normal Wash 5.7 117
Water Saver 4.5 113
Rinse Only 2.2 53
Drying 0.0 40
HDA3500 Hot PreWash Option12.5 12
Heavy Wash 7.0 118
Normal Wash* 5.7 118
Water Saver* 4.5 114
Rinse Only* 2.2 53
Plate Warmer 0.0 40
GSD2300 Hot Start Option12.5 12
GSD2301 Pots & Pans 7.0 118
GSM2200 Normal Wash* 5.7 118
ight Wash* 4.5 114
Rinse Only* 2.2 53
Plate Warmer 0.0 40
GSD2700 Hot Start Option12.5 12
Heavy Wash 7.0 118
Normal Wash* 5.7 118
Rinse Only* 2.2 53
Plate Warmer 0.0 40
GSD3300 Hot Start Option12.5 12
Pots & Pans 7.0 118
Normal Wash* 5.7 118
Rinse Only* 2.2 53
Plate Warmer 0.0 40
GHDA350 Hot Start Option11.3 3
Pots & Pans 8.2 103
Heavy Wash 7.0 103
Normal Wash* 5.7 103
ight Wash* 3.4 95
Rinse Only* 2.2 42
Plate Warmer 0.0 33
GSD4000 Pots & Pans 8.8 112
Heavy Wash 7.5 108
Normal Wash 5.7 105
China/Crystal 6.3 80
Rinse Only 1.3 3
1Hot Start Option adds water amount and cycle time shown when selected.
* Normal Wash button should be pushed to run this cycle.
Control Settings
NOTE: Not all models have every cycle listed.
6
About the d shwasher control panel
Operat ng Instruct ons Safety Instruct onsConsumer Support Troubleshoot ng T ps
You can locate your model number on the left tub wall just inside the door. Throughout this manual,
features and appearance may vary from your model.
Please match the control panel for your un t to a s m lar control panel below.
Start (Models w th a D al)
Slowly turn the Dial to the START or ON position, or the selected cycle. Don’t turn it past the START,
ON or cycle position; you could accidentally miss a prewash.
There is a time delay between start-up and water fill so you will not hear any wash action right
away.
■atch the door to begin the cycle.
7
Consumer Support
Troubleshoot ng T psOperat ng Instruct onsSafety Instruct ons
Operat on of models w th cycle d al ge.com
R nse Only
For rinsing partial loads that will be washed later. Do not use detergent.
Make sure HEATED DRY is not selected.
Slowly turn the Dial to RINSE ONLY.
Be sure the door is unlatched. atch the door to start the cycle.
42 31
Be sure the door is unlatched.
Slowly turn the Dial to SHORT WASH,
LIGHT WASH or WATER SAVER.
atch the door to start the cycle.
3
2
1
Plate Warmer or Dry ng
oad clean dishware to be warmed.
Select HEATED DRY ON.
Be sure the door is unlatched.
Slowly turn the Dial to PLATE WARMER or
DRYING.
atch the door to start the cycle.
5
4
3
2
1
Start Delay (on some models)
The START DELAY will allow you to delay the start time of any cycle automatically up to 6 hours.
Hot Start or Hot Prestart Opt on
Preheats wash water to the correct temperature.
Select the HOT START or HOT PRESTART
cycle and any other option on the push
button pad.
Be sure the door is unlatched.
Slowly turn the Dial to HOT START or
HOT PRESTART.
atch the door to start the cycle.
4
3
2
1
For warming clean dishes and serving plates. This cycle will take approximately 39 minutes.
Short Wash or L ght Wash or Water Saver
For quickly washing loads of everyday dishes with light to medium soils that have not dried on.
Be sure the door is unlatched.
Select the wash cycle and option you want.
Slowly turn the Dial to the desired time.
The CYCLE ON light will come on.
atch the door to start the cycle.
4
3
2
1
Operat ng Instruct ons Safety Instruct onsConsumer Support Troubleshoot ng T ps
8
Operat on of electron c models (model GSD4000 Only)
L ghts What It Means What To Do
This is normal. Allow the dishwasher to drain and reset before you start a new
The START/RESET pad wash cycle.
has been pressed.
Control Error Press the START/RESET pad to turn off the beeper. If the CLEAN
light continues to flash, call for service.
Control Error Press the START/RESET pad to turn off the beeper and the
dishwasher will attempt to reset. Restart the wash cycle.
If this error continues, turn off the power to the dishwasher at
the circuit breaker for 30 seconds. Try the dishwasher again.
If the error is still present, call for service.
PLUS A
BEEPING
SOUND
RESET
STARTSTART
CLEANCLEAN
PLUS A
BEEPING
SOUND
Us ng the D shwasher Door
The door must be closed and locked into place to select a LOAD SELECTION or an OPTION.
If the door is opened during a cycle and left open, the dishwasher will beep once every 30 seconds until the
door is closed and latched into place.
2
1
Start
Close and latch the door. Touch the START/RESET pad to begin the cycle. Water fill begins and
approximately 60 seconds later the wash action begins.
NOTE: The dishwasher remembers your last cycle so you don’t have to reprogram each time. When
the dishwasher is loaded and the door latch is in the locked position, the control panel lights will be ON
and display the last settings you selected.
If you don’t want to change any of the settings, simply touch the START/RESET pad to begin
the cycle.
Also, if a power failure occurs, NORMAL and HEATED DRY will automatically be programmed.
Make any new selections and touch the START/RESET pad to begin the cycle.
Clean
This light is illuminated when a wash cycle is complete. The light will stay ON until the door is opened.
Flash ng D splay L ghts
Consumer Support
Troubleshoot ng T psOperat ng Instruct onsSafety Instruct ons
F ll ng the D spenser
Fill the rinse agent dispenser until it reaches the bottom of
lip inside the opening. Replace cap.
To check if rinse agent is needed, remove the cap and look
into the dispenser.
A full dispenser should last about one month.
If the rinse agent spills, wipe up the excess.
Check the Water Temperature
The entering water must be at least 120°F and
not more than 150°F, for effective cleaning and to
prevent dish damage. Check the water temperature
with a candy or meat thermometer. Turn on the
hot water faucet nearest the dishwasher, place
the thermometer in a glass and let the water
run continuously into the glass until the temperature
stops rising.
Adjust the maximum/minimum temperature of the
water heater if necessary to deliver water at the
proper temperature.
Use Jet-Dry®Rinse Agent
Proper Use of Detergent
Jet-Dry®or Cascade Crystal Clear®rinse agents remove spots and prevent new film buildup on dishes,
glasses, flatware, cookware and plastic.
Use only detergent specifically made for use in
dishwashers. Cascade®and Electrasol®Automatic
Dishwashing Detergents have been approved for use
in all GE dishwashers. Keep your detergent fresh and
dry. Don’t put powder detergent into the dispenser
until you’re ready to wash dishes.
The amount of detergent to use depends on whether
your water is hard or soft. With hard water, you need
extra detergent. With soft water, you need less
detergent.
Protect your dishes and dishwasher by contacting
your water department and asking how hard your
water is. Twelve or more grains is extremely hard
water. A water softener is recommended. Without it,
lime can build up in the water valve, which could
stick while open and cause flooding. Too much
detergent with soft water can cause a permanent
cloudiness of glassware, called etching.
Use the information in the table below as a guideline
to determine the amount of automatic dishwasher
detergent to place in the dispenser.
You’ll find two detergent dispensers on the inside door
of your dishwasher. All wash cycles require detergent
in the main cup.
When
using automatic dishwashing
detergent tabs, simply place one tab in the main cup
and close.
Be sure the Dial is OFF before adding detergent.
Otherwise, the
detergent cup will not close and latch
properly.
Add detergent then close the main cup.
NOTE: To open detergent cup after it has been
closed, simply turn the detergent cup handle
counterclockwise until it releases. A snapping
sound may be heard.
DO NOT USE HAND DISH DETERGENT
NOTE: Using a detergent that is not specifically
designed for dishwashers will cause the dishwasher
to fill with suds. During operation, these suds will spill
out of the dishwasher vents, covering the kitchen floor
and making the floor wet.
Because so many detergent containers look alike,
store the dishwasher detergent in a separate space
from all other cleaners. Show anyone who may use
the dishwasher the correct detergent and where it
is stored.
While there will be no lasting damage to the
dishwasher, your dishes will not get clean using
a dishwashing detergent that is not formulated
to work with dishwashers.
Us ng the d shwasher ge.com
Detergent Cups to F ll
Fill to 1/3 of main cup
Fill to 2/3 of main cup
Fill main cup
Fill
main cup and open cup
Number
of Gra ns
ess than 4
4 to 8
8 to 12
Greater than 12
Open cup
Main cup
9
Load ng the d shwasher racks
10
Operat ng Instruct ons Safety Instruct onsConsumer Support Troubleshoot ng T ps
Upper Rack
The upper rack is for glasses, cups and
saucers. Cups and glasses fit best along
the sides. This is also a secure place for
dishwasher-safe plastics. The upper rack is
good for all kinds of odd-shaped utensils.
Saucepans, mixing bowls and other items
should be placed face down.
Secure larger dishwasher-safe plastics over
two fingers when possible.
Make sure small plastic items are secure so
they can’t fall onto the heating element.
Wash Tower
Keep the center area clear in the lower
rack.
The wash tower rises through the
center of the lower rack during the
wash and rinse portions of the cycle.
Lower Rack
When loading the lower rack, do not load
large platters or trays in the front right
corner. They may prevent detergent from
circulating during the wash cycle.
The lower rack is best used for plates,
saucers and cookware. arge items such as
broiler pans and racks should go along the
sides. oad platters, pots and bowls along
the sides, in corners or in the back. The
soiled side of items should face the center
of the rack.
For best dishwashing results, follow these loading guidelines. Features and appearance of racks and silverware
baskets may vary from your model.
Don’t block the wash
tower or load tall things
next to it.
Be sure items don’t fall
through rack and block
rotation of the spray arm.
Also, be careful not to
let a portion of an item
such as a pot or dish
handle extend through
the bottom rack. This
could block the wash
arm and cause poor
washing results.
S lverware Basket
Put flatware in the removable basket with
fork and knife handles up to protect your
hands. Place spoons in the basket with
handles down. Mix knives, forks and spoons
so they don’t nest together. Distribute
evenly. Small plastic items, such as
measuring spoons and lids from small
containers, should go in the bottom of the
silverware basket with silverware on top.
DON’T ET ANY ITEM EXTEND THROUGH
BOTTOM OF SI VERWARE BASKET AND
RACK, TO ENSURE PROPER FUNCTION
OF SPRAY ARM.
Do not cover upper rack tower
(not present on all models)
Tower
Don’t block the upper rack
wash tower.