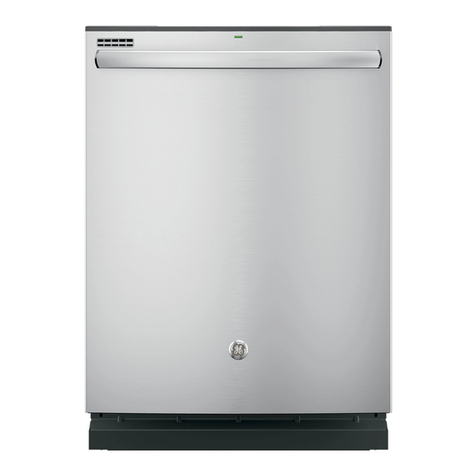
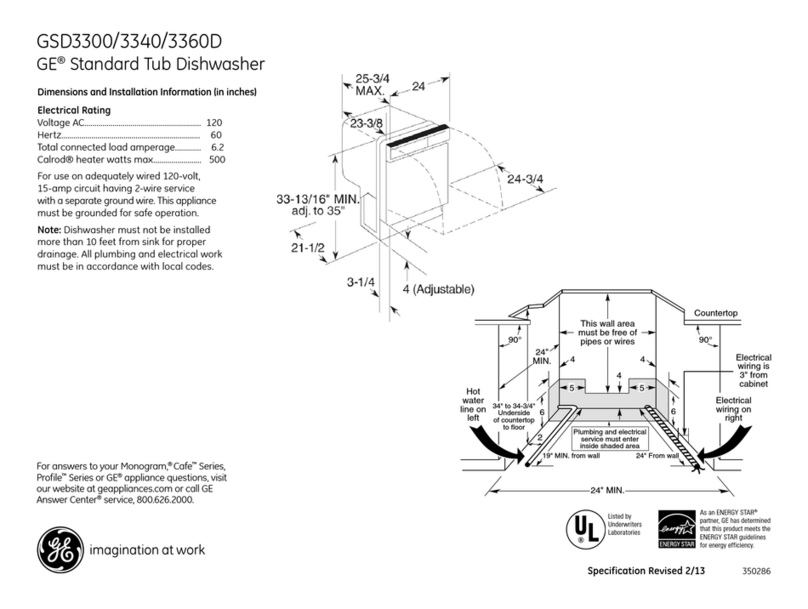
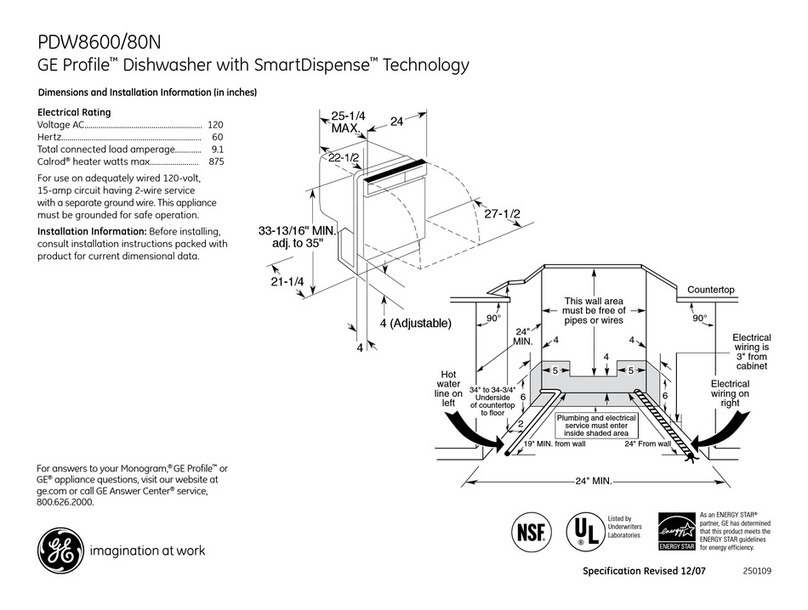
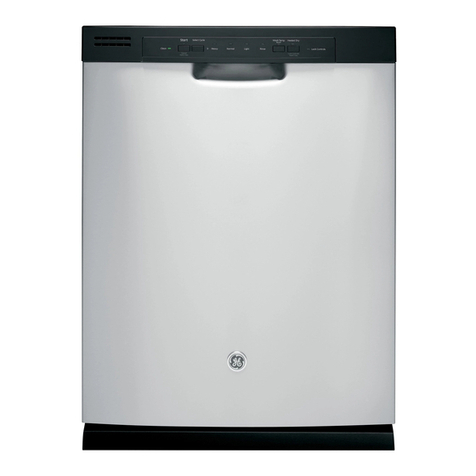
GE Appliances GSD4410 User manual

GEAppliances
GSD4410
GSD4420
GSD4425
GSD4430
GSD4435
GSD4910
GSD4920
GSD4930
GSD4940
Part No. 165D4700P162 Pub.No. 49-5829

Congratulations!
YouAm Now Partof the GEFamily.
Welcome to the GE thmily.
We're proud of our qualib_
products and we are
committed to providing
dependable se_@e. You'll
see it in this easy-to-use
Owner's Manual and you'll .
hear it in the fliendly voices
of our Custolller sei_qce
department.
Best of all, you'll experience
fl_ese values each time you
use your dishwasher. Thaffs
important, because your
new dishwasher will be part
of your family for ma W
years. And we hope you will
be part of ours tor a long
time tocome.
Weflmnkyou tor bwing
GE. We appreciate your
purchase, and hope you
_ll continue to rely on us
whenever you need quality
appliances tor your home.
Staple sales slipor cancelled
check here.
Proof of the original purchase date
isneeded to obtain service under
the warranty.
Write the modeland serial
numbershere.
#
#
Youcan find them on the tub walljust
inside the door.

GE& You,
A Service Partnership.
Ask any GEappliance owner and they will
tell you we stand behind our products with
unmatched quality service. However, did
you know that most questions result from
simple problems that you can easily fix
yourseff injust a few minutes? This
Owner's Manual can teflyou how.
ReadthisManual
Inside you _dll find many
helpflll }finis on how lo use and
maintain )x)ur dishwasher
properly..lust a lillle preventive
care on your part can save you a
greal deal of time and money
over the life of your dishwasher.
ReviewtheSectionon
TroubleshootingTips
You'll find many answers 1o
common problems here.
If you review our charl of
Troubleshooting Tips firsl,
you InW nol need 1ocall for
sel_ice al all.
If YouNeedService
If you do need sewice, you can
relax knoxdng help is only a
phone call mvay.A lisl of loll-flee
cuslolner service nulnbers is
included in the back secdon.
()r)_m can always call ll_e
GE Answer Cenler ®at
800.626.2000, 24 hours a day,
7 days a week.
Safety Information ....... 4- 7
Operating Instructions
ControlPanel ............... 8
ControlSettings........... 8,9
Display ............... 70,1!
DiagnosticCodes ...... 12-14
Soil SenserSystem ......... 15
LoadingtheRacks ....... 18, 19
OptionalAccessories........ 20
CareandCleaning.......... 21
TroubleshootingTips
BeforeYou
CarlForService......... 22-26
CustomerService
Warranty ................ 27
ServiceTelephone
Numbers .......... BackCover
3

IMPORTANTSAFETYINFORMATION.
READALLINSTRUCTIONSBEFOREUSING.
WARNING!
Foryour safety, the information in this manual must be
followed to minimize the risk of fire, explosion, electric
shock, or toprevent property damage, personal injury,
or loss of life.
WATERHEATERSAFETY
Under certain conditions hydrogen gas may be produced in
a water heater that has not been used for two weeks or
more. Hydrogen gas can be explosive under these
circumstances.
If the hot water has not been used tbr l_vo weeks or more, prevent
lhe possibilily of damage or injm 7 by luming on all hot water
/hucels and allow them lo run tbr several minums. Do Ibis betore
using any eIecliica] appliance which is connecled 1o the hot waler
syslem. This simple procedure will allow any buih-up hydrogen gas
1o escape. Since the gas is flammable, do nol smoke or use an ()pen
flame or appliance dining ibis process.

Use this appliance only for its intended purpose as
described in this Owner's Manual
PROPERINSTALLATION
ANDMAINTENANCE
This dishwasher must be properly installed and located in
accordance with the Installation Instructions before it is used.
Ifyou did not receive an Installation Instructions sheet with
your dishwasher, you can receive one by calling us toll-free
at the GEAnswer Center7800.626.2000.
Connect lo a grounded
metal, permanent _dfing
sysleln; or nln an equipmenl_
gTounding conductor with
lhe circuil conduclors and
connect 1olhe equipmenl:
gTounding lenninal or lead
of lhe appliance.
hnproper connection of the
equipment-grounding
conducu)r can result in a risk
of eleclfic shock. Check xdlh
a qualified eleclfician or
sel_ice represenlafive if}xm
are in doubl wheflmr lhe
appliance is properly
gTounded.
Dispose of discarded
appliances and shipping or
packing malefial properly.
Do not attempt to repair or
replace any part of)xmr
dishwasher unless it is
specifically recommended in
this manual. All other
sel_icing should be referred
u) a qualified technician.
To minimize lhe possibilily of
elecuic shock, disconnecl
lhis appliance flom lhe
power supply betbre
attempting any maintenance.
NOTE:Turning the
dishwasher offdoes not
disconnect the appliance
flom the pox_r supply. We
recommend hming a
qualified lechnician selaice
your appliance.
5

IMPORTANTSAFETYINFORMATION.
READALLINSTRUCTIONSBEFOREUSING.
WARNING!
DONOT...
Do not tamper with conlrols. Do nol allow children It) play
inside, on or P_llh this
Do not abuse, sit on, or stand
on the door or dish rack of appliance or any discarded
the dishwasher, appliance.
iiiiiiiiiiiii_iil
Do not discard a dishwasher
_dd_ou! first remoxing the
door of the washing
conlpartnlenl.
Do not store or use
combustible mamfials,
gasoline or other flammable
vapors and liquids in the
xicinily of this or any olher
appliance.

WHENUSINGYOURDISHWASHER
1Jse only powder or liquid
detergents or x_lling agenls
recommended fbr use in a
dishwasher.
Locate shm]) items so that
lhey are not likely 1o damage
the door seal.
Load shm]) knives xdth the
handles up 1oreduce lhe risk
of cul-lype injuries.
Do not washplastic ilems
unless marked dishwasher
safeor dm equivalent. For
plasticimms nol somarked,
check lhe manutacmrer's
recommendations.
iiiiiiiiiiiii_iil
iiiiiiiiiiiii_iil
iiiiiiiiiiiii_iil
Do not touch the heating
element during or
immedialely after use.
Do not operate your
dishwasher unless all
enclosure panels me properly
in place.
Close supervision is necessm T
if this appliance is used 1)yor
near children.
Load light plastic ilems so
lhey x_ll nol become
dislodged and drop u) lhe
bollom of lhe dishwashel_
lhey mighl come inlo conlact
_dfl_lhe heating elemenl and
be damaged.
REMEMBER...
Yourcontinued health and safety are important to us.
Please read and follow this Safety Information carefully.
We want you to remain a happy and healthy part of our
GE family.
$,4VETHESEINSTRUCTIONS

Aboutthe dishwasher controlpanel.
Youcan Iocate your model number on the tub wall_justinside the door.
Throughout this manual, features and appearance may vary from)our model.
8
ControlSettings
This display tells you what is happening in tile
dishwasher and can alert you to some possible
problems. It also remembers your |ast t3,cle so you don't
haveu) reprogram each 'dine. See',heAbout the display
set't;lOn.
Information displayed:
LOADSELECTION.
OPTIONS.
X4_len tile dishwasher is sensing tile amount of soil in
tile load.
Cycle phase, such as WASHING,RINSINGor DRYING.
Diagnostic codes toalert }_mto possible problems.
Time remaining in tile cycle_dll be displayed approx.
10-15 minutes after cycle has slmled.
The mnount of soil in lhe load.
See tile Know the displaysection for explanation of
displays and codes.
TheActiveVent--The vent xdll close during washing to
retain Ileal and reduce noise. After washing it xdll open
to vent moisture and help tile dishes dD_fhster.

LoadSelection
NORMAL Forloadsof everydaydishes,glassesandcookwarewith
mediumsoils.NOTE:Manydisheshavelightersoil than
normal.ChoosingacycleotherthanNORMAL will save
energyandwater.
POTSPANS Forheavilysoileddishesor cookwarewith dried-onor
baked-onsoils. Everydaydishesmaybeincluded.This
cyclewill notremoveburned-onfoods.
CHINACRYSTALForlightlysoiled chinaandcrystal.Water isaeratedfor a
gentlewash.
RINSEHOLD Forrinsingpartial loadsthat will bewashedlater.Make
sureENERGYSAVERDRYis selected.Donotuse
detergentor DELAYSTARTwiththiscycle.
Option,,
ENERGY SAVER Shuts offthe drying heat options. Dishes air dry naturally
DRY ON and energy is saved. You can prop the door open after the
word CLEPNappears in the display.
ENERGY SAVER Turns the drying heater on for fast drying. This cycle will
DRY OFF extend the time to your wash cycle.
DELAY START You can delay the start of a wash cycle for up to 14 hours.
Tap or press and hold the DELAY START pad to choose
the number of hours you want to delay the start of the
cycle. The machine will count down and start
automatically at the correct time. NOTE: If you forget to
latch the door a reminder signal will beep until you do so.
RESET Tochange a cycle after washing starts, touch the RESET
pad to cancel cycle. After water is pumped out and motor
stops, you can reprogram and restart the dishwasher.
LOCI( When the LOCK pad istouched twice within 3 seconds,all
padsbecome inoperative. Youcan lock the controls to
prevent any selections from being made. Oryou can lock
the controls afteryou have started a cycle or selected
DELAY START so the cycle or DELAY START isnot
internJpted.Theword LOCKED appears in the display.
Children cannot accidentally start dishwasher
by touching pads.
Tounlockthe dishwasher after it has been locked, touch the
LOCKpad twice within 3 seconds. Theword LOCKEDwill
disappear from the display.
Sta,,
Latch the door and touch the STARTpad to begin the cycle.
There is a time delay bet_veen start-up and water fill so you
will not hear any wash action right away.
9

Aboutthe display.
Thedishwasherfemembersyour!ast
cyclesoyoudon't havetoreprogram
eachtime,
Dishwashing Shortcut
When the dishwasher is loaded and the door latch is
moved to the ON position, the control panel _ill display
the last seldngs you selec/ed.
If you don't wanl 1ochange any of the seuings, simply
u>uch START,
NOTE."If flmre has been a power t?tilure, NORMALwash
and ENERGYSAVERORYOFFwill auummdcal|y be
programmed. Make aW new selections as desired and
touch START,
These .graphics show the selection NORMAL cycle with ENERGYSAVER
DRY OFF(Heated Dry) as it appears in the display.
Cycle#elected Rinsecycleandminutesremainingin thecycle
Cyclestartedandthesoillevelis beingsensed Dwng
Soil level detem_ined
/0 Mainwashandminutesremaininginthe cycle
Dishes clean and dry

Know the display.
What It Means
AUTONORMAL NORMALcycle hasbeen se]ecled.
AUTOPOTSPANS POTSPANScycle has been se]ecled.
AUTOCHINA CHINACRYSTALcycle has been selecled.
RINSEHOLDcycle has 1)eense]ecled.
HEATEDDRY Displayed when ENERGYSAVERDRYis no! selecled.
ENERGYSAVER Displayed when ENERGYSAVERDRYis selecled.
DRY
SENSINGSOIL Displayed when lhe dishwasher isdetermining lhe
LEVEL amount of soil in the load and calculating the amounl of
wash time needed.
LO- HI Shows lhe amounl of soil in lhe load flom LO(one bar
SOILLEVEL lighled) lo HI(all fi)ur bars lighled).
Numeralsfrom Number ofminules left in lhe cycle.
1to99minutes
WASHING Displayed duling pre-wash, pre-rinse and main wash
periods.
RINSING Displayed during rinse periods fi)llo_dng lhe main wash.
DRYING Displwed during heated duing.
CLEAN Indicates complemd (Tcle. Remains on until door is
unlatched.
LOCKED Indicates connols are locked {oprevent unauthorized use.
Numeralsfrom Number of hours del Wuntil SIHI'/of(Tcle.
1to 14HRS.DEIJtY
RESET The RESETpad was/ouched.
PFRESET Indicams a power fitilure occuned.
77

Aboutthe display diagnosticcodes.
/2
What It Means What ToDo
p_ Electrical power to thedishwasher has been
interrupted but is now
back on.
_i_i_ _ii_i _ _
iii_ ii ii ii i _
iill
i i ii iii_ii (iii_
(iii_!i_i_ii_!_I_I_I___i
F!¸
iFDISHWASHERWASiN USEWHEN
THEPOWERFAILUREOCCURRED:
1Press the RESETpad andwait
approximately 30 seconds.
2Unlatch and ()pen the door.
A Iffl_e detergent cup is ()pen and
empty and the dishwasher was set
for tim NORMAL,POTSPANSor
CHINACRYSTAL(3,de, (lose
door and put the load through a
RINSEHOLD(Tcle. After the
RINSE HOLD(Tcle is completed,
add demigent and reset the load
tot the washing (Tcle you want.
BIf the detergent cup is closed and
the dishwasher was set tot the
NORMAL POTSPANSor
CHINACRYSTAL(Tcle, reset the
dishwasher for the wash cycle
you want.
C If the dishwasher was set fin the
RINSEHOLD(Tcle, reset the
dishwasher for RINSEHOLD.
IF THEDISHWASHERWASNOTiN USE
when power fi_ilure occuned, use
dishwasher as you normally would.
Slow draining. The
dishwasher is taking
longer than normal to
This dishwasher is designed to
automatically compensate for longer
than normal drain times, but cycle time
dr_ mewatero.t.
by a blockage in the drain
air gap, a kink in the
dr_ hose,ora
+pped..p+e.
_qllbe extended. If this code continues
tt)appeal fiequenfly:
I Clean the air gap.
2Check tbr a kink in the drain hose.
3Check plumbing for slowor
stopped-up drains.
NOTE:WmTanlyseI_'icedoes not
cover household drain problems.

RESET
What It Means What ToDo
Drain is blocked. This
indicates that the drain
is so clogged that the
dishwasher cannot
continue to operate in
a satisfactory manner.
Dishwasher will stop.
Press the RESETpad to stop the beep.
D)cate and remove the blockage in the
drain system. To pump any remaining
water out of the machine:
ILalch the door.
2Select aW tTcle.
3Touch SYARYand tl_en immediaiely
touch RESET
NOTE:Warranty service does not
cover household drain problems.
E3( f.nc.oning.Dramsen °risn°t
Dishwasher will
continue cycle along
with a fixed drain period.
If E3 repeats tbr the next cycle call
tbr se_ice.
RESET
_i _ii ii__i_i
i i Z
There is too much water
in the dishwasher. Press the RESETpadto slop the beep.
The dishwasher is designed to
automatically pump out extra water as
long as tl_e door is lalched. When you
hear the motor stop running:
I
2
IJnlatch the door and seeit all the
wamris,gxme.
Ifyou seewamrenmring the
dishwasher, closeand latch the door.
Shut off lhe water supply to the
dishwasher.
3Ifwamr is gone and no wamr is
entering tim dishwasher, restmt tTcle.
4If L repeals, shutoflthewater
supply to the dishwasher. Call tbr
service.
_i!il_ iiii_i_iiilii_i_i_
iii !I i ii:iii
5

Aboutthe display diagnosticcodes.
What It Means What ToDo
ill _ _i
%1 i ii
Not enough water is
entering the dishwasher.
OR
lJnlatch tile door. If there is no water in
tile bottom of file dishwasher, check tile
wamr supply It) the dishwasher.
Is the dishwasher water supply mined on?
Is the household water supply turned on?
If you use well or cislenl water, is tile
supply adequate?
If tile water supply is adequam, tD" file
(Tcle again. If KS repeats, call for sei_ce.
Thetemporarilydrain pumpblockedcould be
(usually caused by food
particles such as cereal).
IJnlatch the door. If there is slanding
waler in the bollom of tile dishwasher,
relatch tile door, touch START,then
immediately touch RESETIo Stall tile
pmnp. If K5 continues In appear, you
may need 1/)do this several times to
break up tile blockage.
i i i
iii iiiIiii i !i!iiiiliIiii
The water temperature
in the dishwasher did not
reach the proper wash
temperature. This is
usually caused by lack of
hot water coming from the
household water heater.
Avoid showers or laundlT.just prior to
nmning tile dishwasher. (Use tile
DEtAgSYARYteamre to start dishwasher
when dm water heater is up to normal
temperature.) Adjust household
water healer thermostat to 120 °F.
minimum.
If E5 appears _dth eveD_cycle and you
know the water flom the water heater is
hot (120°F. or more), call fbr service.
W_ The temperature sensor
L. _ in the dishwasher is not
functioning properly.
Dishwasher may conlinue
to be used, but it will not
heat water automatically.
Tile lemperature sensor needs to be
replaced. Call fi)r service.
NOTE:You InWcontinue 1/)use your
dishwasher. For best results a(!just your
household water heater thermostat
to 140 °F
74
Before YouCa/IFor Service
TD_tile Cv(le again to see iftile (ode reappears. Tile dishwasher may
conect itself.
Elecuonic conu-ols can be aflecmd by ou/side inmrterence. Shutting off
power u) tile dishwasher (at tile fuse or circuit breaker) could correct
tile problem. Restore power after 15 seconds and tD-tile cycle again.
Check tile g_lide fbr things you can do u) correct tile problem.
See tile #oubleshootin.qTipsat tile back of this manual.

Aboutthe soil sensorsystem.
Thedishwasher has an exclusive Soil Sensor System that measures the
amount of soil in the load,ARer the soil is measured the dishwasher decides
the length of the main wash cycle and the number of rinses needed,
WATER TOTAL
CYCLE USAGE TIME
SEQUENCES GALLONSMINUTES
Norma!Heavy
Norm_lMe_J.r_
NormaILig.t
Pans Heavy _______ 1Z2 67-82
LO- - _ - HI
ots Heavy
Pans LO--HI 9,3 58-73
pois Lig.t
CrystalLO_ HI
Crystal L0 - HI 5,9 29-39
Rinse
Hold _1,5 7
mmmmmmmmm_
DryingCycle Options
ENERGY SAVERDRY OFF(Healed D1)-). Available on all wash cples
excepl RINSE HOLD.Add 38 minules lo cple lhne.
ENERGY SAVERDRY ON. D1)_ng heater is mined off. Dishes all)-
naturally.
15

Usingthe dishwasher.
Checkthe WaterTemperature
The entering waler must be at least 120°F. and not more lhan
150 oF., for effective cleaning and u:)prevenl dish damage. Check
ll_e water temperalure _ifl_ a can@ or meat flmnnometer. Turn on
lhe hot wa/er fimcet nearesl ll_edishwasher, place the flmnnomeler
in a glass and let lhe water run continuously into ll_e glass until ll_e
lemperalure slops rising. Ac!jusl your wamr healer, if needed.
76
UsingaRinseAgent
A rinse agenl, such as JET-DRY,makes water flow off tlae dishes
quickly lherel)y reducing waler spouing.
Fill the rinse agent dispenser
until it reaches the bottom of lip
inside ll_e opening. Replace cap.
To check if rinse agent is needed,
remove the cap and look inlo tim
dispenser. ()n some models, lhe
dispenser can be checked by
pressing the clear cenler of the
fill cap 2 or 3 times. If rinse agent
fills the cenmr of the fill cap, you
have enough.
A full dispenser should last about 3months.
Ifrinse agentspills,wipeit up immediately.It can keepyourdetergent
from working.

ProperUseof Detergent
IJse only detergenl specifically made fi)r use in dishwashers. Keep
your detergent fiesh and &y. Don't put powder delergenl into the
dispenser unlil you're ready lo wash dishes.
The amount of detergent to use depends on whether your water is
hardor soft.With hard water, you need exlra delergenl. Wilh soft
waler, you need less detergent.
Prolect yore dishes and dishwasher by contacling your waler
depmlmenl and asking how hard your waler is. T_elve or more
grains is exlremely hard waler. A water softener is recommended.
_¥ilhoul it, lime can build up in lhe waler valve, which could slick
while ()pen and cause flooding. Too much detergent with soft water
can caum a permanent cloudiness of glassware, called etching.
You'll find tsvodelergent dispensers on lhe openCup
inside door ofyour dishwasher. All wash Q_cles
require delergenl in lhe main cup. Wash (ycles
with l_vowashes will also use the open cup.
Be sure lhe conlrol panel lighls are not lil
before adding detergent. ()therwise, the
delergenl cup will nol close and latch MainCup
properly. Add delergenl lhen close lhe
main cup.
NOTE:To open detergent cup after il has
been closed, simply lure lhe delergent cup
handle counler-clockwise until il releases.
A snapping sound may be heard.
ForgettoAddaDish?
A fbrgouen dish can be added any time befi)re lhe main wash.
'Push the door lalch to lhe left
_()nce the waler cahns ()pen the door. Sleam may _Jseoul of lhe
_dishwasher.
!_Close lhe door and push the lalch lo the tar righl.
IVOI'E:If you torgol lo lalch lhe door a reminder signal will beep
unlil you do st). /7

Loadingthe dishwasher racks.
For best dishwashing results, follow these loading guidelines. Features and
appearance of racks and silverware baskets may vary from your model.
UpperRack
The upper ra(k is tor glasses, cups and saucers.
Cups and glasses fit besl along the sides. This is
also asecure place for dishwasher-sate plastics. A
cup shelf (on some models) may be placed in lhe
up or down position to add flexibilib_. The upper
rack is good for all kinds of od&shaped utensils.
Saucepans, mixing bowls and o/her imms should
be placed face dox_l_.
Securelargerdishwasher-safeplasticsovertwofingers
whenpos:sible.
Makesuresmallplasticitemsaresecuresotheycant fail
ontotheheatingelement.
78
The Wash Tower
Keepthecenterareadearinthelowerrack:
The wash tower rises through tim cenler of the
lower rack during lhe wash and rinse portions of
lhe cycle.
Dontblockit orloadtaftthingsnexttoit.
Also, be careflfl not to let a
portion of an item such as a pot or
dish handle extend lhrough lhe
botlom rack. This could block lhe
wash ann and cause poor washing
resuhs.

Lower Rack
Whenloadingthelowerrack,donotloadlargeplattersor
traysin thefrontrightcorner.Theymaypreventdetergent
fromcirculatingduringthewashcycle,
The lox_r rack is best used fi)r plains, saucers,
and cookware. Large items such as broiler pans
and racks should go along the sides. Load
platmrs, pots and bowls along the sides, in
comers, or in lhe back. The soiled side of items
should tace the center of the rack.
Fold-doxm fingers (on some models) provide
flexibility fi)r extra large and hard-to-fit items.
The fingers may be left in the up position or
fi)lded dox_I_to customize the lower rack.
iiii,l!!,i_iiiiiii!{Hiiii!iiiiiiiii!ill_
mmmmmmmmm_
Don'tletony
itemextend
throughbottom,
Silverware Basket
Put flatware in tim removable basket x_fithfork
and knite handles up to protect your hands. Place
spoons in the basket x_lh handles doxm. Mix
knives, finks and spoons so they don't nest
u)geflmr. DistHbum evenly. Small plastic items,
such as measuring spoons and lids fiom small
containers, should go in the botu)m of the
siNerware basket xdlh silverware on u)p.
To increase lhe flexibility of the lower rack, lhe
siNerware basket m W be split. (;rasp the basket at
opposim comers and slide apml. The basket
sections should be placed in the lower rack by
hanging lhem on the lop hoop.
...................... A security cell cover (on
_iii, somemodels)hingedin
_:'t _'_il:_llll_ somehandlescanbe
\\ lowered,oei,herside,o
secureligh,,,'eigh,i,e,ns
fi-om the effects Of the
_-ra'r.....'>'_ vigorous wash action. 19

Aboutoptionalaccessories.
Wood panel trim kits are available at an extra costby calling, toll-free,
8_-626-2002. Yourorder will be sent directly toyour home. VISA,
MasterCard and Discover cards are accepted.
WoodPanelTrimKits
Wood panel Uim kils contain Uim and insu_uc6ons ff)r adding a
...................... decorauve wood door panel and bolloln access panel 1o n]aM]
your kilchen cabinels.
Specify the trimofyour choice from the followingoptions:
GPF451/4"PanelTrimKit(for all modelsexcept GSD4940)
,GPF463/4"Panel TrimKit
Other manuals for Appliances GSD4410
3
This manual suits for next models
8
Table of contents
Other GE Dishwasher manuals

GE
GE PBT650 Series User manual

GE
GE Profile PDW8100 Series User manual

GE
GE PDWF2 - Profile 24 in. Dishwasher User manual

GE
GE GLD2850T10CS User manual

GE
GE GDWT668V How to use

GE
GE GDT550HGDWW User manual

GE
GE Profile PDW9700N User manual

GE
GE GSD2300V Manual

GE
GE Triton XL GSD6900 Series User manual

GE
GE PDW7300N10WW User manual

GE
GE GDF610PGJ Manual

GE
GE GLD2850TCS Assembly instructions

GE
GE GLDA696FSS Manual

GE
GE GLC4100N User manual

GE
GE Appliances GLDT690 Series User manual

GE
GE GLDA690P Manual

GE
GE Appliances EDW3000 Series User manual

GE
GE CDT 725 Series User manual

GE
GE GLDA696FSS Assembly instructions

GE
GE Triton XL EDW4000 User manual