Safety Information
BEFORE YOU BEGIN
Read these instructions completely and carefully.
"IMPORTANT-Observeallgoverning codes
and ordinances.
, Note to Installer- Be sureto leavethese
instructionsforthe consumer's and local
inspector'suse.
, Note to Consumer - Keep theseinstructionswith
your Owner% Manual forfuturereference.
, SkillLevel- Installationofthisdishwasher
requiresbasicmechanical and electricalskills.Proper
installation is the responsibility of the installer.
Product failure due to improper installation is not
covered under the GE Appliance Warranty. See
warranty information.
. Completion Time - i to 3 Hours.
New installations require more time than replacement
installations.
"IMPORTANT- The dishwasher MUST be
installedtoallowforfutureremoval from the enclosure
ifserviceisrequired.
Care should be exercisedwhen the applianceisinstalled
or removed, toreduce the likelihoodof damage to the
power supplycord.
Ifyou receiveda damaged dishwasher,you should
immediately contact your dealer or builder.
Optional Accessories - See the Owner's Manual for
available custom panel kits.
READ CAREFULLY.
KEEP THESE INSTRUCTIONS.
FOR YOUR SAFETY
Read and observe all CAUTIONS and WARNINGS
shown throughout these instructions. While
performing installations described in this booklet,
gloves, safety glasses or goggles should be worn.
ForMonogram local service in your area, 1.800.444.1845.
ForMonogram parts and accessories, call 1.800.626.2002.
For Monogram parts and accessories in Canada, call
1.800.561.3344.
CONTENTS
Installation Preparation
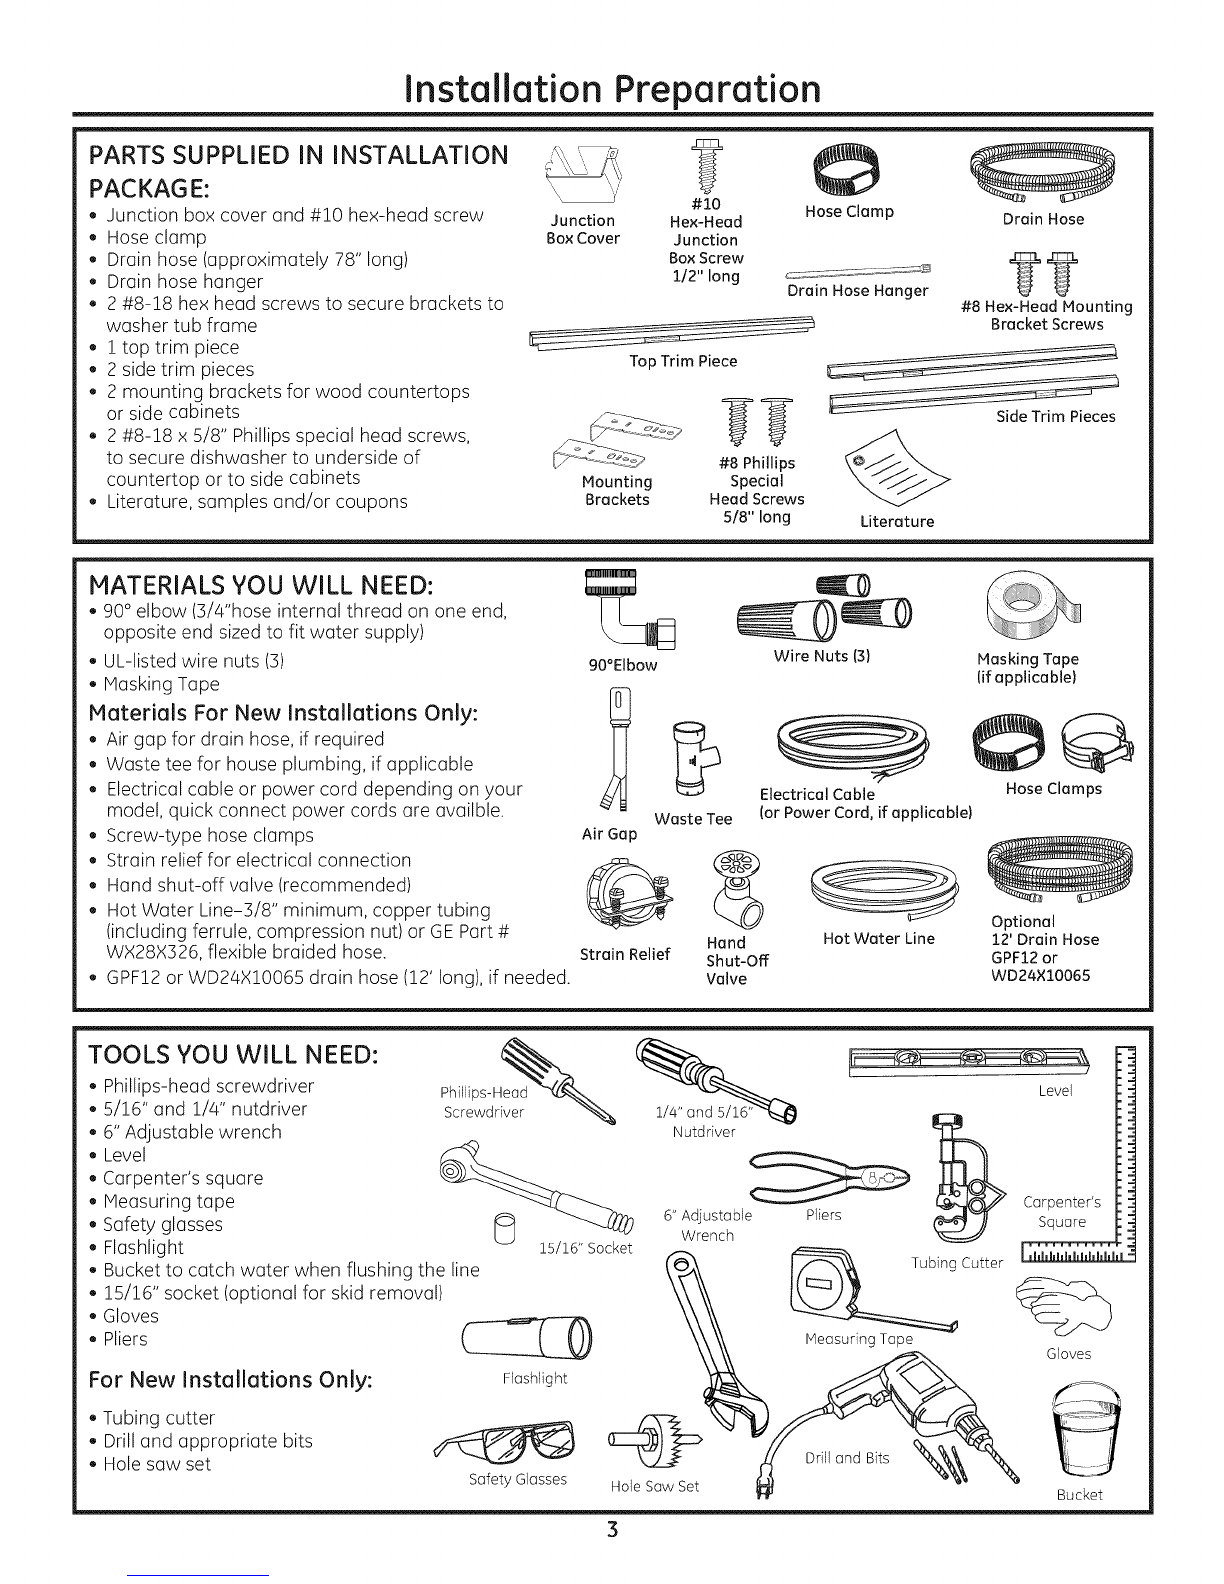
Parts Supplied......................................................................................3
Materials You Will Need..................................................................3
Tools You Will Need..........................................................................3
Prepare Dishwasher Enclosure ...................................................4
Drain Requirements ..........................................................................4
Prepare Electrical Wiring ................................................................
Prepare Hot Water Line..................................................................
Dishwasher Installation
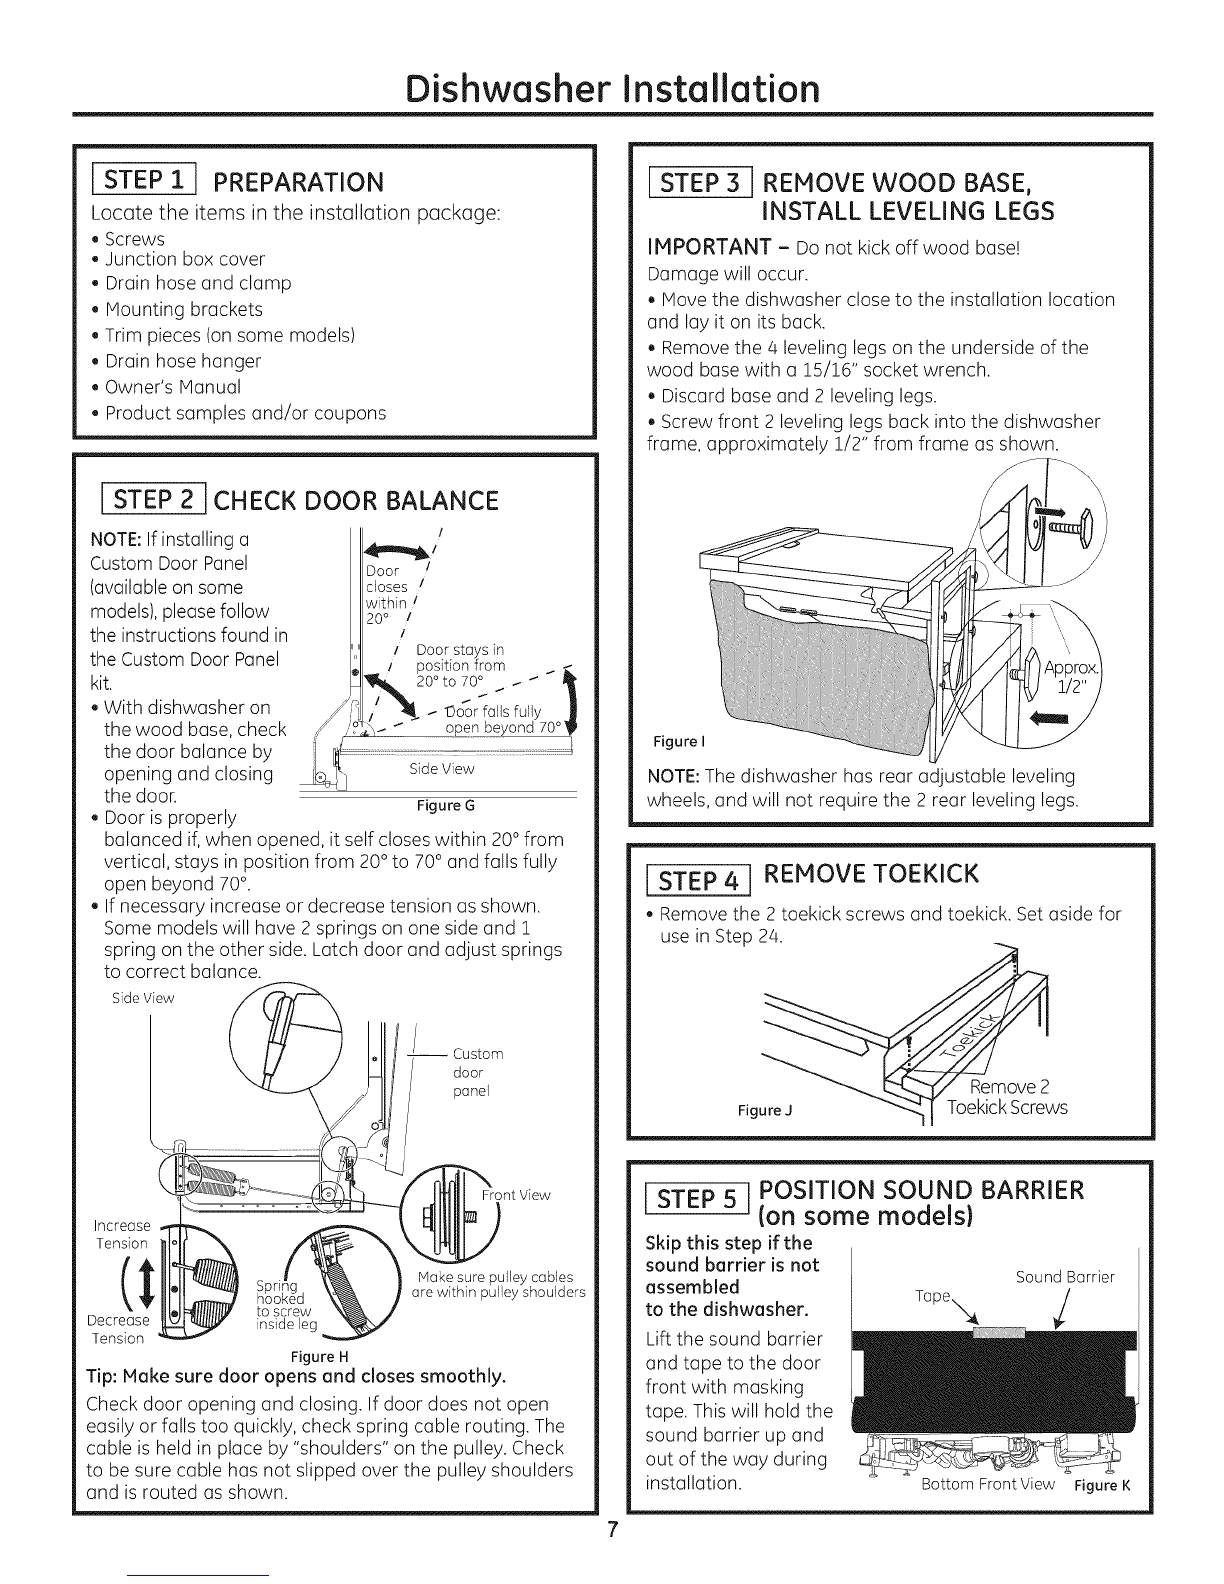
Step 1, Preparation ...........................................................................7
Step 2,
Step 3,
Step 4,
Step 5,
Step 6,
Step 7,
Step 8,
Step 9,
Check Door Balance .........................................................
Remove Wood Base, Install Leveling Legs.............
Remove Toekick..................................................................
Position Sound Barrier .....................................................
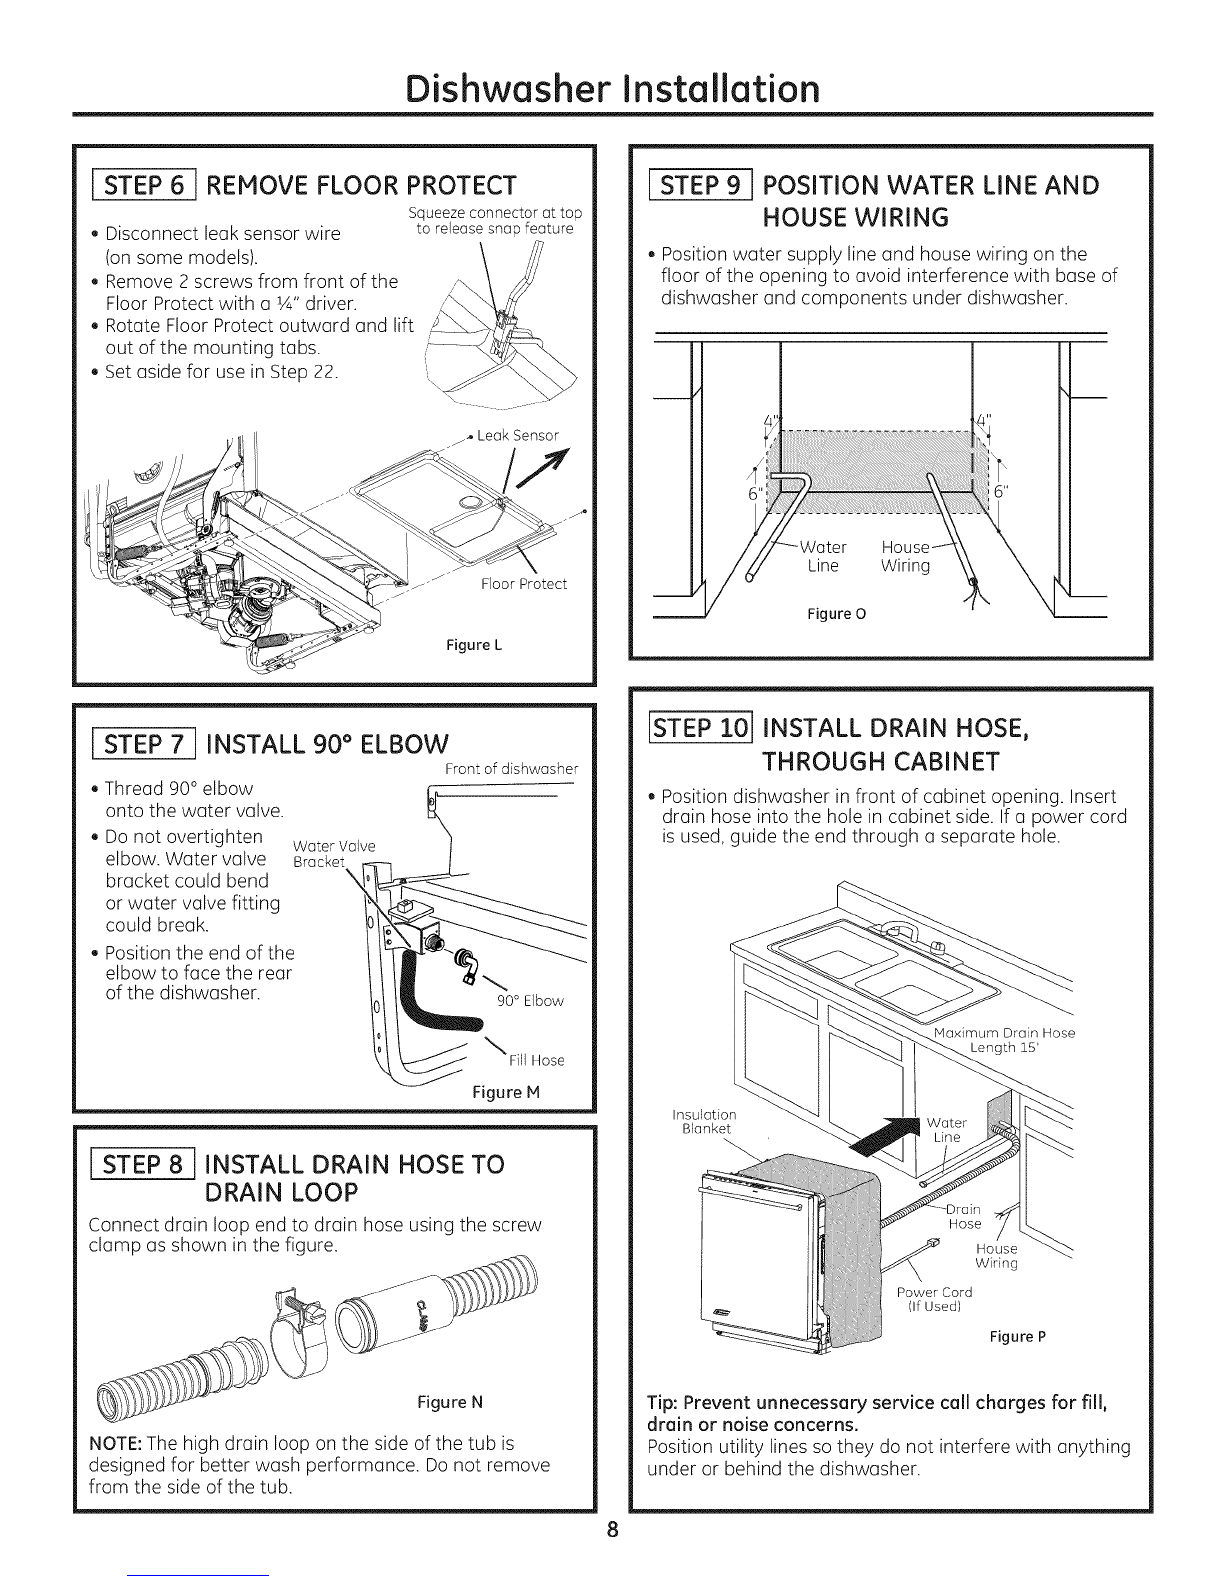
Remove Floor Protect .......................................................
Install 90° Elbow..................................................................
Install Drain Hose to Drain Loop..................................
Position Water Line and House Wiring.....................
Step 10, Install Drain HoseThrough Cabinet .......................8
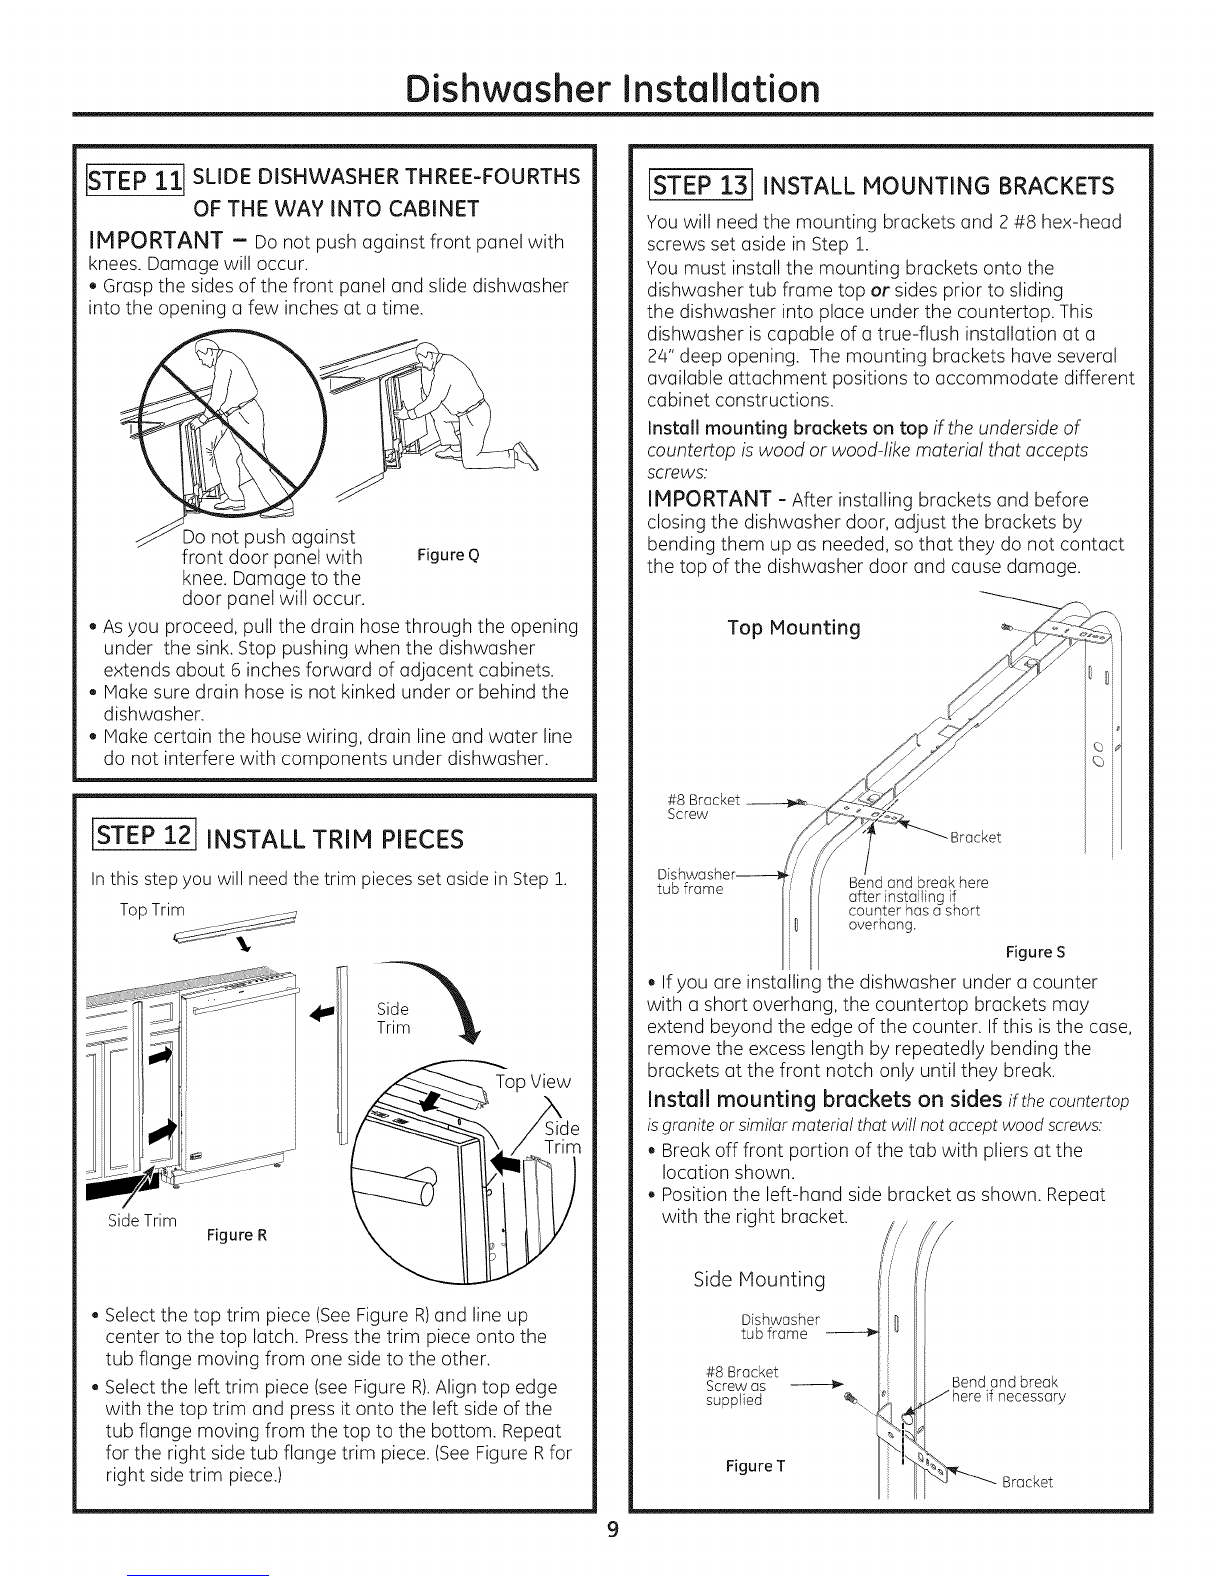
Step 11, Slide Dishwasher Three-Fourths of the
Way Into Cabinet ...............................................................................9
Step 12, Install Trim Pieces............................................................9
Step 13, Install Mounting Brackets ...........................................9
Step 1/4,Push Dishwasher Into Final Position ...................10
Step 15, Level Dishwasher .........................................................10
Step 16, Position Dishwasher, Secure to Countertop or
Cabinet .................................................................................................11
Step 17, Connect Water Supply ...............................................11
Step 18, Connect Drain Line ................................................11,12
Step 19, Connect Power Supply ...............................................12
Step 20, Pretest Checklist ...........................................................13
Step 21, Dishwasher Wet Test ..................................................13
Step 22, Replace Floor protect .................................................13
Step 23, Position Insulation, Pre-Toekick and
Sound Barrier ...................................................................................14
Step 24, Replace Toekick .............................................................1/4
Step 25, Literature ..........................................................................14