GE Cafe CDWT280VSS User manual

Stainless Steel
Tub Dishwashers
Owner’s Manual
Dishwashers
49-55078 05-11 GE
GEAppliances.com
Write the model and serial
numbers here:
Model # __________________
Serial # __________________
You can find them on the tub wall
just inside the door.
Safety Instructions . . . . . . . . . . . 2–5
Operating Instructions
Care and Cleaning . . . . . . . . . . . . . . . . . 17
Control Panel and Settings . . . . . . . . 6–9
Display Lights . . . . . . . . . . . . . . . . . . . . . . . 6
Loading Place Settings . . . . . . . . . . . . . 16
Loading the Racks . . . . . . . . . . . . . 14–16
Recommended Dishwasher
Products . . . . . . . . . . . . . . . . . . . . . . . . . . . . .9
Using the Dishwasher . . . . . . . . . .10–13
Troubleshooting Tips . . . . . . 18–20
Consumer Support
Consumer Support . . . . . . . . . . . . . . . . .24
Warranty . . . . . . . . . . . . . . . . . . . . . . . . . . . 23

2
Operating Instructions Safety InstructionsConsumer Support Troubleshooting Tips
IMPORTANT SAFETY INFORMATION
READ ALL INSTRUCTIONS BEFORE USING—
SAVE THESE INSTRUCTIONS
WARNING!
For your safety, the information in this manual must be followed to minimize the risk of fire,
explosion, electric shock, and to prevent property damage, personal injury, or death.
WATER HEATER SAFETY
PROPER INSTALLATION AND MAINTENANCE
This dishwasher must be properly installed and located in accordance with the Installation Instructions
before it is used. If you did not receive an Installation Instructions sheet with your dishwasher, you can
receive one by visiting our website at GEAppliances.com. In Canada, visit www.GEAppliances.ca.
■Connect the dishwasher/appliance to a grounded
metal, permanent wiring system; or run an
equipment-grounding conductor with the circuit
conductors and connect to the equipment-
grounding terminal or lead of the appliance.
■Improper connection of the equipment-grounding
conductor can result in a risk of electric shock.
Check with a qualified electrician or service
representative if you are in doubt whether the
appliance is properly grounded.
■Dispose of discarded appliances and shipping
or packing material properly.
■Do not attempt to repair or replace any part
of your dishwasher unless it is specifically
recommended in this manual. All other servicing
should be referred to a qualified technician.
■To minimize the possibility of electric shock,
disconnect this appliance from the power supply
before attempting any maintenance.
NOTE: Turning the dishwasher off does not
disconnect the appliance from the power supply.
We recommend having a qualified technician
service your appliance.
WARNING!
Under certain conditions, hydrogen gas may be produced in a water heater that has not been used for two
or more weeks. HYDROGEN GAS IS EXPLOSIVE.
If the hot water has not been used for two or more weeks, prevent the possibility of damage or injury
by turning on all hot water faucets and allow them to run for several minutes. Do this before using any
electrical appliance connected to the hot water system. This simple procedure will allow any built-up
hydrogen gas to escape. Since the gas is flammable, do not smoke, use an open flame, or use the appliance
during this process.
SEGURIDAD DEL CALENTADOR DE AGUA
¡ADVERTENCIA!
Bajo ciertas condiciones, se podrá producir gas de hidrógeno en un calentador de agua que no fue usado por
dos semanas o más. EL GAS DE HIDRÓGENO ES EXPLOSIVO.
Si el agua caliente no se usó por dos semanas o más, evite la posibilidad de que ocurran daños o lesiones
abriendo todos los grifos de agua caliente y dejando que corra agua por varios minutos. Haga esto antes de
usar cualquier artefacto eléctrico conectado al sistema de agua caliente. Este procedimiento simple
permitirá la salida de cualquier acumulación de gas de hidrógeno. Debido a que el gas es inflamable, no
fume, no use una llama abierta ni use el electrodoméstico durante este proceso.
Para su seguridad, siga las instrucciones de este manual a fin de minimizar riesgos de
incendio, explosión, descargas eléctricas, y para evitar daños en su propiedad,
lesiones personales o la muerte.
¡ADVERTENCIA!

■Contents washed in Anti-bacterial mode, if
available, may be hot to the touch. Use care
before handling.
■Using a detergent that is not
specifically designed for
dishwashers will cause the
dishwasher to fill with suds.
■If your dishwasher is
connected to a wall switch, ensure that
the switch is on prior to use.
■On dishwashers with electronic controls,
if you choose to turn the wall switch
off between wash cycles, allow 5-10
seconds after turning the switch on
before touching START/RESET to allow the control
to initialize.
■Non-Dishware Items: Do not wash items such
as electronic air cleaner filters, furnace filters
and paint brushes in your dishwasher. Damage
to the dishwasher and discoloration or staining
of the dishwasher may result.
■Close supervision is necessary if this appliance
is used by or near children.
■Load light, plastic items so they do not become
dislodged and drop to the bottom of the
dishwasher—they might come into contact with
the heating element and be damaged.
CAUTION: To prevent minor injury and property damage
3
IMPORTANT SAFETY INFORMATION
READ ALL INSTRUCTIONS BEFORE USING—
SAVE THESE INSTRUCTIONS
Consumer SupportTroubleshooting TipsOperating Instructions
■Los contenidos lavados en el modo SANI
WASH/SANITIZE (Lavado Desinfectante/ Des
infección), si este producto está disponible, podrán
estar calientes al tacto. Tenga
cuidado antes de tomar los
mismos con las manos.
■El uso de un detergente que
no esté diseñado
específicamente para lavavajillas hará
que este último se llene de agua con
jabón.
■Si el lavavajillas está conectado a un
tomacorriente, asegúrese de que el
interruptor esté encendido antes del uso.
■Si el lavavajillas tiene controles electrónicos, en
caso de decidir apagar el interruptor entre ciclos
de lavado, espere entre 5 y 10 segundos luego de
encender el interruptor antes de presionar START/
RESET (Iniciar/ Reiniciar) para permitir que el
control se inicie..
■Ítems que no sean Utensilios: No lave artículos
tales como filtros electrónicos de limpieza con
aire, filtros de horno y brochas de pintura en su
lavavajillas. Se podrán producir daños,
descoloración o manchas sobre el lavavajillas.
■Se deberá estar especialmente atento si el
electrodoméstico es usado por niños o si se
encuentra cerca de los mismos.
■Cargue artículos de plástico livianos, de modo que
no sean desplazados ni caigan al fondo del
lavavajillas – es posible que entren en contacto
con el elemento calentador y sean dañados.
PRECAUCIÓN: A fin de evitar lesiones menores y daños sobre la propiedad
Safety Instructions
■This appliance must be supplied with 120V, 60 Hz,
and connected to an individual, properly grounded
branch circuit, protected by a 15 or 20 amp circuit
breaker or time-delay fuse.
■If the electric supply
provided does not meet the
above specifications, it is
recommended that a
licensed electrician install
an approved outlet.
■Your dishwasher circuit should not be used for any
other appliance while the dishwasher is in
operation as the dishwasher requires the full
capacity of the circuit.
■If the wall receptacle you plug the dishwasher’s
power cord into is controlled by a switch, turn on
the switch.
ELECTRICAL REQUIREMENTS
Ensure proper ground
exist before use
(portable models only).

PROPER DISPOSAL OF THE DISHWASHER
Junked or abandoned dishwashers are
dangerous…even if they will sit for “just
a few days.” If you are getting rid of
your old dishwasher, please follow the
instructions below to help prevent
accidents.
Before You Throw Away Your Old
Dishwasher:
■Take off the door of the washing
compartment or remove the door
latch (as shown).
WARNING! RISK OF CHILD ENTRAPMENT
4
Operating Instructions Safety InstructionsConsumer Support Troubleshooting Tips
IMPORTANT SAFETY INFORMATION
READ ALL INSTRUCTIONS BEFORE USING—
SAVE THESE INSTRUCTIONS
Front control latch keeper Top control latch keeper
FORMA ADECUADA DE DESCARTAR EL LAVAVAJILLAS
Los lavavajillas antiguos o abandonados son
peligrosos… incluso aunque se
conserven por “sólo unos pocos días”.
Si se deshará de su antiguo
refrigerador, siga las siguientes
instrucciones a fin de evitar
accidentes.
Antes de Descartar su Antiguo
Lavavajillas:
■Retire la puerta del compartimiento
de lavado o retire la traba de la
puerta (como se muestra).
¡ADVERTENCIA! RIESGO DE QUE UN NIÑO QUEDE
ATRAPADO
Control frontal de la traba
de seguridad
Control superior de la
traba de seguridad

■Use this appliance only for its intended purpose
as described in this Owner’s Manual.
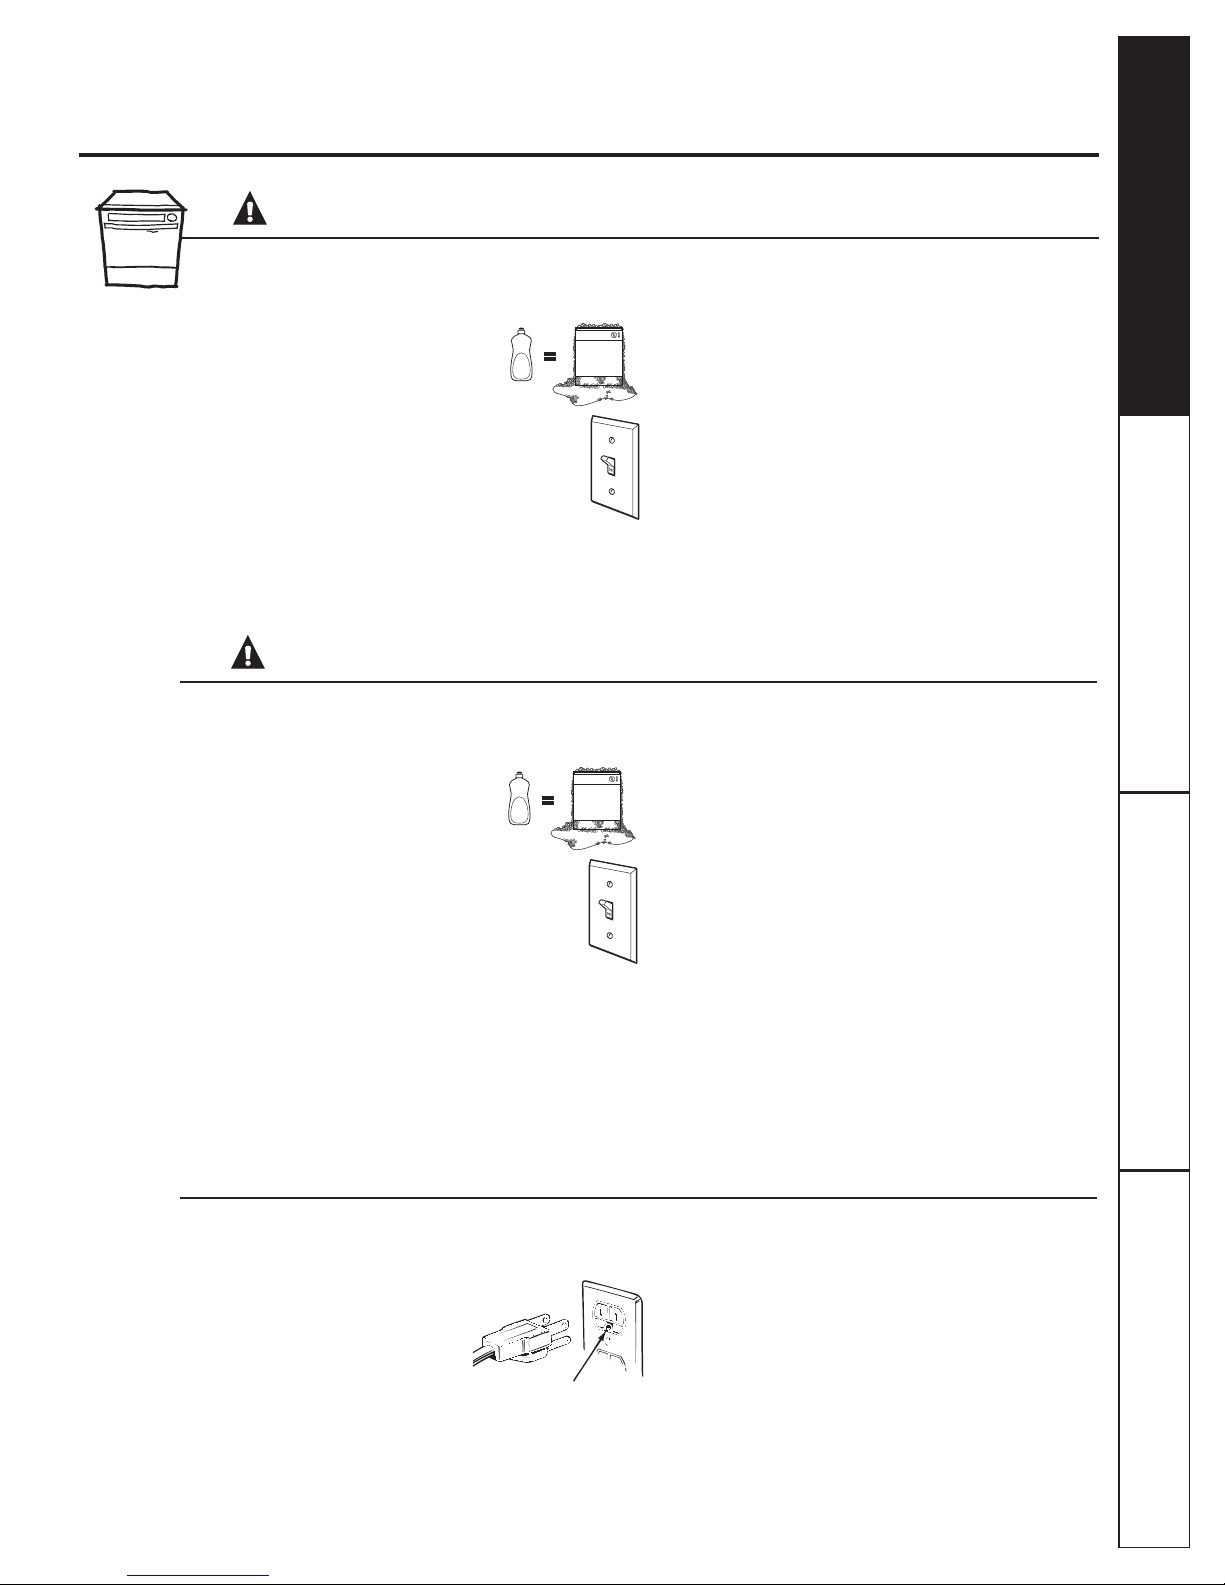
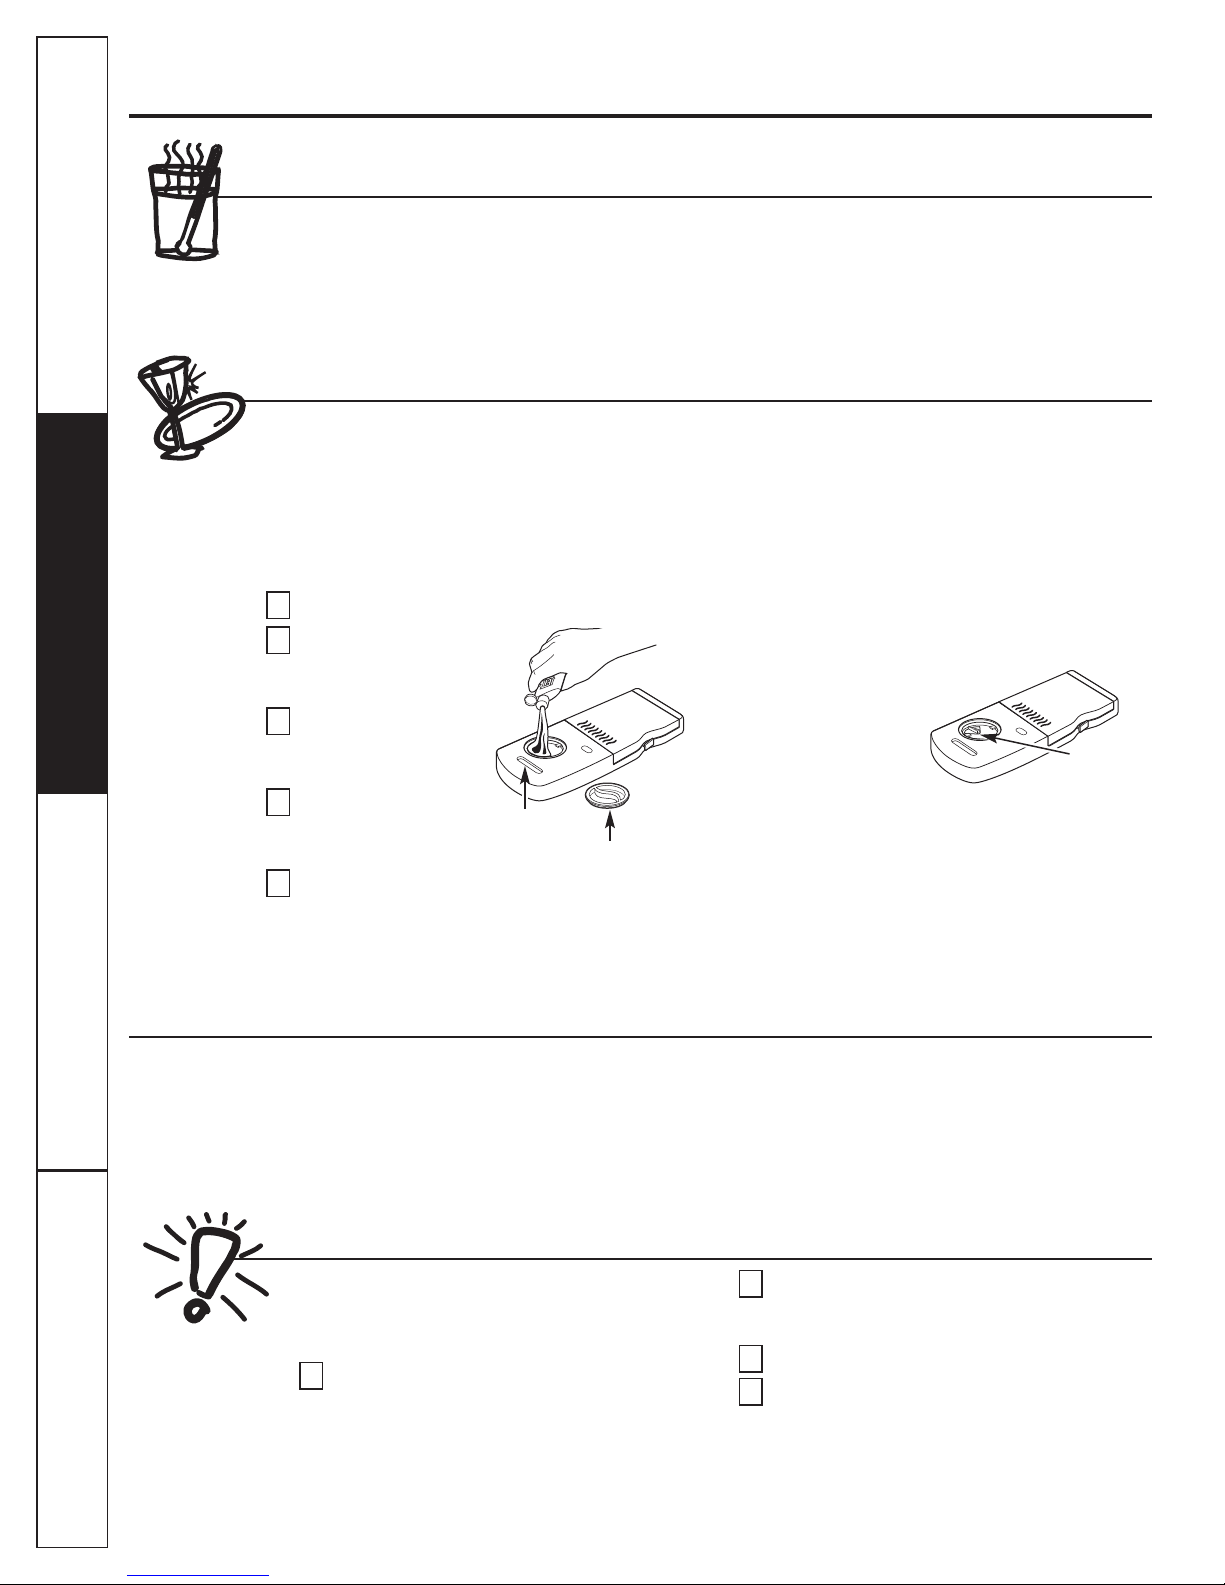
■Use only powder, Cascade®Complete Action Packs,
liquid detergents or rinse agents recommended for
use in a dishwasher and keep them out of the reach
of children. Cascade®and Cascade®Complete
Automatic Dishwashing Detergents, and Cascade®
Rinse Aid rinse agents have been approved for use
in all GE dishwashers.
■Locate sharp items so that they are not likely
to damage the door seal.
■Load sharp knives with the handles up to reduce
the risk of cut-type injuries.
■Do not wash plastic items unless marked
dishwasher safe or the equivalent. For plastic
items not so marked, check the manufacturer’s
recommendations.
■Do not touch the heating element during or
immediately after use.
■Do not operate your dishwasher unless all enclosure
panels are properly in place.
■Do not tamper with controls.
■Do not abuse, sit on or stand on the door or dish
rack of the dishwasher.
■Do not allow children to play around the dishwasher
when opening or closing the door due to the
possibility of small fingers being pinched in the door.
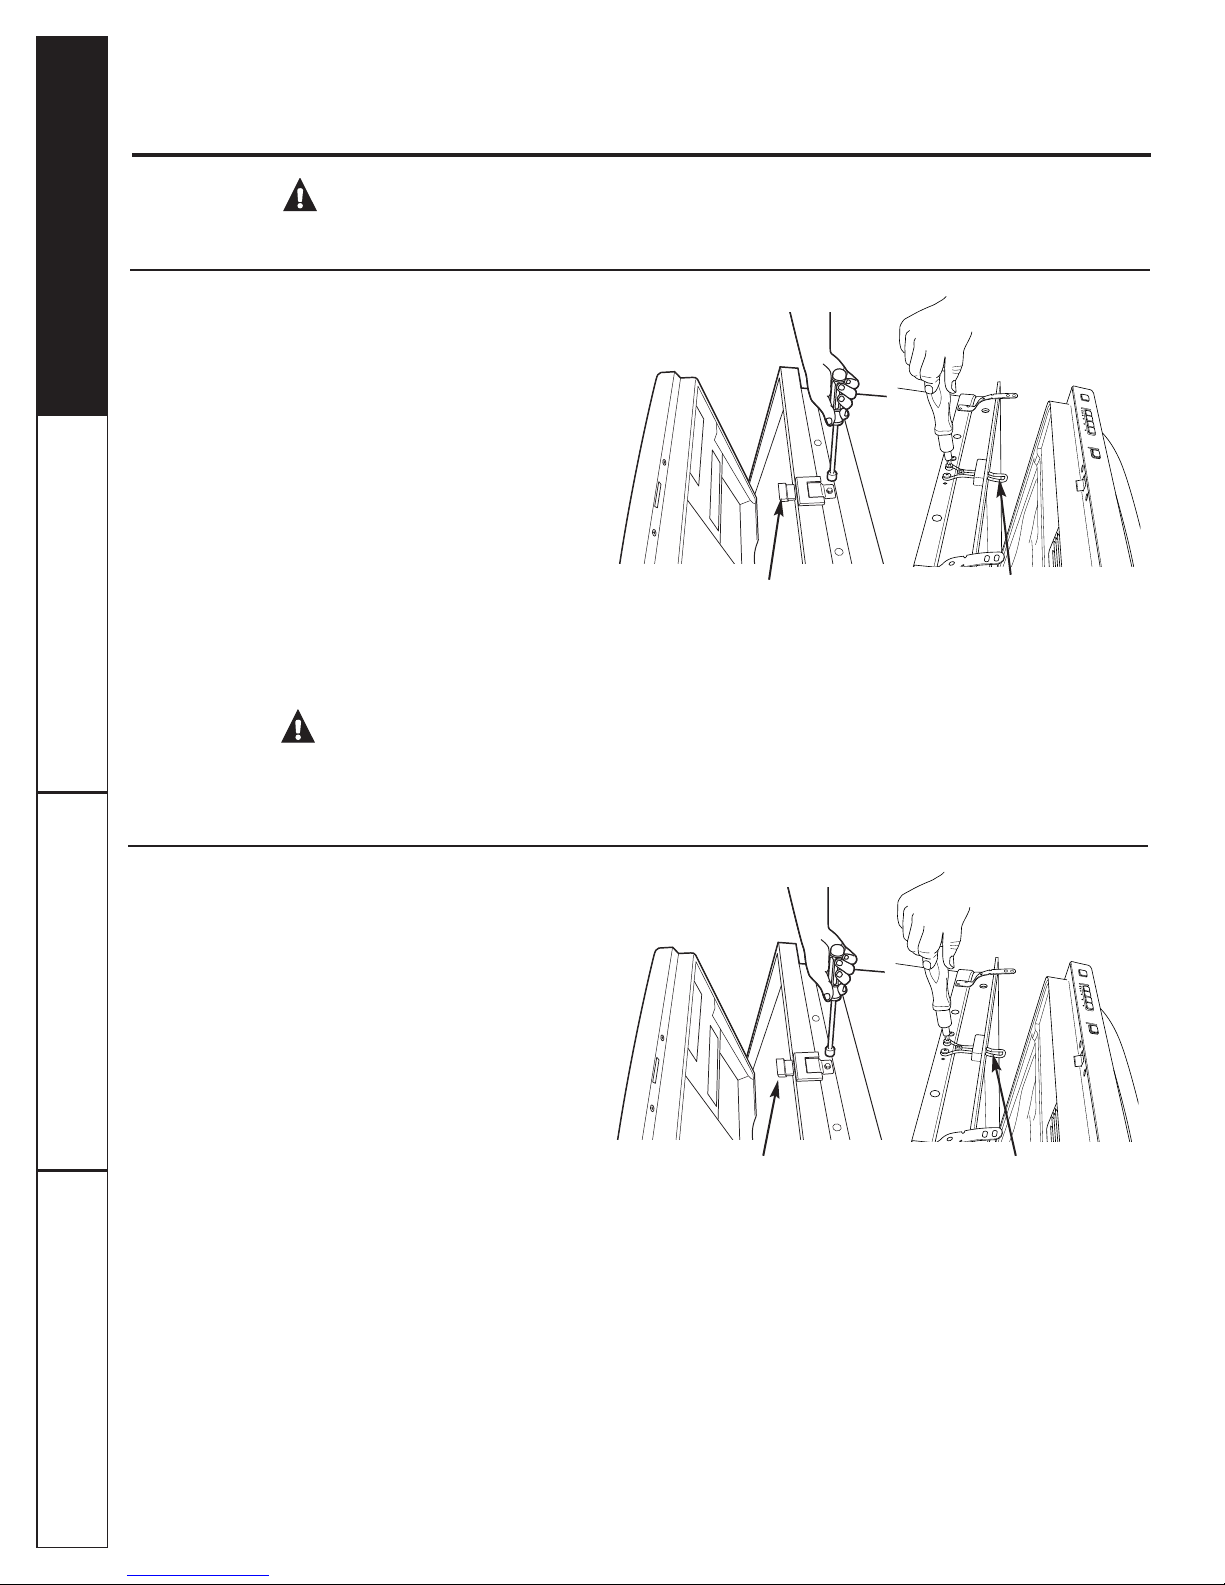
■Do not discard a dishwasher without first removing
the door of the washing compartment or the door
latch.
■Do not store or use combustible materials, gasoline
or other flammable vapors and liquids in the vicinity
of this or any other appliance.
■Do not allow children to play with, on or inside this
or any discarded appliance.
WARNING! When using your dishwasher, follow basic precautions,
including the following:
■Use este electrodoméstico sólo para su propósito
original, como se describe en el Manual del
Propietario.
■Use sólo polvo, Paquetes de Acción Completa de
Cascade®, detergentes líquidos o agentes de
enjuague recomendados para uso en un
lavavajillas, y mantenga los mismos fuera del
alcance de los niños. Los Detergentes para Lavado
en Lavavajillas Automáticos Cascade® y Cascade®
Complete, y los agentes de enjuague de Cascade®
Rinse Aid fueron aprobados por su uso en todos los
lavavajillas de GE.
■Ubique artículos puntiagudos de modo que no haya
posibilidades de daños sobre el sellador de la
puerta.
■Ubique artículos puntiagudos de modo que no haya
posibilidades de daños sobre el sellador de la
puerta.
■No lave artículos de plástico, a menos que figure
que son seguros para uso en lavavajillas o una
indicación equivalente. Si se trata de artículos de
plástico que no cuentan con dicha indicación,
consulte las recomendaciones del fabricante.
■No toque el elemento de calefacción durante o
inmediatamente después del uso.
■No toque el elemento de calefacción durante o
inmediatamente después del uso.
■No toque el elemento de calefacción durante o
inmediatamente después del uso.
■No abuse, no se siente ni se pare sobre la puerta o
la bandeja del plato del lavavajillas.
■No permita que los niños jueguen alrededor del
lavavajillas al abrir o cerrar la puerta, debido a la
posibilidad de que sus dedos pequeños sean
presionados contra la puerta.
■No permita que los niños jueguen alrededor del
lavavajillas al abrir o cerrar la puerta, debido a la
posibilidad de que sus dedos pequeños sean
presionados contra la puerta.
■No guarde ni use materiales combustibles, gasolina
u otros vapores inflamables y líquidos cerca de éste
ni de otros electrodomésticos.
■No guarde ni use materiales combustibles, gasolina
u otros vapores inflamables y líquidos cerca de éste
ni de otros electrodomésticos.
¡ADVERTENCIA! Al usar su lavavajillas, siga las precauciones básicas,
incluyendo lo siguiente:
READ AND FOLLOW THIS SAFETY INFORMATION CAREFULLY.
SAVE THESE INSTRUCTIONS 5
IMPORTANT SAFETY INFORMATION
READ ALL INSTRUCTIONS BEFORE USING—
SAVE THESE INSTRUCTIONS
Consumer SupportTroubleshooting TipsOperating InstructionsSafety Instructions

6
Operating Instructions Safety InstructionsConsumer Support Troubleshooting Tips
About the dishwasher control panel.
You can locate your model number on the tub wall just inside the door. Throughout this manual, features and appearance may vary from your model.
Control Settings
Status Indicator Lights (Indicators vary by models)
The Status display tells you what is happening while the dishwasher is in operation and may flash, indicating
a malfunction. The lights will come ON indicating the sequence of the dishwasher operation.
LOW DETERGENT Displayed when the SmartDispenseTM needs to be refilled with liquid or gel automatic
dishwasher detergent.
NOTE: If you are not using SmartDispenseTM and you want to turn the LOW DETERGENT
LED light off, press the ADDED HEAT button 5 times within 3 seconds. You will hear 3
beeps; then the light will go off. You can turn the light back on by pressing the ADDED
HEAT button 5 times within 3 seconds.
SENSING Displayed while the Clean SensorTM is measuring the amount of soil and temperature
of water. The dishwasher will adjust the selected cycle to achieve optimal performance.
SANITIZED Displayed at the end of the cycle when SANITIZE has been selected and the dishwasher
has met the requirements for sanitization. See SANITIZE, below, for complete cycle
description. Opening the door or pressing any key while the door is closed and latched
will turn off the light.
CLEAN Displayed when a wash cycle is complete. Refer to Item 6, page 9, for further
explanation of clean light operation
CYCLE STATUS The cycle status indicator light is located on the right side of the dishwasher, above the
INDICATOR handle. This light comes on as amber while the selected cycle is running. The light turns
to green when the selected cycle is complete. The light stays ON as green as a reminder
that the dishes are clean until the door is opened or until another cycle is selected.
Time Remaining Display (on some models)
During operation, the display shows the minutes remaining until the cycle is complete. The display may
adjust the remaining time while the Sensing light is on. The time displayed at the start of each cycle may
change from the factory setting as the unit customizes itself to home use. During a delay start, the display
will show hours of time remaining until the cycle starts.
NOTE: This dishwasher is equipped with CleanSensorTM with automatic temperature control; therefore,
cycle length and time may vary depending on soil and water temperature conditions.
2
1
Front-Control Dishwashers
Top-Control Dishwashers
16
34
5
5
6
2
4
3
1
Cycle Status Indicator Light

Wash Programs (Selections)
Front-Control Dishwashers: Close and latch door. Press the button for the desired wash cycle.
Top-Control Dishwashers: Use the Select Cycle button to scroll through the wash cycles while the door is open.
NOTE: All cycle times and water usage information contained in the following section are approximate
values. Actual results will depend on several factors, including but not limited to inlet temperature and
amount of soil in the wash water.
The light above or next to the selected button will be ON to indicate which WASH CYCLE has been selected.
7
Consumer SupportTroubleshooting TipsOperating InstructionsSafety Instructions
GEAppliances.com
Wash
Program
Time
(minutes)
Water Usage
(gallons/cycle)
Food Soil
Level
Description
Sanitize/
Sani Wash 50-135 7.5-8.75 Light to heavy This cycle raises the water temperature in the final
rinse to sanitize your dishware.
NOTE: This cycle is monitored for sanitization
requirements. If the cycle is interrupted during or
after the main wash portion or if the incoming water
temperature is so low that adequate water heating
cannot be achieved, the sanitizing conditions may
not be met. In these cases, the sanitized light will not
illuminate at the end of the cycle. When using th is
cycle, do not open the dishwasher door in the final
rinse.
Deep Clean/
Scour 115-175 10 Heavy to
baked on food This cycle is meant for heavily soiled dishes or
cookware with dried on or baked on soils. Every day
dishes are safe to be used in this cycle.
NOTE: On some models the STEAM enhancement will
be automatically selected when this cycle is selected,
and cannot be deselected.
NOTE: This cycle is monitored for sanitization
requirements. If the cycle is interrupted during or after
the main wash portion or if the incoming water
temperature is so low that adequate water heating
cannot be achieved, the sanitizing conditions may not
be met. In these cases, the sanitized light will not
illuminate at the end of the cycle. When using this
cycle, do not open the dishwasher door in the final
rinse.
Cookware/
Pots & Pans 75-140 8.75-10 Heavy to
baked on food This cycle is meant for heavily soiled dishes or
cookware with dried on or baked on soils. Everyday
dishes are safe to be used in this cycle.
Auto 62-114 5.2 Light to heavy This cycle is meant for light to heavily soiled dishes.
Normal 68-118 3.75-5.2 Normally
soiled dishes This cycle is meant for normal every day soil levels and
is designed to conserve both water and energy. The
Normal cycle was used to rate the efficiency of this
dishwasher.
China/
Crystal
Light Wash
40-60 7.5 Light to
Normal This cycle is specifically designed for delicate
ware such as crystal and china by maintaining
lower temperatures.
Glasses 40-75 7.5 Light to normal This cycle is specifically designed for glasses.
Plastics 85-145 6.25-7.5 Light to heavy This cycle is specifically designed for plastic ware
and includes a built in drying portion that is
specifically designed to reduce the risk of melting
plastic items and improve plastic drying.
Top Rack 50-110 5-8.75 Light Upper rack only.
Rinse 11 2.5 Any For rinsing partial loads that will be washed later.
Do not use detergent with this cycle.
3
NOTE: Only the Sanitize, Sani Wash, Deep Clean and Scour cycles have been designed to meet the
requirements of Section 6, NSF 184 for soil removal and sanitization efficacy.
NOTE: NSF-certified residential dishwashers are not intended for licensed food establishments
.

8
Operating Instructions Safety InstructionsConsumer Support Troubleshooting Tips
Enhancements
The light above the selected button will be ON to indicate which ENHANCEMENT has been selected.
Start
Front-Control Dishwashers
Close and latch the dishwasher door and select the cycle and desired enhancements. Touch the
START/RESET button one time to begin the cycle. Water fill begins immediately, and approximately
60 seconds later the wash action begins.
When the dishwasher door is fully closed and latched, the control panel lights will display the last settings
you selected. If you don’t want to change any of the settings, simply touch the START/RESET button to
begin the cycle.
If the door is closed, the indicator lights will turn off if the START/RESET button is not selected within 5
minutes. To activate the display, open and close the door or press any button.
4
5
About the dishwasher control panel.
ENHANCEMENTS DESCRIPTION
DELAY HOURS You can delay the start of a wash cycle for up to 24 hours (depending on model).
Press the DELAY START button to choose the number of hours you want to delay the
start of the cycle; then press START/RESET.
Front-Control Dishwashers: The machine will count down and start automatically at
the correct time.
Top-Control Dishwashers: After closing the door, the machine will count down and
automatically start at the correct time.
NOTE: To cancel the DELAY START selection before the cycle begins, repeatedly press
the DELAY START button until the display is blank.
ADDED HEAT When selected, the cycle will run longer with heating element on to improve both
wash and dry performance.
NOTE: Cannot be selected with RINSE AND HOLD cycle.
STEAM For use with heavily soiled and/or dried-on, baked-on soils. This option MUST be
selected PRIOR to starting the cycle. The STEAM option adds 26 minutes to the cycle time.
NOTE: Cannot be selected with RINSE AND HOLD cycle.
HEATED DRY When HEATED DRY is off, dishes will air dry. Top-control models have a fan that
assists the drying process.
Light Off: Shuts off the drying heat option. Dishes will air dry naturally (front-control
dishwashers) or fan dry (top-control dishwashers) to save energy.
Light On: Turns the heater on for faster drying. This will extend the total cycle time
between 8 and 38 minutes depending on the cycle selected.
NOTE: Cannot be selected with RINSE AND HOLD cycle.
LOCK You can lock the controls to prevent any selections from being made. Or you can lock
the controls after you have started a cycle.
Children cannot accidentally start dishwasher by touching buttons with this
option selected.
Front Control: To unlock the dishwasher controls, press and hold the HEATED DRY button
for 3 seconds. The light above the lock button will turn off. To lock the dishwasher, press and
hold the HEATED DRY button for 3 seconds. The light above the LOCK button will turn on.
Top Control: To unlock the dishwasher controls, press and hold the HEATED DRY and
DELAY HOURS buttons for 3 seconds. The lock satus indicator light will turn off. To lock the
dishwasher, press and hold the HEATED DRY and DELAY HOURS buttons for 3 seconds.
The lock sttus indicator light will turn on.
START/RESET For top control models, open the door slowly. For front control models leave the door
closed, then follow below.
To change a cycle after washing starts, touch the START/RESET button to cancel the
cycle.
The START/RESET LED will turn off and the drain pump will pump water out of the
dishwasher for 75 seconds and then turn off. Cycle selection and option LED’s will
remain on, and buttons will respond during pump out. If the START/RESET is pressed
while the dishwasher is in pump out, the START/RESET LED will turn on and the
dishwasher will start a new wash cycle.

9
Consumer SupportTroubleshooting TipsOperating InstructionsSafety Instructions
GEAppliances.com
Recommended dishwasher products.
GE recommends the following products for use in its
dishwashers:
■For your manual detergent dispenser, Cascade®
Complete ActionPacs are recommended. Powders,
liquids, and gels may also be used but may not
work as effectively. See page 11 for more details.
■For your SmartDispenseTM Detergent Dispenser,
Cascade®Complete gel is recommended. See page
12 for differences between liquid gel types and a
warning about mixing liquid detergents together.
■Cascade®Rinse Aid ™rinse agent to remove spots
and prevent new film buildup on your dishes,
glasses, flatware, cookware and plastic. Using rinse
agent also improves dry performance.
Start (continued)
Top-Control Dishwashers
After selecting the cycle and desired enhancements, touch the START/RESET button to ready the
dishwasher to begin the cycle. Close the door to start the cycle or begin the DELAY START countdown.
When the cycle starts, the water fill begins and approximately 60 seconds later the wash action begins.
The dishwasher will always display your last selection and enhancements. If you don’t want to change
the settings, simply touch the START/RESET button to ready the dishwasher and close the door to begin
the cycle.
ALL MODELS: If a power failure occurs AUTO and HEATED DRY will automatically be programmed. Make
any new selections and touch the START/RESET button to begin the new cycle.
When the door is opened, the indicator lights will turn off if the START/RESET button is not selected within
5 minutes. To activate the display, open and close the door or touch any button.
Clean
Front-Control Dishwasher
The CLEAN light will illuminate and a double beep will sound when a wash cycle is complete. On some
models, the CLEAN light will turn off when the door is opened. On other models, the CLEAN light will
remain on until the door is opened and then relatched or until any keypad is pressed while the door
is latched shut.
Top-Control Dishwasher
The CLEAN light will illuminate and a double beep will sound when a wash cycle is complete. The CLEAN
light will remain on until the door is opened and then relatched or until any key is pressed.
ALL MODELS: To turn off the audible end-of-cycle signal (or re-activate it if it was previously turned off),
press the HEATED DRY button 5 times within 3 seconds. A triple beep will sound to indicate the end-of-
cycle beep option has been toggled.
6
5

10
Operating Instructions Safety InstructionsConsumer Support Troubleshooting Tips
Using the dishwasher.
The entering water should be at least 120°F and not more than 150°F for effective cleaning and to
prevent dish damage. Check the water temperature with a candy or meat thermometer. Turn on the
hot water faucet nearest the dishwasher, place the thermometer in a glass and let the water run
continuously into the glass until the temperature stops rising.
Check the Water Temperature
Cascade®Rinse Aid™ rinse agent improves drying, removes spots and prevents new film buildup on
your dishes, glasses, flatware, cookware and plastic.
Use Cascade®Rinse Aid™ Rinse Agent
Filling the Dispenser
The rinse agent dispenser holds 3.5 oz. of rinse agent.
Under normal conditions, this will last approximately
one month. Try to keep it full, but do not overfill.
Make sure the dishwasher door is fully open.
Turn the dispenser
cap to the left and
lift it out.
Add rinse agent until
the indicator window is
full.
Clean up any spilled
rinse agent with a
damp cloth.
Replace the dispenser cap.
Rinse Aid Setting
The amount of rinse agent released into the final rinse
can be adjusted. The factory setting is at the
midpoint. If there are rings of calcium (hard water)
spots on dishes, try a higher setting. If there is
foaming, use a lower setting.
To adjust the setting:
Remove the dispenser cap;
then turn the adjuster
counterclockwise to
increase the amount
of rinse agent or
clockwise to reduce
the amount of rinse agent dispensed.
5
4
3
2
1
Rinse agent
adjuster
■No prerinsing of normal food soil is required.
■Scrape off hard soils, bones, toothpicks, skins and
seeds.
■Remove large quantities of any remaining food.
■Remove leafy vegetables, meat trimmings and
excessive amounts of grease or oil.
Dish Preparation Prior to Loading
Indicator
window Dispenser cap
A forgotten dish can be added any time,
however, for best wash performance it is
recommended to add a dish prior to the opening
of the detergetnt cup.
Squeeze the door latch to release the door.
Do not open the door until the water spray
action stops. Steam may rise out of the
dishwasher.
Add forgotten dishes.
Close the door and dishwasher will start
in 5 seconds.
4
3
2
1
Forget to Add a Dish?

The detergent dispenser is on the upper left hand side of the
dishwasher door. It has two compartments. Use the main
wash compartment for all loads. Use the pre-wash
compartment only when your water is extremely hard or
when you have a heavy soiled load.
You may use tablet, powder, liquid or gel automatic
dishwasher detergent. Make sure you use only detergents
specifically labeled for use in automatic dishwashers. Never
use liquid hand dish detergent in an automatic dishwasher.
Sudsing and poor wash performance will result with the use
of improper detergents.
Detergents should be stored in a dry location and in their
original container to prevent loss of effectiveness. Place
detergent in the cup just prior to starting the dishwasher
and then close and latch the cover. The cover will open
during the wash cycle.
Filling the Detergent Dispenser
GE recommends using detergent in tablet or packet form.
Independent testing has shown this form of detergent is
very effective in the dishwasher. Cascade® Complete
Action Packs are an example of this type of detergent.
Simply put a tablet or packet into the main wash
compartment and then close and latch the detergent cup
cover. Please notice that the tablet or packet must be
placed in the main wash compartment of the detergent
cup. If the tablet or packet is tossed in the bottom of the
dishwasher, the detergent will be flushed down the drain in
a very short period of time and will thus be wasted. Wash
performance will be very poor as a result.
If you choose to use detergent in powder, liquid or gel form,
the amount of detergent you use will be determined by the
hardness of your water, the temperature of your water, and
the food soil load inside the dishwasher. Contact your water
company to get information about the hardness of the
water in your area. Alternatively, you may purchase a hard
water test strip from GE. Call 1-800-626-2002 and ask for
part number WD01X10295.
Using too much detergent with very soft and/or very hot
water may cause a condition called etching on your
glassware. Etching is a permanent cloudiness in your
glassware. This condition is irreversible. However, using too
little detergent will cause poor wash performance.
Use the table as a starting point and then adjust the
amount of detergent you use. Use just enough to get good
wash performance. Using just the right amount of detergent
will provide great wash performance without wasting
detergent or etching of glassware.
DO NOT USE HAND DISH DETERGENT
NOTE: Using a detergent that is not specifically designed for
dishwashers will cause the dishwasher to fill with suds.
During operation, these suds will spill out of the dishwasher
vents, covering the kitchen floor and making the floor wet.
Because so many detergent containers look alike, store the
dishwasher detergent in a separate space from all other
cleaners. Show anyone who may use the dishwasher the
correct detergent and where it is stored.
While there will be no lasting damage to the dishwasher,
your dishes will not get clean using a dishwashing
detergent that is not formulated to work with automatic
dishwashers.
Consumer SupportTroubleshooting TipsOperating InstructionsSafety Instructions
GEAppliances.com
Detergent Dispenser
Detergent Cups to Fill
Fill cup to soft line (1/3 full)
Fill cup to medium soft line (2/3 full)
Fill cup to medium hard line
(completely full)
Fill both main wash cup
and pre wash cup
Number
of Grains
Less than 4
4 to 8
8 to 12
Greater
than 12
11
Manual Detergent
Dispenser

12
Operating Instructions Safety InstructionsConsumer Support Troubleshooting Tips
Using the dishwasher.
SmartDispenseTM Detergent Dispenser (some models)
This dishwasher may have SmartDispenseTM, a feature
which automatically dispenses liquid automatic
dishwasher detergent into each cycle based on soil level
and water hardness. To utilize the SmartDispenseTM
Detergent Dispenser, it must first be filled. Although any
liquid or gel automatic dishwashing detergent can be
used in the SmartDispenseTM system, all liquid or gel
automatic dishwashing detergents are not the same.
Most automatic dishwashing detergents are chlorine
bleach-based (such as Cascade®) while others contain
enzymes (such as Cascade Complete®).
Do not mix any chlorine bleach-based automatic
dishwashing detergent with any dishwashing
detergent containing enzymes as this could cause
the detergents to congeal and lead to blockage of
the SmartDispenseTM system.
Check the detergent label to determine if the detergent
is chlorine bleach-based or one that contains enzymes.
It is recommended that the same type of detergent be
used when refilling your SmartDispenseTM system.
To open the dispenser for filling, push down and turn
the blue cap counterclockwise until the cap is loose.
Lift cap off.
Set the door at a comfortable angle to fill the dispenser.
Aim the detergent bottle at the opening in the door and
begin to fill.
The dispenser will hold 45 oz of liquid dishwasher
detergent (standard size bottle).
When full, replace the cap and turn clockwise until tight
to ensure no water enters the SmartDispenseTM dispenser.
If residue is left on the door, it will be washed off in the
next cycle.
An indicator light will turn on to notify you when the
dispenser needs to be filled again. After filling, the light
will not turn off until the door is closed. A full dispenser
will last approximately 1 month for the average user.
NOTE: If you are not using SmartDispenseTM and you
want to turn the LOW DETERGENT LED light off, press
the ADDED HEAT button 5 times within 3 seconds. You
will hear 3 beeps; then the light will go off. You can turn
the light back on by pressing the ADDED HEAT button 5
times within 3 seconds.
CAUTION! Absolutely do not add
powder detergent, tablets or any liquid soap
or detergent normally used for washing hands
or dishes in a sink. Only use liquid or gel
detergent specifically designed for use in
an automatic dishwasher.
¡PRECAUCIÓN! Bajo ninguna
circunstancia agregue detergente en polvo,
tabletas o jabón o detergente líquido
normalmente utilizado para lavar manos o
platos en un fregadero. Sólo utilice detergente
líquido o en gel específicamente diseñado para
utilizar en lavaplatos automáticos.
LOW DETERGENT
SmartDispense
SENSING
WASHING
DRYING
SANITIZED
CLEAN
Light Will
Turn On
When
Time to
Refill (appearance may vary)
Turn clockwise.

Prior to the first use, the dishwasher needs
to be calibrated for water hardness. Please follow
the directions below to calibrate the dishwasher
to the hardness of your tap water.
Determine the Hardness of Your Tap Water
In the bag that contained these instructions, you
should find a water hardness test strip package.
Read the instructions on the package, remove the
test strip and follow the instructions to determine
the hardness level of your tap water. You will use
this information to calibrate your dishwasher to
dispense the optimal amount of detergent.
Calibration of Front-Control Models With
3-Digit Display
Close and latch the door (lights on, dishwasher
not running).
Press the
AUTO
and DELAY HOURS buttons at the
same time for 3 seconds.
The display will show a number from 1to 5. This
is the water hardness value currently set.
Press the
AUTO
button to raise the value or the
NORMAL button to lower the value. Set the water
hardness value to the number determined with
the test strip and table above.
Once the water hardness is set, press the
START/RESET button to save the setting and
return the dishwasher to normal operation.
Calibration of Front-Control Models Without a
3-Digit Display
Close and latch the door (lights on, dishwasher
not running).
Press the AUTO button and DELAY HOURS buttons
at the same time for 3 seconds. All lights will light
up and you will hear 1 to 5 beeps. The number of
beeps indicates the current hardness value.
To change the setting, press the DELAY HOURS
button the number of times that corresponds to
the water hardness value determined at the left.
The control will beep each time you press the
button.
Once finished pressing the button, you will hear a
confirmation with beeps for the hardness value
selected.
If the number of beeps is not what you desire,
start pressing the DELAY HOURS button again to
reenter a new water hardness level.
Once the water hardness is set, press the
START/RESET button to save the setting and
return the dishwasher to normal operation.
Water hardness test strip indication.
Calibration of Top-Control Models With
3-Digit Display
Open the door and touch any button other than
START to turn lights on.
Press the Select Cycle button and DELAY HOURS
button at the same time for 3 seconds. The
display will show a number from 1to 5. This is the
water hardness value currently set.
Press the STEAM button to raise the value
or the Select Cycle button to lower the value. Set
the water hardness value to the number
determined with the test strip and table at the left.
Once the water hardness is set, press the
START/RESET button to save the setting and
return the dishwasher to normal operation.
Calibration of-Top-Control Models Without
a 3-Digit Display
Open the door and touch any button other than
START to turn lights on.
Press the Select Cycle button and DELAY HOURS
button at the same time for 3 seconds. All lights
will light up and you will hear 1to 5beeps. The
number of beeps indicates the current hardness
value.
To change the setting, press the DELAY HOURS
button the number of times that corresponds to the
water hardness value determined at the left. The
control will beep each time you press the button.
Once finished pressing the button, you will hear a
confirmation with beeps for the hardness value
selected.
If the number of beeps is not what you desire,
start pressing the DELAY HOURS button again to
reenter a new water hardness level.
Once the water hardness is set, press the
START/RESET button to save the setting and
return the dishwasher to normal operation.
6
5
4
3
2
1
4
3
2
1
6
5
4
3
2
1
2
3
4
1
Consumer SupportTroubleshooting TipsOperating InstructionsSafety Instructions
GEAppliances.com
SmartDispenseTM Detergent Dispenser
Water Hardness Calibration
Press at the same time. Display
Press at the same time.
Display
0 RED
1 RED
2 RED
3 RED
4 RED
1
2
3
4
5
SOFT
HARD
Value to Enter into
Dishwasher
NOTE: You should recalibrate the dishwasher control if water conditions change; for example, if a water softener
system is added or removed from your home. 13

Operating Instructions Safety InstructionsConsumer Support Troubleshooting Tips
14
Loading the dishwasher racks.
For best dishwashing results, follow these loading guidelines. Features and appearance of racks and silverware
baskets may vary from your model.
Upper Rack
Although the upper rack is primarily for
glasses, cups and saucers, pots and pans can
be placed in this rack for effective cleaning.
Cups and glasses fit best along the sides. This
is also a secure place for dishwasher plastics.
The utility shelf (some models) may be placed
in the up or down position to add flexibility. A
wine glass holder (some models) secures
wine glasses for best washability.
Some models have contoured metal cup
shelves that can secure up to 12 wine glasses
(as shown).
Because wine glasses come in various sizes,
after loading, slowly push in the rack to make
sure they will clear the top of the dishwasher.
Some models have an Angled Rack System,
which allows you to angle your dishes, such
as coffee mugs, for better cleaning and
quicker drying. To position the tines, pull the
lever forward then drop the tines into
position, then release the lever.
The upper rack is good for all kinds of
odd-shaped utensils. Saucepans, mixing
bowls and other items should be placed face
down. Fold-down tines (on some models)
provide flexibility for extra-large and hard-
to-fit items.
Secure larger dishwasher-safe plastics over
2 tines when possible.
Make sure small plastic items are secure so
they can’t fall onto the heater.
Be sure that items do not protrude through
the bottom of the rack and block rotation of
the middle spray arm. This could result in
poor wash performance for items in the
upper rack.
Check to make sure that no items will block
rotation of the wash arm.
NOTE:
The Single Rack Wash selection, on
models with this feature, washes the upper
rack only. If you use this feature, do not load
items in the lower rack.
Adjustable Upper Rack (on some models)
The standard position of your adjustable rack
is “up” which allows for maximum clearance
for your taller items in the lower rack. If you
have taller wine glasses, tumblers or other
items to place in the upper rack, you may
want to adjust the rack to the lower position.
To lower the rack, support the weight of the
rack with your hands as shown and press
both finger pads about 1/4” toward the inside
of the rack as indicated and guide the rack
down to its lower position.
To raise the rack to the “up” position, pull up
on the center of the rack side frame until the
rack locks into place.

15
Consumer SupportTroubleshooting TipsOperating InstructionsSafety Instructions
GEAppliances.com
Don’t let any
item extend
through bottom.
To remove end baskets, grasp the
basket at opposite corners and slide
apart.
Three-piece basket (on some models)
One-piece basket (on some models)
Silverware Basket
To load flatware, simply push the adjustable
handle to either side (on some models). Put
flatware in the removable basket with fork
and knife handles up to protect your hands.
Place spoons in the basket with handles
down. Mix knives, forks and spoons so they
don’t nest together. Distribute evenly. Small
plastic items, such as measuring spoons and
lids from small containers should go in the
bottom of the silverware basket with the
silverware on top.
The one-piece silverware basket (on some
models) can be placed in the front, right side
or back of the lower rack.
A variety of options is available regarding
the three-piece silverware basket (on some
models) in your dishwasher. The complete
basket is designed to fit on the right side of
the lower rack. Additionally, each end of
the basket is removable to add loading
flexibility to accommodate flatware and
lower rack capacity needs.
The lids of both end and middle baskets (on
some models) can be closed to contain small
items. Long items can be placed on the utility
shelf in the upper rack. Load flatware through
the slots in the silverware basket covers.
Lower Rack
The lower rack is best used for plates, saucers
and cookware. Large items such as broiler
pans and baking racks should go along the
left-hand side. Load platters, pots and bowls
along the sides, in corners or in the back. The
soiled side of items should face the center of
the rack. If necessary, oversized glasses and
mugs can be placed in the lower rack to
maximize loading flexibility.
Also, be careful not to let a portion of an item
such as a pot or dish handle extend through
the bottom rack. This could block the wash
arm and cause poor washing results.
Fold-down tines (on some models) provide
flexibility for extra-large and hard-to-fit items.
The tines may be left in the up position or
folded down to customize the lower rack. Do
not load large bowls or pots facedown in the
front left-hand corner. Items loaded in this
manner could prevent proper operation of
the manual detergent cup.

Operating Instructions Safety InstructionsConsumer Support Troubleshooting Tips
16
Loading the dishwasher racks.
Extra Rack Features (on some models)
Cutlery Tray
The cutlery tray holds up to 4 large knifes
such as a carver, chef’s knives, bread knife,
etc., that are too tall to fit in the silverware
basket.
Hook the tray onto the rear of the upper rack.
Lay the knives between the guides
(as shown).
Bowl Tines
The special large-bowl tines in the lower rack
add flexibility to your loading pattern. They
are useful for serving bowls or other large
bowls.
To use the bowl tines, fold down the
2 rows of flex tines in front of the bowl
tines and load bowls just as you would
in the upper rack.
Loading place settings…
Follow these guidelines for loading 10 place settings. Features and appearance of racks and silverware baskets may
vary from your model.
NOTE:
Silverware should be individually loaded into the slots on the silverware basket lid.
Upper Rack—10 place settings Lower Rack—10 place settings
Follow these guidelines for loading 12 place settings. Features and appearance of racks and silverware baskets may
vary from your model. NOTE: Silverware should be individually loaded into the slots on the silverware basket lid.
Upper Rack—12 place settings Lower Rack—12 place settings
These tines fold down Large-bowl tines
NOTE: Do not place
large objects in the
front-left corner of
the lower rack.

Consumer SupportTroubleshooting TipsOperating InstructionsSafety Instructions
Caring for the dishwasher. GEAppliances.com
Cleaning the Exterior Door Panel
Before cleaning the front panel, make
sure you know what type of panel you have.
Refer to the last two letters of your model
number. You can locate your model number
on the left-hand tub wall just inside the door.
If your model number ends with BB, CC, WW,
SA or BG, then you have a Painted Door
panel. If your model number ends with SS,
then you have a Stainless Steel Door panel. If
your model number ends with CS, then you
have a CleanSteel panel.
Follow the instructions below for cleaning the
door panel for your specific model.
Painted Door Panel (model numbers ending
in BB–black, CC–bisque, WW–White, SA–silver
metallic or BG–graphite black)
Use a clean, soft, lightly dampened cloth,
then dry thoroughly. You may also use a
good appliance wax or polish.
Stainless Steel Door Panel (model numbers
ending in SS)
The stainless steel panels can be cleaned
with Stainless Steel Magic or a similar product
using a clean, soft cloth. Do not use appliance
wax, polish, bleach or products containing
chlorine on Stainless Steel doors.
You can order Stainless Steel Magic
#WX10X15 through GE Parts by calling
800.626.2002.
CleanSteel Door Panel (model numbers
ending in CS)
Use a clean, soft, lightly dampened cloth,
then dry thoroughly. Do not use appliance
wax, polish or any chemical agent on
CleanSteel doors.
Do not wipe the dishwasher with a soiled
dish cloth or wet towel. These may leave
a residue. Do not use scouring pads or
powdered cleaners because these products
can scratch the finish.
Cleaning the Control Panel
To clean the control panel, use a lightly
dampened cloth. Then dry thoroughly.
Check the air gap any time your
dishwasher isn’t draining well.
An air gap protects your dishwasher against
water backing up into it if a drain clogs. The
air gap is not a part of the dishwasher. It is
not covered by your warranty. Not all
plumbing codes require air gaps, so you may
not have one. If the air gap gets clogged, the
dishwasher will not drain. Clean the air gap
if the dishwasher will not drain.
The air gap is easy to clean.
Turn off the dishwasher and lift off the
cover.
Remove the plastic cap and clean with
a toothpick.
2
1
Air gap Does Your Dishwasher Have an Air Gap?
Stainless Steel Interior—Tub and Inner Door
The stainless steel used to make the
dishwasher tub and inner door provides
the highest reliability available in a GE
dishwasher. If the dishwasher tub or inner
door should be scratched or dented during
normal use, they will not rust or corrode.
These surface blemishes will not affect
their function or durability.
17
If your dishwasher is left in an unheated place
during the winter, ask a service technician to:
Cut off electrical power to the
dishwasher. Remove fuses or trip
circuit breaker.
Turn off the water supply and disconnect
the water inlet line from the water valve.
Drain water from the water inlet line
and water valve. (Use a pan to catch
the water.)
Reconnect the water inlet line to the
water valve.
4
3
2
1
Protect Against Freezing

Operating Instructions Safety InstructionsConsumer Support Troubleshooting Tips
Error Messages Possible Causes What To Do
Dishwasher BEEPS This is a reminder that your •Close and latch the door after opening it mid-cycle.
once every minute dishwasher door has been left
open during operation. It will
continue beeping until you close
the door.
Beeping at the end This is normal. The dishwasher •To turn off the double beep indicator (or re-activate it if it was previously
of the cycle will beep twice at the end of the turned off), press the HEATED DRY pad 5 times within 3 seconds.
cycle A triple beep will sound to indicate the end-of-cycle beep option
has been turned on or off.
Dishes and flatware Low inlet water temperature •Make sure inlet water temperature is correct (see page 10). Turn on the hot
not clean water faucet nearest the dishwasher, let run until the water temperature
stops rising. Then start the dishwasher and turn off the faucet. This insures
the entering water is hot.
Water pressure is temporarily low •Turn on a faucet. Is water coming out more slowly than usual? If so, wait
until pressure is normal before using your dishwasher.
Air gap or disposer is clogged •Clean the air gap or flush the disposer.
Improper rack loading •Make sure large dishware does not block the detergent dispenser or the
wash arms. See the Loading the dishwasher racks section.
No air gap or high drain loop •Verify that you have an air gap or a high drain loop. Refer to the
Installation Instructions.
Poor performing detergent •Use a highly rated detergent such as Cascade ® Complete.
Spots and filming Extremely hard water •Use rinse agents such as Cascade® Rinse Aid™ to remove spots
on glasses and flatware and prevent new film buildup.
Low inlet water temperature •Make sure water temperature is at least 120°F.
Overloading or improper •Load dishwasher as shown in the Loading Place Settings section.
loading of the dishwasher
Old or damp powder detergent •Make sure detergent is fresh.
Rinse agent dispenser empty •If water is extremely hard, a softener may be required.
Too little or low performing •Make sure you use the proper amount of highly rated detergent.
detergent
Cloudiness on Combination of soft water and •This is called etching and is permanent. To prevent this from happening,
glassware too much detergent use less detergent if you have soft water. Wash glassware in the shortest
cycle that will get it clean.
Low performing phosphate •See White film on inside surface page 20
free detergent
Water temperature entering the • This could be etching. Lower the water heater temperature.
dishwasher exceeds 150°F (66°C)
Before you call for service…
Troubleshooting Tips
Save time and money! Review the charts on the following pages,
or visit GEAppliances.com. You may not need to call for service.
18

Problem Possible Causes What To Do
Suds in the tub Correct detergent • Use only automatic dishwasher detergents to avoid sudsing.
wasn’t used Cascade®Automatic Dishwashing Detergents have been approved
for use in all GE dishwashers.
•To remove suds from the tub, open the dishwasher and let
suds dissipate. Close and latch the dishwasher door. Pump out water
by touching the START/RESET button once; then 30 seconds later,
touch the START/RESET button again. Repeat if necessary.
Rinse agent was spilled • Always wipe up rinse agent spills immediately.
Detergent left in Dishes are blocking the • Reposition the dishes, so the water from the lower spray arm can
dispenser cups detergent cup flush the detergent cup. See pages 15 and 16.
Black or gray Aluminum utensils have • Remove marks with a mild, abrasive cleaner.
marks on dishes rubbed against dishes
Dishes don’t dry Low inlet water temperature • Make sure inlet water temperature is at least 120°F.
•Select HEATED DRY.
•Use ADDED HEAT options.
•Select a higher cycle, such as SANI WASH/SANITIZE or DEEP CLEAN.
Rinse agent dispenser is empty • Check the rinse agent dispenser and fill as required.
Control panel responded Door latch may not be properly • Make sure the door is firmly closed.
to inputs but dishwasher seated
never filled with water
Water valve may be turned off • Make sure water valve (usually located under the sink) is turned on.
Stained tub interior Some tomato-based foods can • Use of the RINSE AND HOLD cycle after adding the dish to the load
cause reddish stains can decrease the level of staining.
Tea or coffee stains • Remove the stain by hand, using a solution of 1/2 cup bleach
and 3 cups warm water.
WARNING
Before cleaning interior, wait at least 20 minutes after a cycle for the
heating elements to cool down. Failure to do so can result in burns.
ADVERTENCIA
Antes de limpiar el interior, espere por lo menos 20 minutos después
de un ciclo para que los elementos calentadores se enfríen. No hacerlo
puede provocar quemaduras.
An overall yellow or brown film can • A special filter in the water supply line is the only way to correct
be caused by iron deposits in water this problem. Contact a water softener company.
Dishwasher won’t run Dishwasher door is not closed • Dishwasher door must be closed and latched for dishwasher to operate.
and latched
Fuse is blown or circuit breaker • Replace fuse or reset circuit breaker. Remove any other appliances from
the circuit.
Power is turned off • In some installations, the power to the dishwasher is provided through a
wall switch, often located next to the disposer switch. Make sure it is on.
Control panel is locked • Unlock control panel. See page 8.
Reboot your control • Turn off power to the dishwasher (circuit breaker or wall switch) for
30 seconds; then turn back on.
19
Consumer SupportTroubleshooting TipsOperating InstructionsSafety Instructions
GEAppliances.com

Operating Instructions Safety InstructionsConsumer Support Troubleshooting Tips
20
Before you call for service…
Problem Possible Causes What To Do
Control panel lights Time too long between • Each button must be touched within 5 minutes of the others.
go off when you’re touching of selected buttons To relight, touch any button again, or unlock and relatch door.
setting controls
Water standing in This is normal • A small amount of clean water around the outlet on the tub
the bottom of the tub bottom at the back of the tub keeps the pump seal lubricated.
Water won’t pump Drain is clogged • If you have an air gap, clean it. See page 17.
out of the tub •If the dishwasher drains into a disposer, run disposer clear.
•Check to see if your kitchen sink is draining well. If not, you
may need a plumber.
Steam This is normal • Warm, moist air comes through the vent by the door latch during drying
and when water is being pumped out (front-control models). This is normal
and necessary for drying.
Sanitized light does The door was opened and the • Do not interrupt the cycle anytime during or after main wash.
not illuminate at the cycle was interrupted during
end of the cycle or after the main wash portion
The incoming water • Raise the water heater temperature to between 120°F and 140°F.
temperature was too low
The cycle is complete and • This is normal. No action is required.
the door has been open for
longer than 60 seconds
Noise Normal operating sounds • These are all normal. No action is required.
Detergent cup opening
Water entering dishwasher
The motor stops and starts at
various times during the cycle
Drain pump sounds during
pump out
Rattling dishes when the spray • Make sure dishes are properly loaded. See the Loading the
arm rotates dishwasher racks section.
A white film on This problem caused by • To remove the white film, run your dishes through a dishwasher cycle with
glassware, dishware phosphate-free dishwasher citric acid. You may purchase a citric acid kit from GE by calling 1-800-626-2002
and the interior detergent and asking for WD35X151. Alternatively, you can purchase citric acid
crystals from your local supermarket.
Pour the citric acid in the detergent cup and close the cover. Place the
filmed but otherwise clean glassware and dishware in the dishwasher.
Leave silverware and other metal items out of the dishwasher. Turn the
dishwasher on and let it run through a complete cycle without detergent.
The glassware, dishware, and dishwasher should come out film free.
Alternatively,a vinegar rinse may be used. Pour 1 cup of vinegar into
dishwasher just after the detergent cup opens and let the dishwasher
complete its cycle. This may be repeated several times a year as needed
The use of a rinse agent such as Cascade® Rinse Aid™ may help minimize
a repeat build up of film. Also, the use of a highly rated detergent such as
Cascade® Complete Action Pads will help prevent film build-up.
Troubleshooting Tips
Other manuals for Cafe CDWT280VSS
3
This manual suits for next models
40
Table of contents
Languages:
Other GE Dishwasher manuals