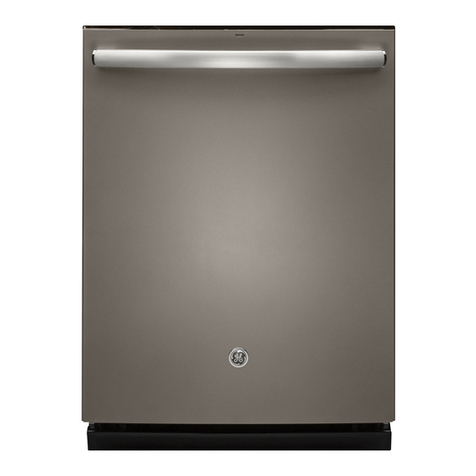
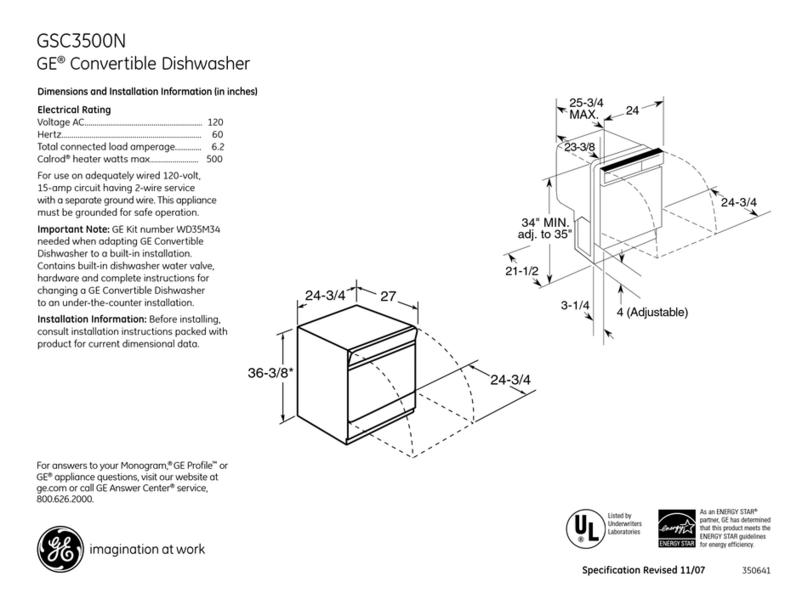
GE GLC4000 Series User manual

0GEAppliances.com
I,..
Safety Instructions ....... 2-5
Operating Instructions
Care and Cleaning ............. 15
Control Panel and Settings .... 8-9
Loading Place Settings ........ 14
Loading the Racks ............. 15
Unicouple ..................... 10
Using the Dishwasher ...... 22, 22
Troubleshooting Tips .. 16,17
Consumer Support
Consumer Support .............. 20
Warrantg ..................... 19
GLC4000 Series
0_ Write the model and serial
numbers here:
Model #
Serial #
Youcan find them on the tub wall
just inside the door. _9-sso6so_/oi/ioGE

IMPORTANTSAFETYINFORMATION.READALL INSTRUCTIONSBEFORE
USING--SAVE THESEINSTRUCTIONS
WARNING! For your safety, the information in this manual must be followed to minimize the risk
of fire or explosion, electric shock, and to prevent property damage, personal injury,
or death.
n^iADVERTENCIA! °ro.u.ogu,,°,.,oh.umUir.con lainformacibndeeste manuala
fin de minimizar el riesgo de incendio o explosibn, descarga el_ctrica y
para prevenir dafios a la propiedad, lesiones personales o la muerte.
WARNING! WATERHEATERSAFETY
Under certain conditions, hydrogen gas may be produced in a water heater that has not been used for two
weeks or more. HYDROGEN GAS IS EXPLOSIVE.
Ifthe hot water has not been used for two weeks or more, prevent the possibilitg of damage or injurg
bg turning on all hot water faucets and allow them to run for several minutes. Do this before using ang electrical
appliance which is connected to the hot water sgstem. This simple procedure willallow ang built-up hgdrogen gas
to escape. Since the gas is flammable, do not smoke or use an open flame or appliance during this process.
SEGURIDAD DEL
iADVERTENCIA! CALENTADOR DE AGUA
Bajo ciertas condiciones, puede producirse gas de hidr6geno en un sistema de agua caliente que no se ha
usado durante dos semanas o mds. EL GAS DE HIDROGENO ES EXPLOSIVO.
%
Siel agua caliente no seha utilizado par dossemanas o mbs,evite la posibilidad deda_os o lesionesabriendo
todos losgrifos de agua caliente g dejbndoloscarter durante varios minutos. Hagaesto antes de utilizar cualquier
aparato elbctrico que seencuentre conectado al sistema de agua caliente. Estesimple procedimiento permitir6
que selibere cualquier clasede acumulaci6n de gas de hidr6geno. Yaque el gas esinflamable, no fume o utilice
una llama abierta o un aparato durante este proceso.
PROPER INSTALLATION AND MAINTENANCE
This dishwasher must be properly installed and located in accordance with the Installation
Instructions before it is used. If you did not receive an Installation Instructions sheet with
your dishwasher, you can receive one by visiting our website at GEAppliances.com.
I Connect to a grounded metal, permanent wiring
sgstem; or run an equipment-grounding conductor
with the circuit conductors and connect to the
equipment-grounding terminal
or lead of the appliance.
I Improper connection of the equipment-grounding
conductor can result in a risk of electricshock. Check
with a qualified electrician or service representative if
gou are in doubt whether the appliance isproperlg
grounded.
I Disposeof discarded appliances and shipping
or packing material properlg.
Ill Donot attempt to repair or replace ang part
of gour dishwasher unlessit isspecificallg
recommended inthis manual. All other servicing
should be referred to a qualified technician.
I Tominimize the possibilitg of electric shock,
disconnect this appliance from the power supplg
before attempting ang maintenance.
NOTE:Turningthe dishwasher off doesnot disconnect
the appliancefrom the power supply.We recommend
having a qualified technicianserviceyour appliance.
CAUTION: Topreventminorinjuryorpropertydamage
I Usinga detergent that isnot
specificallg designedfor
dishwashers will cause the
dishwasher to fill with suds.
I If gour dishwasher is
connected to a wall switch, ensure that
the switch ison prior to use.
I Non-Dishware Items: Donot wash items
such aselectronic air cleanerfilters,
furnace filters and paint brushes in gour
dishwasher. Damage to dishwasher and
discoloration or staining of dishwasher
mag result.
I Closesupervisionis necessargifthis appliance
is usedbg or near children.
I Load light, plastic items so theg will not become
dislodged and drop to the bottom
of the dishwasher-theg might come into contact
with the heating element and be damaged.
J
APRECAUCION: GEAppliances.com
Para evitar lesiones menores y daSos a la propiedad
I Utilizarun detergente no
dise_ado espedficamente
par(] lavaplatos provocar(_
que el aparato seIlenede
espuma.
I Si su lavaplatos se encuentra conectado
a un interruptor de pored, verifique que
el interruptor se encuentre encendido
antes del uso.
I Elementosno aptos para lavaplatos: No
lave elementos como filtros de limpiadores de aire
electr6nicos,filtros de hornos g pincelesde pintura
en su lavaplatos. Puedenproducirse dahos en el
lavaplatos g decoloraci6n o manchas en el aparato.
I Serequiere una supervisi6nestricta sieste aparato
es utilizado por nihoso en su cercan[a.
I Cargue elementos livianos g pl6sticos de modo
que no se desplacen g caigan al fondo del
lavaplatos, ga que pueden entrar en contacto con
el elemento calentador g da_arse..
CAUTION:
For personal safety:
DO NOT USEAN EXTENSION CORD OR AN ADAPTER PLUG WITH THIS APPLIANCE.
DO NOT, UNDER ANY CIRCUMSTANCES,CUT OR REMOVE THE THIRD GROUNDING PRONG FROM THE POWER CORD.
GROUNDING INSTRUCTIONS--This appliance must be grounded. In the event of a malfunction or breakdown,
grounding will reduce the risk of electric shock by providing a path of least resistance for electric current. This
dishwasher is equipped with a cord having a grounding conductor and a grounding plug. The plug must be
plugged into an appropriate outlet that
is installed and grounded in accordance with the NATIONAL ELECTRICAL CODE, ANSI/NPFA NO. 70.
J
PRECAUCION:
Para seguridad personal:
NO UTILICE UN CABLE DEEXTENSION 0 UN ENCHUFE ADAPTADOR CON ESTEAPARATO.
BAJO NINGUNA CIRCUNSTANCIA CORTE0 QUITE LA TERCERACLAVUA DE CONEXION A TIERRA DEL CABLE DE
ENERG[A.
INSTRUCCIONES DE CONEXION A TIERRA--Este aparato debe contar con una conexi6n a tierra. En caso de mal
funcionamiento oaveria, la conexi6n a tierra reduce el riesgo de una descarga el_ctrica brindando un camino de
resistencia menor para la corriente el_ctrica. Este lavaplatos se encuentra equipado con un cable el_ctrico que
contiene un cable de conexi6n a tierra con un enchufe de conexi6n a tierra. El enchufe debe conectarse a un
tomacorriente apropiado que se haya instalado y que cuente con conexi6n a tierra de acuerdo con el CODIGO
ELECTRICONACIONAL, ANSI/NPFA NO. 70.
.4,WARNING!
Improper connection of the equipment/grounding conductor can result in arisk of electric shock. Check with a
qualified electrician or serviceman if you are in doubt as to whether the dishwasher is properly grounded. Do not
modify the plug provided with the appliance; if it will not fit the outlet, have a proper outlet installed by a qualified
electrician.
aiADVERTENClA!
cone×i6n inadecuada del equipamiento/conductor de conexi6n a tierra puede provocar un riesgo de
descarga el_ctrica. Consulte a un electricista o t_cnico calificado si no sabe si el lavaplatos tiene una adecuada
cone×ion a tierra. No modifique el enchufe provisto con este aparato; si no entra en el tomacorriente, solicite a un
electricista calificado que instale un tomacorriente adecuado.

IMPORTANTSAFETYINFORMATION.READALL INSTRUCTIONSBEFORE
USING--SAVE THESEINSTRUCTIONS
ELECTRICALREQUIREMENTS
I Thisappliance must be supplied with 120V,60 Hz,and
connected to an individual,
properlg grounded branch circuit,
protected bg a 15 or20 amp
circuit breakeror time-delag fuse.
it Ifthe electric supplg provided does -i!1__
not meet the above specifications,
it isrecommended that a licensed
electrician install an approved Ensureproperroundexists
beforeuse.
outlet.
I Yourdishwasher circuit should not be usedfor ang other
appliance while the dishwasher isin operation asthe
dishwasher requiresthe fullcapacitg of the circuit.
I Ifthe wall receptacle gou plug the dishwasher's power cord into
iscontrolled bg a switch, turn on the switch.
_k WARNING! RISK OF CHILD ENTRAPMENT
PROPER DISPOSAL OF THE DISHWASHER
Junked or abandoned dishwashers are dangerous...even if
theg will sit for "just a
few dags." If gou are getting rid of gour old dishwasher, please
follow the instructions
below to help prevent accidents.
Before You Throw Away Your Old Dishwasher:
I Take off the door of the washing compartment or remove
the door latch keeper (as shown).
Doorlatchkeeper
_iLiADVERTENCIA! RIESGO DE ENCIERRO PARA NI_IOS
ELIHINACION CORRECTA DEL LAVAPLATOS
Un lavaplatos desechado o abandonado resulta
peligroso...a6n siquedar@ en un lugar por %61ounos dias". Si
va a desechar su viejo lavaplatos, siga las siguientes
instrucciones para prevenir accidentes
Antes de desechar su viejo lavaplatos:
I Quite la puerta del compartimento de lavado o saque la
traba de la puerta (como puede verse).
Trabadelapuerta

GEAp_pliances.com
WARNING! When using your dishwasher, follow basic precautions, including
the following:
[] Usethis appliance only for its intended purpose
asdescribed inthis Owner's Manual.
I Useonly powder,tabs, liquid detergents or rinse
agents recommended for usein a dishwasher and
keepthem out of the reach of children. Cascade®and
Cascade®Complete Automatic Dishwashing
Detergents,and CascadeCrystal Cleare rinseagent
have been approved for usein all GEdishwashers.
I Locate sharp items so that they are not likely
to damage the door seal.
I Load sharp kniveswith the handlesup to reduce the
riskof cut-type injuries.
I Do notwash plastic items unlessmarked dishwasher
safe or the equivalent. Forplastic
items not so marked, checkthe manufacturer's
recommendations.
BDo nottouch the heating element during or
immediately after use.
I Do not operate your dishwasher unlessall enclosure
panelsare properly in place.
[] Do not tamper with controls.
[] Do not abuse,sit on or stand on the door or dish rack
of the dishwasher.
[] Do not allow children to play around dishwasher when
opening or closing door due to the possibility of small
fingers being pinched in door.
[] Do not discard a dishwasher without first removing
the door of the washing compartment.
[] Do not store or usecombustible materials, gasolineor
other flammable vapors and liquids inthe vicinity of
this or any other appliance.
[] Do not allow children to play with, on or insidethis
appliance or any discarded appliance.
-4,iADVERTENCIA! cuon ou,,,u,ovouo o ,precauciones b6sicas de
seguridad, incluyendo las siguientes:
[] Useeste aparato s61ocon el objetivo para el que rue
creado, como sedescribe en este iqanual del
Propietario..
[] Utilices61odetergentes en polvo,liquido o tabletas o
agentes de enjuague recomendados para uso en
lavaplatos y mant6ngalos alejados del alcance de los
ni_os. Losdetergentes para lavaplatos autom@ticos
Cascade@g Cascade@Complete, g el agente de
enjuague Cascade Crystal Clear@han sido
aprobados para el uso en todos los lavaplatos GE.
[] Ubique loselementosfilosos de modo que no dahen el
selladode la puerta.
[] Carguecuchillosfilosos con los mangos hacia arriba
para reducir el riesgode un corte,
[] No laveelementos pl(_sticosa menos que est6n
marcados como aptos para lavaplatos o equivalente.
Enel caso de elementos pl@sticosque no est6n
marcados asi,verifique lasrecomendaciones del
fabricante.
[] Notoque el elemento calentador durante el usoo
inmediatamente despu6s de finalizar el uso.
[] No haga funcionar el lavaplatos a menos que todos
lospanelesdel recinto seencuentren en su lugar.
[] No altere o modifique loscontroles.
[] No maltrate, ni sesiente o separe sobre la puerta o
bandejas de los platos del lavaplatos.
[] No permita que losnihosjueguen alrededor del
lavaplatos cuando abra o cierre la puerta debido a la
posibilidad de pellizcar sus deditos con la puerta.
[] No desecheel lavaplatos sinantes quitar la puerta del
compartimento de lavado o la traba de la puerta.
[] No almacene o use materiales combustibles, gasolina
u otros vapores o I[quidosinflamables cerca de este o
cualquier otto aparato.
[] No permita que losni_osjueguen sobre,con o dentro
de este o cualquier otto aparato descartado.
READ AND FOLLOW THIS SAFETY INFORMATION CAREFULLY.
SAVE THESE INSTRUCTIONS

About the dishwasher control panel.
For use with GLC4100 Series
You can locate your model number on the tub wall just inside the door. Throughout this manua!, features and
appearance may vary from your mode!.
__ Cycles
® ®
O"SE]_]C')_ ]
ONLY LIGHT 0
WASH NORMAL HEAVY
WASH VVASH
_Options
......,2..........
_S-TA RT DELAY
o
Q
• ] [;o,]
_G"o.....
HEATED ASH
DRY B
g
CLEAN
Control Settings
BStatus Indicutor Lights
The Status indicator lights tell you what's happening while the dishwasher is in operation. The lights
willcome ON indicating the sequence of operation the dishwasher is in.
CLEAN Displaged when a wash cgcle is complete. The light stags ON as a reminder that
the dishes are clean until the door is opened or until another cgcle is selected.
mCycles
The light above the selected pad willbe ON to indicate which cycle has been selected.
HEAVVWASH 8.5 gal., 89 min.
This cgcle is meant for heavilg soiled dishes or cookware with dried-on or baked-
on soils. EvergdaUdishes are safe to be used in this cgcle.
NORMALWASH 5.9 gal., 56 min.
This cgcle isfor medium/heavilg soiled dishes and glassware.
LIGHTWASH 6.1 gal., 36 min.
This cgcle isfor evergdag dishes and glassware.
CHINA CRYSTAL6.1 gal., 39 min.
This cgcle isfor lightlg soiled china and crustal.
RINSEONLY 1.2 gal., 6 min.
For rinsing partial loads that will be washed later. Do not use detergent with
this cgcle.

About the dishwasher control and. GEAppliances.com
Options
Thelight above the selected pad will be ON to indicate which OPTIONhas been selected.
HOT START For use with heavilg soiled and/or dried-on, baked-on soils.This option MUST be
(on some selected PRIORto starting the cgcle. This option will improve both wash and dry
models) performance. This option adds 20 minutes to the cycle time.
NOTE:Cannot be selected with RINSEONLYcgcle.
HEATEDDRY Shuts off the drging heat option. Dishesair drg naturallg and energg is saved.
Light OFF For faster air drg gou can prop the door open after the CLEAN light illuminates.
HEATEDDRY Turns the heater on for faster drging. Thiswill extend the total run time by :38minutes.
Light ON NOTE:Cannot be selected with RINSEONLYcgcle.
LOCK
(on some
models)
You can lock the controls to prevent any selections from being made. Oryou can lock
the controls after you have started a cycle.
Children cannot accidentally start dishwasher by touching pads with this option
selected.
ToLOCKthedishwashercontrol,touchandholdtheHEATEDDRYpadfor3 seconds.Thelightleftof
theHEATEDDRYpadwillturnon.ToUNLOCKthe dishwashercontrol,touch andholdtheHEATED
DRYpadfor3 seconds.TheLOCKlightwillturnoff.
HOTWASH When selected, the cgcle will run longer with the heating element on to improve both
wash and drg performance. NOTE:Cannot be selected with RINSEONLYcgcle.
DELAYHOURS You can delaUthe start of a wash cgcle for 2, 4 or 8 hours (delaUtime options maU
varg bg model). Touch the DELAYHOURSpad to choose the number of hours Uouwant
to delaUthe start of the cgcle; then touch START/RESETone time. The dishwasher will
count down and start automaticall Uat the correct time. Touching START/RESETa
second time will cancel the DELAYHOURSselection.
RESET Tochange a cgcle after washing starts, touch the START/RESETpad to cancel the
cgcle. The CYCLElight will flash while the water is pumped out if needed. This takes
approximatelg 2 minutes. When the light stops flashing, the dishwasher can be
reprogrammed and restarted.
Start
Close and latch the dishwasher door and select the cycle and desired enhancements. Touch the
START/RESETpad once to begin the cgcle. Water begins to fill the dishwasher, and approximatelg 60
seconds later the wash action begins. Touching the START/RESETpad a second time will cancel the
cgcle and cause the water to drain out. This will take approximatelg 2 minutes.
NOTE:When the dishwasher door isfullg closed, the control panel lights will displag the last settings
gou selected.
If gou don't want to change ang of the settings, simplg touch the START/RESETpad once to begin
the cgcle.
If the door is closed, the indicator lights will turn off if the START/RESETpad isnot pressed within two
minutes. To activate the displag, open and close the door or touch ang pad.
Also, if a power failure occurs or the unit is first plugged into the wall, NORMALand HEATEDDRYwill
automaticallg be programmed.

About the dishwasher control panel.
For use with GLC4400 Series
T
You can locate your model number on the tub wall just inside the door. Throughout this manual, features and
appearance may vary from your mode!.
/u \ /u/
Sonitized Cleon
_ Cgcles_ _ • Options®
Control Settings
gStatus Indicator Lights
The Status indicator lights tell gou what's happening while the dishwasher is in operation. The lights
willcome ON indicating the sequence of operation the dishwasher is in.
SANITIZED
CLEAN
Disploged when cgcle has met sonitizotion conditions. Light remains ON until
door is opened.
Disploged when a wash cgcle is complete. The light stags ON as a reminder that
the dishes ore cleon until the door is opened or until another cgcle is selected.
1tCycles
The light above the selected pad will be ON to indicate which cycle has been selected.
SANI WASH 7.3 gal., 97 rain.
This cgcle raises the water temperature in the final rinse to sanitize gour
dishware.
The cgcle length will varg depending on the temperature of gour inlet water.
NOTE:The SANI-WASH cgcle is monitored for sanitization requirements. Ifthe
cgcle is interrupted during or after the main wash portion or if the incoming water
temperature is so low that adequate water heating cannot be achieved, the
sanitizing conditions mag not be met. In these cases, the sanitized light will not
illuminate at the end of the cgcle.
NOTE: NSF certified residential dishwashers are not intended for licensed food
establishments.
NORHALWASH 5.9 gal., 56 min.
This cgcle is for medium/heavilg soiled dishes and glassware.
LIGHTWASH 6.1 gal., 36 min.
This cgcle is for evergdag dishes and glassware.
RINSEONLY 1.2 gal., 6 min.
For rinsing partial loads that will be washed later. Do not use detergent with
this cgcle.
NOTE:OnlUthe SANI-WASH cgcle has been designed to meet the requirements of Section 6,
NSF184 for soil removal and sanitization efficac U.

About the dishwasher control panel. GEAppliances.com
Options
Thelight above the selected pad will be ON to indicate which OPTIONhas been selected.
STEAH For use with heavilg soiled and/or dried-on, baked-on soils.This option NUST be
selected PRIORto starting the cgcle. This option will improve both wash and dry
performance. This option adds 20 minutes to the cycle time.
NOTE:Cannot be selected with RINSEONLYcgcle.
HEATEDDRY Shuts off the drging heat option. Dishes air drg naturallg and energu is saved.
Light OFF Forfaster air drg gou can prop the door open after the CLEAN light illuminates.
HEATEDDRY Turns the heater on for faster drging. This will extend the total run time bg 38 minutes.
Light ON NOTE:Cannot be selected with RINSEONLYcgcle.
LOCK You can lock the controls to prevent any selections from being made. Oryou can lock
the controls after you have started a cycle.
Children cannot accidentally start dishwasher by touching pads with this option
selected.
ToLOCKthe dishwashercontrol,touchand holdtheHEATEDDRYpadfor3seconds.Thelightleftof
theHEATEDDRYpadwillturnon.ToUNLOCKthedishwashercontrol,touchandholdtheHEATED
DRYpadfor Sseconds.TheLOCKlightwillturnoff.
ADDED HEAT When selected, the cgcle will run longer with the heating element on to improve both
wash and drg performance. NOTE:Cannot be selected with RINSEONLYcgcle.
DELAYHOURS You can delau the start of a wash cgcle for 2, 4 or 8 hours (delag time options mag
varg bg model). Touch the DELAYHOURSpad to choose the number of hours gou want
to delag the start of the cgcle; then touch START/RESETone time. The dishwasher will
count down and start automaticallg at the correct time. Touching START/RESETa
second time will cancel the DELAYHOURSselection.
RESET To change a cgcle after washing starts, touch the START/RESETpad to cancel the
cgcle. The CYCLElight will flash while the water is pumped out if needed. This takes
approximatelg 2 minutes. When the light stops flashing, the dishwasher can be
reprogrammed and restarted.)
Start
Close and latch the dishwasher door and select the cucle and desired enhancements. Touch the
START/RESETpad once to begin the cgcle. Water begins to fill the dishwasher, and approximatelg 60
seconds later the wash action begins. Touching the START/RESETpad a second time will cancel the
cgcle and cause the water to drain out. This will take approximatelg 2 minutes.
NOTE:The dishwasher remembers gour last cgcle so gou don't have to reprogram each time. When
the dishwasher door is fullg closed, the control panel lights will displag the last settings gou selected.
If gou don't want to change ang of the settings, simplg touch the START/RESETpad once to begin
the cgcle.
If the door is closed, the indicator lights will turn off if the START/RESETpad is not pressed within two
minutes. To activate the displau, open and close the door or touch ang pad.
Also, if a power failure occurs, NORMAL and HEATEDDRYwill automaticallg be programmed.

About the unicoupleo
@
Before Operating the Dishwasher the First Time
Attach the faucet adapter. Thespecialfaucet adapter supplied with gour dishwasher must be assembled
to the sinkfaucet before gou can use gour dishwasher.
Thefaucet adapter isdesignedto fit standard spouts having internal or external threads. Youwill find the
adapter and two washersin the faucet adapter packetinyour dishwasher.
Toinstallfaucet adapter,first remove the old aerator or trim ring on gour faucet spout.
If faucet has external threads: Insertthe thinner of the two washers into the faucet adapter and attach it to
the faucet spout.
Tighten with pliers.
If faucet has internal threads: Insertboth ofthe washers into the faucet adapter and attach it to the faucet
spout.
Tighten with pliers.
Ifthe faucet adapter threads do not match gout faucet spout, gour local hardware or plumbing supplg
store normallg hasadditional fittings to adapt gout faucet spout to the specialfaucet adapter.
NOTE:A sinkspray attachment hosecan burst ifit isinstalled on the same sink with your dishwasher.We
suggestthat you disconnectthe sinkspray attachment ifyour sink hasone and plug the hole.
Pressure
release
button
::'1%"-_
10
How to Connect the Unicouple
rl1 Runthe hot water faucet to cold water from
purge
the hot water line.Thehot water must be between
120°Fand 150%for best wash performance.
r2-] Pullunicouple and its hoses completely out from
storage compartment located at rear of
dishwasher.
B]Attach the Unicouple connector to the faucet
adapter by depressingthe collar at the top ofthe
connector. When Unicouple isall the way up onto
the adapter, releasethe collar. It will then snap into
position to lock the Unicouple in place. B1
B1
The Unicouple'ssmall hosecarries water from the
faucet to the dishwasher. Itslarge hosecarries
drain water to the sink. Besure Unicoupleis
pointing toward the sink bowl drain opening and
the sinkdrain is open for water that will drain from
your dishwasher.
If your dishwasher drains into a disposer,operate
the disposer until it iscompletely empty before
starting the dishwasher.
Turn hot water fully on before starting the
dishwasher.
Plugthe dishwasher power cord intothe outlet.
How to Disconnect the Dishwasher
r_ Unplug the dishwasher.
P1Push the cord back into its storage location.
r_Turn offthe hot water.
Releasethe water pressure by depressing the
pressure releasebutton.
@
@
Releasethe Unicouplefrom the faucet
bg depressingthe collar at the top ofthe
Unicouple connector.
Drain excesswater from the unicouple hoses
(seebelow).Pushthe hosesback into their
storage location.
CAUTION: Toprotect yourself and
the room from severesplashing,relievewater
pressureprior to disconnecting the unicouple.
J
PRECAUCION: Paraprotegerse
a usted y a la habitaci6n de salpicadurasfuertes,
alivie la presi6n del agua antes de desconectar el
unicople.
How to Drain Excess Water From Unicouple Hoses
Ifthe sink is34" or higher from the floor,the excesswater in Unicouple hosescannot be drained directlg into
the sink.Itwill be necessargto drain excesswater from hoses into a bowl or suitable container that isheld
outside and lowerthan the sink.

Using the dishwasher. GEAppliances.com
Check the Water Temperature
The entering water should be at least 120°F
and not more than 150°F,for effective cleaning
and to prevent dish damage. Check the water
temperature with a candg or meat
thermometer. Turn on the hot water faucet
nearest the dishwasher, place the thermometer
in a glass and let the water run continuouslg
into the
glass until the temperature stops rising.
Use Cascade Crystal Clear®RinseAgent
Cascade Crystal Clear®rinse agent removes spots and prevent new film buildup on gout dishes,
glasses, flatware, cookware and plastic.
Filling the Dispenser
The rinse agent dispenser holds 100 ml (3.5ft. oz.)of rinse agent.
Under normal conditions, this will last approximatelg one month.
Trg to keep it full, but do not overfill.
r_ Make sure the dishwasher door is fullg open.
[_1 Turn the dispenser cap to the left and lift it out.
r_Add rinse agent until the indicator window looks full.
[_ Clean up ang spilled rinse agent with a damp cloth.
r_l Replace the dispenser cap.
Rinse Aid Setting
The amount of rinse agent released into the final wash can be
adjusted. The factorg setting is at the midpoint. If there are rings
of calcium (hard water) spots on dishes, trg a higher setting. If gou
see foam in the dishwasher, move the indicator to a lower setting.
Rinse
agent
uster
To adjust the setting Le._
Remove the dispenser cap; then turn the adjuster counterclockwise
to increase the amount of rinse agent, clockwise to reduce the amount of rinse agent.
/lore
Dish Preparation Prior to Loading
[] No pre-rinsing of normal food soil is required.
[] Scrape off hard soils, including bones,
toothpicks, skins and seeds.
[] Remove large quantities of ang remaining
food.
[] Remove leafg vegetables, meat trimmings
and excessive amounts of grease or oil.
[] Remove acidic food soils that can discolor
stainless steel.
11

Pro ent
Use onlg detergent specificallg made for use
in dishwashers. Cascade® Automatic
Dishwashing Detergents have been approved for
use in all GEdishwashers. Keep gour detergent
fresh and drg. Don't put powder detergent into
the dispenser until gou're readg
to wash dishes.
The amount of detergent to use depends on
whether gour water is hard or soft. With hard
water, gou need extra detergent. With soft water,
gou need less detergent.
Protect gour dishes and dishwasher bg
contacting gour water department and asking
how hard gour water is. Twelve or more grains
is extremelg hard water. A water softener is
recommended. Without it, lime can build up
in the water valve, which could stick while open
and cause flooding. Too much detergent with
soft water can cause a permanent cloudiness
of glassware, called etching.
Usethe information in the table below as a
guideline to determine the amount of automatic
dishwasher detergent to place in the dispenser.
Number
of Grains Detergent Cups to Fill
Lessthan/4 Fillcup to first line
/4to 8 Fillcup to second line
8 to !2 Fillmainwash cup
Greater Fillboth MainWash and
than 12 PreWash cup
Soft MediumSoft MediumHard ExtremelyHard
For heavily-soiled loads, use the Pots and Pans or
Heavy Wash cycle and add a little extra detergent.
DO NOT USE HAND DISH DETERGENT
m
m
NOTE:Usinga detergent that is not specifically
designedfor dishwashers wilt causethe dishwasher
to fill with suds.Duringoperation, thesesudswilt spill
out of the dishwashervents,covering thekitchen
floor and making the floor wet.
Becauseso mang detergent containers lookalike
store the dishwasherdetergent in a separate space
from all other cleaners.Show angone who mag use
the dishwasher the correct detergent and where
it is stored.
Whilethere will be no lasting damage to the
dishwasher,gour disheswill not get clean using a
dishwashing detergent that isnot formulated to
work with dishwashers.
Forget to Add a Dish?
A forgotten dish can be added any time before
the main wash.
r_ Squeeze the door latch to release the door.
r_-i Donot open the door until the water sprag
action stops. Steam mag rise out of the
dishwasher.
r_Add forgotten dishes.
F] Close the door.
12

Loading the dishwasher racks. GEAppliances.com
For best dishwashing results, follow these loading guidelines. Features and appearance of racks and silverware
baskets may vary from your model.
Upper Rack
Althoughtheupperrackisforglasses,cupsand
saucers,potsand panscanbeplacedinthisrack
foreffectivecleaning.Cupsandglassesfit best
alongthesides.Thisisalsoasecureplacefor
dishwasher-safeplastics.
Theutilityshelf(onsomemodels)may beplacedin
theupor downpositiontoaddflexibility.Awine
glassholder(onsomemodels)secureswine
glassesfor bestwashability.Becausewineglasses
comeinvarioussizes,after loading,slowlypush
intherackto makesuretheywillclearthetopof
thedishwasher.
Theupperrackisgoodforallkindsof odd-shaped
utensils.Saucepans,mixingbowlsandotheritems
shouldbeplacedfacedown.Fold-downtines(on
somemodels)provideflexibilityforextra-largeand
hard-to-fititems.
Securelargerdishwasher-safeplasticsover2tines
whenpossible.
Makesuresmallplasticitemsaresecuresothey
can'tfallontotheheater.
Besurethat itemsdonotprotrudethrough
thebottomoftherackandblockrotationofthe
middlesprayarm.Thiscouldresultinpoorwash
performanceforitemsintheupperrack.
Check to make
sure that no items
will block rotation
of the wash arms.
Lower Rack
Thelowerrackisbestusedfor plates,saucersand
cookware.Largeitemssuchasbroilerpansand
bakingracksshouldgoalongtheleft-handside.
Loadplatters,potsand bowlsalongthesides,in
cornersor intheback.Thesoiledsideofitems
shouldfacethecenteroftherack.ifnecessary,
oversizedglassesandmugscanbeplacedinthe
lowerrackto maximizeloadingflexibility.
Also,becarefulnotto leta portionofan itemsuch
asa potor dishhandleextendthroughthe bottom
rack.Thiscouldblockthewasharmandcause
poorwashingresults.
Fold-downtines(onsomemodels)provide
flexibilityforextra-largeandhard-to-fititems.The
tinesmay beleftintheuppositionor foldeddown
tocustomizethelowerrack.
Donotlet anyitem
extendthroughthe
bottom ofthesilverware
basket.Itemsthat
extendthroughtherack
couldpreventthespray
arm from turningand
causepoor wash
performance.
Single basket fan some models)
One-piece basket (on some models)
Three-piece basket (on some models)
Silverware Basket
Toloadflatware,simplypushtheadjustable
handleto eitherside(onsomemodels).Put
flatwarein theremovablebasketwithforkand
knifehandlesupto protectyourhands.Place
spoonsinthebasketwith handlesdown.Mix
knives,forksandspoonssotheydon'tnest
together.Distributeevenly.Smallplasticitems,
suchasmeasuringspoonsandlidsfromsmall
containers,shouldgo inthebottomofthe
silverwarebasketwiththesilverwareontop.
Theone-piecesilverwarebasket(onsomemodels)
canbeplacedinthefront,rightsideor backofthe
lowerrack.
Avarietyofoptionsisavailableregardingthe
three-piecesilverwarebasket(onsomemodels)
in yourdishwasher.Thecompletebasketis
designedtofit ontherightsideofthelowerrack.
Additionally,eachendofthebasketisremovable
toadd loadingflexibilityto accommodateflatware
andlowerrackcapacityneeds.
Thelidsofbothendand middlebaskets
(onsomemodels)canbeclosedtocontainsmall
items.Longitemscanbeplacedontheutilityshelf
intheupperrack.
Theaccessory
basket (onsome /_j_.
models)can hold _._
small itemssuch _:___
as: baby bottle X%._-__._____k_.....
nipples,plastic lids, _]___.-_/_
corn cob holders,etc.
To remove end baskets, grasp the
basket at opposite corners and slide
apart.
13

Loading place settings...
Follow these guidelines for loading 10 place settings. Features and appearance of racks and silverware baskets
may vary from your model.
Upper Rack--lO place settings Lower Rack--lO place settings Lower Rack--lO place settings
Follow these guidelines for loading 12 place settings. Features and appearance of racks and silverware baskets
may vary from your model.
Upper Rack--12 place settings
g
Lower Rack--12 piece settings
14

Caring for the dishwasher. GEAppliances.com
Cleaning the Door Panel
Before cleaning the front panel, make sure
you know what type of panel you have.
Refer to the lost two letters of your model
number. You can locate your model
number on the left-hand tub wall just
inside the door. If your model number ends
with BB,WW, CC,SA, BGor GS,then you
have a Painted Door panel. If your model
number ends with SS,then you hove a
Stainless Steel Door panel. If your model
number ends with CS,then you have a
CleanSteel Door panel.
Follow the instructions below for cleaning
the door panel for your specific model.
Painted Door Panel (model numbers
ending in BB-black, WW-white, CC-bisque,
SA-silver metallic, BG-graphite metallic or
GS-silver)
Use a clean, soft, lightly dampened cloth,
then dry thoroughly. You may also use a
good appliance wax or polish.
Stainless Steel Door Panel (model
numbers ending in SS)
The stainless steel panels can be cleaned
with Stainless Steel Magic or a similar
product using a clean, soft cloth. Do not
use appliance wax, polish, bleach or
products containing chlorine on Stainless
Steel doors.
You can order Stainless Steel Magic
#WX!OX!5 through GEParts by calling
800.626.2002. In Canada, please call
1.800.661.1616.
CleanSteel Door Panel (model numbers
ending in CS)
Use a clean, soft, lightly dampened cloth,
then dry thoroughly. Do not use appliance
wax, polish or any chemical agent on
CleanSteel doors.
Do not wipe the dishwasher with a soiled
dish cloth or wet towel. Thesemay leave
aresidue. Do not use scouring pads or
powdered cleaners because these
products can scratch the finish.
Cleaning the Control Panel
To clean the control panel, use a lightly
dampened cloth. Then dry thoroughly.
Protect Against Freezing
If your dishwasher isleft in an unheated
place during the winter, ask a service
technician to:
ri-] Unplug the dishwasher from the
wall outlet.
r_-i Remove the Unicouple from the
faucet. Disconnect the hose from
the water valve.
r_ Drain water from the water inlet line
and water valve. (Use a pan to catch
the water.)
r_] Reconnect the water inlet line to the
water valve.
15

Beforeyou call for service...
Troubleshooting Tips
Save time and money! Review the charts on the following pages, or
visit GEAppliances.com. You may not need to call for service.
In Canada, visit geappliances.ca.
Error Messages
START/RESETstatus
indicator light
flashing
Dishwasher BEEPS
onceevery
30seconds
Possible Causes What To Do
You havepressedthe
START/RESETpad while the
dishwasherisrunning.Thiswill
cancelthecycle.Thelightwill
stopflashingafter thedishwasher
drainsCabout90seconds}.
This isa reminder that your
dishwasher door hasbeen left
open during operation. It will
continue beeping until you close
the door.
PresstheSTART/RESETpadonetimetostartthedishwasher.Pressita
secondtime onlg if gouwish to cancelthe cgcle and start overwith
a newcgcle.
Closeandlatchthedoorafteropeningit mid-cgcle.
Problem
Dishesandflatware
notclean
Spotsandfilming
onglassesand
flatware
Possible Causes What ToDo
Lowinlet water temperature • Hakesuretheinletwatertemperatureisatleast120°RRemovethe
Unicouple,ifattached,andrunthehotwaterfaucetuntilthewater
temperaturestopsrisingto purgecoldwaterfromthehotwater line.
Turnoffthefaucet.ReconnecttheUnicoupleandthenturnthefaucet
backon.ifthewater temperaturedidnotreach120°F,consider
increasingthewatertemperatureatthewaterheater.Water
temperaturemustnotexceed150°F.
Water pressureistemporarilylow • Turnonafaucet,iswatercomingoutmoreslowlgthanusual?
tfso,waituntilpressureisnormalbeforeusinggourdishwasher.
Improperrackloading • Hakesurelargedishwaredoesnotblockthedetergentdispenser
or thewasharms.SeetheLoadingthedishwasherrackssection.
Extremelyhardwater • UseCascadeCrystalClear*rinseagentto removespotsand
Lowinletwater temperature preventnewfilm buildup.
Overloadingthedishwasher
Improperloading 1
Oldor damppowderdetergent 2
Rinseagentdispenserempty 3
Toolittle detergent 4
Toremovestubbornspotsandpre-existingfilmfrom glassware:
Removeall metalutensilsfromthedishwasher.
Donotadddetergent.
SelecttheHEAWWASHcgcle.
Startthedishwasherandallowto runfor 18to 22minutes.Dishwasher
willnowbeinthemainwash.
5Openthedoorandpour2cups(500ml)ofwhitevinegarintothe
bottomofthedishwasher.
6Closethedoorandallowtocompletethecgcle,ifvinegarrinsedoesn't
work:Repeatasabove,exceptuse1/4cup(60ml)ofcitricacidcrgstals
insteadofvinegar.
cloudinesson Combinationof softwater and • Thisiscalledetchingand ispermanent.Topreventthisfromhappening,
glassware too muchdetergent uselessdetergentifgouhavesoftwater.Washglasswarein theshortest
cgclethatwillgetthem clean.
Water temperatureentering • Thiscouldbeetching.Lowerthewaterheatertemperature.
thedishwasherexceeds150°F
Sudsin thetub Wrongdetergent • Useonlgautomaticdishwasherdetergentsto avoidsudsing.
Cascade®AutomaticDishwashingDetergents
havebeenapprovedforuseinallGEdishwashers.
Toremovesudsfromthetub,openthedishwasherand let
sudsdissipate.Closeandlatchthedishwasher.Pumpoutwater
bgtouchingtheSTART/RESETpadonce;then30secondslater,
touchtheSTART/RESETpadagain.Repeatif necessarg.
16 Rinseagentwas spilled • Alwagswipeup rinseagentspillsimmediatelg.

Beforeyou call for service... 6EAppliances.com
Problem Possible Causes What ToDo
Detergentleft in Dishesare blocking the • Repositionthe dishes,sothewater from the lowerspray arm can
dispensercups detergent cup flushthe detergent cup.Seethe Loadingthedishwashersection.
Blackorgray Aluminumutensilshave • Removemarkswitha mild,abrasivecleaner.
markson dishes rubbedagainstdishes
Dishesdon'tdry Lowinletwater temperature • Hakesureinletwatertemperatureisatleast120°F.
•SelectHEATEDDRY.
•UseHOTSTART,HOTWASHorADDEDHEAToptions.
•Selecta highercycle,suchasHEAVYWASH.
Rinseagentdispenserisempty • Checktherinseagentdispenserandfill asrequired.
Controlpand respondedDoorlatch may notbeproperly • Hakesurethedoorisfirmlgclosed.
toinputsbutdishwasherseated
neverfilledwithwater Faucetmay beturned off • Hakesurehotwaterfaucetisturnedon.
Floodfloat may bestuck • Removethelowerrackandtap lightlyonthefloodfloatcover(dome
locatedattheleftfrontcornerofthetub bottom).
UseoftheRINSEONLYcgcleafter addingthedishto the load
candecreasethelevelofstaining.
•Removethestainbyhand,usinga solutionof 1/2cupbleach
and3 cupswarmwater.
Stainedtubinterior
Dishwasherwont run
Control panel lights
go off whenyou're
setting controls
Water standing in
the bottom of the tub
S_am
Noise
Sometomato-basedfoodscan
causereddishstains
Teaor coffeestains
WARNING
Beforecleaninginterior,waitat least20minutesaftera cycleforthe
heatingelementsto cooldown.Failureto dosocanresultinburns.
,ADVERTENCIA
Anoverallyellowor brownfilm can •
becausedbyirondepositsinwater
White film on insidesurface- •
hardwater minerals
Fuseisblownor circuitbreaker
istripped
Antesde limpiarelinterior,espereparIomenos20minutosdespu6sdeun
cicloparaqueloselementoscalentadoresseenfrfen.Nohacerlopuede
provocarquemaduras.
Aspecialfilter inthewatersupplylineistheonlywagtocorrect
thisproblem.Contactawatersoftenercompany.
GErecommendsCascadeCrystalC/eaPto helppreventhard
watermineraldepositsfromforming.
Rundishwasherwith citricacidto removemineraldeposits.Citricacid
(Partnumber:WD35×151)canbeorderedthroughGEParts.Seeback
coverfororderinginformation.
Replacefuseorresetcircuitbreaker.Removeanyotherappliancesfrom
thecircuit.
Poweristurnedoff • tnsomeinstallations,the powertothedishwasherisprovidedthrougha
wallswitch,oftenlocatednexttothedisposerswitch.Hakesureit ison.
Controlpanelislocked • Unlockcontrolpanel.Seepage6.
Rebootyour control
Time too long between
touching of selectedpads
•Unplugthedishwasherfor30seconds;thenplugbackin.
•Eachpad must betouched within 30 secondsofthe others.
Torelight,touch any pad again,or unlockand relatchdoor.
This is normal
Thisisnormal
Normal operating sounds
Rattling disheswhen the spray
arm rotates
• A smallamount of cleanwater around the outlet on thetub
bottom at the backof the tub keepsthe water seallubricated.
• Warm,moistaircomesthroughtheventby thedoorlatchduringdrying
andwhenwaterisbeingpumpedout.Thisisnecessaryfordrying.
• Detergentcup opening.
• Water enteringdishwasher.
• Themotor stopsand starts at varioustimesduring the cycle.
• Drainpumpsoundsdurinq the pumpout.
• Hake suredishesare properly loaded.Seethe Loadingthe
dishwasherrackssection.
17

Notes.
28

GE Dishwasher Warranty.
All warranty service provided by our Factory Service Centers,
or an authorized Customer Care®technician. Toschedule service, on-
line, visit us at GEAppliances.com, or call 800.GE.CARES(800.432.2737).
In Canada, call ;_.800.561.3344. Please have serial number and model
number available when calling for service.
Stapleyour receipt here.
Proof of the original purchase
date is needed to obtain service
under the warranty.
For The Period Of: GE Will Replace:
One Year Anv pert of the dishwasher which fails due to a defect in materials or workmanship. During this
From the date of the limited one-year warranty, GEwillalso provide, free of charge, all labor and related service to
original purchase replace the defective part.
What GE Will Not Cover (for customers in the United States):
I Service trips to your home to teach you how to use
the product.
[] Improper installation, delivery or maintenance.
[] Failure of the product if it is abused, misused, or used for
other than the intended purpose or used commercially.
[] Replacement of house fuses or resetting of circuit
breakers.
[] Damage to the product caused by accident, fire, floods
or acts of God.
[] Incidental or consequential damage causedby possible
defects with this appliance.
[] Cleaning or servicing of the air gap device in the
drain line.
[] Damage causedafter delivery.
[] Product not accessible to provide required service.
EXCLUSION OF IMPLIED WARRANTIES--Your sole and exclusive remedy is product repair as provided in this Limited
Warranty. Any implied warranties, including the implied warranties of merchantability or fitness for a particular
purpose, are limited to one year or the shortest period allowed by law.
This warranty is extended to the original purchaser and any succeeding owner for products purchased for
home use within the USA. Ifthe product is located in an area where service by a GEAuthorized Servicer is not
available, you may be responsible for a trip charge or you may be required to bring the product to an Authorized GE
Service location for service. Proof of original purchase date is needed to obtain service under the warranty. In
Alaska, the warranty excludes the cost of shipping or service calls to your home.
Some states do not allow the exclusion or limitation of incidental or consequential damages. This warranty
gives you specific legal rights, and you may also have other rights which vary from state to state. To know
what your legal rights are, consult your local or state consumer affairs office or your state's Attorney General.
Warrantor: General Electric Company. Louisville, KY 40225
What Is Not Covered (for customers in Canada):
[] Service trips to your home to teach you how to use
the product.
[] Improper installation.
If Sou have an installation problem, contact gout dealer
or installer. You are responsible for providing adequate
electrical, exhausting and other connecting facilities.
[] Failure of the product if it isabused, misused, or used for
other than the intended purpose or used commercially.
[] Replacementof housefusesor resetting ofdrcuit breakers.
[] Damage to the product caused by accident, fire, floods
or acts of God.
[] Damage caused after delivery.
EXCLUSION OF IMPLIED WARRANTIES--Your sole and exclusive remedy is product repair as provided in this Limited
Warranty. Any implied warranties, including the implied warranties of merchantability or fitness for a particular
purpose, are limited to one year or the shortest period allowed by law.
Thiswarranty isextended tothe originalpumhaser and any succeedingowner forproducts purchasedin Canadaforhome use
within Canada.In home warranty servicewill beprovided in areaswhereit isavailableand deemedreasonableby Mabetoprovide.
WARRANTOR IS NOT RESPONSIBLE FOR CONSEQUENTIAL DAMAGES. i
Warrantor: MABE CANADA INC. 1
19 J

Consumer Support.
GEAppliancesWebsite Inthe U.S.:GEAppliances.com
Have a question or need assistancewith gour appliance? Trgthe GEAppliances Website 24 hours a dag,
ang dag of the gear! Forgreater convenienceand faster service,gou can now download Owner's Manuals,
order parts or evenschedule serviceon-line. In Canada: www.geappliances.ca
Schedule Service Inthe U.S.:GEAppliances.com
Expert GErepair service is onlg one step awag from gour door. Get on-line and schedule gour service at gour
convenience 24 hours ang dag of the gear! Or call 800.GE.CARES(800.432.2737) during normal business hours.
In Canada, call 1.800.561.3344
RealLifeDesignStudio intheU.s.:GEAppliances.cam
GEsupports the UniversalDesignconcept-products, servicesand environments that can be usedbg peopleof all
ages,sizesand capabilities. We recognizethe need to design for a wide range of phgsical and mental abilities and
impairments. Fordetails of GE'sUniversalDesignapplications, including kitchen design ideasfor peoplewith disabilities,
check out our Websitetodag. Forthe hearing impaired, pleasecall 800.TDD.GEAC(800.833.4322).
In Canada, contact: Manager,Consumer Relations,Mabe Canada Inc.
Suite310, ! Factorg Lane
Moncton, N.B.E1C9P13
Extended Warranties In the U.S.:GEAppliances.com
Purchasea GEextended warrantg and learn about specialdiscounts that are availablewhile gour warrantg isstill
in effect. You can purchase iton-line angtime, or call800.626.2224 during normal businesshours. GEConsumer Home
Serviceswill still bethere after gour warrantg expires.In Canada, please visit our Website or contact your local
extended warranty provider.
Parts and Accessories IntheU.S.:GEAppliances.com
Individuals qualified to servicetheir own appliances can haveparts or accessoriessent directlg to their homes
(VISA,MasterCardand Discovercards are accepted).Order on-line todag, 24 hourseverg dag or bg phone at
800.626.2002during normal businesshours.
Instructions contained in this manual cover procedures to be performed by any user. Other servicing generally
should be referred to qualified service personnel Caution must be exercised,since improper servicing may cause
unsafe operation.
Customers in Canada can order parts and accessorieson-line atgeappliances.ca,or bg phone at !.800.66!.!6!6.
Contact Us In the U.S.:GEAppliances.com
If gou are not satisfied with the service gou receive from GE,contact us on our Website with all the details including
gour phone number, or write to: General Manager, Customer Relations
GEAppliances, Appliance Park
Louisville, KY40225
In Canada: w_,w.geappliances.ca, or write to: Director, Consumer Relations, ivlabe Canada Inc.
Suite 3!0, ! Factorg Lane
Moncton, N.B. E1C9M3
l Register YourAppliance In the U.S.:GEAppliances.com
Register your new appliance on-line--at your convenience! Timelg product registration willallow for enhanced
communication and prompt service under the terms of gour warrantg, should the need arise. You mag also mail
in the pre-printed registration card included in the packing material. In Canada: www.geappliances.ca
_,_°t, Printed in the United States
20 _:,,4:,•Printed on Recycled Paper
Other manuals for GLC4000 Series
5
Table of contents
Languages:
Other GE Dishwasher manuals