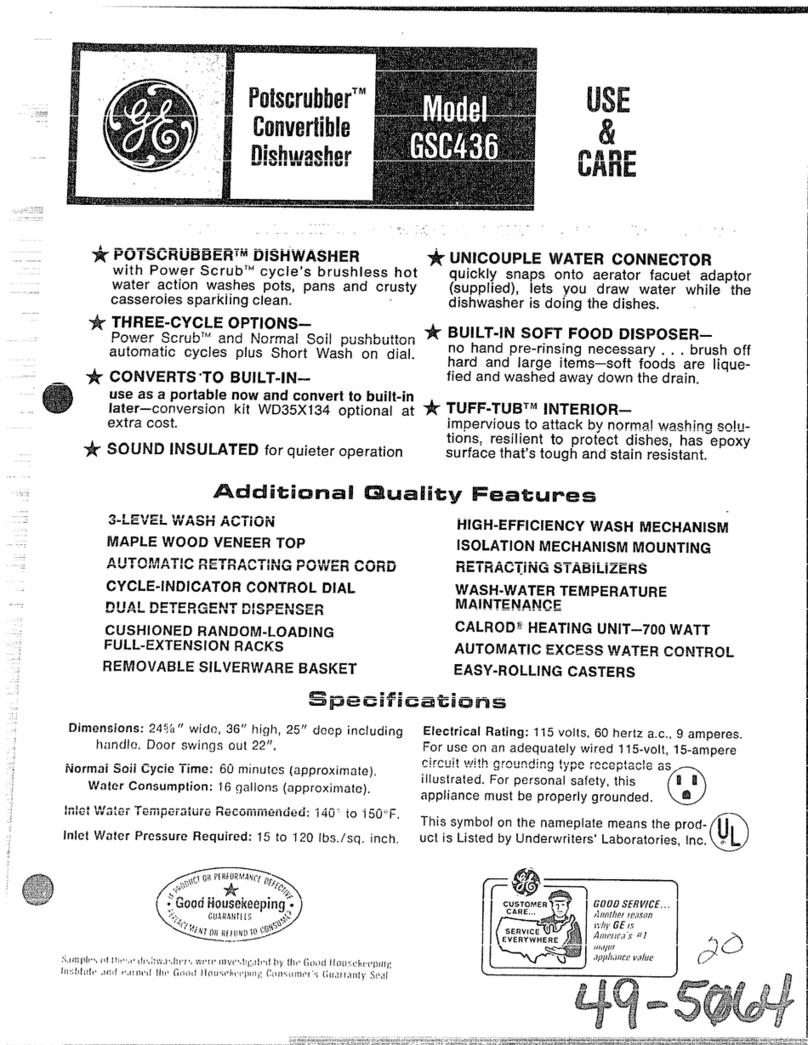
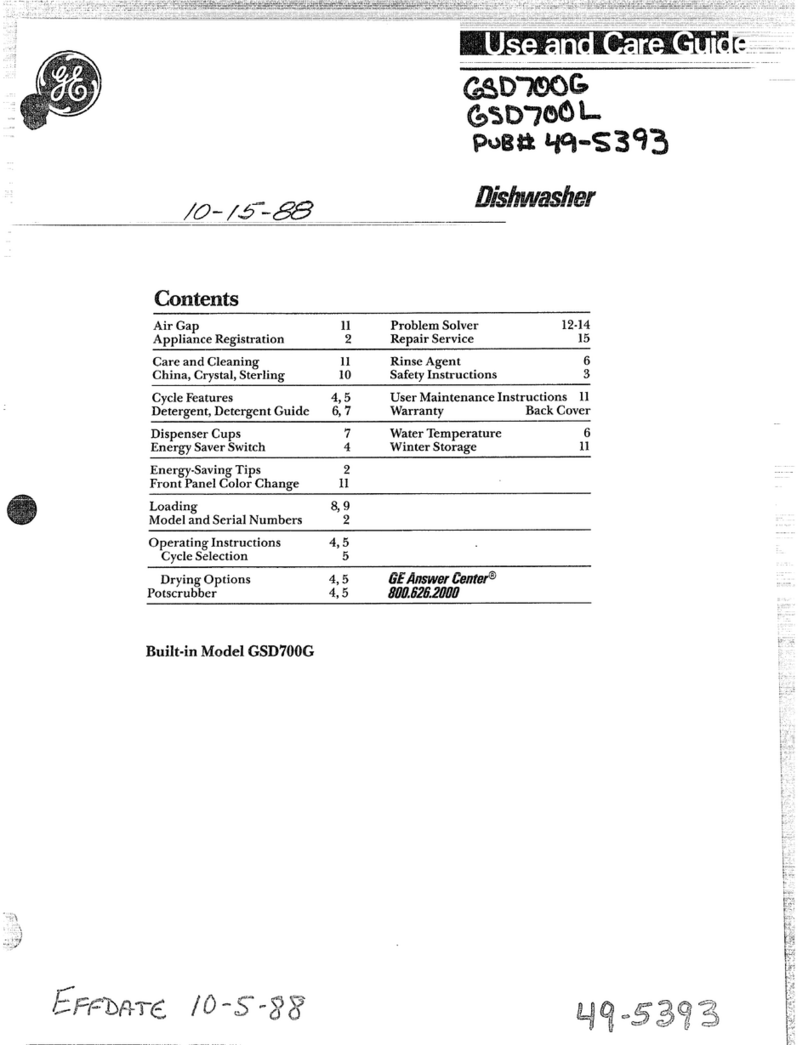
GE GSC800 User manual

Dishwasher
Safe~
Instrutiions.........................3
Operating
Instrutiions,
Tips
ApplianceRegistration.................................2
China, Crystal, Sterling . . . . . . . . . . . . . . . . . . . . . . . . . . . . . . . 12
ConnectingElectricity...................................5
Cycle Features
................................................6
DetergentGuide.............................................9
Dispenser
Cups...............................................9
Drying
Options................................................6
Energy-SavingTips........................................2
Features
.......................................................6,
7
Loading
...:.
. . . . . . . . . . . . . . . . . . . . . . . . . . . . . . . . . . . . . . . . . . . . .
.
10, 11
Operatinginstructions.............................6,7
Rinse Agent
.....................................................8
Unicouple.........................................................4
WaterTemperature.......................................8
Care and Cleaning
Winter Storage . . . . . . . . . . . . . . . . . . . . . . . . . . . . . . . . . . . . . . . . . . . .
.
13
Wood
TOP
. . . . . . . . . . . . . . . . . . . . . . . . . . . . . . . . . . . . . . . . . . . . . . . . . . . . .
.
13
@
●
✚✌✎
✞✎✚
✎✌
✎✌✌
✌✚✌
Problem
Solver.......................l5-l
7
More questions
?...call
GE&swer
CentiP
800.626.2000
Preparation
Front Panel Change . . . . . . . . . . . . . . . . . . . . . . . . . . . . . . . . . . . . 14
Consumer
Services...................l9
Important Phone Numbers .......................19
Model and Serial Numbers ..........................2
Repair Service
.................................................2
Warranw........................................Back
Cover
Conveflible
Model
GSC800
GE Appliances

~LPUS
~LPYOU...
-
Before using your
dishwasher, read this
guide
arefully.
It is intended to help you
operate and maintain your new
dishwasher properly.
Keep it handy for answers to
your questions.
Hyou don’t understand something
or need more help, write (include
your phone number):
M
you received
a damaged dishwasher...
tiediately
contact the
deder
(or builder) that sold you the
dishwasher.
Save time and money.
Before you request
service...
Check the Problem Solver in
tie
back of this
oide.
It lists causes
Consumer Affairs
GE Appliances of minor
op;ating
problems that
Apptiance
Park
you can correct yourself.
Louisville, KY 40225
To obtain a Spanish
lmguage
Para obtener la
versi6n
en
version of this
bookd
cdl
espafiol
de
este
manual,
GE Answer Center
llarne
a
800.626.2000
GE
hswer
Center?
consumer information service.
servicio
de
informaci6n
para
el
consurnidor,
te16fono
800.626.2000.
Write down the model
and serial numbers.
You’ll
fmd
them on a label
fastened to the tub
wd
just
inside the dishwasher door.
These numbers are
dso
on the
Consumer Product Ownership
Registration
Cad
that came
with your dishwasher. Before
sending in this card, please write
these numbers here:
Serial
Numbr
Use these numbers in any
correspondence or service calls
concerning your dishwasher.
~
YOU
~ED
SERWCE...
To obtain service, see
tie
Consumer Services page in
the back of this guide.
We’re proud of our service and want you to be
pleased. If for some reason you are not happy with the
service you receive, here are three steps to follow for
further help.
~ST,
conmct
the people who serviced your
appliance. Explain why you are not pleased.
k
most
cases, this will solve the problem.
~XT,
if you are still not pleased, write
rdl
the
details-including your phone number—to:
Manager, Consumer Relations
GE Appliances
Appliance Park
Louisville, KY 40225
~WLY,
if your problem is still not resolved, write:
Major Appliance Consumer Action Panel
20 North Wacker Drive
Chicago,
~
60606
EWRGY-SA~G
mS
● Operate dishwasher
ordy
when it’s fall. Let the
●
If you don’t need your dishes right away, allow the
dishes accumulate in dishwasher. When you put in dishes to dry naturally over a longer period such as
only a partial load, use the
~SE
&
HOLD cycle to overnight.
rinse off heavy soils.
●
Always
select the cycle that uses the least amount
of water that
vviU
remove the
sofl
from the load.
(See the
Operating section.)
2

●
~lo&s*pmisibn is
Dwssqif
Wa~fim&
‘
IS
u~
by
or
near
Wdren.
M
not
Wow
children
to play inside, on
or.wi@thisapptianGe
?r
any’
discardedappUance:
~spose
bf
@$carded
ap@iances
and shipping &packing
titerid
properly. Before
disc~ding
a dishwasher, remove
the door of tie
wastig
comp~ent.
●
K&p
dl
wtihing
&te&ents
and
yetting
@ents
out
of.tie
reach of
cMdren,
preferably in
a.lock@
cabinet. Observe
fl
warnings
on
cbntainer
Iabels
to avoid personal injury.
*
●
To
mini-
the possibility
of
.
electric shock, disconnect~
‘
apptianeetim.the~
wtitipp~y
.kfore
attempting any
mainte~ce.
.NO~:
-g
tie
m~trol
@to the Opposition
does
notdisconnectthe
apptiauce~omtie
power supply. We
mcommendhaving.a
q-~
technician service
yourapplianti.
‘,
SAW
TmsE
mST~uCTIQNS

HOW TO USE
~
MCOWLE
Before operating your
tihwmher
the
fimt
tie...
Attach the Faucet Adapter. The
special faucet adapter
supptied
with your dishwasher must be assembled to the
sink faucet before you can use your dishwasher.
The faucet adapter is designed to fit standard spouts
having
intemd
or
extemd
threads. You will fmd the
adapter
ad
two washers in the “Faucet Adapter”
packet in your dishwasher.
To
insw
faucet
ada~ter,
f~st
remove the old aerator
or trim
fig
on your
f;ucet
spout.
K
faucet has
exteti
threads:
ksert
the
thinner of the two
a
—
washers into
tie
faucet adapter
and
attach it to the faucet spout.
Tighten with
ptiers.
fl
,
U
faucet has internal
tids:
ksert
both of the washers into
the faucet
a&pter
and attach it
—
to the faucet
sDout.
z
.
Tighten with pliers.
U
the
faucet adapter threads
do not match your faucet
spout
your
local hardware or plumbing
supply store
normrdly
has
additiond
fittings to adapt your faucet spout to
#-
0
the
special faucet adapter.
NOTE: A sink spray attachment hose can burst
ifit
is installed on the same sink with your
dishwashe~
We suggest that you disconnect the sink spray
attachnnt
if your sink
tis
one and plug the hole.
How to connect the Uticouple
1.
h~
Unicouple and its hoses completely out from
storage compartment located at rear of dishwasher
and attach it to the faucet adapter.
2.
Attach the Unicouple
connector to the
faucet adapter by
depressing the
collar at
the
top
of
tie
connector.
men
Unicoupk
is
dl
the way up
onto the adapter,
release the collar. It will then
snap into position to lock the Unicouple in place.
The
Unicouple’s
small hose carries water from
the faucet to the dishwasher. Its large hose carries
drain water to the sink. Be sure Unicouple is
pointing toward the sink bowl drain opening and
the sink drain is open for water that
wfl
drain from
your dishwasher.
K
your dishwasher drains into a
disposer, operate the disposer until it is completely
empty before starting the dishwasher.
3. Turn hot water
fu~y
on before
sting
the dishwasher.
How to
dkconnect
the Uticouple from faucet adapter
1. Turn off the
hot water.
3. Release Unicouple from faucet by
depresstig
2. Release the water pressure by depressing the collar at the top of the Unicouple connector.
the pressure release button. This relieves water
pressure and protects you, and the room, from
severe splashing.
How to
dkconnect
your
&hwmher
1.
Remove the power cord plug from the
wrdl
NO~:
men
motor stops at the end of the
fmrd
receptacle.
rinse, the Unicouple can be disconnected and returned
2. Disconnect Unicouple from faucet adapter.
to storage.
4

How to
draht
excess water from
Uticouple
hoses
If the sink is 34” or higher from the floor,
the excess water in
Unicouple
hoses cannot be
drained
direcdy
into the sink. It will be necessary to
drain excess water from hoses into a bowl or suitable
\
container that is held outside and lower than the
si~.
HOW TO
CO~CT
ELECTWC~
Caution, for personal
safe~:
DO NOT USE AN
E~NSION
CORD OR
AN ADAPTER PLUG_
~
APPL~CE.
DO NOT, UNDER ANY CIRCUMSTANCES,
CUT OR REMOW
T~
T~RD
GROUND~G
PRONG FROM
T=
POWR
CORD.
GROUND~G
~STRUCTION&This
apptiance
must be grounded.
k
the event of a
mtiunction
or
breakdown, grounding wi~ reduce the risk of
electric shock
by
providing a path of least
resistance for electric current. This dishwasher
is
equipped with a cord having a grounding
conductor and a grounding plug. The plug must be
plugged into an appropriate outlet that
is
instied
and grounded in accordance with the NATIONAL
ELECTWC
CODE,
ANSHFA
NO. 70.
DANGER—bproper
connection of the
equipmentigrounding
conductor
can
resdt
in
a risk of electric shock. Check with a
qu~led
electrician or serviceman if you are in doubt as to
whether the dishwasher is properly grounded. Do
not modify the plug provided with the
apphance;
if
it
ti
not fit the
outlet
have a proper outlet
ins~ed
by a
qudfled
electrician.
Electid
qtirements
●
This
apphance
must be
SUppfiCd with
120v,
60
~,
and connected to an individud,
QQ
properly grounded branch
circui~
protected by a 15 or 20 amp circuit
breaker or time-delay fuse.
●
Kthe
electic
supply
-p
~
!
+,
provided does not meet the above
INSURE PROPER
specifications, it is recommended
GROUND EXISTS
that a licensed electrician
instil
BEFORE USE
an
approved
ouflet.
●
Your dishwasher circuit
should not be used for any
other appliance
w~e
the
dishwasher is in operation as
the dishwasher requires the full
capacity of the circuit.
●
H
the
wd
receptacle you
plug the dishwasher’s power
cord into is contro~ed by a
switch, turn on the switch.
5

HOW TO OPERATE
YO~
DBHWAS~R
Your dishwasher is
designd
to give maximum
performance on loads with
nomd
and heavy soils.
You may find that many of your dishes have lighter
soils than normal; if this is the case you can save
water
ad
energy by selecting a cycle other than
NORMAL WASH.
NOTE: The
fights
over the Cycle and Energy Option
pads come ON to indicate
tie
cycle/option that has
been selected. Press pad
ftiy
until the
fight
comes
on. These Cycle and Energy Option
hdicator
lights
remain on while
the
door is latched.
If dishwasher drains into a food waste disposd,
operate the
disposd
until it is empty before
starting dishwasher.
step
1.
kd
YOU
dishwasher.
(S=
bading
section.)
step
2.
Make sure the Cycle
hdicator
Did
is at
the OFF position. Add detergent to the detergent
dispenser. (See
Detergent Guide.) Use a rinse aid
agent to help prevent spotting. (See How to Use
a Mnse Agent section.)
Step
3.
Latch the door.
step
4.
Select desired wash cycle.
●
POTSCRUBBER—For
items such as pots, pans
and casseroles with dried-on or baked-on soils.
Everyday dishes may be included. This cycle will
get heavily soiled dishes cleaner
than
the normal
cycle. It will not remove burned-on foods.
● NORMAL WASH—For most loads of everyday
dishes, glasses and cookware with medium soils.
Designed to yield high performance on norrnd soils.
● LIGHT WASH—For loads that have dishes with
light soils.
step
5.
Select the desired Energy Options.
●
WASH HEAT BOOST
ON—Use this option
for best performance with heavily-soiled dishes.
men
selected, the wash cycle is extended while
the dishwasher heats the water for the best washing
and drying. (See Cycle Selection Chart.)
●
WASH HEAT BOOST
OFF+huts
off the
WASH HEAT BOOST ON option.
● HEATED DRY ON—Turns the drying heater on
for fast drying.
Men
selected, the cycle time
wfll
be extended for 35 minutes.
II
\
@
\’
I
Features ad appearance
my
vary slightly
● HEATED DRY OFF-Shuts off the heating unit,
thus saving energy. Dishes air-dry
naturdly.~t
ties
longer but saves energy. You can open the door after
the motor stops to speed drying. Excellent for
overnight drying.
step
6.
~rn
the Cycle
hdicator
Did
to START.
●
Turning the
did
to START will begin the cycle
immediately. To obtain the benefits of a complete
cycle, be careful that you do not turn the
did
any
farther than is necessary to start the dishwasher.
There is a time delay between sin-up and water
fi~
so you will not hear any wash action right away.
Did
CyclW
The
SHORT WASH
cycle allows you to quicUy
wash loads of everyday dishes with
mdum
soils
that have not dried on, such as loads consisting
mosdy
of glasses.
a. Select
tie
NOWL
WASH cycle and any
Energy Option if desired.
b. Be sure the door is unlatched.
c. Slowly turn the Cycle
hdicator
Dird
to
SHORT WASH.
d. Latch the door to start the cycle.

[
Did
Cycles
(continu~)
The
~SE
& HOLD cycle is for
tising
The
PLATE
WA-R
cycle
is for
wting
clean
partial loads which wi~ be washed later. Do dishes and sewing plates
f;r
the seining of
h~t
foods.
not use detergent.
The cycle will
tde
approtiately
35
tinutes
if
a. Select HEATED DRY OFF.
selected.
b. Be sure the door is
utiatched.
a. Load clean plates and dishes to be
wartned.
c. Slowly turn the Cycle
hdicator
Did
to
b. Select HEATED DRY ON.
~SE
& HOLD.
c. Be sure
tie
door is
udatched.
d. Latch the door to start the cycle. d. Slowly turn the Cycle Indicator
Dird
to
PLATE
WA~ER.
e. Latch the door to start the cycle.
Cycle Selection Chati
Water Use
Gdons
Wash Cycles
(approx.)
NTSCR~BER
10.6
NO-L
WASH
9.1
LIGHT WASH
7.9
SHORT WASH
7.4
mSE
& HOLD
3.0
Wash Cycle
Time
Minut=
(approx.)
Cycle
Smuence
72
51*
51*
43*
12
mmmmmmm
*Unextended times.
~ese
cycle times will be increased approximately
21
minutes
tiWash
Heat Boost option is selected,
~A~
DRY ON. Avtilable on
dl
wasb
cycles except
RtNSE
& HOLD. Add 35 minutes to wash cycle time.
=A~
DRY
0=.
Drying
h=ter
is turned off. Dishes dry
natudly. 7
—

a
Gd
Dkhwastig
Starts
tith
HOT Water
To get dishes clean and dry, you need hot water. For good washing and drying,
the entering water must beat least 120°F. To prevent dish
@age,
idet
water
shotid
not exceed
150°F.
How to Test Water Temperature
Check your water temperature with a candy or meat
thermometer. Turn on the hot water faucet nearest
the dishwasher.
Put
the thermometer in a glass and
let the water run continuously into the glass until the
temperature stops rising. If the water temperature is
below 120°F., adjust your water heater.
Helpfti
Mnti:
If outside temperatures are unusually
low, or if your water travels a long distance from water
heater to dishwasher, you may need to set your water
heater’s thermostat up.
E
you have not used hot water
for some time, the water in the pipes will be cold.
~
on the hot water faucet at the sink and Mow it to mn
until the water is hot. Then start the dishwasher. If
you’ve
recentiy
done laundry or run hot water for
showers, give your water heater time to recover before
operating the dishwasher.
To improve washability if
tie
water is less than 120°F.
and you cannot adjust your water heater: Select a
longer cycle or the WASH
~AT
BOOST option and
fill both detergent cups at least
hrdf-fu~
witi
detergent.
How to Use a
-e
Agent
The rinse agent makes water flow off dishes
quicker than usual. This lessens water spotting
and makes drying faster, too.
For best
dishwashing
performance, use of a rinse
agent such as
~T-DRY
brand is recommended.
Rinse agents come in either liquid or
sofid
form.
Your dishwasher uses the
hquid
form.
How to
fl
the rinse agent dispenser:
Unscrew the cap.
Add
tiquid
rinse
agent until it just
reaches the bottom of
fip
inside the dispenser
Q
!$}
opening. Replace cap.
The dispenser
&
/’
D
automatically releases
rinse agent into
find
rinse water.
You may check to see if you need to add rinse agent
by removing the fill cap and looking into the
continer.
You may
dso
check the rinse agent, on
some models, by pressing
tie
clear center of the fill
cap 2 or 3 times. If rinse agent is drawn into the center
of the fill cap, you have enough.
E
the center area
remains clear add rinse agent.
Your dishwasher’s rinse agent
contier
holds
approximately
4%
ounces. This should last about
3 months. Fill as needed.
E
you
accidentiy
sp~:
Wipe up the rinse
agent with a damp cloth. Don’t leave the spill in the
dishwasher. It can keep your detergent from working.
U
you can’t find any rinse agent,
write:
BENC~SER
CONSU~R
PRODUCTS,
~C.
(“~T-DRY”)
Corporate
Centie
1
.55
Federd
Road
P.O.
Box 1991
Danbury, CT 06813-1991
8
How to Choose and Use the
Mght
Detergent
Use
ody
powder or
tiquid
detergent
_dy
made for use in dishwashers. Other
W
*
Muse
oversudsing.
How much detergent
shodd
you use?
That depends.
Is your water “hard” or “soft”? With hard water, you
need extra detergent to get dishes clean. With soft water,
you
ned
less detergent.
Your water department
m
teu you how hard your
water is. So can your county extension agent or your
area’s water softener company. Just
cd
and ask them
how many “grains” of hardness there are in your water.
Too much detergent with soft water not
ody
wastes
money, it can be
h-.
It can cause a permanent
cloudiness of glassware,
c~d
“etching.” An outside
layer of glass is etched away! Of course, this takes some
time. But why take a chance when it’s easy to
fmd
out
the
hardness of your water.
Keep your detergent fresh and dry. Under the
sti
isn’t a good place to store detergent because there is too
much moisture. Don’t put
pwder
detergent into
the
.
dispenser until you’re
reaay
to wash dishes, either.
Ot
won’t be fresh OR dry.)
U
your powder detergent gets old or lumpy, throw it
away. Old detergent often won’t dissolve.
H
you use a
liquid dishwasher
detergen4
these precautions are not
necessary because liquid detergents don’t “lump” as
they age or come in contact with moisture.
Detergent Dispensers
You’M
find two detergent dispensers on the inside
Close the
min
cup.
NOTE: To open deteqent cup
a$er
it has
been closed,
unhtch
the herd rotate the
Cycle Indicator Dial
afili
turn to
tb
OFF
d
“>
position.
Men
the closed cup contains
Grasp
handle,
rotate and
soap
it
is best
tbt
the door be in
apatillY
CIOSS
tight~
open position before rotating the Cycle
Indicator Dial.
~is
will help redwe the
mount
of
detergent &rime aid agent spilhge into the
~.
Detergent Usage Gtide
(powder or liquid)
SO~
WA~R
(O-3 grains hardness)
MED~
WATER (3-7 grains) HARD WATER (7-12 grains*)
CYCLES Main Cup Open Cup
Main
cup
Open Cup
Main
Cup$
I
Open
Cup~
POTSCRUBBER
Hdf Full
~
Hti
Full
Completely
:
HdfFull
Completely
~
Completely
NORMW
WASH
Full Full Full
LIGHT WASH
Hdf Full
None
Half Full None Completely None
SHORT WASH
Full
~SE
& HOLD Use
no
dete~ent
Use
no
dete~ent
Use
no
dete~ent
*12 grains
and up is
exrremely
hard water. A water softener is recommended.
Wltbout
i~
fime
$Filled
Main Cup holds 3
tablespns;
can build up in the water valve. The water valve may stick while open and cause flooding.
filled
Open Cup holds 2 tablespoons.
How to Prepare the Dishes for Washing
If this is your
fwst
dishwasher, or if you’re
NO~:
You may
dso
wat
to consider removing
replacing a much older model, you may wonder foods such as mustard, mayonnaise,
vinegm,
lemon
how much preparation your dishes need. ActuWy juice
ad
other foods
tiat
can cause discoloration of
very
httie.
Scrape off bones, seeds, skins, toothpicks stainless steel if allowed to remain on dishes for a long
and other hard solids. Remove excessive quantities period of time.
of oil or grease.
The
POTSCR~BER
cycle
cm
wash
heavily
soiled dishes and remove dried-on and
b&ed-on
soils from pots, pans and casseroles. Items with
burned-on soils need extra preparation.
9

NO~:
Do not load
large
platters or
mays
in front right comer
of lower rack.
~ey
may prevent detergent from circuladng in the wash
cycle,
me
upper
rack is handy ford] kinds of odd shapes.
Sauce
pans,
mixing
bowls and other items should
be placed face down.
men
loading dishwasher-safe
plastics make sure each plastic item is secured over
two fingers.
~s
will insure
good
washing results.
me
upper rack is best for glasses, cups and
saucers. Cups and glasses fit
best
along the sides.
~is
is
dso
the
pIace
for dishwasher-safe plastics.
Make sure small plastic
items
are
lodged
in
tighdy
so
they
can’t
fdl
onto the heating unit.
tian:e
stemware
so
~at
it
cannot move easily.
-Don’t
let the-glasses
touch each other.
Keep
cmter
area
clear
in
&e
lower
rak
me
wash tower rises
Mough
tie
center of the lower
rack during the wash
md
rinse portions of the
cycle.
Don’t
block
it
or load
Ml
things next to it,
Aso.
be
c~eful
not to let a portion of an
item
such as a pot or
dish
hande
extend
through the bonom rack.
~is
could
block the wash arm and cause poor washing results.

The lower rack is best
used
for plates. saucers, and
cookware.
Large
items
such as broiler pans
and
racks
should
go
in
tie
lower
rack
Aong
the
edge.
Load
platters,
po~
and bowls along the sides, in comers,
or in the back. For best
washing
results
dl
items
should
be
position~
with the
soiled
side
facing
the center of
the rack.
Put
flatware in the removable basket
with
handles up
to protect your hands.
Mx
knives, forks and spoons
so they don’t nest together. Distribute
even]:’.
The security
cell
cover hinged in the
handle
maybe
mution!
Take out anything that
may
fdl
or extend through the
bottom
of the basket.
lowered to either side to
se~ure
light-weight
ite~s
horn
the effects of the vigorous wash action.
11

-T
YOU
Cm
USUALLY WASH
S~LY
~
YOUR
DB~AS~R
I
I
I
Usdy
Materid Stie
hceptions
(not We)
sad
btitiom
Forget a dish?
Here’s
when you
~
add it:
Add dishes
any
time during the
~SE
& HOLD
cycle. With other wash cycles, you can add dishes
at any time
BEFOM
the main detergent wash portion
of the cycle.
However, opening the door during any cycle
lessens cleaning power. So
~
to load everything
at the
kginning.
Here’s how to add a forgotten
dish:
1. Push the door latch to
tie
left. Washing will stop.
2. Wait a few seconds until the water
cahns.
men
open the door.
WA~~G:
Hot vapor may rise
from opened door.
3. Add dishes you’ve forgotten.
4. Close the door and push the latch to the far right.
When the door is locked, washing will continue.
12

USER
MTENANCE
~STRUCTIONS
Clean the control panel with a
Ughtiy
dampened
Apphance
Polish Wax& Cleaner (Cat. No.
cloth. Dry
thorougNy.
Do not use abrasives or sharp WR97X0216)
is
avtiable
from GE Service and
objects on
the
panel. They can damage it. Parts Center.
Clean the
oukide
with a good
apptiance
po~h
The inside
usdly
ties
are
of
ike~.
If it should
wax. The outside cabinet finish is durable, but it ever need cleaning, use a mild cleansing powder.
can scratch. So use no scouring pads, or harsh or Scouring pads and harsh cleaners can mar
the
ftish.
gritty cleaners.
Not Using
Yom
Dishwasher
in
Winter? Protect Against Freezing
(On
btit-in
models
ody)
E
your dishwasher is left in
an
unheated
place during
the
winter, ask a service
tectician
to:
●
Cut off electrical power to
the
dishwasher. Remove fuses or trip circuit breaker.
●
Turn off the water supply.
● Disconnect
the
water
inlet
line
from
the
water
VdVe.
● Drain water from
the
inlet line and water valve.
~se
a pan to catch
the
water.)
●
Reconnect
the
water inlet
PUMP COVER
SCRWS
line to the water valve.
● Drain collection chamber at
rear of unit below filter by
disconnecting hose to pump.
Reconnect after draining.
● Remove the plastic pump
cover in the
fib
bottom and
use a sponge to soak up water in
the
rubber
booh
Removing the wood top
Remove
the
mounting
screws under
the
front of
the
top.
PuU
top forward
and upwind.
r
,.
To remove the protective cover, use scissors to cut the
*-.—
-.
bag from the underside. To
reinsti
the top
fign
screws
in bottom of top with slotted holes in panel flange.
Sfide
,.
‘r
top to rear of unit.
Reinsti
front screws.
DO NOT operate
the
dishwasher without
the
wood top
in place.
Care of the wood top
Before using, wipe well with a dry cloth to remove Should your top become too stained or cut, sand with
surface dust. Wood top is treated with a preservative
~(150)
or
~0(220)
sandpaper, wipe with a cloth
at the factory.
and then wipe with a very
smd
amount of non-toxic
Do not use the wood top of your dishwasher as a mineral
ofl.
Wipe off any excess oil immediately
witi
cutting board. It
can
be scarred
perrnanentiy.
Wood
a
sof4
@
cloti.
tops should
dso
not be used as a place for thawing
frozen foods, even when protected by a sheet of
durninum
foil. Never let water stand on
tie
wood top.
Conversion Mt
A special kit (Cat No.
WD35X0193)
for changing a convertible dishwasher
to a permanent built-in instigation is available from your
deder
or service organization.
13

HOW
TO
CWGE
COLOR
PMLS
If you are redecorating, you can change your dishwasher’s front panel to
match or blend
witi
your new colors by flipping it over. Each side of each
panel is a different color. You may
dso
paint a panel with a color of your
own choice.
How to Change the Door Panel:
1.
Take out trim screws on either side of the
dishwasher door. Remove the side trim.
2. Slide the door panel out.
(Careful-edges may be sharp.)
3. Turn the door panel around
ad
put the color you
want in front.
4. Replace the door panel, side trim and screws.
NOTE: Do not operate
dishwasher
wtie
changing
panek
or when lower
acc~s
panel is removed.
How to Change the Lower Panel:
Bottom Panel Attachment %rews
1.
Remove the bottom panel attachment screws.
2. On models without top mounting screws, remove
the entire access assembly by lifting it up and over
the retaining tabs.
3. On models with top mounting screws, remove
the screws.
4. Take out the top trim screws and remove the
top trim.
5. Slide the color panel(s) up and out and put the
color you want in front.
6. Replace the top trim and screws.
7. Replace the entire access assembly by reversing
the steps.
Wood panel trim
kiti
contain trim and
ins~ctions
for adding a decorative wood door
panel and lower access panel no thicker than 1/4”
to match kitchen cabinets.
Specify the trim color of your choice from the
following options:
GPF40BC (Chrome Trim and Screws)
GPF40BK (Black Trim)
GPF40W
(mite
Trim)
The kit is available for $5.00 (shipping and handling).
Make check payable to the General Electric Co.
Color Panels
If you have redecorated, and the color panels in
your dishwasher do not blend with your new color
scheme you may order the
additionrd
color panel
without charge.
Specify the color panel number when ordering:
GPF24
Wte/Mmond
GPF25
Coffee/Avocado
Order a Trim
Wt
or a Color
Pmel
from:
GE Appliances
c/o Dri-View Manufacturing
4706 Mlmond Ave.
Louisville, KY 40209
1A

PROBLEM
I
POSS~LECAUSE
(continuednextpage)
15

~
PROBLEM
SOLWR
-
(continued)
PROBLEM
I
POSS~LE
CAUSE
16

PROBLEM
\
POSS~LE
CAUSE
-.
~
you
need more
help...d,
toll free:
GE Answer
Center@
800.626.2000
consumer information service

.-
NO~S
18

W611
Be
There
With the purchase
ofyournew
GE appliance, receive the
assuran
ce that
ifyou
ever need-
information or assistance
horn
GE,
wdU
be there.
Mlyou
have to do is dl–tofl-free!
Idome
RepakSem;~
80MEWES(80W2-2737)
AGE consumer service professional will provide expert repair service,
scheduled at a time that’s convenient for you. Many GE Consumer Service
company+perated
locations offer you service today or tomorrow, or at your
convenience
(7:00
a.m. to
7:00
p.m. weekdays, 9:00 a.m. to
2:00
p.m. Saturdays).
Our factory-trained technicians know your appliance inside and out–so most
repairs can be handled in just one visit.
GEAnswer&nte~
80~62&2000
Whatever your question about any GE major appliance, GE Answer Center”
information service is available to help. Your call—and your question-will be
answered
prompdy
and courteously. And you can call anytime. GE Answer
Centere service is open 24 hours a day, 7 days a week.
—
--
-—-.=-
-...
hrCustomem
Wti
SpecialNeeds...
80~6262000
Upon request, GE will provide Consumers with impaired hearing or speech who have
Braille controls for a variety of GE access to a TDD or a conventional teletypewriter may
appliances, and a brochure to
=11
800-TDD-GEAC
(80W3H322)
to request
assist
in planninga barrier-free
information or service.
kitchen for persons with limited
mobility. To obtain these items,
free of charge,
cdl
800.626.2000.
80M2&2224
You can have the secure feeling that GE Consumer Service will still be there
after your warranty expires. Purchase a GE contract while yourwarranty is still
in effect
andyou’11
receive a substantial discount. With a
multipleyear
contract,
you’re assured of future service at today’s prices.
80M2&2002
hdividd
q-led
to
sernce
tick own appliances
User maintenance instructions contained in
ti
boo~et
can have needed parts or accessories sent
direcdy
to
cover procedures intended to
be
performed
byanyuser.
their home. The GE parts system provides access to over
Otier
servicing
gene~shoddbe
referred to
q=led
47,000 parts... and
all GE Genuine
Reneti
ParK
are service personnel.
Caution
mwt
be exercised,
since
fully warranted.
VISA, MasterCard and Discover cards
improper servicing may
muse
unsafe
operation.
are accepted.

.
YOUR GE DISHWASHER WITH Staple sales slip or
cancelled
check
PERMATUF
INTERIOR here. Proof of original purchase date
WARRANW
is
needed to obtain
semice
under
warran~.
WHAT IS COVERED
LIMITED SECOND-YEAR
nis
wa~nw
is extended to
WARRANTY
the original purchaser and any
FULL ONE-YEAR WARRANTY
For the second year from date of succeeding owner for products
For one year from date of original original purchase, we will provide, purchased for ordinary home use in
purchase, we will provide, free of
free of charge,
rep~cement
parts for
the 48 mainland states, Hawaii and
charge, parts and
sewice
labor in
any part of the Water
Diti.bti”on
Washington,
D.C.
In Alaska the
your home to repair or replace any System (as illustrated below) that wamnty is the same except that it is
pati
of the
dishwasherthat
fails
fails because of a manufacturing LIMITED because you must pay to
because of a manufacturing defect. defect. Associated inlet and drain ship the product to the service shop
plumbing
patis
are not covered by
or for the service technician’s travel
this warranty.
You
pay for the costs to your home.
FULL TEN-YEAR WARRANTY
service trip to your home and
1
All warranty service will be
For ten years from date of original service labor charges. provided by our Factory Service
purchase, we will provide, free of
charge, parts and service labor in
Power
Showe~arm
~
your home to repair or replace the
PemaT@
&b
or door liner if it
Wash arm
fails to mntain water because of
(spray arm)
a
manufacturing defect such as
cracking, chipping, peeling
or rusting.
Boot
i’
Cente= or by our authorized
Customer
Care”
servicers during
1
Hose
normal working hours.
Should your appliance need
Hub
sewice, during warranty period or
s
~~~~~~~~n
beyond, call 800-GE-CARES
●
(800-432-2737).
Motor
Sofi
Food Disposer
Pump
Water Distribution System
WHAT IS NOT COVERED
●
Service trips to your home to teach adequate electrical, plumbing, and
you how to use the product. other connecting facilities.
Read your Use and Care material.
●
Replacement of house fuses or
If you then have any questions
resetting of circuit breakers.
about operating the product, please
contact your dealer or our
●
Cleaning or servicing of air gap
Consumer Affairs office at the
device in
dmin
line.
address below, or call, toll free: . Failure of the product if it is used for
GE Answer
Center@
other than its intended purpose or
800.626.2000
used commercially.
consumer information
sewice
●
Damage to product caused by
●
Improperinstallation.
accident, fire, floods or acts of God.
If
you have an installation problem,
WARRANTOR IS
~TRES~SIBLE
contact your dealer or installer. You
FOR
CONSEQUEW
DWGES.
are responsible for providing
Some states do not allow the exclusion or limitation of incidental or consequential damages, so the above limitation or exclusion
may not apply to you. This warranty gives you specific legal rights, and you may also have other rights which
va~
from state to state.
To know what your legal rights are in your state, consult your Ioml or state consumer affairs office or your state’s Attorney General.
Warrantor: General Electric Company
If further help is needed concerning this warranty, write:
Manager—Consumer Affairs, GE Appliances, Louisville, KY 40225
RECYCLED PAPER
e
We care
abut
our environment.
RECYCUBLE
Part No. 165D3080P311
GSC800
Pub
No.
49-5619
4-w
CG
Printed in Canada
Table of contents
Other GE Dishwasher manuals

GE
GE Profile PDW8900 Series User manual

GE
GE GLD5600V Manual

GE
GE GSD2800G User manual

GE
GE CDT725SSFSS User manual

GE
GE Stainless Steel Tub Dishwashers User manual

GE
GE ADT521PGF4WS User manual

GE
GE GDF510PSDSS User manual

GE
GE GBF 412 Series User manual

GE
GE GLD4464RSS Manual

GE
GE Monogram ZBD6800 User manual