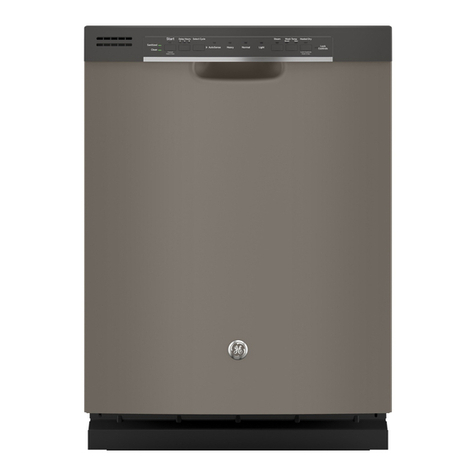
GE Appliances EDW3000 Series User manual

GEAppliances.com
EDW3000
GSD5400
GSD5500
GSD5560
GSD5600
GSD5700
GSD5800
GSD5900
Owner’s Manual
Dishwashers
165D4700P249 49-5923 11-01 JR
Safety Instructions . . . . . . . . 2, 3
Operating Instructions
Care and Cleaning . . . . . . . . . . .11
Control Panels . . . . . . . . . . . . . . .4
Control Settings . . . . . . . . . . . . . 5
Flashing Display Lights . . . . . . . .6
Loading the
Dishwasher Racks . . . . . . . . . .8, 9
Loading Place Settings . . . . . . .10
Optional Accessories . . . . . . . . .12
Using the Dishwasher . . . . . . .6, 7
Troubleshooting Tips . . . . 13, 14
Consumer Support
Consumer Support . . . Back Cover
Warranty . . . . . . . . . . . . . . . . . . 15
Write the model and serial
numbers here:
Model # ____________________
Serial # ____________________
You can find them on a label on the
tub wall just inside the door.

2
Operating Instructions Safety InstructionsConsumer Support Troubleshooting Tips
■
Do not tamper with controls.
■
Do not abuse, sit on, or stand on the door or
dish rack of the dishwasher.
■
Do not discard a dishwasher without first
removing the door of the washing compartment.
■
Do not store or use combustible materials,
gasoline or other flammable vapors and liquids
in the vicinity of this or any other appliance.
■
Do not allow children to play around dishwasher
when opening or closing door due to the
possibility of small fingers being pinched in door.
■
Do not allow children to play with, on or around
this appliance or any discarded appliance.
DO NOT…
WARNING!
IMPORTANT SAFETY INFORMATION.
READ ALL INSTRUCTIONS BEFORE USING.
WARNING!
For your safety, the information in this manual must be followed to minimize the risk of fire
or explosion, electric shock, or to prevent property damage, personal injury, or death.
Under certain conditions hydrogen gas may be produced in a water heater that has not been
used for two weeks or more. HYDROGEN GAS IS EXPLOSIVE.
If the hot water has not been used for two weeks or more, prevent the possibility of damage or
injury by turning on all hot water faucets and allow them to run for several minutes. Do this
before using any electrical appliance which is connected to the hot water system. This simple
procedure will allow any built-up hydrogen gas to escape. Since the gas is flammable, do not
smoke or use an open flame or appliance during this process.
WATER HEATER SAFETY
Use this appliance only for its intended purpose as described in this Owner’s Manual.
PROPER INSTALLATION AND MAINTENANCE
This dishwasher must be properly installed and located in accordance with the Installation
Instructions before it is used. If you did not receive an Installation Instructions sheet with
your dishwasher, you can receive one by visiting our website at GEAppliances.com.
■
Connect to a grounded metal, permanent
wiring system; or run an equipment-grounding
conductor with the circuit conductors and
connect to the equipment-grounding terminal
or lead of the appliance.
■I
mproper connection of the equipment-
grounding conductor can result in a risk of
electric shock. Check with a qualified electrician
or service representative if you are in doubt
whether the appliance is properly grounded.
■Use supply conductors rated at least 75°C
(167°F).
■
Dispose of discarded appliances and shipping
or packing material properly.
■
Do not attempt to repair or replace any part
of your dishwasher unless it is specifically
recommended in this manual. All other
servicing should be referred to a qualified
technician.
■
To minimize the possibility of electric shock,
disconnect this appliance from the power
supply before attempting any maintenance.
NOTE:
Turning the dishwasher off does not
disconnect the appliance from the power
supply. We recommend having a qualified
technician service your appliance.

Consumer SupportTroubleshooting TipsOperating InstructionsSafety Instructions
3
PROPER DISPOSAL OF THE DISHWASHER
Junked or abandoned dishwashers are
dangerous…even if they will sit for “just a few
days.” If you are getting rid of your old
dishwasher, please follow the instructions below
to help prevent accidents.
Before You Throw Away Your Old Dishwasher:
■Take off the door of the washing
compartment or remove the door latch
keeper (as shown).
WARNING! RISK OF CHILD ENTRAPMENT
WHEN USING YOUR DISHWASHER
■Use only powder, tabs, liquid detergents
or rinse agents recommended for use in a
dishwasher and keep them out of the reach
of children. Cascade®, Cascade Complete®
and Electrasol®Automatic Dishwashing
Detergents, and Jet-Dry®rinse agent have
been approved for use in all GE dishwashers.
■Locate sharp items so that they are not likely
to damage the door seal.
■Load sharp knives with the handles up to
reduce the risk of cut-type injuries.
■Do not wash plastic items unless marked
dishwasher-safe
or the equivalent. For
plastic items not so marked, check the
manufacturer’s recommendations.
■Non-Dishware Items: Do not wash items such
as electronic air cleaner filters, furnace filters
and paint brushes in your dishwasher.
Damage to dishwasher and discoloration
or staining of dishwasher may result.
■Do not touch the heating element during or
immediately after use.
■Do not operate your dishwasher unless all
enclosure panels are properly in place.
■Close supervision is necessary if this
appliance is used by or near children.
■Load light, plastic items so they will not
become dislodged and drop to the bottom
of the dishwasher—they might come into
contact with the heating element and be
damaged.
READ AND FOLLOW THIS SAFETY INFORMATION CAREFULLY.
SAVE THESE INSTRUCTIONS
Door latch keeper
GEAppliances.com

Cycle Chart
Model Cycle Water Usage (gal.) Cycle Time (min.)
EDW3000, SaniWash 8.5 56–101
GSD5500, Pots & Pans
GSD5560, Heavy 11.5 70–85
GSD5600, Medium 9.9 65
GSD5700, Light 8.2 61
GSD5800, Normal Wash
GSD5900 Heavy 9.9 70
Medium 8.2 62
Light 6.6 56
Speed Wash/Light Wash 8.3 39
China Crystal 6.6 34
Rinse Only 1.6 5
Operating Instructions Safety InstructionsConsumer Support Troubleshooting Tips
4
About the dishwasher control panel.
OPTIONSLOAD SELECTIONS
STATUS
POTS
& PANS
SPEED
WASH
RINSE
ONLY
SPEED
DRY
DELAY
START
LOCK
(2 TIMES)
POWER
PRESOAK
SANI
WASH NORMAL
CHINA
CRYSTAL
SENSING
Clean Sensor
WASHING
RINSING
DRYING
SANITIZED
2 4 8
CLEAN
START
RESET
Model EDW3000
OPTIONSLOAD SELECTIONS
STATUS
POTS
& PANS
LIGHT
WASH
RINSE
ONLY
HEATED
DRY
DELAY
START
LOCK
(2 TIMES)
SANI
WASH NORMAL
CHINA
CRYSTAL
SENSING
Clean Sensor
WASHING
RINSING
DRYING
SANITIZED
2 4 8
CLEAN
START
RESET
Models GSD5500 and GSD5560
OPTIONSLOAD SELECTIONS
STATUS
POTS
& PANS
SPEED
WASH
RINSE
ONLY
SPEED
DRY
DELAY
START
LOCK
(2 TIMES)
SANI
WASH NORMAL
CHINA
CRYSTAL
SENSING
Clean Sensor
WASHING
RINSING
DRYING
SANITIZED
2 4 8
CLEAN
START
RESET
Models GSD5600 and GSD5700
OPTIONSLOAD SELECTIONS
STATUS
POTS
& PANS
LIGHT
WASH
RINSE
ONLY
HEATED
DRY
DELAY
START
LOCK
(2 TIMES)
POWER
PRESOAK
SANI
WASH NORMAL
CHINA
CRYSTAL
SENSING
Clean Sensor
WASHING
RINSING
DRYING
SANITIZED
2 4 8
CLEAN
START
RESET
Model GSD5800
OPTIONSLOAD SELECTIONS
STATUS
POTS
& PANS
SPEED
WASH
RINSE
ONLY
SPEED
DRY
DELAY
START
LOCK
(2 TIMES)
POWER
PRESOAK
SANI
WASH NORMAL
CHINA
CRYSTAL
SENSING
Clean Sensor
WASHING
RINSING
DRYING
SANITIZED
2 4 8
CLEAN
START
RESET
Model GSD5900
You can locate your model number on the tub wall just inside the door. Throughout this manual, features
and appearance may vary from your model.

Consumer SupportTroubleshooting TipsOperating InstructionsSafety Instructions
Options
The light above the selected pad will be ON to indicate which OPTION has been selected.
POWER For use with heavily soiled and/or dried-on, baked-on soils. This option
MUST
be selected
PRIOR
to starting the cycle.
PRESOAK
This option adds 16 minutes to the cycle time.
SPEED DRY/ Shuts off the drying heat option. Dishes air dry naturally and energy is saved. You can prop the door open after the
HEATED DRY
CLEAN
light illuminates.
OFF
SPEED DRY/ Turns the heater on for fast drying. This cycle will extend the time to your wash cycle by 23 minutes for the
NORMAL
HEATED DRY cycle and 30 minutes for the
SANI WASH
cycle.
NOTE:
Cannot be selected with
RINSE ONLY
cycle.
ON
LOCK
When the
LOCK
pad is touched twice within 3 seconds, all pads become inoperative.
You can lock the controls to prevent any selections from
being made. Or you can lock the controls after you have
started a cycle or selected DELAY START so the cycle or DELAY START is not interrupted.
Children cannot accidentally start dishwasher by touching pads with this option selected.
To unlock the dishwasher after it has been locked, touch the
LOCK
pad twice within 3 seconds. The light above the
LOCK
pad will turn off.
DELAY START You can delay the start of a wash cycle for up to 8 hours. Press the
DELAY START
pad to choose the number of hours you want
to delay
the start of the cycle. The machine will count down and start automatically
at the correct time. Pressing the
START/RESET
button will cancel the
DELAY START
selection.
NOTE:
If you forget to latch the door, a reminder signal will beep until you do so.
RESET To change a cycle after washing starts, touch the
START/RESET
pad to cancel the cycle. After water is pumped out and the
motor stops, you can reprogram and restart the dishwasher. This will take approximately 90 seconds.
Load Selections
The light above the selected pad will be ON to indicate which LOAD SELECTION has been selected
.
SANI WASH This cycle raises the water temperature in the final rinse to sanitize your dishware. The cycle length will vary depending
on the temperature of your inlet water.
NOTE:
The SaniWash cycle is monitored for sanitization requirements. If the cycle is interrupted during or after the main wash
portion or if the incoming water temperature is so low that adequate water heating cannot be achieved, the sanitizing conditions
will not be met. In these cases, the sanitized light will not illuminate at the end of the cycle.
POTS & PANS For heavily soiled dishes or cookware with dried-on or baked-on soils.
Everyday dishes may be included.
This cycle will not remove burned-on foods.
NORMAL
For loads of everyday dishes, glasses and cookware with medium soils.
NOTE:
Many dishes have lighter soil than normal.
Choosing
a cycle other than
NORMAL
will save energy and water.
SPEED WASH/ For dishes with light soils.
LIGHT WASH
CHINA CRYSTAL For lightly soiled china and crystal.
RINSE ONLY For rinsing partial loads that will be washed later.
Do not use detergent.
The Status
The Status display tells you what is happening while the dishwasher is in operation and also any malfunctions if they occur (see page 6). The lights
will come ON indicating the sequence of operation the dishwasher is in.
SENSING Displayed during periods using CleanSensor technology to measure the amount of soil in the load and decide if another prewash
is needed. The SENSING light is displayed only during NORMAL and POTS & PANS cycles.
WASHING Displayed during prewash and main wash periods.
RINSING Displayed during rinse periods.
DRYING Displayed during
SPEED DRYING/HEATED DRYING
.
SANITIZED Displayed when cycle has met sanitization conditions. Light remains
ON
until door is opened.
Start
Close and latch the door. Touch the
START/RESET
pad to begin the cycle. Water fill begins, and approximately 40 seconds
later the wash action begins.
NOTE:
The dishwasher remembers your last cycle so you don’t have to reprogram each time. When the dishwasher is loaded
and the door latch is in the locked position, the control panel lights will be
ON
and display the last settings you selected.
If you don’t want to change any of the settings, simply touch the
START/RESET
pad to begin the cycle.
Also, if a power failure occurs,
NORMAL
and
SPEED DRY/HEATED DRY
will automatically be programmed. Make any new
selections and touch the
START/RESET
pad to begin the cycle.
Control Settings
GEAppliances.com
Clean
This light is illuminated when a wash cycle is complete. The light will stay
ON
until the door is opened. 5
Other manuals for Appliances EDW3000 Series
3
This manual suits for next models
7
Table of contents
Other GE Dishwasher manuals

GE
GE Monogram ZBD1850NII User manual

GE
GE GSC3500 User manual

GE
GE GSD1130 User manual

GE
GE Monogram ZBD4700XWW User instructions

GE
GE GDF630-640 Series User manual

GE
GE Monogram ZBD6880NSS User guide

GE
GE Built-In Dishwasher User manual

GE
GE 165D4700P138 User manual

GE
GE GPS5CC User manual

GE
GE GSD500 User manual

GE
GE GDF 570 Series User manual

GE
GE Monogram ZBD1800K Series How to use

GE
GE GSD1400 Series User manual

GE
GE GLDA696FSS Assembly instructions

GE
GE GLDT696DSS Manual

GE
GE Triton XL GSD6900 Series User instructions

GE
GE GSD4230X User manual

GE
GE GSD1430 User manual

GE
GE GLDA696MSS User manual

GE
GE Monogram ZBD1850NII User manual