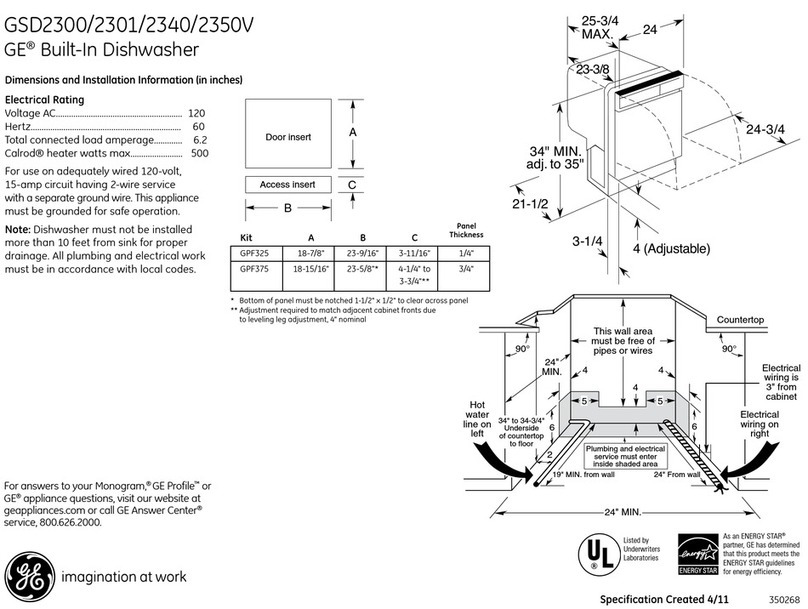
GE Profile PDW7800PCC User manual

ge.com
0
LU
0
Safety Instructions ....... 2,s
Operating Instructions
Care and Cleaning ......... 11, 12
Control Panel and Settings .... _J_
Loading Place Settings ........ 11
Loading the Racks ............. 10
Using the Dishwasher ......... _J9
Troubleshooting Tips... 12-14
Consumer Support
Consumer Support ..... Back Cover
Warranty ..................... 15
Write the model and serial
numbers here:
Model #
Serial #
Youcan find them on the tub wall
just insidethe door.
165D4700P382 49-55058 OI-09JR

IMPORTANTSAFETYINFORMATION.
READALL INSTRUCTIONSBEFOREUSING-
SAVETHESEINSTRUCTIONS
WARNING!
For your safety, the information in this manual must be followed to minimize the risk of fire
or explosion, electric shock, and to prevent property damage, personal injury, or death.
WARNING! WATER HEATER SAFETY
Under certain conditions, hydrogen gas may be produced in a water heater that has not been used
for two weeks or more. HYDROGEN GAS IS EXPLOSIVE.
Ifthe hot water has not been used for two weeks or more, prevent the possibility of damage or injury
by turning on all hot water faucets and allow them to run for several minutes. Dothis before using any
electrical appliance which is connected to the hot water system. This simple procedure willallow any built-
up hydrogen gas to escape. Since the gas is flammable, do not smoke or use an open flame or appliance
during this process.
%PROPER INSTALLATION AND MAINTENANCE
This dishwasher must be properly installed and located in accordance with the Installation
Instructions before it is used. If you did not receive an Installation Instructions sheet with
your dishwasher, you can receive one by visiting our website at www.ge.com. In Canada
visit www.geappliances.ca.
• Connectto a grounded metal, permanent wiring
system; or run an equipment-grounding
conductor with the circuit conductors and
connect to the equipment-grounding terminal
or lead ofthe appliance.
• Improper connection ofthe equipment-grounding
conductor can result in a risk of electric shock.
Checkwith a qualified electrician or service
representative if you are in doubt whether the
appliance is properly grounded.
• Disposeof discarded appliances and shipping
or packing material properly.
• Do not attempt to repair or replaceany part
of your dishwasher unless it isspecifically
recommended in this manual. All other servicing
should be referredto a qualified technician.
• To minimizethe possibility of electric shock,
disconnect this appliance from the power supply
before attempting any maintenance.
NOTE:Turningthe dishwasheroff doesnot
disconnectthe appliancefrom the power supply.
Werecommend having o qualified technician
servicegout appliance.
2
CAUTION: Topreventminorinjuryorpropertydamage
• Contents washed in Anti-bacterial mode, if
available, may be hot to the touch. Usecare
before handling.
• Usinga detergent that is
not specifically designed
for dishwashers will cause
the dishwasher to fill with
suds.
• If your dishwasher is connected to a
wall switch, ensure that the switch is
on prior to use.
• On dishwashers with electronic controls,
if you choose to turn the wall switch
off between wash cycles, allow 5-10
seconds after turning the switch on before
touching START/RESETto allow the control
to boot.
• Non-Dishware Items:Do not wash items such
as electronic air cleaner filters,furnace filters and
paint brushes in your dishwasher.Damage to
dishwasher and discoloration or staining of
dishwasher may result.
• Closesupervision isnecessary if this appliance
isusedby or near children.
• Load light, plastic items so they will not
become dislodged and drop to the bottom
of the dishwasher-they might come into
contact with the heating element and be
damaged.

ge.com
_k WARNING! RISK OF CHILD ENTRAPMENT
PROPER DISPOSAL OF THE DISHWASHER
Junked or obondoned dishwoshers ore
dongerous...even if they will sit for "just o
few doys." If you ore getting rid of your old
dishwosher, pleose follow the instructions below
to help prevent occidents.
Before You Throw Away Your Old
Dishwasher:
• Toke off the door of the woshing comportment
or remove the door Iotch keeper (osshown). Doorlatchkeeper
WARNING! When using gour dishwasher, follow basic precautions,
including the following:
• Usethis opplionce only for its intended purpose
os described in this Owner's Monuol.
• Useonly powder,tobs, liquid detergents or rinse
ogents recommended for use in o dishwosher ond
keepthem out of the reoch of children.Cascade®,
Cascade®Complete and Electrasol®Automatic
Dishwashing Detergents,and Jet-Dry ®and
Cascade Crystal Cleare rinseagents have been
approved for usein all GEdishwashers.
• Locatesharp itemsso that they are not likely
to damage the door seal.
• Loadsharp kniveswith the handles up to reduce
the risk of cut-type injuries.
• Donot wosh plostic items unlessmorked
dishwosher sofe or the equivolent. Forplostic
items not so morked, checkthe monufocturer's
recommendotions.
• Donot touch the heoting element during or
immediotely ofter use.
• Do not operote your dishwosher unlessoil
enclosure ponels ore properly in ploce.
• Do not tomper with controls.
• Do not obuse,sit on or stond on the door or dish
rock of the dishwosher.
• Do not ollow children to ploy oround dishwosher
when opening or closing door due to the possibility
of smoll fingers being pinched in door.
• Do not discord o dishwosherwithout first removing
the door of the woshing comportment or the door
Iotch.
• Do not store or usecombustible moteriols,gosoline
or other flommoble vopors ond liquidsin the
vicinity of this or ony other opplionce.
• Do not ollow children to ploy with, on or insidethis
opplionce or ony discorded opplionce.
READ AND FOLLOW THIS SAFETY INFORMATION
CAREFULLY.
SAVE THESE INSTRUCTIONS

About the dishwasher control panel.
You can locate your model number on the tub wall just inside the door. Throughout this manual, features and
appearancemay vary fromyour model.
ll El
• * . . • . _ Smart Dispense
SENSING WASHING RiNSiNG DRYING SANiTiZED CLEAN LOW_ET_RGENT
.................................. SELECTIONS ENHANCEMENTS
D El El
Control Settings
_l Status Indicator Lights
TheStatusdisplaytellsyouwhat'shappeningwhilethedishwasherisinoperationandmayflash,indicatinga malfunction(see
page6).ThelightswillcomeONindicatingthesequenceofoperationthedishwasherisin.
LOWDETERGENT DisplayedwhentheSmartDispenseTM needsto berefilledwithliquidorgelautomaticdishwasher
(onsomemodels) detergent.
SENSING Displayedwhilethe ExtraCleanTM Sensorismeasuringtheamountof soilandtemperatureof water.
Thedishwasherwilladjusttheselectedcycleto achieveoptimalperformance.
WASHING Displayedduringprewashandmainwashperiods.
RINSING Displayedduringrinseperiods.
DRYING DisplayedduringHEATEDDRY.
SANITIZED Displayedwhencyclehasmetsanitizationconditions.LightremainsONuntildoorisopened.
CLEAN Displayedwhena washcycleiscomplete.
le
i[i
TimeRemaining Displag (onsomemodels)
Duringoperation,thedisplayshowsthe minutesremaininguntilthecycleiscomplete.Thedisplaymay adjusttheremaining
timewhiletheSensinglightison.Thetimedisplayedatthestartofeachcyclemay changefromthefactorysettingastheunit
customizesitselftohomeuse.Duringadelaystart,thedisplaywillshowhoursoftime remaininguntilthecyclestarts.
Selections
Pressthepad for thedesiredwash c_Icle.
NOTE:Allcycletimes and water usage information contained inthe following sectionare approximate valuesonly.
Actual resultswill depend on severalfactors, includingbut not limitedto, inlettemperature, householdwater pressure
and turbidity of the wash water.
Thelightabove or next to the selectedpad will be ONto indicatewhich WASHCYCLEhas beenselected.
ANTI-BACTERIA Heavy 8.8gallons(33.3litres),105minutes
Medium 7.5gallons(28.4litres),95 minutes
Light 6.3gallons(23.8litres),85 minutes
Thiscycle raisesthe water temperature inthe final rinseto sanitizeyour dishware.Thecycle
lengthwillvary depending on the temperature of your inletwater.
NOTE:TheAnti-Bacteriacycle ismonitored for sanitizationrequirements.Ifthe cycle is
interrupted during or after the main wash portion or ifthe incoming water temperature isso
lowthat adequate water heatingcannot be achieved,the sanitizingconditionsmay not be
met. Inthese cases,the sanitizedlight willnot illuminate at the end ofthe cycle.
NOTE:NSF-certifiedresidentialdishwashersare not intendedfor licensedfood establishments.
COOKWARE
(POTS& PANS)
NORMAL WASH
Heavy 10.0gallons(37.9litres),80 minutes
Medium 8.8gallons(33.3litres),70 minutes
Light 7.5gallons(28./4litres),60 minutes
Thiscycle ismeant for heavily soileddishesor cookwarewith dried-on or baked-on soils.This
cycle may not remove burned-on foods. Everydaydishes are safe to be used inthis cycle.
5.0-8.8gallons(18.9-33.3litres),/47-90minutes
Thiscycleisfor medium/heavilysoileddishesandglassware.
Cycle time and water usage are approximate values. Results will depend on
several factors, including but not limited to inlet temperature, household water
pressure and amount of soil in the wash water.

II
ge.com
SPEEDCYCLE 7.5gal.(28.4I),35 min.
(onsome models) Thiscycle isfor everyday dishesand glassware.
CHINACRYSTAL 7.5gal.(28.4I),35 min.
or HANDIGENTLE Thiscycle isfor lightly soiledchina and crystal.
GLASSES 7.5gal.(28.4I),35 min.
(onsome models) Thiscycle isspecifically designedfor glasses.
RINSEONLY 2.5gal,(95 I),10 min.
or RINSE& HOLD Forrinsing partial loadsthat will be washed later.Oonot usedetergent with this cycle.
NOTE:TheCHINACRYSTAL/PLASTICS(somemodels)selectorisa toggle pad;toggle the pad until the
desiredcycle isindicated.
NOTE:Thisdishwasherisequipped with o CleonSensoF"with automatic temperature control;therefore,cycle
length and time may vary depending on soiland temperature conditions.
NOTE:Only theAnti-Bacteria cycle hasbeendesignedto meet therequirementsof Section6,NSF284 for soil
removal and sonitizotion efficacy.
Enhancements/Extras
The light above the selected pad will be ON to indicate which ENHANCEMENT/EXTRAhas been selected.
PREWASH For use with heavily soiled and/or dried-on, baked-on soils. This option MUSTbe
(on some models selected PRIORto starting the cycle. This option adds 26 minutes to the cycle time.
NOTE:Cannot be selected with RINSEONLYcycle.
HEATED DRY When HEATED DRY is off, dishes will air dry.
Light OFF
HEATED DRY Turns the heater on for faster drying. This will extend the total cycle time between
Light ON 8 and 38 minutes depending on the cycle selected. NOTE: HEATED DRY cannot be
selected with RINSE ONLY cycle.
LOCK Youcan lock the controls to prevent any selections from being made. Or you con lock
the controls after you hove started ocycle.
Children cannot occidentally start dishwasher bg touching pods with this option
selected.
To unlock the dishwasher controls, touch and hold the HEATEDDRYpad for 3 seconds.
The light abovethe LOCKpad will turn off.To lock the dishwasher, touch and hold the
HEATEDDRYpad for 3 seconds. The light above the LOCI( pad will turn on.
ADDED HEAT or
EXTRAHOTWASH
or TEMPBOOST
(on some models
When selected, the cycle will run with heating element on longer and may
increase cycle times to improve both wash and dry performance.
NOTE:Cannot be selected with RINSEONLYcycle.
DELAY HOURS You can delay the start of a wash cycle for up to 9 hours, Touch the DELAYHOURSpad
to choose the number of hours you want to delay the start of the cycle; then touch
START/RESET.Themachine will count down and start automatically at the correct time.
Touching START/RESETesecond time will cencel the DELAVSTARTselection. NOTE:If
you forget to fully close the door,a reminder signal will beep until you do so.
RESET To change a cycle after washing starts, touch the START/RESETpad to cancel the
cycle. TheSTART/RESETlight will flash while the water is pumped out if needed. This
takes approximately 90 seconds. When the light stops flashing, the dishwasher
can be reprogrammed and restarted.

About the dishwasher control panel.
m
m
Start
Closethedishwasherdoorandselectthecycleanddesiredenhancements.TouchtheSTART/RESETpadtobegin
thecycle.Waterfillbegins,andapproximately60secondslaterthewashactionbegins.
NOTE;Thedishwasherremembersyourlastcyclesoyoudon'thaveto reprogrameachtime.Whenthedishwasher
doorisfullyclosed,thecontrolpanellightswilldisplaythelastsettingsyouselected.
If youdon'twantto changeanyofthesettings,simplytouchtheSTART/RESETpadtobeginthecycle.
Ifthedoorisclosed,theindicatorlightswillturnoff iftheSTART/RESETpadisnotselectedwithintwo minutes.
Toactivatethedisplay,openandclosethedooror pressanypad.
Also,ifa powerfailureoccurs,NORMALandHEATEDDRYwillautomaticallybeprogrammed.Hakeanynew
selectionsandtouchtheSTART/RESETpadto beginthecycle.
Clean
TheCLEANlightwillilluminateanda doublebeepwillsoundwhena washcycleiscomplete.Onsomemodels,
theCLEANlightwillturnoff whenthedoorisopened.Onothermodels,theCLEANlightwillremainonuntilthedoor
isopenedandthenrelatchedoruntilanykeypadispressedwhilethedoorislatchedshut.
Flashing display lights.
Status Indicator Lights
START/RESET
Using the dishwasher.
6
What It Means
CyclehasbeeninterruptedbypressingtheSTART/RESETpad.Lightwillstop
flashingafterthedishwasherautomaticallydrainsoutthewater.
Check the Woter Temperoture
Theenteringwatershouldbeat least120%(49°C)and
notmorethan 150%(66°C)foreffectivecleaningandto
preventdishdamage.Checkthewatertemperaturewith
acandyor meatthermometer.Turnonthehotwater
faucetnearestthedishwasher,placethethermometerin
aglassandletthewaterruncontinuouslyintotheglass
untilthetemperaturestopsrising.
Use Jet-Dry ®or Cascade Crystal Clear®Rinse Agent
Jet-Dry®or CascadeCrystalCleare rinseagentsremovespotsandpreventnewfilm buildupon yourdishes,glasses,
flatware,cookwareandplastic.
Filling the Dispenser
Therinseagentdispenserholds3.5oz.(99g.)ofrinseagent.Undernormalconditions,
thiswilllastapproximatelyonemonth.Tryto keepitfull,butdo notoverfill.
[] Hakesurethedishwasherdoorisfullyopen.
I_1 Turnthedispensercaptotheleftand liftitout.
[] Addrinseagentuntiltheindicatorwindowlooksfull.
[] Cleanupanyspilledrinseagentwitha dampcloth. In
F'I Replacethedispensercap. window Dispensercap
RinseAid Setting
Theamountof rinseagentreleasedintothefinalwashcanbeadjusted.Thefactory
settingisat themidpoint.Ifthereareringsofcalcium(hardwater)spotson dishes,try a
highersetting.Ifyouseefoaminthedishwasher,movetheindicatorto a lowersetting.
Toadjustthesetting
Removethedispensercap;thenturntheadjustercounterclockwiseto increasethe
amountof rinseagent,clockwiseto reducetheamountof rinseagent.
Dish Preparation Prior to Loading
Rinseagent
adjuster
• Noprerinsingof normalfoodsoilisrequired.
• Scrapeoffhardsoils,includingbones,toothpicks,skins
and seeds.
• Removelargequantitiesofanyremainingfood.
• Removeleafyvegetables,meattrimmingsand
excessiveamountsofgreaseoroil.
• Removeacidicfoodsoilsthat candiscolorstainless
steel.

ge.com
Manual Detergent Dispenser
Vourdishwashercomesequippedwitha manualdispenser
and,on somemodels,an automaticliquiddishwasher
detergentdispenser(SmartDispenseTM).Voucanuseeither
ofthesedispensers,butdon'tusebothatthesametime.
SmartDispense TM
ManualDetergent
Dispenser
Forheavilysoiledloads,usea bitmoredetergent.Forwater
temperaturesabove180%(60°C),usea bitlessdetergent.
Medium Medium Extremely
Soft Soft Hard Hard
Forheavilysoiledloads,usethePotsandPansorHeawWashcycle.
Thecoverofthemainwashsectionwillopenduringthe
washcycle.IfyouareusingSmartDispenseTM, leavethe
coverofthe mainwashsectiondispenseropenbefore
startingthecycle.
Voumay usepowder,liquid,gelortabletsinthemanual
dispenser.Itisimportanttokeeppowdereddetergentsand
tabletsfreshanddrysothey don'tloseeffectiveness.
Therefore,donotputdetergentintothemanualdispenser
untilyouarereadytowashdishes.
DO NOTUSEHAND DISHDETERGENT
m
m
Filling Manual Detergent Dispenser
Theamountofdetergentto usedependsonwhetheryour
waterishardor soft.Withhardwater,youneedextra
detergent.Withsoftwater,youneedlessdetergent.
Protectyourdishesanddishwasherbycontactingyour
waterdepartmentandaskinghowhardyourwateris.
Twelveor moregrainsisextremelyhardwater.Awater
softenerisrecommended.Withoutit, limecanbuildup in
thewatervalve,whichcouldstickwhileopenandcause
flooding.Toomuchdetergentwithsoftwatercancausea
permanentcloudinessofglassware,calledetching.
Usetheinformationinthetablebelowasa guideto
determinetheamountofautomaticdishwasherdetergent
to placeinthedispenser.Voumay usepowder,liquid,gel
ortabletsinthisdispenser.
Whenusingautomaticdishwashingdetergenttablets,
simplyplaceonetabletinthemainwashsectionandclose
thecover.
NOTE:Usingo detergentthatisnotspecificoll_tdesigned
fordishwasherswillcausethedishwasherto fillwith suds.
Duringoperation,thesesudswillspilloutofthedishwasher
vents,coveringthekitchenfloorandmakingthefloorwet.
Becausesomanydetergentcontainerslookalike,storethe
dishwasherdetergentina separatespacefrom allother
cleaners.Showanyonewhomay usethedishwasherthe
correctdetergentandwhereitisstored.
Whiletherewillbeno lastingdamagetothedishwasher,
yourdisheswillnotgetcleanusinga dishwashing
detergentthat isnotformulatedto workwith dishwashers.
Number
of Grains Detergent Cups to Fill
Lessthan 4 Fillcup to soft line (1/3 full)
4 to 8 Fillcup to medium soft line (2/3 full)
8 to 12 Fillcup to medium hard line
(completely full)
Greater Fillboth main wash cup
than 12 and pre wash cup

Using the dishwasher.
SmartOispense Detergent Dispenser ionsome models)
This dishwasher may have a SmartDispenseTMfeature
which automatically dispensesliquid automatic
dishwasher detergent into each cycle based on soil
leveland water hardness.
To utilizethe SmartDispenseT"Detergent Dispenser,
it must first befilled.Although any liquid or gel
automatic dishwashing detergent can be usedin
the SmartDispenseT"system, all liquid or gel
automatic dishwashing detergents are not the same.
Host automatic dishwashing detergents are chlorine
bleach-based (such asCascade®or Electrasol®)
while others contain enzymes (suchas Cascade
Complete®or Electrasol®AdvancedT"Gel).
Do not mix ong chlorine bleoch-bosed outomotic
dishwoshing detergent with ong dishwoshing
detergent contoining enzymes osthis could couse
the detergents to congeol ond leod to blockoge of
the SmortDispense'" system. Checkthe detergent
label to determine if the detergent ischlorine
bleach-based or one that contains enzymes. It is
recommended that the same type of detergent be
usedwhen refilling your SmartDispense_"system.
Zi,CAUTION! Absolutely do not add
powder detergent, tablets or any liquid soap or
detergent normally usedfor washing hands or
dishes in a sink.Onlyuse liquid or gel detergent
specifically designed for use in an automatic
dishwasher.
Setthe door at acomfortable angleto fillthe
dispenser.
Aimthe detergent bottle at the opening in the door
and begin to fill.
i
Thedispenser will hold 40 ozof liquid dishwasher
detergent (standard sizebottle).
Riling Dispenser
Toopen the dispenser for filling,push down and
turn the blue cap counterclockwise untilthe cap
isloose.Lift cap off.
SEN;,NG_AS_ING.IN;i.GW,NG S_"I;,ZEO
i
i i i
Turn clockwise until tight. 'i
Whenfull, replace the cap and turn clockwise
until tight to ensure that no water enters the
SmartDispenseT"dispenser.If residueisleft on
the door,itwill bewashed off in the next cycle.
An indicator light will turn on to notify you when the
dispenser needsto be filled again.After filling, the light
will not turn off untilthe door isclosed.A full dispenser
will last approximately 1 month for the average user.
Light will turn on
when it is time to refill.
CLEAN Low_ErE_G_NT
SELEC'flONS
@@@@@@@ ENHANCEMENTS
NOTE:If you are not usingSmartDispense_"and you
want to turn the LOW DETERGENTLEDlight off,press
theADDEDHEATpad 5 times within 3seconds.You
will hear 3 beeps,then the light will go off.Youcan
turn the light back on by pressingthe ADDEDHEAT
pad 5times within 3 seconds.

SmartDispense Detergent Dispenser
Water Hardness Calibration
ge.com
Priorto the first use,the dishwasher needsto
be calibrated for water hardness.Pleasefollow
directions below to calibrate the dishwasher to
the hardness of gour tap water.
Determine the Hardness of Vour Tap Water
Inthe bag containing these instructions, gou should
find a water hardnesstest strippackage. Readthe
instructions on the package, removethe test strip and
follow the instructions to determine the hardness level
of gour tap water.Youwill use this information to
calibrate gour dishwasher to dispensethe optimal
amount of detergent.
Water hardness test strip indication
SOFT
HARD
Volue to Enter
into Dishwosher
OREDI I I I I I I I I 1
1 RED _ 2
2 RED _ 3
3 RED _ 4
4RED _ 5
Set Control to Calibration Mode
From the standbg mode (dishwashernot running
a cgcle and the panel lights on),enter the water
hardness selectionmode.
Control Calibration
Control Panel
Pressatthesametimefor3seconds. Display
1.Closeand latch the door (lightson, dishwasher
not running).
2.Pressthe COOKWAREand DELAYHOURSpads at
the same time for 3 seconds.Thedisplauwill show
a number 1to 5.This isthe water hardness value
currentlu set.
Control Panel
WASHpadto lower padto raisethe
thevalue, value.
3.Pressthe COOKWAREpad to raisethe value or
the NORMALpad to lower the value. Setthe water
hardness value(1 to 5)to the number determined
with the test strip and table at left.
4. Oncethe water hardness isset, pressthe
START/RESETpadto save the setting and return
the dishwasher to normal operation.
Youshould recalibrate the dispenser ifwater
conditions change, for example,if a water softener
sgstem isadded or removed.

Loading the dishwasher racks.
For best dishwashing results, follow these loading guidelines. Features and appearance of racks and silverware
baskets ma_l var_l from _lour model.
J
I II II II II 11 II II II II I!
Upper Rack
Although the upper rock isprimarily for
glosses,cups and saucers, pots and pans con
be placed in this rock for effective cleaning.
Cupsand glossesfit best along the sides.This
isalso o secure place for dishwasher-safe
plastics.
Theupper rack isadjustable (onsome models)
to add flexibilitg in loading gour dishwasher.
Tolower,push tabs inand lower rock.Toraise,
just pull up on rack untilit snaps.
Theutility shelf(on some models)mug be
placed in the up or down position to odd
flexibilitg.A wine gloss holder (onsome
models)secureswine glossesfor best
wushubilitg. Becausewine glossescome
in various sizes,after lauding,slowlg push
in the rock to make suretheg will clear
the top of the dishwasher.
Somemodels haveon Angled RackSgstem,
which ollows gou to angle gour dishes,such
as coffee mugs,for better cleaning and
quicker drging.To position the tines,pull the
leverforward, drop the tines into position
and releasethe lever.
Theupper rock isgood for oil kinds of
odd-shaped utensils.Saucepans,mixing
bowls and other items should be placed face
down. Fold-down tines (onsome models)
provide flexibilitgfor extra-large and hard-to-
fit items.
Securelarger dishwasher-safe plastics over
2 tines when possible.
Makesure small plastic items are secure so
theg can't fall onto the heater.
Besurethat items do not protrude through
the bottom of the rock and block rotation of
the middle sprog arm. This could result in
poor wash performance for items in the
upper rock.
Checkto make surethat no items will block
rotation of the wash arms.
Lower Rack
Thelower rock isbest usedfor plates,saucers
and cookwore. Large items such as broiler
pans and baking rocks shouldgo along the
left-hand side. Load plotters, pots and bowls
along the sides,in corners or in the back.The
soiledsideof items shouldface the center of
the rock. If necessorg,oversizedglossesand
mugs con be placed in the lower rock to
maximize loading flexibilitg.
Also,be careful notto let a portion of on item
such as o pot or dish handle extend through
the bottom rock.Thiscould blockthe wash
arm and cause poor washing results.
Fold-down tines (onsome models)provide
flexibilitgfor extra-large and hard-to-fit items.
Thetines mog be left inthe up position or
folded down to customize the lower rock.
Don'tletany
itemextend
throughbottom.
Toremoveendbaskets,graspthe
basketatoppositecornersand
slideapart.
Silverware Basket
Avarietg of options isavailable regarding
the three-piece silverware basketin gour
dishwasher.The complete basket isdesigned
to fit on the right sideof the lower rock.
Additionollg, each end of the basketis
removable to odd loading flexibilitg to
accommodate flatware and lower rock
copocitg needs.
Toload flatware, simplg push the adjustable
handle to either side.Putflatware in the
basket with knife handlesup to protect
gour hands. Placespoons in the basket
with handles down. Mix knives,forks and
spoons sotheg don't nest together.
Theprovided lidswith slots con be used
to ovoid nesting of silverware.Small plastic
items, such as measuring spoons and
lidsfor small containers, should go in
the bottom of the silverware basketwith
silverware on top.
Thelidsof both end and middle baskets con
be closed to contain small items. Long items
con be placedon the utilitg shelf in the
upper rock.
10

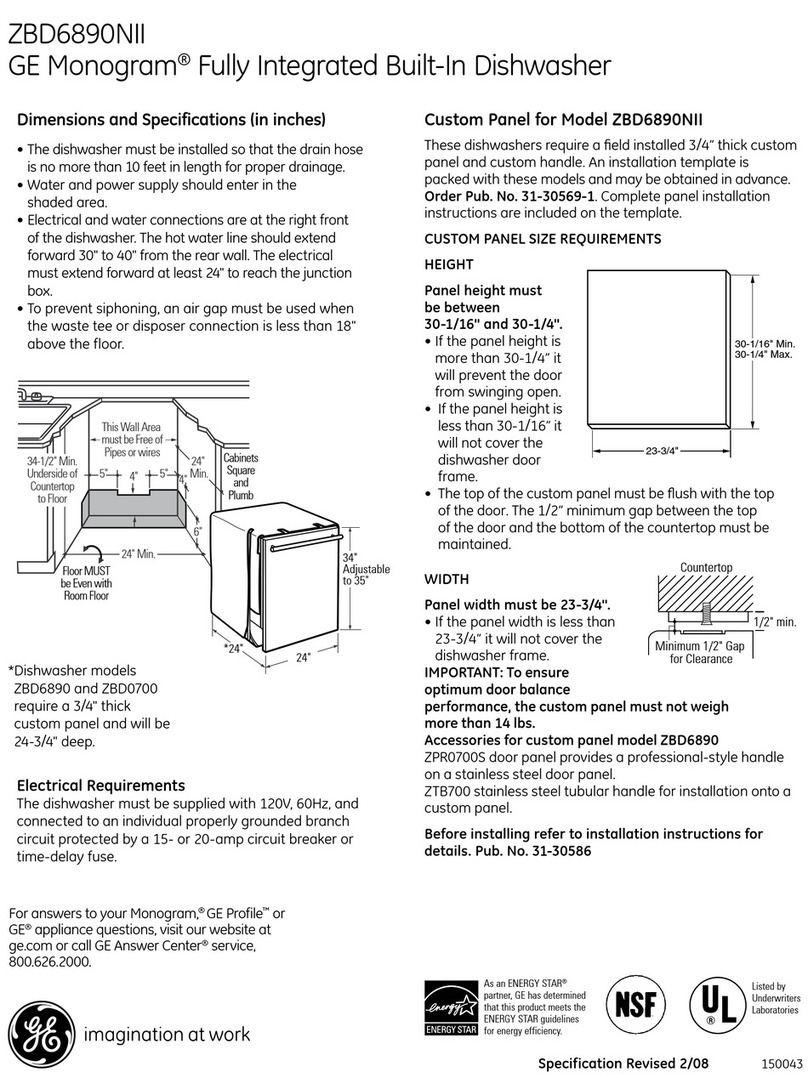
Loading place settings.., go.cam
Follow these guidelines for loading 10 place settings. Features and appearance of racks and silverware baskets
mabl varbl from blour model. NOTE:Silverware should be individuallbl loaded into the slots on the silverware basket lid.
Upper Rack--lO place settings Lower Rack--lO place settings
Follow these guidelines for loading 12 place settings. Features and appearance of rocks and silverware baskets
mabl varbl from blour model. NOTE:Silverware should be individuallbl loaded into the slots on the silverware basket lid.
Upper Rack--12 place settings Lower Rack--12 place settings
Caring for the dishwasher.
Cleaning the Exterior Door Panel
Beforecleaning the front panel,make
sure gou know what tgpe of panel gou have.
Referto the last two letters of gour model
number. Youcan locate your model number
on the left-hand tub walljust insidethe door.
If gour model number endswith BB,CC,WW,
SAor BG,then you have a painted door
panel. If gour model number ends with SS,
then gou have a StainlessSteelDoor panel.If
gour model number endswith CS,then gou
have a CleanSteelpanel.
Follow the instructions belowfor cleaning the
door panel for gour specific model.
Pointed Door Panel(modelnumbers ending
in BB-black, CC-bisque,WW-white, SA-silver
metallic or BG-grophite black)
Usea clean,soft, lightlg dampened cloth,
then drg thoroughlg. Youmag alsouse a
good appliance wax or polish.
Stainless SteelDoor Panel (modelnumbers
ending in SS)
The stainlesssteel panels can be cleaned
with StainlessSteelMagic or a similar product
using a clean, soft cloth. Donot useappliance
wax, polish,bleach or products containing
chlorine on StainlessSteeldoors.
Youcan order StainlessSteelMagic
#WXlOX15 through GEParts bg calling
800.626.2002.
CleanSteel Door Panel (model numbers
ending in CS)
Use a clean, soft, lightly dampened cloth,
then dry thoroughly. Do not use appliance
wax, polish or any chemical agent on
CleanSteel doors.
Do not wipe the dishwasher with a soiled
dish cloth or wet towel. Thesemag leave
a residue. Do not use scouring pads or
powdered cleaners because these products
con scratch the finish. 11

Caring for the dishwasher.
Stainless Steel Interior--Tub and Inner Door
Thestainlesssteel usedto make the
dishwasher tub and inner door provides
the highest reliability available in o GE
dishwasher.If the dishwasher tub or inner
door should be scratched or dented during
normal use,they will not rust or corrode.
Thesesurface blemisheswill not affect
their function or durability.
Cleaning the Control Panel
Tocleanthe control panel,usea lightly
dampened cloth.Then dry thoroughly.
Protect Against Freezing
If your dishwasher isleft in an unheated
place during the winter,ask a service
technician to:
r_l cut off electrical power to the
dishwasher.Removefusesor trip
circuit breaker.
I-_1Turnoff the water supply and disconnect
the water inlet linefrom the water valve.
r_l Drainwater from the water inlet line
and water valve.(Usea pan to catch
the water.)
r_-i Reconnectthe water inlet lineto the
water valve.
Air gap _t. lu"L,_o-.i_°
Checktheairgapanytimeyour
dishwasherisn'tdrainingwell.
Does Vour Dishwasher Have an Air Gap?
An air gap protects your dishwasher
against water backing up into it if a drain
clogs.The air gap is not a part of the
dishwasher.It isnot covered by your
warranty. Not all plumbing codes require
air gaps,so you may not have one.
Theair gap is easy to clean.
[] Turnoff the dishwasher and lift off the
cover.
Removethe plasticcap and clean with
E]a toothpick.
Before you call for service...
Troubleshooting Tips
Save time and money! Review the charts on the following pages, or visit www.ge.com.
ln Canada visit www.geappliances.ca. You may not need to call for service.
Error Messages
START/RESETstatus
indicatorlight flashing
Dishwasher BEEPS
onceevery30seconds
12
Possible Causes What To Do
You have pressed the
START/RESETpad while the
dishwasher is running. This will
cancel the cgcle. The light will
stop flashing after the dishwasher
drains (about 90 seconds).
Power to the dishwasher was
turned off while a cgcle was
running and power hasjust been
restored to the dishwasher. The
blinking lights indicate that the
dishwasher isdraining the potential
water inside.
• PresstheSTART/RESETpadoncetostartthedishwasher.Pressthe
START/RESETpada secondtimewhenthedishwasherisrunningonlyifyou
wishto cancelthecycle.
• Thelightwillstopflashingafterthedishwasherdrains.Anewcyclewill
startautomatically.
This isa reminder that your
dishwasher door has beenleft
open during operation. It will
continue beepinguntil youclose
the door.
• Closeand latchthedoorafteropeningitmid-cycle.

ge.com
Error Messages Possible Causes What To Do
Beepingat theend This is normal.Thedishwasher •Toturnoff thedoublebeepindicator(orre-activateitifitwaspreviously
ofthecycle will beeptwice at the endofthe turned off),pressthe HEATEDDRYpad 5 timeswithin 3 seconds.
cycle Atriple beepwill soundto indicatethe an&of-cycle beepoption
hasbeenturned on or off.
LowDetergentlight SmartDispens#"haslessthan • FilltheSmartDispense"reservoirwith liquiddetergent.Afterfillingthe
isON 10cyclesworth ofdetergent reservoir,theLOWDETERGENTlightwillturnOFFoncethedoorisclosed.
left inthe dishwasher If youarenotusingtheSmartDispense"feature,turnoffthelowdetergent
lightby pressingtheADDEDHEATpad 5timeswithin3 seconds.
Problem Possible Causes What ToDo
Dishesandflatware Lowinletwater temperature •
notclean
Water pressureistemporarily low •
Airgap or disposerisclogged •
Improperrackloading •
Noair gap or highdrain loop •
Spots and filming
on glasses and
flatware
Cloudinesson
glassware
Extremelyhardwater •
Lowinletwater temperature
Overloadingthe dishwasher
Improperloading •
Oldor damp powderdetergent •
Rinseagentdispenserempty
Toolittle deter_ient
Combinationof softwater and
too muchdetergent
Water temperatureenteringthe
dishwasherexceeds150°F(66°C)
Sudsin thetub Correctdetergent •
wasn'tused
Makesureinletwatertemperatureis correct(seepage6).Turnonthehot
waterfaucetnearestthedishwasher,letrun untilthewatertemperature
stopsrising.Thenstartthedishwasherandturnoff thefaucet.Thisinsures
theenteringwaterishot.
Turnon afaucet.Iswatercomingoutmoreslowlythanusual?Ifso,wait
untilpressureisnormalbeforeusingyourdishwasher.
Cleantheairgap orflushthedisposer.
Makesurelargedishwaredoesnotblockthedetergentdispenseror the
washarms.Seethe Loadingthedishwasherrockssection.
Verifythat youhaveanairgapor a highdrainloop.Refertothe
InstallationInstructions.
UseJet-Dry ®or Cascade Crystal Clear*rinseagents to remove spots and
prevent new filmbuildup.
Makesurewatertemperatureisatleast120°I:.
Loaddishwasherasshowninthe LoadingPlaceSettingssection.
Makesuredetergentisfresh.
Ifwaterisextremelyhard,asoftenermay berequired.
• Thisiscalledetchingand ispermanent.Topreventthisfrom happening,
uselessdetergentifyouhavesoftwater.Washglasswareintheshortest
cyclethat willgetitclean.RecalibratetheSmartDispense"systemif you
areusingit (seepage9).Donotusethemanualdetergentdispenserand
theSmartDispenseT'atthesametime.
• Thiscouldbeetching.Lowerthewaterheatertemperature.
Useonlyautomaticdishwasherdetergentstoavoidsudsing.Cascade®and
ElectrasoPAutomaticDishwashingDetergentshavebeenapprovedfor use
inallGEdishwashers.
• Toremovesudsfromthetub,openthedishwasherandletsudsdissipate.
Closeandlatchthedishwasher.Pumpoutwaterbytouchingthe
START/RESETpadonce;then30secondslater,touchthe
START/RESETpadagain.Repeatifnecessary.
Rinseagentwas spilled • Alwayswipeuprinseagentspillsimmediately.
Detergentplacedin manual • UseSmartDispenseT'orthemanualdetergentdispenser,but notboth.
detergentdispenserand
SmartDispense"dispenser
Detergentleft in Dishesare blocking the • Repositionthe dishes,sothe water from the lowerspray armcan
dispensercups detergent cupor flushthe detergentcup orthe outlet on the SmartDispense_'system.
SmartDispense"outlet Seethe Loadingthedishwashersection.
Water in the Capnottightened after • Usea turkey basterto removeasmuch water as possiblefrom the
SmartDispenseT" filling the dispenser SmartDispense'Mdispenserand refillit as normal.Besureto tighten
dispenser the capfully to preventwaterfrom enteringthe dispenser.
Blackorgray Aluminumutensilshave • Removemarkswitha mild,abrasivecleaner.
markson dishes rubbedagainstdishes
13

Before you call for service...
Problem
Dishesdon'tdry
Controlpanelresponded
toinputsbutdishwasher
neverfilledwith water
Stainedtubinterior
Dishwasherwon't run
Control panel lights
go offwhenyou're
setting controls
Water standing in
thebottom ofthetub
Waterwon'tpump
outof thetub
Steam
Sanitizedlight does
notilluminateat the
endof thecycle
IAnti-Bacteria
cgcleonlg)
Noise
Possible Causes What To Do
Low inlet water temperature
Rinseagentdispenserisemptg
Doorlatch megnotbe properlg
seated
•Makesureinletwatertemperatureisatleast120°F.
• SelectHEATEDDRY.
• UseHOTSTART,HOTWASHor ADDEDHEAToptions.
• Selecta highercycle,suchasANTI-BACTERIA,SANIWASHor POTS&PANS.
• Checkthe rinseagentdispenserandfillasrequired.
• Makesurethedoorisfirmlyclosed.
Water valve mag be turned off
Sometomato-based foods can
cause reddish stains
Teaor coffeestains
Anoverallgellowor brownfilmcan •
becausedbyirondepositsinwater
White film on insidesurface- •
hardwater minerals
Fuseisblownor circuit breaker •
istripped
Poweristurned off •
Controlpanelislocked
Rebootgourcontrol
• Hakesurewatervalve(usuallylocatedunderthesink)isturnedon.
• UseoftheRINSEONLYcycleafteraddingthedishtotheload
candecreasethelevelof staining.GErecommendsCascade®
PlasticBoosterto helpremovethesetypesofstains.
• Removethestainbyhand,usinga solutionof1/2cupbleach
andBcupswarmwater.
Timetoo long between
touching of selectedpads
-AWARNING
Beforecleaninginterior,wait atleast20minutesaftera cycleforthe
heatingelementsto cooldown.Failuretodosocanresultin burns.
Aspecialfilterinthewatersupplylineistheonlywayto correct
this problem.Contacta watersoftenercompany.
GErecommendsJet-Dry®or CascadeCrystalClear*to help
preventhardwatermineraldepositsfromforming.
Rundishwasherwithcitricacidto removemineraldeposits.Citricacid
(Partnumber:WDBSX1S1)canbeorderedthroughGEParts.Seeback
coverfororderinginformation.
Replacefuseor resetcircuitbreaker.Removeanyotherappliancesfrom
thecircuit.
Insomeinstallations,thepowertothedishwasherisprovidedthrougha
wallswitch,oftenlocatednextto thedisposerswitch.Hakesureitison.
Unlockcontrolpanel.Seepage5or 7.
Turnoffpowertothedishwasher(circuitbreakerorwallswitch)for
BOseconds;thenturnbackon.
Eachpad mustbetouched within BOsecondsof the others.
Torelight,touch any pad again,or unlockand relatchdoor.
This isnormal
Drainisclogged
This isnormal
Thedoorwasopenedand the
cgclewas interruptedduring
or after the mainwashportion
Theincomingwater
temperaturewas too low
Normal operating sounds
Detergentcupopening
Waterenteringdishwasher
Themotor stopsand starts at
varioustimesduring thecgcle
Drainpumpsoundsduring
pumpout
Rattling disheswhen the sprag
arm rotates
• Asmallamount ofcleanwater around the outlet on thetub
bottom atthe backof thetub keepsthe water seallubricated.
• Ifyouhaveanairgap,cleanit.Seepage12.
• Ifthedishwasherdrainsintoa disposer,rundisposerclear.
• Checkto seeifyourkitchensinkisdrainingwell.Ifnot,you
mayneeda plumber.
• Warm,moistaircomesthroughtheventbythedoorlatchduringdrying
andwhenwaterisbeingpumpedout.Thisisnecessaryfordrying.
• Donotinterruptthecycleanytimeduringor aftermainwash.
• Raisethewaterheatertemperaturetobetween120°Fand 140°E
• Theseareall normal.Noactionisrequired.
•Hakesuredishesare properlg loaded.Seethe Loadingthe
dishwasherrackssection.
14

GEDishwasher Warranty.
All warranty service provided by our Factory Service Centers, or an
authorized Customer Care®technician. Toschedule service, visit us
on-line at ge.com, or call 800.GE.CARES(800.432.2737) in the United
States. In Canada, call 1.800.561.3344. Pleasehave serial number
and model number available when calling for service.
Staple your receipt here.
Proof of the original purchase
date is needed to obtain service
under the warranty.
For The Period Of: GE Will Replace:
Any part ofthe dishwasher which fails due to adefect in materials or workmanship. During
this limited one-year warranty, GEwill also provide,free of charge, all labor and in-home service
to replacethe defective part.
Thedishwasher racks and the electronic control module if theg should fail due to a defect
in materials or workmanship. Duringthis five-year limited warranty, Sou will be responsible
for ang labor or in-home servicecosts.
One Vear
From the dateof the
original purchase
Five Vears
(forProfile Models
PDW7000 Series)
From the dateof the
original purchase
Lifetime of Product ThePermaTuf®tub or door liner, if itfails to contain water due to a defect in materials or
(for Profile Models workmanship. Duringthis limited warranty, GEwill alsoprovide, free ofcharge,all labor and
PDW7000 Series) in-home serviceto replacethe defective part.
What GE Will Not Cover (for customers in the United States):
• Service trips to gour home to teach gou how to use
the product.
• Improper installation, delivery or maintenance.
• Failure of the product if it is abused, misused, or used for
other than the intended purpose or used commercially.
• Replacement of house fuses or resetting of circuit breakers.
• Product not accessible to provide required service.
• Damage to the product caused bg accident, fire,floods
or acts of God.
• Incidental or consequential damage caused bg possible
defects with this appliance.
• Cleaningor servicing ofthe air gap device in the drain line.
• Damage caused after deliverg, including damage from
items dropped on the door.
IXCLUSION OF IMPLIED WARRANTIES--Vour sole and exclusive remedy is product repair as provided in this Limited
Warrantg. Ang implied warranties, including the implied warranties of merchantabilitg or fitness for a particular
purpose, are limited to one gear or the shortest period allowed bg law.
Thiswarranty isextendedto the originalpurchaser and any succeedingowner forproducts purchasedfor homeusewithin the
USA.If theproduct islocatedin on areawhere serviceby a GEAuthorizedServicerisnot available,you may be responsiblefora trip
chargeor you may berequired tobring theproduct to on Authorized GEServicelocationfor service.Proofoforiginal purchasedate
isneededto obtainserviceunder thewarranty. InAlaska,the warranty excludesthe costofshippingor servicecoilstoyour home.
Somestates do not allow the exclusionor limitation of inddental or consequentialdamages.Thiswarranty givesyou specificlegal
rights,and you may alsohoveother rights which vary from state to state.Toknow what your legal rights ore,consultyour local
or state consumeraffairs office or your state'sAttomeFGeneral.
Warrantor: General Electric Compang. Louisville, KV 40225
What Is Not Covered (for customers in Canada):
• Servicetrips to gour home to teach gou how to use
the product.
• Improper installation.
If Sou have an installation problem, contact sour dealer
or installer. You are responsible for providing adequate
electrical, exhausting and other connecting facilities.
• Failure of the product if it isabused, misused, or used for
other than the intended purpose or used commerciallg.
• Replacementof housefusesor resettingof circuit breakers.
• Damage to the product caused bg accident, fire, floods
or acts of God.
• Damage caused after deliverg.
EXCLUSION OF IMPLIED WARRANTIES--Vour sole and exclusive remedy is product repair as provided in this Limited
Warrantg. Ang implied warranties, including the implied warranties of merchantabilitg or fitness for a particular
purpose, are limited to one gear or the shortest period allowed bg law.
This warranty is extended to the originalpurchaser and any succeeding owner for products purchased in Canada for home use
within Canada. In home warranty service willbe provided in areas where it is available and deemed reasonable by Mabe to provide.
WARRANTOR IS NOT RESPONSIBLE FOR CONSEQUENTIAL DAMAGES. I
Warrantor: MABE CANADA INC. I 15
I

Consumer Support.
GEAppliances Website In the U.S.:go.cam
Have a question or need assistancewith your appliance?Try the GEAppliancesWebsite 2/4hours a day,
any day ofthe year! Forgreater convenience and faster service,you can now download Owner's Manuals,
order parts or evenschedule service on-line.In Canada: www.geappliances.ca
ScheduleService ,ntheU.S.:go.cam
Expert GErepair service isonly one step away from your door.Geton-line and schedule your serviceat your
convenience any day of the year! Orcall 800.GE.CARES(800./432.2737)duringnormal businesshours.
In Canada, call 1.800.561.3344
Real LifeDesign Studio Inthe u.s.:ge.com
GEsupports the UniversalDesignconcept-products, services and environments that can be usedby people of all
ages,sizesand capabilities.We recognizethe needto designfor a wide range of physical and mental abilities and
impairments. Fordetails of GE'sUniversalDesignapplications, including kitchen designideasfor people with disabilities,
check out our Websitetoday. Forthe hearing impaired, pleasecall800.TDD.GEAC(800.833./4322).
In Canada, contact:Manager,ConsumerRelations,Mabe Canada Inc.
Suite310, 1 Factory Lane
Moncton,N.B.EIC 9M3
ExtendedWarranties In the U.S.:go.cam
Purchasea GEextended warranty and learn about special discounts that are available while your warranty isstill
in effect. You can purchase it on-line anytime, or call800.626.222/4during normal businesshours. GEConsumer Home
Serviceswill still be there after your warranty expires.InCanada, call 1.888.261.2133
Parts and Accessories In the U.S.:go.cam
Individualsqualified to servicetheir own appliances can have parts or accessoriessent directly to their homes
(VISA,MasterCardand Discovercardsare accepted).Orderon-line today, 2/4hours every day or by phone at
800.626.2002during normal businesshours.
Instructionscontainedin this monuol cover procedures to be performed by ony user. Other servicing generally
should be referred to qualified service personnel Caution must be exercised,since improper servicing may cause
unsafe operation.
Customers in Canada can order parts and accessorieson-line at www.geappliances.ca,24 hoursevery day, or by
phone at 1.800.661.1616during normal businesshours.
Contact Us In the U.S.:ge.com
If you are not satisfiedwith the service you receivefrom GE,contact uson our Website with all the details including
your phone number,or write to: General Manager,Customer Relations
GEAppliances,Appliance Park
Louisville,KY/40225
In Canada: www.geappliances.ca, or write to: Director,ConsumerRelations,MabeCanada Inc.
Suite310, 1 Factory Lane
Moncton, N.B.EIC 9M3
lRegister YourAppliance Inthe u.s.:ge.com
Register gour new appliance on-line--at gour convenience! Timely product registration will allow for enhanced
communication and prompt serviceunder the terms of your warranty, should the need arise.Youmay also mail
in the pre-printed registration card included in the packing material.In Canada: www.geappliances.ca
Printed in the United States
_Printed on Recycled Paper

cL
(.D
LU
0
Instructions de s@curit@..... _,3
Instructions de fonctionnement
Chargement des couverts......... ii
Chargement des paniers...........i0
Panneau de contr61e
etr#glages........................4-6
Soinsetnettoyage .............ii,12
Utilisationdu lave-vaisselle........6-9
Conseils de d@pannage ... 12-1q
Soutien ou consommateur
Garantie............................ 15
Soutienau consommateur .........16
I
Inscrire le module et le num@ro
de s@rieici :
Mod@le #
S@rie#
Vouslestrouverezsurlaparoide la
cuvejuste_ l'int@rieurdelaporte.
165D4700P382 49-55058 OI-09JR

INFORMATION IMPORTANTESURLA SECURITE.
LISEZ TOUTESLESINSTRUCTIONSAVANT L'UT/LISAT/ON --
CONSERVEZCESINSTRUCTIONS
%
ii AVERTISSEMENT I.
Pour votre s_curit_, les instructions de ce manuel doivent _tre suivies pour r_duire le risque
d'incendie ou d'explosion, d'_lectrocution et pour _viter lesdommages _la proprietY, les
blessures ou la mort.
AVERTISSEMENT !S4CUR DUCHAUFFE-EAU
Dans certoines conditions, de I'hydrog@ne peut @trepr@seotdans un chauffe-eau qui n'o pas @t4
utilis@pendant deux semoines ou dovontoge. L'HYDROGENE ESTUN GAZ EXPLOSIK
SiI'eauchaude n'a pas_t_ utilis_ependant deux semainesou plus,r_duisezles risquesde dommages
ou de blessure en ouvrant tous lesrobinets d'eau chaude pendant plusieurs minutes. Faitescela avant
d'utilisertout appareil _lectrique raccord_ 6 la canalisation d'eau chaude. Cetteprecaution permettra
6 toute accumulation d'hgdrog_ne de sedissiper.Etant donn_ que ce gazest inflammable, nefumez
paset n'utilisez pasde flamme ou d'appareil pendant ce processus.
CONFORMITE DE L'INSTALLATION ET ENTRETIEN
Ce lave-vaisselle doit @tre correctement install@ et plac@ en conformit@ avec les instructions
d'installation avant d'@tre utilis@. Si vous n'avez pas re_u les instructions d'installation
avec ce lave-vaisselle, vous pouvez vous en procurer en allant sur notre site web 8
www.electromenagersge.ca.
• RaccordezI'appareil6 un syst_me _lectrique
permanent et mis 6 la terre ou installezun fil
de mise 6 la terre desappareils avec lesills
d'alimentation et raccordez-le6 la borne ou
au fil de mise 6 la terre de I'appareil.
• Unmauvais raccordement au filde mise
6 la terre peutcauser un risquede choc
@lectrique.Consultezun @lectriciencompetent
ou un agent du servicesivous ne savezpassi
I'appareilest correctement mis 6 la terre.
• Disposezdesappareils 61ectriqueshorsservice
et des mat_riaux d'emballage ou d'exp@dition
correctement.
• Netentez pas de r@parerou de remplacer une
pi@cede ce lave-vaisselle6 mains que cela soit
sp@cifiquementrecommand@dans ce manuel.
Tout autre entretien ou r@parationdevrait @tre
confi@6 un technicien camp@tent.
• Pourminimiser la possibilit_d'61ectrocution,
d@branchezI'appareil du circuit d'alimentation
avant tout entretien.
NOTE: l'arr@tdu love-vaissellene d@bronchepas
l'appareil de l'olimentation @lectrique.Nous
recommandons qu'un techniden camp@tent
r@porevotre opporeil.
2
pour _viter les blessures mineures ou les
IIVlISE EN GARDE : dommagesmat_riels
• Lesarticles laves avec le mode anti-bact6rien,
s'il g a lieu,peuvent _tre chauds au toucher.
A manipuler avec precaution.
• L'utilisationd'un d_tergent
qui n'estpas conqu
sp_cifiquement pour le
lave-vaisselleremplira
celui-ci de mousse.
• Si le lave-vaisselle est raccord@6
un interrupteur mural, assurez-vous
que celui-ci est activ@avant d'utiliser
cet apporeil.
• Surleslave-vaisselledot@sde
commandes @lectroniqueset sivous
pr@f@rezfermer I'interrupteur mural entre les
cgclesde lavage, attendez de 5 6 10 secondes
apr@savoir remis I'interrupteur avant de toucher
au bouton START/RESETpour permettre 6 la
commande de ser@initialiser.
• Articlesautres que la vaisselle: ne lavezpas des
articles comme lesfiltres de purificateur d'air,filtres
de chaudi@resou pinceaux dans lelave-vaisselle.
Le lave-vaissellepourrait _tre endommag@et une
d@colorationou destaches pourraient en r@sulter.
• Unesurveillance attentive est n@cessairesicet
apporeil est utilis@par ou pr@sdesenfonts.
• Chargez lesarticles I@gersen plastique de
mani@re6 ce qu'ils ne se d@placentpos et ne
tombent pas au fond; ils pourraient @treen
contact avec I'@l@mentde chauffage et @tre
endommag@s.

electromenogersge.ca
AVERTISSEMENT ! RISQUE D'ENFANT PRISAU PIE-GE
BONNE DISPOSITION DE VOTRE LAVE-VAISSELLE
Leslave-vaissellejet_sou abandonn@ssont
dangereux..m_mesivous ne leslaissezjet_sque
quelquesjours.Sivousvoulezjetervotre vieuxlave-
vaisselle,suivezlesinstructionspouremp_cher
lesaccidents.
Avant de jeter votre vieux lave-vaisselle :
• Enlevezla portedu compartimentde lavageou
enlevezleverroudela porte(commelemontre
I'illustration). //
Verroudela porte
Lors du fonctionnement, suivez les precautions de base
_tLAVERTISSEMENT ! dontcelles-ci:
• N'utilisezcet appareil que pour I'objectif pour
lequel il a @t_conqu tel que d@critdans le Manuel
du propri@taire.
• N'utilisezque lesd@tergentsen poudre,en tablette
ou liquides,ou agents de rinqage,recommand@s
pour leslave-vaisselleet gardez-les horsde la
port_e des enfants. Lesd@tergentspour lave-
vaisselleCascade®,Cascade®Complete et
Electrosol®et lesagents de rinqageJet-Drg®
et Cascade Crystal Cleore sont approuv@s
avec leslave-vaisselleGE.
Placezlesarticles coupants de mani@e@ce qu'ils
n'abYmentpas le sceau de la porte.
Placezlescouteaux avec le manche vers le haut
pour r@duirelesrisques de coupures.
Nelavezpas lesarticles de plastique @moins qu'ils
n'aillentau lave-vaisselleou I'@quivalent.Siles
articles de plastique ne sont pasmarqu@sen ce
sens,vouez lesrecommandations du fabricant.
• Netouchez pas_ I'@l@mentchauffant pendant ou
imm@diatementapr@sI'utilisation.
Nefaites pasfonctionner le lave-vaissellesiles
panneaux de I'habitacle ne sont pas install@s.
N'alt_rezpas lescommandes.
Ne maltraitez pas,ne vous assogez paset ne
montez passur la porte ou sur le plateau de
vaisselle.
• Ne laissezpas lesenfantsjouer autour du lave-
vaisselleIorsque vous ouvrez et fermez la porte
pour @viterque leurspetits doigts ne secoincent
dans la porte.
• Nejetez pasun lave-vaissellesans d'abord enlever
la porte du compartimentdelavageou leverrou
de la porte.
• N'entreposezpas et n'utilisezpasde produits
combustibles, de I'essenceou desvapeurs ou
liquidesinflammables pr@sde cet appareil ou
de tout autre appareil.
• Ne laissezpas lesenfants s'amuser avec ou dans
cet appareil ou de tout appareil mis au rebut.
LISEZ ET RESPECTEZCESCONSIGNESDE SL-CURITL-.
CONSERVEZ CESINSTRUCTIONS

Lepanneau de contrDle du lave-vaisselle.
Vous pouvez trouver le num_ro de modSle sur Io paroi de Io cuve juste aI'int_rieur de Io porte. Dons ce manuel,
les coroct_ristiques et I'opporence peuvent vorier selon le modSle.
I1
o • . ® = _ 0----- Smart Dispense
SENSING WASHING P_NSIN6 DRYING SANITIZED CLEAN LOWOETE_GENT
SELECTIONS ENHANCEMENTS
\,0u,_j \,EA,22_JW \_ ..........
N El El
R gloge des contr61es
Voyants lumineux d'&tat
Lesvogants lumineu× vous indiquentce qui se passependant le fonctionnement du lave-vaisselleautomatique. IIs
peuvent clignoter si le lave-vaissellefonctionne mal (voirla page 6).Lesvogants indiquent ON (marche)pour donner
la s_quence de fonctionnement du lave-vaisselle.
LOW ApparaTtquand le distributeur de d_tergent SmartDispenseT"doit _tre rempli de d_tergent
DETER6ENT liquide ou en gelpour lave-wisselle automatique.
(d_tergent bos)
(surcertains modules)
SENSING(senseur) ApparaTtquand le senseurmesure lemontant de salet_ et la temperature de I'eau.
Lelave-vaisselle ajuste le cgcle choisi pour obtenir le rendement optimal.
WASHING(lavage) ApparaTtpendant le pr_lavage et le lavage principal.
DRYING(s_chage) Appara?tpendant le HEATEDDRY(s_chagechaud).
SANITIZED ApparaTtquand le cgcle a rempli les conditions d'aseptisation. Levogant lumineux ON
(sunitis_) resteallum_jusqu'_ ce que laporte soit ouverte.
CLEAN(propre) ApparaTtquand un cgcle de lavage esttermin&
ll
Fq_ Voyunt temps (sur modules)
de restont certoins
Pendant lefonctionnement, ce vogant indiquele nombre de minutes qui restentpour terminer le cgcle.Cevogant
peut ajuster le temps restant quand les lumi_res du senseur sont allum_es. Letemps indiqu_ au d_but de chaque
cgcle peutchanger par rapport au r_glage en usine,car votre appareil s'ajuste_ votre utilisation personnelle.
Pendant la mise en marche diff_r_e,cevogant indique le nombre d'heures qui restent avant le d_but du cgcle.
HSelections(cycles)
Appuyez sur testouches pour sdtectionnertecycle detavage voutu.
REMARgUE:tous les renseignements fournis dans la prochaine section relativement aux dur@esde cgcle et aux
quantit@sd'eau utilis@essont des valeurs approximatives seulement.
Lesr@sultatsactuels d@pendrontde plusieurs variables et notamment, sans toutefois s'g limiter,de la temp@rature
de I'eau @I'admission,de la pression de I'eau dans la maison et de la turbidit@de I'eaude lavage.
Levogant lumineux au-dessus de la touche s_lectionn_e ou adjacent _celle-ci s'illuminera (ON)pour indiquer quel
cycle de luvuge (WASHCYCLE)est en cours.
ANTI-BACTERIA
COOKWARE
(POTS & PANS)
NORMAL
Maximum 33,3litres(8,8gallons), 105 min.
Medium 28,/4litres(7,5gallons),95 min.
Minimum 2&8 litres(6,3gallons),85 min.
Cecgcle augmente latemperature de I'eau dans le rin(;agefinal pour aseptiser votre vaisselle.
Ladur_e du cgcle d_pend de la temperature de I'eau qui alimente votre lave-vaisselle.
NOTE:le cgcle bactericide est v_rifi_pour obtenir une bonne aseptisation. Silecgcle est
interrompu pendant ou apr_s le lavage principal ou si la temperature d'alimentation d'eau est
trap basse pour obtenir une temperature d'eau suffisante, lesconditions d'aseptisation peuvent
ne pas exister pleinement. Enconsequence, le vogant d'aseptisation nes'allume pas _ la fin
du cgcle.
NOTE:les lave-vaisselle r_sidentielscertifies par le NSFne sont pas con(;us pour les
_tablissements agant un permis de vente d'aliments.
Maximum 37,9litres(10,0gallons),80 min.
Medium 33,3 litres(8,8gallons), 70 min.
Minimum 28,/4litres(7,5gallons),60 min.
Cecgcle est con(;u pour la vaisselleou les casserolestr_s salesou les casserolescontenant des
aliments s_ch_s ou cults. IIest possibleque cecgcle ne r_ussissepas _ _liminer lesaliments
broils et coll_s dans le plat. Ce cgcle convient 4]la vaisselleordinaire.
Maximum 18,9-3&3 litres (5,0-8,8gallons),/47-90 min.
Cecgcle est con(;u pour les assietteset les verres mogennement/extr_mement sales.
This manual suits for next models
1
Table of contents
Languages:
Other GE Dishwasher manuals

GE
GE GDF630-640 Series User manual

GE
GE PDWF400PCC - Profile Dishwasher With SmartDispense... Manual

GE
GE GSC3200J User manual

GE
GE GSC950W User manual

GE
GE EDW1500J Series User manual

GE
GE GLC5604VWW Assembly instructions

GE
GE Monogram ZBD6400 Series User manual

GE
GE Spacemaker PDW1800N User manual

GE
GE GHDA696P User manual

GE
GE Monogram ZBD6800KBB User guide