Step 5 - Remove Front Control
Console Step 9 - Re-assemble Inner to Outer
Door Panels
• Remove the front control console from the
inner door assembly, consult Service Guide
31-9226 or Mini-manual.
Step 6 - Remove Vent Conduit
• Remove the 2 - T15 Torx screws to remove the
vent conduit from the front console.
• Vent conduit can now be removed.
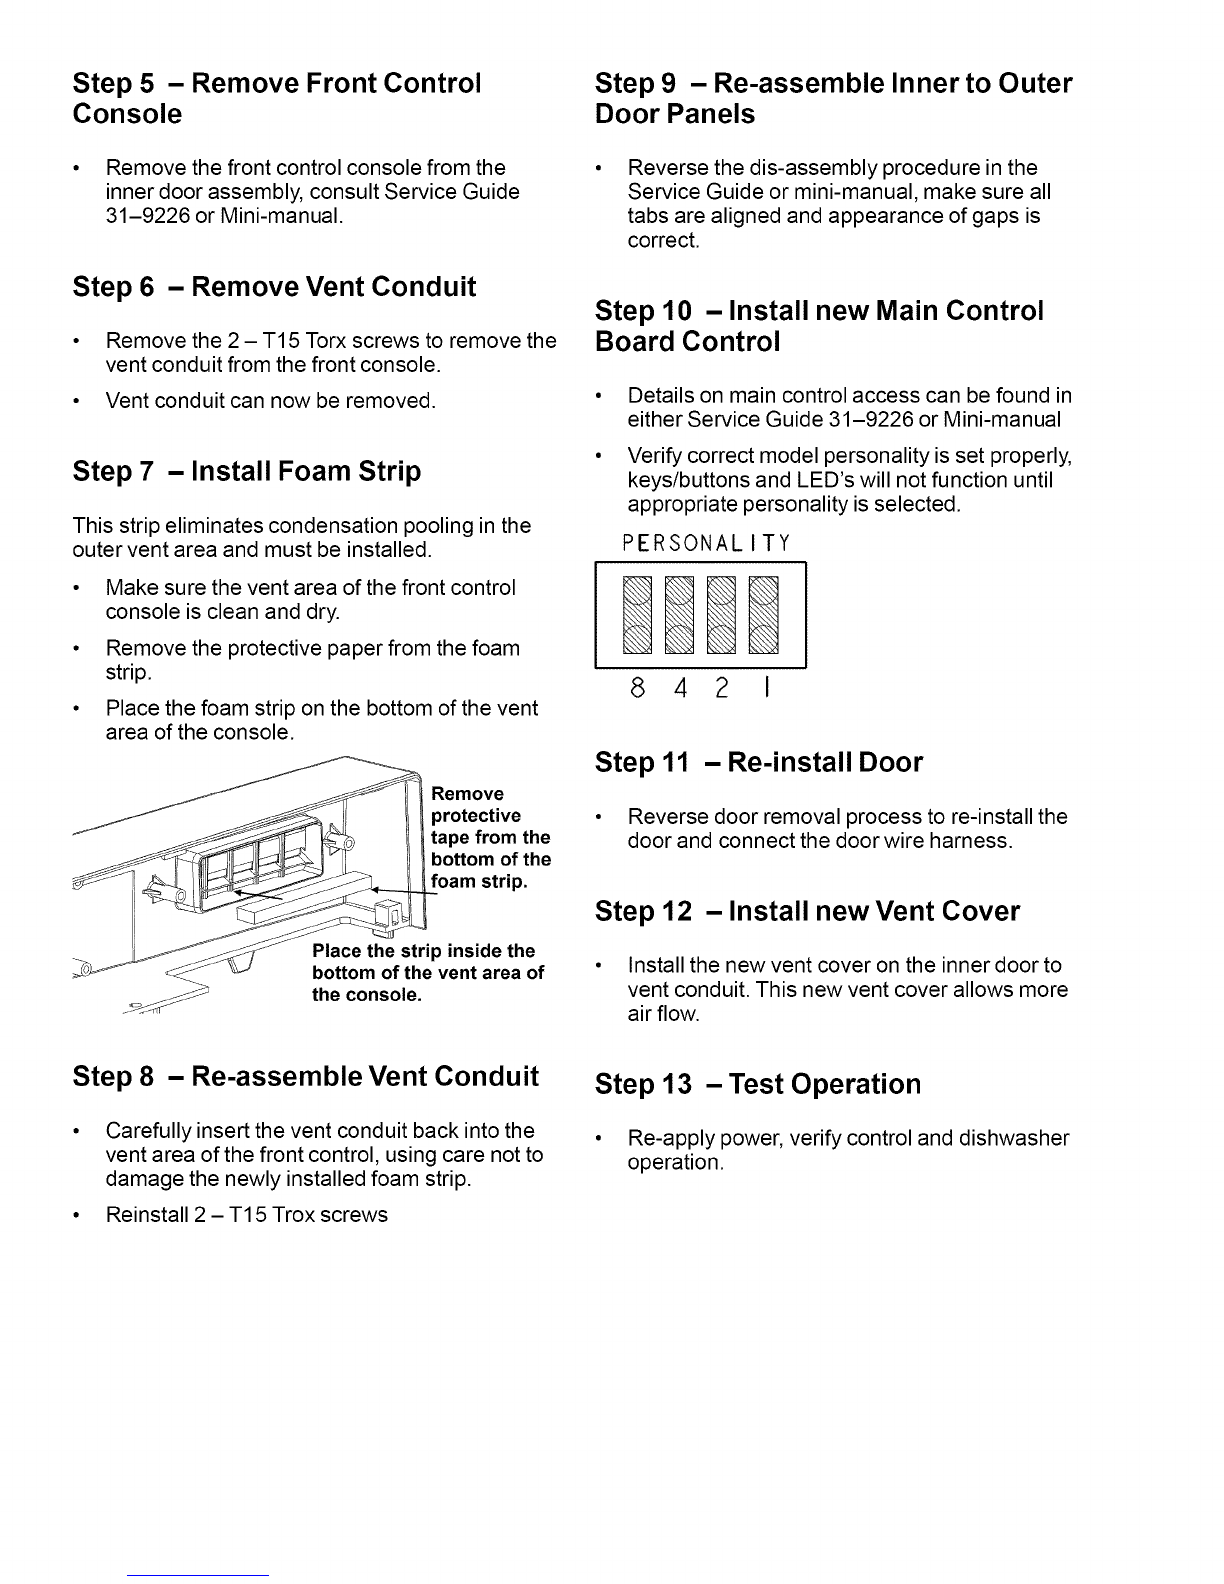
Step 7 -Install Foam Strip
This strip eliminates condensation pooling in the
outer vent area and must be installed.
• Make sure the vent area of the front control
console is clean and dry.
° Remove the protective paper from the foam
strip.
• Place the foam strip on the bottom of the vent
area of the console.
Remove
protective
tape from the
bottom of the
foam strip.
Place the strip inside the
bottom of the vent area of
the console.
Reverse the dis-assembly procedure in the
Service Guide or mini-manual, make sure all
tabs are aligned and appearance of gaps is
correct.
Step 10 - Install new Main Control
Board Control
Details on main control access can be found in
either Service Guide 31-9226 or Mini-manual
Verify correct model personality is set properly,
keys/buttons and LED's will not function until
appropriate personality is selected.
PERSONALITY
842 I
Step 11 - Re-install Door
•Reverse door removal process to re-install the
door and connect the door wire harness.
Step 12 -Install new Vent Cover
• Install the new vent cover on the inner door to
vent conduit. This new vent cover allows more
air flow.
Step 8 - Re-assemble Vent Conduit
Carefully insert the vent conduit back into the
vent area of the front control, using care not to
damage the newly installed foam strip.
Step 13 - Test Operation
• Re-apply power, verify control and dishwasher
operation.
° Reinstall 2 - T15 Trox screws


