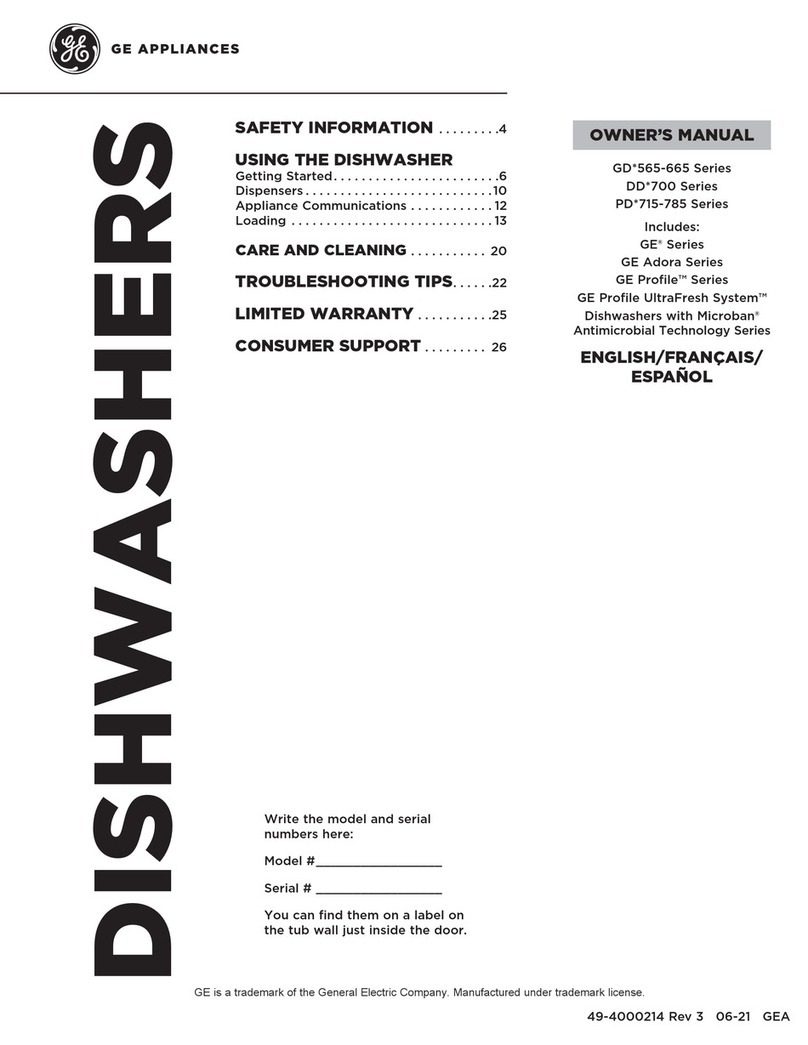
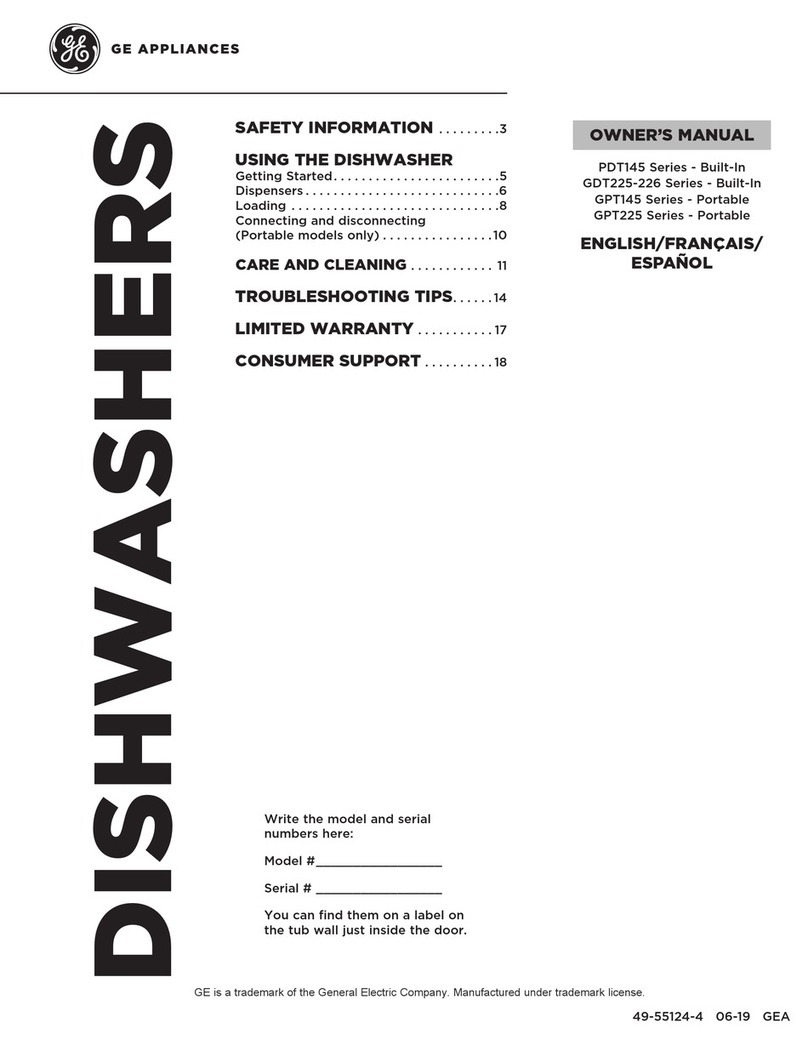
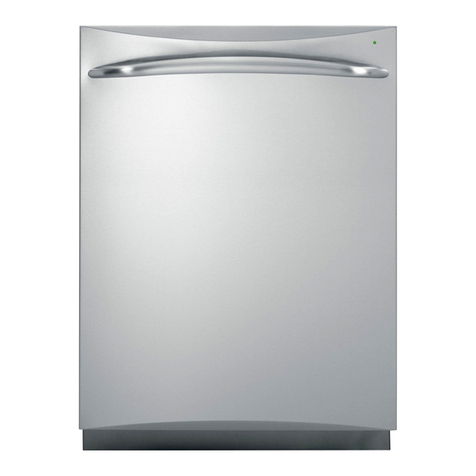
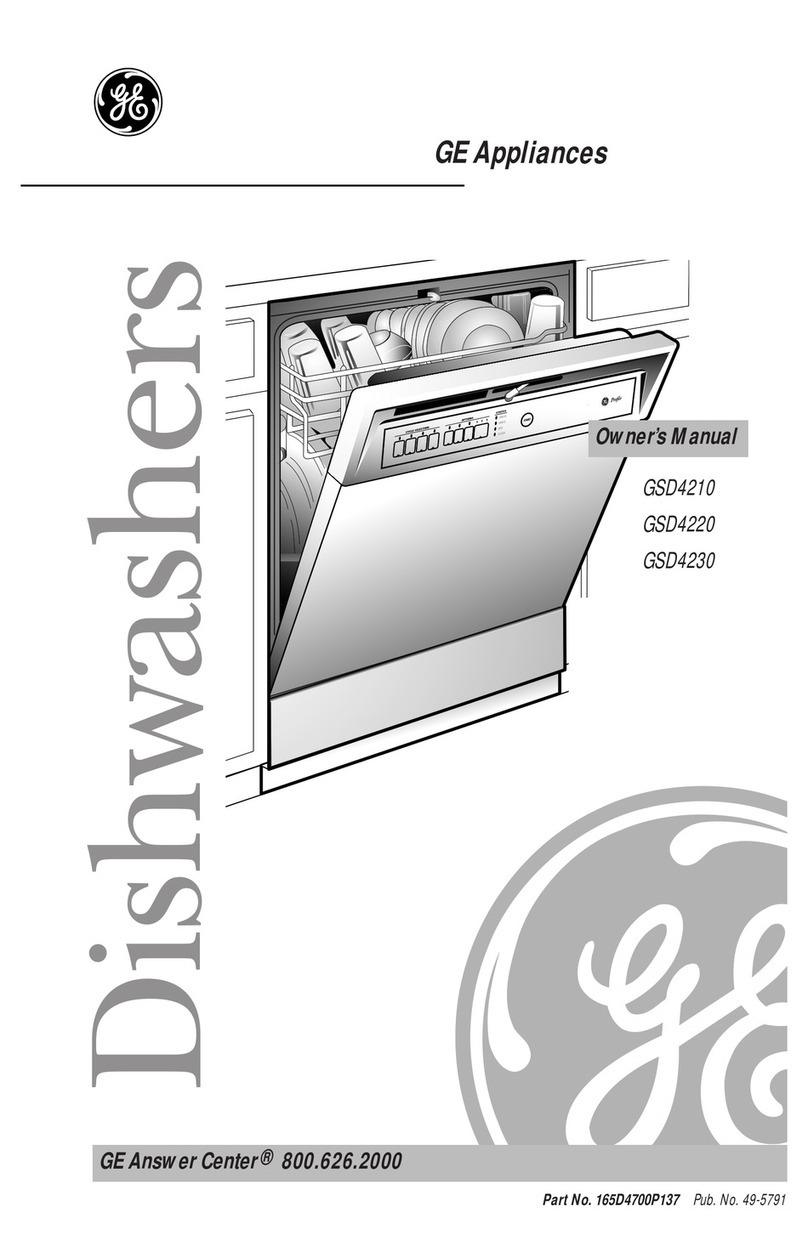
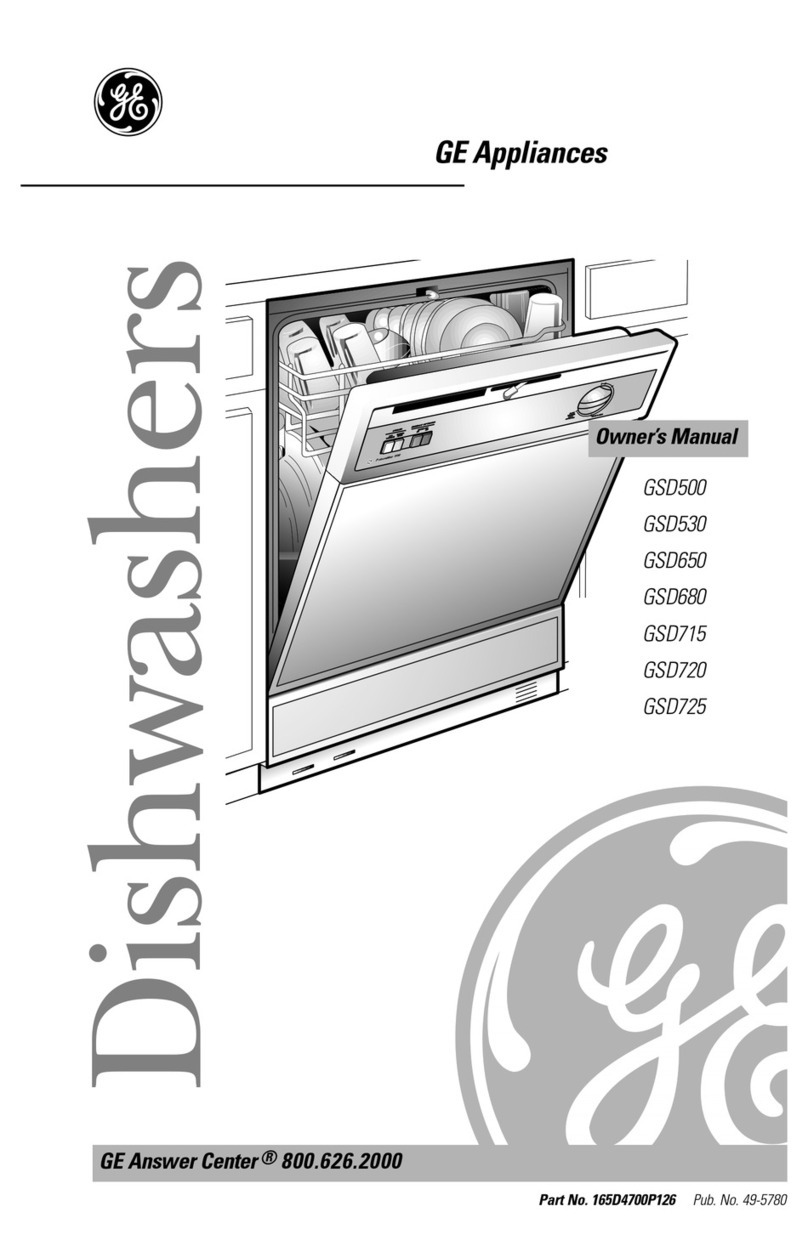
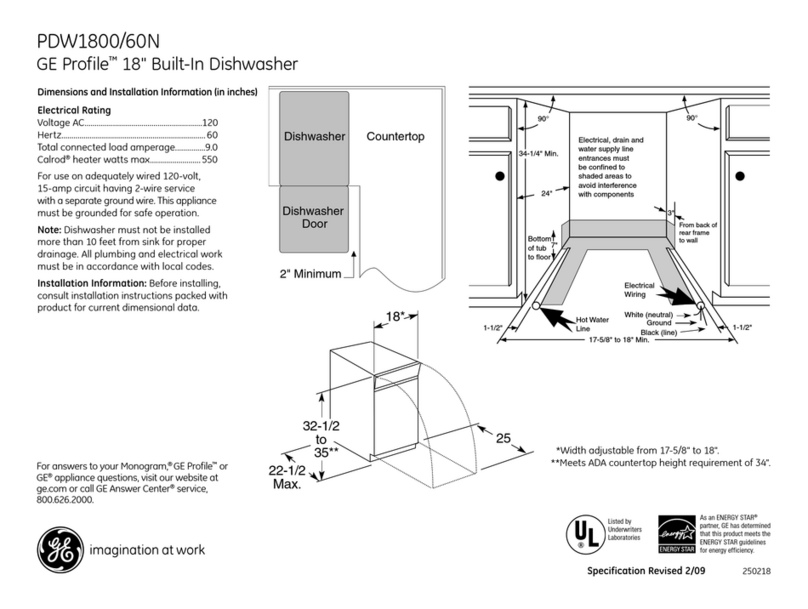
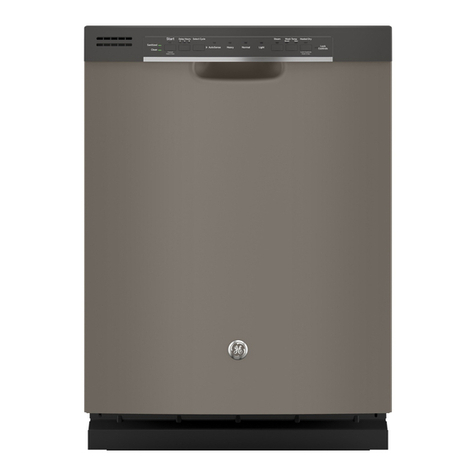
GE Triton XL GSD6900 Series User manual

Oge.com
Safety Instructions ...... 2,s
Operating Instructions
Care and Cleaning ............ 10
Control Panel and Settings ... 4-6
Loading Place Settings ......... 9
Loading the Racks ............. 8
Optional Accessories ........... 9
Using the Dishwasher ........ 6, 7
Troubleshooting Tips .. 11, 12
Consumer Support
Consumer Support ..... Back Cover
Product Registration ....... 13, 14
Warrantg .................... 1S
GSD6900
PDW7300
PDW7700
PDW7800
PDW7880
Z
I--
C)
Write the model and serial
numbers here:
Model #
Serial #
Youcan find them onthe tub wall
just insidethe dooE
165D4700P323 49-55005 11-05 JR

IMPORTANT SAFETY INFORMATION.
READ ALL INSTRUCTIONS BEFORE USING --
SAVE THESE INSTRUCTIONS
WARNING!
For your safety, the information in this manual must be followed to minimize the risk of fire
or explosion, electric shock, and to prevent property damage, personal injury, or death.
WARNING! WATERHEATERSAFETY
f _,l'_ _ Under certain conditions hydrogen gas mo9 be produced in o water heater that has not been used
for two weeks or more. HYDROGEN GAS ISEXPLOSIVE.
If the hot water has not been used for two weeks or more, prevent the possibilitgof damage or injury
bg turning on all hot water faucets and allow them to run for several minutes. Dothis before using ang
electrical appliance which isconnected to the hot water sgstem.Thissimple procedure will allow any built-
up hydrogen gasto escape.Sincethe gas isflammable, do not smoke or use an open flame or appliance
during this process.
PROPERINSTALLATIONAND MAINTENANCE
This dishwasher must be properly installed and located in accordance with the Installation
Instructions before it is used. If you did not receive on Installation Instructions sheet with
gout dishwasher, you con receive one bg visiting our website at ge.com.
• Connectto a grounded metal, permanent wiring
system; or run an equipment-grounding
conductor with the circuit conductors and
connect to the equipment-grounding terminal
or lead of the appliance.
• Improper connection ofthe equipment-grounding
conductor can result in a riskof electric shock.
Checkwith a qualified electrician or service
representative if you are in doubt whether the
appliance is properly grounded.
• Disposeof discarded appliances and shipping
or packing material properly.
• Do not attempt to repair or replaceany part
of your dishwasher unlessit is specifically
recommended in this manual. All other servicing
should be referred to a qualifiedtechnician.
• Tominimize the possibility of electric shock,
disconnect this appliance from the power supply
before attempting any maintenance.
NOTE:Turningthedishwasher off does not
disconnectthe appliance from the power supply.
Werecommend having o qualified technician
serviceyour appliance.
CAUTION: Topreventminorinjurgorpropertgdamage
• Contents washed in Anti-bacterial mode, if
available, may be hot to the touch. Usecare
before handling.
• Using a detergent that is
not specificallydesigned
for dishwashers will cause
the dishwasher to fill with
suds.
• If your dishwasher is connected to a
wall switch, ensure that the switch is
on prior to use.
• On dishwashers with electronic controls,
if you choose to tum the switch off
between wash cycles,allow 5-10
seconds after turning the switch on before
touching START/RESETto allow the control to
reboot.
• Non-Dishware Items:Do not wash items such
as electronic air cleaner filters,furnace filters and
paint brushes in your dishwasheEDamage to
dishwasher and discoloration or staining of
dishwasher may result.
• Closesupervisionis necessary if this appliance
is usedbg or near children.
• Load light, plastic items so they will not
become dislodged and drop to the bottom
of the dishwasher-they might come into
contact with the heating element and be
damaged.

ge.com
_i, WARNING! RISK OF CHILD ENTRAPMENT
PROPER DISPOSAL OF THE DISHWASHER
Junked or abandoned dishwashers are
dangerous _.even if they will sit for "just a
few days." If you are getting rid of your old
dishwasher, please follow the instructions below
to help prevent accidents.
Before You Throw Away Your Old
Dishwasher:
• Take off the door of the washing compartment
or remove the door latch keeper (asshown). Door latch keeper
WARNING! When using your dishwasher, follow basic precautions,
including the following:
• Usethis appliance only for its intended purpose • Donot operate your dishwasher unlessall
as described in this Owner's Manual. enclosure panels are properly in place.
• Use only powder,tabs, liquid detergents or rinse • Donot tamper with controls.
agents recommended for usein a dishwasher and • Donot abuse, sit on or stand on the door or dish
keepthem out of the reach of children.Cascade®,
Cascade®Complete and Electrasol®Automatic
Dishwashing Detergents,and Jet-Drg®and
Cascade RinseAid®rinseagents have been
approved for usein all GEdishwashers.
• Locate sharp items so that they are not likely
to damage the door seal.
• Load sharp kniveswith the handles up to reduce
the riskof cut-type injuries.
• Do not wash plastic items unlessmarked
dishwasher safe or the equivalent. Forplastic
items not somarked, checkthe manufacturer's
recommendations.
• Do not touch the heating element during or
immediately after use.
rack ofthe dishwashen
• Donot allow children to play around dishwasher
when opening or closing door due to the possibility
of small fingers being pinched in doon
• Donot discard a dishwasherwithout first removing
the door of the washing compartment.
• Donot store or usecombustible materials, gasoline
or other flammable vapors and liquids in the
vicinity of this or any other appliance.
• Donot allow children to play with, on or insidethis
appliance or any discarded appliance.
READAND FOLLOW THISSAFETYINFORMATION
CAREFULLY.
SAVE THESE INSTRUCTIONS

About the dishwasher control panel.
Youcanlocate your model number on the tub walljust insidethedoonThroughoutthismanual,featuresand
appearancemay vary fromyour model.
n El
SANITIZEO_NNIN6
SELEC_OHS
@@@@@@@
El
CLEAN
_E _M_NING
lsi Ira--
ENHANCEMENTS
_R_E_N0S
El
4
Control Settings
HStatus Indicator Lights
The Status display tells Uouwhat's happening while the dishwasher is in operation and mag flash, indicating a
malfunction {seepage 6).The lights will come ON indicating the sequence of operation the dishwasher is in.
SENSING Displaged while the ExtraCleanTM Sensor is measuring the amount of soil and temperature of
wateE The dishwasher will adjust the selected cgcle to achieve optimal performance.
WASHING Displaged during prewash and main wash periods.
RINSING Displaged during rinse periods.
DRYING Displaged during HEATEDDRY.
SANITIZED Displaged when cgcle has met sanitization conditions. Light remains ON until door is opened.
CLEAN Displaged when a wash cucle is complete, The light will remain ON until door is opened.
_'_ Time Remaining Displag (onsomemodels)
During operation, the displag shows the minutes remaining until the cgcle is complete. The displag mag
adjust the remaining time while the Sensing light is on. The time displaged at the start of each cgcle mag
change from the factorg setting as the unit customizes itself to home use. During a delag start, the displag
will show hours of time remaining until the cgcle starts.
_l Selections
The light above the selected pad will be ON to indicate which WASH CYCLEhas been selected.
ANTI-BACTERIA Heovg 9,1 gal., 91 min.
Medium 7.8 gaL, 89 min.
Light &S gaL, 87 min.
This cgcle raises the water temperature in the final rinse to sanitize gour dishware. The
cgcle length will varg depending on the temperature of uour inlet waten
NOTE:The Anti-Bacteria cgcle is monitored for sanitization requirements. If the cgcle is
interrupted during or after the main wash portion or if the incoming water temperature is so
low that adequate water heating cannot be achieved, the sanitizing conditions mag not be
met. In these cases, the sanitized light will not illuminate at the end of the cgcle.
NOTE:NSF-certified residential dishwashers are not intended for licensed food
establishments.
POTS COOK
or
& PANS WARE
NORMAL WASH
Heovg 10.4gal., 102 min.
Medium 9.1 gal., 76 min.
Light 7.8 gal., 72 min.
This cgcle is meant for heavilu soiled dishes or cookware with dried-on or baked-on soils.This
cgcle mag not remove burned-on foods. Everudag dishes are safe to be used in this cgcle.
Heavg 9.1 gal., 77 min.
Medium 6.5 gal., 62 min.
Light 5.2 gal., 49 min.
This cgcle is for medium/heovilu soiled dishes and glassware.

ge.com
SPEED CYCLE
CHINA CRYSTAL
GLASSES
(on some models)
RINSE ONLY
Heavy 7.8 gal., 37 min.
Medium 6.5 gal., 33 min.
Light 5.2 gal., 29 min.
This cycle is for everyday dishes and glassware.
Heavy 9.1 gal., 52 min.
Medium 7.8 gal., 45 min.
Light 6.5 gal., 38 min.
This cgcle is for lightly soiled china and crystal.
Heavy 9.1 gal., 49 min.
Medium 7.8 gal., 42 min.
Light 6.5 gal., 40 min.
This cycle is specifically designed for glasses.
Heavy 2.6 gal., 7 min.
Light 1.3 gal., 4 min.
For rinsing partial loads that will be washed later. Do not use detergent with this cycle.
NOTE:This dishwasher is equipped with an ExtraCleanTM Sensor with automatic temperature control;
therefore cycle length and time may vary depending on soil and temperature conditions.
NOTE:Only the Anti-Bacteria cycle has been designed to meet the requirements of Section 6, NSF184 for
soil removal and sanitization efficacy.
_]l Enhancements/Extras
The light above the selected pad will be ON to indicate which ENHANCEMENT/EXTRAhas been selected.
PREWASH For use with heavily soiled and/or dried-on, baked-on soils.This option MUSTbe
(on some models) selected PRIORto starting the cycle. This option adds 16 minutes to the cycle time.
NOTE:Cannot be selected with RINSEONLYcycle.
HEATEDDRY Shuts off the drying heat option. Dishes air dry naturally and energy is saved. For
Light OFF faster air dry, you can prop the door open after the CLEAN light illuminates.
HEATEDDRY Turns the heater on for fast drging. This will extend the time to your wash cgcle bg 8
Light ON minutes for the SPEEDCYCLEand 30 minutes for all other cgcles. NOTE:Cannot be
selected with RINSEONLYcgcle.
LOCK
ADDED HEAT or
EXTRAHOTWASH
(on some models)
Youcan lock the controls to prevent any selections from being made. Or you can lock
the controls after you hove started o cycle.
Children cannot occidentally start dishwasher by touching pods with this option
selected.
To unlock the dishwasher controls, touch and hold the HEATEDDRYpad for 3 seconds.
To lock the dishwasher, touch and hold the HEATEDDRY pad for 3 seconds. The light
above the LOCKpad will turn off.
When selected, the cgcle will run longer with heating elements on to improve both
wash and dry performance. NOTE:Cannot be selected with RINSEONLYcgcle.
DELAY HOURS
RESET
You can delag the start of a wash cgcle for up to 9 hours. Touch the DELAYHOURSpad
to choose the number of hours you want to delag the start of the cgcle; then touch
START/RESET.The machine will count down and start automatically at the correct time.
Touching START/RESETa second time will cancel the DELAYSTARTselection. NOTE:If
you forget to fully close the door,a reminder signal will beep until you do so.
To change a cgcle after washing starts, touch the START/RESETpad to cancel the
cgcle. The START/RESETlight will flash while the water is pumped out if needed. This
takes approximately 90 seconds. When the light stops flashing, the dishwasher can be
reprogrammed and restarted.

About the dishwasher control panel.
mStart
Closethedishwasherdoorandselectthecycleand
desiredenhancements.TouchtheSTART/RESETpadto
beginthecycle.Waterfillbegins,andapproximately60
secondslaterthewashactionbegins.
NOTE:Thedishwasherremembersyourlastcycleso
youdon'thaveto reprogrameachtime.Whenthe
dishwasherdoorisfullyclosed,thecontrolpaneljlights
willdisplaythelastsettingsyouselected.
_J Clean
TheCLEANlightis illuminatedwhen a wash cycle
iscomplete.ThelightwillstayONuntilthedooris
opened.
If youdon'twantto changeanyofthesettings,simply
touchtheSTART/RESETpadtobeginthecycle.
Ifthedoorisclosed,theindicatorlightswillturn
off iftheSTART/RESETpadisnotselectedwithintwo
minutes.Toactivatethedisplay,openandclosethedoor
or pressanypad.
Also,ifa powerfailureoccurs,NORMALandHEATED
DRYwillautomaticallybe programmed.Makeanynew
selectionsandtouchtheSTART/RESETpadto beginthe
cycle.
Flashing display lights.
Status Indicator Lights What It Means
START/RESET
Using the dishwasher.
CyclehasbeeninterruptedbypressingtheSTART/RESETpad.Lightwillquit
flashingafterthedishwasherautomaticallydrainsoutthewate_
Check the Water Temperature
Theenteringwater shouldbeat least120°Fandnotmore
than150°Fforeffectivecleaningandto preventdish
damage.Checkthewatertemperaturewith acandyor
meatthermometenTurnonthe hotwaterfaucetnearest
thedishwasher,placethethermometerin aglassandlet
thewater runcontinuouslyintotheglassuntilthe
temperaturestopsrising.
Use ®or Cascade stal Cleaff Rinse Agent
Jet-Dry®or CascadeCrystalClear_ rinseagentsremovespotsand preventnewfilm buildupon yourdishes,glasses,
flatware,cookwareandplastic.
Filling the Dispenser
Therinseagentdispenserholds5.5oz.ofrinseagent.Undernorrnalconditions,thiswill
lastapproximatelyonemonth.Tryto keepitfull,butdo notoverfill.
I-i7 Makesurethedishwasherdoorisfullyopen.
r_ Turnthedispensercaptothe leftand liftitout.
F_] Addrinseagentuntiltheindicatorwindowlooksfull.
[] Cleanupanyspilledrinseagentwitha dampcloth.
[] Replacethedispensercap.
Indicator
window Dispensercap
Rinse Aid Setting
Theamountof rinseagentreleasedintothefinalwashcanbeadjusted.Thefactory
settingisatthe midpoint.Ifthereareringsofcalcium(hardwater)spotson dishes,try
a highersetting.
Toadjustthe setting
Removethedispenserknob;thenturntheadjustercounterclockwisetoincreasethe
amountof rinseagent.
Dish Preparation Prior to Loading
agent
adjuster
• Noprerinsingofnormalfoodsoilisrequired.
• Scrapeoff hardsoils,includingbones,toothpicks,skins
andseeds.
• Removelargequantitiesofany remainingfood.
• Removeleafyvegetables,meattrimmingsand
excessiveamountsofgreaseoroil.
• Removeacidicfoodsoilsthat candiscolorstainless
steel.

Using the dishwasher, gecom
Using the Dishwasher Door
tiThe door must be closedto select a
LOADSELECTIONor an ENHANCEMENT.
Proper Use of Detergent
Useonlg detergentspecificallgmadefor usein
dishwashers.Cascade®,CascadeComplete®and
Electrasol®Automatic DishwashingDetergentshave
beenapprovedfor usein all GEdishwashers.Keep
gourdetergentfresh and drg.Don'tput detergent into
the dispenseruntil gou'rereadgto wash dishes.
Allwash cgclesexceptRINSEONLVrequiredetergent.
Theamount of detergentto usedependson whether
gourwater ishardor soft.
Protectgour dishesand dishwasherbg contacting
gourwater department and askinghow hard gour
water is.Twelveor moregrainsisextremelghard
water.A water softenerisrecommended.Withoutit,
limecanbuild up inthe water valve,which couldstick
while openand causeflooding.Toomuch detergent
with softwater cancausea permanent cloudinessof
glassware,calledetching.
Thedetergentcuphasindicatorlinesto helpgou.
Usetherightamountof detergent.Asa guide:
ForSoftwater(waterhardness<4GrainsPerGallon,GPG),
fillcuptothefirstline.
ForHediumwater(4-8GPG),fillcuptothe
secondline.
ForHediumhardwater(8-12GPG),fillcup.
ForExtremelghardwater(>12GPG),fill bothcups.
Soft Hedium Hediurn hard Extremelg
_ 1 hard
SMAINWASH
_t
PRE
WASH
Filling the Dispenser
FI_ Ifthe dispensercoveris closed,openthe cover
bgdepressingthe coverlatch.
[-_Add the detergentto the HainWashsection,
as perguidelines.
F_Fill the Pre-washsectionif water isextremelghard.
[] Closethe dispensercoven
m Ifthedoorisopenedduringa cgcleand leftopen,the
dishwasherwillbeeponceeveryminuteuntilthedoor
isclosed.
Main
wash
Coverlatch
section
DO NOTUSEHAND DISHDETERGENT
@_
NOTE:Usingo detergentthat isnot specificollg
designedfordishwasherswill causethedishwasher
to fill with suds.Duringoperation,thesesudswillspill
outof thedishwashervents,coveringthekitchenfloor
andmaking thefloorwet.
Becauseso mangdetergentcontainerslookalike,
storethe dishwasherdetergentin a separatespace
from all other cleaners.Showangonewho mag use
the dishwasherthe correctdetergentand where
it isstored.
Whiletherewill be no lastingdamageto the
dishwasher,gour disheswill notget cleanusinga
dishwashingdetergentthat isnotformulated to
workwith dishwashers.
It is normal for the cover to open partiallg when
dispensing detergent.
Forget to Add a Dish?
Aforgottendishcanbeaddedangtimebeforethemain
wash.
r-l] Squeezethedoorlatchto releasethedoon
r'_Do notopenthedooruntilthewaterspragaction
stops.Steammagriseoutofthedishwashen
[_] Addforgottendishes.
Closethedoor.

Loading the dishwasher racks.
For best dishwashing results, follow these loading guidelines. Features and appearance of racks and silverware
baskets may vary from your model.
Upper Rack
Although the upper rack isfor glasses,cups
and saucers,pots and pans can be placed
in this rack for effective cleaning. Cupsand
glassesfit best along the sides.Thisis also
a secure place for dishwasher-safe plastics.
Theupper rack isadjustable (onsome
models)to add flexibility in loading your
dishwasher.Tolower, pushtubs in and lower
rack.To raise,just pull up on rack until it
snaps.
Theutility shdf(on some models)may be
placedin the up or down position to add
flexibility.A wine glass holder (onsome
models)secureswine glassesfor best
washability. Becausewine glassescome
in various sizes,after loading,slowly push
in the rack to make surethey will clear
the top of the dishwasher.
Theupper rack isgood for all kindsof
odd-shaped utensils.Saucepans,mixing
bowls and other items should be placed face
down. Fold-down tines (onsome models)
provide flexibility for extra-large and hard-to-
fit items.
Securelarger dishwasher-safeplastics over
2tines when possible.
Make suresmallplastic items ore secureso
theg can't fall onto the heote_
Besurethat items do not protrude through the
bottom of therack and block rotation of the
middle sprogarm. Thiscould result in poor
wash performance for itemsin theupper rack.
Checkto make surethat no itemswill block
rotation of the wash arms.
Lower Rack
Thelower rack isbest usedfor plates,
saucers,and cookware. Large items such
as broiler pans and baking racks should
go along the left-hand side.Load platters,
pots and bowls along the sides,in corners,or
in the back.The soiledsideof items should
face the center of the rack. If necessary,
oversizedglassesand mugs can be placedin
the lower rack to maximize loading flexibility.
Also,be careful not to let a portion of
an item such as a pot or dishhandle
extend through the bottom rack. Thiscould
block the wash arm and cause poor washing
results.
Fold-down tines (on some models)provide
flexibility for extra-large and hard-to-fit items.
Thetines may be left in the up position or
folded down to customize the lower rack.
Don't let any item
extend through
bottom.
Toremoveendbaskets,graspthe
basketatoppositecornersandslide
apart.
8
Silverware Basket
Avariety of options isavailable regarding
the three-piece silverware basketin your
dishwasher.The complete basket isdesigned
to fit on the right side ofthe lower rack.
Additionally, each end of the basket is
removable to add loading flexibility to
accommodate flatware and lower rack
capacity needs.
Toload flatware, simply push the adjustable
handleto either side.Putflatware in the
basketwith knife handles up to protect
your hands. Placespoons in the basket
with handles down. Mix knives,forks and
spoons sothey don't nest together.
Theprovided lidswith slots can be used
to avoid nesting of silverware.Small plastic
items, such as measuring spoons and
lidsfor small containers, should go in
the bottom of the silverware basketwith
silverware on top.
Thelidsof both end and middle baskets can
be closed to contain small items. Long items
can be placed on the utility shelf in the
upper rack.
Loading place settings.., gecom
Follow these guidelines for loading 10 place settings. Features and appearance of racks and silverware baskets
mag varg from gout model.
Upper Rack--lO place settings Lower Rack--lO place settings
Follow these guidelines for loading 12 place settings. Features and appearance of racks and silverware baskets
mag varg from gout model.
ff-<
V
Upper Rack--12 place settings Lower Rack--12 place settings
About optional accessories.
Youcon change the appearance of _lour
dishwasher to match your kitchen cabinets
5g ordering one of these optional accessories
(PDW7700 models onl_l):
• 1/4" Wood Panel Trim Kit
•3/4" Trimless Wood Panel Kit
These accessories are available at extra cost
(VISA,PtasterCard, or Discover cards accepted)
5g calling 800.626.2002.
Specifg accessorg number when ordering.
Descriptions of Optional Accessories
Wood panel trim kit--This accessory contains
trim and instructions for gou to supplg end
install a 1/4" thick decorative wood door:
• GPF82SB (Black)
• GPF825W (White)
• GPF82SC (Bisque)
Trimless wood panel kit--This accessoru
contains ports and instructions for gou to supplg
end install a 3/4" thick decorative wood door:
• GPF87SB (Black)
• GPF87SW (White)
• GPF875C (Bisque)

Caring for the dishwasher.
To cleon the control panel use a lightly dampened Never use sharp objects, scouring pads or harsh
cloth, then dry thoroughly. To clean the exterior, use cleaners on an_l part of the dishwoshe_
o good appliance polish wax.
Protect Against Freezing
If your dishwasher is left in an unheated
place during the winter, ask a service
technician to:
r-q-lcut off electrical power to the
dishwasheE Remove fuses or trip circuit
breaker.
r_Turn off the water supply and
disconnect the water inlet line
from the water valve.
F_ Drain water from the water inlet line
and water valve. (Use a pan to catch
the water.)
_-] Reconnect the water inlet line to the
water valve.
Checkthe airgap onFtime
Fourdishwasher isn't
draining well.
Does Your Dishwasher Have
an Air Gap?
An air gap protects your dishwasher
against water backing up into it if a drain
clogs. The air gap is not a part of the
dishwasher. It is not covered by your
warranty. Not all plumbing codes require
air gaps, so you may not have one.
The air gap is easy to clean.
IT]Turn off the dishwasher and liftoff the
chrome cover.
2] Remove the plastic cap and clean with
a toothpick.
The Stainless Steel Panels
The stainless steel panels can be cleaned
with CERAMA BRYTE Stainless Steel
Appliance Cleaner or a similar product
using a clean, soft cloth.
You can order CERAMA BRYTE Stainless
Steel Appliance Cleaner through GE Parts
by calling 800.626.2002 (for U.S. only).
!0

Before you call for service.., gecom
Troubleshooting Tips
Save time and money! Review the charts on the following pages,
_or visit ge.com. You mog not need to call for service.
Error Messages Possible Causes What To Do
START/RESETstatus Youhave pressedthe • PresstheSTART/RESETpadonlgwhengouwantto restartthe
indicator light flashing START/RESETpad while the dishwasher.
dishwasheris running. This will
cancelthe cgcle.Thelight will stop
fleshing after the dishwasher drains
(about90 seconds).
Dishwasher BEEPS This is a reminder that gour • Closeand latchthedoorafteropeningitmid-cgcle.
onceevery 30seconds dishwasherdoor has beenleft
openduring operation. It will
continue beeping until gau close
the door.
Problem Possible Causes What ToDo
Dishesandflatware Lowinlet watertemperature • Makesureinletwatertemperatureiscorrect(seepage8).Turnon
notclean thehotwaterfaucetnearestthedishwasher,letrununtilthewater
temperaturestopsrising.Thenstartthe dishwasherandturn off
thefaucet.Thisinsurestheenteringwaterishot.
Water pressureistemporarilg low • Turnon afaucet.Iswatercomingoutmoreslowlgthanusual?
Ifso,wait untilpressureisnormalbeforeusinggourdishwasher.
Air gapor disposerisclogged • Cleantheair gapor flushthedispose_
Improperrackloading • Makesurelargedishwaredoesnotblockthedetergentdispenser
or thewasharms.SeetheLoadingthedishwasherrackssection.
Noair gapor high drainloop •Verifgthat gouhaveanair gapora highdrainloop.Referto
theInstallationInstructions.
Spotsandfilming
onglassesand
flatware
Extremelghardwater
Lowinletwater temperature
Overloadingthe dishwasher
Improperloading
Oldor damppowderdetergent
Rinseagentdispenseremptg
Toolittle detergent
• Use Jet-Dry®orCascadeCrystalClear_rinseagentsto removespotsand
preventnewfilm buildup.
• Toremovestubbornspotsandpre-existingfilmfromglassware:
1 Removeallmetalutensilsfromthedishwasher.
2Donotadddetergent.
3 Selectthe POTS&PANScgcle.
4 Startthedishwasherandallowto runfor18to22minutes.Dishwasher
willnowbeinthemainwash.
5Openthedoorandpour2cups(500ml)ofwhitevinegarintothe
bottomofthedishwashen
6Closethedoorandallowtocompletethecgcle.Ifvinegarrinsedoesn't
work:Repeatasabove,exceptuse1/4cup(60ml)ofcitricacidcrgstals
insteadofvinegan
Cloudinesson Combinationofsoftwater and • Thisiscalledetchingandispermanent.Topreventthisfrom happening,
glassware too muchdetergent uselessdetergentifgou havesoftwatenWashglasswareintheshortest
cgclethat willgetthemclean.
Water temperatureentering • Thiscouldbeetching.Lowerthewaterheatertemperature.
the dishwasherexceeds150°F
Sudsin thetub Correctdetergent • Useonlgautomaticdishwasherdetergentstoavoidsudsing.
wasn'tused Cascade®andEleetrasal®AutomaticDishwashingDetergents
=_ havebeenapprovedforuseinallGEdishwashers.
• Toremovesudsfromthetub,openthedishwasherandlet
sudsdissipate.Closeand latchthedishwashenPumpoutwater
bgtouchingtheSTART/RESETpadonce;then30secondslater,
touchtheSTART/RESETpadagain.Repeatifnecessarg.
Rinseagentwas spilled • Alwagswipeup rinseagentspillsimmediatelg. 11

Before you call for service...
Problem Possible Causes What To Do
Detergent/eft in
dispensercups
Blackor gray
markson dishes
Dishesdon'tdry
Control panel responded
to inputs but dishwasher
never filled with water
Stainedtubinterior
Dishwasherwon'trun
Control panel lights
go off when you're
setting controls
Water standing in
the bottom of the tub
Water won't pump
out of the tub
Steam
Sanitized light does
not illuminate at the
end of the cycle
(Anti-Bacteria
cycleonly)
Noise
Dishesare blocking the
detergent cup
Aluminumutensilshave
rubbedagainstdishes
Lowinletwater temperature
Rinseagentdispenserisemptg •
Doorlatch magnotbeproperlg •
seated
• Repositionthe dishes,sothe water from the lowerspragarm can
flush the detergentcup.Seethe Loadingthedishwashersection.
• Removemarkswith a mild,abrasivecleanen
• Makesureinletwatertemperatureisat least120°E
•SelectHEATEDDRY.
• UseHOTSTART,HOTWASHorADDEDHEAToptions.
•Selecta highercycle,suchasANTI-BACTERIA,SANIWASHor POTS&PANS.
Checkthe rinseagentdispenserandfillasrequired.
Hakesurethedoorisfirmlyclosed.
Water valve mag be turned off •
Some tomato-based foods can •
cause reddish stains
Teaorcoffeestains
Anoverallgelloworbrownfilmcan •
becausedbg irondepositsinwater
Whitefilmoninsidesurface- •
hardwater minerals
Fuseisblownor circuitbreaker •
istripped
Hakesurewatervalve(usuallylocatedunderthesink)isturnedon.
UseoftheRINSEONLYcycleafteraddingthedishtothe load
candecreasethelevelofstaining.GErecommendsCascade®
PlasticBoosterto helpremovethesetypesofstains.
Removethestainby hand,usinga solutionof 1/2cupbleach
and3cupswarmwater.
AWARNING
Beforecleaninginterior,wait atleast20minutesaftera cycleforthe
heatingelementstocooldown.Failuretodosocanresultin burns.
A specialfilterinthewatersupplylineistheonlywagto correct
this problem.Contacta watersoftenercompang.
GErecommendsJet-Dry®or CascadeCrystalCleaPto help
preventhardwatermineraldepositsfromforming.
Rundishwasherwithcitricacidto removemineraldeposits.Citricacid
(Partnumber:WD35×151)canbeorderedthroughGEParts.Seeback
coverfororderinginformation.
Replacefuseor resetcircuitbreakenRemoveanyotherappliancesfrom
thecircuit.
Poweristurned off • Insomeinstallations,thepowertothedishwasherisprovidedthrougha
wallswitch,oftenlocatednextto thedisposerswitch.Hakesureitison.
Controlpanelislocked • Unlockcontrolpanel.Seepage5or7.
Rebootgourcontrol
Timetoo long between
touching of selectedpads
• Turn off power to the dishwasher (circuit breaker or wall switch)for
30 seconds;then turn back on.
• Each pad must be touched within 30 seconds of the others.
To relight, touch any pad again, or unlock and relatch door.
This isnormal
Drainisclogged
Thisisnormal
Thedoorwasopenedand the
cgclewas interrupted during
or after the mainwash portion
Theincomingwater
temperaturewastoo low
Normal operating sounds
• A smallamount ofcleanwater aroundthe outlet on thetub
bottom at the backofthe tub keepsthewater seallubricated.
• Ifyouhaveanairgap,cleanit. Seepage12.
• Ifthedishwasherdrainsintoa disposer,rundisposerclear.
• Checkto seeifyourkitchensinkisdrainingwell.Ifnot, gou
magneeda plumber.
• Warm,moistaircomesthroughtheventbgthedoorlatchduringdrying
andwhenwater isbeingpumpedout.Thisisnecessargfordrying.
• Donotinterruptthecgcleanytimeduringor aftermainwash.
Raisethe water heatertemperature to between 120°Fand 140°E
• Detergentcupopening.
• Water enteringdishwasher.
• Themotor stopsand starts at varioustimesduringthe cycle.
• Drainpumpsoundsdurinqthe pump out.
• Hake suredishesare properlg loaded.Seethe Loadingthe
dishwasherrackssection.
Rattling disheswhen the spray
12 arm rotates

GE Service Protection Plus'"
GE, a name recognized worldwide for quality and dependability, offers you
Service Protection Plus_'-comprehensive protection on all your appliances-
No Matter What Brand!
Benefits Include:
• Backed bg GE
• All brands covered
• Unlimited service calls
• All parts and labor costs included
• No out-of-pocket expenses
• No hidden deductibles
• One 800 number to call
We'll Cover Ang
Appliance. Angwhere.
Angtime.*
You will be completely satisfied with our service protection or you mug request your money back
on the remaining value of your contract. No questions asked. It's that simple.
Protect your refrigerator, dishwasher, washer and dryer, range, TV,VCRand much more-ung brund!
Plusthere's no extra charge for emergency service and low monthly financing is available. Even icemaker
coverage and food spoilage protection is offered. You can rest easy, knowing that all your valuable household
products are protected against expensive repairs.
Place your confidence in GEand call us in the U.S.toll-free at 800°626°2224
for more information.
*All brands covered, up to 20 years old, in the continental US
_Cut here
Please place in envelope and mail to:
General Electric Compang
Warranty Registration Department
RO. Box 32150
Louisville, KY40232-2150
13

Consumer Product Ownership Registration
Dear Customer:
Thank you for purchasing our product and thank you for placing your confidence in us.
We are proud to have you as a customer!
Follow these three steps to protect your new appliance investment:
Complete and mail
your Consumer
Product Ownership
Registration today.
Have the peace of
mind of knowing we
can contact you in
the unlikely event of a
safety modification.
After mailing the
registration below,
store this document
in a safe place. It
contains information
you will need should
you require service.
Our service number
is 800.GE.CARES
(800.432.2757).
Read your Owner's
Manual carefully.
It will help you
operate your new
appliance properly.
Model Number Serial Number
I I I I I I
Important: If gou did not get a registration card with gour
product, detach and return the form below to
ensure that gour product is registered, or register
online at ge.com. ._ Cut here
Consumer Product Ownership Registration
. Model Number Serial Number
I,,,,,, , , , , , I I , , , , , ,
Mc Ms. Mrs i Missi
First I I Lastl
Name I I I I I I I I I Name I I I I I I I I I I I I
, I
Street IAddress l I I I I I I I I I I I I I I I I I I I I I I I I
Apt.#I I I I I I I I I E-mailAddress*
zipI
cityl i, i i i i I i i i i i I I Statel, 1 Code
Date Placed
,.u_ol, I I , I I , I Phone
.umberl I, I-I,, I-I , , I
Nonth Day Year
O EConsumer &, lndustriaJ
Appliances
General Electric Company
Louisville,KY40225
ge.com
* Please provide gout e-mail address to receive, via e-mail, discounts, special offers and other important
communications from GEAppliances (GEA)
Check here if you do not want to receive communications from GEA'scarefully selected partners
FAILURETOCOMPLETEAND RETURNTHISCARDDOESNOTDIMINISHYOURWARRANTYRIGHTS
For information about GEA's privacg and data usage policg, go to gecom and click on "Privacg Policg" or call
800.626.2224
14

GE Dishwasher Warranty.
All warranty service provided by our Factory Service Centers,
or an authorized Customer Care ®technician. To schedule
service, on-line, 24 hours a day, visit us at ge.com, or call
800.GE.CARES (800.432.2737). Please have serial number and
model number available when calling for service.
Staple your receipt here.
Proof of the original pumhase
date is needed to obtain service
under the warranty,
For The Period Of:
One Year
From the date of the
original purchase
Five Years
(for models PDW7306
PDW7700, PDW7800
and PDW7880)
From the date of the
original purchase
Lifetim e of Product
(for models PDW730_
PDW7700, PDW7800
and PDW7880)
GE Will @lace:
Any part of the dishwasher which fails due to a defect in materials or workmanship. During
this limited one-gear warranty, GEwillalso provide, free of charge, alllabor and related service
to replace the defective part.
The dishwasher racks or the electronic control module, ifthey should foildue to a defect in
materials or workmanship. During this five-gear limited warranty, gou will be responsible for ang
labor or in-home servicecosts.
ThePermaTuf ®tub or door liner, if itfails to contain water due to a defect in materials or
workmanship. Duringthis limited warrants, GEwill alsoprovide, freeof charge, all labor and
related serviceto replacethe defective part.
What GE Will Not Cover:
[] Service trips to gout home to teach SOUhow to use [] Damage to the product caused bg accident, fire, floods
the product, or acts of God.
[] Improper installation, delivery or maintenance. []
[] Failure of the product ifit is abused, misused, or used for
other than the intended purpose or used commemiallg. []
[] Replacement of house fuses or resetting of circuit
breakers. []
[]
Inddental or consequential damage caused bg possible
defects with this appliance.
Cleaning or servicing of the air gap device in the
drain line.
Damage caused after deliverg.
Product not accessible to provide required service.
I
IEXCLUSIONOFIMPLIEDWARRANTIES--Yoursole and exclusive remedg is product repair asprovided in this Limited I
Warrantg. Ang implied warranties, including the implied warranties ofmerchantabilitg or fitness for a particular I
purpose, are limited to onegear orthe shortest period allowed bg law.
This warranty is extended to the origina! purchaser and any succeeding owner for products purchased for
home use within the USA. If the product is located in on area where service by o GE Authorized Servicer is not
available, you may be responsible for a trip charge or gou may be required to bring the product to an Authorized GE
Service location for service. Proof of original purchase date is needed to obtain service under the warrant_j.
In Alaska, the worranttj excludes the cost of shipping or service calls to _jour home.
Some states do not allow the exclusion or limitation of incidental or consequential damages. This warranty
gives you specific legal rights, and you may also have other rights which vary from state to state. To know
what _jour legal rights are, consult _jour local or state consumer affairs office or your state's Attorne_j General.
Warrantor: General Electric Company. Louisville, KY 40225
15

Consumer Support.
GEAppliances Website
Have a question or need assistancewith sour appliance?Trg the GEAppliances Website 24 hours a dog,
ang dog ofthe gear! Forgreater convenience and faster service,SOUcan now download Owner's Manuals,
order parts,catalogs, or evenschedule service on-line.Youcan also "AskOurTeam of Experts....
sour questions,and so much more...
ge.com
ScheduleService ge.com
Expert GErepair service isonlg one step awag from sour door Geton-line and schedule sour serviceat
sour convenience24 hoursang dag ofthegear!Orcall800.GECARES(800.432.2737)duringnormal businesshours.
RealLifeDesignStudio ge.com
GEsupports the UniversalDesignconcept-products, services and environments that can be usedbg
people of all ages,sizesand capabilities.We recognizethe need to design for a wide range of phgsical and
mental abilities and impairments. Fordetails of GE'sUniversalDesignapplications, including kitchen designideas
for peoplewith disabilities,check out our Website todag. Forthe hearing impaired, pleasecall 800ZDD.GEAC
(800.833.4322).
ExtendedWarranties
Purchasea GEextended warrants and learn about special discounts that are available while sour warrants
isstill in effect. You can purchase it on-line angtime, or call800.626.2224during normal businesshours.
GEConsumer Home Serviceswill still be there after sour warrants expires.
ge.com
Parts and Accessories ge.com
Individuals qualifiedto servicetheir own appliances can haveparts or accessoriessent directlg to their homes
(VISA,MasterCardand Discovercards are accepted).Order on-line todag, 24 hours everg dog or bg phone at
800.626.2002during normal businesshours.
Instructions contained in this manual cover procedures to beperformed bg ang user. Other servicing
generallg should be referred to qualified service personnel Caution must be exercised,since improper
servicing mag cause unsafe operation.
Contact Us
If gou are not satisfied with the service gou receive from GE,contact us on our Website with all the details
including gour phone number, or write to: General Manager, Customer Relations
GEAppliances, Appliance Park
Louisville, KY40225
ge.com
Register YourAppliance
Register gour new appliance on-line--at gour convenience! Timelg product registration will allow for
enhanced communication and prompt service under the terms of gour warrantg, should the need arise.
Youmag also mail in the preprinted registration card included in the packing material.
ge.com
.... Printed in the United States
,Printed on Recycled Paper
Other manuals for Triton XL GSD6900 Series
4
This manual suits for next models
4
Table of contents
Other GE Dishwasher manuals