manuals.online logo
Brands
  1. Home
  2. •
  3. Brands
  4. •
  5. GE
  6. •
  7. Dryer
  8. •
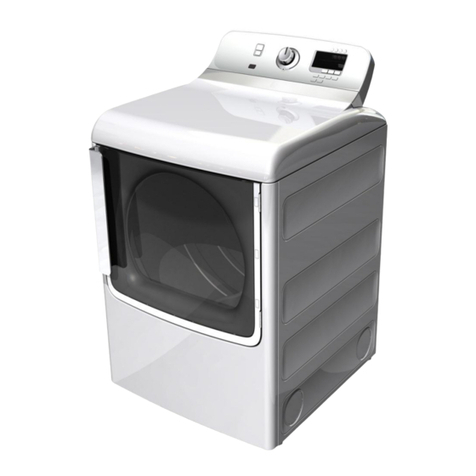
  9. GE Profile DNSB514 User manual

GE Profile DNSB514 User manual

Other manuals for Profile DNSB514

1

This manual suits for next models

3

Other GE Dryer manuals

GE DCCB330GJWC User manual

GE

GE DCCB330GJWC User manual

GE Appliances DCCB330 User manual

GE

GE Appliances DCCB330 User manual

GE GFD14ESSNWW Original instructions

GE

GE GFD14ESSNWW Original instructions

GE GTD65EBMR User manual

GE

GE GTD65EBMR User manual

GE DWXR463GG Manual

GE

GE DWXR463GG Manual

GE DWSR483EAAA Manual

GE

GE DWSR483EAAA Manual

GE Unitized Spacemaker WSM2420D User manual

GE

GE Unitized Spacemaker WSM2420D User manual

GE GFDS175 User manual

GE

GE GFDS175 User manual

GE DDE7107R User manual

GE

GE DDE7107R User manual

GE DWXR483EBWW Manual

GE

GE DWXR483EBWW Manual

GE GFDN240GL Manual

GE

GE GFDN240GL Manual

GE DuraDrum GTDP250EM Manual

GE

GE DuraDrum GTDP250EM Manual

GE DCVH640 User manual

GE

GE DCVH640 User manual

GE GUSR493GBWW User manual

GE

GE GUSR493GBWW User manual

GE DBVH520EJWW Manual

GE

GE DBVH520EJWW Manual

GE DCVH640GJ Manual

GE

GE DCVH640GJ Manual

GE Spacemaker DCXH46 Original instructions

GE

GE Spacemaker DCXH46 Original instructions

GE Appliances DCCB330 Manual

GE

GE Appliances DCCB330 Manual

GE DNCK440EA1WC User manual

GE

GE DNCK440EA1WC User manual

GE DDE9200V User manual

GE

GE DDE9200V User manual

GE DWSR483GG Manual

GE

GE DWSR483GG Manual

GE DMCD330EH Manual

GE

GE DMCD330EH Manual

GE Profile UPGT650 Service manual

GE

GE Profile UPGT650 Service manual

GE GTDP301GL1WS User manual

GE

GE GTDP301GL1WS User manual

Popular Dryer manuals by other brands

Whirlpool WED9270XL2 parts list

Whirlpool

Whirlpool WED9270XL2 parts list

Kleenmaid KED2000 Repair instructions

Kleenmaid

Kleenmaid KED2000 Repair instructions

SPI Supplies SPI-DRY Operation manual

SPI Supplies

SPI Supplies SPI-DRY Operation manual

Amana NGD5800DW Use & care guide

Amana

Amana NGD5800DW Use & care guide

Bosch WTG86402GB Installation and operating instructions

Bosch

Bosch WTG86402GB Installation and operating instructions

Maytag MED4200BW0 installation instructions

Maytag

Maytag MED4200BW0 installation instructions

ffuuss eos user manual

ffuuss

ffuuss eos user manual

KitchenAid 53-3498 installation instructions

KitchenAid

KitchenAid 53-3498 installation instructions

Schulthess Spirit topLine TW 8340 operating instructions

Schulthess

Schulthess Spirit topLine TW 8340 operating instructions

Whirlpool LGR4624BW0 parts list

Whirlpool

Whirlpool LGR4624BW0 parts list

World Dryer AirMax D M5-972A manual

World Dryer

World Dryer AirMax D M5-972A manual

Alliance Laundry Systems ADEE9BSS user guide

Alliance Laundry Systems

Alliance Laundry Systems ADEE9BSS user guide

Miele PDR 910 EL Operating and installation instructions

Miele

Miele PDR 910 EL Operating and installation instructions

Amana NGD5800TQ0 parts list

Amana

Amana NGD5800TQ0 parts list

Bosch WTA79200GB Installation and operating instructions

Bosch

Bosch WTA79200GB Installation and operating instructions

AEG TR838P4OB user manual

AEG

AEG TR838P4OB user manual

Asko T760 user guide

Asko

Asko T760 user guide

Electrolux EW2H328R2 user manual

Electrolux

Electrolux EW2H328R2 user manual

manuals.online logo
manuals.online logoBrands
  • About & Mission
  • Contact us
  • Privacy Policy
  • Terms and Conditions

Copyright 2025 Manuals.Online. All Rights Reserved.

GEApp/iances.com
Safety Instruotions ........ 2-5
Operating Instru_tions
Automatic Settings ......... 8, 9
Control Panels ............ 6, 7
Controls Features ........... 12
Cycle Options .............. 13
Cycle Status ................ 14
Dryer Features .............. 15
Drying Qcles ............... 10
Dryness Levels .............. 11
Heat Settings ............... 11
Loading and Using the Dryer . . .17
ONE TO_CH Cycles ............ 6
ONE To_CH Selections ......... 8
Rexersing the Door . ......... 16
Special Dr},' Cycles ............ 9
Timed Dry Cycles ........... 11
Venting the Dryer . .......... 18
Troubleshooting Tips ..... 19-21
Consumer Support
Consumer Support . . . Back Co_er
Warranty .................. 23
D_S'B 5 l 4
DPSB5 l 3
DPSB5 l 9
DPXB 5 l 5
Write the model and serial
numbers here:
Model #
Serial #
They are on the label on the
front of the dryer behind
tile door.
500A277P041 175D1807P383 49-90720-7 77-07JR
IMPORTANTSAFETYINFORMATION.
READALLINSTRUCTIONSBEFOREUSING.
WARNING!
For yoursafety,the informationin this manual mustbe followed tominimize the risk offire
or explosion,electric shock, or topreventpropertydamage,personal injury,or death.
•Do notstore or usegasoline or other
flammable vaporsand liquids in the
vicinityof thisor any otherappliance.
•Installationand service mustbe performed
bya qualified installer,service agency or
the gas supplier.
WHATTODOIF YOUSMELLGAS:
[] Donottry to lighta match, or cigarette, or
turnon anygas or electrical appliance.
[] Donottouchanyelectrical switch; do not
use anyphone in yourbuilding.
[] Clear the room,buildingor area of all
occupants.
[] Immediately call yourgassupplier
froma neighbor'sphone. Follow the
gassupplier'sinstructionscarefully.
[] If youcannot reach yourgassupplier,
call the fire department.
Caflfomia Safe Drinking Water and ToxicEnforcement Act
This act requires tile goxemor of Califi)rnia to publish a list of substances kno_n to tile state to cause cancex,
birth defects or other reproductive ham_ and reqtfires businesses to warn custome_ of potential exi)osm'e
to s/Ich sllbstilnces.
(;as al)l)liances C}lil C}lllSe illinoi" exl)OS/li'e to ii)/li" oJ[ these s/lbst_lnces_ nai/lelv benzene, C}li'bon illOnoxide_
fimnaldehyde and soot, caused primarily by the incomplete combustion of natural gas or I,P fllels.
Propedy ac!jusmd dr)/et_ will minimize incomplem coillb/istion. EN)osure to these s/Ibst_lnces can be
minimized fln'ther by propedy venting tile dryer to tile out(loo_.
GEAppliances.com
%PROPERINSTALLAtiON
This dryer must be properly installed and located in accordance with the Instaflafion Instructions
before it is used. If you did not receive an Installation Instructions sheet, you can receive one by
visiting 6EAppliances.cem, or by calling 800.6E.CARES (800.432.2737).
[] Proper]) gr(mnd di) er to confi_m_ with all
governing codes and oidinances. Fol](;,_ details
in Installation Instructions.
[] Install or store where it will not be exposed to
temperatures below fi'eezing or exposed to
the _ eathe_;
[] Comlect to a propedy rated, protected and sized
power supply circuit to a\_fid electdcal o',efload.
[] Remove the colored protective fihn fi'om the
control panel.
[] Remo\v all shaq_ packing items and dispose of all
shipping matedals properly.
Exhaus_/Ducting:
[7] (;as dr}el_ MUSTbe exhausted to the outside.
_ Exhausting electric dr} el_ to the outside is
stronglyrocommondodto prevent hrge alllO/llltS
of moisture and lint fi'om being blo_n into
tile l'OOl/l,
] , • • tt
_] Lse onl} ngld metal or flexable metal 4
diameter duct_ork inside tile dr_er cabinet or
fiw exhausting to tile outside. USEOFPLASTiC
OROTHERCOMBUSTIBLEDUCTWORKCAN
CAUSEAFIRE.PUNCTUREDDUCTWORKCAN
CAUSEIt FIREIFIT COLLAPSESORBECOMES
OTHERWISERESTRICTEDIN USEORDURING
INSTALLATION.
For complete details, fi)How tile Installation
Instructions.
3
iMPORTANTSAFETYiNFORMATiON.
READALLiNSTRUCTiONSBEFOREUSING.
a, WARNING!
YOURIAUNDflYAflEA
• Keep the area underneath and aromM yam"
appliances fl'ee of combustible materials
(lint, paper; rags, etc.), gasoline, chemicals,
and other flammable wq)ors and liquids.
• Kee I) the floor around your appliances clean
and dry to reduce tile possibili Vof slipping.
• Close supervision is necessm T if this appliance
is used by or near children. Do not allow children
to play on, _ith, or inside this or any other
appliance.
• Kee I) all laundIw aids (such as deteigents,
bleaches, etc.) out _ff tile reach of children,
preferably in a locked cabinet. Observe all
warnings on container labels to avoid ii_jur,_;
• Never climb on or stand on tile dryer top.
WHENUSINGYOURDRYER
• Never reach into tile dryer while tile drum is
moving. Before loading, unloading or adding
clothes, wait until the drum has completely
stopped.
• Clean the lint filter before each load to prevent
lint aCC/lil/tllation inside tile dryer or in tile
room. DONOTOPERATETHEDRYERWITHOUT
THELINTFILTERIN PLACE.
• Do not wash or (li T articles that have been
cleaned in, washed in, soaked in, or spotted
with combustible or explosive substances (such as
wax, oil, paint, gasoline, degreasers, dry-cleaning
solvents, kerosene, etc.) which may ignite or
explode. Do not add these substances to tile
wash water. Do not use or place these substances
around your washer or dryer duling operation.
• Do not place items exposed to cooking oils in
w)ur (liTer Items contaminated with cooking oils
may contribute to a chemical reaction that could
cause a clothes load to catch fire.
•Anv article on which you have used a cleaning
solvent or that contains flammable materials
(such as cleaning cloths, mops, towels used in
beaut)' salons, restaurants or barber shops, etc.)
must not be placed in or near tile diwer until
solvents or flammable materials have been
removed. There are many highly flammable
items used in homes such as acetone, denatured
alcohol, gasoline, kerosene, some household
cleaners, SOille Sl)Ot i'eil/ovei's, ttli])entines,
waxes, wax i'eiilovei's and l)I'o(hIcts contnining
petroleum distillates.
• Tile laundry process can reduce tile flame
retardanc', of rid)tics. To axoid such a result,
careflllE fi)llow tile gam_ent mamffacturer's
caI'e insti'tictions.
• Do not dry articles containing rubbei; plastic,
foam or si_nilar materials such as padded bras,
temfis shoes, galoshes, bath mats, rugs, bibs, baby
pants, plastic bags, pillo_:% etc., that may melt or
bum. Some rubber mateiials, when heated, can
under certain drcumstances produce fire by
Sl)On[;i neo/is Coii/b/istion.
• Do not store plastic, paper or clothing that may
bum or melt on top _d the dryer during
ol)ei'ation.
• Gam/ents labeled On/Away from Hoat or Do Not
TumbloDo/(such as lilbjackets containing kapok)
m ust not be put in your (h_'eI:
• Do not (liTfibeIglass articles in w_ur (hwei:
Skin irritation could result fl'om the remaining
particles that may be picked up by clothing
during subsequent diTer uses.
• To minimize the possibility of electric shock,
unI)lug this appliance fl'om tile power supply
or discmmect the dryer at the building's
distribution panel b)' removing the fllse or
switching off the circuit breaker befi)re
attempting any maintenance or cleaning
(except the removal and cleaning at the lint
filter). NOTE:Pressing STOPdoes NOTdiscmmect
tile appliance from tile power supply:
4
GEAppliances.com
WHENUSINGYOURDRYER(cont.)
• Never attempt to operate this appliance if it is
dmnaged, nmlflmcfioning, partially clisassembled,
or has missing or broken parts, including a
damaged cord or plug.
• The interior of the machine and the exhaust
duct connection inside tile (hyer should be
cleaned at least once a year by a qualified
technidan. See the loading and Using the Dryer
section.
• If vom_ is a gas dtTet) it is equiI)ped with an
automatic electric ignition and does not have
apilot light. DONOTATTEMPT TOLIGHT WITH A
MATCH. Burns may result fr(>m having y(>ur hand
in the vicinity of the burner when the automatic
• Ybu may wish to soften your laundered lid)tics
or reduce tile static electridtv in them by using
a (hTe_=ai)i)lied thl)_ic softener or an anti-static
condifione_; We recommend you use either a
lid)tic softener in tile wash cycle, according to
tile manufi_cturer's instructions for those
products, or t_?' a drye>added product fin.
which the manuemmrer gives written assurance
on the package that their product can be satelv
used in your (h_'e_: Service or perfimnance
problems caused by use of these products are
the responsibility of the manufi_cmre_ of those
products and are not covered under tile warranty
to this appliance.
ignition ttlYIIS {Ill.
CWHENNOTUSINGYOURDRYER
• Grasp tile plug firefly when disconnecting this
appliance to avoid damage to the cord while
pulling. Place tile cord away fi'om trattic areas
so it will not be stepped on, t_ipped over or
subjecmd to damage.
• Do not attempt to repair or replace any part of
this appliance or attempt any se_Mcing unless
specifically recommended in this ()x_a_er's Manual
or in published use>repair instructions that you
understand and have the skills to car_T out.
• Before discarding a (hTe_; or removing it fl'om
service, i'ell/ove the (liTer door to l)i'e\'ent
children fi'om hiding inside.
• Do not tamper with controls.
READANDFOLLOWTHISSAFETYINFORMATIONCAREFULLY.
SAVETHESEINSTRUCTIONS
Easy ONE TOUCHcycles.
Your new dryer offers the convenience of starting your dr}er loads with our eas_ ONE TOUCHcycles. Make one simple
selection, and your DRYNESSLEVELand HEAT SETTING are at|tomaticall) set. Then all _ou ha'_e to do is press START.
• Cleanlintfilter •Addclothes •Selectdrycycle
•Checkdrynesslevel
•Checkheatsetting
•Closedoor
•PushSTART
Dryercontrolpanel
Youcan locate your model number on the label on the front of the dryer, behind the door.
/VOTE:Any time you make a selection that is incompatible with the chosen dry cycle, the dryer will beep twice.
Model DPSB513
ONE TOUCH
_,*ns_- lkry Cydes DRYNESS TIMED DRY HEAT
LEVEL ONLY SETTING OPTIONS
70 30 MEDIUM
60 20 LOW ADO
lIME
5o _o EXTRA
Low
SensorDry Plus TIMED GRY EXTENDED TUMBLE CLEAN LINT FILTER
CYCLE STATUS
q
Q
Q
m
EST.TIMEREMAINING
SENSING
Model DPSB519
OPTIONS TIMED
.......................... DRY
EXTENR SiGN,_,_.....................................
TUr_GLE"_)4 30N,N
DRY SIGNAL MORE
SACTERIAL 1-8 Hrs,
SenserDtyPlus TIMED DRY EXTENDED TUMBLE
CYCLE STATUS
CLEAN LINT FILTER
1
Q
Q
m
EST,TIMEREMAINING
SENSING
GEAppliances.com
Youcan locate your model number on the label on the front of the dryer, behind the door.
NOTE: Any time you make a selection that is incompatible with the chosen dry cycle, the dryer will beep twice.
Model DPXB515
TIMED DRY HEAT OPTIONS
ONLY SETTING
.....................,,o .................40 •,)4)
70 30 MEDIUM EXTEND
TUMBLE
60 20 L0W ADD
n,E......
so lo EXTRA
LOW
SensorDry Plus TIMED DRY EXTENDED TUMBLE CLEAN LINT FILTER
CYCLE STATUS
1
Q
m
ESETIMEREMAINING
SENSING
Model DNSB514
HEAT DRYNESS
SETTINGS LEVEL
MORE¸ DRY
LESS ])AMP
SensorDry Plus
SPECIAL DRY CYCLES TIMED
DRY
M0_E
J
TIMED DRY EXTENDED TUMBLE CLEAN LINT FILTER
CYCLE STATUS
EST,TIMEREMAINING
SENSING
ONE TOUCHselections.
ONETOUCHcycles use the Sensor Dry Plus feature, whi€h ¢ondnuousl} monitors the amount of moisture in the load and
stops the dr_er when the clothes are dry. Throughout this manual, features and appearance may vary from your model.
PRESS... AUTOMATICALLYSELECTS...
H,GHii
THENPRESS...
For cottons and mostfinens.
Forloads consisting of
cottons and poly-blends.
HIGH
For wrinkle-free and
permanent press items.
Forknits and sweaters with fabric
care labels that say "Machine Dry_"
....................................................................................ii
LOW
Forlingerie and special-care fabrics.
EXTRA
LOW
(onsome models)
Forsmafl loads that are needed in a hurry,
such as sport or school uniforms. Canalso
be used ff the previous cycle left some
items damp,such as collars or waistbands.
HIGH
NOTE:During SPEEDDRY
you will see."
EST,TINE RENANNG
Changingthe automaticsettings.
You can chaw,eo any, of the automatic settings, by,simi,i)lv )ressing, the desired pads.
8
Special Dry Cycles.(onsomemodels) GEAppliances.com
Special Dry Cycles are customized to proxicle optinmn_ (h'_ing for a ;ariet_ of fabrics and clothing t_pes.
PRESS... AUTOMATICALLYSELECTS... THENPRESS...
MORE
DRY
DRY
DRY
Changingtheautomaticsettings.
You can chanoe_ any, of the automatic settings, b_,,simI,I)lx )ressing, the desired pads.
Aboutdryingcycles.
Throughout this manual, features and appearance may vary from your model.
ORYELTM (onsomemodels)
This teature is designed ti)r use with the DRYEI/" "dry-clean only" tabric care system.
See product package ti)r directions.
For questions or issues related to the use and peril)finance of DRYEI/_,
call 1-800-914-8913, or visit the DRYEI. _'' Website at w_sv.drvel.com.
Automatic DRYEL"Msettings:
HEAT
SETTING
_] E_, U _'[ EST. TIME }{EMA[N,NG
DE DEWRI/VKLE
WRINKLE Use this feature to remoxe wrinkles from items that are (h'x or slightly damp.
Automatic DEWRINKLEsettings:
HEAT
SETTING
........
I_EDUUM
.................... EST.TINEBEP_AINING
AIR
DRY AIR DRY
Use this feature to tmnble items without heat,
Automatic AIR DRYsettings:
EST.TI#IEBEM_INING
CUSTOM Cycle (on some models)
Set up your ta\'orite combination ot settings and save them here for one-touch recall.
These custom settings can be set while a cvcle is in progress,
Some models have two CUSTOM pads to store two different custom combinations.
Tostore a custom combination of settings:
1. Select a ONE TOUCH setting.
2, Change DRYNESS LEVEl and HEAT SE1TING to fit yore" needs.
3. Select any drying OPTIONS you want.
4. Press and hold the CUSTOM Cycle pad for three seconds to store vom" selection,
A beep will sotmd and the pad will light up,
Torecall your stored combination:
Press the CUSTOM Cycle pad, then press START.
Toreprogram the CUSTOM settings:
Repeat steps I-4 above.
lO