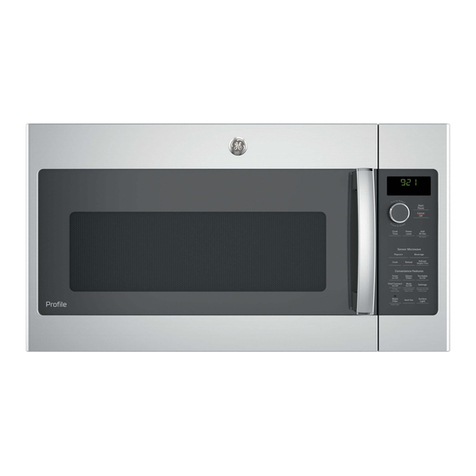
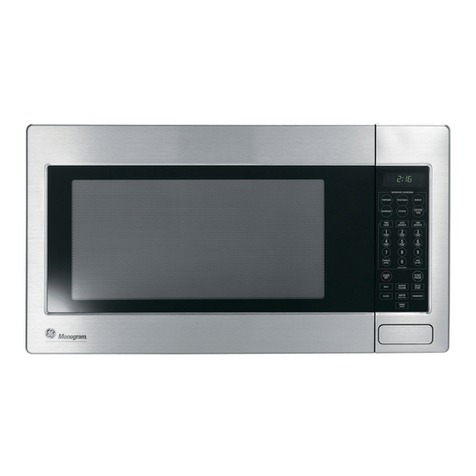
GE JE1240 Use and care manual

Turntable
Microwave Oven
Safe~
lnstrutiions...................3-5
Precautions to Avoid Possible Exposure
to Excessive Microwave Energy ...........2
Operating Instructions, Tips
Add 30 Seconds . . . . . . . . . . . . . . . . . . . . . . . . . . . . . . . . . . . . . . . . .
.
12
Aluminum
Foii..........................................4,
19
AutoDefrost..........................................18,19
Auto Start . . . . . . . . . . . . . . . . . . . . . . . . . . . . . . . . . . . . . . . . . . . . . . . . . . . . .
.
12
Beverage . . . . . . . . . . . . . . . . . . . . . . . . . . . . . . . . . . . . . . . . . . . . . . . . . . . . . . .
.
15
Child LockQut . . . . . . . . . . . . . . . . . . . . . . . . . . . . . . . . . . . . . . . . . . . . . . 10
Clock..................................................................8
ControlPanel..............................................8,9
Cooking by Time ...................................1 1, 12
Cooking Complete Reminder .....................7
Cooking
Guide..............................................23
Defrosting by Time. . . . . . . . . . . . . . . . . . . . . . . . . . . . . . . . . . . . . . 17
DefrostingGuide.........................................22
Delayed Cooking . . . . . . . . . . . . . . . . . . . . . . . . . . . . . . . . . . . . . . . . .
.
10
Express Cook . . . . . . . . . . . . . . . . . . . . . . . . . . . . . . . . . . . . . . . . . . . . . . .
.
12
Features
............................................................7
Glossary of Microwave
Terms..................2O
Heating or Reheating Guide .....................21
Hold Time . . . . . . . . . . . . . . . . . . . . . . . . . . . . . . . . . . . . . . . . . . . . . . . . . . . . .
.
10
MicrowavingTips..........................................6
Kitchen Timer . . . . . . . . . . . . . . . . . . . . . . . . . . . . . . . . . . . . . . . . . . . . . . . 10
Popcorn . . . . . . . . . . . . . . . . . . . . . . . . . . . . . . . . . . . . . . . . . . . . . . . . . . . . . . . . .
.
13
PowerLevels.....................................6,
10,
11
ProgramCooking...........................................7
Reheat . . . . . . . . . . . . . . . . . . . . . . . . . . . . . . . . . . . . . . . . . . . . . . . . . . . . . . . . . . .
.
15
Snacks . . . . . . . . . . . . . . . . . . . . . . . . . . . . . . . . . . . . . . . . . . . . . . . . . . . .
.
13, 14
Turntable
.................................................3,
4,7
Problem
Soiver..............................26
More questions
?...caii
GEAnswer
Center” 800.626.2000
Care and
Cleaning
...........................24
Control Panel
................................................24
Turntable
.......................................................24
Installation
.........................................25
Adapter
Plugs...............................................25
Extension
Cords...........................................25
Grounding instructions ..............................2 5
Consumer Services ..................27
ApplianceRegistration.................................2
Important Phone Numbers .......................27
Model and Serial Number Location ..........2
WarranW........................................BackCover
Model.
JE1240
Microwave power
ou@ut
of thk oven is
900
wafls.
I
I
(IEC-705
kstProcedun)
GE Appliances

~LP
US
~LP
YOU...
Before using your oven,
read this guide carefully.
It is intended to help you operate
and maintain your new microwave
oven properly.
Keep it handy for answers to your
questions.
If you don’t understand something
or need more help, write (include
your phone number):
Consumer Affairs
GE Appliances
Appliance Park
Louisville, KY 40225
Write down the model and
serial numbers.
You’ll find them on a label inside
the oven.
These numbers are also on the
Consumer Product Ownership
Regis~ation
cad
that came with
your microwave oven. Before
sending in this card, please write
these numbers here:
Be sure your microwave
oven is registered.
It is important that we know the
location of your microwave oven
should a need occur for
adjustments.
Your supplier is responsible for
registering you as the owner.
Please check with your supplier to
be sure he has done so; also send in
your Consumer Product Ownership
Registration Card. If you move, or
if you are not the original
purchaser, please write to us,
stating model and serial numbers.
This appliance must be
registered. Please be certain
that it is.
Write to:
GE Appliances
Rage
product
se~ice
Appliance Park
Louisville, KY 40225
If you received a
damaged oven...
Model Number
Immediately contact the dealer
(or builder) that sold you the oven.
Save time and money.
Before you request
service...
Check the Problem Solver in the
back of this guide. It lists causes of
minor operating problems that you
can correct yourself.
All these things are normal
with your microwave oven.
● Steam or vapor escaping from
around the door.
●
Light
reflection around door or
outer case.
● Dimming oven light and change
in blower sound may occur while
operating at power levels other
than high.
● Dull thumping sound while oven
is operating.
● Some TV-Radio interference
might be noticed
while
using
your microwave oven. It’s similar
to the interference caused by
other small appliances and does
not indicate a problem with
your oven.
Serial Number
Use these numbers in any
correspondence or service calls
concerning your microwave oven.
PRECAUTIONS TO AVOID POSS~LE EXPOSURE
TO EXCESSIVE MICROWAVE ENERGY
(a) Do Not Attempt
to
operate this oven with
(c)
the door open since open-door operation can
result in
harmful exposure to microwave
energy. It is important not to defeat or tamper
with the safety interlocks.
(b) Do Not Place any
object between the oven
front face and the door or allow soil or cleaner
Do Not
Opemti
the
oven if it is damaged. It is
particularly important that the oven door close
properly and that there is no
damage
to the:
(1) door (bent)
(2) hinges and latches (broken or loosened)
(3) door seals and sealing surfaces.
residue to accumulate on sealing surfaces.
(d)
me
Oven Should Not
be adjusted or repaired
by anyone except properly qualified service
personnel.
2

When using electrical
apphances,
basic safety
precautions should be followed, including the
foUowing:
A
WA~NG-Toreducetheriskof
bums, electric
shock
fire, injury to persons
or exposure
to
excessive microwave energy:
c
Read
and
fotiow
the
specific “Precautions to
Avoid Possible Exposure to Excessive Microwave
Energy” on the previous page.
s
This appliance must be grounded.
Connect
ody
to properly grounded outlet.
See Grounding
hstructions
section in the
back of this guide.
●
Use
this
app~ance
only for
iti
intended use
as
described in this guide.
Do not use corrosive
chemicals or vapors in this appliance. This
microwave oven is
spectilcdly
designed to heat or
cook food, and
is
not intended for laboratory or
industrid
use.
c
For best operation, plug this
appfiance
into
iti
own
electrid
outle~
to
prevent flickering of
lights, blowing of fuse or tripping of circuit
breaker.
“
Install or
locate
this
apptiance
ody
in
accordance with the provided Instigation
Instructions.
●
Be certain to place the front surface of the
door three inches or more back from the
countertop edge
to
avoid accidental tipping
of the
apphance
in normal usage.
●
Do not cover or block any openings on the
appliance.
●
Do not store this
apptiance
outdoors.
Do not use
this product near water—for example, in a wet
basement, near a swimming pool or near a sink.
●
This microwave oven is not approved or tested
for marine use.
c
Do not immerse power cord or plug in water.
●
Keep power cord away from heated surfaces.
●
Do not operate any heating or cooking
appliance beneath this microwave oven.
●
Do not mount the microwave oven over or near
any portion of a heating cooking appliance.
●
Do not store anything
direcdy
on top
of the
microwave oven surface when the microwave
oven is in operation.
●
Do not let power cord hangover edge of table
or counter.
●
Do not operate this
apptiance
if it
has
a
damaged power cord or plug, if it is not
working properly or if it has been damaged
or dropped.
. Do not operate oven without the turntable
and turntable support seated and in place.
●
Do not allow turntable to be restricted so the
turntable cannot rotate.
. See door surface cleaning instructions
in the Care and Cleaning section(s) of this guide.
●
This
appfiance
shotid
be serviced only by
quaMled
service personnel.
Contact nearest
authorizd service facility for examination,
repair or adjustment.
Q
As with any appliance, close supervision is
necessary when used by children.
●
To reduce the risk of fire in the oven cavity:
—Do not overcook
food.
Carefilly
attend
appliance if paper, plastic or other combustible
materials are placed inside the oven to facilitate
cooking.
—Remove wire twist-ties and
meti
handles
from paper or plastic containers before placing
them in the oven.
—Do not use your microwave oven to dry
newspapers.
—Do not use recycled paper products.
Recycled
paper towels, napkins and waxed paper can
contain
meti
flecks which may cause arcing
or ignite. Paper products containing nylon or
nylon filaments should be avoided, as they may
dso ignite.
—Do not pop popcorn in your microwave oven
unless it is in a special microwave popcorn
accessory or unless you use popcorn labeled for
use in microwave ovens.
—Do not overcook potatoes. They
could dehydrate
and catch fire, causing damage to your oven.
(continued next page)
3

WORTANT
SA~~
mSTRUC~ONS
(condnued)
—Do not operate the oven while empty to avoid
damage to the oven and the danger of fire.
Hby
accident the oven should run empty a
minute or two, no harm is done. However, try to
avoid operating
tie
oven empty at
dl
times—
it saves energy
and
prolongs the life of the oven.
—Do not use the oven for storage purposes.
Do not leave paper products, cooking utensils
or food in the oven when not in use.
—Mmaterials
inside oven
shodd
ignite,
keep
oven door closed, turn oven off and disconnect
power cord, or shutoff power at the fuse or
circuit breaker panel.
●
Some products such as whole eggs and sealed
containers-for example, closed
jms—will
explode
and
should not be heated in this
microwave oven. Such use of the microwave
oven could result in injury.
●
Avoid heating baby food in glass jars, even
without their
hds;
especially meat and egg
mixtures.
●
Do not defrost frozen beverages in narrow
necked bottles
(espwidly
carbonated beverages).
Even if the container is opened, pressure can build
up. This can cause the container to burst, possibly
resulting in injury.
●
Use foil only as directed in this guide.
N
dinners maybe microwaved in foil trays less
than 3/4” high; remove the top foil cover and
return the tray to the box.
men
using foil in the
microwave oven, keep the foil at least 1 inch
away from the sides of the oven.
%
●
Cookware may become hot
because of heat transferred
from the heated food.
Pot holders may be needed to
handle the cookware.
●
Sometimes, the turntable can become too hot
to touch.
Be
carefd
touching the turntable during
and after cooking.
●
Foods cooked in liquids
(such as pasta) may tend
to boil over more rapidly than foods containing
less moisture.
Shodd
this occur, refer to the Care
and
Cleaning section(s) for instructions on how to
clean the inside of the oven.
●
Thermometer-Do
not use a thermometer in
food you are microwaving unless the thermometer
is designed or recommended for use in the
microwave oven.
●
Plastic
cookwar+Plastic
cookware designed
for
microwave cooking is very useful, but should be
used carefully. Even microwave-safe plastic may
not be as tolerant of overcooking conditions as are
glass or ceramic materials and may soften or char
if subjected to short periods of overcooking. In
longer exposures to overcooking, the food
and
cookware could ignite. For these reasons:
1) Use microwave-safe plastics only
and
use
them in strict compliance with the cookware
manufacturer’s recommendations. 2) Do not
subject empty cookware to microwaving.
3) Do not permit children to use plastic cookware
without complete supervision.
Q
When cooking pork, follow the directions
exactly and always
cook the meat to
an
internal
tempera~re
of at least
170°F.
This assures that,
in
tie
remote possibility that trichina maybe
present in the meat, it will be killed and meat
will be safe to eat.
c
Do not
bofl
eggs in a microwave oven.
Pressure will build
up inside egg yolk and will
cause it to burst, possibly resulting in injury.
-
●
Foods with unbroken outer
“skin”
such as potatoes, sausages,
tomatoes, apples, chicken
hvers
and other giblets and egg yoks
(see previous caution) should be
pierced to allow steam to escape
during cooking.

w
●
Spontaneous
bofing-Under
●
Hot foods and
stmm
can cause
certain special circumstances,
liquids may start to boil during or
e
-
)“
-=
burns. Be careful when opening
-.
----
-
.=
any containers of hot food,
shortly after removal from the including popcorn bags, cooking
microwave oven. To prevent bums pouches and boxes. To prevent
from splashing liquid, stir the liquid
briefly
before
possible injury, direct steam away
removing the container from the microwave oven. from hands and face.
●
C
’Boilable”
cooting
pouches and tightly closed
●
Not
au
plastic wrap is suitable for use in
plastic bags should be
stit,
pierced or vented as microwave ovens. Check the package for
directed by package. If they are not, plastic could
proper use.
burst during or immediately after cooking,
possibly resulting in injury.
Mso,
plastic storage
containers should beat least partially uncovered
because they form a tight seal.
men
cooking
SAW
~SE
with containers tightly covered with plastic wrap,
~S~UC~ONS
remove covering carefully and direct steam away
from hands and face.
To obtain service, see the Consumer Services page in NEXT, if you are still not pleased, write all the
the back of this guide. details-including your phone number—to:
We’re proud of our service and want you to be Manager, Consumer Relations
pleased. If for some reason you are not happy with the GE Appliances
service you receive, here are
tiree
steps to follow for Appliance Park
further help.
Louisville, KY 40225
FIRST, contact the people who serviced your HNALLY, if your problem is still not resolved, write:
appliance. Explain why you are not pleased. In most Major Appliance Consumer Action Panel
cases, this will solve the problem. 20 North
Wacker
Drive
Chicago, IL 60606
5

MICROWAVING TIPS
● Make sure all cookware used in your microwave . Paper towels, waxed paper and plastic wrap
oven is suitible for microwaving. Most glass can be used to cover dishes in order to retain
casseroles, cooking dishes, measuring cups, custard moisture and prevent spaneting. Be sure to vent
cups,
potte~
or china dinnerware which does not plastic wrap so steam can escape.
have rnetdlic trim or glaze with a metallic sheen can
be used. Some cookware is labeled “suitable for
microwaving”.
●
M
you are not
sure if a dish is
microwave-safe,
use this test: Place
in the oven both the
dish you are testing
and a glass measuring
cup filled with one
cup water—set the measuring cup either in or next
to the dish. Microwave 1 minute at high. If the dish
heats, it should not be used for microwaving. If the
dish remains cool and only the water in the cup
heats, then the dish is microwave-safe.
“
Some microwaved foods require stirring, rotating
or rearranging. Check the Cooking Guide.
● Steam builds up pressure in foods which are
tightly covered by a skin or membrane.
Pierce potatoes, egg yolks and chicken livers to
prevent bursting.
If you use a meat thermometer while cooking,
make sure it is safe for use in microwave ovens.
VA~LE
POWER
LE~LS
(1-10)
Variable power levels add flexibility to your
microwave cooking. The power levels on your
microwave oven can be compared to the surface
units on a range. HIGH (Power Level 10) or full
power is the fastest way to cook and gives you
1009o
power. Each power level gives you microwave energy
a certain percent of the time. Power Level 7 is
microwave energy 70% of the time. Power Level 3
is energy
3090
of the time.
A high setting (10) will cook faster but may need
additiond attention such as frequent stirring, rotating
or turning over. Most of your cooking will be done on
HIGH (Power Level 10). A lower setting will cook
more evenly and with less attention given to stirring
or rotating the food. Some foods may have better
flavor, texture or appearance if one of the lower
settings is used. You may wish to use a lower power
level when cooking foods that have a tendency to boil
over, such as scalloped potatoes.
Rest periods (when the microwave energy cycles
o~
give time for the food to “equalize” or transfer heat
to the inside of the food. An example of this is shown
with Power Level 3—the defrost cycle. If microwave
energy did not cycle off, the outside of the food would
cook before the inside was defrosted.
Here are some examples of uses for various
power levels:
POWER LEVEL
I
BEST USES
‘H&h 10 Fish, bacon, vegetables,
boiling liquids.
Meal-High 7
Gentle cooking of meat and
poultry; baking casseroles
and reheating.
~um
5
Slow cooking and tenderizing
such as stews and less tender
cuts of meat.
Low 2 or 3 Defrosting without cooking;
simmering; delicate sauces.
warm
1
Keeping food warm without
overcooking; softening butter.
6

?
1
[
I
——
------ —
=
=——---
-———-—-
—-====-
=
>=———
———-——
—--
1. Door Latches.
2. Door Screen. Metal screen permits viewing of
foods and keeps microwaves confined inside oven.
3. Automatic Cooking Guide. Quick reference codes
for many frequently prepared foods.
4. Touch Control Panel and Display. See Your
Touch Control Panel section for instructions.
Program
Cooting
5. Removable Turntable Support.
6. Removable
~rntable.
Turntable must be in place
when using the oven. Cooking performance will
be unsatisfactory without the turntable in place.
The turntable may be removed for cleaning.
7. Door Latch Release. Press latch release button to
open door.
NOTE: Rating plate, oven vent(s) and oven light are
located on the inside walls of the microwave oven.
Use your Touch Control Panel to Time Defrost or
Create your own programs to suit your individud
Time Cook I &II with choice of power levels from 1 cooking style. For example: use the Ktchen Timer
(lowest) to 10 (highest); to Reheat using a preset time
to delay the start of Time Cook I & II or program a
and power level; to cook popcorn using a preset time
hold time between Time Defrost and Time Cook I &
and power level; to time kitchen tasks with the
Ktchen II. Set Time Cook I & II for a two-stage program
Timer; and to set the clock.
using different times and power levels.
Cooting
Complete Reminder
(For Time Cook and Time Defrost cycles)
To remind you that you have food in the oven, the oven will beep once a
minute until you either open the oven door or touch the CLEAWOFF pad.
7

f
\
\
TIME COOK
TIME
AUTO
I &II
DEFROST DEFROST
●
,
Convenience Controls
e
.
BEVERAGE POPCORN
SNACKS
REHEAT
COOK
,
GUIDE BEHIND DOOR
&press
Cook - l-5 Minutes
1
2
34
5
6
7
8
9
0
[
c
*
ADD 30
SECONDS
CLOCK
KITCHEN
TIMER
POWER LEVEL
SOUND - ON/OFF
&
*
t
.
AUTO
START START
c~
OFF .
I
\
●
REMINDER
a
J
\
8

The Touch Control Panel allows you to set the oven controls
tith
the
touch of a finger. It’s designed to be easy to use and understand.
1. DISPLAY.
Displays time of day, time or
temperature during cooking functions, power level
being used, cooking mode and instructions.
2.
T~
COOK I & 11. Microwave for a selected
amount of time using automatic Power Level
10 (High).
3.
T~E
DEFROST. Gentle thawing at automatic
Power Level 3 (Low).
4.
BEVERAGE.
Touch this pad to reheat a beverage.
No need to touch START, the oven will start
immediately.
5. REHEAT. Use Reheat for quick reheating of
a variety of foods using different times and
power levels.
6. EXPRESS COOK. Touch number pads 1
through 5 for 1 to 5 minutes of cooking. No need
to touch START, the oven will start immediately.
7. ADD 30 SECONDS. Press this pad for 30
seconds of cook time, to add 30 seconds to the
cook time as it’s counting down or for an “instant
on” for 30 seconds.
8. POWER LEVEL. Touch this pad before entering
another power level number if you want to change
from automatic Power Level 10 (High) for
cooking or Power Level 3 (Low) for defrosting.
9. AUTO START. Allows you to program your
oven to begin cooking at a preset time of day—
up to a 12-hour delay. The Reminder feature can
be used like an alarm clock.
10. START. After all selections are made, touch this
pad to start the oven.
11. AUTO DEFROST. Touch this pad and food
weight, then START. The oven automatically
sets power levels and defrosting time.
12. POPCORN. Touch this pad to cook prepackaged
microwave popcorn weighing 3.0 to 3.5 ounces.
No need to touch START, the oven will start
immediately.
13. SNACKS. Touch this pad, a code number and
weight or quantity of food to warm a variety of
snack foods.
14. COOK. Touch this pad, a code number and
weight of food for quick cooking of a
vtiety
of foods using different times and power levels.
15. NUMBER PADS. Touch these pads to enter
cooking time, defrosting time, time of day, power
level, food weights for Auto Defrost, food quantity
and food code for Snacks, Reheat or serving size
for Beverage.
16. CLOCK. Touch this pad to enter time of day
or check time of day while microwaving. To set
clock, first touch CLOCK pad and then enter time
of day. For example, if time is
1“:30,
touch number
pads 1,3 and O and “1:30” will appear in display.
Then touch START or CLOCK pad. To reset or
change time, simply repeat above process.
17. KITCHEN
T~ER.
This feature uses no
microwave energy. It functions as either a kitchen
timer, as a holding period after defrost or as a
delay timer before time or temperature cooking.
18. SOUND ON/OFF. Touch the SOUND ON/OFF
pad to turn the oven beeper on or off.
19. CLEAWOFF. When touched, it shuts off the
oven and erases all settings (except time of day).
When held for three seconds, the Child Lock-Out
feature will be activated.
When You Plug in the Oven
The display panel displays “88888”, “18 POWER” and all of the oven
functions. After 15 seconds,
dl
lights disappear and “RESET” appears
in the upper portion. Touch the CLEAWOFF pad, set the Clock and the
oven is ready for use.
This will happen any time there is a power outage.
9

HOW TO USE THE
~TCHEN
T~R
The
Ktchen
Ttier
Using a Holding
Ttie
The Kitchen Timer has three timing functions: The Mtchen Timer can
rdso
be used to program a
● It operates as a minute timer.
“holding time” between microwave cooking functions.
The time can range from one second to 99 minutes
● It
wn
be set to delay
cooting.
and 99 seconds. A holding or standing time may be
● It can be used as a hold setting after defrosting.
found in some of your own recipes or in a cookbook.
The
Kitchen Timer operates without microwave energy.
How to
Tfie
a 3-Minute Phone Call
Prograhng
Delayed Cooking
m
Step 1: Touch
~TCHEN
TIMER pad. To delay cooking up to 99 minutes and 99 seconds,
touch TIME COOK I & II and enter cook time. Touch
~TCHEN
TIMER and enter number of minutes to
MI”M
Step 2: Touch number pads 3,0 and O
delay cooking. Touch START. Timer will count down
~
~
~
~
~
(for 3 minutes and no seconds). to zero and cooking will begin.
E
Step 3: Touch START. Display shows
START
time counting down. The timer signals
when time is up.
How to Defrost, Hold and
The
Cook
Let’s say you want to defrost a frozen casserole for 15
minutes, hold for 10 minutes and then Time Cook for
25 minutes. Here’s how to do it:
m
Step 4: Set standing or hold time by
touching
HTCHEN
TIMER.
SteD
1: Take casserole from freezer
and
ulace
in oven. Step 5: Touch 1,0, 0 and O to hold for ten minutes.
.
I I
TIME
DEFROST
m
.
Step
2:
Touch TIME DEFROST.
m
Step
6:
Touch TIME COOK I & II.
Step 3: Touch pads 1,5,0 and O for
15 minutes defrosting time. (Defrosting
is automatically set on Power Level 3
Step 7: Touch 2,5,0 and O for 25 minutes of
cooking time.
~
Step 8: Touch START. As each
but can be
ch~ged
by touching the
POWER LEVEL pad and the desired
m
fun~tion
is automatically performed,
oven display shows instructions
power level.) entered and the function. When time is
up, the oven signals and flashes “End”.
C~D
LOCK-OUT
You may lock the control panel to prevent the
If anyone tries to use the microwave, the display
microwave from being accidentally started or will show LOCK.
used by children.
To unlock the control panel press and hold the
Iml
To lock the controls press and hold
CLEAWOFF pad for about three seconds.
the CLEAWOFF pad for about three The display will show the time of day.
seconds. The display will show LOCK
and then return to the time of day. A
small “L” will be displayed to remind
you that the control panel is locked.
10

Time Cook I
Time Cook allows you to microwave for a preset
amount of time.
Power Level 10 (High) is recommended for most
cooking, but you may change this for more flexibility.
See the Cooking Guide.
To become better acquainted with time cooking, make
a cup of coffee by following the steps below.
Step 1: Fill a cup
2/3 full of water,
add 1 teaspoon of
instant coffee and
stir to dissolve.
Use a cup that has
no metal decoration
and is microwave-
safe (refer to
Microwaving Tips section).
Place cup in oven and close door.
1
~lMECOOK
~
Step 2: Touch TIME COOK I & II.
I
I
&II
Step 3: Select your time. Touch pads 1,0 and O for
1 minute.
Because automatic Power Level 10 is recommended
for this cup of coffee,
there
is no need to change the
power level. (If Power
Uvel
10 is not appropriate,
see “How to Change Power Level” below.)
m
Step 4: Touch START.
Step
5:
When time is up, the oven signals and flashes
“End”. The oven, light and fan shut off.
Step 6: Open the door.
If you
intempt
Time Cook to check the food, simply
close the door and press START to resume cooking.
If there is not time remaining on the timer you must
reset the timer to resume cooking.
How to Change Power Level When Setting
Time Cook I
1. Press TIME COOK I & II.
2. Select cooking time.
3. Press POWER LEVEL.
4. Select power.
5. Press START.
Using the Time Cook II
Featire
The Time Cook II feature lets you set 2 time cooking
functions within one program. This is ideal if you
want to change power levels during your cooking
operations. Here’s how to do it.
Step 1: Place the food in the oven in a microwave-
safe container and close the door.
m
Step
2:
Touch
~ME
COOK I & II.
Step 3: Select your first cook time. For example,
touch 2, 1 and 5 for 2 minutes and 15 seconds.
Step 4: Now is the time to change the power level
if you don’t want full power for TIME COOK I.
(Press POWER LEVEL. Select power.)
Step 5: Touch TIME COOK I & II again.
The microwave oven will start and the time set for
“COOK TIME I“ will count down. Also, “POWER
10” or the power level selected for “COOK TIME I“
will be displayed.
At the end of “COOK TIME I“, the second power
level is displayed and the time for “COOK TIME II”
is shown counting down.
When time is up, the oven
signrds
and flashes “End”.
The oven, light and fan shut off. Open the door.
If you interrupt Time Cook to check the food, simply
close the door and press START to resume cooking.
If there is no time remaining on the timer you must
reset the timer to resume cooking.
(continued next page)
Step 6: Set your second cook time.
Step 7: Change the power level for TIME COOK II.
(Press POWER LEVEL. Select power.)
m
Step
8:
Press START.
—

COOmG
BY
T~
(continued)
The Express Cook Feature
The Express Cook feature is a short-cut method to
Touch a number pad
set time for 1-5 minutes at Power Level 10. (from 1 to 5) for
1
to 5
kpm=
tik.
l-5MinW
To Express Cook your food or beverage: minutes of cooking at
112131415
Power Level 10. For
example, touch
tie
2 pad
for 2 minutes of cooking time. No need to touch
START, the oven will start immediately.
The oven will signal and turn off automatically
when finished.
How to Use Auto
Stirt
The Auto
Stirt
feature allows you to program your
oven to begin cooking at a preset time of day—
up to a 12-hour
delay.
m
Step 1: Touch AUTO START pad.
REMIND~
Step 2: Enter the time you want the oven to start.
(Be sure your microwave oven clock shows the
correct time of day.)
Step 3: Enter your desired cooking program.
H
Step 4: Touch START pad. The display
will show the time you entered. The
time of day maybe displayed by
touching the CLOCK pad. The oven will
automatically start at the desired time.
How to Use
Retinder
The Reminder feature can be used like an alarm
clock, without starting the oven.
Example: It is 7 a.m. and you must remember
to leave for a dentist appointment at 10 a.m.
m
Step 1: Touch AUTO START pad.
RWINDW
Step 2: Enter the time you want the oven to remind
you. (Be sure your microwave oven clock shows the
correct time of day. The reminder time can be set up
to 12 hours later.)
Step 3:
Touch START
pad. The reminder is now
set at the time you
programmed, and will
signal you at that time
with a beeping sound until
E
you open the door or touch the CLEAWOFF pad. The
display will show “REM” until the oven door is
opened or CLEAWOFF is touched. The REMinder
time may be displayed by touching the AUTO START
pad.
The
time-of-day may be displayed by touching
the
CLOCK pad.
Add 30 Seconds
The Add 30 Seconds feature provides a convenient
way to extend cooking time by 30 seconds while the
oven timer is counting down. It will add 30 seconds to
the time shown each time the pad is touched.
This pad may also be used as an express cook for 30
seconds of cooking. No need to touch START, the
oven will start immediately.
Sound
OtiOff
Feature
The Sound
OtiOff
feature allows you to turn the oven
beeper on or off.
=
Touch the SOUND
ON/0~
pad once
for sound. Touch the pad again for no
sound. If
the
sound has been turned off,
the display will show
“0~’
and then
return to the time of day. A small “NO”
will be displayed.
12

The Popcorn feature is designed to be used only Step 2: Open oven door and place package of
with prepackaged microwave popcorn weighing 3.0 popcorn in the center of the oven floor as directed
to 3.5 ounces. by the package instructions. Close oven door.
Step 1: Remove the outer wrapper from the
microwave popcorn.
m
Step 3: Touch POPCORN pad. No
need to touch START, the oven will
start immediately.
How to Adjust the Popcorn Program to Protide a Shorter or Longer Cook Time
If your favorite popcorn is not completely popped,
there is a simple adjustment you can make.
Touch the POPCORN pad
and then immediately
touch number pad 9. A
plus sign will appear on
the display beside the
word “POP”. The plus
E
/—tt—fl=f
+
1-
~f
1
sign indicates 20 seconds more cooking time is being
provided.
No need to touch START, the oven will start
If your favorite popcorn is overcooked, there is
another adjustment you can make.
Touch the POPCORN
pad and then
immediately touch
number pad 1. A minus
sign will appear on the
display beside the word
E
1=11-11=1
-
/
~11
“POP”. The minus sign indicates 20 seconds less
cooking time is being provided.
No need to touch START, the oven will start
immediately. If the oven beeps before you were able to immediately. If the oven beeps before you were able to
touch 9,
to~ch
the CLEAWOFF pad
~d
begin again.
touch 1, touch the
CLEAWOFF
pad and begin again.
SNACKS
With the Snacks
f=tire,
the oven
automatidly
seti Use the Snacks Code Guide. Touch the SNACKS pad.
the microwaving times and power Ieveh for you. For codes 1 to 4 enter the quantity of food. For codes
5 and 6 enter the food weight in ounces. Then touch
the START pad.
The oven calculates time and changes power levels
during microwaving to give even results.
How to Use the Snacks Feature (Snacks Codes 1 to 4)
NOTE: See the next page on how to use Snacks Step 4: Touch number pad to enter the quantity of
Codes 5 and 6. food. For example, touch 2. After 5 seconds “START”
Step 1: Remove the food from the package, place in
flashes on the display.
the oven on microwave-safe dish and close door.
~
Ste~ 5: Touch the START pad. Oven
~1
Step 2: Touch the SNACKS pad.
m-
Step 3: Touch number
pad of desired food code.
For example, touch
number pad 1 for bread,
rolls and muffins. The
code number and food
type you selected will
appear on the display.
“ENTER” will flash.
m
wil~
begin microwaving. T;uching the
SNACKS
pad
during
microwaving will
display
th~
remainin~
time. When-
done, oven displays “End”.
(continued next page)
I
ENER
~DE

(continued)
How
to Use the Snacks Feature (Snacks Codes 5 and 6)
NOTE: See the previous page on how to use
Snacks Codes 1 to 4.
Step 1: Remove the food from the package, place in
the oven on microwave-safe dish or container. Close
the oven door.
m
Step 2: Touch the SNACKS pad.
Step
3:
Touch number
pad of desired food code.
For example, touch
number pad 5 for soup.
=
— —
The code number and
food type you selected
E
l;~:(~
/\3
5
WDE
will appear on the display.
“ENTER WEIGHT’ will flash.
Step 4: Touch number pad to enter food weight. For
example, touch 1 and 2 for 12 ounces. After 5 seconds
“START” flashes on the display.
Step 5: Touch the START pad. Oven
will begin microwaving. Touching the
SNACKS pad during microwaving will
display the remaining time. When
done, oven displays “End”.
SNAC~
CODE
G~E
Codes 1 to 4
For warming foods with Snacks Codes 1 to 4 use the following guide:
Food
Code Display
Bread, rolls,
1
bREd
muffins
Sandwiches
2
SANdw
Pizza
3
PIZ
(leftover slices)
Dessert Toppings
4
TOP
Quantity
Limit
(QTY)
Commenk
1 to 4
Use paper towel or
microwave-safe plate.
1 to 2
Use paper towel or
microwave-safe plate.
1
to 4
Use microwave-safe plate.
I
1
to 4 Use microwave-safe dish.
Codes 5 and 6
For warming foods with Snacks Codes 5 and 6 use the following guide:
Weight
Food
Code
Display
Limit
(OZ)
Comments
soup
5
SOUP 8
to
40 OZ. Use microwave-safe dish.
Cheese Dip
6
CHEEZ 4
to
16 OZ. If container is microwaveable,
follow instructions on container;
or use microwave-safe dish.
14

The Reheat feature is a short-term program to automatically reheat a
previously cooked food. The oven turns off automatically after a preset
amount of time.
Touch just three pads to use Reheat codes 1 to 6 to reheat many popular
foods. See the Reheat Guide below.
Reheat To Reheat More Than One Serving
The Reheat program makes it a snap to reheat many Reheat codes 1 through 5 let you heat up to three
popular foods. Choose a code number from 1 to 6 servings. To add more than one serving, just touch
(see Reheat Guide below).
number pad 2 or 3 right before touching START.
m
Step 1: Touch REHEAT pad. The serving size may even be changed or added after
touching START. Just touch number pad 2 or 3.
I
I
Step 2: Touch a number pad from 1 to 6 to select a
food group.
H
Step 3: Touch START pad. Oven
will signal and turn off automatically
when finished.
The word
“SERV”
and a number will be
displayed to show how — -
many servings have
been selected.
E
1;
\=
\;(
~!
In
Reheat Guide
Serving Time per
Code
Display
Size Serving
Foods Recommended
11
I
PASTA
1
1-3
I
I
2 min.
1
Pasta
12
I
MEATS
I
1-3
I
I
1 min.
I
Meats, casseroles, pizza
13
I
VEGS
I
1-3
I
lmin.10
sec.
I
Fruitsandvegetables
I
I
I
II
I
I
4
bEV
1–3
1 min. 20 sec.
Beverages
15
I
SAUCE
I
1-3
I
I
2min.30
sec.
I
Saucesandgravies
I
III I
I
6PLATE
3 min. 30 sec. 2 to 3 foods, 4 oz. each
The Beverage program makes it simple to reheat a The serving size is automatically set at 1, but can be
cup of hot chocolate or other beverage. Use a cup that changed by touching number pad 2 or 3 right after
has no metal decoration and is microwave-safe (refer touching the BEVERAGE pad. The oven will signal
to the Microwaving Tips section). and turn off automatically when finished.
Touch BEVERAGE pad. No need
=
immediate~y.
to touch START, the oven will start
15

COOK
With the Cook feature, the oven automatically seti The oven calculates cooking time and changes power
the cooking times and power levels for you.
levels during cooking to give even cooking results.
Use the Cook Code Guide. Touch the COOK pad.
Touch a number pad from 1 to 9 to select the desired
food group. Enter the food weight in ounces, then
touch the START pad.
How to Use the Cook Feature
Step 1: Remove the food from the package, place in
the oven on microwave-safe dish and close door.
m
Step 2: Touch the COOK pad.
II
Step 3: Touch number
pad of desired food code.
For example, touch
number pad 1 for canned
AW}
— —
vegetables. The code
number and food type you
E
(~
f=
1—
II
1~
~DE
selected will appear on the
display. “ENTER WEIGHT” will flash.
Step 4: Enter weight. For example, touch 1 and 8
for 18 ounces. After 5 seconds “START” flashes
on the display.
m
Step 5: Touch the START pad. Oven
will begin cooking. Touching the
COOK pad during cooking will display
the remaining Cook time. Oven
displays “End” when cooking is done.
Cook Code Guide
Cook
Food
Code
I
Potatoes
4
I
Fish
5
I
Chicken
6
Pieces
Ground Meat
7
(Beef, Pork,
Turkev)
I
Bacon
8
Pizza
9
(frozen
microwaveable)
Weight
Limit
(OZ)
4
to
20
oz.
4 to 16 OZ.
4 to 16 OZ.
8
to 40
OZ.
4 to 16 OZ.
4 to 40 oz.
8 to 48 OZ.
Commenti
Use microwave-safe casserole or bowl.
Cover with lid or
ulastic
wrap.
Use microwave-safe casserole or bowl.
Follow package instructions for adding water.
Cover with lid or
Dlastic
wrap.
Use microwave-safe casserole or bowl.
Add 2 tablespoons water for each serving.
Cover with lid or
Dlastic
wrap.
Pierce skin with fork. Place side by side on oven floor.
Use oblong, square or round dish.
Cover with
Dlastic
wraD.
I
Use oblong, square or round dish.
Cover with wax
DaDer.
I
Use round casserole dish. Crumble meat into dish.
I
Cover with wax paper.
2 to 10 oz.
Layer strips on a plate, 4 to a layer.
Cover each layer with a paper towel.
4 to 16 OZ. Follow package instructions to prepare pizza for
microwaving.
16

Time Defrost &ower Level 3)
Time Defrost is designed for speedy thawing of
frozen food and is one of the great advantages of a
microwave oven.
Use the Time Defrost setting to
quic~y
thaw foods
such as bread, rolls, vegetables, fruits and frozen
dinners. The Auto Defrost setting is
prefemed
for
meat
and
poultry because the oven sets the defrosting
time
and
power levels for you.
● Power Level 3 is automatically set when you
press Time-Defrost pad, but you may change this
for more flexibility.
● See the Defrosting Guide for defrosting help.
How to Change Power Level
1. Press
TIME DEFROST.
2. Select defrosting time.
3. Press POWER LEVEL.
4. Select power.
5. Press START.
To become better acquainted with the defrost
function, defrost a 10 oz. package of frozen
strawberries by following the steps below.
Step 1: Place a package of frozen strawberries in
the oven
and
close door. Be sure package contains
no metal.
m
Step 2: Touch TIME DEFROST.
Step 3: Select one half of the total defrosting time
recommended. For example, touch pads 4, 0 and O
for 4 minutes.
H
Step 4: Touch START. When the
cycle is completed, the oven signals
and flashes “End”, then
automaticrdly
shuts Off.
Step 5: Turn the package over, close the door and
repeat Steps 2 and 3 to set remaining half of
defrosting time. Touch START.
Step 6: When the oven signals and flashes “End”,
open the door, remove the package and separate
strawberries to finish defrosting.
Defrosting Tips
-
● Foods frozen in paper or
~
7
@>:~2’?:’-:’&L plastic can be defrosted in
the package. Tightly closed
packages should be slit,
pierced or vented,
-R
food has partially defrosted,
as directed by package.
Plastic storage containers
should be at least partially
uncovered.
● Family-size, pre-packaged frozen dinners can be
-O
For even defrosting, some
foods need to be broken up
or separated part of the way
through the defrosting time.
●
Foods that spoil easily, such as milk, eggs, fish,
stuffings, poultry and pork should not be allowed to
sit out for more than one hour after defrosting. Room
temperature promotes the growth of harmful bacteria.
●
Check the Defrosting Guide for other defrosting tips.
defro~ted
and
mi~rowa~ed.
If the food is in a foil
container, transfer it to a microwave-safe dish.
Questions and Answers
Q. When I press START, I hear a dull thumping Q. Can I defrost small items in a hurry?
noise. What is it? A. Yes, but they will need more frequent attention
A. This sound is norrnd. It is letting you know the than usual. Raise the power level after entering
oven is using a power level lower than 10 (High). the time by touching the desired power level pad.
Power Level 7 cuts the total defrosting time in
about 1/2; Power Level 10 cuts the
toti
defrosting
time to approximately 1/3. During either, rotate or
stir food frequently.
17

AUTO DEFROST
Auto Defrost
With the Auto Defrost feature, the oven Use the Auto Defrost Guide. Enter the food weight in
automatically sets the defrosting times and power pounds and tenths of a pound (see Conversion Guide
levels for you. below). Then touch START pad.
The oven calculates defrosting time and changes power
levels during defrosting to give even defrosting results.
How to Set Auto Defrost
Before you begin, check the guide located on the
inside front of oven when you open the door.
It shows minimum and maximum food weights for
a variety of foods. You will need to know your food
weight before setting Auto Defrost.
Step 1: Remove food from package, place in oven on
microwave-safe dish
and
close door.
mStep 2: Touch Auto Defrost pad.
Step 3: Enter weight. For example, touch number
pads 1 and 2 for weight of 1.2 pounds (1 pound, 3
ounces). See Conversion Guide below. After 3
seconds “START” flashes.
m
Step 4:
Touch START pad. Display
shows defrost time counting down.
Twice during defrosting,
‘~~~~~~nm
the oven beeps 4 times
~
the Auto Defrost Guide
for what to do at the first
1
and second signal.
Then close the door and
touch START pad.
men
defrosting time is completed, “End” flashes
and oven beeps 4 times.
“End” remains on display
and oven beeps every minute until door is opened or
CLEAWOFF
pad is touched.
Stind
Time
After Auto Defrosting, meat needs to stand in order to
let
the
inside defrost. You may take
the
food out of the
oven if you wish. Stand time recommendations are
given in the Auto Defrost Guide.
Conversion Guide
If the weight of food is stated in
pounds and ounces, the ounces
must be converted to tenths (.1)
of a pound.
Ounces
Pounds
1-2
.1
3
.2
&5
.3
67
.4
8.5
9-1o
.6
11
.7
12-13
.8
1415
.9
18

AUTO DEFROST
G~E
RECOMMENDED
M~.-MAX.
FOODS
WIGHT
FIRST SIGNAL SECOND SIGNAL
I
STANDTM
1
.
Chops
0.1 -6.0
lbs.
Turn over.
Separate.
Turn over.
Separate and shield
where necessary.
Remove defrosted
pieces.
Remove defrosted areas
and break
apart.
5
minutes
Frankfurters, Sausage 0.1 -6.0 lbs.
2 minutes
Ground Meat 0.1 -6.0 lbs.
5
minutes
Beef Patties
I
0.1
-6.Olbs.
Turn over. Separate patties.
I
5minutes
Roast
0.1 -6.0 lbs. Turn over and
shield. Shield if necessary.
I
90 minutes
Ribs
0.1 -6.0 lbs. Remove defrosted
pieces. Shield if
necessary.
10 minutes
Turn over.
I
5minutes
Steak
I
0.1 -6.Olbs.
Turn over.
Stew
0.1 -6.0 lbs. Separate and remove
5 minutes
defrosted pieces.
Turn over and
separate.
Turn over and shield. 10 minutes;
run cold water
in cavity.
20 minutes
in refrigerator;
run cold water
in cavity.
5 minutes
Whole Chicken 0.1 -6.0 lbs. Turn over and
shield.
Turn over.
Turkey Breast
(breast side up)
0.1 -6.0 lbs. Shield where
necessary.
Chicken Pieces 0.1 -6.0 lbs.
0.1 -6.0 lbs.
Turn over.
Remove wrapper
and turn over.
Turn over.
Separate
and
remove
defrosted pieces.
Comish Hens (whole)
10 minutes;
run cold water
in cavity.
5 minutes
Comish Hens
(split)
0.1 -6.0 lbs.
.
.
I
.I
●
Fish Fillets
I
0.1 -6.0 lbs.
Turn over.
Separate and remove
defrosted Pieces. 5 minutes
5 minutes
Shrimp, Scallops 0.1 -6.0 lbs.
Separate.
Separate and remove
defrosted pieces.
Whole Fish 0.1 -6.0 lbs. Turn over and
shield tail and
head.
Hold under
cold running
water.
Edges or thin areas of meat will defrost more
raDidlv
than other areas.
Af&r first or second signal,
shield
warm areas ~ith
~mal]
pieces of foil.
19

GLOSSARY OF
~CROWA~
TE~S
men
adapting recipes for the microwave, it is
best to start with a familiar recipe.
~owing
how
the food should look and
~te
will
heip
when
adapting recipes for microwaving. Foods that
require browning or crisp, dry surfaces will cook
better in regular ovens.
● Moist foods, such as vegetables, fruits, poultry and
seafood, microwave well.
“
Rich foods, such as bar cookies, moist cakes and
candies, are suitable for microwaving because of
their high fat and sugar content.
● Reduce regular oven cooking times by 1/2 to 1/3.
Check food after minimum time to avoid
over-cooking.
● Small amounts of butter or oil can be used for
flavoring, but are not needed to prevent sticking.
● Seasonings may need to be reduced. Salt meats and
vegetables after cooking.
Covering. In both regular baking
and
microwave
cooking, covers hold in moisture, allow for more
even heating and reduce cooking time. In regulm
ovens, partial covering allows excess steam to escape.
Venting plastic wrap or covering with wax paper
serves the same purpose when microwaving.
Venting. After covering a dish with plastic wrap,
you vent the plastic wrap by turning back 1 comer
so excess steam can escape.
Arranging Food in Oven. When baking in regular
ovens, you position foods, such as cake layers or
potatoes, so hot air can flow around them. When
microwaving, you arrange foods in a ring, so that all
sides are exposed to microwave energy.
Basic Microwave Guidelines
Density of Food. In both
regul=
baking and
microwave cooking, dense foods, such as potatoes,
take longer to cook than light, porous foods, such as
rolls, bread or pieces of cake.
Round Shapes. Since microwaves penetrate foods to
about 1 inch from top, bottom and sides, round shapes
and rings cook more evenly. Comers receive more
energy and may overcook. This may also happen
when cooking in a regular oven.
Delicacy. Foods with a delicate texture, such as
custards, are best cooked at lower power settings to
avoid toughening.
Natural Moisture of food affects how it cooks. Very
moist foods cook evenly because microwave energy is
attracted to water molecules. Food that is uneven in
moisture should be covered or allowed to stand so it
heats evenly.
20
Stirring. In range-top cooking, you stir foods up from
the bottom to heat them evenly. When microwaving,
you stir cooked portions from the outside to the
center. Foods that require constant stirring will need
only occasional stirring when microwaving.
~rning
Over. In range-top cooking, you turn over
foods, such as hamburgers, so both sides can directly
contact the hot pan. When microwaving, turning is ,
often needed during defrosting or when cooking
certain foods, such as frozen hamburgers.
Standing Time. When you cook with regular ovens,
foods such as roasts or cakes are allowed to stand to
finish cooking or to set. Standing time is especially
important in microwave cooking. Note that a
microwaved cake is not placed on a cooling rack.
Shielding. In a regular oven, you shield chicken
breasts or baked foods to prevent over-browning.
When microwaving, you use small strips of foil to
shield thin parts, such as the tips of wings and legs
on poultry, which would cook before larger parts.
Arcing. Sparks caused by too much metal in the
microwave oven or metal touching the side of the
oven or foil that is not molded to food.
Prick Foods to Release Pressure. Steam builds up
pressure in foods that are tightly covered by a skin or
membrane. Prick foods, such as potatoes (as you do
before regular oven cooking), egg yolks
and
chicken
livers, to prevent bursting.
Rotating.
Occasionally, repositioning a dish in the oven
helps food cook more evenly. To rotate 1/2 turn, tum the
dish until the side that was to the back of the oven is to
the front. To rotate 1/4 turn, turn the dish until the side
that was to the back of the oven is to the side.
Piece Size. Small pieces cook faster than large ones.
Pieces that are similar in size and shape cook more
evenly. With large pieces of food, reduce the power
setting for even cooking.
Shape of Food. In both types of cooking, thin areas
cook faster than thick areas. This can be controlled in
microwaving by placing thick pieces near
the
outside
edge and thin pieces in the center.
Stirting Temperature. Foods taken from the freezer
or refrigerator take longer to cook than foods at room
temperature. Timings in our recipes are based on the
temperatures at which you normally store the foods.
Quantity of Food. In both types of cooking, small
amounts usually take less time than large amounts.
This is most apparent in microwave cooking, where
time is directly related to the number of servings.
Other manuals for JE1240
1
Table of contents
Other GE Microwave Oven manuals

GE
GE JES0736SPSS User manual

GE
GE SpaceMakerXL JMV1420 How to use

GE
GE JES1142SFC User manual

GE
GE Spacemaker JVM150 Installation instructions

GE
GE PVM9179DF1BB User manual

GE
GE JE1415 Installation instructions

GE
GE JES1160 User manual

GE
GE SpacemakerXL JVM3660 User manual

GE
GE Profile Spacemaker PVM2070DM User manual

GE
GE JVM1665 User manual