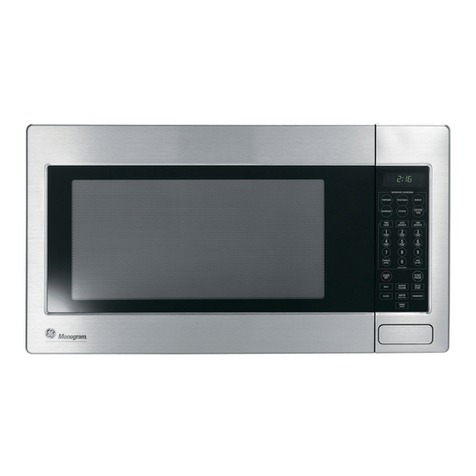
GE JES1224T Use and care manual

,,
.,:.
,,,
.,.
l
,
,,
..”,
–
..us6’ana&r6ti&ok
6g:Guide~
,.
,,.
:
.
,
“..
. . .
.
. . . .
.
,.
.:
.’.
.
.
.
.
.
,:.:
Turntable
Microwave Oven
Safe~lnstructions
....................3-5
Precautions to Avoid Possible
~posure
to
&cessive
MicrowaveEnergy ............2
Operating
Instrutiions,
~ps
Aluminum Foil ..................................4, 15, 18
AutoDefrost..........................................1
4,
15
Auto Defrost Guide . . . . . . . . . . . . . . . . . . . . . . . . . . . . . . . . . . . . . . 15
Clock
..................................................................8
Control
Panel...............................................8,
9
Cooking by Time. . . . . . . . . . . . . . . . . . . . . . . . . . . . . . . . . . . 10, 11
Cooking Complete Reminder ......................7
Cooking Guide . . . . . . . . . . . . . . . . . . . . . . . . . . . . . . . . . . . . . . . . . . . . .
.
19
Defrosting by Time . . . . . . . . . . . . . . . . . . . . . . . . . . . . . . . . . . . . . . 13
Defrosting Guide . . . . . . . . . . . . . . . . . . . . . . . . . . . . . . . . . . . . . . . . . . 18
Delayed Cooking . . . . . . . . . . . . . . . . . . . . . . . . . . . . . . . . . . . . . . . . .
.
10
&press Cook . . . . . . . . . . . . . . . . . . . . . . . . . . . . . . . . . . . . . . . . . . . . . . . . 10
Features
............................................................7
Glossav
of Microwave Terms . . . . . . . . . . . . . . . . . . 16
Heating or Reheating Guide
..................l7
Hold Time . . . . . . . . . . . . . . . . . . . . . . . . . . . . . . . . . . . . . . . . . . . . . . . . . .
.
10
MicrowavingTips...........................................6
Min/Sec
Tmer............ . . . . . . . . . . . . . . . . . . . . . . . . . . . . . . . .
.
10
Popcorn . . . . . . . . . . . . . . . . . . . . . . . . . . . . . . . . . . . . . . . . . . . . . . . . . . . . . . . . .
.
12
Power
Levels.....................................6,
10,
11
Program
Cooking............................................7
Reheat . . . . . . . . . . . . . . . . . . . . . . . . . . . . . . . . . . . . . . . . . . . . . . . . . . . . . . . . . . . .
.
12
Turntable
.................................................3,
4,7
Problem
SoIver...............................22
More questions
?...call
GEAnswerfinteP
800.626.2000
Care and Cleaning
..................-.....-.2O
Control Panel
................................................2O
Turntable........................................................2O
lnstallation..........................................2
1
AdapterPlugs...............................................21
hension
Cords . . . . . .
.....................................2 1
Groundinginstructions...............................21
Consumer Services ...................23
Appliance
Registration..................................2
Important Phone
Numbers........................23
Model and Serial Number
Lo~tion...........2
WarranW........................................BackCover
GE Appliances

~LP
US
~LP
YOU...
Before using your oven,
read this guide
carefuUy.
It is intended to help you operate
and maintain your new microwave
oven properly.
Keep it handy for answers to your
questions.
If you don’t understand something
or need more help,
dl:
GE Answer
Centefl
800.6262000
24
hours a
&y,
7 &ys a week
Write down the model and
serial
numbem.
You’ll find them on a label inside
the oven.
These
numbem
are
dso
on the
Consumer Product Ownership
Registration Card that came with
your microwave oven. Before
sending in this
cara
please write
these numbers here:
Be sure your microwave
oven is registered.
It is important that we know the
location of your microwave oven
should a need occur for
adjustments.
Your supplier is responsible for
registering you as the owner.
Please check with your supplier to
be sure he has done so;
dso
send
in
your Consumer Product Ownership
Registration
&rd.
M
you move, or
if you are not the original
purchaser, please write to us,
stating model and serial numbers.
This appliance must be
registered. Please be certain
that it
is
Write to:
GE Appliances
Range Product Service
Appliance Park
huisville,
KY
402=
Save time and money.
Before you request
service...
Check the Problem Solver in the
back of this guide. It lists causes of
minor operating problems that you
a
mrrect
yourself.
M
these things are normal
with your microwave oven.
●
Steam or vapor
esaping
from
around the door.
●
Light reflection around door or
outer case.
●
Dirnmi ng
oven light and change
in blower sound may
ouur
while
operating at power levels other
than high.
●
Ddl
thumping sound while oven
is operating.
● Some ~-Radio interference
might be noticed
wMe
using
your microwave oven. It’s similar
If you received a
~o
the interference caused by
Model Number
damaged oven...
other
sdl
appliances and does
not indicate a problem with
Send
Number
Immediately contact the
derder
your oven.
Use these
numbem
in any (or budder) that sold you the oven.
correspondence or
seM&
ds
concerning your microwave oven.
PMCAU~ONS
TO
AVO~
POSSmLE
EXPOSURE
TO
EXCESS~
MCROWA~
ENERGY
(a) Do Not Atimpt to operate
ti
ovenwitb
the door open
sinw
open-door operation
=n
restit
in
H
e~ure
to
tiaowave
energy. It is important not to defeat or roper
with the safety
interlmks.
@)
Do Not
Pku
any
obj~
between the oven
front
fa~
and the door or
Wow
soti
or cleaner
residue to
amulate
on
Aing
surfam.
(c)
Do Not Operate the
oven
ifit
is
tiagd
It is
particdarly
im~rtant
that the oven door close
properly and that there
is
no
tiage
to the:
(1) door @nt)
(2)hinges
and latches
@rokenor
loosened)
(3)
doorse~
andseting surfam.
(d)
me
Oven
Shotid
Not be
adjusted or repaired
by anyone exupt properly qualified
serviw
persoMel.

men
using
electrid
appliances, basic safety
precautions
shodd
be
foHowe&
including the
following:
A
W~NGTor~ucetieriskof
burns, electric
shock
fiie,
injury to persons
or exposure to excessive microwave energy:
●
Read and
fonow
the
spectilc
“Precautions to
Avoid Possible Exposure to Excessive ~crowave
Energy” on the previous page.
●
This
apptiee
must be grounded.
GMect
ody
to
properly grounded
outiet
See
Gounding
Instructions section in the
back of this guide.
●
Use this
appknce
ordy
for ik intended use as
described in this guide.
Do not use corrosive
chemids
or vapors in this
appfiance.
This
microwave oven
is
s~ifictiy
designed to heat or
cook
fti
and is not intended for laboratory or
industrird
use.
s
For best
operatio~
plug this
apphce
into
its
own
electrid
otie~
to prevent
fickering
of
@@
blowing of
faseortripping
of circuit
b-r.
●
titi
or
Imte
this
app~nu
ody in
accordance with the provided
kta~ation
Wtractions.
●
Be certain to
pkce
the
tint
surface of the
doortiinches
ormore
backtim
the
countertop edge to avoid
accidenti
tipping
of the app~nce in
normti
usa~
. Do not cover or
block
any openings on the
apptice.
●
Do not store
W
app~ce
outdoom.
Do not use
this product near water—for example, in a
wet
basemen;
neara
swimming pool or near a sink.
●
W
microwave oven is not approved or tested
for marine
=
●
Do not immerse power cord or plug in water.
. Keep power cord
away
from heated
surfac=
●
Do not operate any heating or cooking
apphce
beneath this microwave oven.
●
Do not mount the microwave oven over or near
any portion of a heating cooking
apptice.
●
Do not store anything directly on top of the
microwave oven surface when the microwave
oven is in operation.
●
Do not
Iet
power cord hangover edge of table
or
comter.
●
Do not operate this
appWnce
if
it has a
damaged power cord or plug, if it is not
working properly or ifit has been damaged
or
dropperL
●
Do not operate oven without the turntable
and turntable support seated and in
phce.
●
Do
not mow-table
to
be restricted so the
turntable cannot rotate.
. See door surface
deanin
g instructions
in the
Gre
and
~eaning
section(s) of this guide.
●
W
apptice
shodd
be serviced
ody
by
q-cd service
personneL
Contact nearest
authotied service
factity
for examination
repair or adjustment.
●
As with any
appW*
close supervision is
necessary when used by
cWdrem
●
To reduce the risk of
k
in the oven cavity:
—Do not overcook food.
&eMy
attend
apptiance
if paper, plastic or other combustible
maten~
are placed inside the oven to
factiitate
cooking.
—Remove wire twist-ties and
mea
han~es
from paper or plastic containers before placing
them in the oven.
—Do not use your
%crowave
oven to dry
newspapem
—Do not use recycled paper products.
Rwycled
paper
towek,
napkins
and
waxed paper
m
contain
meti
flecks which may cause arcing
or ignite. Paper products containing nylon or
nylon filaments
shotid
be
avoidd
as they may
*ignite.
—Do
not pop popcorn in your microwave oven
urdess
it is in a
s*4
microwave popcorn
accessory or
urdess
you use popcorn labeled for
use in microwave ovens.
—Do
not overcook potatoes. They
cotid
dehydrate
and catch fire, causing damage to your oven.
-d
&pge)
(co
3

MORT~
S-H
mSTRU~ONS
(wntinued)
—Do not operate the oven
wtie
empty to avoid
damage to the oven and the danger of
h
~by
accident the oven shotid run empty a
minute or two, no harm is done. However, try to
avoid operating the oven empty at
afl
tire+
it saves energy and prolongs the
Me
of the oven.
—Do not use the oven for storage purposes.
Do not leave paper products, inking
utensfis
or food in the oven when not in use.
—If
materi~
inside oven
shodd
igni~
keep
oven door
clos@
turn oven off and
discoMect
power
cor~
or shut
otipower
at the fuse or
circuit breaker panel.
●
Some products such as whole eggs and sealed
containe%for
example, closed
j%w~
explode and
shotid
not be heated in this
microwave oven. Such use of the microwave
oven
mdd
result in injury.
. Avoid heating baby food
in
glass jars, even with
the
tid
off.
We
sure
W
infant food
is
thoro@y
cookd
Stir food to distribute the heat
evedy.
W
care~
to prevent scalding when warming
formda
or breast
@.
The container may feel
cooler than the
ti
retiy
is.
Mways
test the*
before feeding the baby.
●
Do not
debt
timn
beverages in narrow
n=
boties
(es-y
carbonated beverages).
Even if the container
is
open@ pressure
canbtid
up.This
can
cause
the container
to
burst
possibly
respiting
ininjury.
~~Ü‹
~~
,
“
use
fofl
Ody
as
directed
in this
gnid~
TV dinners maybe microwaved
infofl
trays
1=
.ti
3/4”
high;
remove the top
foficova’and
return
thetray
to
the box.
men
using
Iod
in the
microwave
oveU
keep the
fofl
at
least
1 inch
away
tim
the sides of the
ovem
%
o
tikware
may
become
hot
because
of
heat transferred
from the heated
fti
Pot holders
may
be needed to
han~e
the cookware.
.
%metim~
the
tarntable
m
become too hot
to touch.
W
carefi
touching the turntable during
and after cooking.
●
Foods cooked in
tiquids
(such as pasta) may tend
to boil over more
rapidy
than foods containing
less moisture.
Shotid
this
wur,
refer to the Care
and
~eaning
section(s) for instructions on how to
clean the inside of the oven.
●
~ermometer-Do
not use a thermometer in
food you are microwaving
tiess
the thermometer
is designed or recommended for use in the
microwave oven.
Plastic cookware designed for
● PMC
cookw~
microwave cooking is very
usefti,
but shodd be
used
carefly.
Even microwave-safe plastic may
not be as tolerant of overcooking renditions as are
glass or ceramic
materiah
sndmay
soften or char
if subjected to short periods of overcooking.
k
longer exposures to overcooking, the food and
cookware
cotid
ignite. For these reasons:
1) Use microwave-safe plastis
ordy
and use
them in strict
compfian~
with the cookware
manufacturer’s recommendations. 2) Do not
subject empty cookware to microwaving.
3) Do not permit
c~dren
to
use plastic cookware
without complete supervision.
●
men
cooking
po*
fo~ow
the directions
exacdy
and
always cook the meat to
an
intemd
temperature of at least
170°F.
This assures
tha4
in
the
remote
possl%fity
that trichina maybe
present
inthemea~
ittibe~edandmmt
W
besafeto
eat
,.
.‘ . .
.
. Do
not
bofl
eggs m a microwave oven.
Pressure
will
build up inside egg
yolk
and
WW
cause it to
burs$
possl%ly
r=ukingin
injury.
*
. Foods with unbroken enter
‘Shn
such
ss
~-
=W~,
~~Ü‹
tomatoes, appl~ chicken
fivers
~
andothergiblets
ande~
yob’
!
(seepreviouscsution)
shotidbe
pierd
to
Wow
steam to
-pe
duringcooking.
—
4

w
● Spon-eous
bofi&Under
cetiin
special circumstances,
Iiqtids
may start to
boti
during or
shotiy
after removal from the
microwave
ovem
To prevent bums
from splashing
liqti~
stir
the
liquid briefly before
removing the
contiiner
from the microwave oven.
●
“BoMble” cooking pouches and
tighfly
closed
plastic bags should be
sli$
pierd
or vented as
directed by package. If they are
nog
plastic could
burst during or immediately after
aking,
possibly
resdting
in injury.
Mo,
plastic storage
containem
should
be at least
partirdly
uncovered
Wause they forma tights*.
men
cooking
with containers
tightiy
revered with plastic wrap,
remove covering
carefi~y
and direct steam away
from hands and face.
&
●
Hot foods and steam can
mnse
~~~~’z
b~.
Be mefdwhen opening
~..--
-
e
any
mntainers
of hot f@
including popcorn bags,
aking
pouches and boxes. To prevent
possible injury, direct steam away
from hands and face.
●
Not
d
pbtic
wrap is suitable for
we
in
microwave
ovens. Check the package for
proper use.
To obtain service, see the Consumer
Servius
page in
~~,
if you are still not
please~
write
dl
the
the back of this guide.
deti~including
your phone number-to:
We’re proud of our
semice
and want you to be Manager, Consumer Relations
pleased. If for some reason you are not happy with the GE Appliances
semiw
you receive, here are three steps to fo~ow for
Applianm Park
further help.
huisville,
~
402fi
FIRST, contact the people who serviced your RNALLY, if your problem is stall not
resolve~
write:
appliance.
E~lain
why you are not
pleased
In most Major Appliance
tinsurner
Action Panel
-es,
this will solve the problem. 20 North
Wacker
Drive
Chicago,
m
60606
5

MICROWAVING TIPS
● Make sure
all
cookware used in your microwave ● Paper towels, waxed paper and plastic wrap
oven is suitable for microwaving. Most glass
@be
used to cover dishes in order to retain
casseroles, cooking dishes, measuring cups,
astard
moisture
and
prevent spattering. Be sure to vent
cups,
pottev
or china dinnerware which does not plastic wrap so steam can escape.
ha;e
rnetdl~c
trim or
gl~e
with a metallic sheen can
be used. Some
mobare
is labeled “suitable for
microwaving”.
● If you are not
sure if a dish is
microwave-safe,
use this test: Place
in the oven both the
dish you are testing
and a
@ass
measuring
cup filled with one
cup water—set the measuring cup either in or next
to the dish. Microwave 1 minute at high. If the dish
heats, it should not be used for microwaving.
H
the
dish remains cool and
ody
the water in the cup
heats, then the dish is microwave-safe.
● Some microwaved foods require stirring, rotating
or rearranging. Check the Cooking Guide.
● Steam butids up pressure in foods which are
tightly covered by a skin or membrane.
Pierce potatoes, egg yolks and chicken livers to
prevent bursting.
If you use a meat thermometer while cooking,
make sure it is safe for use in microwave ovens.
V~LE
POWER LEVELS
(1-10)
Variable power levels add flexibility to your
microwave cooking. The power levels on your
microwave oven can be compared to the surface
mits
on a range. HIGH
rower
hvel
10) or
fll
power is the fastest way to cook and gives you 100%
power.
fich
power level gives you microwave energy
a certain
perwnt
of the time. Power
bvel
7 is
microwave energy
7090
of the time. Power
hvel
3
is energy
3070
of the time.
A high setting (10) wdl cook faster but may need
additionrd
attention such as frequent
stfig,
rotating
or turning over. Most of your rooking will be done on
HIGH
rower
Uvel
10). A lower setting
wfll
cook
more
everdy
and with less attention given to stirring
or rotating the food. Some foods may have better
flavor, texture or appearance if one of the lower
settings is
used
You may wish to use a lower power
level when cooking foods that have a tendency to
bofl
over, such as
dloped
potatoes.
Rest periods (when the microwave energy cycles
o~
give time for the food to
“eqtitie”
or transfer heat
to the inside of the food. An example of this is shown
with Power
hvel
&the
defrost cycle. Hmicrowave
energy did not cycle off, the outside of the food
wodd
cook before the inside was defrosted.
Here are some examples of uses for various
power levels:
POWR
LEWL
I
BEST USES
High 10
Fish
bacom
vegetables,
bofiing
liquids.
Meal-High 7 Genfle
~oking
of meat and
podtry;
baking casseroles
and reheating.
Medium 5 Slow rooking and
tendetiing
such as stews and less tender
cuts of meat.
bw
2 or 3 Defrosting without cooking;
sirnrnerin~:
delicate sauces.
-,
Warml
Keeping food warm without
overcooking; softening butter.
6
I
1
1. Door
btches.
2. Door Screen.
Meti
screen permits viewing of
foods and keeps microwaves
mnfind
inside oven.
3. Automatic Cooking Guide. Quick referenm codes
for many frequently prepared foods.
4. Touch Control Panel and Display. See Your
Touch Control Panel
sedion
for instructions.
&%
B
———
0“
—
-.
Iml
5. Removable
~mtable
Suppofi
6. Removable
~mtable.
Turntable must be in
Dlace
when using the
oven,
Cooking performance
w’dl
be unsatisfactory without the turntable in place.
The turntable may be removed for cleaning.
7. Door
btch
Release. Press latch release bution to
open door.
NO~:
Rating plate, oven vent(s) and oven light are
lo~ted
on
the
inside walls of the microwave oven.
ti~m
CooMng
Use your Touch Control Panel to Time Defrost or Create your own programs to suit your individud
Time Cook I &II with choice of power levels from cooking style. For example: use the
MidSec
Timer
1 (lowest) to 10
@ighest);
to Reheat using a preset to delay the start of Time Cook I & 11 or program a
time and power level; to cook popcorn using a preset hold time between Time Defrost and Time Cook I &
time and power level; to time kitchen tasks with the II. Set Time Cook I &II for a two-stage program
MWSec Timer; and to set the clock. using different times and power levels.
CooMng
Complete
Retinder
@or Time Cook and Time Defrost cycles)
To remind vou that vou have food in the
ove~
the oven
wtil
beep
once a
I
i
,
1
1
minute until you
eiher
open the oven door or touch
the
CL@OFF
pad.
7

ENTER
FOOO
TEMP
COOK NO
SOUNO
WG~
MS.
OEF
nME
I ~
COOE
I
——
I
I
TIME COOK
I I
I
&II
II
D;##;ST
I
1°
I
I
I
A~OMAnC
COO~NG
CO~OM
-
GUIOE
BEHINO
OOOR
:
0:
?
POPCORN
AUTO
DEF.
REHEAT
>
I
I
I
.
●
✟
START
CLEAR
OFF
t
8

The Touch Control Panel allows you to set the oven controls with the
touch of a finger. It’s designed to be easy to use and understand.
1.
DISP~Y.
Displays time of day, cooking time,
power level being
used
cooking mode and
instructions.
2.
Tf~
COOK I & II. Microwave for a selected
amount of time using automatic Power
bvel
10 @igh).
3.
POWR
LEVEL. Touch this pad before entering
another power level number if you want to change
from automatic Power
hvel
10
@gh)
for cooking
or Power
hvel
3
@w)
for defrosting.
4. ~/SEC
~~R
This feature uses no
microwave energy. It functions as either a kitchen
timer, as a holding period after defrost or as a delay
timer before time cooking.
5. POPCORN. Touch this pad to cook prepackaged
microwave popcorn weighing 3.0 to 3.5 ounces. No
need to touch START, the oven
wtil
start
immediately.
6. AUTO DEF. Touch this pad and food weight, then
ST~T.
The oven
automaticrdly
sets power levels
and defrosting time.
7.
E=RESS
COOK
Touch number pads 1 through
5 for 1 to 5 minutes of cooking at Power
Uvel
10.
No need to touch
STMT,
the oven will start
immediately.
8. START. After
rdl
selections are made, touch this
pad to start the oven.
9.
~~
DEFROST. Gentle thawing at automatic
Power
hvel
3
(bw).
10.
CLOCK
Touch this pad to enter time of day
or check time of&y while microwaving. To set
clock, first touch CLOCK pad and then enter time
of day. For example, if time is
1:30,
touch number
pads 1,3 and O and
“1:30”
will appear in display.
Then touch START or CLOCK pad. To reset or
change time, simply repeat above process.
11. REHEAT. Use Reheat for quick reheating of
a variety of foods using different times and
power levels.
12.
N~ER
PADS. Touch these pads to program
the microwave.
~.
CLWOFF.
men
touche~
it shuts off the
oven and erases
dl
settings
(exwpt
time of day).
When You Plug
k
the Oven
The display panel displays “88888”, “18
POWR”
and
dl
of the
oven
functions. After 15 semnds, all lights disappear and “RESET” appears
in the upper portion. Touch the
CLWOFF
pa~
set the Clock and the
oven is ready for use.
This
w~
happen any time there is a power outage.
9

HOW TO USE THE m/SEC
=R
The
Mn/Sec
Timer
Using a Holding Time
The
MidSec
Timer has three timing functions:
The
MitiSec
Timer
ean
dso
be used to program a
● It operates as a minute timer.
“holding time”
beween
microwave cooking functions.
The
time
m
range from one
sewnd
to 99 minutes
● It
an
be set to delay cooking.
and 99 seconds. A holding or standing time may be
● It
an
be used as a hold setting after defrosting.
found in some of your own recipes or in a wokbook.
The
MidSec
Timer operates without microwave energy.
How to Time a 3-Mnute Phone Call Programming Delayed Cooking
m
Step 1:
Touch MIN/SEC TIMER pad. To delay cooking up to 99 minutes and 99
sewnds,
touch TIME COOK I &II and enter cook time. Touch
MIN/SEC
~ER
and enter number of minutes to
Step 2: Touch number pads 3,0 and O
~~~~~
(for3
minutes and no seconds). delay cooking. Touch
STMT.
Timer will count down
to zero and cooking will begin.
m
Step
3: Touch
STMT.
Display shows
time munting down. The timer signals
when time is up.
How to
Dehs~
Hold and Time Cook
Let’s say you want to defrost a frozen casserole for 15
minutes, hold for 10 minutes and then Time Cook for
25 minutes. Here’s how to do it:
Step 1:
Take
-serole
from freezer and plain in oven.
m
Step
2: Touch TIME DEFROST.
Step
3: Touch pads 1,5,0 and O for
~~~~~
15
finutes
defrosting time. (Defrosting
6
is
autornatidly
set on Power
Uvel
3
but
ean
be changed by touching the
PO~R
LEWL
pad and the desired
power level.)
m
Step
4: Set standing or hold time by
touching MIN/SEC
~MER.
Step 5: Touch 1,0,0 and O to hold for ten minutes.
m
Step
6: Touch
~ME
COOK I & II.
Step
7: Touch 2,5,0 and O for 25 minutes of
rooking time.
m
Step 8:
Touch START. As each
function is automatimlly performed,
oven display shows instructions
entered and the function.
men
time is
up, the oven signals and flashes “End”.
The Express Cook Feature
The Express Cook feature is a short-cut method to
To Express Cook your food or beverage:
set time for 1-5 minutes at Power
bvel
10.
Touch a number pad (from 1 to 5) for 1 to 5 minutes
of
aoking
at Power Level 10. For example, touch the
~a”aKD~W
2 pad for 2 minutes of cooking time. No need to touch
START, the oven will start immediately.
The oven will signal and turn off
autornatidly
when finished.
10

Time Cook I
~me
Cook allows you to microwave for a preset
amount of
the.
Power Level 10 @igh) is recommended for most
cooking, but you may change this for more flexibility.
See the Cooking Guide.
To become better acquainted with time cooking, make
a cup of coffee by following the steps below.
Step 1:
Fill a cup
2/3 full of water,
add 1 teaspoon of
instant coffee and
stir to dissolve,
Use a cup that has
no metal decoration
and is microwave-
safe (refer to
Microwaving Tips section).
Plain cup in oven and close door.
m
Step
2: Touch TIME COOK I &
11.
Step 3:
Select your time. Touch pads 1,0 and O for
1 minute.
Because automatic Power Level 10 is recommended
for this cup of coffee, there is no need to change the
power level. (If Power
hvel
10 is not appropriate,
see “How to Change Power Level” below.)
m
Step
4: Touch START.
Step
5:
men
time is up, the oven
signrds
and flashes
“End”.
me
oven, light and fan shut off.
Step
6:
Open the door.
E
you interrupt Time Cook to check the
foo~
simply
close the door and press
STMT
to resume cooking.
If there is not time remaining on the timer you must
reset the timer to resume cooking.
How to Change Power
bvel
When
Seting
me
Cook I
1.
Press
~ME
COOK I & II.
2. Select cooking time.
3. Press
POWR
LE~L.
4. Select power.
5. Press
ST~T.
Using the Time Cook
~
Feature
The Time
tiok
II feature lets you set 2 time cooking
functions within one program. This is
idd
if you
want to change power levels during your cooking
operations. Here’s how to do it.
Step 1:
Place the food in the oven in a microwave-
safe container and close the door.
m
Step 2:
Touch
~ME
COOK I & II.
Step 3:
Seleet
your
first
Wok
time. For example,
touch 2,
1
and 5 for 2 minutes and 15
seeonds.
Step 4: Now is the
time to change the power level
if you don’t want
til
power for
~ME
COOK I.
@ress
POWR
LE~L.
Select power.)
Step
5: Touch
~ME
COOK I &II again.
The
rnierowave
oven will start and the time set for
“COOK
~E
I“ wdl count down.
Aso,
“POWR
10” or the power level selected for “COOK
T~
I“
wdl be displayed.
At the end of “COOK
WE
I“, the second power
level is displayed and the time for “COOK
~E
II”
is shown munting down.
men
time is up, the oven signals and flashes “End”.
The oven, light and fan shut off. Open the door.
H
you interrupt Time Cook to check the
foo~
simply
close the door and press START to resume cooking.
H
there is no time
rernairdng
on the timer you must
reset the timer to resume cooking.
Step
6: Set your second cook
time
Step
7: Change the power level for
~ME
COOK II.
Tress
PO~R
LE~L.
Select power.)
m
Step
8: Press
ST~T.
I
I
11

POPCOW
The Popcorn feature is designed to be used
ordy
Step
2: Open oven door and place package of
with prepackaged microwave popcorn weighing 3.0 popcorn in the center of the oven floor as directed
to 3.5 ounces. by the package instructions. Close oven door.
Step
1:
Remove the outer wrapper from the
Step
3: Touch POPCORN pad. No need to touch
microwave popcorn. START, the oven will start immediately.
How to Adjust the Popcorn Program to Provide a Shorter or
hnger
Cook Time
If your favorite popcorn is not completely popped, If your favorite popcorn is overcooked there is
there is a simple adjustment you can make. another adjustment you
m
make.
Touch the POPCORN
pad
(The oven will start
immediately.) Then touch
number pad 9. A plus sign
wfil
appear on the display
beside the word “POP”.
E
Touch the POPCORN pad
1~1-fln
+
me
oven will start
1
~[/
immediately.) Then touch
number pad 1. A minus
sign will appear on the
display beside the word
E
p~~x
-
The plus sign indicates 20 seconds more cooking time “POP”. The minus sign indimtes 20 seconds less
is being provided. cooking time is being provided.
The Reheat feature is a short-term program to Touch just three pads to use Reheat codes 1 to 6
automatically reheat a previously rooked food. to reheat many
popdar
foods. See the Reheat
The oven turns off
automatidly
after a preset
Guide below.
amount of time.
Reheat To Reheat More Than One Serving
The Reheat program makes it a snap to reheat many Reheat
@es
1 through 5 let you heat up to three
popular foods. Choose a code number from 1 to 6 servings. To add more
thaa
one serving, just touch
(see Reheat Guide below). number pad 2 or 3 right before touching
ST~T.
Step 1:
Touch
REM
pad. The serving size may even be changed or added after
Step
2: Touch a number pad from 1 to 6 to select a touching START. Just touch number pad 2 or 3.
food
~OUp.
Step
3: Touch START pad. Oven
til
signal and turn
off
automatidly
when finished
have been selected.
E
:~;::~;~::to
s~R”
Reheat Guide
Code Display
Sefing
Size Foods Recommended
1
PASTA
1-3
Pasta
2
WS
1-3
Meats, casseroles, pizza
3
VEGS
1-3
Fruits and vegetables
4
bEV 1-3
Beverages
5
SAUCE
1-3
Sauces and gravies
6
Pm
-
2 to 3 foods, 4 oz. each
Caution:
Reheated foods may have wide
variations in temperature. Some areas maybe
extremely hot. After removing food from the
oven, we recommend that
dl
reheated foods be
stirre~
if possible, to even out the temperature.

DE~OS~G
BY
m
Time
Detist
rower
Uvel
3)
Time Defrost is designed for speedy thawing of
frozen food and is one of
tie
great advantages of a
microwave oven.
Use the Time Defrost setting to
quic~y
thaw foods
such as
brea~
rolls, vegetables, fruits and frozen
dinners. The Auto Defrost setting is preferred for
meat and poultry
beeause
the oven sets the defrosting
time and power levels for you.
●
Power Level 3 is
autornatimlly
set when you press
~E
DEFROST
pa~
but you may change this for
more flexibility.
●
See the Defrosting Guide for defrosting help.
How to Change Power
hvel
1.
Press TIME DEFROST.
2. Select defrosting time.
3. Press
PO~R
LE~L.
4. Select power.
5. Press START.
To become better acquainted with the defrost
function, defrost a 10
OZ,
package of frozen
strawberries by following the steps below.
Step 1:
Place a package of frozen strawberries in
the oven and close door. Be sure package contains
no metal.
m
Step 2:
Touch
~ME
DEFROST.
Step
3: Select one
hdf
of the total defrosting time
remmrnended. For example, touch pads 4, 0 and O
for 4 minutes.
m
Step 4:
Touch
STMT.
men
the
cycle is complete~ the oven signals
and flashes “End”, then automatically
shuts
Off.
Step
5: Turn the package over, close the door and
repeat Steps 2 and 3 to set remaining
hdf
of
defrosting time. Touch START.
Step 6:
Men
the oven signals and flashes “End”,
open the door, remove the package and separate
strawberries to finish defrosting.
Detisting
Tips
e
●
Foods frozen in
~a~er
or
plastic can be d~fr;sted
in
the package. Tightly closed
packages should be slit,
piereed or
vented
~R
food has partially defroste~
as directed by package.
Plastic storage wntainem
shodd
be at least partially
uncovered
-* For even defrosting, some
foods need to be
b~oken
up
or separated part of the way
through the defrosting time.
●
Foods that spoil
easfly,
such as
milk
eggs, fish,
stuffings, potitry and pork should not be
rdlowed
to
sit out for more than one hour after defrosting. Room
temperature promotes the growth of harmful bacteria.
●
Familv-size,
Dre-uacka~ed
frozen dinners
eau
be
●
~-k
the Defrosting Guide for other defrosting tips.
defro~ted
fi~
mi~rowa~ed.
H
the food is in a
fofl
wntainer, transfer it to a microwave-safe dish.
Questions and
hswers
Q.
men
I press
ST~T,
I hear a dull thumping Q. Can I defrost sma~ items in a hurry?
noise.
mat
is it? A. Yes,
but they wdl need more frequent attention
A. This
sound is normal. It is letting you know the than usual. Raise the power level after entering
magnetron is in operation. the time by touching the desired power level pad.
Power Level 7 cuts the
totrd
defrosting time in
about 1/2; Power Level 10 cuts the
toti
defrosting
time to approximately 1/3. During either, rotate or
stir food
frequendy.
13

AmO
DE~OST
Auto Defrost
With the Auto Defrost feature, the oven
Use the Auto Defrost Guide. Enter the food weight in
automatically sets the defrosting times and power
pounds and tenths of a pound (see Conversion Guide
levels for you.
below). Then touch
ST~T
pad.
The oven
dcdates
defrosting time and changes power
levels during defrosting to give even defrosting restits.
How to Set Auto
Detist
Before you begin, check the guide
loated
on the
inside front of oven when you open the door.
It shows minimum and maximum food weights for
a variety of foods. You
will
need to
how
your food
weight before setting Auto Defrost.
Step 1:
Remove food from
pacbge,
place in oven on
microwave-safe dish and close door.
m
Step 2:
Touch AUTO
DEF.
pad.
m
Step 4:
Touch
STMT
pad. Display
shows defrost time counting down.
Twice during defrosting,
the oven beeps 4 times —
and
“~Rn”
flashes.
the Auto Defrost Guide
for what to do at the first
E
Follow
thedirectionsin
;
~~
\T’
!-~
and second
simal.
LI
Step 3:
Enter weight. For example, touch number Then close
th~
door and
touch START pad.
pads 1 and 2 for weight of 1.2 pounds (1
poun~
3
ounes).
See Conversion Guide below. After
men
defrosting time is wmpleted “End” flashes
approximately 5 seconds
“START’
flashes. and oven beeps 4 times. “End” remains on display
and oven beeps every minute until door is opened or
C~NOFF
pad is touched.
Sbnd
The
Mer
Auto Defrosting, meat needs to stand in order to
let the inside defrost. You may take the food out of the
oven if you wish. Stand time recommendations are
given in the Auto Defrost Gui&.
2onvemion
Guide
E
the weight of food is stated in
pounds and ounces, the
ounas
must be
mnverted
to tenths (.1)
of a
oound.
I
.3
I
67
.4
8.5
%10
.6
11
.7
12-13
I
.8
I
I I
1615
.9
1A

M
,.’
RECOMMENDED
MIN.-M.
FOODS
~IGHT
~RST
SIGN&
Chops
0.1+.0
Ibs.
Turn over.
Frankfurters, Sausage
0.1+.0
lbs. Separate.
Separate and shield
where
necessv.
5
minutes
Remove defrosted
pieces.
2
minutes
I I
Ground Meat
0.1+.0
Ibs.
Turn over.
I
Remove defrosted areas 5 minutes
and break
aDart.
Beef Patties
I
O.1+.Olbs.
!
Turnover.
Separate patties. 5 minutes
Shield
if
necessary. 30 minutes
Roast
0.1+.0
lbs. Turn over and
shield.
Ribs
0.1+.0
lbs.
Turn over.
Remove defrosted
10 minutes
pieces. Shield if
necessarv.
Steak
0.1+.0
lbs.
Turn over.
Stew
0.1+.0
Ibs. Turn over and
separate.
5
minutes
Separate and remove 5 minutes
defrosted pieces.
mole
Chicken
0.1+.0
Ibs. Turn over and
shield
Turkey Breast
0.1+.0
lbs.
Turn over.
@reast
side up)
Turn over and shield.
10 minutes;
run cold water
in
avity.
20 minutes;
run
~ld
water
Shield where
necessary.
in
@vity.
Chicken Pieces
0.1+.0
Ibs.
Turn over.
Comish Hens (whole)
0.14.0
lbs. Remove wrapper
and turn over.
Separate and remove
defrosted pieces. 5 minutes
10 minutes;
mn cold water
in
mvity.
Comish
Hens
(split)
I
O.1+.Olbs.
I
Turnover. I 5minutes
Fish Fillets
0.14.0
lbs.
Turn over.
shrimp,
Scrdlops
0.1+.0
lbs.
Separate.
mole
Fish
0.1+.0
lbs. Turn over and
shield
tafi
and
head.
Separate and remove
defrosted pieces.
Separate and remove
5 minutes
5
minutes
defrosted
Dieces.
Hold under
mld
running
water.
Uges
or thin areas of meat will defrost more
rapidy
than other areas.
Mer
first or second signal, shield warm areas with
smrdl
pieces of foil.
15

M
,“
GLOSSARY OF
~CROWAm
mmS
When adapting recipes for the microwave, it is
best to start with a familiar recipe. hewing how
the food should look and taste will help when
adapting recipes for microwaving. Foods that
require browning or crisp, dry surfaces will cook
better in regular ovens.
●
Moist foods, such as vegetables, fruits, poultry and
seafood, microwave well.
●
Rich foods, such as bar cookies, moist cakes and
candies, are suitable for microwaving because of
their high fat and sugar content.
●
Reduce regular oven cooking times by
1/2
to
1/3.
Check food after minimum time to avoid
over-cooking.
●
Smrdl
amounts of butter or od
=n
be used for
flavoring, but are not needed to prevent sticking.
●
Seasonings may need to be reduced.
Sdt
meats and
vegetables after cooking.
Covering.
In both regular baking and microwave
cooking, covers hold
in
moisture, allow for more
even heating and reduce rooking time. In regular
ovens, partial covering allows excess steam to escape.
Venting plastic wrap or covering with wax paper
sewes the same purpose when microwaving.
Venting.
~er
wvering
a dish with plastic wrap,
you vent the plastic wrap by turning back 1 comer
so excess steam can escape.
knging
Food in Oven.
When baking in regular
ovens, you position foods, such as
de
layers or
potatoes, so hot air can flow around them. When
microwaving, you arrange foods in a ring, so that
dl
sides are exposed to microwave energy.
Basic Mcrowave
Guidehes
Density of Food.
In both
re@ar
baking and
microwave cooking, dense foods, such as potatoes,
take longer to cook than
light
porous foods, such as
rolls, bread or pieces of cake.
Round Shapes.
Since microwaves penetrate foods to
about 1 inch from top, bottom and sides, round shapes
and rings cook more
evedy.
Comers
rewive
more
energy and may overcook. This may
dso
happen
when cooking in a regular oven.
Delicacy.
Foods with a delicate texture, such as
custards, are best cooked at lower power settings to
avoid toughening.
Natural Moisture
of food affects how it cooks. Very
moist foods cook
everdy
because microwave energy is
attracted to water
moledes.
Food that is uneven in
moisture
shodd
be covered or allowed to stand so it
heats
everdy.
16
Stirring. In range-top cooking, you stir foods up from
the bottom to heat them
everdy.
When microwaving,
you stir cooked portions from the outside to the
center. Foods that require constant stirring
wfll
need
ody
occasional stirring when microwaving.
~rning
Over. In range-top cooking, you turn over
foods, such as hamburgers, so both sides can directly
contact the hot pan. When microwaving, turning is
often needed during defrosting or when cooking
certain foods, such as frozen hamburgers.
Standing Time. When you cook
with
regular ovens,
foods such as roasts or cakes are allowed to stand to
finish cooking or to set. Standing time is especially
important in microwave cooking. Note that a
microwaved cake is not placed on a moling rack.
Shielding. In a regular oven, you shield chicken
breasts or baked foods to prevent over-browning.
When microwaving, you use
smrdl
strips of foil to
shield thin parts, such as the tips of wings and legs
on poultry, which
wodd
mok
before larger parts.
king.
Sparks caused by too much metal in the
microwave oven or
metrd
touching the side of the
oven or foil that is not molded to food.
Prick Foods to Release
hssure.
Steam builds up
pressure in foods that are tightly covered by a skin or
membrane. Prick foods, such as potatoes (as you do
before
re@ar
oven cooking), egg yolks and chicken
livers, to prevent bursting.
Rotating.
Occasionrdly,
repositioning a dish in the oven
helps food cook more evedy. To rotate
1P
~
turn the
dish
unti
the side that was to the back of the oven is to
the front. To rotate 1/4
~
turn the dish
untti
the side
that was to the back of the oven is to the side.
Mece
She.
SW
piems cook faster than large ones.
Pieces that are similar in size and shape cook more
evedy.
With large pieces of
foo~
reduce the power
setting for even rooking.
Shape of Food.
k
both types of cooking, thin areas
ook
faster than thick areas. This can be controlled in
microwaving by placing thick pieces near the outside
edge and thin pieces in the writer.
Starting
Temperatum.
Foods taken from the freezer
or refrigerator take longer to cook than foods at room
temperature. Timings in our recipes are based on the
temperatures at which you normally store the foods.
Quantity of Food.
In both types of cooking, small
amounts usually take less time than large amounts.
This is most apparent in microwave cooking, where
time is
directiy
related to the number of servings.

1.
Directions below are for heating or reheating Adjust temperatures to suit your personal taste.
already-cooked foods stored in refrigerator or at
bt
foods stand a few minutes before serving.
room temperature. Use microwave-safe
eootiare.
4. Be sure foods are heated throughout before serving.
2. Cover most foods for fastest heating.
fiwptions
are Steaming or bubbling around edges of dish does
some sandwiches,
gridde
foods and baked items. not necessarily mean food is heated throughout.
3. Bubbling around edges of dish is normal, since the If you use a meat thermometer while rooking,
center is the last to heat. Foods heated to
160°F.
to
165°F.
will provide safe, palatable results. make sure it is safe for use in microwave ovens.
Item Amount Power
~vel
~me
Bake~
Foods
Cx
coffee
4%
doughnu@
sweet
row
1
piece
hw
(3) 1/4 to 1 min.
nut or
ftit
b~ad
9
inch cake or
hw
(3)
1
to 4 min.
12 rolls or doughnuts
Dinner
rob
mtibts
1
Medium (5) 1/4 to
1~
min.
6 to 8
Medium (5) 1/2 to 2 min.
Pie:
fiit,
nut or custard; 1 slice= l/8 of 9 inch pie
1 slice
1/4 to
1
min.
(use minimum time for custard) 9 inch pie
Meal-High
(~
4 to 7 min.
Beverages
Cocoq other
W-based
drinks (6 oz.
per cup)
1
to 2 cups
Meal-High (7)
2 to 6 min.
Coffee,
other water-based drinks (6 oz.
per cup)
1
to 2 cups
1/2 to 3 min.
Meats and Main Dishes
Chickn
pieces
1
to 2 pieces
Hamburgers or
meafloaf(4
oz.
per serving) 1 to 2 servings
Hot dogs
md
Sattsag=
1 to
2
Ece
and pasta (~-3/4 cup per serving)
1 to 2 servings
Saucy, main dishes:
chop
suey,
spaghetti, creamed chicken,
1
to 2 servings
chili,
stew,
maaroni
and cheese, etc. (3/4-1 cup per serving)
Steak
chore
n~
meat pieces
1
to 2 servings
Meal-High
(~
Thistty-shced
meat (3
to
4 oz.
per serving) 1 to 2 servings
Meal-High (7)
Topped or mixed
tith
sauce (2B-3/4
cup per serving) 1 to 2 servings
~p:
tiver
saucy main dishes with plastic wrap.
aver
other main dishes and meats with wax paper.
When heating or reheating 3 to 4 servings of meat
slies
or
pie~s,
rotate dish
12
turn after half of cooking time.
1 to 3 min.
1 to 3 min.
1/4 to
1
min.
1~
to 3 min.
2 to 5 min.
1 to 4 min.
lE
to 2 min.
12
to 5 min.
Plate of
bftovers
Mat
plus 2 vegetables
1 plate
2 to 4 min.
Tip:
aver
plate of food with wax paper or plastic wrap.
Sandwiches
Meat<heese
-g:
with 2 slices of bread
1 to 2 servings M@-High
(~
12
to 3 min.
Mokt
fig:
Sloppy Joes, barbecue, ham
sala~
1
to 2 servings
Meal-High (7)
1~
to 2 min.
etc. in bun (1D cup per serving)
Tip:
Use
pzoer
towel or napkin to rover sandwiches.
soups
~-based
(6 oz. per serving) 1 to 2 servings
Meal-High
(~
1
to 3 min.
Water-based (6 oz.
per sewing) 1 to 2 servings
1
to 3 min.
Tip:
aver
soups with wax paper or plastic wrap.
Vegetables
me
piece
or
whole:
asparagus spears, com on the cob, etc.
1
to 2 servings
1~
to 2 min.
Mashed
(12
cup per serving) 1 to 2 servings 1/2 to 2 min.
Sd
pieces: pcss,
beans, corn, etc.
(1P
cup per serving) 1 to 2 servings
1/2
to 2 min.
Tip:
tiver
vegetables for most even heating.
17

DE~OS~G
G~E
1.
Food packaged in paper or plastic maybe defrosted 3. Be sure large meats are completely defrosted
without unwrapping. If food is
fofl
wrappe~
before cooking.
remove foil and place food in cooking dish for
defrosting. Most food defrosts well using Defrost 4. When defroste~ food should be cool but softened
(3). For more even defrosting of larger foods, such in all areas.
H
sttil
slightiy
icy, return to microwave
as beef, lamb and
ved
roasts, use Warm (l). oven very briefly, or let stand a few minutes.
2.
Wter
first
hrdf
of defrosting time, unwrap package
and check food. Turn food over, if necessary; break
apart or separate food if possible. Shield any warm
areas with small pieces of foil.
Food
~me
Commenti
Breads, Cakes [Power
hvel:
Defrost (3)]
Brea&
buns or
mh
(1 piece)
1/2 min.
Sweet
rok
3
to 6 min.
Rearrange after half of time.
(approx.
12 oz.)
Fish and Seafood [Power
Uvel:
Defrost (3)]
FWe@ frozen (1 lb.) 8 to 12 min.
SheMih
small pieces 5 to 8 min. Place block in casserole.
(1 lb.) Turn over and break up after first half of time.
Fmit
[Power
Uvel:
Defrost (3)]
Pbtstic
pouc&l
to 2
3 to 7 min.
(10+z.
package)
Meat [Power
Uvel:
Defrost (3)]
Bacon (1
lb.) 3 to 6 min. per lb. Place unopened package in oven.
ht
stand 5 minut= afterdefrosting.
Franks (1 lb.)
3 to 6 min. Placeunopened package in oven. Microwave just until franks
an
be
separated.
bt
stand 5 minutes, if necessary, to complete defrosting.
Ground meat
(1 lb.) 5 to 8 min.
~m
meat over after
fit
half of time.
Roast:
beef, lamb, veal, pork 10 to 16 min. per lb. Use Power
bvel
Warns (1).
Stea~
chops and cutlets 5 to 10 min. per lb. Place unwrapped meat in cooking
dish,
Turn over after first half
of time and shield warm areas with foil.
Mer
seand
half of time,
separate pieces with table knife.
bt
stand to complete defrosting.
poult~
[Power
Uvel:
Defrost (3)]
Cticke~
broiler-fryer, 15 to 22 min. Place wrapped chicken in dish. Unwrap and turn over after first half
Cut
Up
(2%103
lbs.) of time.
&r
second half of time, separate pieces and
plaw
in @eking
dish. Microwave 2 to 4 minutes more, if necessary.
Ut
stand a few
minutes to finish defrosting.
CMcke&
whole 20 to
28
min. Place wrapped chicken in dish.
fir
first half of time, unwrap and
(2%
to 3
Ibs.)
turn chicken over. Shield warm areas with foil. To complete defrosting,
run cool water in cavity until giblets can be removed.
Co-h
hen 9
to 16 min. per lb. Place unwrapped hen in oven breast-side-up. Turn over after first
hdf
of time. Run mol water in cavity until giblets can be removed.
~y
ba
(4 to 6 lbs.) 5 to
10
min. per lb. Place unwrapped breast in microwave-safe dish
bresst-sidedown.
Mer
first half of time, turn breast-side-up and shield warm areas with foil.
Defrost for second half of time.
bt
stand 1 to 2 hours in refrigerator
to complete defrosting.
18

Vegetables
Vegetible
&ount
me
Co-en6
-rap
(frozenspears) In
l%qt.
oblong
@ass
baking dish,
plaa
1/4 cup water.
Rearrange after half of time.
In lqt. casserole.
In
l%qt.
casserole, place
12
cup water.
In I-qt. casserole, plain 2 tabl=poonswater.
In lqt. casserole, place 1/4 cup water.
1 lb. 7 to 10 min.,
Med-Higb
(~
5 to 8 min.
(frozenspears)
BMns
(fresh
green)
(froZn
green)
(frozn
lima)
10+z. package
1 lb. cut in half
10+z. package
10+z. package
12
to 17 min.
6 to 9 min.
6 to 9 min.
BWS
(fresh, whole)
1 bunch 18 to 25 min.
In
2qt
wserole,
place
12
cup water.
Broccoti
(freshcut)
(freshspears) 1 bunch
(1X
to
1%
lbs.)
1
bunch
(1%
to
1%
lbs.)
7 to 10 min.
9 to 13 min.
In 2qt. casserole, place
12
cup water.
In
2qL
oblong
glass
baking dish,
place
1/4 cup water.
Rearrange after half of time.
In lqt. casserole.
In
IqL
casserole,
place
3
tablapns
water.
(frozen,chopped)
(frozenspears)
Cabbage
(fresh)
(wedges)
s~liced)
(frozen)
Ca*wer
(flowerets)
(fresh, whole)
(frozen)
Corst
(frozenkernel)
10+z. package
IO*Z.
package
5 to 8 min.
5 to 8 min.
1
mdium
head (about 2 lbs.)
8 to 11 min.
7 to
10
min. In 1%-or 2qt. casserole, place 1/4 cup water.
In 2- or
3qt.
casserole,
place
1/4 cup water.
1 lb.
10*z
package
6 to 9 min.
5 to 8 min.
In
l%qt.
casserole, place 1/4 cup water.
h
lqt,
casserole, place 2 tablespoons water.
9 to 14 min.
9 to 17
min.
5 to 8 min.
In 2qt. casserole, place
1~
cup water.
In
2qL
casserole, place
In
cup water.
h
lqt.
casserole, place 2 tablespoons water.
1
medium head
1 medium head
10+z
package
10+z. package
4 to 8 min.
In
lq~
casserole, place 2
tabl~pns
water.
Corn
on
tie
cob
1 to
5 ears
3 to 5 min.
per
w
In 2qt. oblong glass baking dish,
plaw
mm. If
mm
is in
husk
use no
wakr;
if
mm
has been
husk~
add
1/4 cup water. Rearrange after half of time.
Place in 2qt. oblong
@ass
baking dish.
aver
with vented plastic wrap. Rearrange after
hdfoftirrre.
(fresh)
(frozen)
1
ear
2t06-
5 to 7 min.
2 to 4 min. per ear
Mke@ vegetables
(frozen)
&~h,
shelld)
(froZn)
Potatoes
(fresh,
cub~
white)
(fresh,
whole,
sweet or white)
10+z
package
4 to 8 min.
2 lbs. unshelled 9 to 12min.
10+z
package
4 to 8 min.
4 potatoes
11 to 14 min.
(6 to 8
oz
each)
1 (6 to 8
oz
each)
2 to 5
min.
In
lqL
casserole,plaw 3 tablespoons water.
In lqt. casserole, place 1/4 cup water.
In
lq~
casserole,plaw 2 tablespoons water.
Peel
artd
cut into 1 inch cubes. Place in
2qL
mserole
with
12
cup water. Stir after
hdf
of time.
Pierce with
aoking
fork. Place on
pa~r
towel
on turntable,
1
inch apart in circular arrangement.
bt
stand 5 minutes.
10 to 16
OZ.
5 to 8 min.
1O-Z.
package
5 to 8 min.
In 2qt. casserole, place washed spinach.
In
lqL
casserole, plaw 3
tablapoons
water.
(fresh)
(tiO=Q
chopped
and
lx
Quash
(fresh, summer
and yellow)
(winter,acorn
or
burtemut)
1 lb. sliced
4 to 7 min.
1
to 2 squash
7 to 11 min.
(about 1 lb. each)
In
l%qL
casserole,
plaw
1/4 cup water.
at
in half and remove fibrous membranes. In
2qL
oblong glass baking dish, place
squ=h
cut-sidedown.
b
cut-side-up after 4 minutes.
19

Keep your oven clean and
sweet-
Do not use sharp-edged utensils
smelting.
Opening the oven
door
on your oven. The
inside and
a few minutes after cooking helps outside oven walls ean be
air out the inside. An
omasioti
scratched. The control panel ean
thorough wiping with a solution of be damaged.
baking soda and water keeps the
BE CERTMN POWER IS OFF
inside fresh.
BEFORE
CLWING
ANY
PART OF
~IS
OVEN.
How to Clean the
hside
Walls and floor.
Some spatters
=n
be removed
with a paper towel, others may require a damp cloth.
Remove greasy spatters with a sudsy
cloth
then rinse
with a damp cloth. Do not use abrasive cleaners on
oven walls.
NE=R
USE A
COMMERCU
OVEN CLEANER ON ANY PART OF YOUR
MICROWA~
OVEN.
Door (inside).
Window: Wipe up spatters daily
and wash with a damp cloth when soiled. Rinse
thorougtiy and dry.
Me@ and plastic parts on door: Wipe frequently
with a damp cloth to remove
dl
soil. DO NOT USE
ABRASIVES, SUCH AS
CLMING
POWDERS
OR STEEL AND
P~nC
PADS. THEY
MLL
DAMAGE THE SURFACE.
Removable
~rntable
and
~rntable
Suppoti
O~asiondly
it is necessary to remove the turntable
and support for cleaning of the oven floor or
turntable. To prevent breakage, do not place the
turntable into water just after cooking. Wash it
mrefully in
w-
sudsy water or in the dishwasher.
The turntable and support
an
be broken if dropped.
Remember, do not operate the oven without the
turntable and support in place.
Special note when using Brown ‘N Sear Dish:
H
grease is present, high heat generated on bottom of
a Brown ‘N Sear dish may
~use
the grease to bum
onto the oven tray. This may be removed with a
cleanser such as Bon
Arni@
brand cleanser.
After using Bon
Arni@
brand cleanser, rinse and dry
thorougti
, following instructions on
an.
Do not use
J
Bon
Aml
brand cleanser on the painted surfaces such
as the walls. It may scratch the
paint.
How to Clean the Outside
Case. Clean
the outside of your oven with soap and
a damp cloth, rinse with a damp cloth and then dry.
Wipe the window clean with a damp cloth. Chrome
trim is best wiped with a damp cloth and then with a
dry towel.
Control
Panel.
Wipe with a damp cloth. Dry
thorougtiy. Do not use cleaning sprays, large amounts
of soap and water, abrasives or sharp objects on the
panel—they ean damage it.
Door Surface.
When cleaning surfaces of door and
oven that come together on closing the door, use
ordy
d~
non-abrasive soaps or detergents applied with a
sponge or soft cloth.
Power Cord. If the cord becomes sode~ unplug and
wash with a damp cloth. For stubborn spots, sudsy
water may be
use~
but be ceflain to rinse with a
damp cloth and dry thorougtiy before plugging
ard
into
oudet.
20
Table of contents
Other GE Microwave Oven manuals
Popular Microwave Oven manuals by other brands

Russell Hobbs
Russell Hobbs EASI RHEM1901 B S user guide

KitchenAid
KitchenAid KHMS147H Use & care guide

Sharp
Sharp R-279T Operation manual and recipes

Kleenmaid
Kleenmaid MW4520 Instructions for use and warranty details

SEVERIN
SEVERIN MW 7845 - FOUR A MICRO-ONDES Instructions for use

Panasonic
Panasonic NN-CS596S Service manual