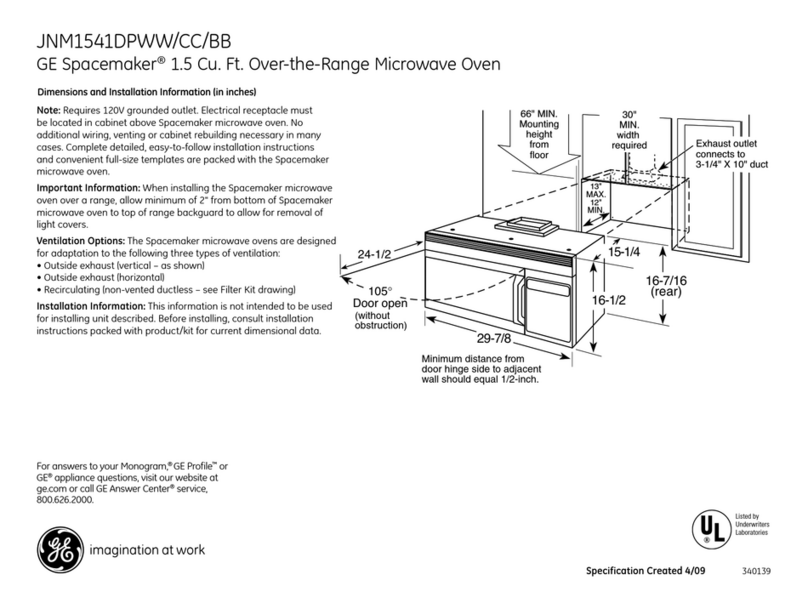
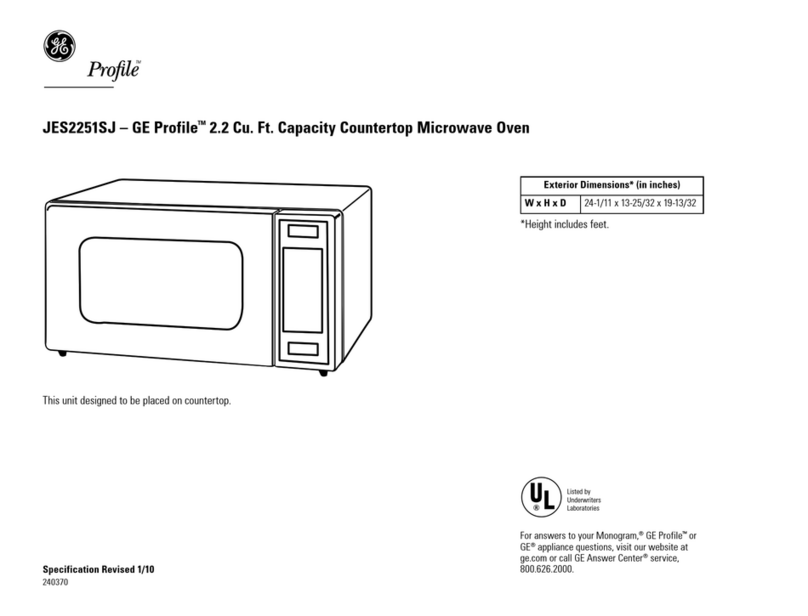
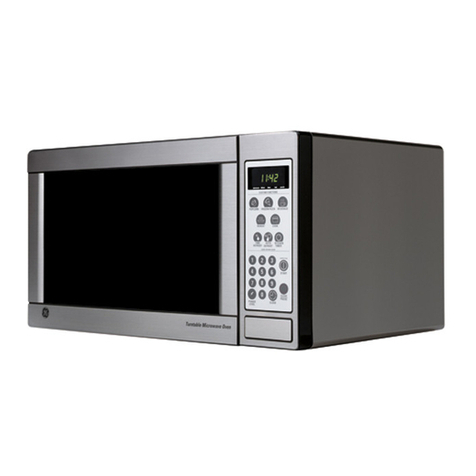
GE JET105 Installation instructions

Countertop
Microwave Oven
Model JET105, JET1ll
toget
BE= the ~
PERFORMANCE
from your
MICROWAVEOVEN
SAVE TIME AND
See Section entitled MONEY
“Before You (MI* For Service” on page 26.
SAVE THESE INSTRUCTIONS FOR FUTURE REFERENCE

Before Using Your Oven
Read This Use and Care Book
Take the time to read this book and learn how to
enjoy your new Microwave Oven. It contains detailed
operating instructions and recommended mainte-
nance, as well as handy tips to help you gain max-
imum benefits from your Microwave Oven. Once
you have read the book, keep it handy to answer
any questions you may have.
If you have any additional questions concerning the
operation of your Microwave Oven, write—including
your phone number—to:
Consumer Affairs
General Electric Company
Appliance Park
Louisville, Kentucky 40225
IF YOU RECEIVED ADAMAGED OVEN, immediately
contact the dealer (or builder) from whom you pur-
chased it. They have been reformed of the proper
procedure to take care of such matters and can
handle it for you.
Register Your Microwave Oven
Itis important that we, the manufacturer, know the
location of your Microwave Oven should a need
occur for adjustments.
Please check with your supplier to be sure he has
registered you as the owner; also send in your Pur-
chase Record Card. If you move, or if you are not
the original purchaser please write to us, stating
model and serial numbers. This appliance must be
registered.Pleasebe certainthatitis.
Write to:
General Electric Company
Range Product Service
AP2-21O
Appliance Park
Louisville, Kentucky 40225
Record Model and Serial Numbers
Anameplate on which is stamped the model and
serial numbers is located either inside oven at top
left side, or on bottom lower left corner of case.
Model and serial numbers are also on the Purchase
Record Card which came with your Microwave
Oven. Record the numbers in the spaces provided
below.
Please refer to both model and serial numbers in
any future correspondence or product service calls
concerning your Microwave Oven.
ModelNumber
Serial Number
DatePurchased
KEEP PURCHASE RECEIPT WITH THIS BOOK TO ESTAB-
LISH THE WARRANTY PERIOD.
.-
Before You Call for Service:
Check “Before You Call for Service” section. (See
page 26.) It lists many minor causes of operating
problems that you can correct yourself and may
save you an unnecessary service call.
If You Need Service
In many cities, there’s aGeneral Electric Factory
Service Center. Call and a radio-dispatched truck
will come to your home by appointment—morning
or afternoon. Charge the work, if you like. All the
centers accept both Master Card and Visa cards.
Or look for the General Electric franchised Customer
Care@ servicers. You’ll find them in the yellow
Pages under “GENERAL ELECTRIC CUSTOMER CARE@
SERVICE” or “GENERAL ELECTRIC–HOTPOINT
CUSTOMER CARE@ SERVICE.”
Ifyou needservice literature,parts lists,parts or acces-
sories,contact one of the Factory Service Centers, a
franchised Customer Care@ servicer or your GeneraI
Electric dealer.
Extended Service Contracts: The terms of your war-
ranty provide free service covering failures due to
manufacturing defects for adefinite period of time.
After this warranty expires you may purchase an
Extended Service Contract which will enable you to
budget your service needs. This coverage beyond
warranty is available from our Factory Service
Centers and from many franchised Customer Care@
servicers. It is a good idea to apply for this cov-
erage before your warranty expires.
Steps to Follow for Further Help
First, contact the people who serviced your micro-
wave oven. Explain why you are dissatisfied. In
most cases, this will solve the problem.
Next, if you are still dissatisfied, write all the
details—including your phone number—to:
Manager, Consumer Relations
General Electric Company
WCE-312
Appliance Park
Louisville, Kentucky 40225
Finally, if your problem is still not resolved, write:
Major Appliance Consumer Action Panel
20 North Wacker Drive
Chicago, Illinois 60606
This panel, known as MACAP, is agroup of inde-
pendent consumer experts under the sponsorship
of several industry associations. Its purpose is to
study practices and advise the industry of ways to
improve customer service. Because MACAP is free
of industry control and influence, it is able to make
impartial recommendations and consider each case
individually.
2—
..—————.—. . —......———.-.——-——- —— -—--—-I

.
1.
2.
3.
4.
5.
—
MODEL JET105
MODEL JET111 ~
Door Handle. Oven doesn’t ~-6.
operate unless door is ‘z
securely latched 8.
Door latch –push in to
open door
Window with metal shield.
Screen allows cooking to be 9
viewed while keeping micro- .
waves confined in oven in
Oven Light
Plastic mode
*Model JET 111 only.
Iu.
,.
.;.>,”... +.
“.
.,. .
..”
.,
,“
.+
.’, -
..;, -. .. . . ..
,.,.
. . .“>’$’>/$$ -,.
.
‘..’.
.?. 4,
,. “f’>
... ..+’
.’ .k~. .“,. .
?-
.’. -
Oven’vvent ~,.
Oven shelf 4!$
Teniperature probe–to use
with TEMP COOK, SIM N
COOK* and TEMP HOLD ~
only. .“-.. ,.,,
Receptacle for temperature
probe
Doubl&Duty Shelf*
Model and serial numbers are
stirrer cover either inside oven at top left
side, or on rear outside of case.
All these things are normal with your microwave oven:
1. Steam or vapor escaping from around 3. Dull thumping sound whiie cooking at
the door power ievels other than high
2. Light reflection around door or outer 4. Flickering iight under low voitage con-
case ditions
3

Table dcontents
Important Notice ............................................................*..... .................
Introduction to Your Microwave Oven ..................................................
All the things you can do with your
microwave oven .............................................................................
Grounding Instructions .........................................................................
Precautions for safe use .........................................OO............................
Safety Tips ........................................................,.......O............................
Easy reference guide to the control panel ................*... .....................*.
Operating Instructions
Setting to microwave by time
2
3
5
6
6
7
8
–Time Cooking .....0..... ..........................................................** 10
–Defrost ........................................................................0......... 11
–Hold Timer .....................................................**..................... 11
Setting to microwave by temperature
–Temperature probe ..........*...............................................,.*, 12
–Temperature cooking ..........................................*................ 13
Programming with time ...............0...... ...........●........................... 14-15
Setting to microwave with Temp Hold ............●.........*.................... 16
Automatic Simmer (Sire nCook) .........0........*... ............................. 17
Programming with temperature ...*....*.. ......................................*... 18
Memory entry ..................................................*.... ........................*. 19
Defrost as cooking function .................*.... ..................................... 20
Memory recall ................................................................................. 21
Foods recommended with probe ................................................... 22
Foods not recommended with probe ............................................. 22
Questions and answers ................................................................. 23
Care of your Microwave Oven .............................................,........O., 24-25
Before You Call for Service ..............................0.................0.................●26
Warranty ............................................,.,00.............................--m
Back Cover

Ail the things you can do with
y~~r ne~~~icrowave ovenm
d
Cooking versatility. Cook by time, by temper-
ature, with automatic slow cooking, or with
temperature hold. Your oven lets you tailor
the cooking to the food.
Fast, familiar cooking by time. You’ll find
most of your new microwave meals will prob-
ably be cooked by time. Use time cooking for
most casseroles, vegetables, appetizers,
snacks, and small, individual foods, like po-
tatoes, hot dogs, hamburgers and meatballs.
It’s handy, too, for pie crust, cakes and other
batter foods.
Use temperature cooking when you can’t af-
ford guesswork. The solid-state microwave
thermometer tells you the internal temper-
ature of food . . . areassuring way to cook.
Ideal for big roasts, turkey, and other foods
that need aspecific temperature for proper
doneness.
Temperature cooking takes the guesswork
out of reheating, too. You can cook unusual
shapes, sizes and amounts of food without
the risk of overcooking.
The automatic simmering feature* brings out
deep-down flavor and tenderness the micro-
wave way. Use all your favorite old-fashioned
slow-cooking recipes, with adifference. The
kitchen stays cool. And the automatic temper-
ature control keeps tabs on the temperature.
Let your food simmer all day, if you want. With
the automatic simmer feature, the oven
doesn’t shut off automatically, as it does with
time cooking and temperature cooking. It sim-
mers slowly until you’re ready for the food.
Temp Hold lets you hold foods at perfect
serving temperature. No need to let foods
lose their “just-cooked” freshness. Hold them
at the most appetizing serving temperature
for latecomers.
Defrost aturkey the afternoon of the feast.
The special Defrost setting is designed espe-
cially for bulky foods.
Time aphone call. The HOLD/TIMER setting
lets you do this, with solid-state precision . . .
Because the timer works separately, just like
the timer on your conventional range.
Microwave ameal without being there! The
Memory setting lets you decide how dinner
should be cooked. Then it remembers for
you. Someone
and the meal else can press START later,
is cooked just the way you
wanted, without you being there.
Use your oven this morning, while it’s re-
membering how to microwave tonight’s din-
ner. Using the Memory Entry/Recall* only
stores instructions. It doesn’t affect cooking.
You ‘re free to use the oven for any type
microwaving, while it’s remembering instruc-
tions for later.
Microwave more than one way, without re-
setting. Your new oven lets you defrost-hold-
and-cook for apreset time. For extra flex-
ibility, you can defrost-and-cook also, with
time settings. Or you can delay-and-cook with
time or temperature settings.
Adjust the power of the oven at the touch of a
finger. Ten Power Levels give you extra con-
trol over what’s cooking. But the oven stays
on full power (HIGH) unless you want a
change.
Enjoy awealth of new recipe ideas. The big
Microwave Guide and Cookbook included
with your oven tells you everything you need
to know to use your oven properly and suc-
cessfully. Microlessons take you step-by-step
through all the basics. And 445 recipes and
41 charts keep mealtimes interesting.
Two-shelf cooking* lets you microwave sev-
eral foods at once-even full meals! Refer to
special instructions.
The controls are easy to use
The controls are arranged the way you use
them, in top-to-bottom order. Start at the top,
and select acooking pad. Then the number
settings you want. Next aPower Level. Then
press START.
When you want to erase an instruction, the
CLEAR/OFF pad is clearly marked for you.
There’s even ashortcut! When recipes call for
whole minutes, just touch MIN, instead of
touching the zero pad twice.
Each time you give the oven an instruction, it
responds. Just listen for the signals. If you
hear ashort signal, the oven is saying “OK.”
Alonger, 3-second signal tells you that you’re
giving the oven instructions it can’t carry out.
‘*on models equipped with this feature.
5
Grounding Instructions
PREFERRED METHOD
Fig. 1Fig. 2
FOR PERSONAL SAFETY, THIS APPLIANCE
MUST BE PROPERLY GROUNDED. The
power cord of this appliance is equipped with
athree-prong (grounding) plug which mates
with astandard three-prong (grounding) wall
receptacle (Fig. 1)to minimize the possibility
of electric shock hazard from this appliance.
The customer should have the wall receptacle
and circuit checked by aqualified electrician
to make sure the receptacle is properly
grounded.
Where astandard two-prong wall receptacle
is encountered, it is the personal responsi-
bility and obligation of the customer to have it
replaced with aproperly grounded three-
prong wall receptacle.
DO NOT, UNDER ANY CIRCUMSTANCES,
CUT OR REMOVE THE THIRD (GROUND)
PRONG FROM THE POWER CORD.
A. USAGE SITUATIONS WHERE APPLl-
ANCE’S POWER CORD WILL BE DIS-
CONNECTED 1NFREQUENTL%
Because of potential safety hazards under
certain conditions, we strongly recommend
against the use of an adapter plug. However,
if you still elect to use an adapter, where local
codes permit, aTEMPORARY CONNECTION
may be made to aproperly grounded two-
prong wall receptacle by the use of aUL listed
adapter which is available at most local hard-
ware stores (Fig. 2). The larger- slot in the
adapter must be aligned with the larger slot in
the wall receptacle to provide proper polarity
in the connection of the power cord.
CAUTION: Attaching the adapter ground ter-
minal to the wall receptacle cover screw does
not ground the appliance unless the cover
screw is metal, and not insulated, and the wall
receptacle is grounded through the house
wiring. The customer should have the circuit
checked by aqualified electrician to make
sure the receptacle is properly grounded.
When disconnecting the power cord from the
adapter, always hold the adapter with one
hand. If this is not done, the adapter ground
terminal is very likely to break with repeated
use. Should this happen, DO NOT USE the
appliance until aproper ground has again
been established.
B. USAGE SITUATIONS WHERE APPLl-
ANCE’S POWER CORD WILL 8E DIS-
CONNECTED FREQUENTLY.
Do not use an adapter plug in these situations
because disconnecting of the power cord
places undue strain on the adapter and leads
to eventual failure of the adapter ground ter-
minal. The customer should have the two-
prong wall receptacle replaced with athree-
prong (grounding) receptacle by aqualified
electrician before using the appliance.
Precautions to avoid possible exposure
2.
DO NOT ATTEMPT to operate this oven 3.
with the door open since open door oper-
ation can result in harmful exposure to mi-
crowave energy. It IS important not to de-
feat or tamper with the safety interlocks.
DO NOT PLACE any object between the
oven front face and the door or allow soIl 4.
or cleaner residue to accumulate on seal-
ing surfaces.
6
DO NOT OPERATE the oven If It IS dam-
aged. It IS particularly Important that the
oven door close properly and that there IS
no damage to the (1) door (bent), (2)
hinges and latches (broken or loosened),
(3) door seals and sealing surfaces.
THE OVEN SHOULD not be adjusted or re-
paired by anyone except properly qualif[ed
service personnel


An easy reference guide to the
control panel on your
microwave oven.
*On models equipped with this feature. 8
Read-out panel–Lets you —
know what’s happening: Time
left to cook or hold, the temper-
ature, or the power level.
Cooking signal lights–Let you ~
know which of the four types of
cooking ‘you’re setting or us-
ing: Time Cook, Temperature
Cook, Defrost, Sim nCook* or
Temp Hold.
TIME COOK–Microwave for a~
preset time. (See pagel O.)
Defrost–Gentle, more uniform ~
thawing than with regular
power. (See page 11.)
HOL-D/TIMER–Two functions. ~
Asolid-state kitchen timer. And
aversatile no-heat setting
that’s handy when foods need
astanding period between de-
frost and cook. (See page 11.)
MIN–E-nters “00”. Use with ~
number pads when you want
minutes, but no seconds. For
example, for 4minutes, touch
4, MIN.
Whatthe Power Levels Mean
1O-HIGH Full power. (About
625 watts output.) Use it any-
time speed is important.
7-MED. HIGH Medium-high
power. About %the oven’s
full power. Fast way of heat-
ing pre-cooked dishes with-
out overcooking.
S-MED. Medium power.
About !4 the oven’s full
power. Good for delicate
foods like omelets and
cheese dishes.
3-LOW Low power. About %
the oven’s full power. Handy
for softening butter, re-heat-
ing delicate sauces.
1-WARM About lAoof oven’s
full power. Hold leftovers or
plates of food %hour to 1
hour.

/
~TEMP COOK—Microwave to a
preset temperature. (See page
18.)
Automatic simmering fea-
ture*–Special low simmer set-
ting. Cook with it as long as
your slow-cook recipe calls for.
No automatic shutoff. (See
page 17.)
TEMP HOLD–Temperature
Hold. Touch when you want to
hold just-cooked foods at serv-
ing temperature, or to warm up
leftovers. (See page 16.)
9
MEMORY ENTRY/RECALL*–
Use-it to tell the oven to remem-
ber your instructions for alater
time. Touch again when you’re
ready to cook with memory en-
try instructions you entered
earlier. (See page 19.)
Number Pads–Use them to tell
the oven how long to micro-
wave or to what temperature.
How long to hold. Or use to
change power level, after
touching Power Level pad.
CLEAR/OFF–Stops the oven
and erases programming.
(Doesn’t erase memory entry.)
Power Level Pad–Touch Pad,
then desired number pad to
change power level. You can
even change power level while
cooking (except with automatic
simmering feature, on models
so equipped).
START–Press after setting
controls. Designed to prevent
accidental starting.

When you plug in the oven
The letters “PF” appear in the readout dis-
play whenever power is resumed to oven after
unit has been unplugged or when electrical
power to the wall outlet has been interrupted.
Touching CLEAR/OFF erases “PF” from the
readout and allows immediate use of oven.
Setting your oven to
microwave by time em
●0
Why not make acup of coffee (or other hot
drink) while you practice setting your oven?
Use acup with no metal decoration on it–
even aplastic-coated paper cup. Fill it %full
of water and add ateaspoon of freeze-dried
coffee. Remove the spoon.
The read-out tells you how much time is
1. Place cup of coffee (or food) in oven.
Close door.
2. Touch TIME COOK. The signal light on the
read-out display above TIME COOK comes
on, telling you the oven will microwave with
time. Read-out displays: O.
remaining.
mm
Box in read-out display shows what
3. Select the amount of time. For your coffee,
you’ll need about aminute and 20 seconds.
Touch 1, 2and O(for 1minute and 20 sec-
onds). The read-out shows 1:20.
4. Select Power Level. The oven is automat-
ically set at HIGH unless you change the
Power Level. For your coffee, leave the oven
at high. (For other foods, see recipes in your
Cook Book for suggested Power Levels. To
change from automatic HIGH (10), touch
Power Level pad, then touch number pad for
power level desired.)
5. Push START. The inside light comes on. A
fan starts.
10
level the oven is using. power
You can change Power Levels easily while
cooking. Just for practice, why not change
Power Levels? Touch Power Level pad, then
the 5number pad, or use other number pad
from 1-9. You may hear adull thumping
sound when using alower Power Level. After
afew seconds, switch back to HIGH, by
touching power level pad again, then touch-
ing the number pads “l” and “O” to set
power level 10.

Setting your m
microwave oven D“‘
to defrost
1. Place frozen food in amicrowave-safe
container and set in oven. Close door.
2. Touch (DEFROST). The signal light on the
read-out display above DEFROST pad comes
on. Read-out displays :0.
3. Select the amount of time. Touch the num-
ber pads.
4. Don’t select aPower Level. The DEFROST
setting has its own, special Power Level. Box
in read-out display shows that DEFROST is
automatically set at Power Level 3.
5. Push START. The inside light comes on. A
fan starts. You may hear adull thumping
sound that lets you know that the oven is
using aPower Level lower than HIGH.
6. The oven signal tells you when time’s up.
It sounds for 3seconds. Then the light inside
the oven and power shut off.
The Defrost setting is designed for uniform
thawing necessary for larger amounts of food.
For small amounts of frozen foods you can
also use TIME COOK on the HIGH setting.
HIGH thaws faster, but you’ll need to turn the
food several times, stir it and rearrange it to
keep thawing uniform.
Because DEFROST can be changed from its
automatic power level of 3to other power lev-
els, you can use DEFROST as the first step of
atwo-step automatic microwave setting. (See
page 20.)
Setting your .,
oven to aKIEB
m
hold-time
The HOLD/TIMER setting is asolid-state 5. The oven signal tells you when time’s up.
timer. No microwave power is used. So you It sounds for 3seconds.
can use it for other things around the kitchen,
like timing a3-minute long distance phone You can also use HOLD/TIMER combined
call. with microwave cooking, when recipes call
for standing time. (To use with microwave
1. Touch HOLD/TIMER. Read-out displays: cooking, see page 14.)
O. No cooking signal light shows.
2. Select amount of time. Touch the number
pads. The read-out panel tells how much time
you set.
3. Don’t select aPower Level. You won’t be
using microwave power.
4. Push START. On some models, you may
hear afan and see the oven interior light.
REMEMBER:,,H~~D/ TIMER can also be~$us~d
to delay microwaving up to 99 minutei atiti 99
seconds. Pages’ 14 and 18 of this book; ‘and
the page in your microwave cookbook explain
this feature.
11
..
------
1

Setting your oven .
to microwave Gl!9
●0
by temperature
Your microwave oven has an
automatic temperature probe.
For many foods, temperature control is impor-
tant. That’s why your microwave oven comes
with aremovable automatic temperature sen-
sor. You can microwave foods like chicken,
turkey, pork and rare roast beef to the tem-
perature you want. The oven shuts off auto-
matically when the food’s done. No guess-
work!
The temperature probe is handy when cook-
ing for children, too. Because you can control
the temperature of each portion individually.
Making soup? Serve the children theirs at a
mild 130°, while the adults get piping hot
soup at 170°.
Frozen foods aren ‘t recommended to use
with the probe. It’s difficult to insert the
probe when foods are frozen. Page 24 tells
you which foods work best with the probe.
(And which ones don’t.)
Setting your microwave oven to cook by tem-
perature is easy. The oven helps!
●The 3-second signal sounds if you set a
temperature outside the oven’s range (be-
low 90° or above 200°) or any temperature
lower than the temperature of the food.
●
●
The signal also sounds if you set the oven
to microwave by temperature and forget to
attach the probe to the receptacle inside
the oven.
During TEMP COOK you can recall the tem-
perature that you set by touching the TEMP
COOK pad.
Things to remember when setting your oven
to microwave with temperature:
●
●
●
●
●
12
Don’t leave the probe in the oven if it’s not
inserted in food. (Prevents damage to
oven).
Like any food thermometer, the probe may
slip out of place in cooking. Reposition it,
press START again, and continue cooking.
If you wait to hear the signal sound and find
the probe has slipped out of the food, the
food could be overcooked. Also, the oven
could be damaged.
If you give the oven instructions it can’t
carry out, a3-second signal sounds when
you press START.
Touch the cooking function pad (TEMP
COOK) before setting number pads.
Recipes in the Cook Book tell you approx-
imate cooking times as well as temperature
settings. Use the times as a guide to plan-
ning when to serve food.
---- .———.._-.—.I

Before you start, insert the probe
Why not try microwaving with the temperature
probe right now? Start with cold tap water. Fill
amicrowave-safe mug %full of water and
make instant soup. f<5
1. First, put probe into food. In general, insert
probe into centermost part of food (at least one
inch into food. )Insert as horizontally as possible
into meats. Insert as directed in other foods.
2. Place food with probe into oven.
*
3J-
.t?
3. Insert cable end Into receptacle on oven
wall untii “seated”. BE SURE PROBE IS AT-
TACHED SECURELY TO OVEN RECEP-
TACLE. (If probe is not attached securely, sig-
nal will sound when you press START. The
oven will not start.)
Use clip on cable to loop cable when needed.
Looping the cable not only controls the
length of the cable, it also helps prevent the
probe from slipping out of position.
4. Close oven door firmiy. Make sure the
cable isn’t interfering with the door seal.
TO COOK:
m
D
●0
1. Touch TEMP COOK. The signal light on
the display above TEMP COOK comes on.
Read-out displays: O.
2. Select the temperature you want. Use 170
for your soup.
3. Select Power Levei. For now, leave the
oven on HIGH. See recipes and heating in-
structions in your cookbook for suggested
Power Levels for other foods. To change
power level, touch Power Level pad, then
number pad for power level desired.
4. Press START. The inside light comes on. A
fan starts. The read-out automatically in-
dicates temperature.
5. Aminus sign in the read-out iets you know
that the internai temperature of the food
hasn’t reached 90”F. yet. Since the water for
your soup came from the cold water tap, it’ll
be less than 90°.
Iiliiili
The pr6be senses temperatures between 90°
and 200”F. Once above 90°, the read-out
panel shows you the internal temperature of
the food until the temperature you selected is
reached. Then the oven shuts off.
6. The signai teiis you when the food
reaches the temperature you seiected. The
oven automatically shuts off. Soup’s ready!
7. Remove the cabie end of the probe from
the receptacle. Then remove food and tem-
perature probe together.
13
., ---- ,

Programming your oven to defrost,
then time cook, automatically
mmm
When you’re microwaving with
time, you can cook additional
ways. Without resetting.
Defrost-hoId-and-cook–For foods that need
astanding period between defrost and cook.
To defrost-hold-and-cook, use the entire
chart. (For foods that don’t need astanding
period between defrost and cook, you can
skip hold-time. )
Hold-start-and-cook-For times when you
can’t be in the kitchen when it’s time to start
cooking. (The oven holds without resetting
for up to 99 minutes and 99 seconds.) Use
only the area marked to hold-start-and-cook.
The chart shows you how to cook all three
ways
When you’re ready to start, just change the
times listed on the chart for times needed for
the food you’re cooking.
Things to remember when pro-
gramming with time:
●
●
If you accidentally reverse the sequence of
programming instructions, the oven auto-
matically rearranges your program. Defrost-
ing always comes first, then hold, then
cooking.
When instructions conflict,. the oven carries
out the last instruction. For example, if you
set the oven to Defrost for 4minutes, Hold-
Time for 2minutes and then Defrost for 6
minutes, the oven would Defrost for 6min-
utes and Hold-Time for 2minutes.
DEFROST-
HOLD-
AND-
COOK
HOLD-START-
AND-COOK
Allow foods to remam at room temperature only as long as safe Times vary
14
. . I

Allow foods to remam at r~om tempera ture only as long as safe. Times vary.
15

Setting your oven
to microwave m●;
with Temp Hold
Temp Hold is an especially handy feature of
your microwave oven. It lets you hold foods at
serving temperature, keeping them “juSt-
cooked” hot and fresh.
With the Temp Hold feature:
1. You can select aholding temperature be-
tween 90° and 200° F.
2. You can select any Power Level you want.
Because foods tend to stay moist and tender
during microwaving, Temp Hold is the perfect
way to keep vegetables, casseroles, and even
scrambled eggs piping hot and ready to
serve. Roasts, ham and poultry, too, may be
kept juicy and table ready with this feature.
You can even warm up leftovers!
If you want, you can set your oven to automat-
ically defrost, hold, time or temperature cook,
and then Temp Hold. You must be sure, when
you time cook, that the temperature probe is
placed in the food before starting the micro-
wave oven.
Temp Hold keeps apre-set temperature level
inside the food for as long as you like. If your
oven does not have an automatic simmer set-
ting, you can achieve the same flavorful, slow-
cooked tenderness by setting the Temp Hold
cycle to 180° and medium (5) power level.
Use the automatic simmer recipes from your
cookbook.
Things to remember when setting
your oven to microwave
Temp Hold.
To prevent spoilage, do not hold foods ex-
cept solid roasts at temperatures below
150° for more than 2hours.
Solid (not rolled) roasts may be held below
150° for up to 2hours.
However, during the microwave roasting
process, agreat amount of heat is stored in
the roast. Keeping the roast in the warm
oven cavity during TEMP/HOLD can cause
agreater increase in internal temperature
than when allowing the roast to stand out-
side the oven on akitchen counter. Temper-
atures of up to 20° to 30° above the TEMP/
HOLD setting are possible. Because of this
heat storage, it is not possible to hold roasts
at arare degree of doneness.
It is suggested that you first remove the roast
from the oven and let it stand, uncovered, for
about 10 to 15 minutes before returning to
TEMP/HOLD. Or, if you know before cooking
that you intend to hold asolid roast at serving
temperature, you may compensate for the
stored heat by undercooking the roast. See
your Cookbook for details.
TO USE:
m
●
●D
1. Insert probe in food. (If you have just Temp
Cooked your food, steps one and two are
already done).
2. Attach probe to oven. (See probe instruc-
tions under Temperature Cooking.)
3. Touch TEMP HOLD. The signal light on the
display above TEMP HOLD comes on. Read-
out displays :0.
4. Select the holding temperature you want.
Your oven will automatically microwave the
food until it reaches the pre-set temperature
and keeps the food at this temperature.
5. Select Power Level. Your oven will auto-
matically use High unless you select another
level. See your cookbook for suggested
power levels for various foods.
6. Push START. The inside light comes on. A
fan starts. If you also selected aTIME COOK
or TEMP COOK cycle, together with TEMP
HOLD cycle, the oven will first cook the food
and then automatically go into the TEMP
HOLD cycle. (TIME COOK or TEMP COOK
always precedes TEMP HOLD.)
7. During the TEMP HOLD cycle, the oven
will not shut off until you touch the CLEAR/
OFF pad. (You can interrupt microwaving by
opening the oven door. The cycle resumes
when you close the door and press START.)
16
.I

Setting your oven
to microwave m●0
.
with Automatic Simmer
If your oven has the Sim ‘N Cook’” feature,
you have extra versatility in microwaving. This
setting lets you slow-cook foods for extra
moistness, extra tenderness. It’s like having
an appliance-within-an-appliance! The Sim ‘N
Cook setting brings food rapidly to asimmer,
then holds the simmer at about 180” Ffor as
long as you want. Perfect for old-fashioned
pot roasts, hearty stews, chili, baked beans,
even mulled drinks. To automatically simmer,
you can use any microwave-proof casseroles.
But do not use alid. Instead, stretch plastic
wrap over the top of the casserole. Gather the
wrap loosely around the probe to allow steam
to escape.
TO COOK:
m●0
1. Insert the probe in liquid in bottom of dish.
(As liquid simmers, steam forms to cook and
tenderize food.) Cover the dish.
2. Attach the probe to the oven. (See probe
instructions.)
3. Touch Sim ‘N Cook pad. The signal light
on the display above Sim ‘N Cook pad lights
up.
4. Don’t select atime. The oven will be cook-
ing by temperature, not time.
5. Don’t select atemperature or aPower
Level. The automatic simmer feature is auto-
matically pre-set for the correct temperature
and Power Level for automatic simmering.
6. Push START. The inside light comes on. A
fan starts.
7. Simmer as long as your slow-cook recipe
calls for. Five hours, six, even ten hours. The
oven won’t shut off until you touch the
CLEAR/OFF pad or open the door of oven.
To restart oven repeat steps 3and 6.
The Sim ‘N Cook feature lets you slow-cook
foods which need long, gentle cooking to ten-
derize or develop flavor. Food is brought to a
simmer rapidly, then the temperature probe
maintains simmering at about 180° for as long
as you want. Temperature of food is not
shown on the read-out during cooking. How-
ever, if you wish to check temperature, touch
Sim ‘N Cook pad; temperature of food and
power level being used will show on the read-
out as long as pad is touched.
Use any microwave-proof casserole for
automatic simmer feature. Insert probe in
mid,dle of casserole so that the tip is resting in
liquid in the bottom of the dish. Since liquid is
necessary for this function, steam tenderizes
and brings out the full flavor of the dish.
Do not use alid on the microwave-proof cas-
serole that you choose. Instead, use stretch
plastic wrap over the top of the casserole.
Cover tight/y with plastic wrap, arranging
/oosely around the probe to allow steam to
escape.
17

Programming your .B
oven to temperature mw
cook automatically
When you’re microwaving with
temperature, you can delay cook-
ing till later.
Can’t be home when it’s time to start dinner?
Let the oven start without you. Using acom-
bination of Hold/Timer and Temperature
Cooking, the oven can delay starting for up to
99 minutes and 99 seconds.
Things to remember when you’re
programming with temperature:
YOU’LL SEE THIS HAP-
WHEN YOU WANT THE PENING ON THE CONTROL
OVEN TO DO THIS TOUCH THIS PANEL
I’d like this cooked roast re-
heated in time for dinner,
but not started yet. . . It
would be ready too soon.
(First insert the probe in the
cooked roast, and attach the
probe to the oven.)
The read-out displays :0. No
signal light turns on.
Wait 15 minutes before start-
ing to heat. Dmm ~J~~ead-Out ‘ane’ ‘hews
Then heat it mThe read-out panel shows
D:0. The signal light on the
●0display above TEMP COOK
comes on.
to about 130°F–just the way
we Iikeit . . . -mm ~;JpMj~;~h:i:::!
The read-out panel shows
the amount of time remain-
Do it just in time for dinner ing for HOLD. After the 15
minute hold time, the oven
automatically microwaves by
temperature to 130°.
““Allow foods to remain at room temperature only as long as safe. Times vary.
18
.. I

Your microwave oven
has amemory
The Memory Entry/ Recall pad allows you to When the pre-set cooking function is needed,
store complete 2, 3, or 4-step programs or touching the Memory Entry/Recall pad once
any l-step cooking function which requires again will set the oven automatically for the
the entry of time or temperature. Just set the cooking function(s) you previously stored in
oven and press the Memory Entry/Recall pad memory. Touch start and the oven begins
instead of start. As Memory Entry/Recall pad microwaving this preset program.
is pressed, readout becomes blank, indicating
that oven can now be used for other
programs.
DO THIS TOUCH THIS YOU’LL SEE THIS HAPPENING
ON THE CONTROL PANEL
Set the control panel for the way you
want the food cooked. But don’t
press START. Use asingle setting or
one of the programs on pages 14 and
16. Defrost, cook by time or temper-
ature ... any settings but the
automatic simmer function work with
memory.
Before you touch Memory Entry/Re-
call, signal lights on the read-out
above the function that you set come
on. Lights go off as soon as memory
pad is touched.
Leave these simple instructions with the baby sitter:
SHE’LL SEE THIS HAPPENING
DO THIS TOUCH THIS ON THE CONTROL PANEL
Put the food in oven and close the Signal lights show what
door. Insert probe if TEMP COOK or microwaving you selected.
TEMP HOLD has been selected. shows when using HOLD/T
kind of
(No light
MER.)
All signal lights go off, ex-
The oven will cook dinner cept the one that confirms
the way the children like it. your first instruction. The
Just as if Mother were there. oven carries out the cooking
program.
Change your mind? It’s easy to clear the Use your oven while it’s remembering. Using
Memory. Just enter anew program, and the the Memory Entry only stores instructions.
old instructions are automatically erased. The You’re free to use the oven for any type
oven is ready to remember new instructions. microwaving. Only when you touch Memory
Remember: If you have any cooking program Recall and START does the oven start
carrying out the stored instructions.
set in the oven, pressing the Memory Entry/
Recall Pad will
oven’s memory,
memory.
store that program in the
and will erase the previous
19

Using Defrost as a ,.0
Choking Function m
In any cooking program, information entered Level of both the Defrost and the Time Cook
under the Defrost setting always occurs first cycles, you can use Defrost to cook at one
in the cooking cycle, and the Time Cook entry power level, then automatically switch to Time
occurs last. Since you can change the Power Cook to cook at another power level.
WHEN YOU WANT THE TOUCH THIS YOU’LL SEE THIS HAPPENING
OVEN TO DO THIS ON THE CONTROL PANEL
1wish to make ahearty Vegetable
Beef Soup (recipe in Cookbook, mSignal light on the display above
page 44) but don’t want to be there DEFROST comes on. Read-out dis-
to turn the power level down after the ~’:- plays 60:00. Box in read-out panel
initial boiling period. shows automatic defrost setting of 3.
Bring to aboil for one hour at HIGH. mm Power level changes from 3to 10
mSignal light on the display above
Then automatically switch to simmer TIME COOK comes on. Read-out dis-
for 99 minutes . . . ~~w plays 99:00. Box in read-out panel
shows power level 10.
at power level 5(MEDIUM) EPower level changes from 10 to 5.
Push START. ~
Appropriate signal lights show that
oven is carrying out the 2-step cook-
ing automatically.
Here are some other examples of stand using the no-heat Hold/Timer until
automatic 2-step cooking: ready to serve.
sYou can cook dried beans at High for 20 to .Or cook the meatloaf at HIGH (power level
30 minutes, then simmer them until tender 10), let it stand and then keep it at WARM
at Medium. (power level 1) until you’re ready.
●Microwave ameatloaf at Medium High For complete cooking instruction and recipes,
(power level 7) for 22 minutes, then let it see the cookbook that came with your oven.
20
I
This manual suits for next models
1
Table of contents
Other GE Microwave Oven manuals

GE
GE Hotpoint RE1440H Use and care manual

GE
GE Spacemaker JVM1752DP Manual

GE
GE JX2127SH User manual

GE
GE JVM7195 User manual

GE
GE PEB3228 Series User manual

GE
GE Profile PVM1790DR User manual

GE
GE SpacemakerXL JVM1642 User manual

GE
GE JES636 User manual

GE
GE SpacemakerXL JVM1320 User manual

GE
GE Monogram ZEM200 Series User manual
Popular Microwave Oven manuals by other brands

Amana
Amana Commercial Microwave Oven owner's manual

Cuisinart
Cuisinart CMW-110 INSTRUCTION AND RECIPE BOOKLET

Whirlpool
Whirlpool AMW 204/1 WH Service manual

Dacor
Dacor DMT2420 Use & care installation instructions

Daewoo
Daewoo KOC-1B0K6S Service manual

Daewoo
Daewoo KQG-8A4R5S Operating instructions & cook book